Convert a Photo to a Sketch
by TheFrankTurk in Design > Digital Graphics
8863 Views, 39 Favorites, 0 Comments
Convert a Photo to a Sketch
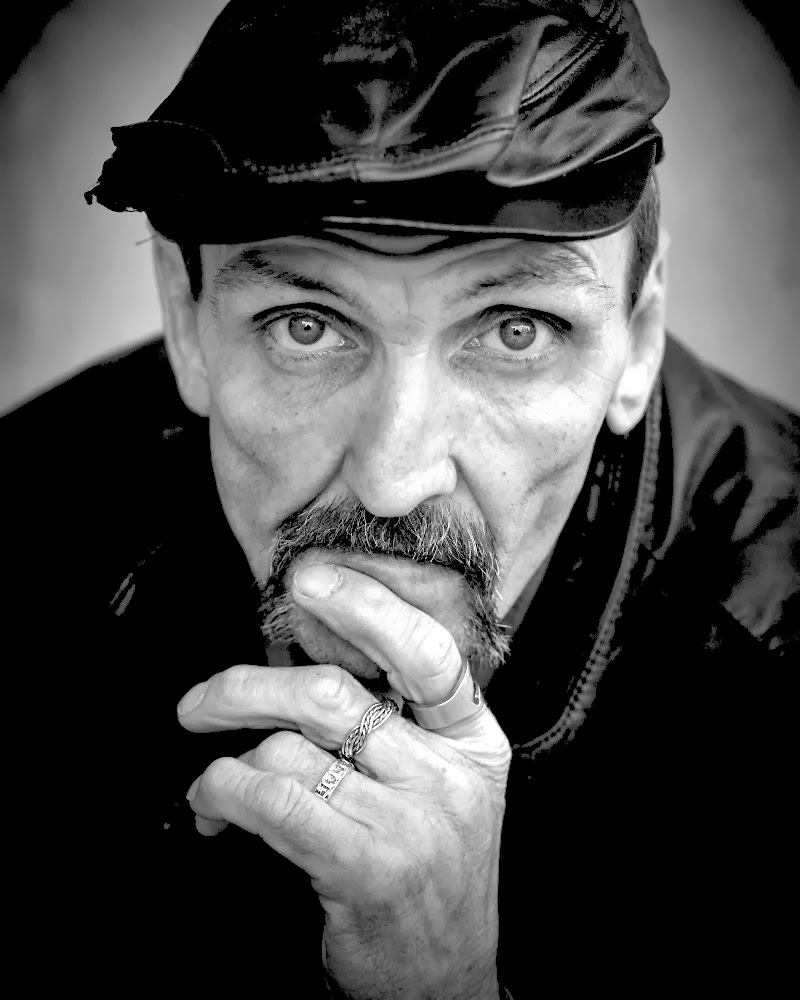
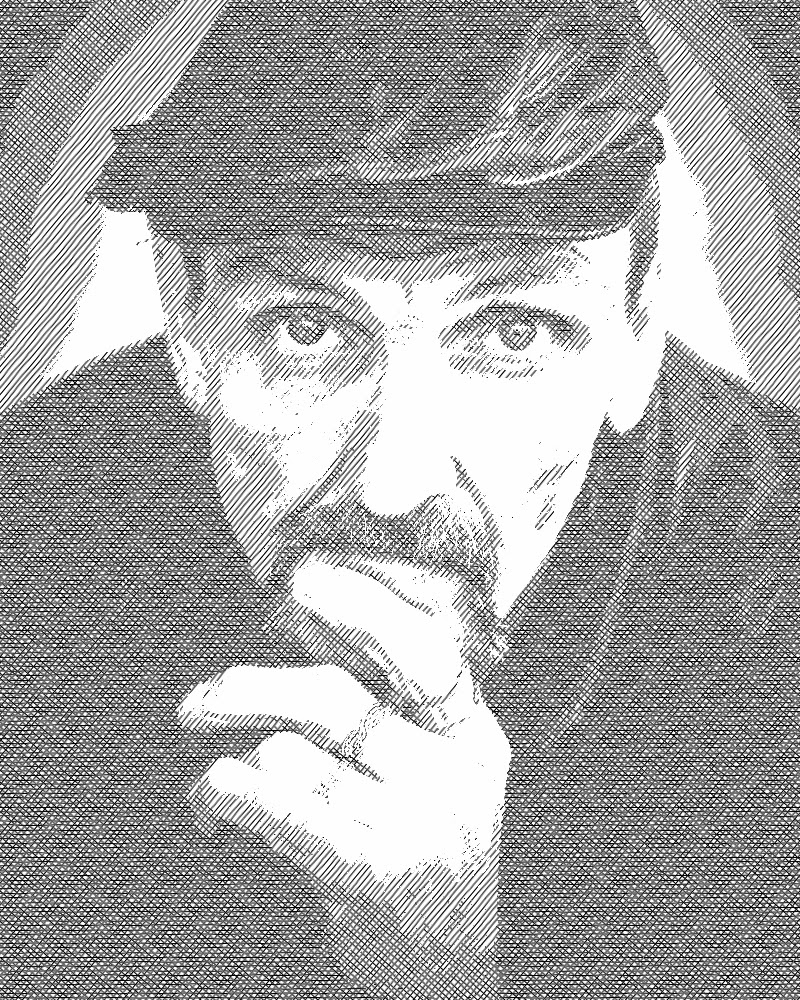
Back in the 90's, when Photoshop 6 cost a lot of money and there was no GiMP, there was a plug-in for Photoshop called X-Hatch by a company called Inklination. It was a ridiculously-powerful little plug in that allowed the user to do all manner of really interesting renderings which are all types of cross-hatch effects to a photo.Unfortunately, that plug-in has simply vanished and there hasn't really been a replacement for it as far as I can tell. I have a clever little app on my Android pad which will do something like X-Hatch to photos, but it's just not the same.This tutorial is also not exactly the same, but it will be able to move you from something like the first photo, above, to the second image -- a simple attempt to change a photo to something that looks like a pen-and-ink sketch.
Please note: the base image is provided royalty-free by http://www.sxc.hu
This Instructable is based on my original post from my blog at GiMP University.
Collect Your Resources - Software and Files
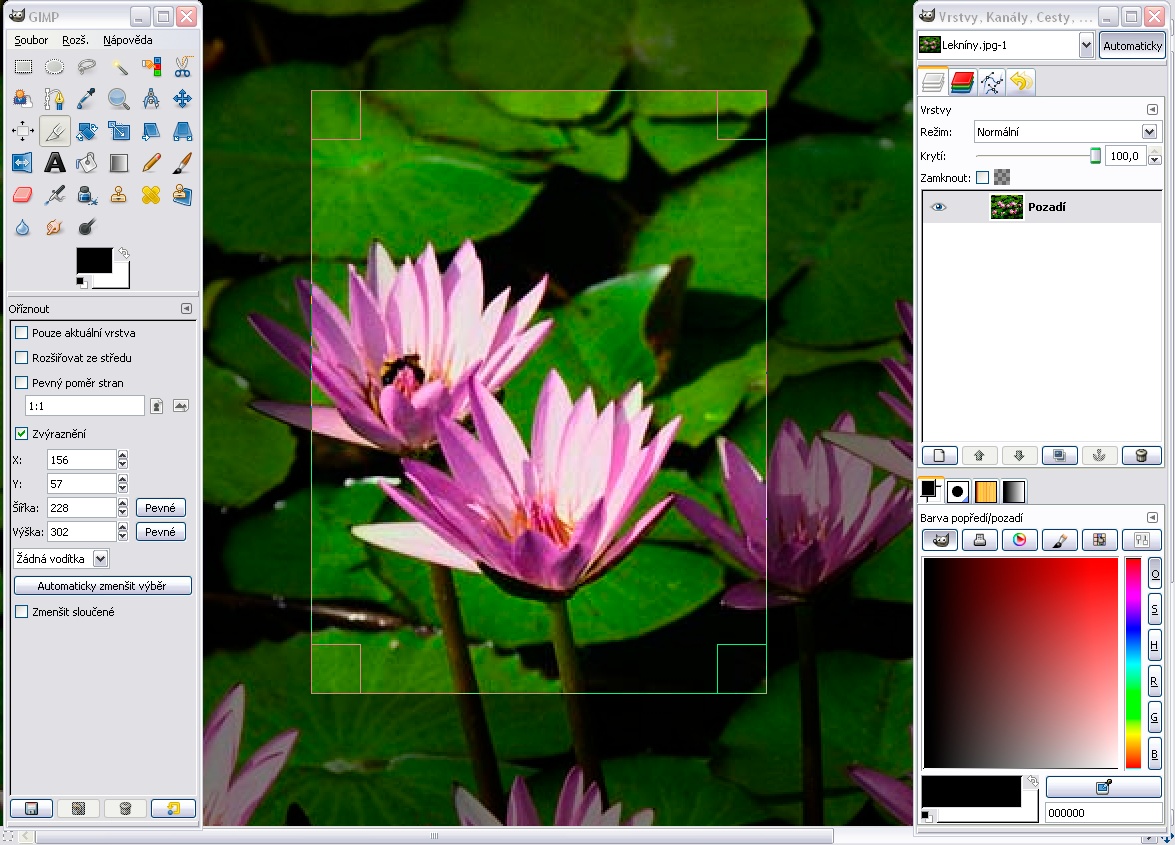
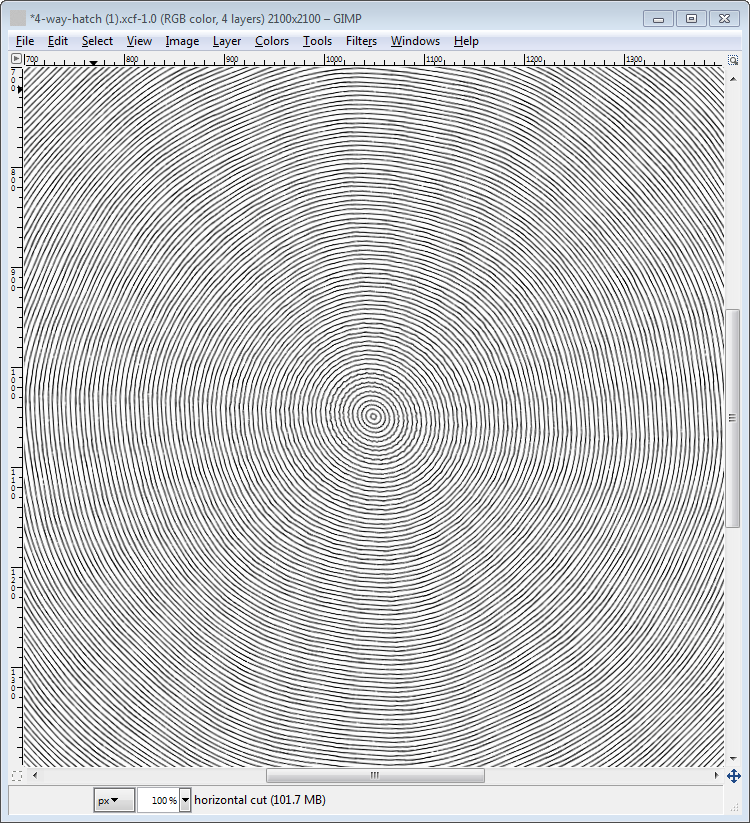
In order to attempt this, you will need to download this file which I built for this tutorial (it is stored on my Google Drive, so I vouch for its non-invasiveness) (Alternative Mirror 1: My DropBox Site 4-way-hatch.xcf), and also add the current version of the OpenSource graphics editor GiMP.
The file is in .xcf format, which for the GiMP is standard layered graphics.
UPDATED: if you have trouble downloading the "4-way-hatch.xcf" file, please e-mail me at frank@iturk.com and I'll find a way for you to get the file as it is essential for this tutorial.
UPDATED 7 Nov 2017: Hi everyone -- looks like Instructables has improved our ability to store files here on the site, so I have added the .xcf file for hatching here in this step.
Downloads
Learn a Little About Color Levels in Digital Images
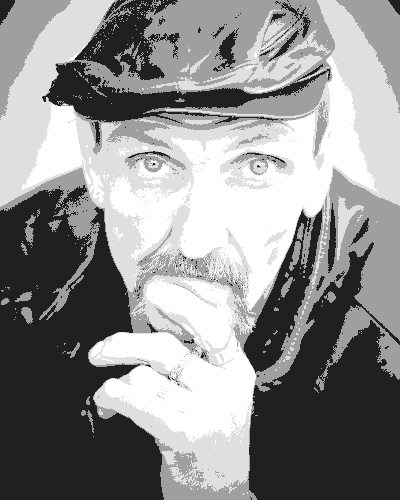
Let's think first about how an x-hatch image needs to be created. Take a look at the version of the original image up above.
This image is effectively a 4-color grayscale image of the original (white plus 3 gray levels), but it is made by taking the image and broadly adjusting the threshold 3 times: once for low-threshold contrast, once for middle-threshold contrast, and one for high-threshold contrast. The three layers are then flattened and we get something that effectively shows us all the brightness levels of the original, compressed into 4 categories. What we need to do is to turn each of those threshold layers into pen-stroke layers, and then flatten them to get a cross-hatch effect which makes sense when you look at it.
But wait: some of you are now asking you browser window: "What the heck is a 'Threshold'?"
That is a great question.
What Is a "Threshold?"

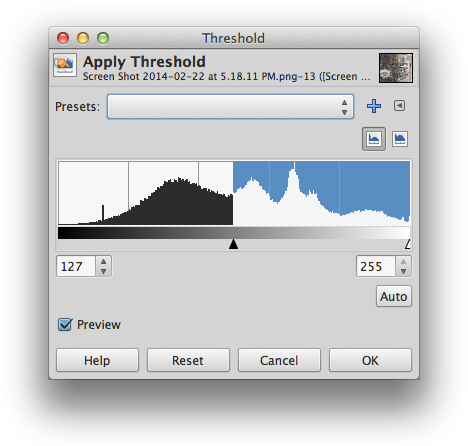
A decent brief explanation of what "threshold" is can be found at this link, but for the lazy or impatient, GiMP allows you the user to transform an image into a high-contrast black-and-white image by selecting the cut-off brightness value for converting the color pixels in your image to either black or white. That may sound like mumbo-jumbo to you, but think of it this way: the colors in every picture can be represented by a chart (or "histogram") ranging from dark to light like the first image, above.
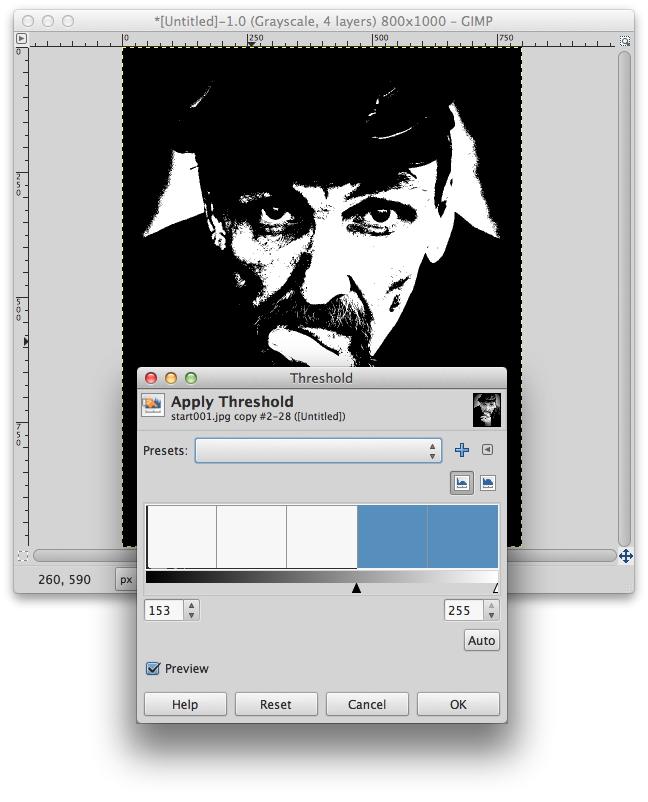
On this histogram, the left side indicates the darkest shades, the right indicates the lightest. To see this histogram of an image you're using, go here: Colors > Threshold. You'll get the dialog window in the second image, above.
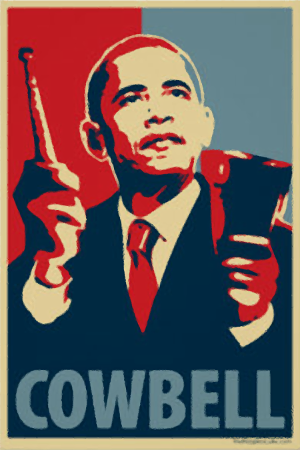
The sliders at the bottom of the histogram tell the tool how you want to convert your image. The black slider causes the threshold to set the cut-off point (the threshold) to covert the pixels to either black or white starting with the darkest color, and moving right includes more and more lighter colors. The white slider starts with the lightest color, and moving from right to left causes the tool to covert darker and darker colors to black. For this tutorial, are are only going to monkey with the black slider, but you can quickly figure out how both sliders can help you create some interesting effects (like the third image, above).
One Image, Four Layers
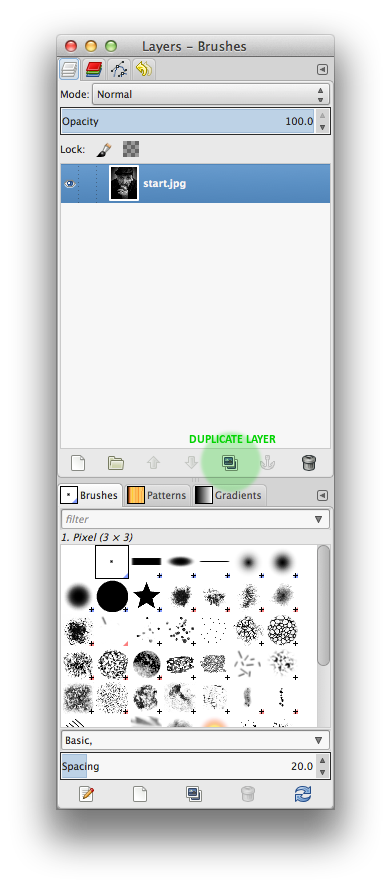
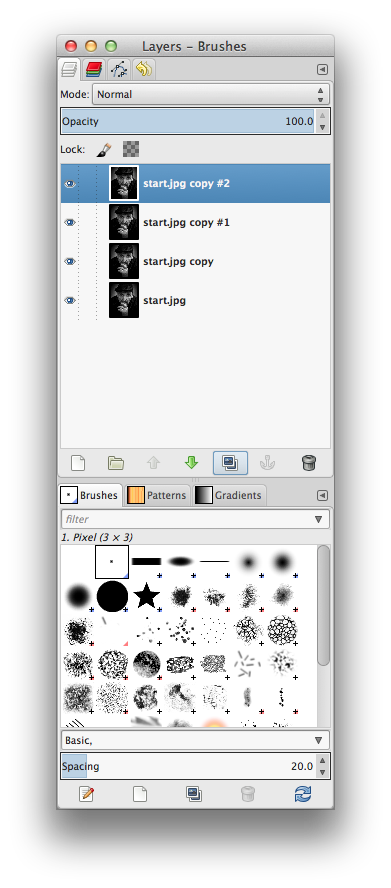
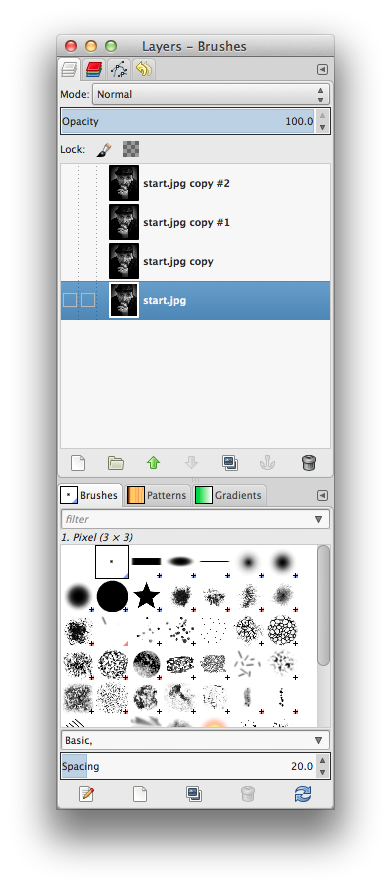
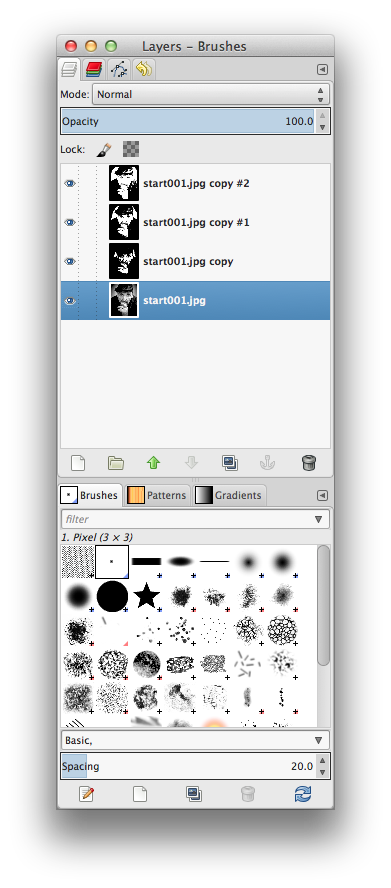
For this part of this tutorial, Let's simply set up the image into threshold layers using 3 different threshold settings. Open the sample image in GiMP, and then look at the LAYERS dialog window. You should see one layer, which is the base layer of this image.
Under the list of layers are 6 layer control buttons. In the first image above, I have highlighted in green the "duplicate layer" button. Click it 3 times, and you'll get 3 more layers identical to the first one, and your layers dialog window will look like the second image, above.
When you have 4 layers showing, it's always useful to rename them to remember what you're going to use them for. To do that, double-click one of the layers, and its name will appear highlighted. Type in the new layer name as you see fit.
The thing about layers is that they are exactly like sheets of paper, and the one on the top is the one you can see -- unless you do something to is which either makes it invisible, translucent, transparent, or function as a mask or filter.
Three Different Thresholds
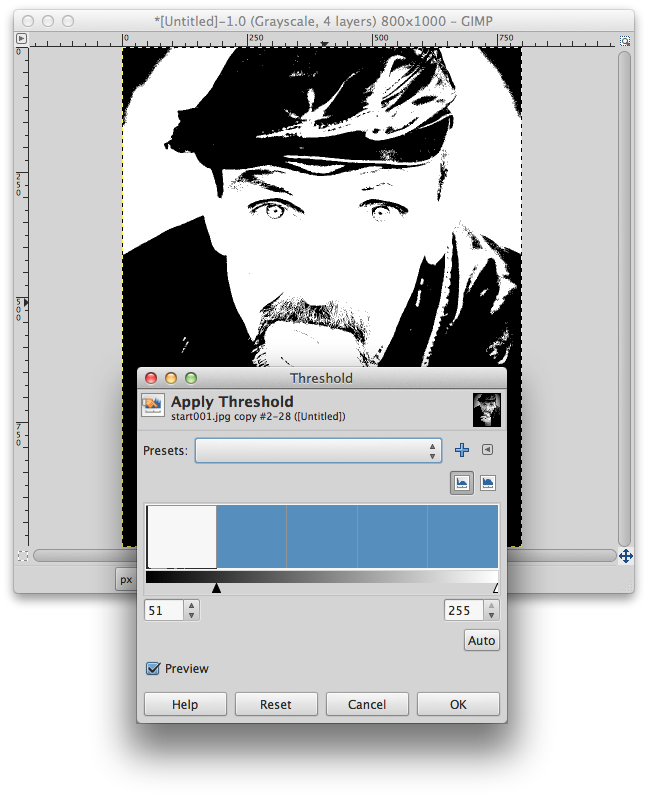
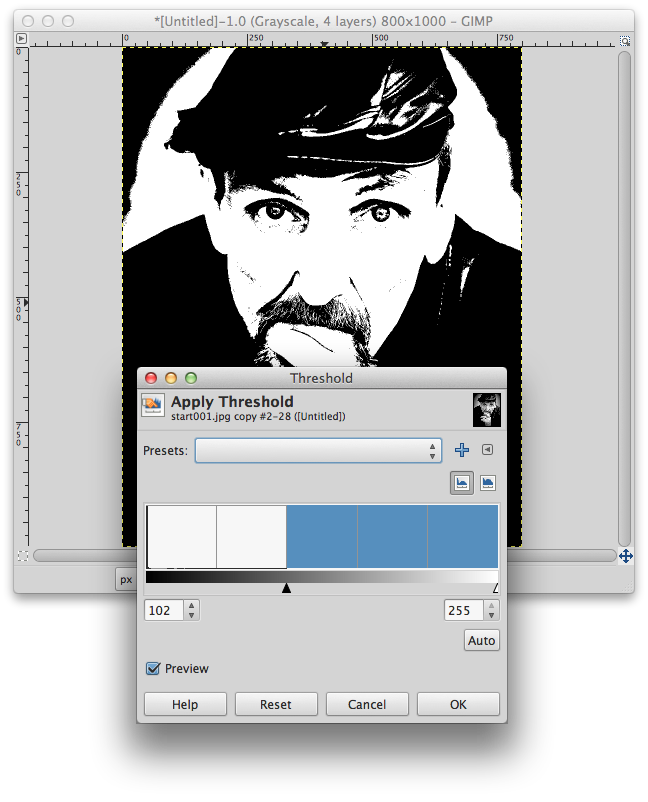
To finish up this step in this effect, let's make one layer the high-threshold contrast, one a mid-threshold contrast, and the last a low-threshold contrast. You'll want to leave the base layer as-is for the last step of this effect.
So make the top layer of this image visible, and select the layer. Then go to the "Threshold"tool (Color > Threshold) and pull the black slider to the left until it is pointing at the first hash mark (which is the 20% threshold). You should get something like the first image, above.
Click "OK" to convert the layer, and then make it invisible. Make the second layer visible, and select it. Go to the threshold menu, and pull the slide to the second hash mark (which is 40% threshold). You'll get something like the second image, above.
Click "OK" to convert the layer, and then make it invisible. Make the third layer visible, and select it. Go to the threshold menu, and pull the slide to the third hash mark (which is 60% threshold). You'll get something like the third image, above.
When you've completed these steps, your LAYERS dialog should look like the last image, above.
Masking Hatch Layers (1 of 2)
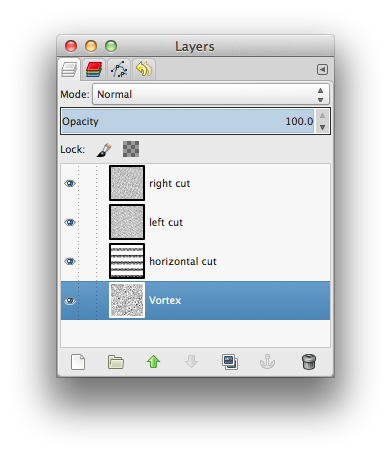
What that leaves us with is the three layers of contrast we need to make the hatch effect work. If you're ready to continue, open the file "4-way-hatch.xcf" (which you downloaded from my Google Drive site way back in step 1, or you can download from this link). When you do, you'll find something like the first image above in the Layers dialog when it is the active document.
It's 4 layers with 4 different hatching patterns -- diagonal slanted right, diagonal slanted left, horizontal, and vortex. We'll be using the top 3 for this tutorial, but I'll show you an alternative rendering using the vortex pattern so you can brainstorm your own uses for this file.
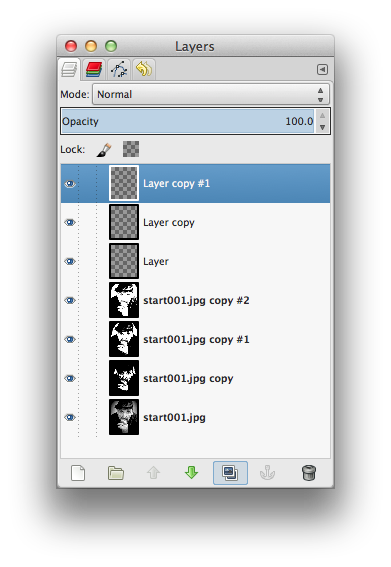
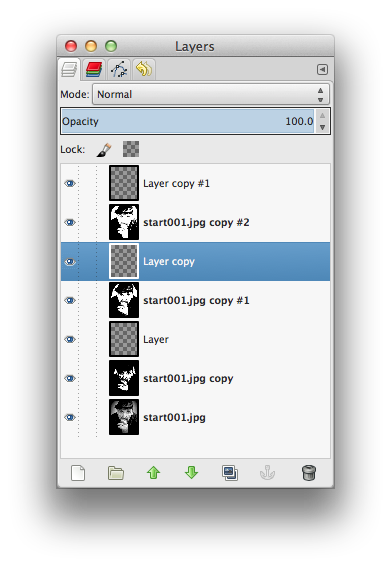
Before we use those hatch layers, go back to the image you want to convert to hatches. Select the top layer and make it visible (that is: click the "eye" icon next to the layer and make sure it's visible; you'll know because it will be the only layer you can see). Now click the first button on the left of the layers dialog, which is the "new layer" button. If you simply press return when the "new layer" dialog pops up, you'll get a new, blank layer on the top of all your other layers. Select that layer and click the "Duplicate Layer" button twice. Now you should have something like the second image, above.
The great thing about the layers dialog is that you can move the layers around in the stack just by clicking and dragging them around. What you want to do is sort the layers so that the top layer is blank, then the next one is one of your threshold layers, then a blank, then a threshold. Make it look like the third image, above.
Now you're ready for some hatching. This next part takes some patience, but it's actually really easy --->>>
Masking Hatch Layers (2 of 2)
Follow these steps:
1. Make your highest THRESHOLD layer visible, and then click and select EMPTY layer ABOVE it. 2. Select the "4-way-hatch" image, and select the TOP layer of hatch lines in the layers dialog. Now click "CTRL-A" to select the whole layer, and then "CTRL-C" to copy it.
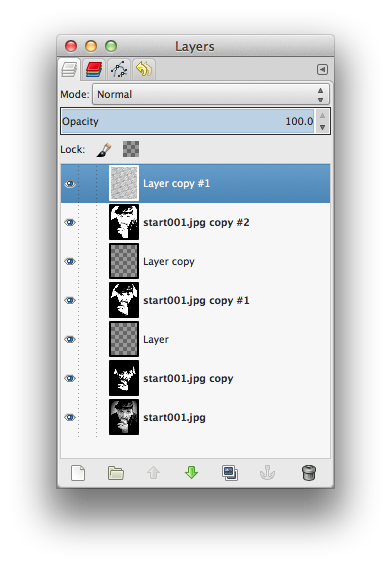
3. Select the IMAGE window, and then PASTE the copied hatch marks into the top empty layer. After you paste, click the Anchor icon in your Layers dialog to anchor the hatch lines into the layer
At this point, you will have something that looks like the first image, above, in your LAYERS dialog for the image you are trying to convert.
The EMPTY layer above your highest threshold level now is filled with repeating hatch lines. It's important that the hatch lines layer is ABOVE the image you're going to hatch our for the next two steps.
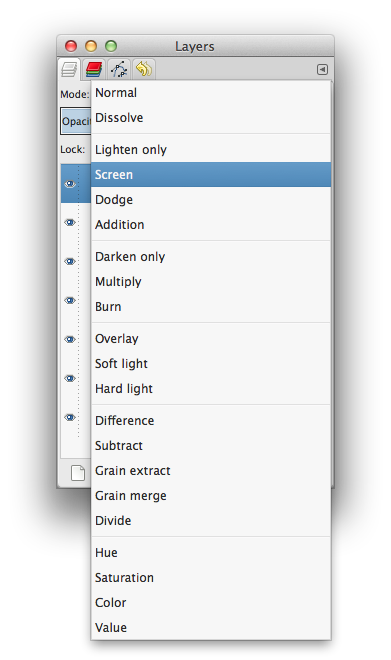
4. Make sure the HATCH layer is selected, and then go to the drop down "MODE" menu at the top of the LAYERS dialog. Drop down the menu so you can see the menu which is captured in the second image, above.
The MODE menu allows you to apply the layer you have selected to the layer(s) beneath it using different masking algorithms to create color or lightness effects. At the end of all that geek speak, the layer's "mode" causes the layer you have selected to combine with the layers under it using a special effect. "Normal" mode covers the layers under the layer selected using the opacity you choose. For this tutorial, we are going to use the "Screen" mode which takes the layer you have selected and applies it to the visible layers underneath as a sort of fill. When you select "Screen" from the mode menu, you should get something like the third image, above.
All the black in the high threshold layer is now filled with the hatch marks from the top layer -- but the layers are still distinct. We want to combine them permanently into a layer for future use.
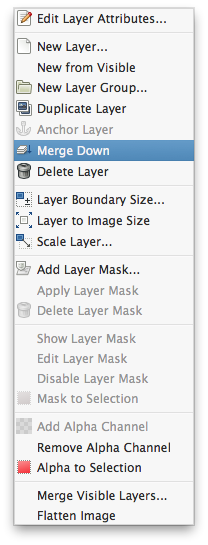
5. Right-click (Control-click on a Mac) the top layer (the one with the hatch marks) and select "merge down" from the context menu (see imgae #4, above)
What this does is permanently apply the hatch layer to the image layer using the "Screen" mode, making the layer a hatched image layer.
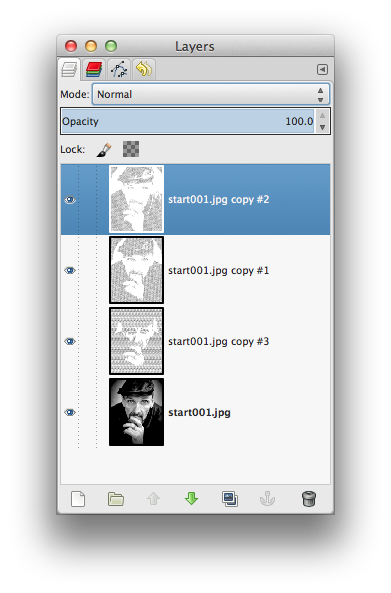
6. Repeat steps 1-5 for the other two image layers, but as you do it, use a different hatch layer for each threshold layer. The top layer we just did has hatch marks running diagonal from bottom-left to top-right. When you are done, you'll have 3 layers plus the base layer in your Layers dialog, like image #5, above.
Finishing Up (and an Alternative Ending)
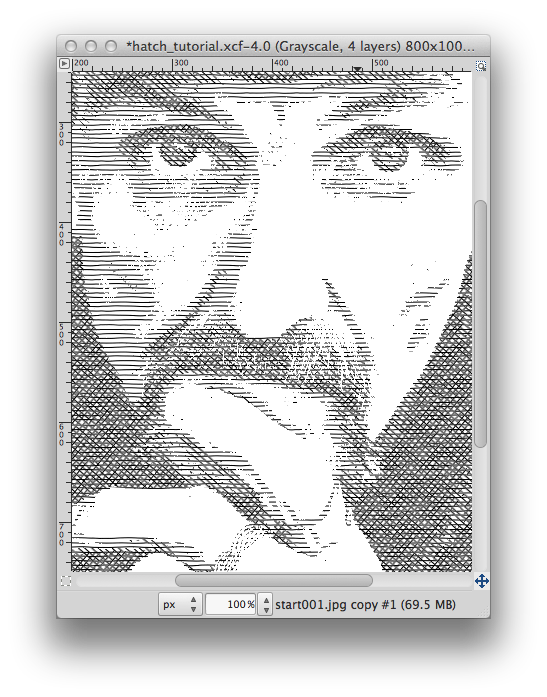
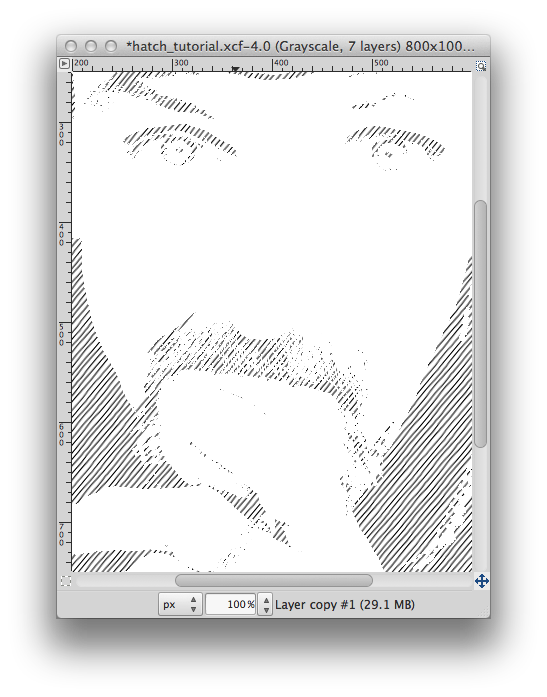
From this point, the rest is easy. Select the TOP layer, go to the MODE menu, and select the "Darken Only" mode. Select the SECOND layer, go to the MODE menu, and again select the "Darken Only" mode. When you're done, you should have something that looks like the first image, above, in the main image window.
All that's left is to use your context menu to merge the layers into one and this is essentially finished.
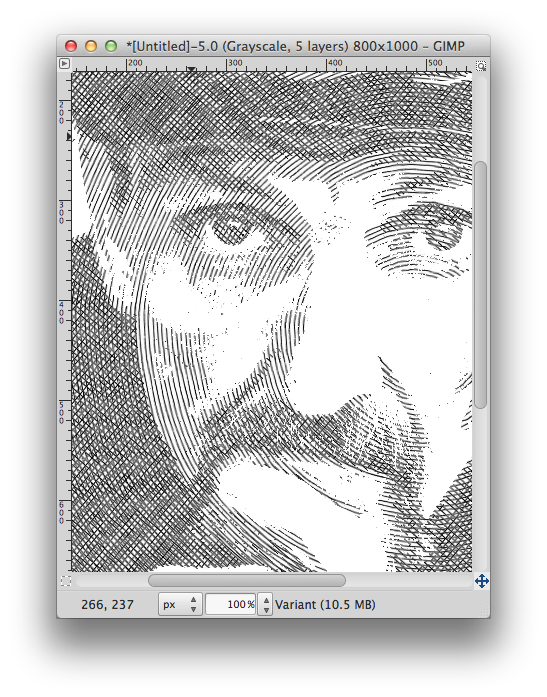
The one alternative I wanted to show you uses the use of the vortex hatch layer. There's a certain flatness to the original method -- the curves of the subject's face don't show through. The totally-straight lines look inorganic.
However, if you use the Vortex hatch for the for the darkest threshold layer, you can get something like the second image, above.
The lines running in a curve add a more natural feel to the hatch effect.