Controlling the World With Google AIY
by Asis Gotam in Circuits > Raspberry Pi
639 Views, 1 Favorites, 0 Comments
Controlling the World With Google AIY
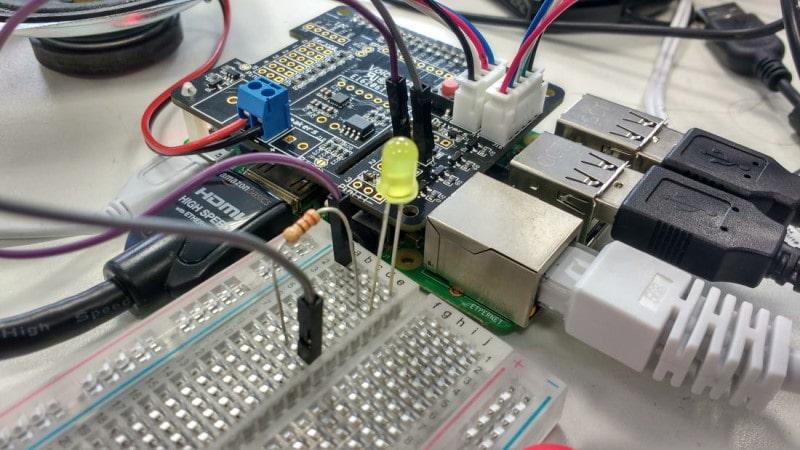
The Google AIY Projects Voice kit came free with the May 2017 print issue of The MagPi, and you can now also buy it from many electronics suppliers.
What you will learn
- How to connect an LED to the AIY Voice Kit
- How to extract information from voice commands
- How to trigger the GPIO pins using voice commands
What You Will Need?
Hardware
- A Raspberry Pi computer
- A Google AIY Voice Kit
- An LED2 x male-female jumper leads
- A 50-100Ω resistor
Software
Solder on Header Pins
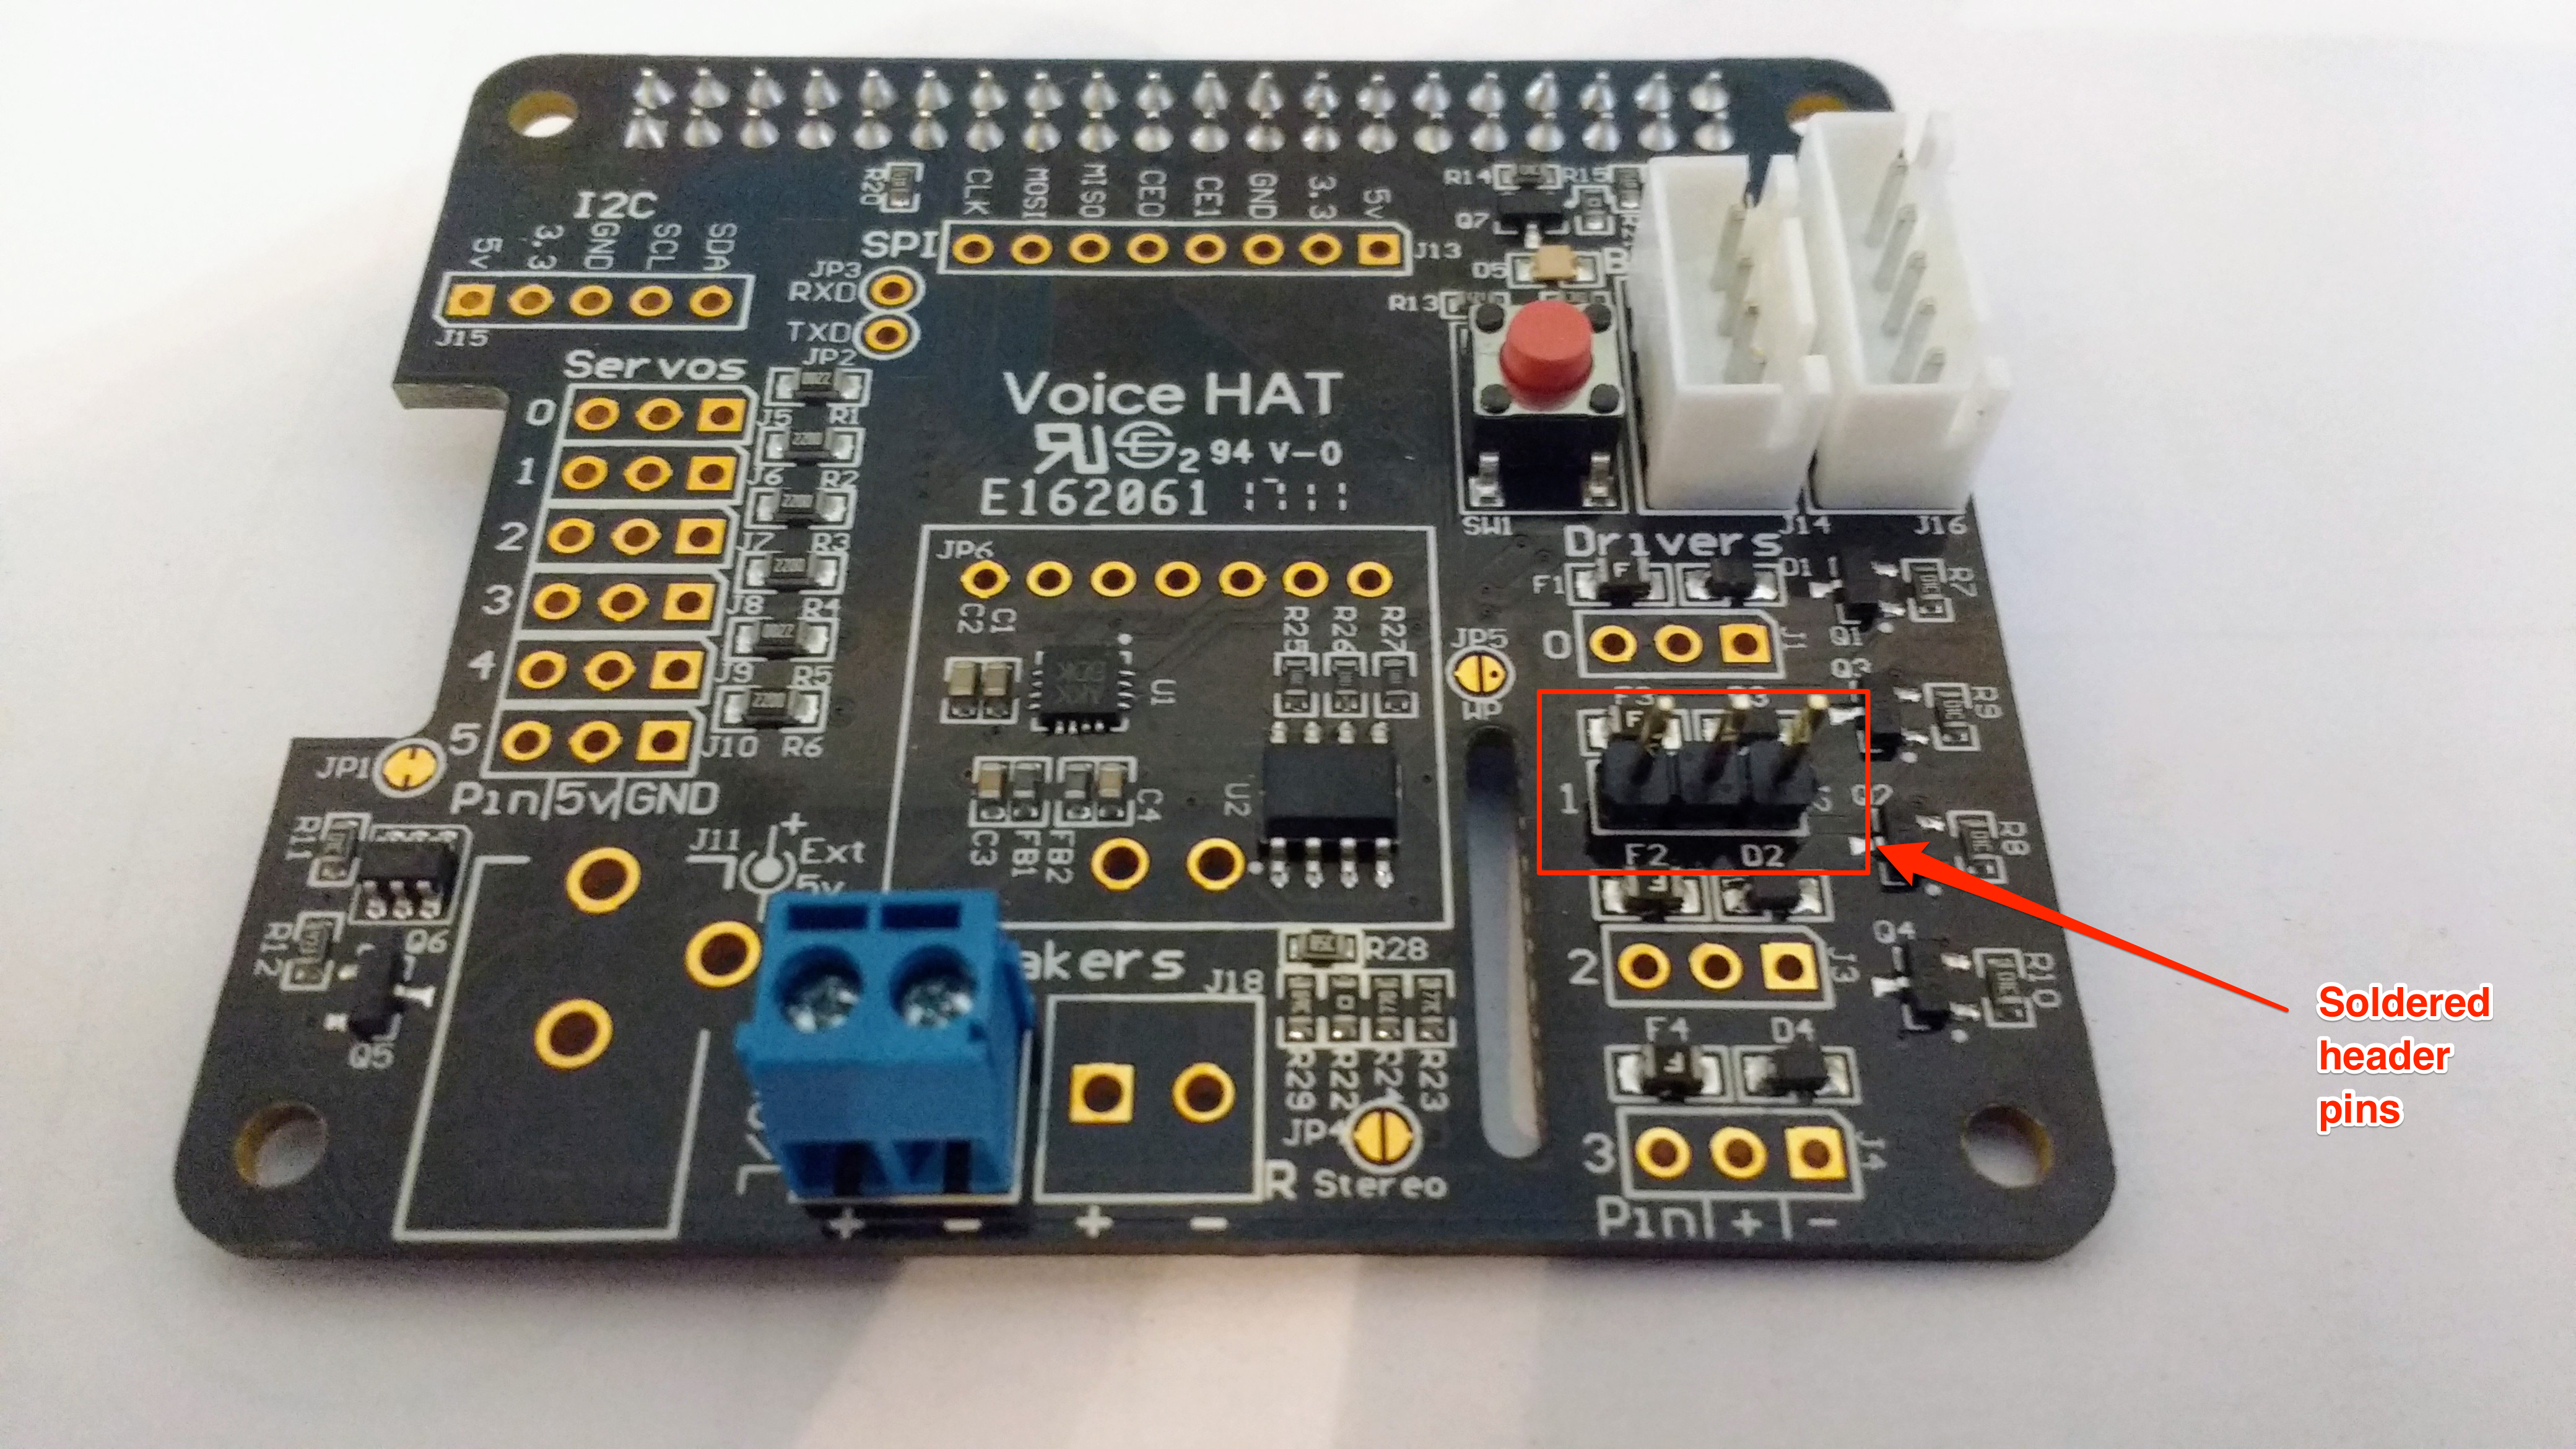
In this project, you’re going to use the Voice Kit to make an LED blink in response to a voice command. If you can make an LED, then there really are very few limits to what you can control.
- The first thing to do is to set up the Voice HAT. As you will be controlling an LED, you will need to use some soldered header pins to allow you to access the GPIO pins of the Raspberry Pi.
- You can solder a set of three header pins to the holes on the board that are in the column of Drivers. In particular, you want row 1.
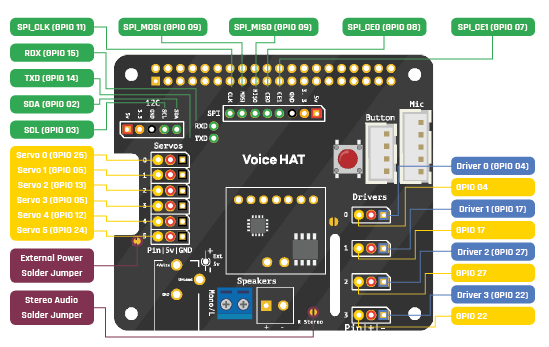
- You can see the mapping of all the GPIO pins on the following schematic, in case you want to use a different GPIO pin.
If you have never soldered before, and need some help, then have a look at our Getting started with soldering guide.
Setting Up the Hardware
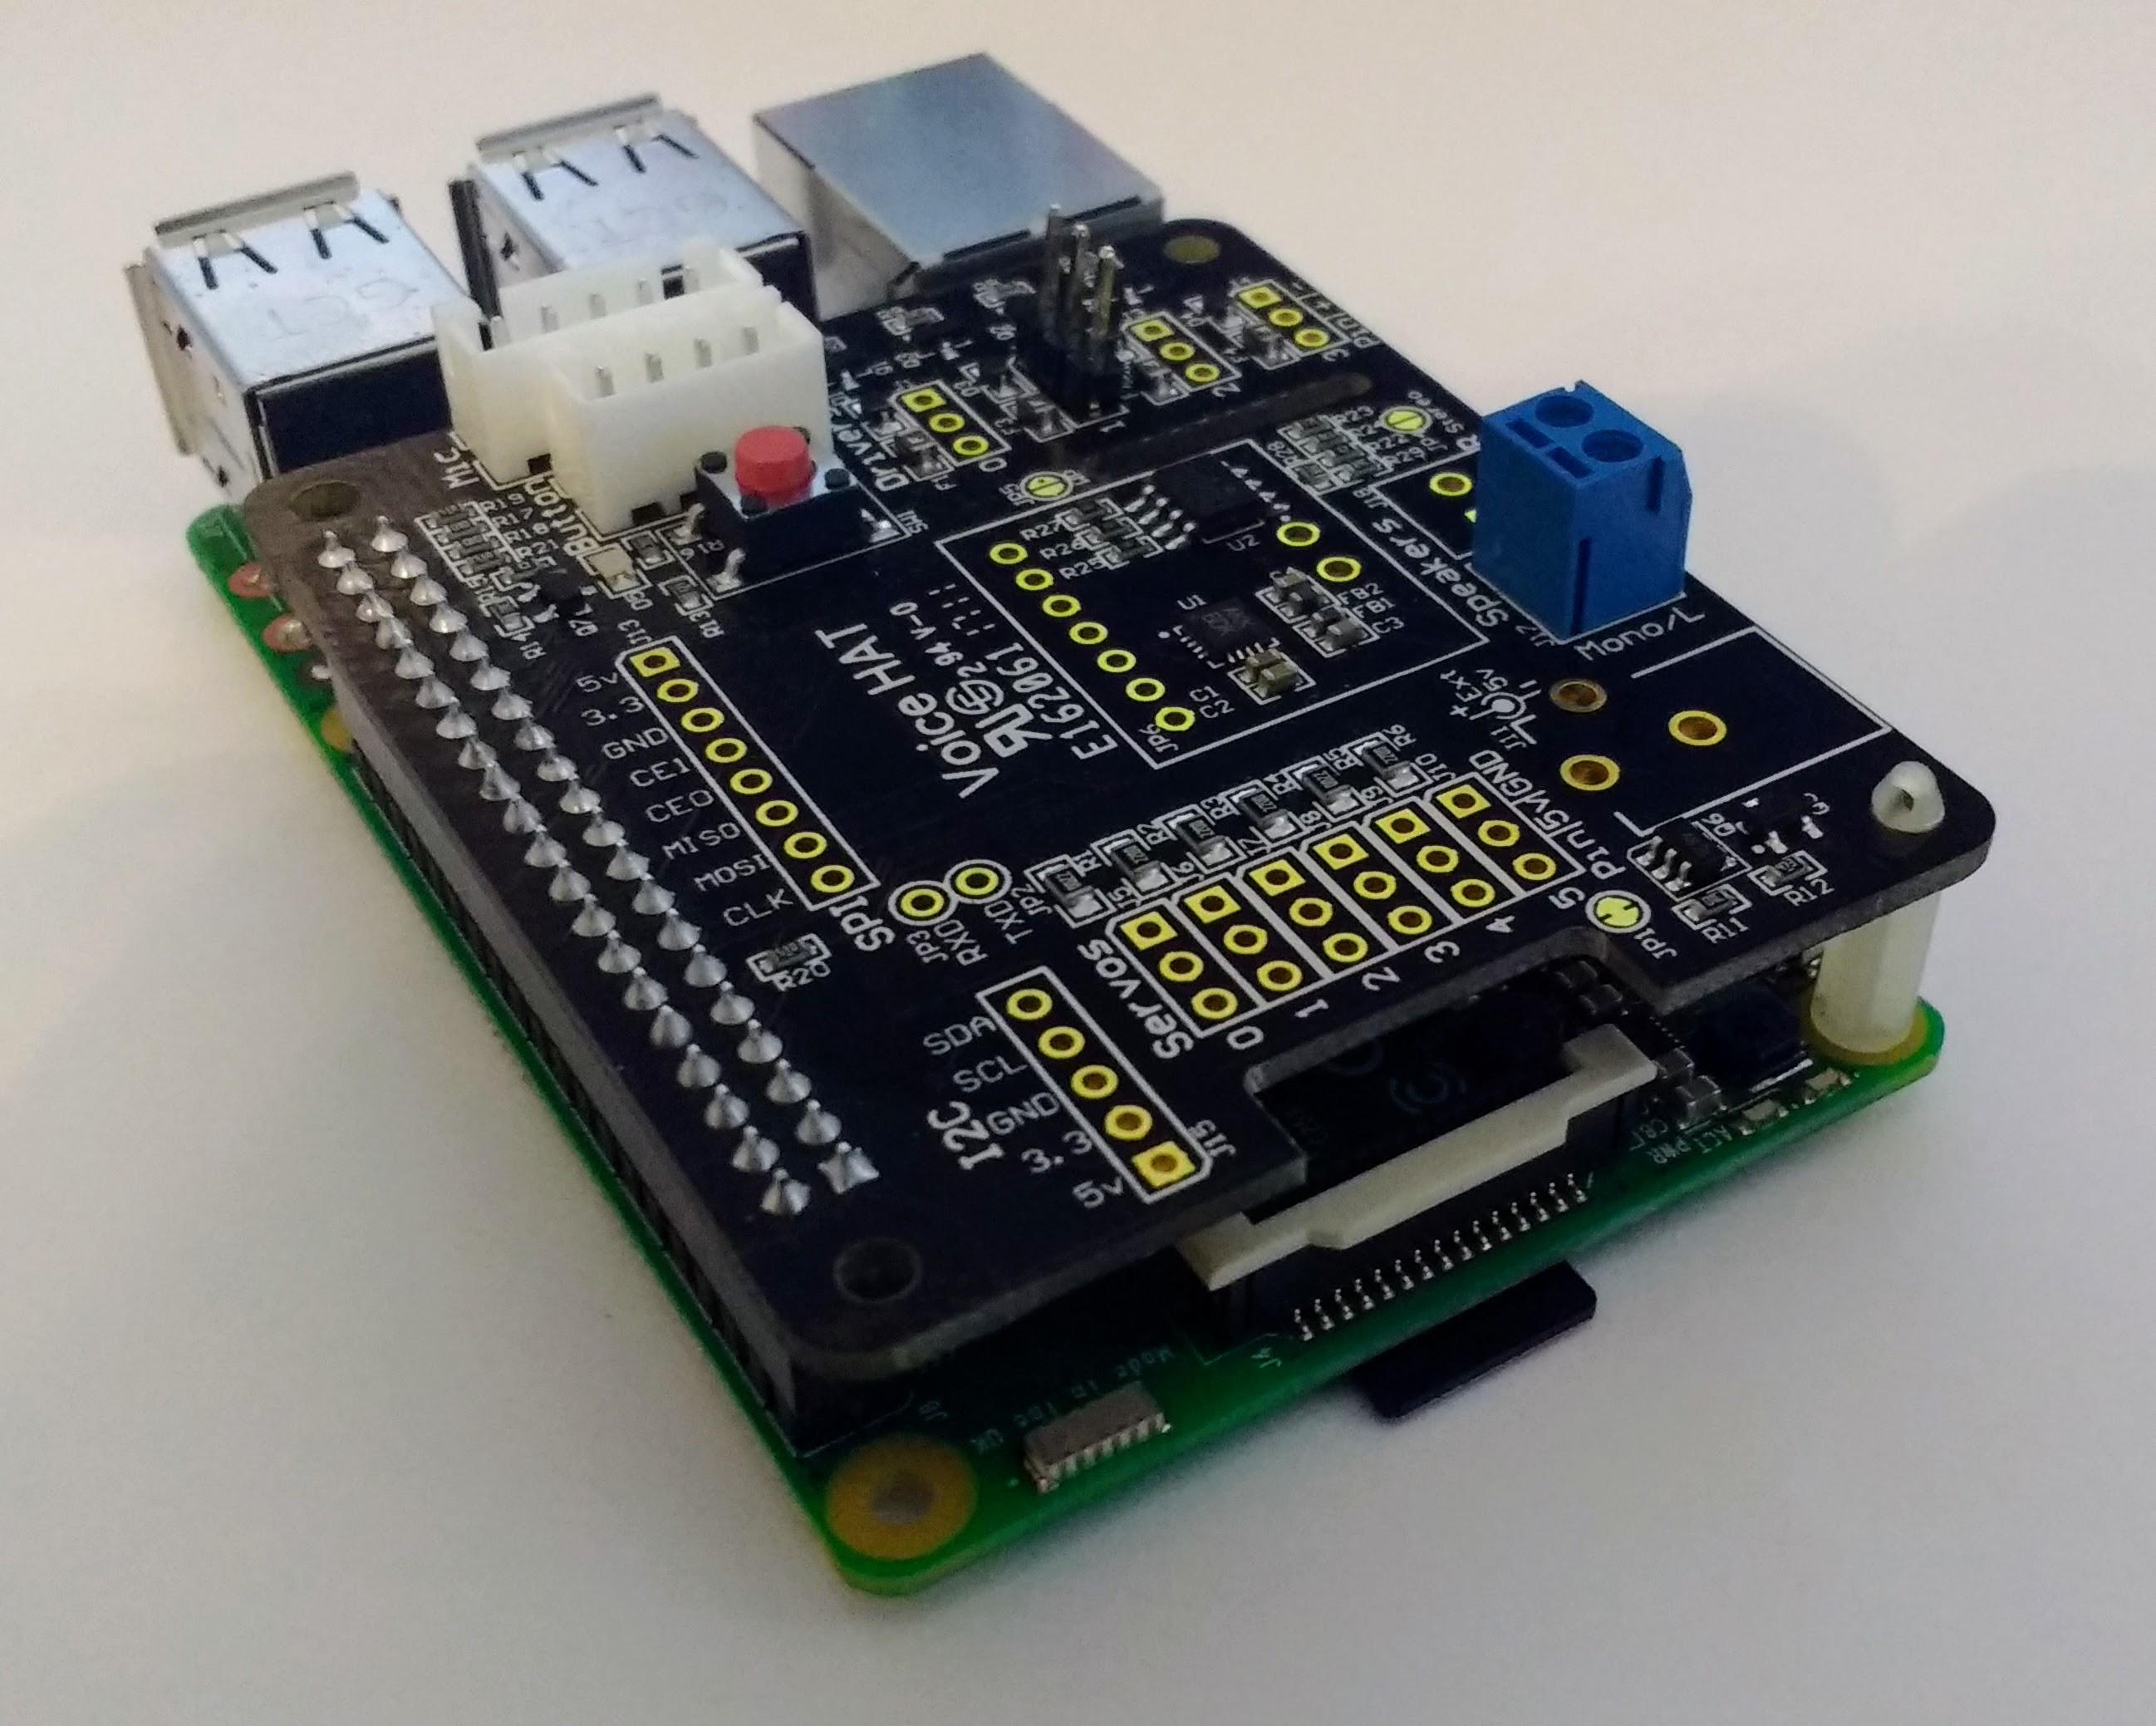
You can follow the build guide on the Google AIY website if you want. However, it uses the cardboard box to house the kit, and this will restrict access to the GPIO pins. If you want to follow a simpler guide, then use the instructions below.
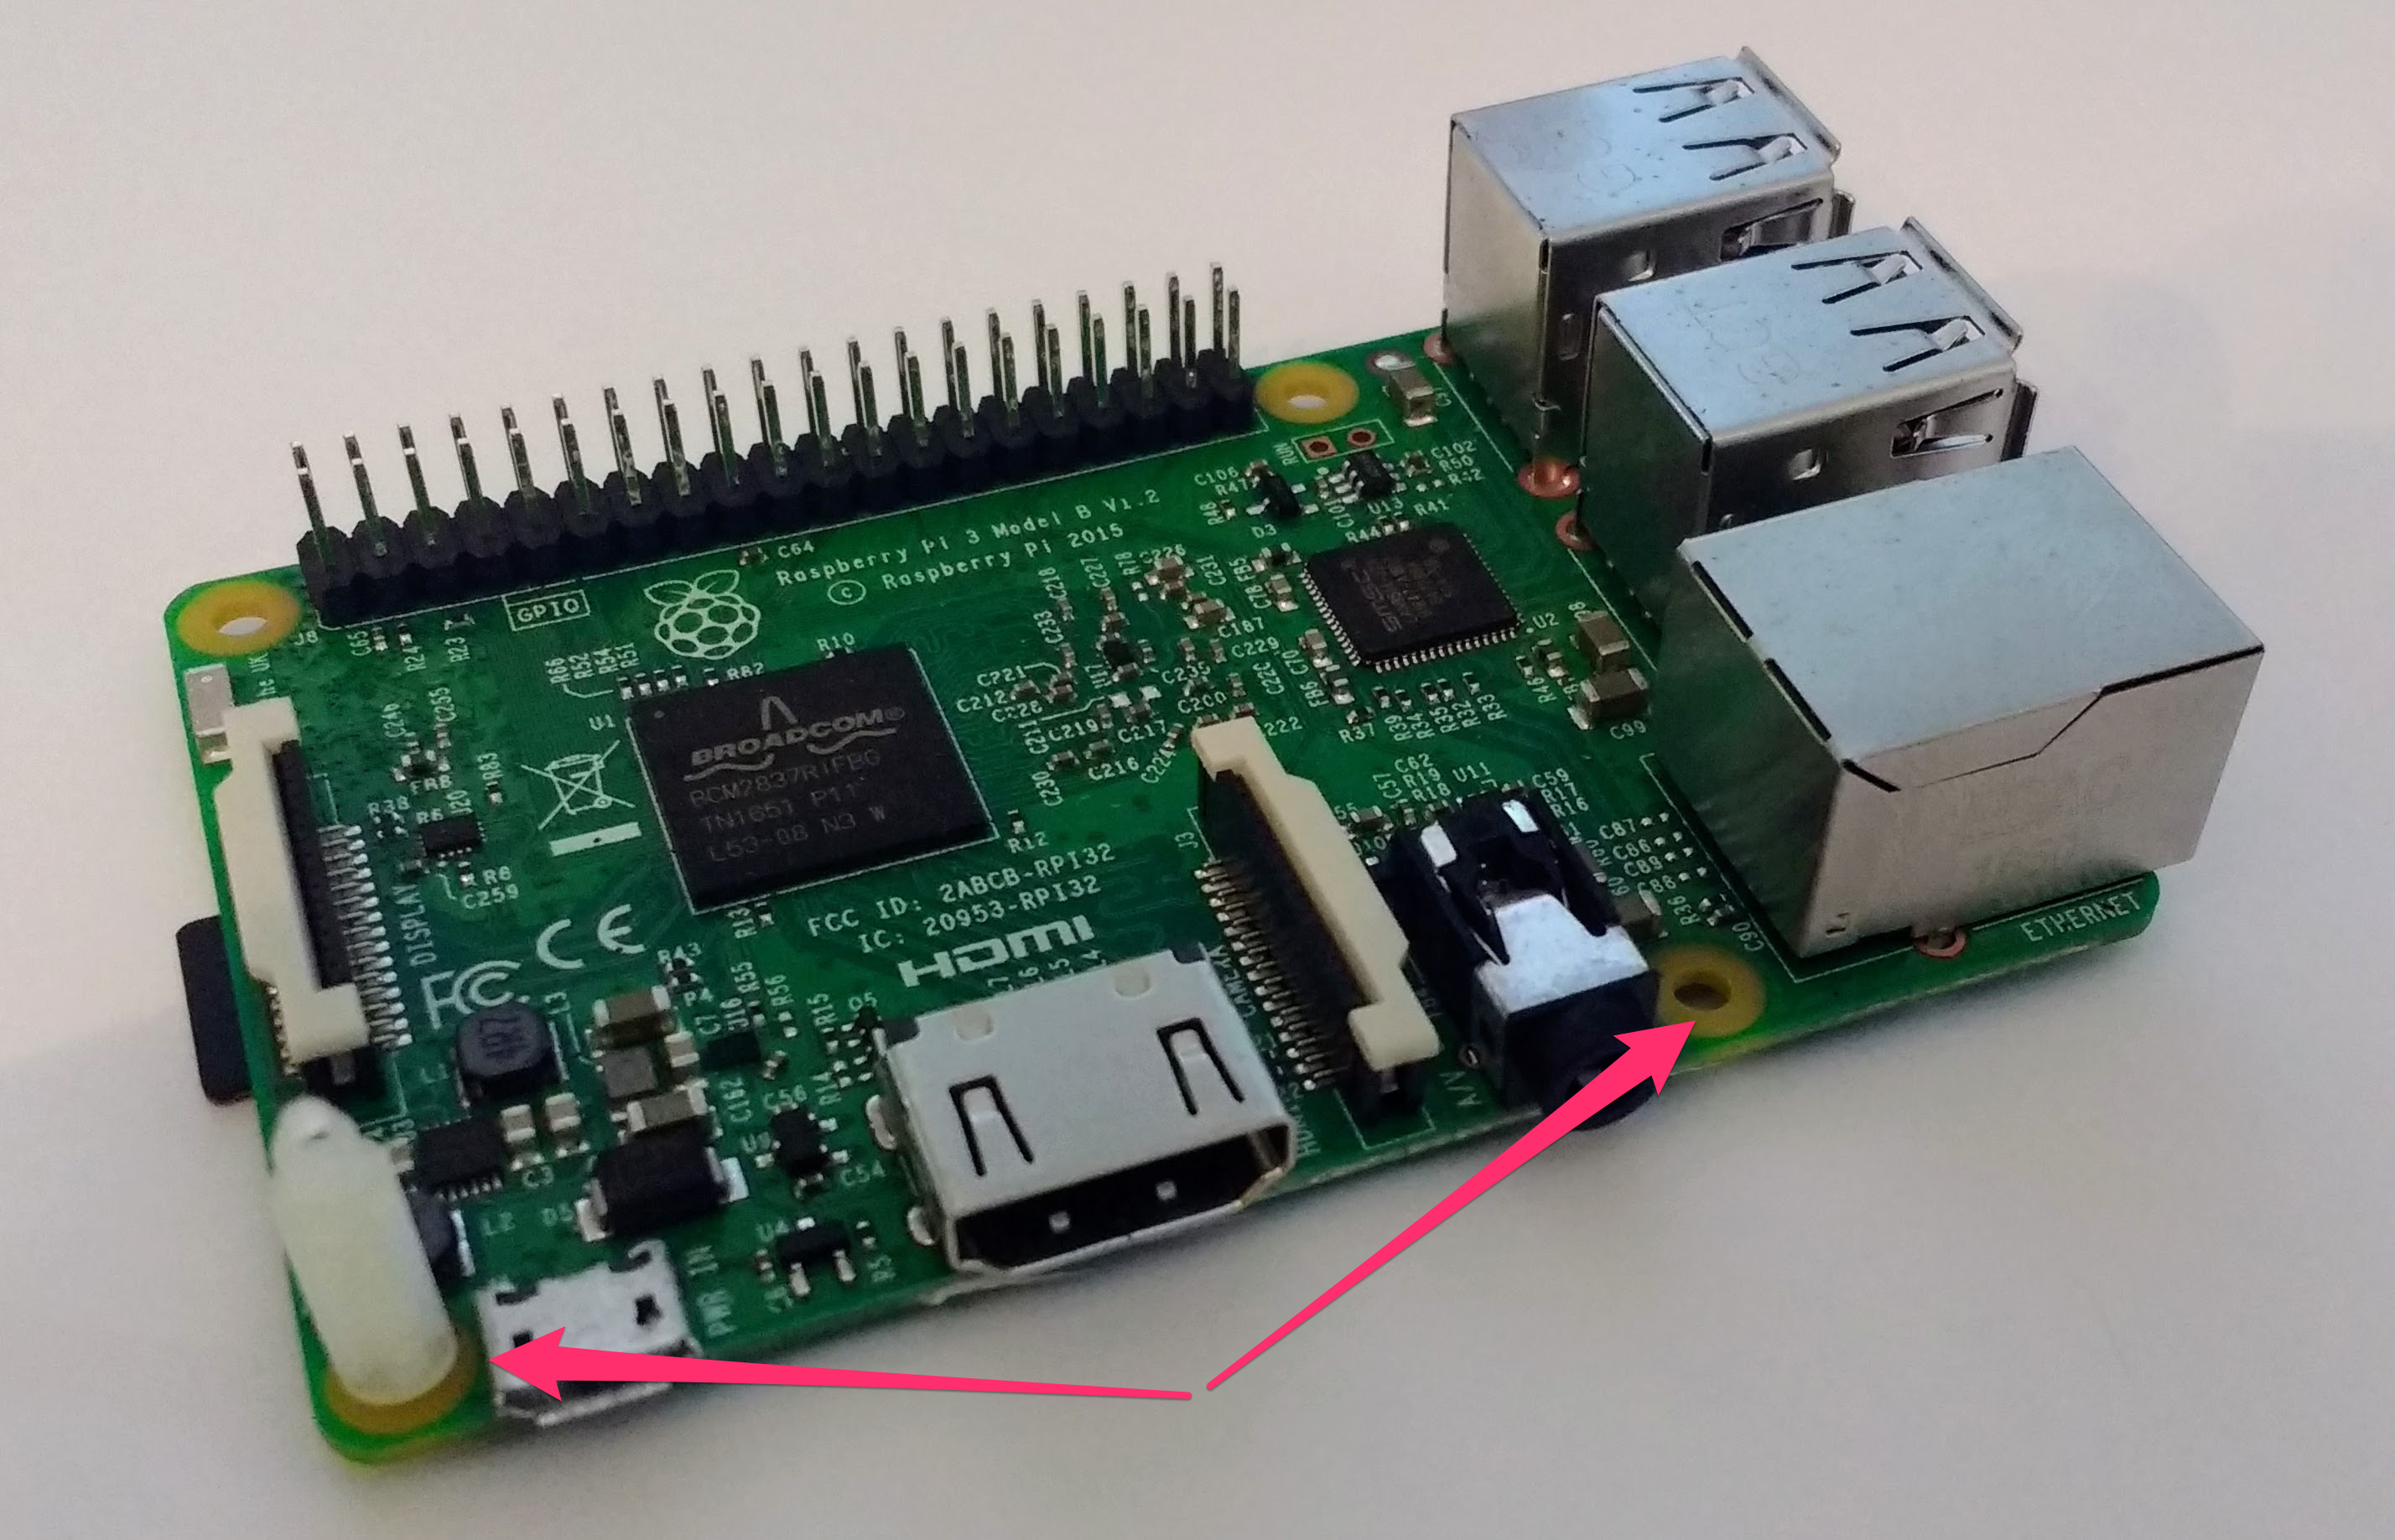
- First, you need to use the plastic standoffs to help support the Voice Kit HAT when it is attached to the Raspberry Pi. Insert the standoffs into the mounting holes opposite the GPIO pins.
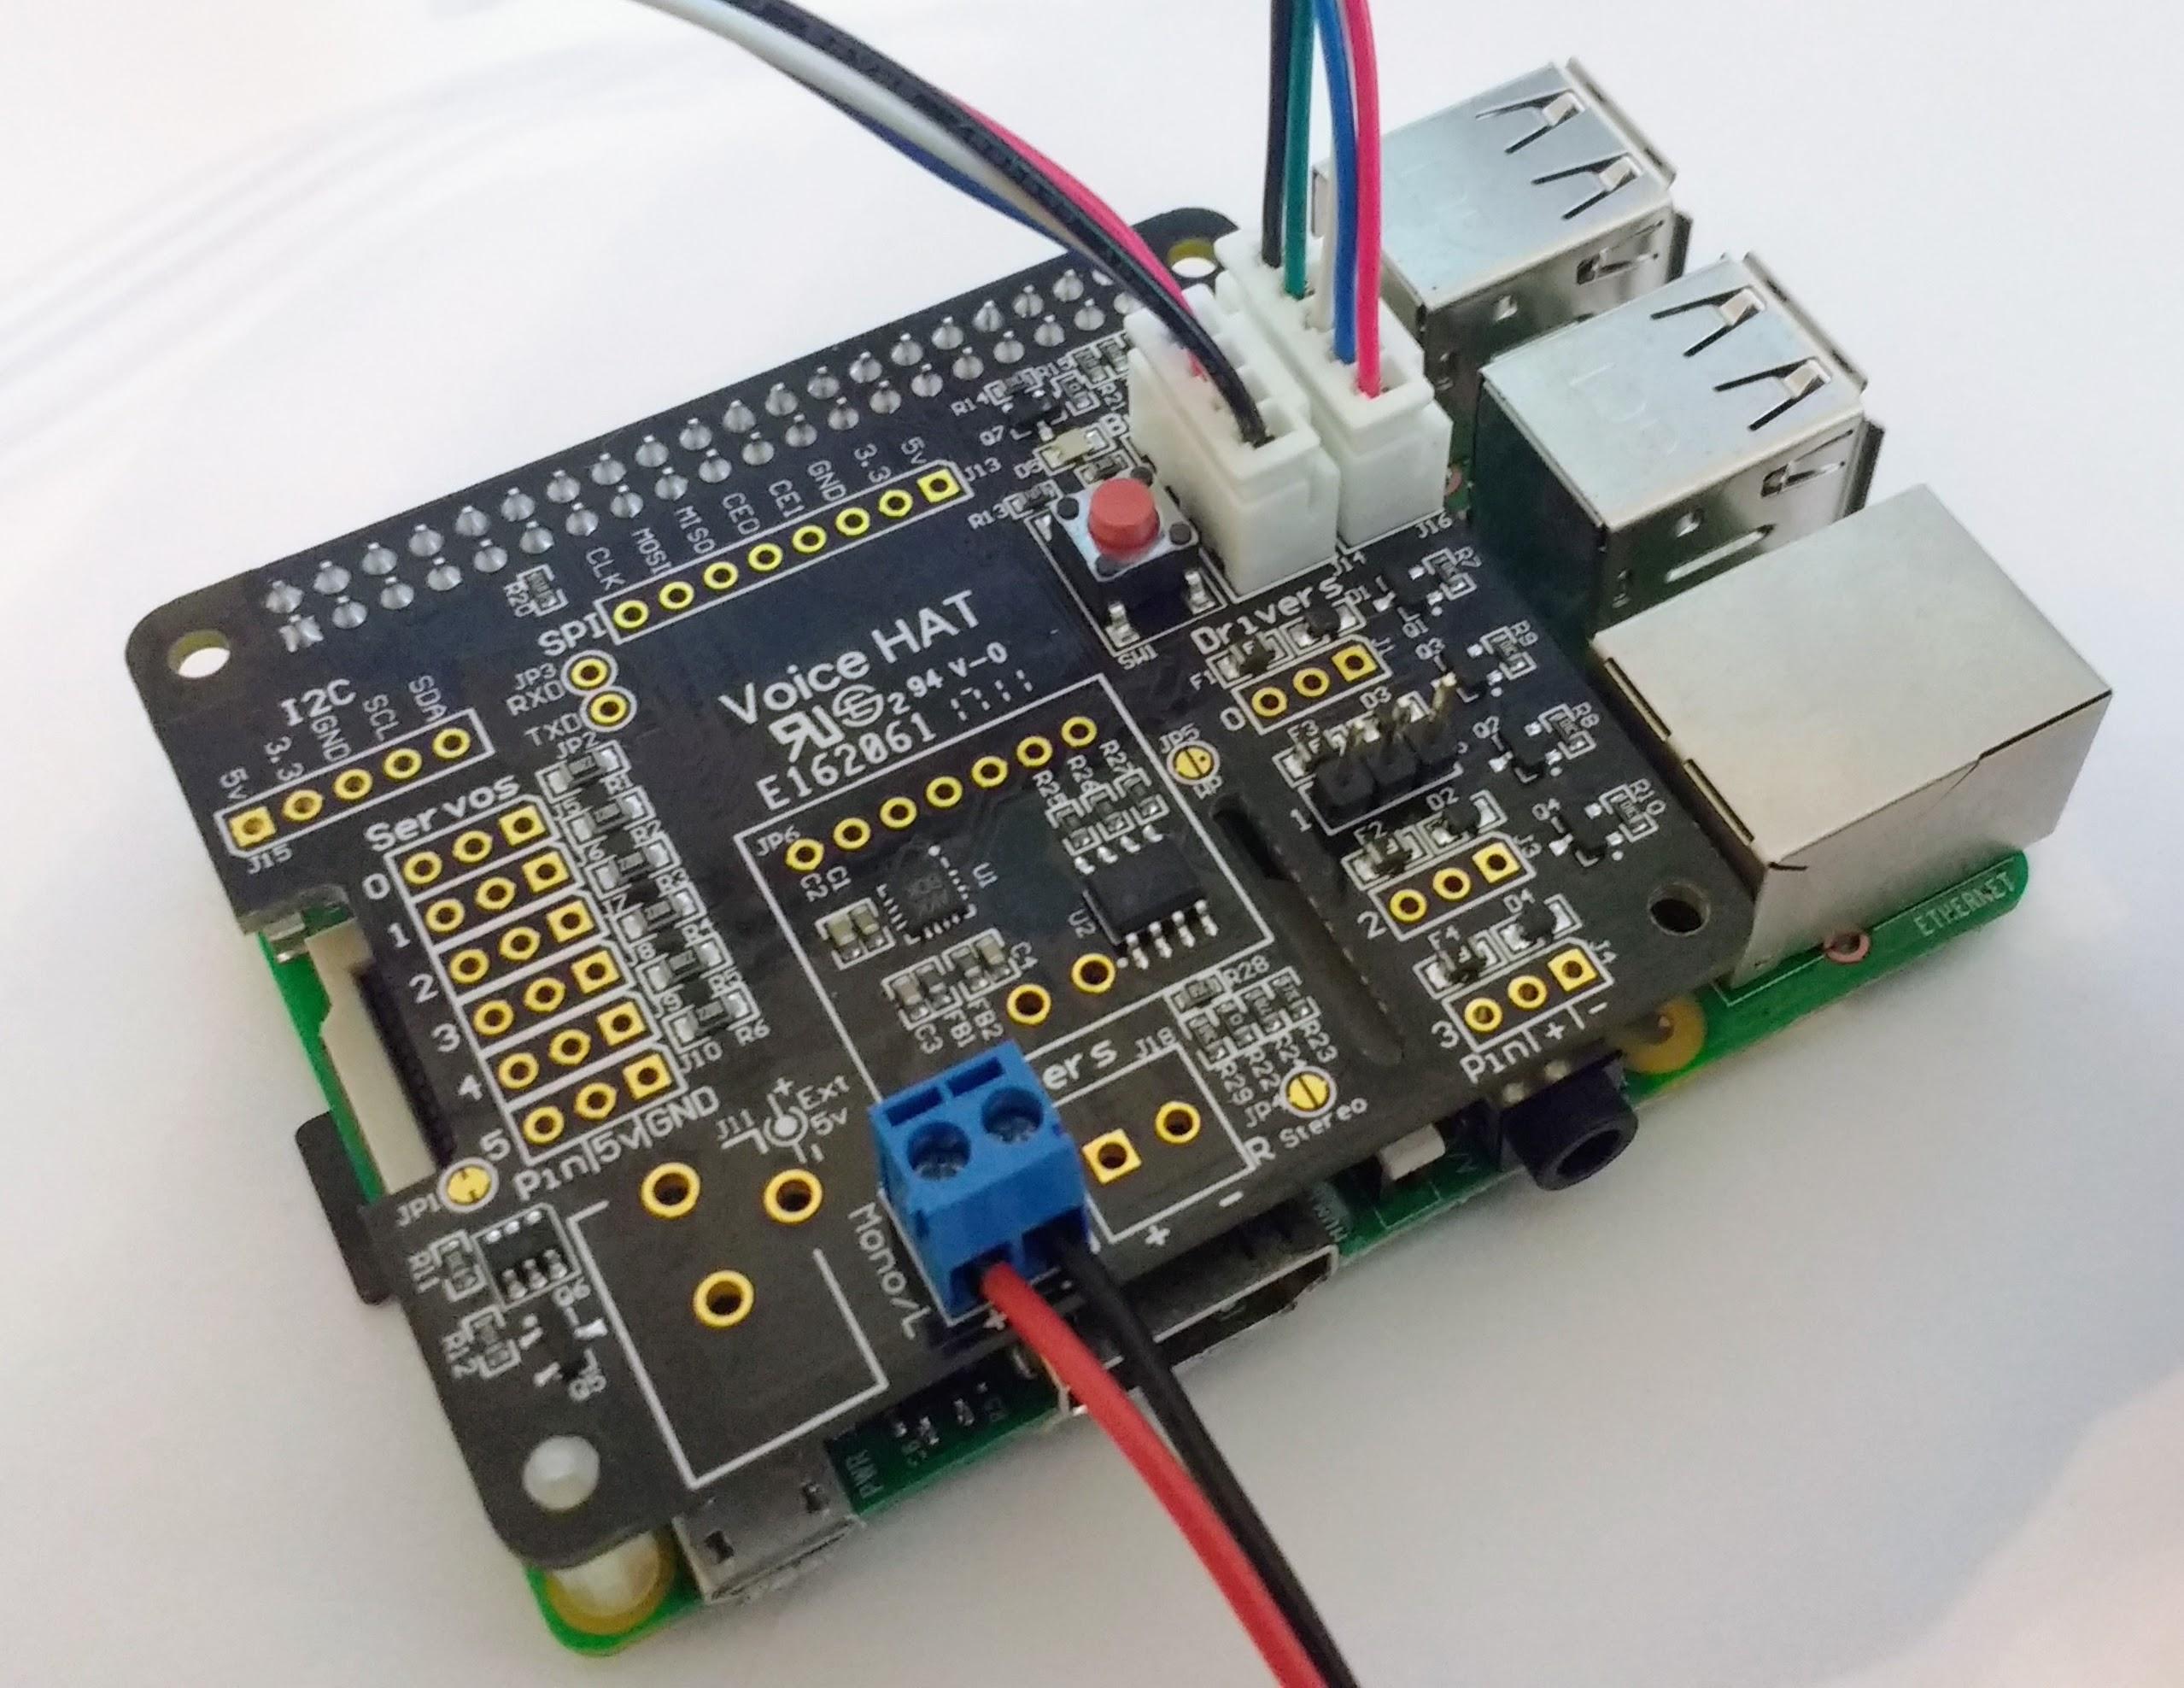
- You can now place the HAT onto the Raspberry Pi - make sure that the pins are all aligned.
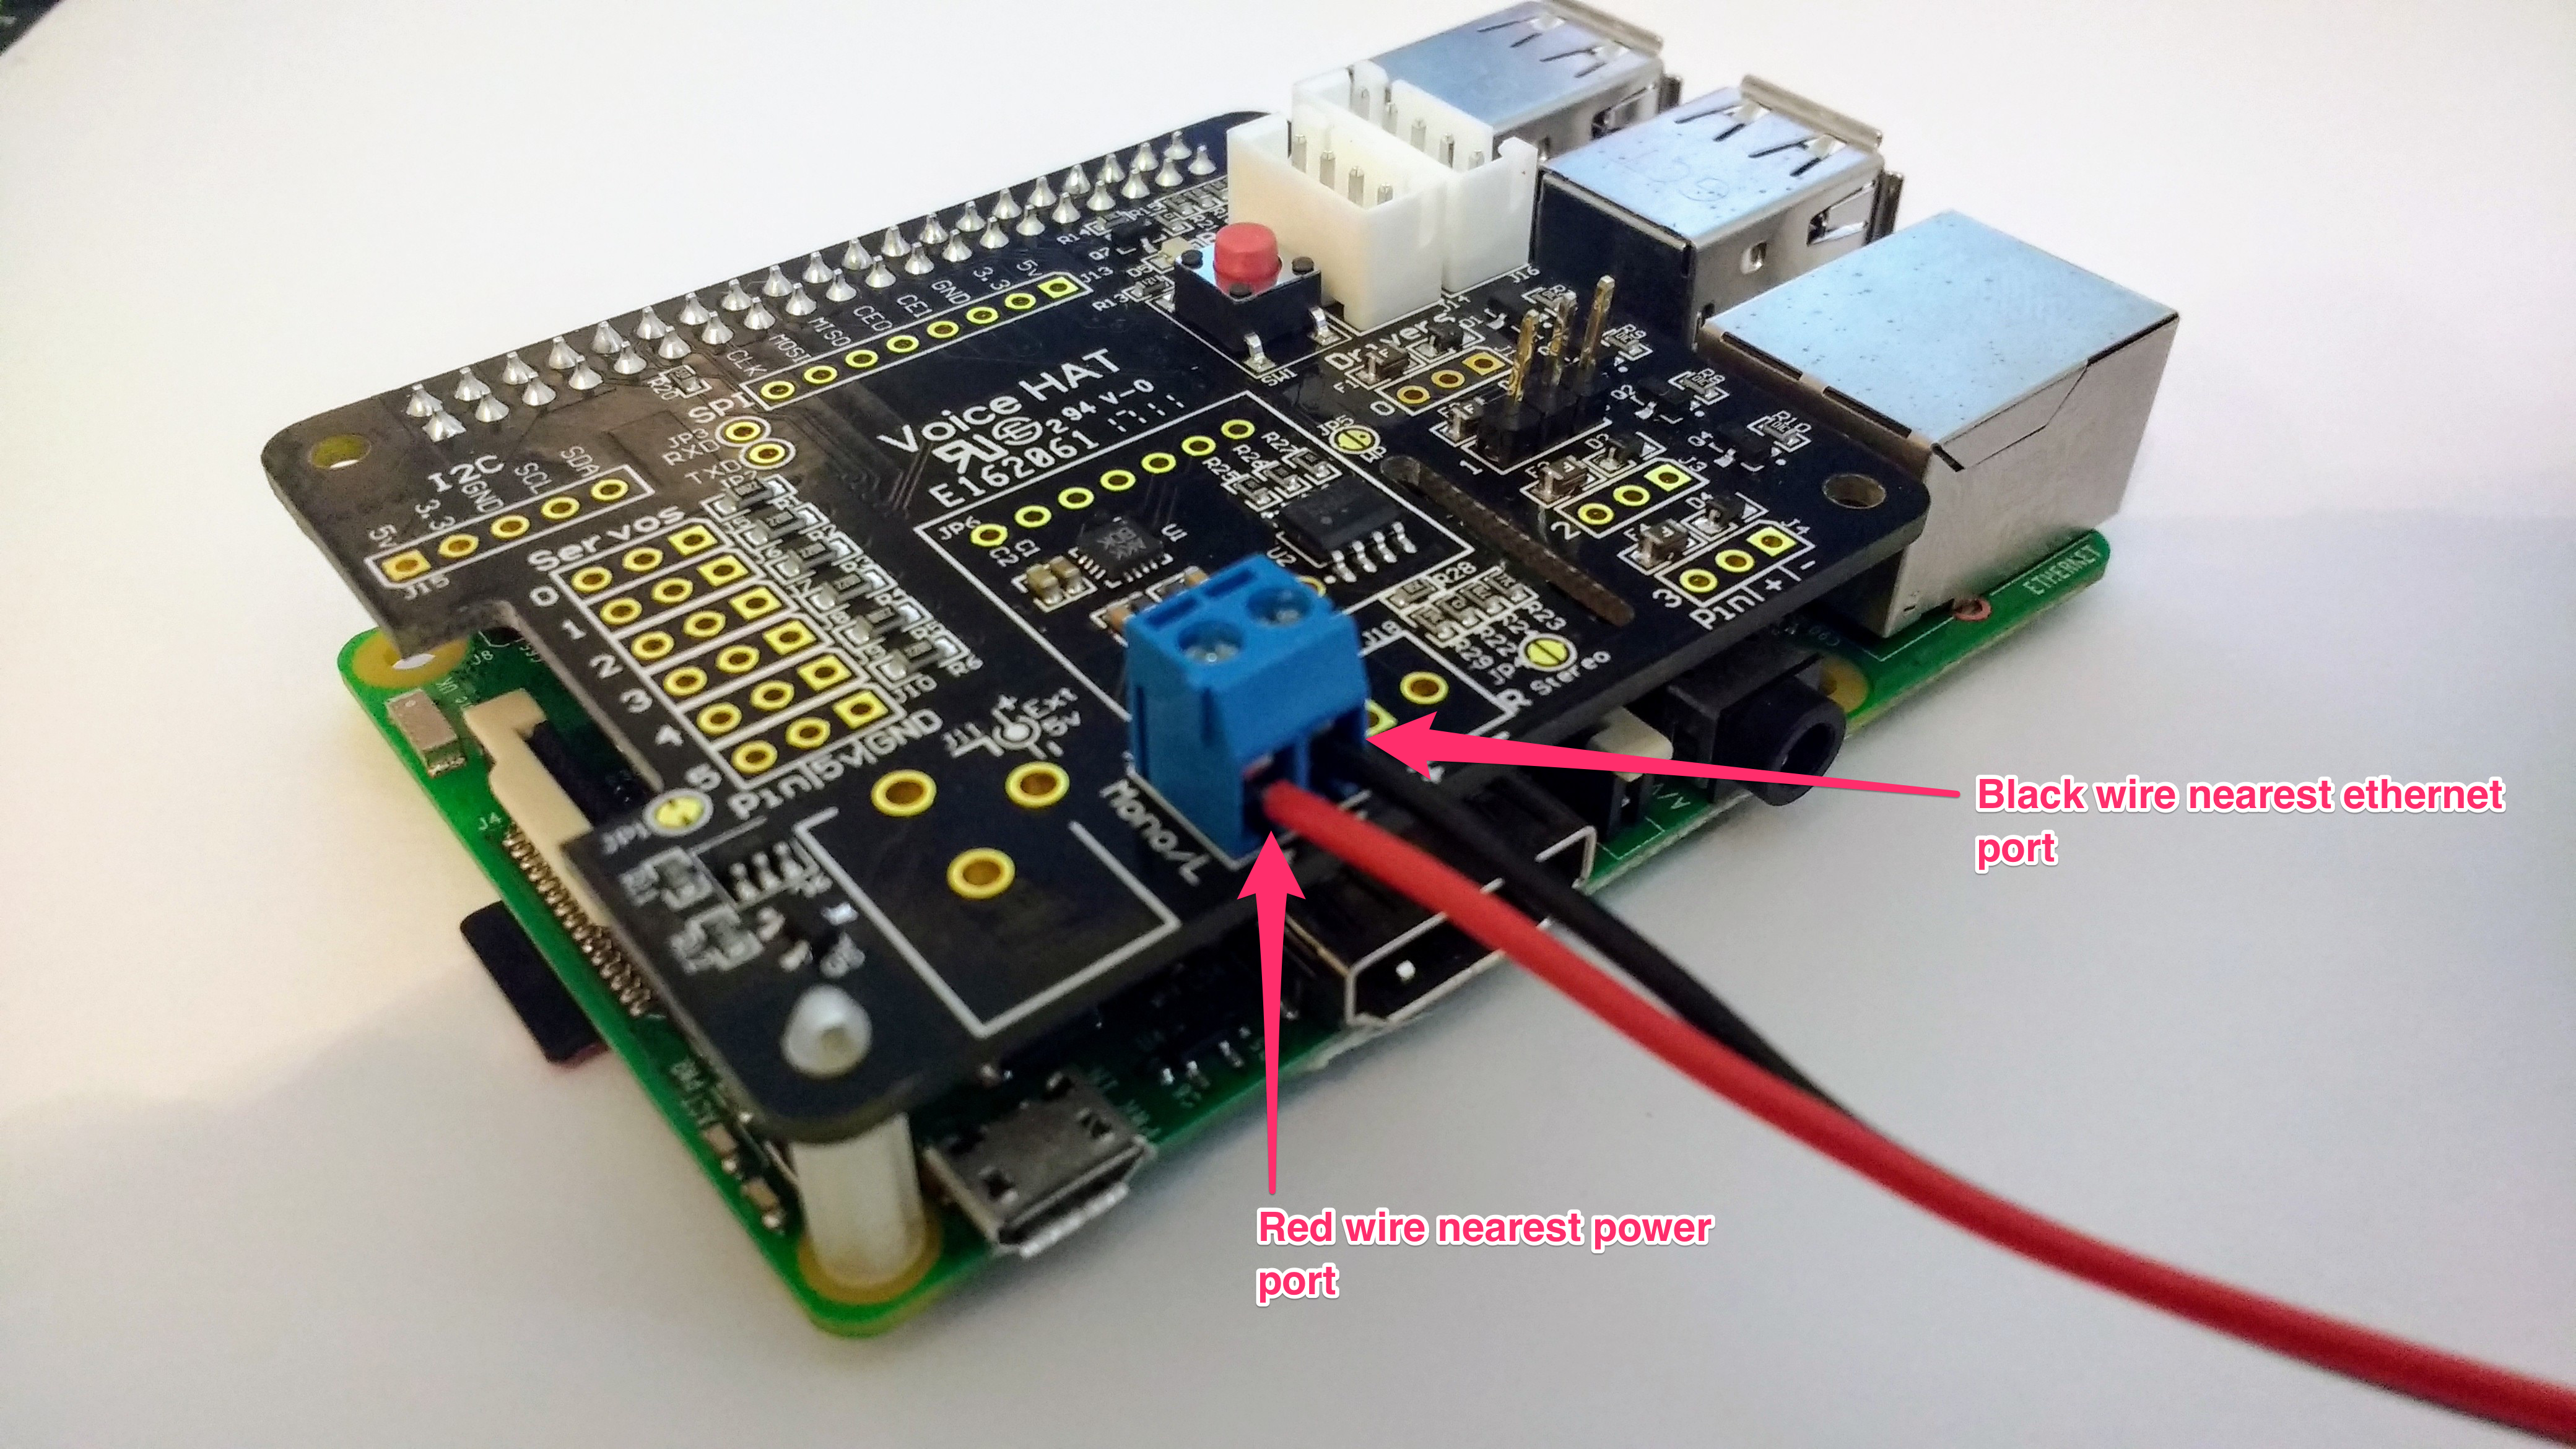
- Next, attach the speaker to the kit. It has to be wired in a particular way: the red wire needs to be inserted into the hole closest to the Raspberry Pi’s Ethernet port. The black wire goes into the other hole. Use a Phillips-head screwdriver to secure the wires in place.
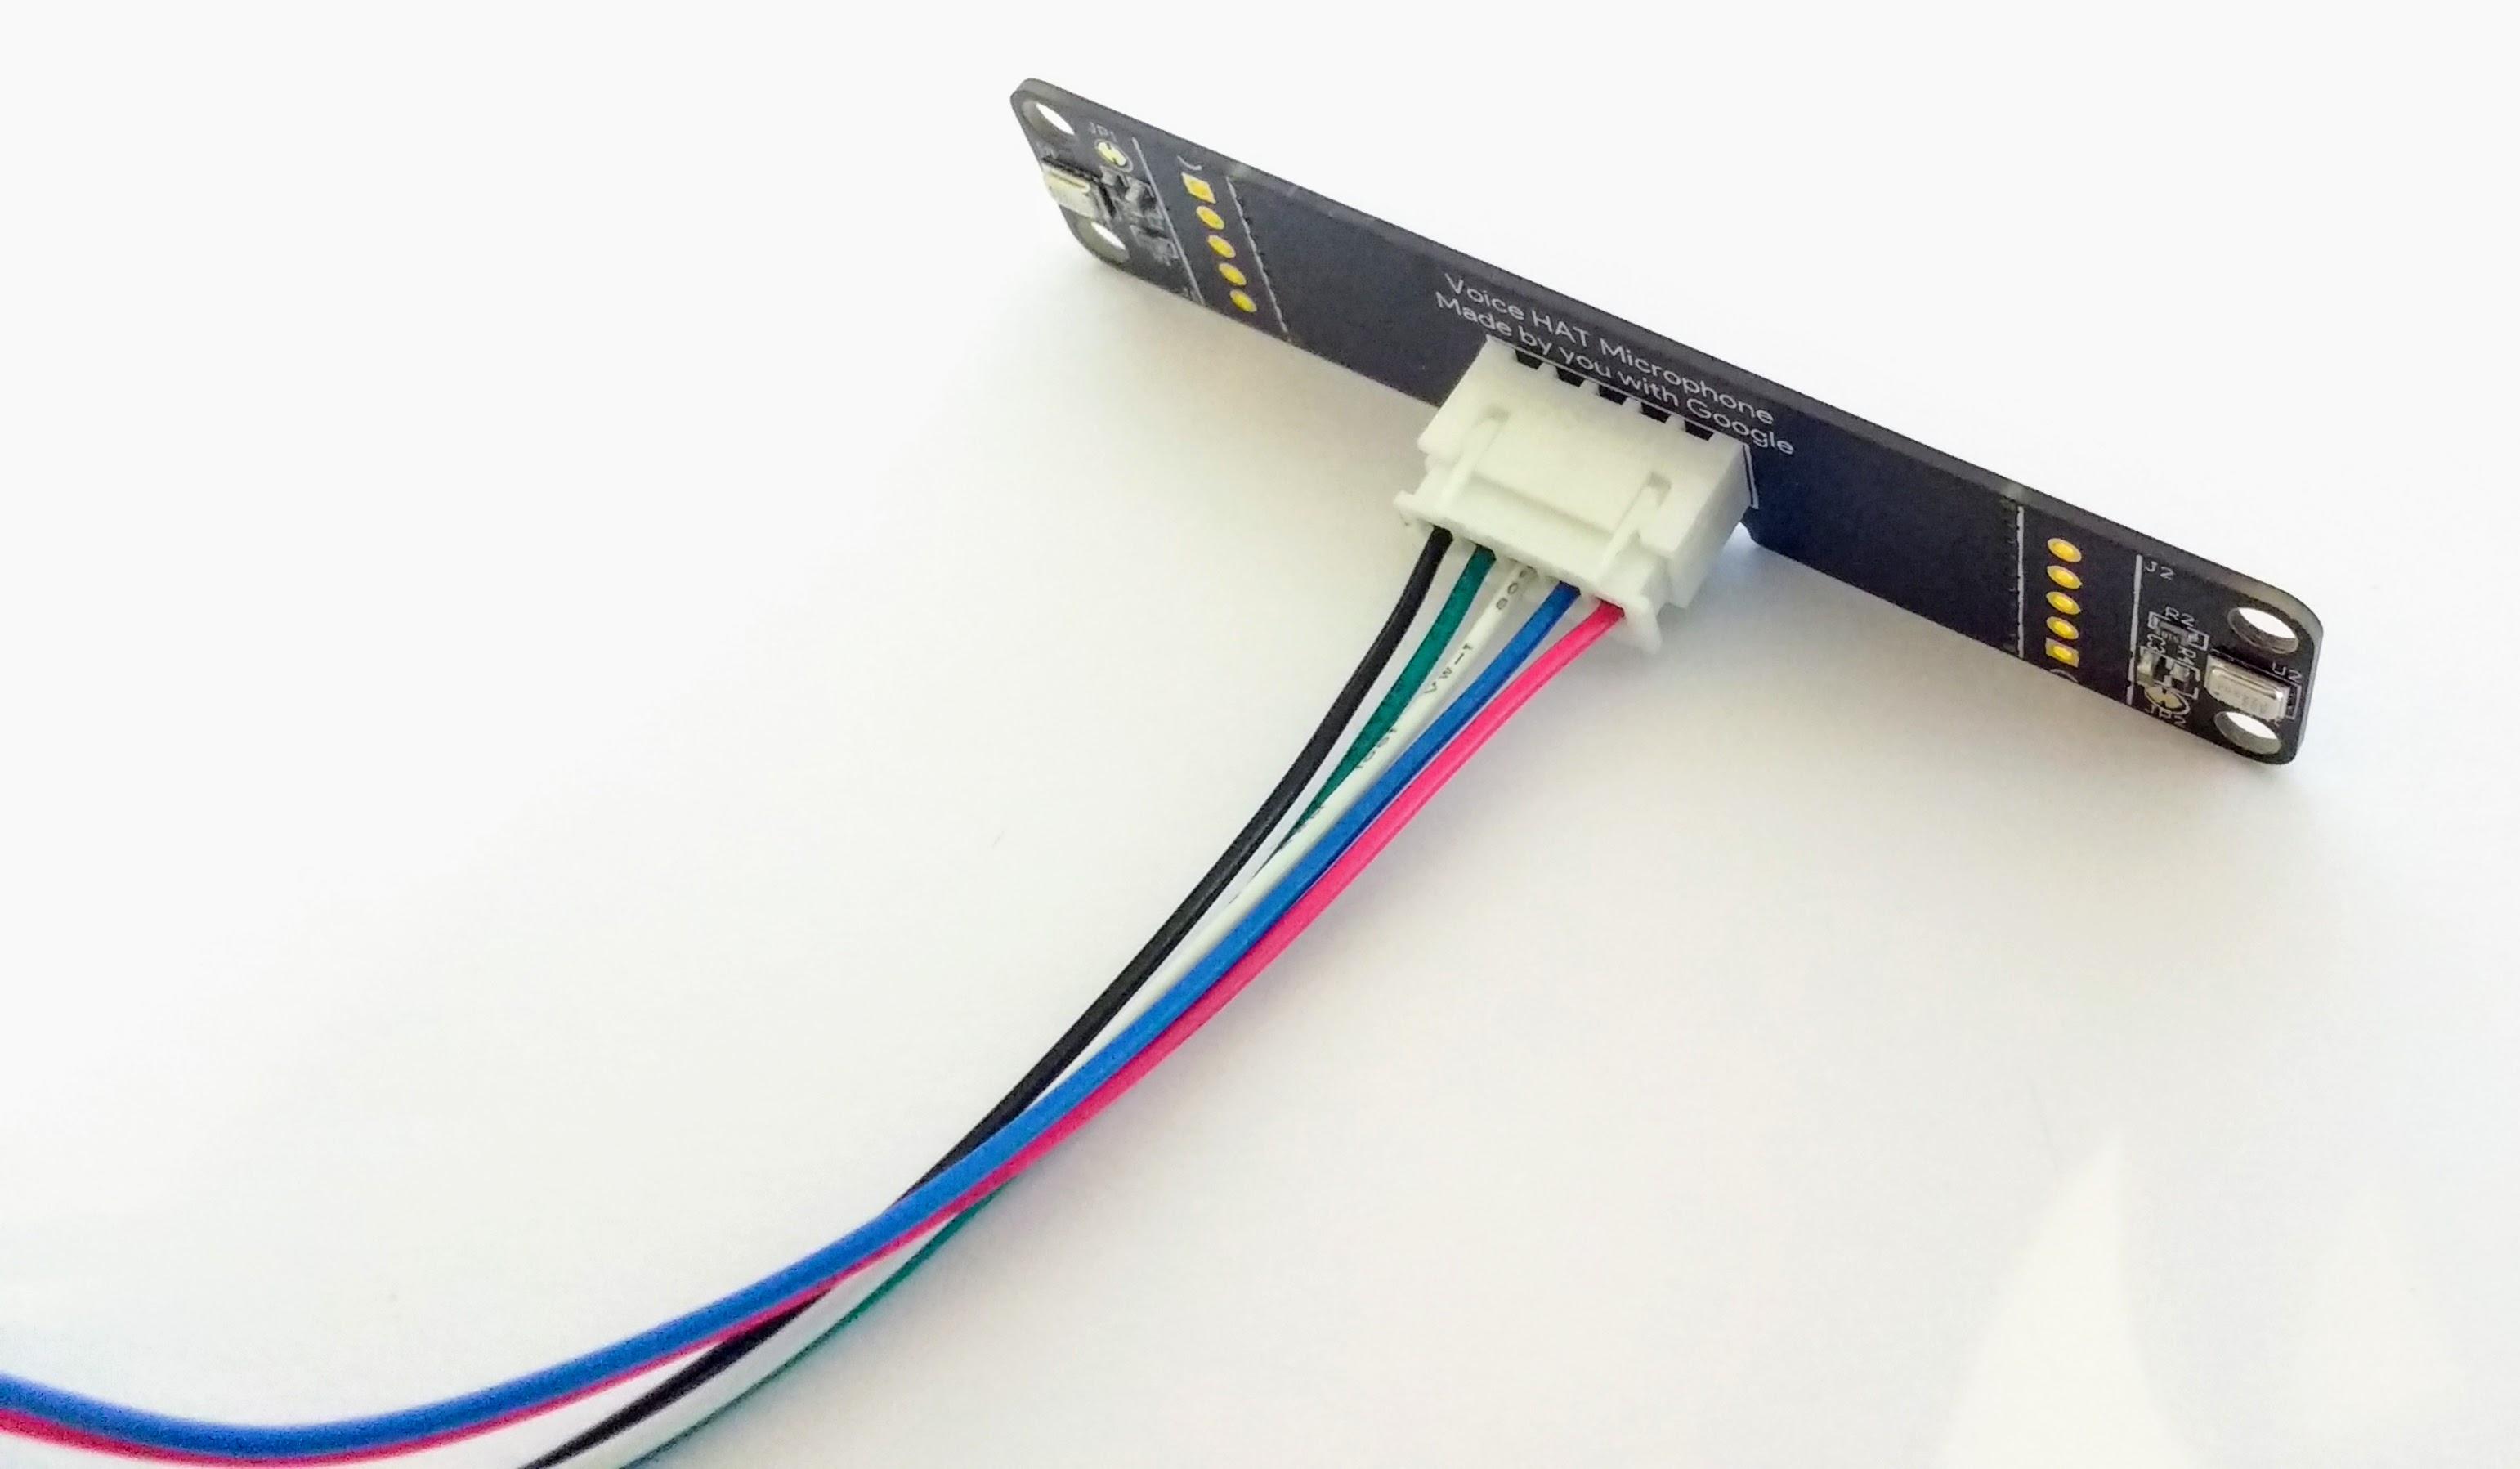
- Now it’s time to connect the microphone to its leads. The connectors only fit one way, so this shouldn’t be too difficult.
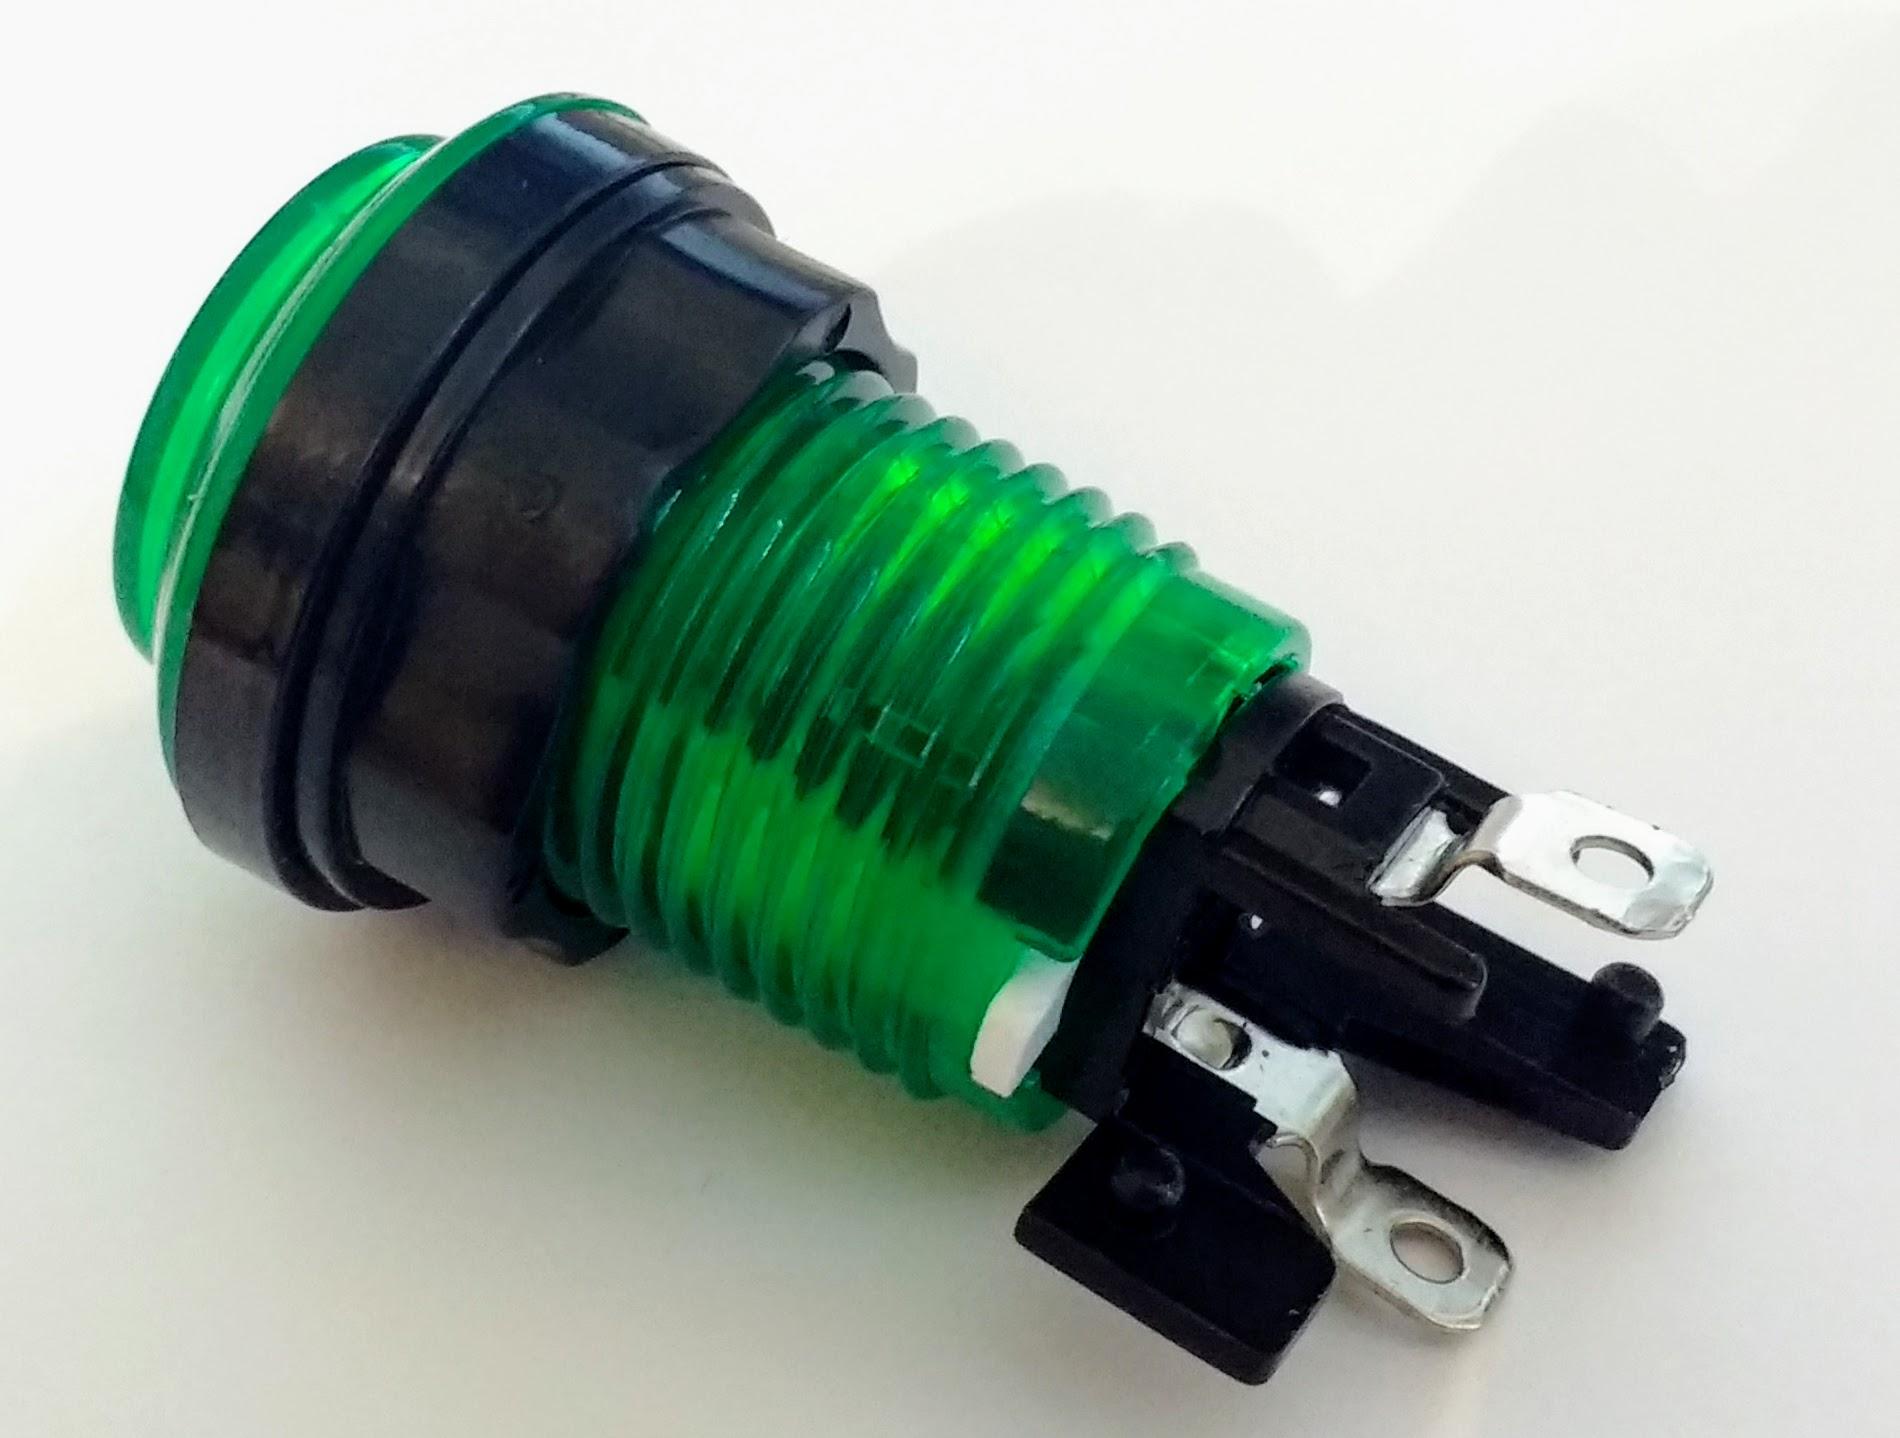
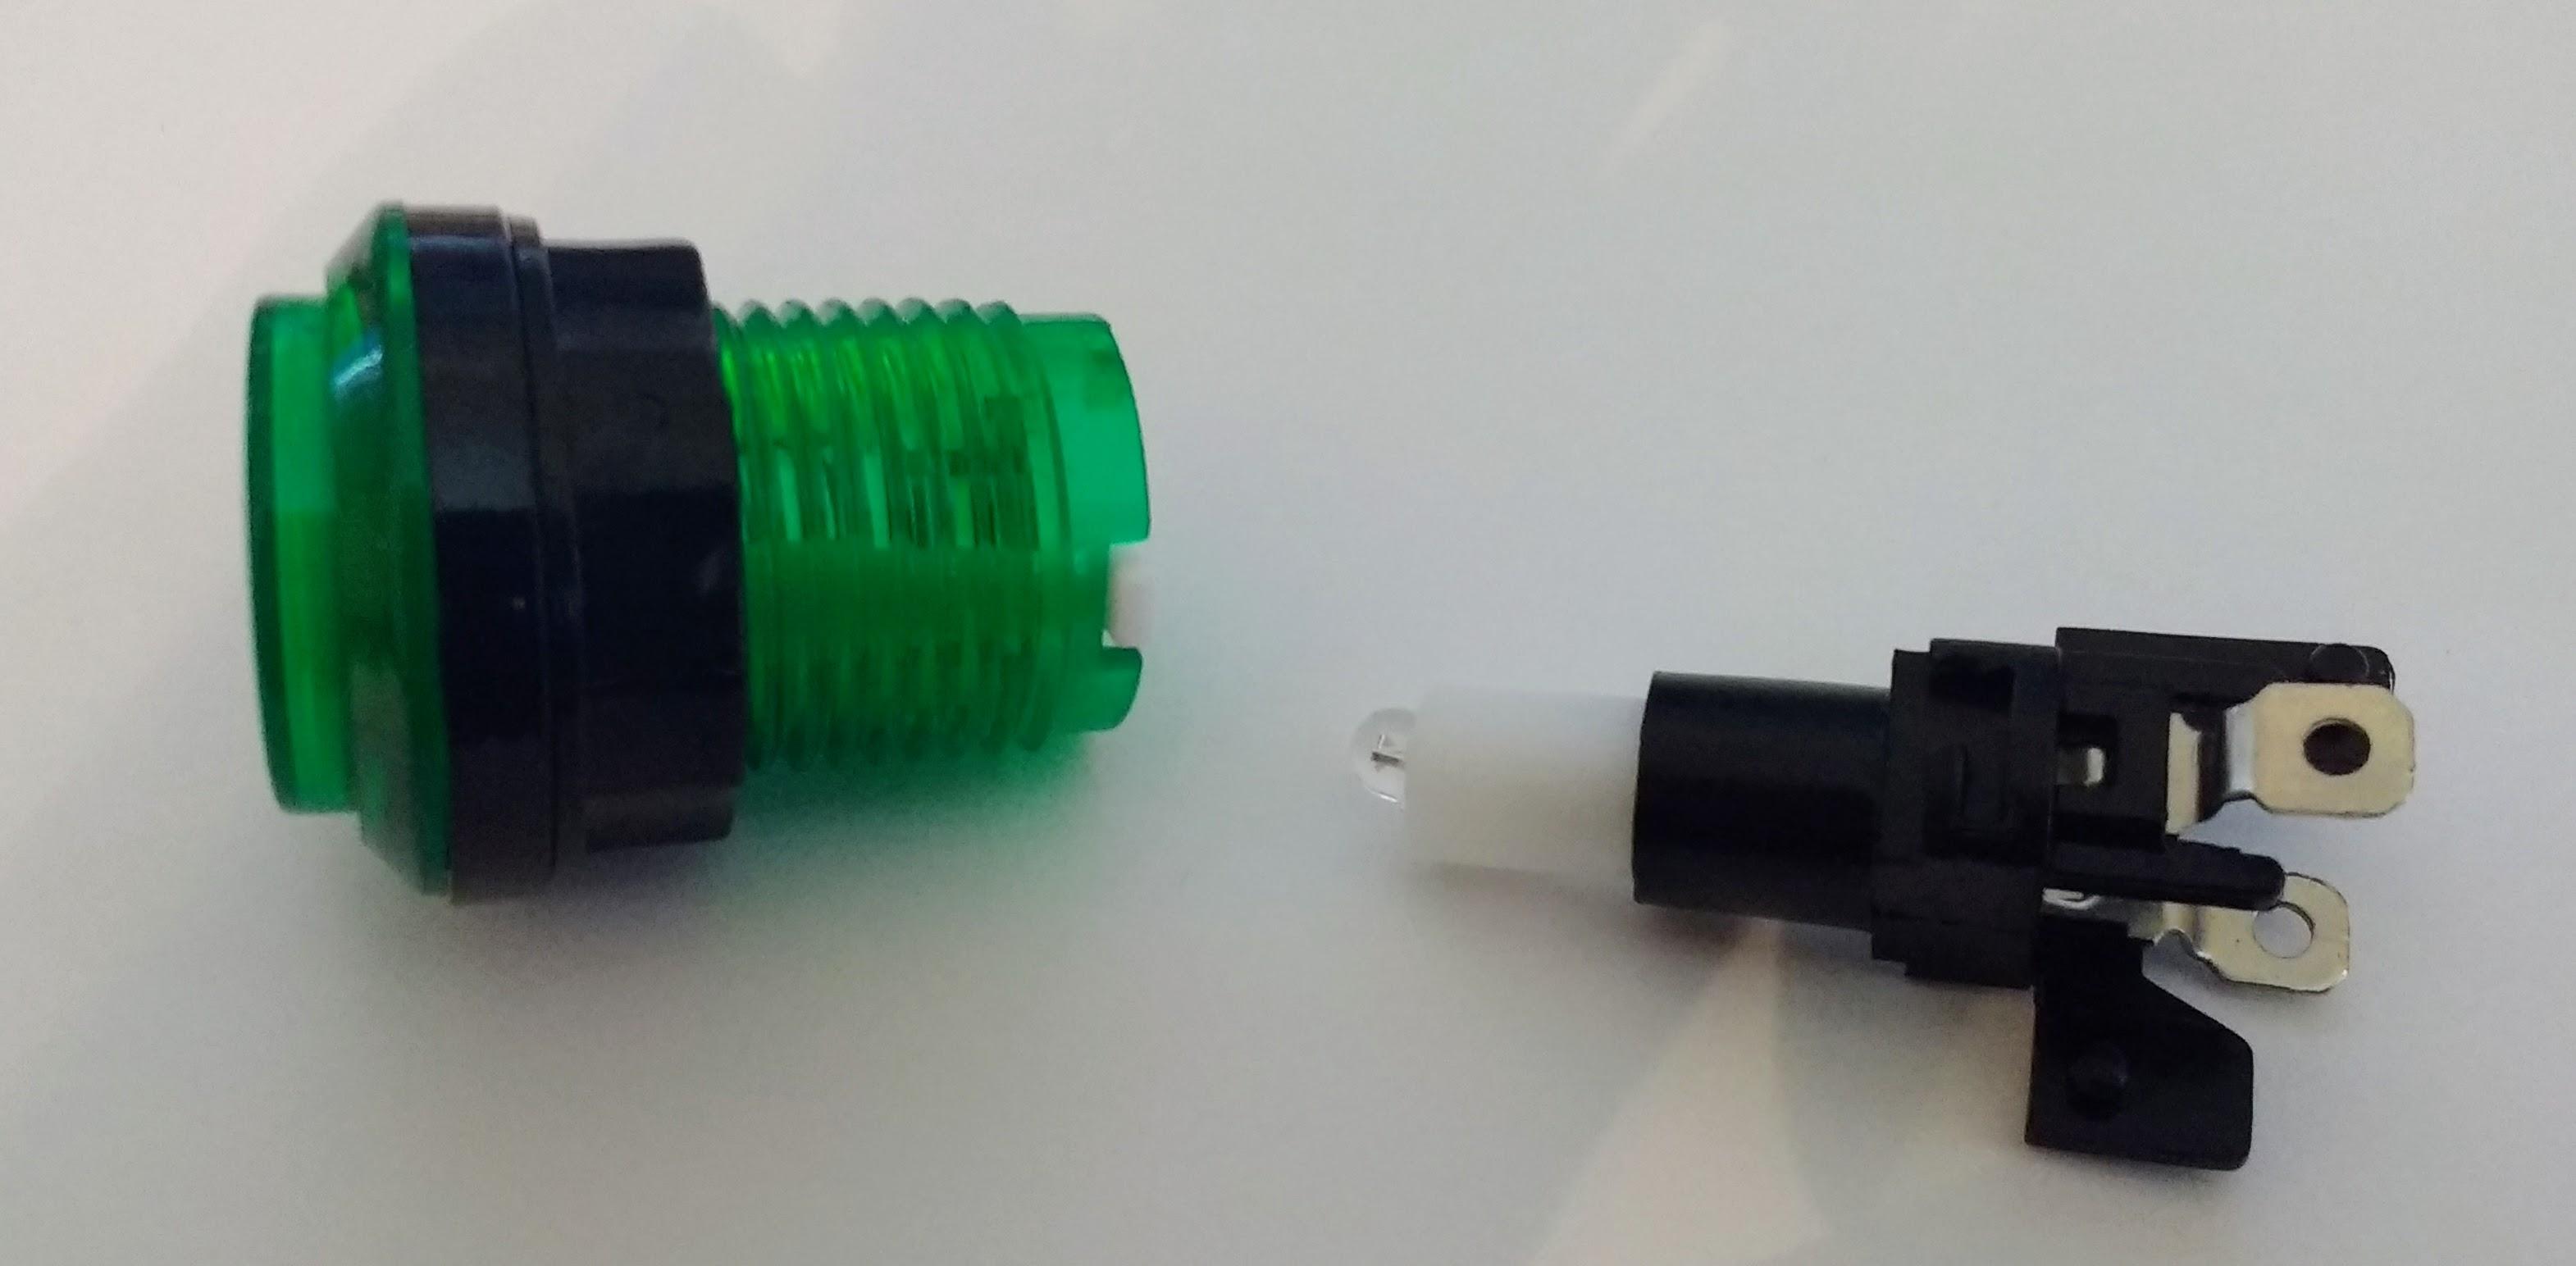
- The trickiest part is assembling the button. You’ll need the button and the LED housing, to begin with.
- Insert the LED Housing into the button, and then twist it to secure it in place.
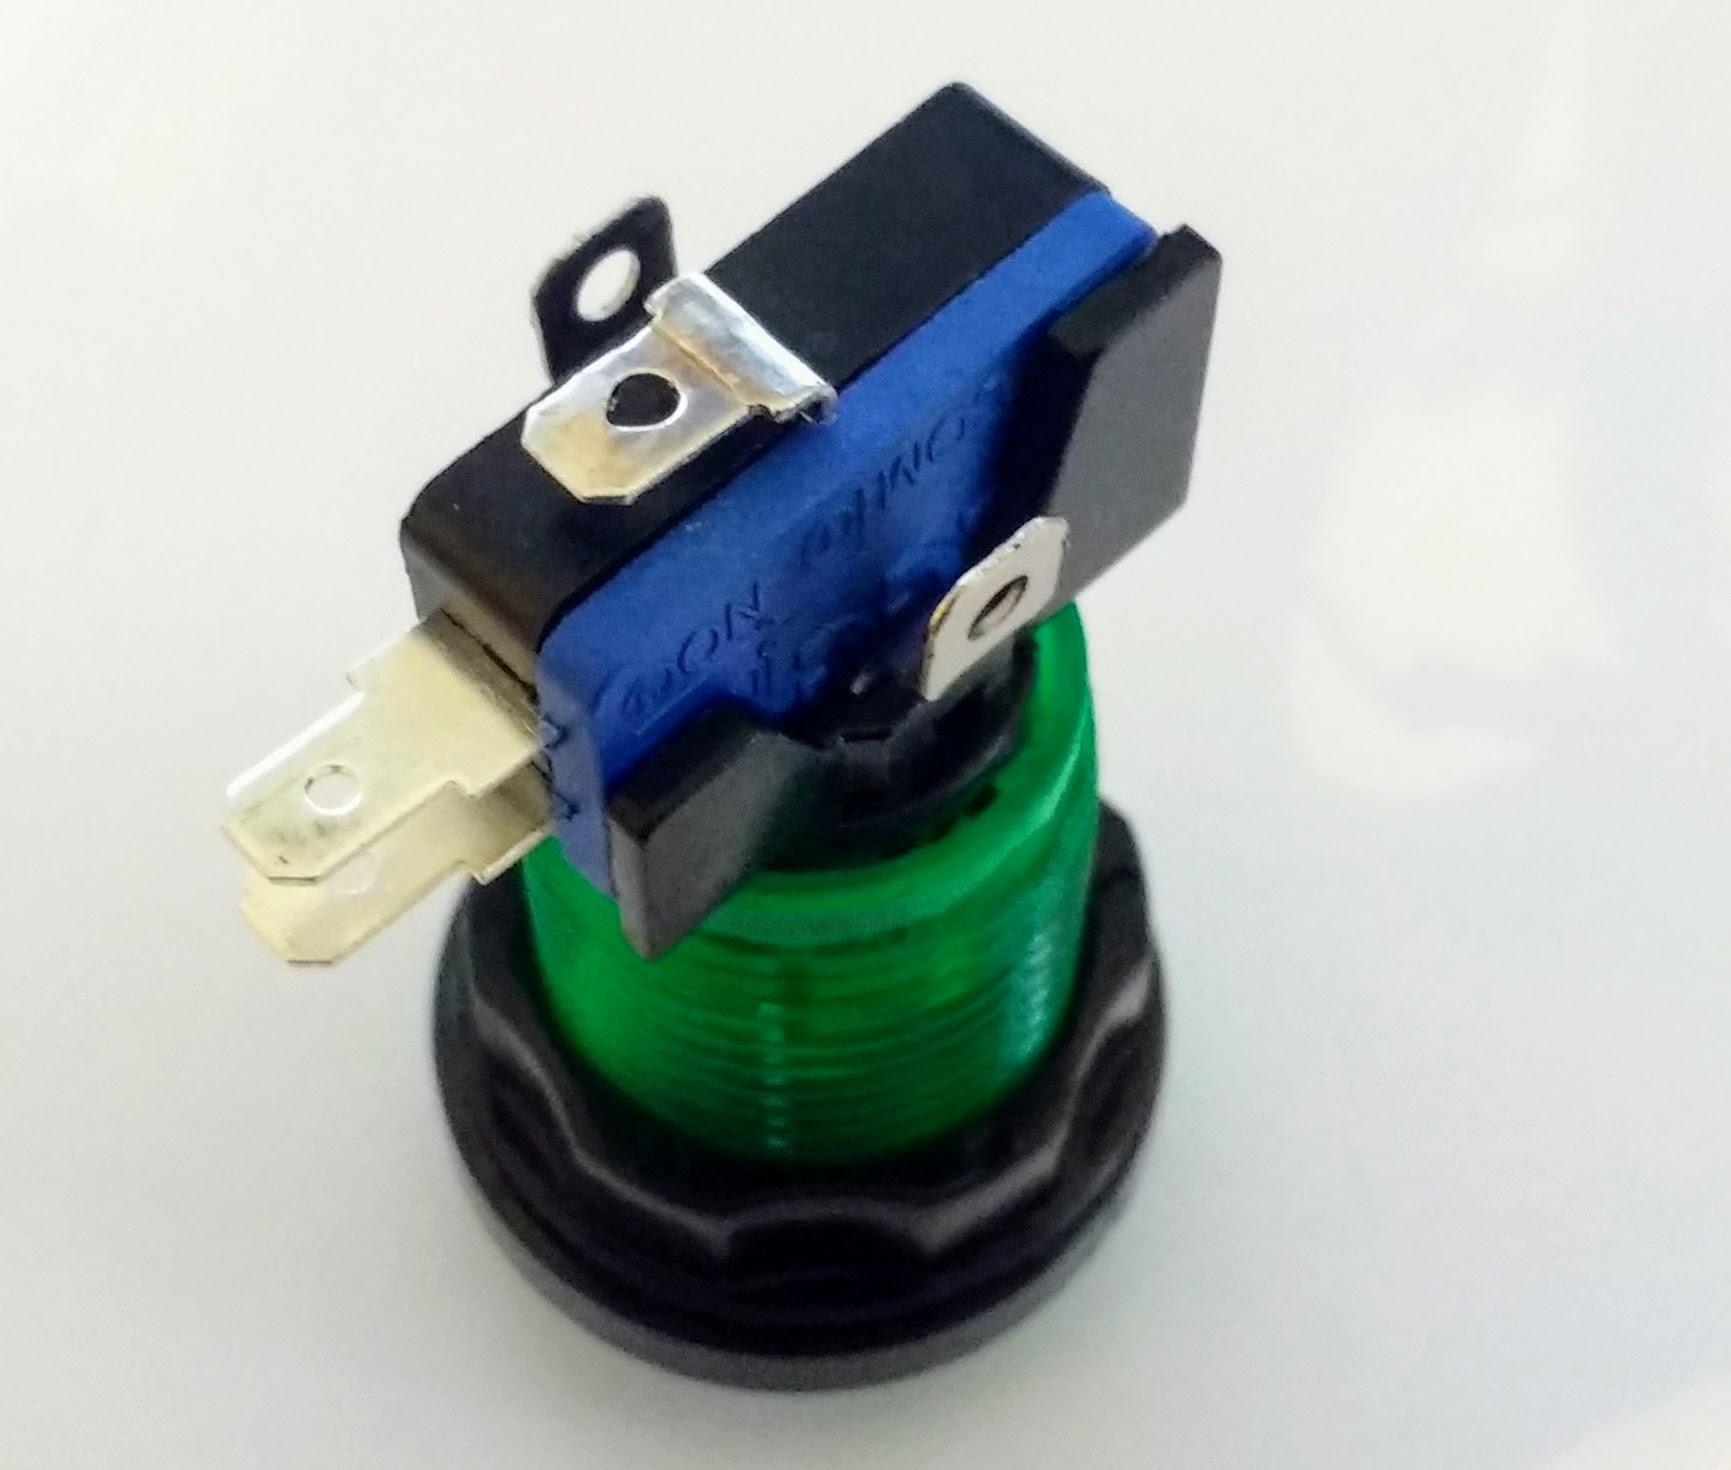
- Then the switch needs attaching. This can be awkward. The holes of the switch need to align with the pegs on the LED housing. Just make sure that the small switch (here in yellow) is positioned closest to the button.
- Now you can attach the leads to the button.
- Attach the leads as shown in the image
- To finish, attach the microphone and the button to the HAT as shown.
Install the Software
If you like, you can install the software for the Voice Kit manually. Google provides this guide to take you through the process. It is far easier, however, to use their image on an SD card.
You can download their image here. The Google image comes as a .xz file. To extract this on Linux, you can install unxz.
sudo apt update && sudo apt install zx-utils -y
unxz aiyprojects-2017-05-03.img.xz
On Windows or macOS, Etcher should handle this for you.
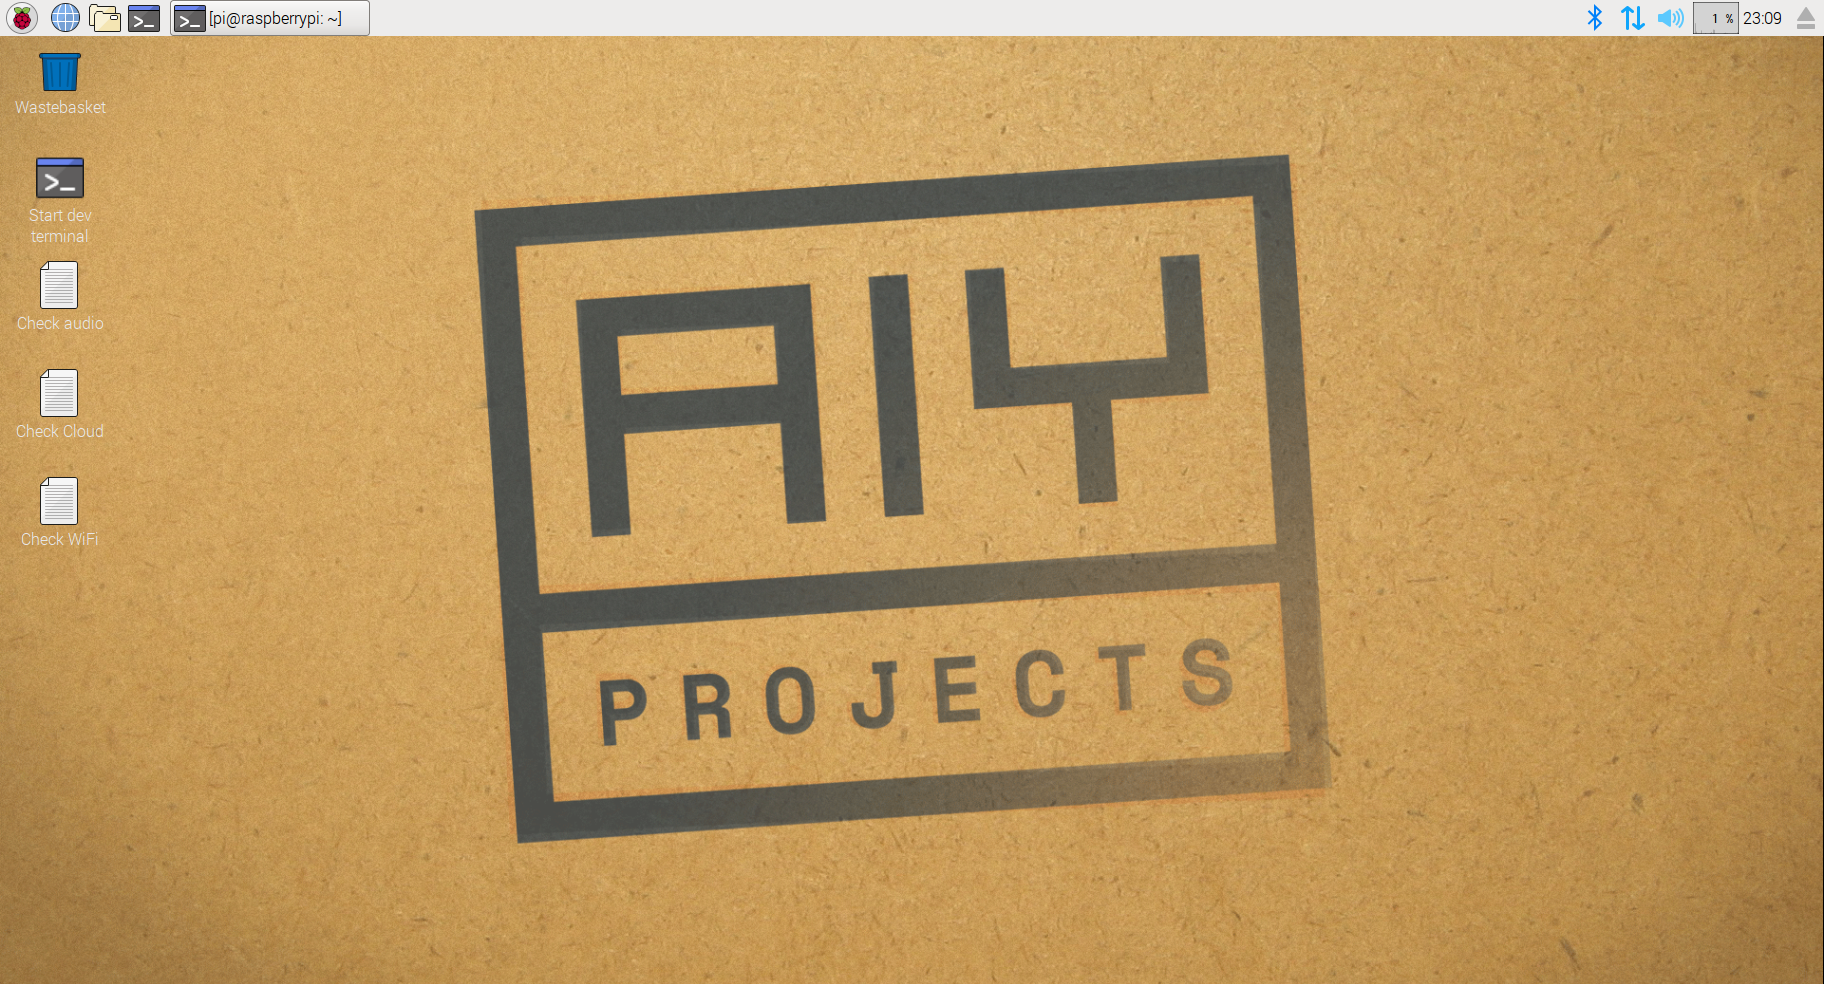
Then just insert your SD card and boot your Raspberry Pi. Your button should be slowly pulsing and your desktop should look like the image shown.
Setting Up the Assistant API
Once your Raspberry Pi has booted, you’re going to need some credentials from Google for the kit to work. Follow the steps below to enable the Google Assistant API.
Register the Google Assistant API
The secrets file that you downloaded will be called something like
client_secret_89351974213-jsno1i2s7lu9mv4q9bjbf3pas6cpnbe5.apps.googleusercontent.com.json.
You need to rename it assistant.json and place it in your /home/pi directory.
To do this, open a terminal and type:
cd ~/
mv Downloads/client_secret* assistant.json
Test It’s Working
With the hardware and software all set up, you need to test that your Voice Kit is working.
- Click on the Start dev terminal icon on the desktop to open a terminal window.
- To start the Voice Kit program manually, you can simply type src/main.py into the terminal.
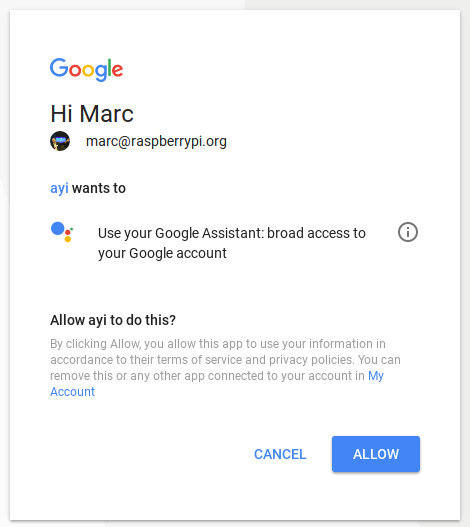
- If it is your first time running this program, Chromium will open and ask you to log in and authorize the use of the Google API.
- Click ALLOW to enable access to the API. Now you should be able to use the button to begin capturing your voice commands. There are several built-in instructions you can use. Try pushing the button and then saying any of the following phrases:
- “What are the three laws of robotics?”“
- What is the time?”
- “IP Address”
You can also ask it questions that will result in a simple Google search, for example:
- “Who is the Prime Minister?”
- “What is the air-speed velocity of an unladen swallow?”
- “What is the air-speed velocity of an unladen African swallow?”
Have a good play with the device before learning how to hack it to create your own voice commands.
Simple Voice Responses
The AIY Voice Kit software allows you to add your own simple voice commands that will result in simple responses.
Using a text editor or IDLE (Menu –> Programming –> Python 3 (IDLE), open the file called action.py. You can find it in /home/pi/voice-recognizer-raspi/src/action.py.
Most of this file consists of instructions on how to use the kit, but if you scroll down, you will eventually come to the following comments:
# =========================================
# Makers! Add your own voice commands here.
# =========================================
Here’s where you can add some simple voice commands and the response you would like to receive back. Below the comment, you can now add your own actions. Try adding the following lines - make sure that you keep the indentation.
# =========================================
# Makers! Add your own voice commands here.
# =========================================
actor.add_keyword("what's up", SpeakAction(say, "I'm fine, thank you"))
What does this line do? actor.add_keyword("what's up" instructs the code to listen for the keywords “what’s up” spoken by the user. SpeakAction(say, "I'm fine, thank you"), instructs the program to respond with the words "I'm fine, thank you".
Have a go at running this code, and test that it’s working. You’ll need to go back to the terminal window, press Ctrl + C if the program is currently running, and then type src/main.py to restart the Voice Kit software.
Push the button and then ask the Voice Kit “What’s up?”
Now try adding your own set of keywords and responses below the one you have just written.
Controlling an LED
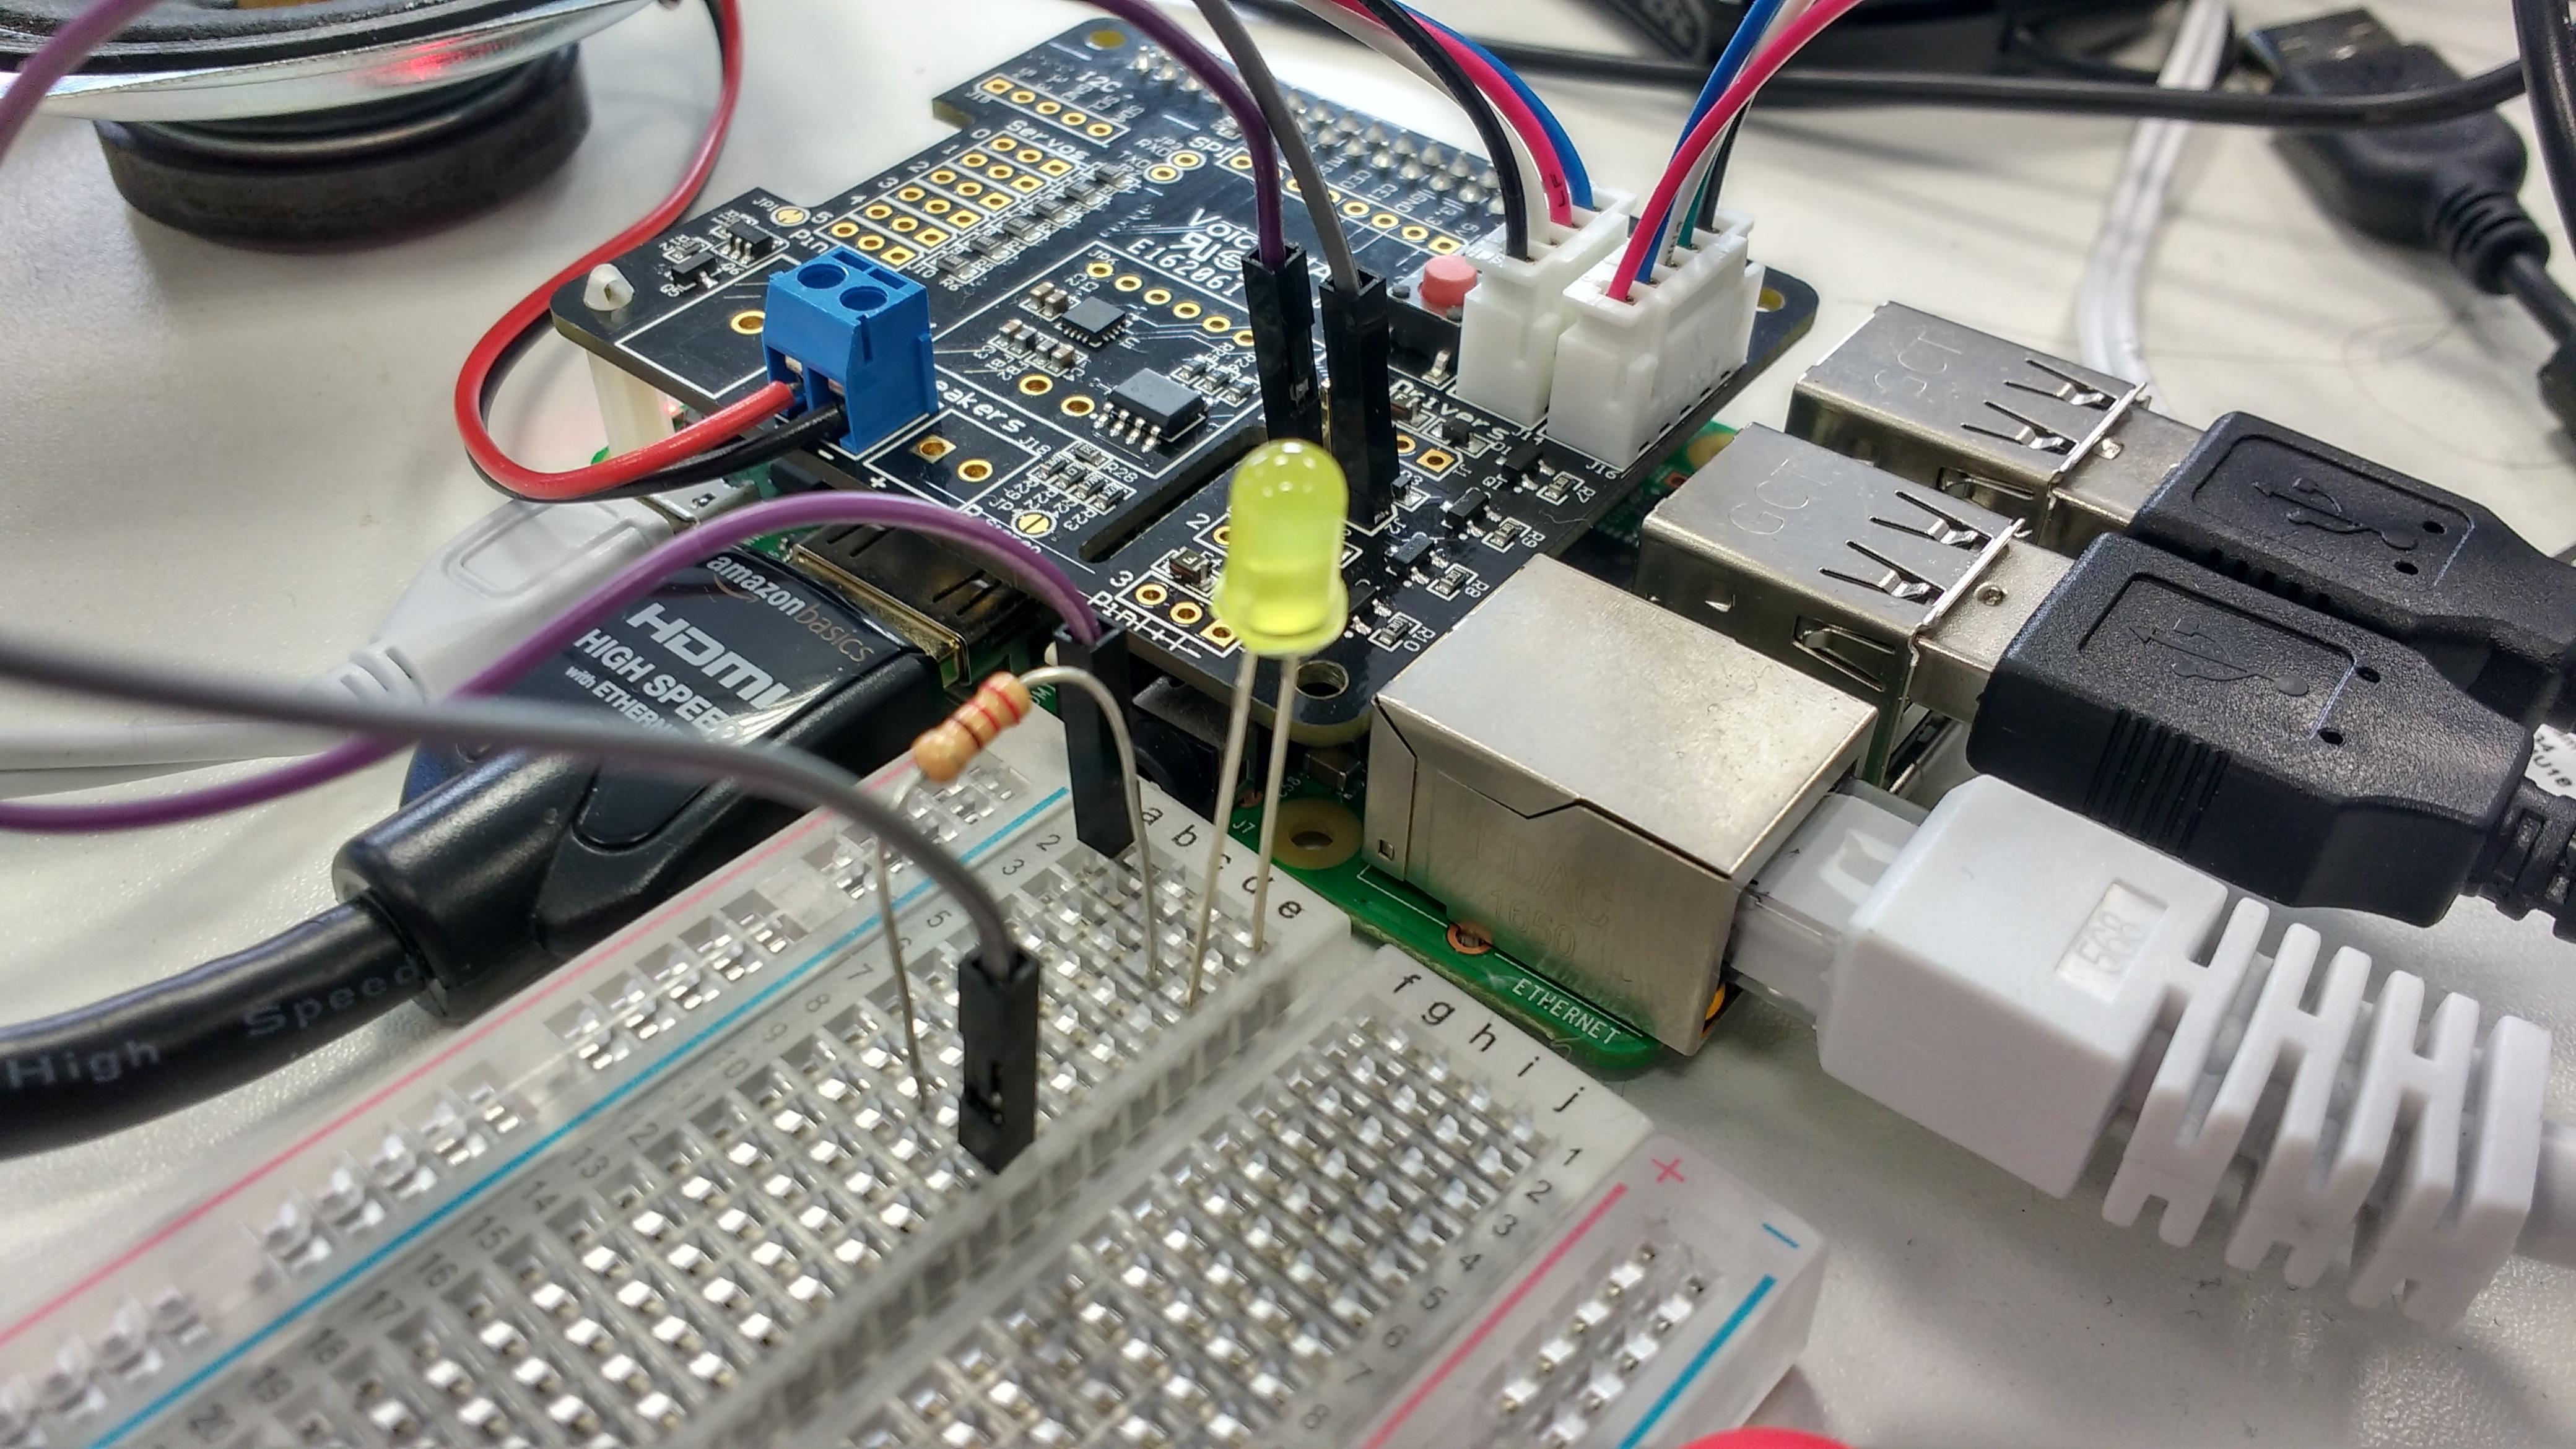
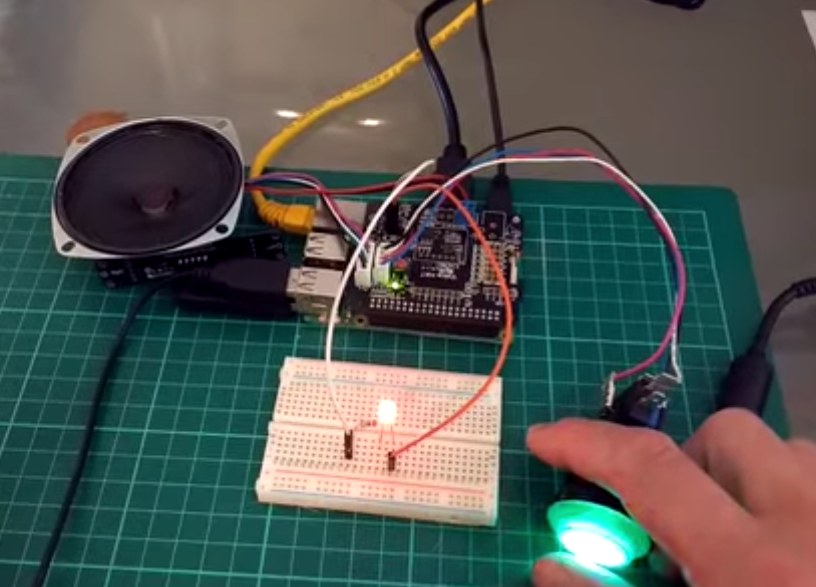
Now is your chance to try and make an LED turn on and off again when a command is given.
- Firstly, connect an LED to the header pins you soldered on earlier
- The positive (long) leg of the LED should be connected to the middle pin, and the negative leg (short leg) should be connected to the pin on the right of it.
You’ll now need to do the following in the action.py file.
- Near the top of the file, import the LED class from the gpiozero module
- Create an led object on GPIO 17
- Create a ControlLED class that turns the LED on, waits for 5 seconds, and turns the LED off again
- Create a new voice command to trigger the class when the letters “LED” is spoken
Here you go, we are done with all the setup.
Now you can control an LED using your voice.
I hope you enjoyed the tutorial and learned something useful. If you have any queries, please leave them in the comment section below. Also, follow us on instructables for more such interesting projects.