Controlling an LED Using NodeMCU WiFi Module and Blynk App
by Belal Elsherbini in Circuits > Arduino
1496 Views, 1 Favorites, 0 Comments
Controlling an LED Using NodeMCU WiFi Module and Blynk App
This Instructable will show you how to control an LED using the NodeMCU ESP8266 WiFi module via the Blynk smartphone app. If you are a beginner, read on. If you are more experienced, you may be interested in skipping to the end, where I talk about the specifics of how this project functions.
Supplies
NodeMCU - https://www.amazon.com/gp/product/B07HF44GBT/ref=p...
Jumper Wires (generic) - 2x
LED (any color)
Breadboard
Setting Up Hardware Connections
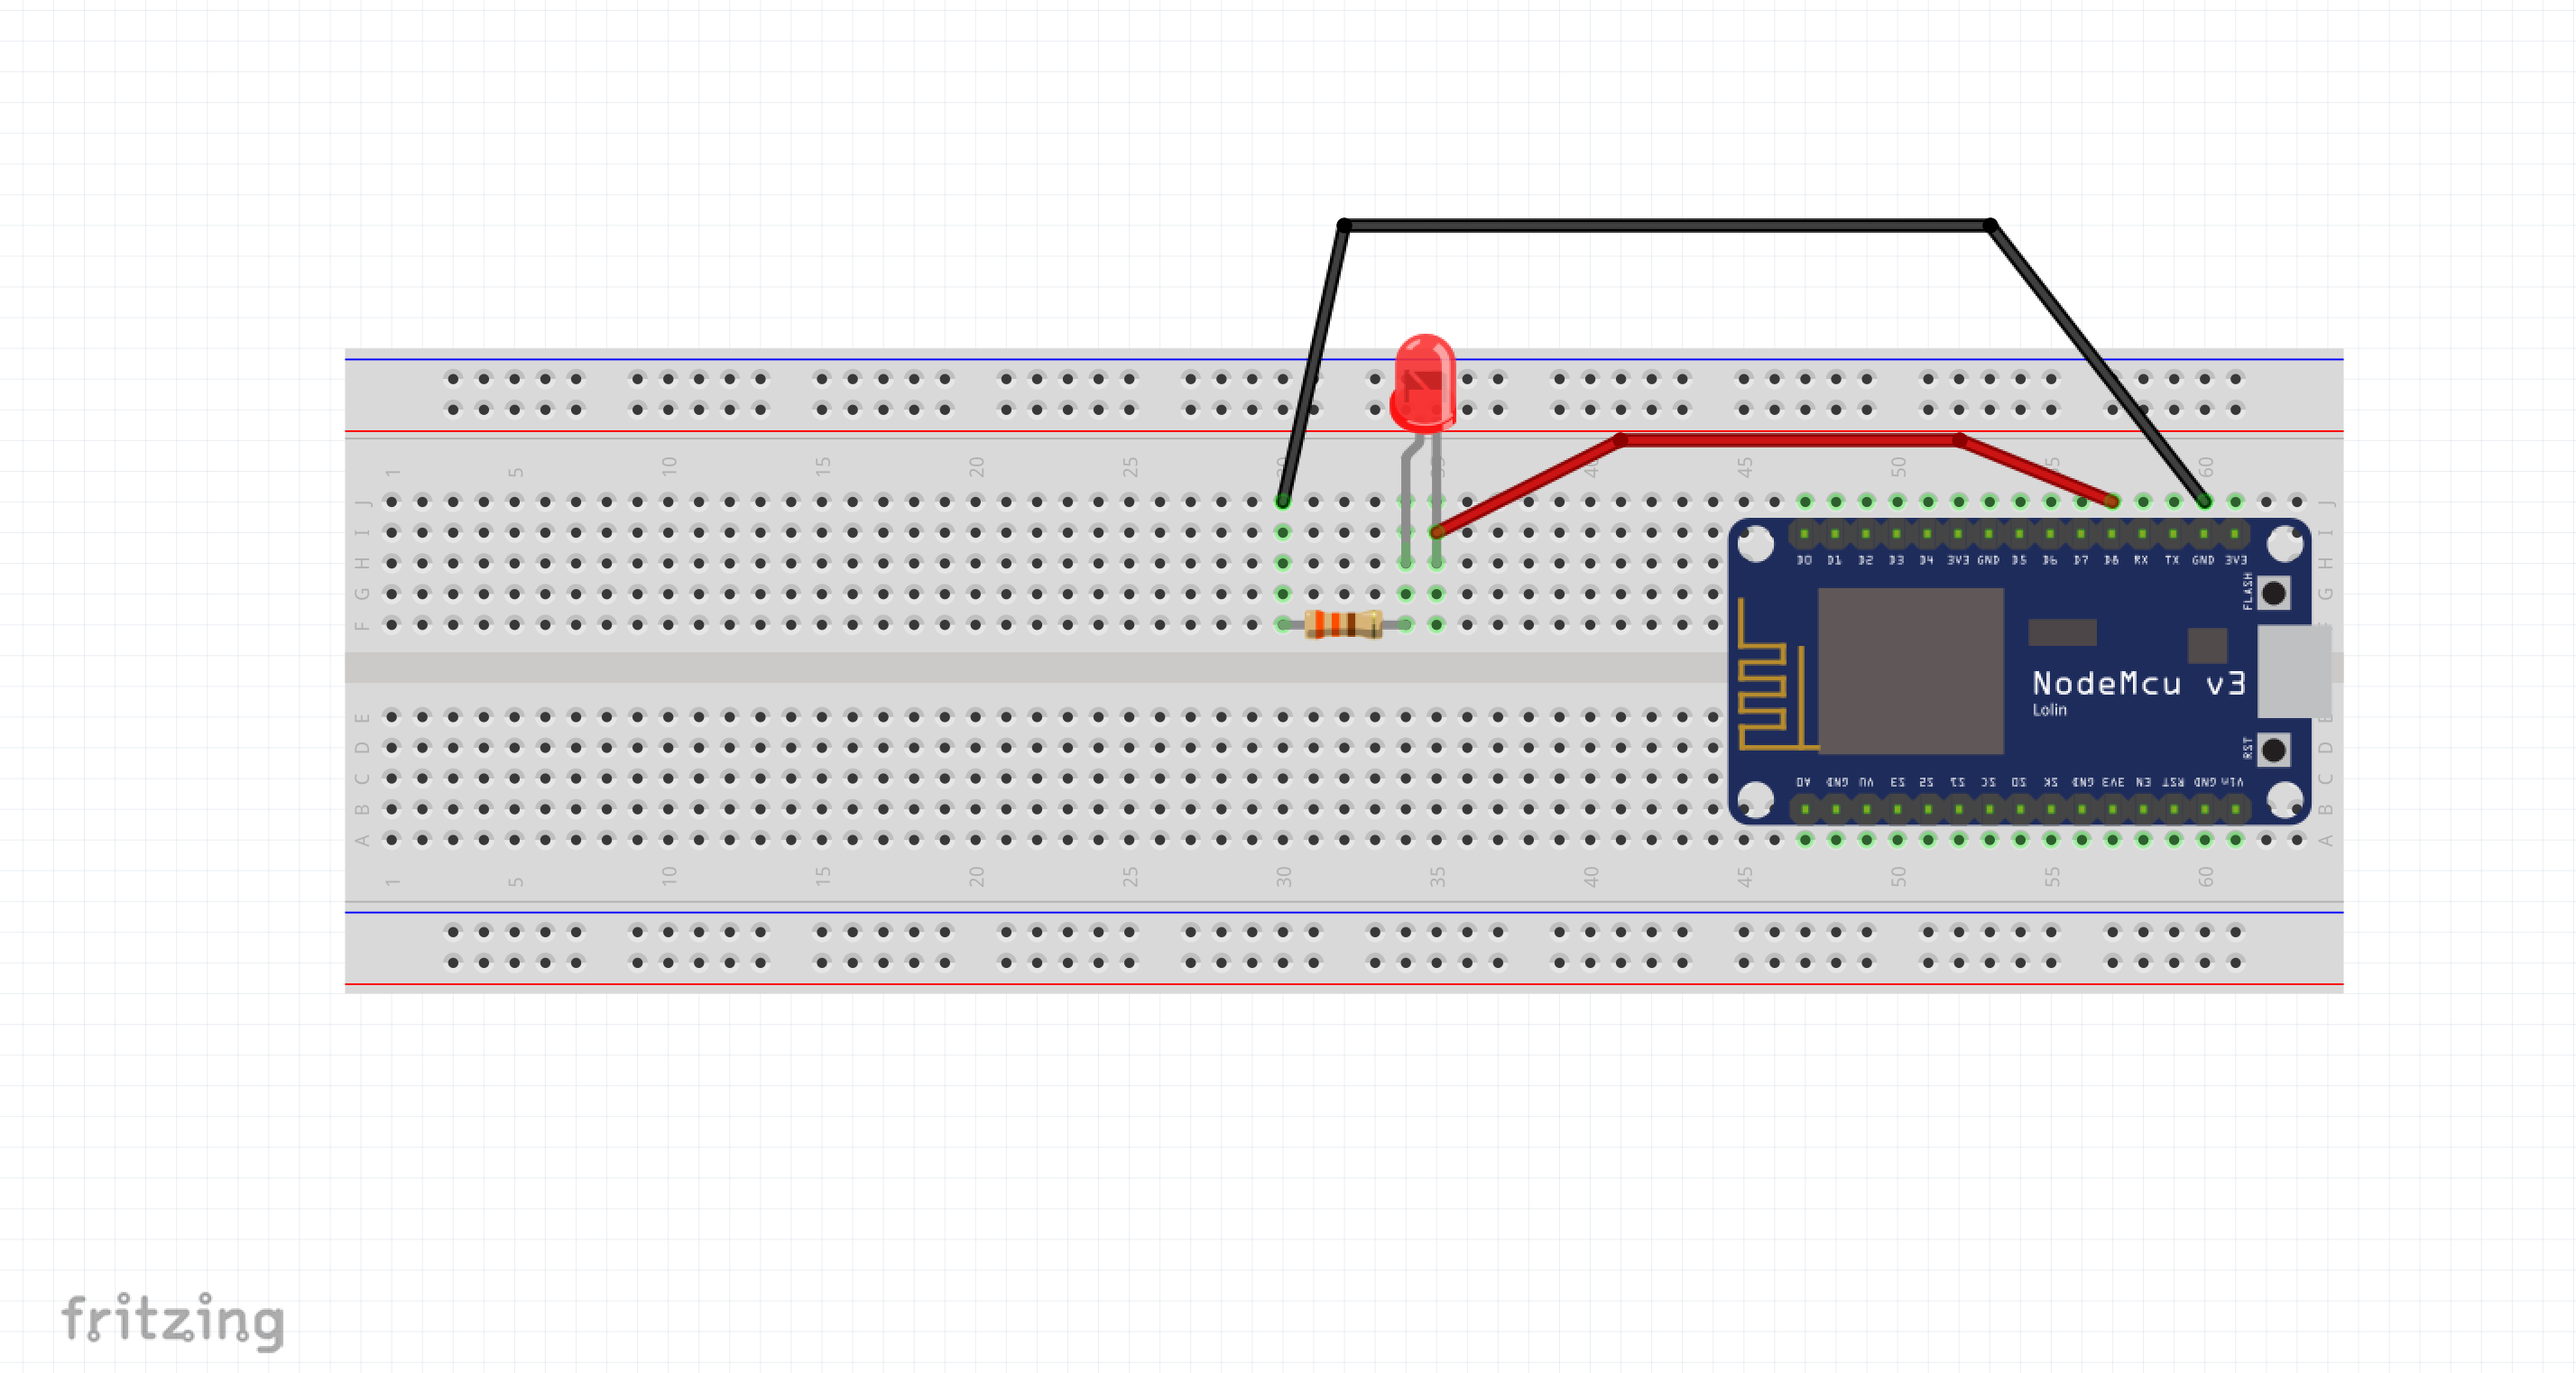
- LED anode to digital pin 8 on the NodeMCU using a jumper wire
- Ground the circuit by connecting the LED cathode to a 330Ω Ohm resistor
- Connect the other end of the resistor to GND on the NodeMCU board.
Preferences
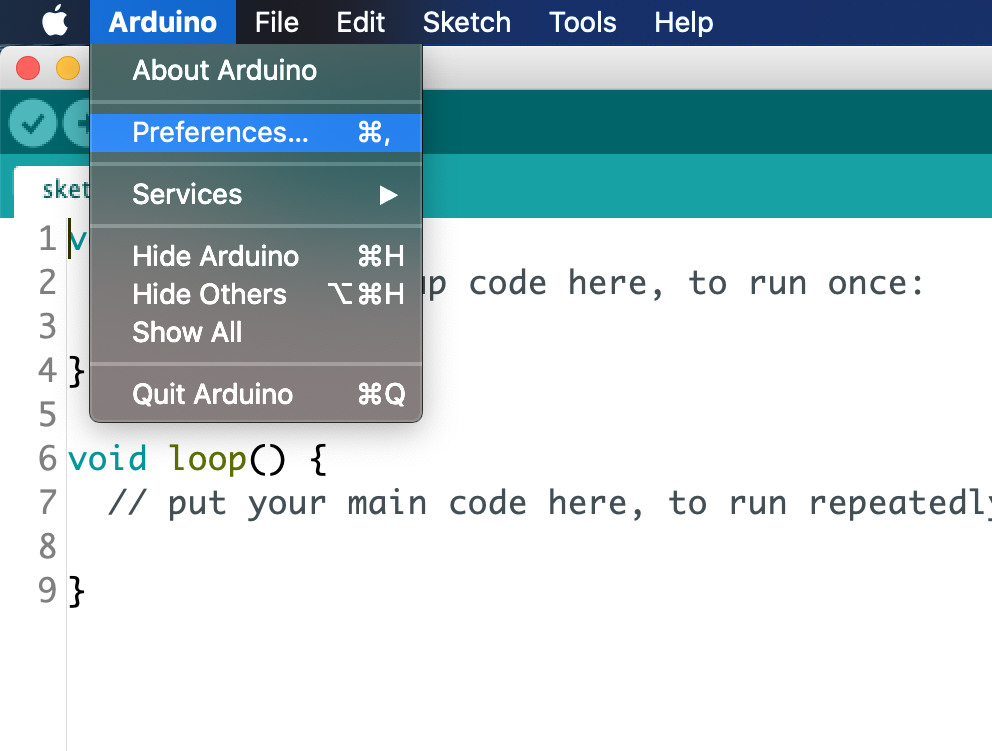
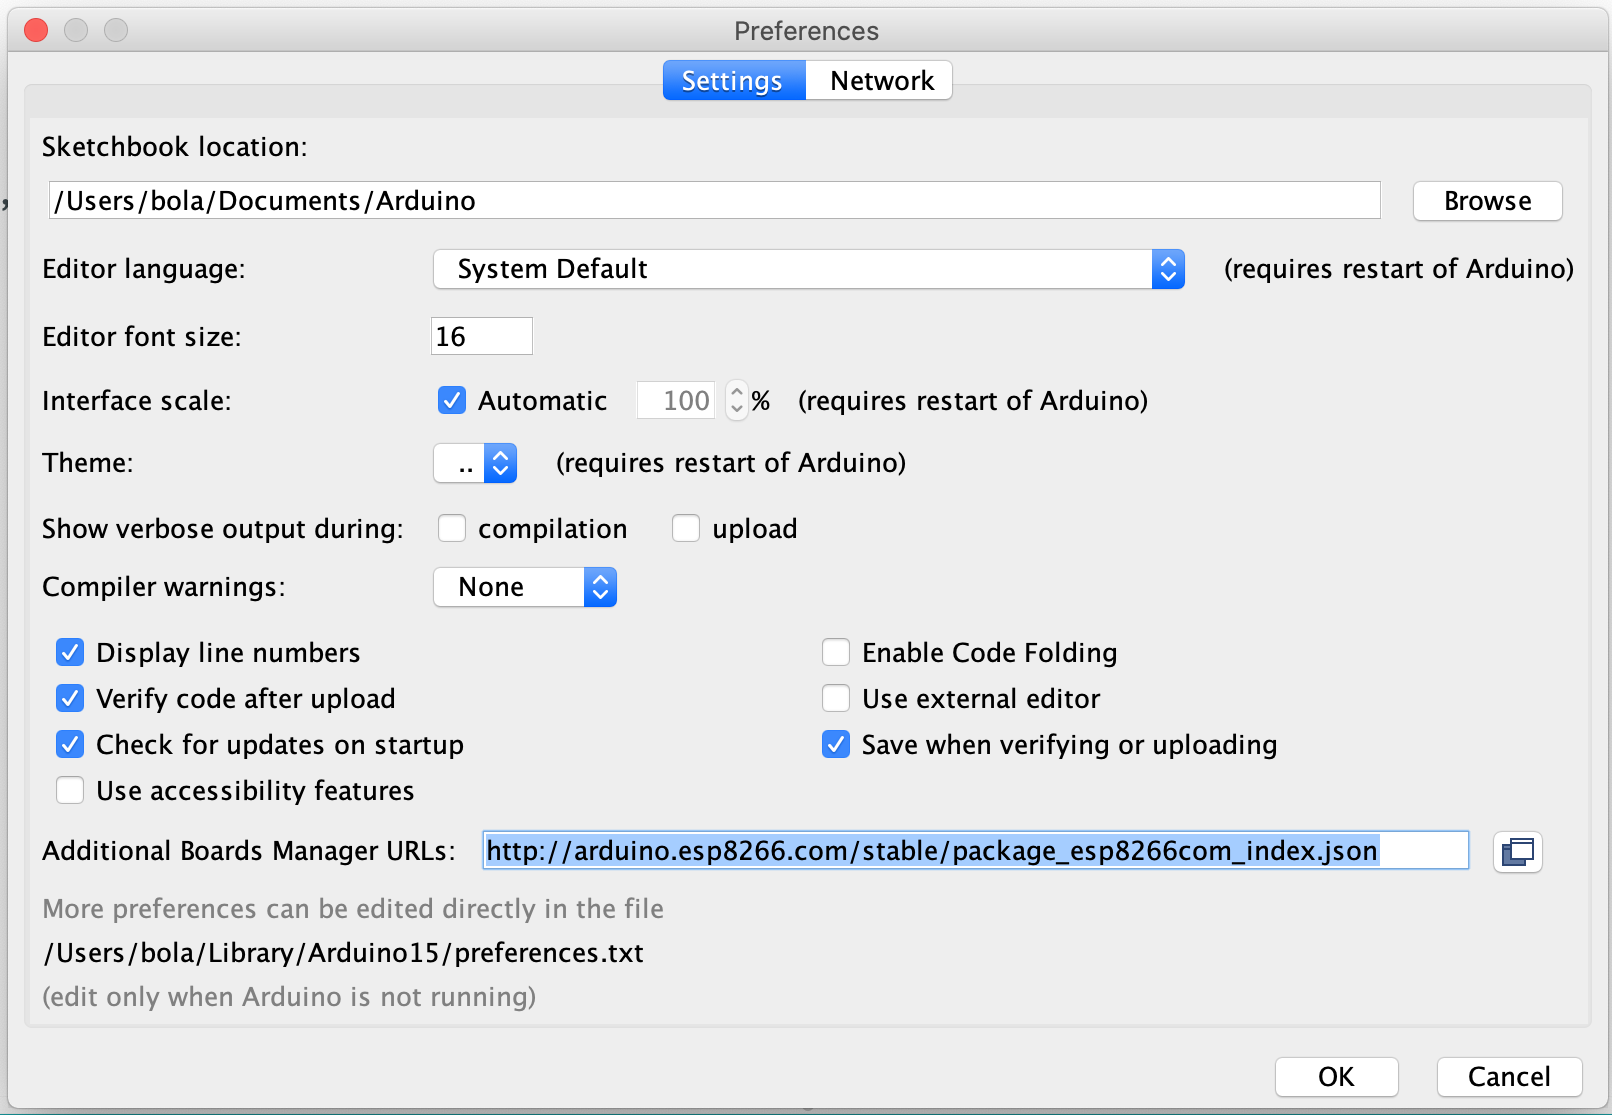
Before we can get to the code, we must change some things in the base preferences in our Arduino IDE. (This step assumes you already have the Arduino IDE installed).
Go to the "Additional Boards Manager URLs" and copy and paste this link into it:
http://arduino.esp8266.com/stable/package_esp8266com_index.json
This setting allows for support to third party boards like the NodeMCU that we will be using.
Installing the Libraries + Proper Board Configuration
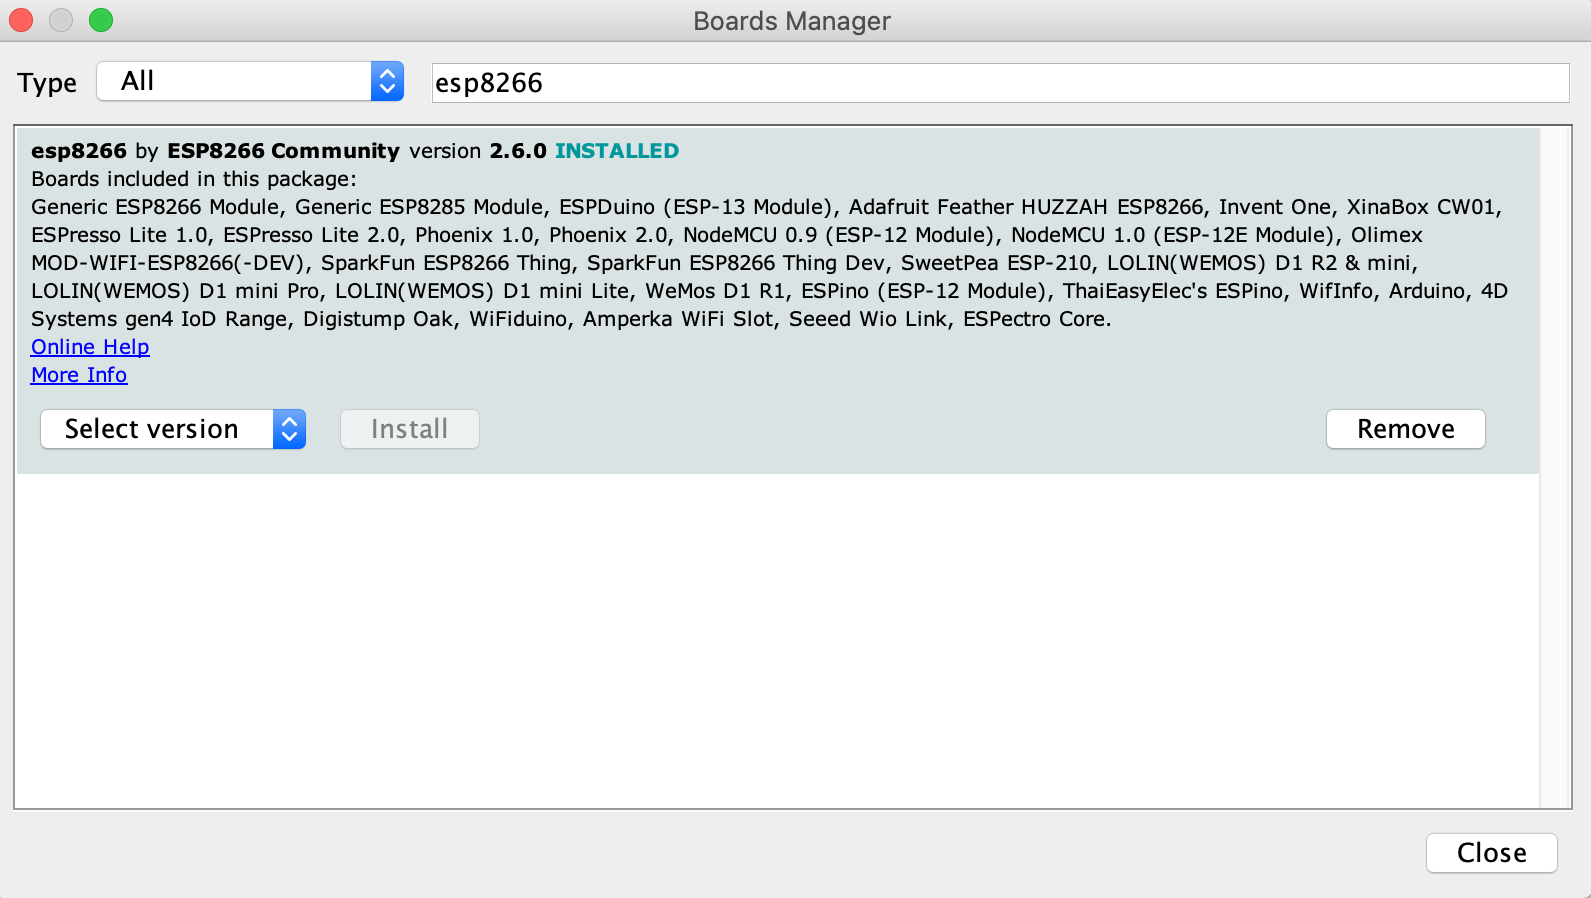
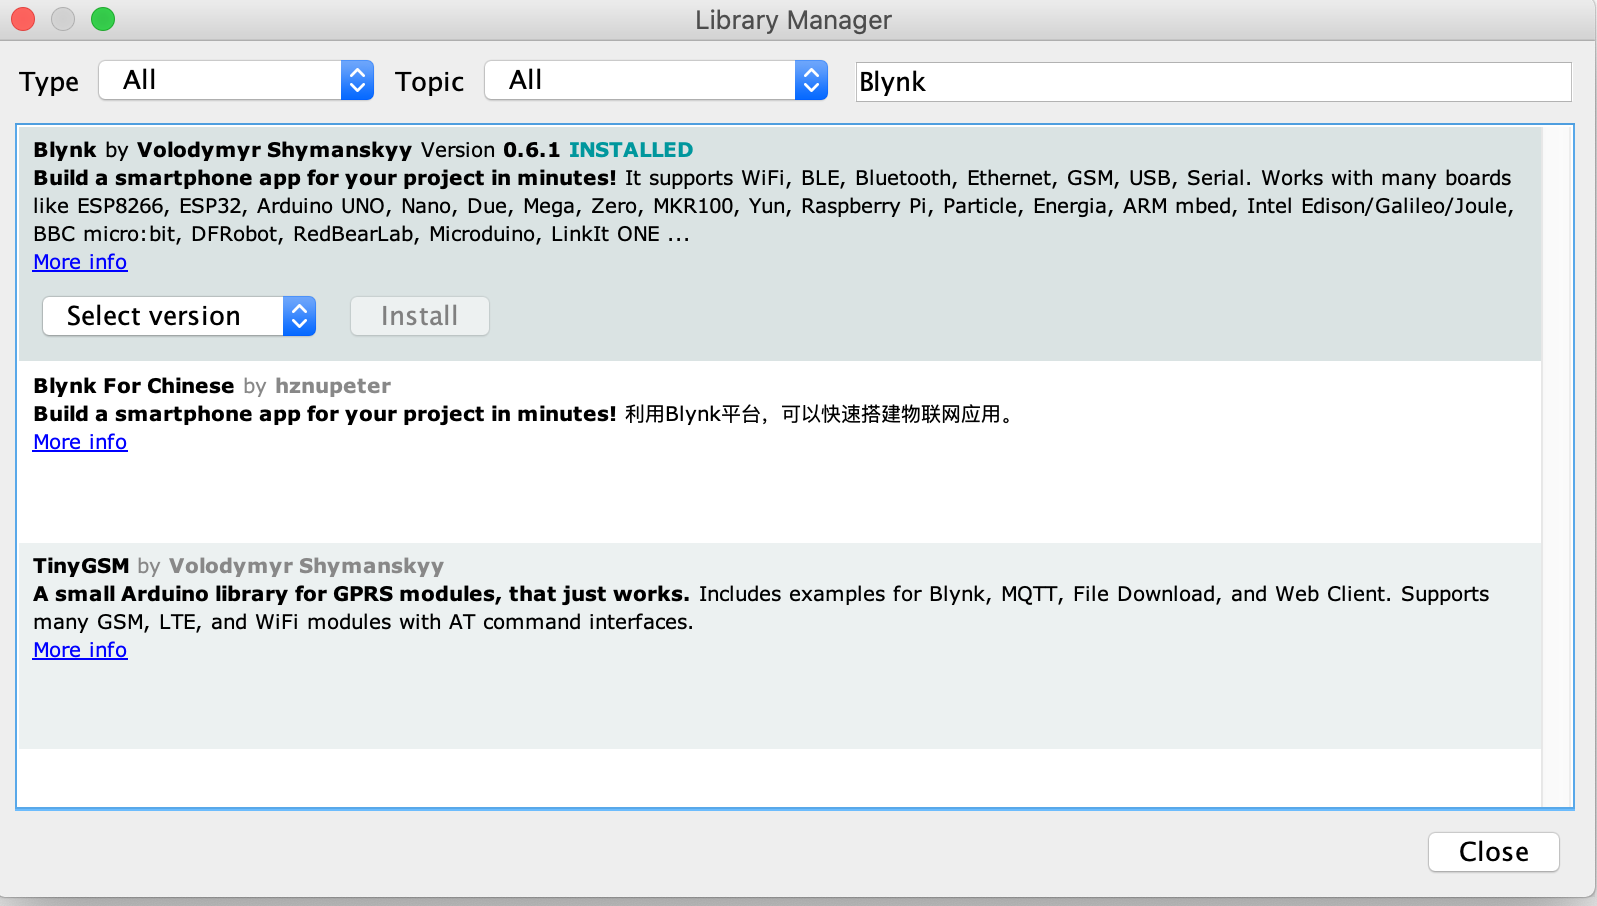
There will be multiple libraries that we will use in this demonstration.
Firstly we must install the ESP8266 board package by going to Tools>Board: > Boards Manager > and type "esp8266" into the search bar (see image on left). Download the latest version of the first package that shows up, "esp8266 by ESP8266 Community". This package supports NodeMCU boards so it will be viable for us to use.
Now we have to install the Blynk library. Go to Tools>Manage Libraries> and type "Blynk" into the search bar (see image on right). Download the latest version of the library titled "Blynk by Volodymyr Shymanskyy". As you can probably already tell, this library will allow a connection to be set between the Blynk app on our phones and the NodeMCU.
Adjusting Settings
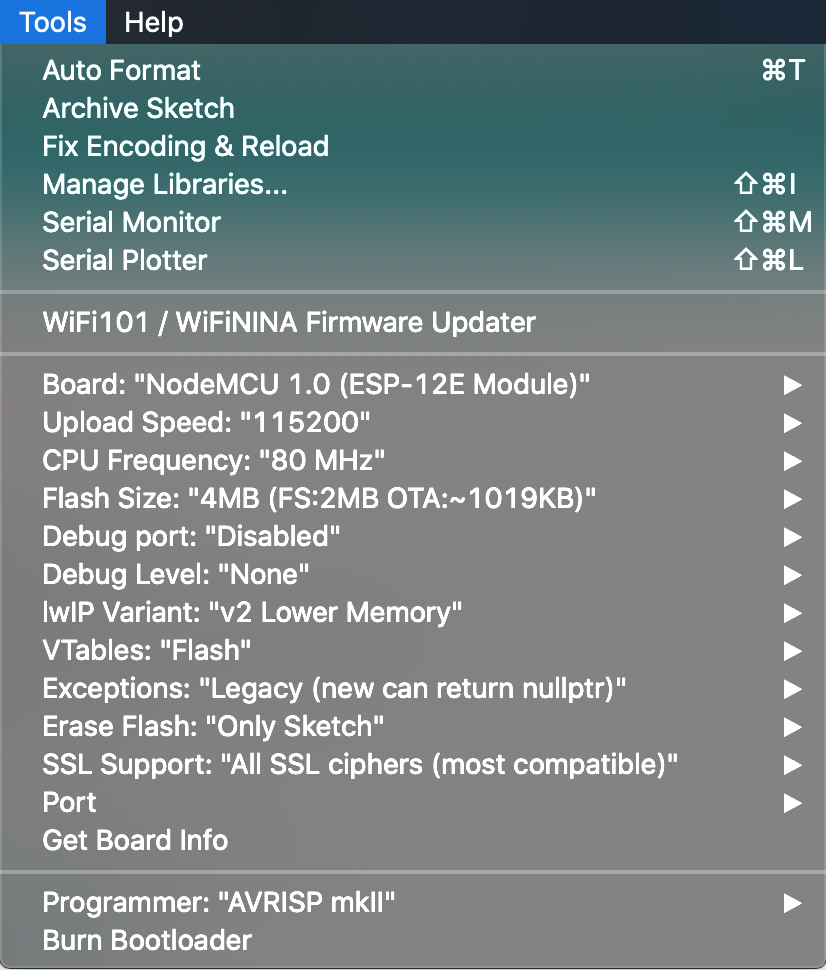
We are going to start changing preferences again, but this time for our board. We do this for many reasons, the most important of which is for our NodeMCU to be recognized by the IDE. To access these settings, go to Tools, scroll down and there will be lists of settings and dropdown menus for adjustments to be made.
- Set "Board: " to "NodeMCU 1.0 (ESP-12E)", or "NodeMCU 0.9 (ESP-12)", needless to say, this depends on which NodeMCU you have. If you bought the NodeMCU linked above, then you should set it to "NodeMCU 1.0 (ESP-12E)", if not, check with the manufacturer to identify it.
- Set "CPU Frequency: " to 80MHz. We set the clock speed to 80MHz to match with our board (or you can set it to be twice as fast with 160MHz).
- Set "Upload Speed: " to 115200.
- Set "Flash Size: " to 4MB(FS:2MB OTA:~ 1019 KB), or if your IDE isn't the latest version, set it to "4M: 3M SPIFFS".
Utilizing the Blynk App
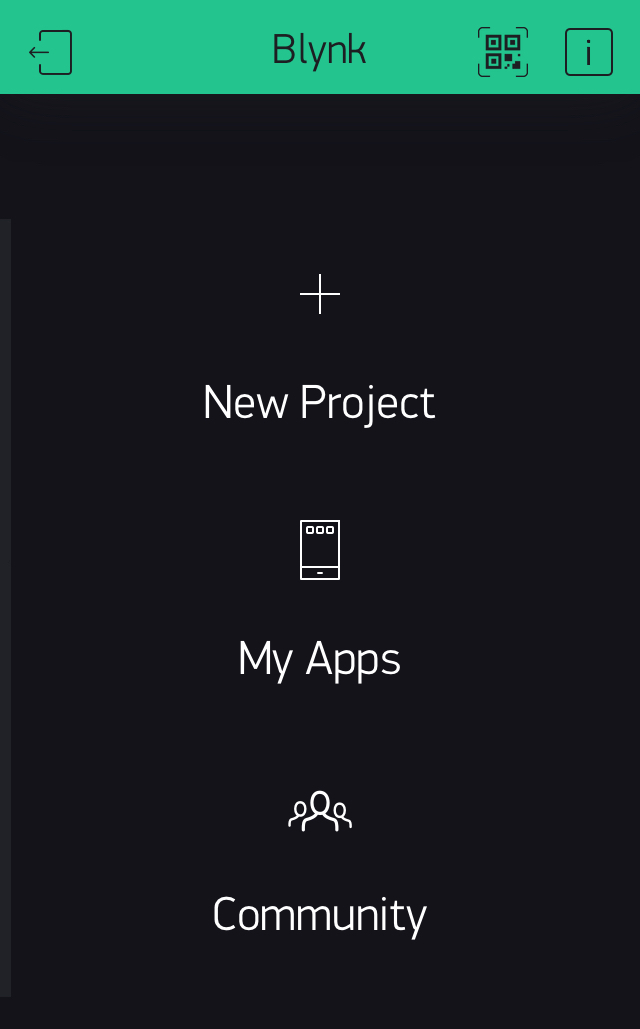
The Blynk App is available on both the App Store and Google Play. Install it, create an account (if you haven't done so already), and create a new project (view image on left).
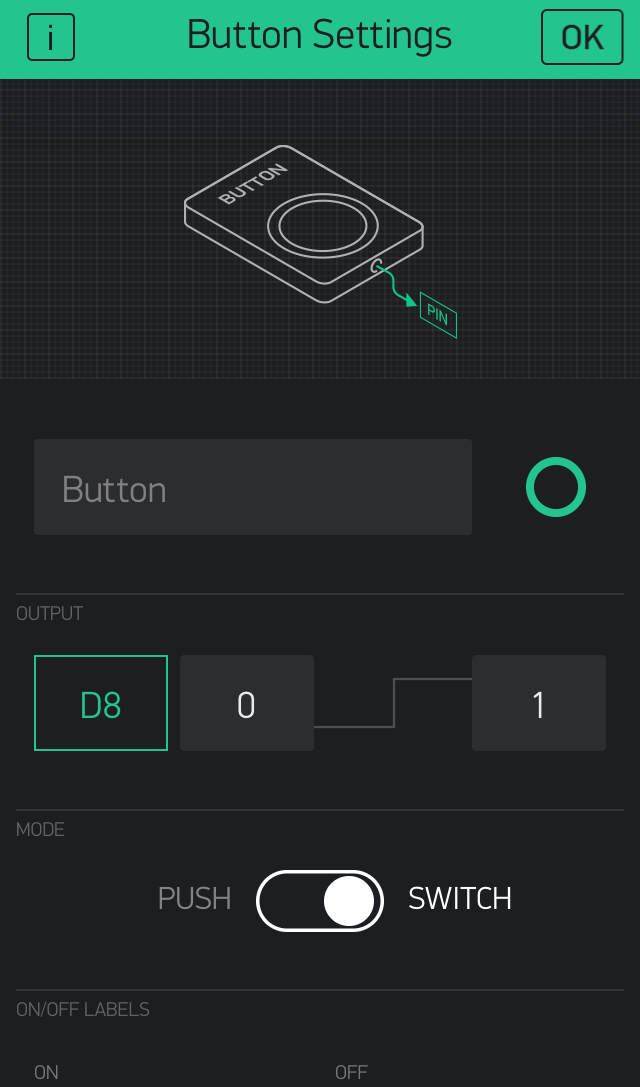
Once you have created a new project, click on the dotted surface, which will take you to the widget box, and click on the button. Click on the button again to access its properties. Once you are viewing the Button Settings screen (view image on right), change the output to digital pin 8. You will notice that this is the same pin that the LED is using, so this will be a direct connection.
One of the things that we need from Blynk is the authenticator token. This token is a UID (unique identifier) which is needed to connect the specific hardware to the phone. You can get this authenticator token by clicking on the bolt icon in the top right corner next to the play button and scrolling down to the auth token section, where you can choose to have it emailed to you. Keep this authenticator token, as we will need it in the next step.
The Code
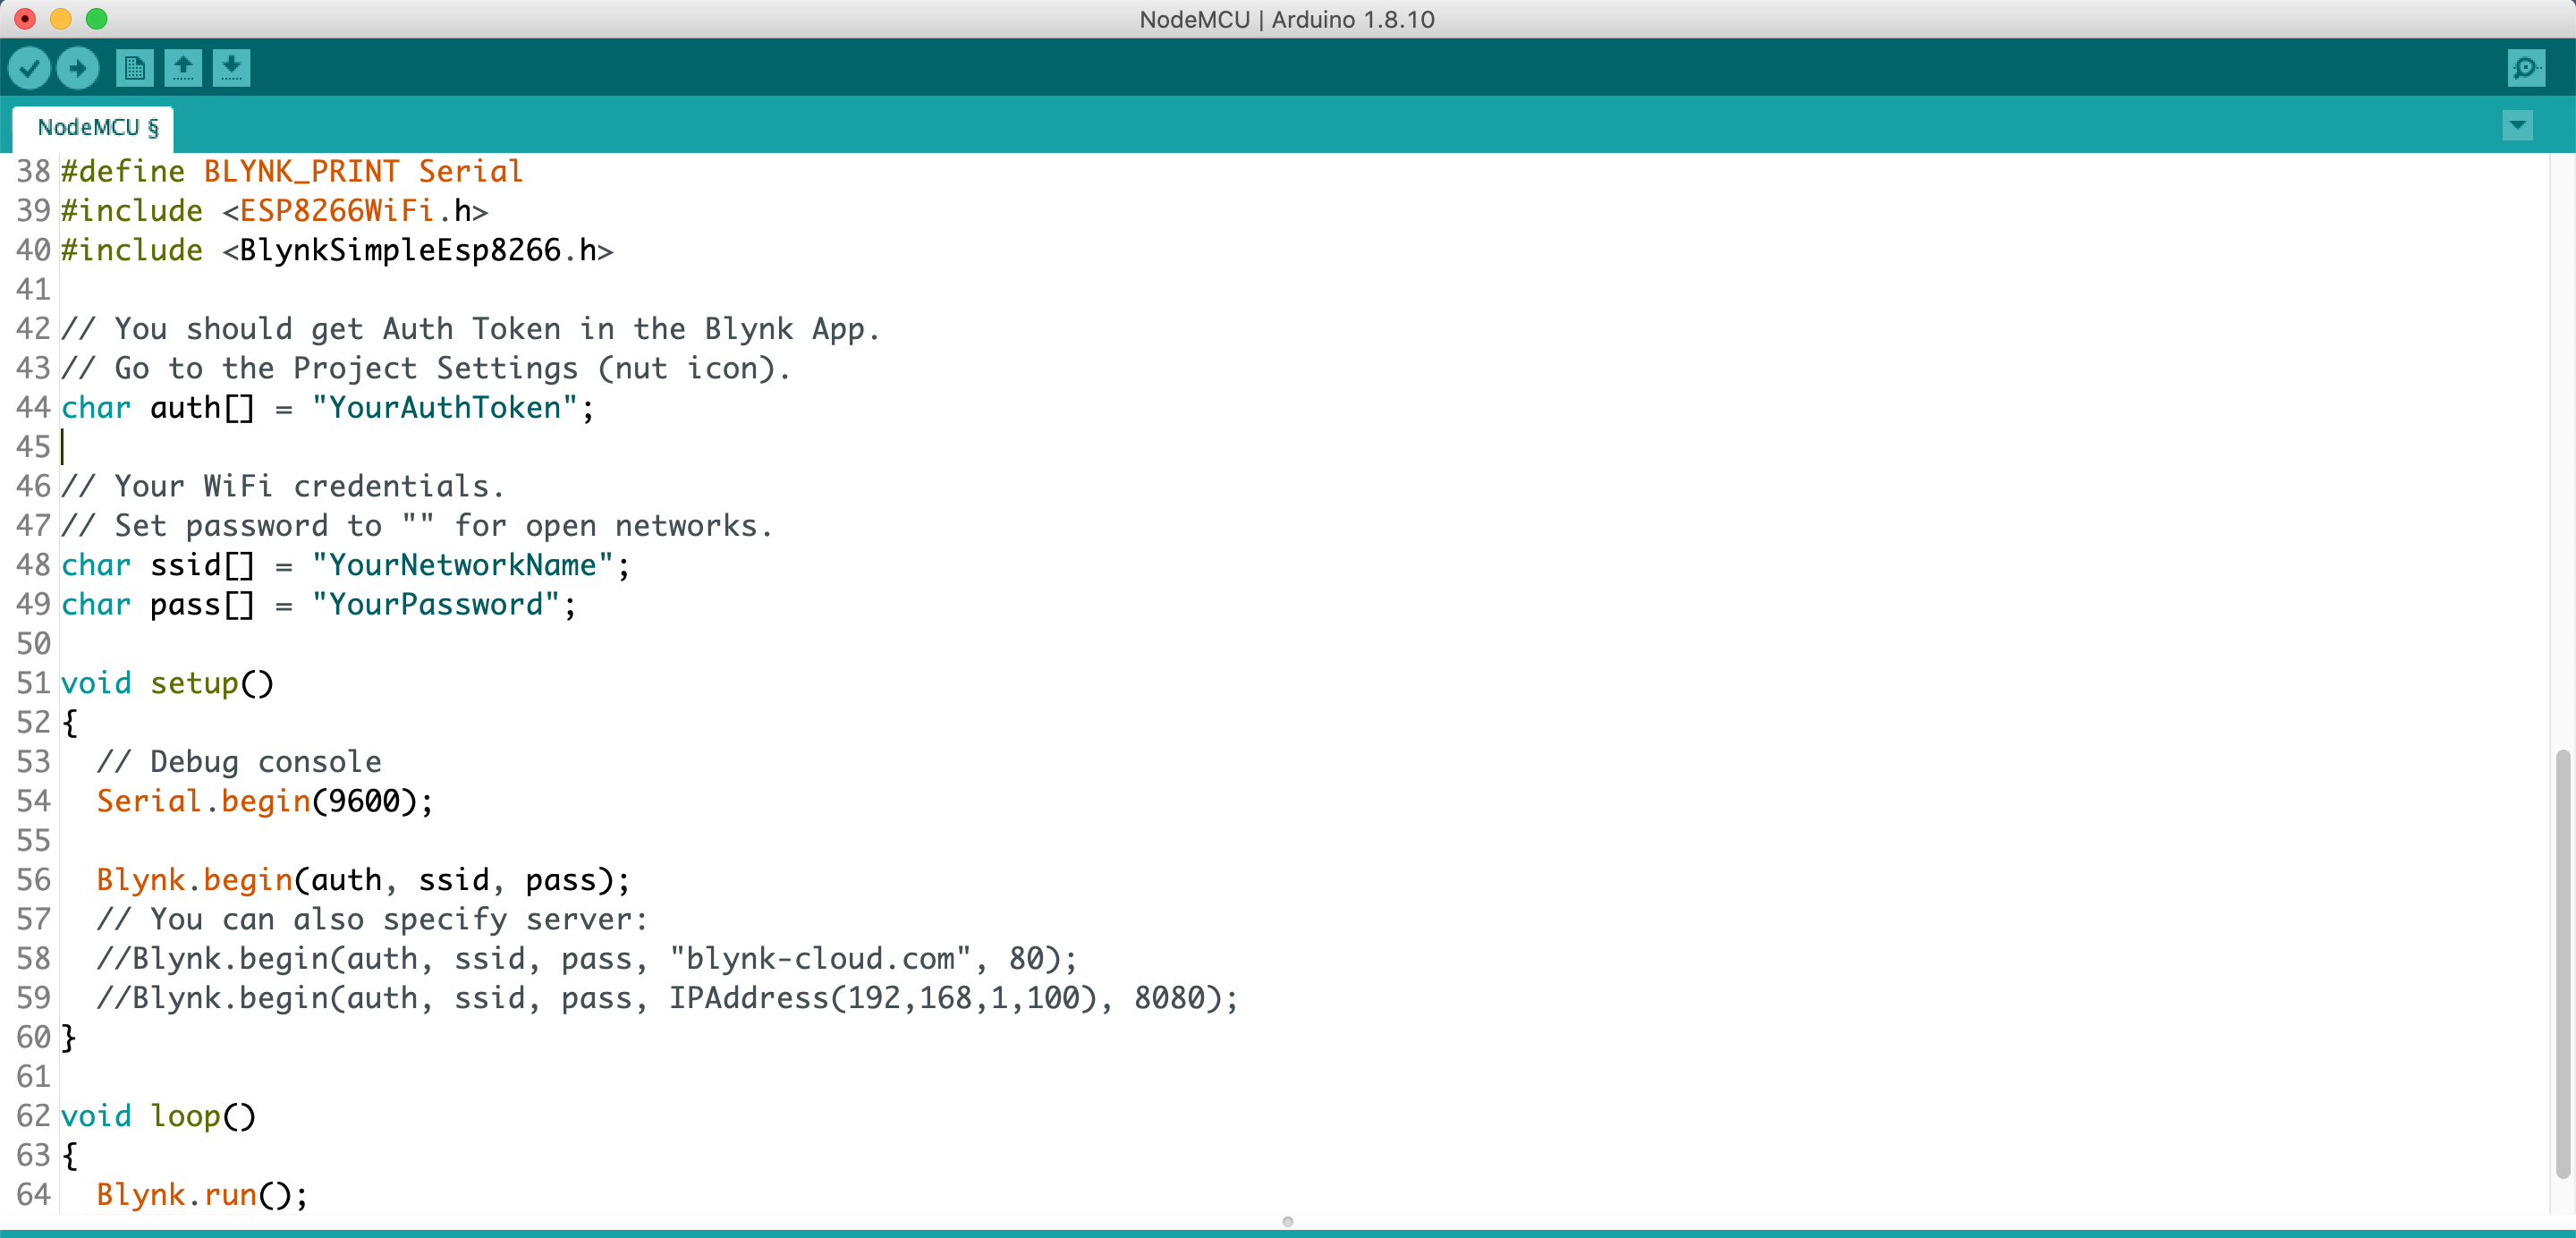
Start by loading the example under File > Examples > Blynk > Boards_WiFi > NodeMCU. You will be met with a fairly short amount of code (view image). Where it says "char auth[ ] = ' ' " is where you will copy and paste your authenticator token we got in the last step. As for the ssid and pass, just insert the WiFi name of your ROUTER (don't make the same mistake I did by connecting it to a range extender), and the the password, respectively. Thats it! (well not really) All you have to do know, is upload the code to the NodeMCU using a USB to Micro-B wire.
The Specifics
In this step I discuss the specifics, the micro, and will walk you through what goes in inside. The NodeMCU runs on ESP8266 firmware, which means that it can connect to WiFi. The ESP8266 firmware connects to a WAP (wireless access point) which can be built in to a router or modem. But to connect to the router, or any password enforced WAP, it needs the SSID (service set identifier) and the password, both of which we supply in the sketch. The router acts as a DHCP (Dynamic Host Configuration Protocol) and basically dishes out IP addresses to connected devices which lease these addresses for a set amount of time. The IP address acts as a unique identifier for a device connecting through WiFi so other devices can recognize it. Now the ESP8266 can be an Access Point (AP) in itself so other wireless stations can discover it and connect to it. Once the sketch is uploaded using the Blynk libraries, the NodeMCU (or any ESP8266 based device) start searching for the Blynk server in the cloud. Once this signal is picked up by the Blynk cloud server, a connection is set up and this server can be accessed via the smartphone app and can be specified to your project in the app using the given authentication token. In the Blynk app, we assigned the button to control digital pin 8 on the NodeMCU. Once the button is pressed, this data is forwarded to the Blynk cloud server as a '1', and to the onboard MCU which carries out the task of sending high voltage (3.3V) to digital pin 8, which turns on the LED.