Controlling Led's Brightness by Raspberry Pi and Custom Webpage
by light_knight in Circuits > Raspberry Pi
2522 Views, 0 Favorites, 0 Comments
Controlling Led's Brightness by Raspberry Pi and Custom Webpage
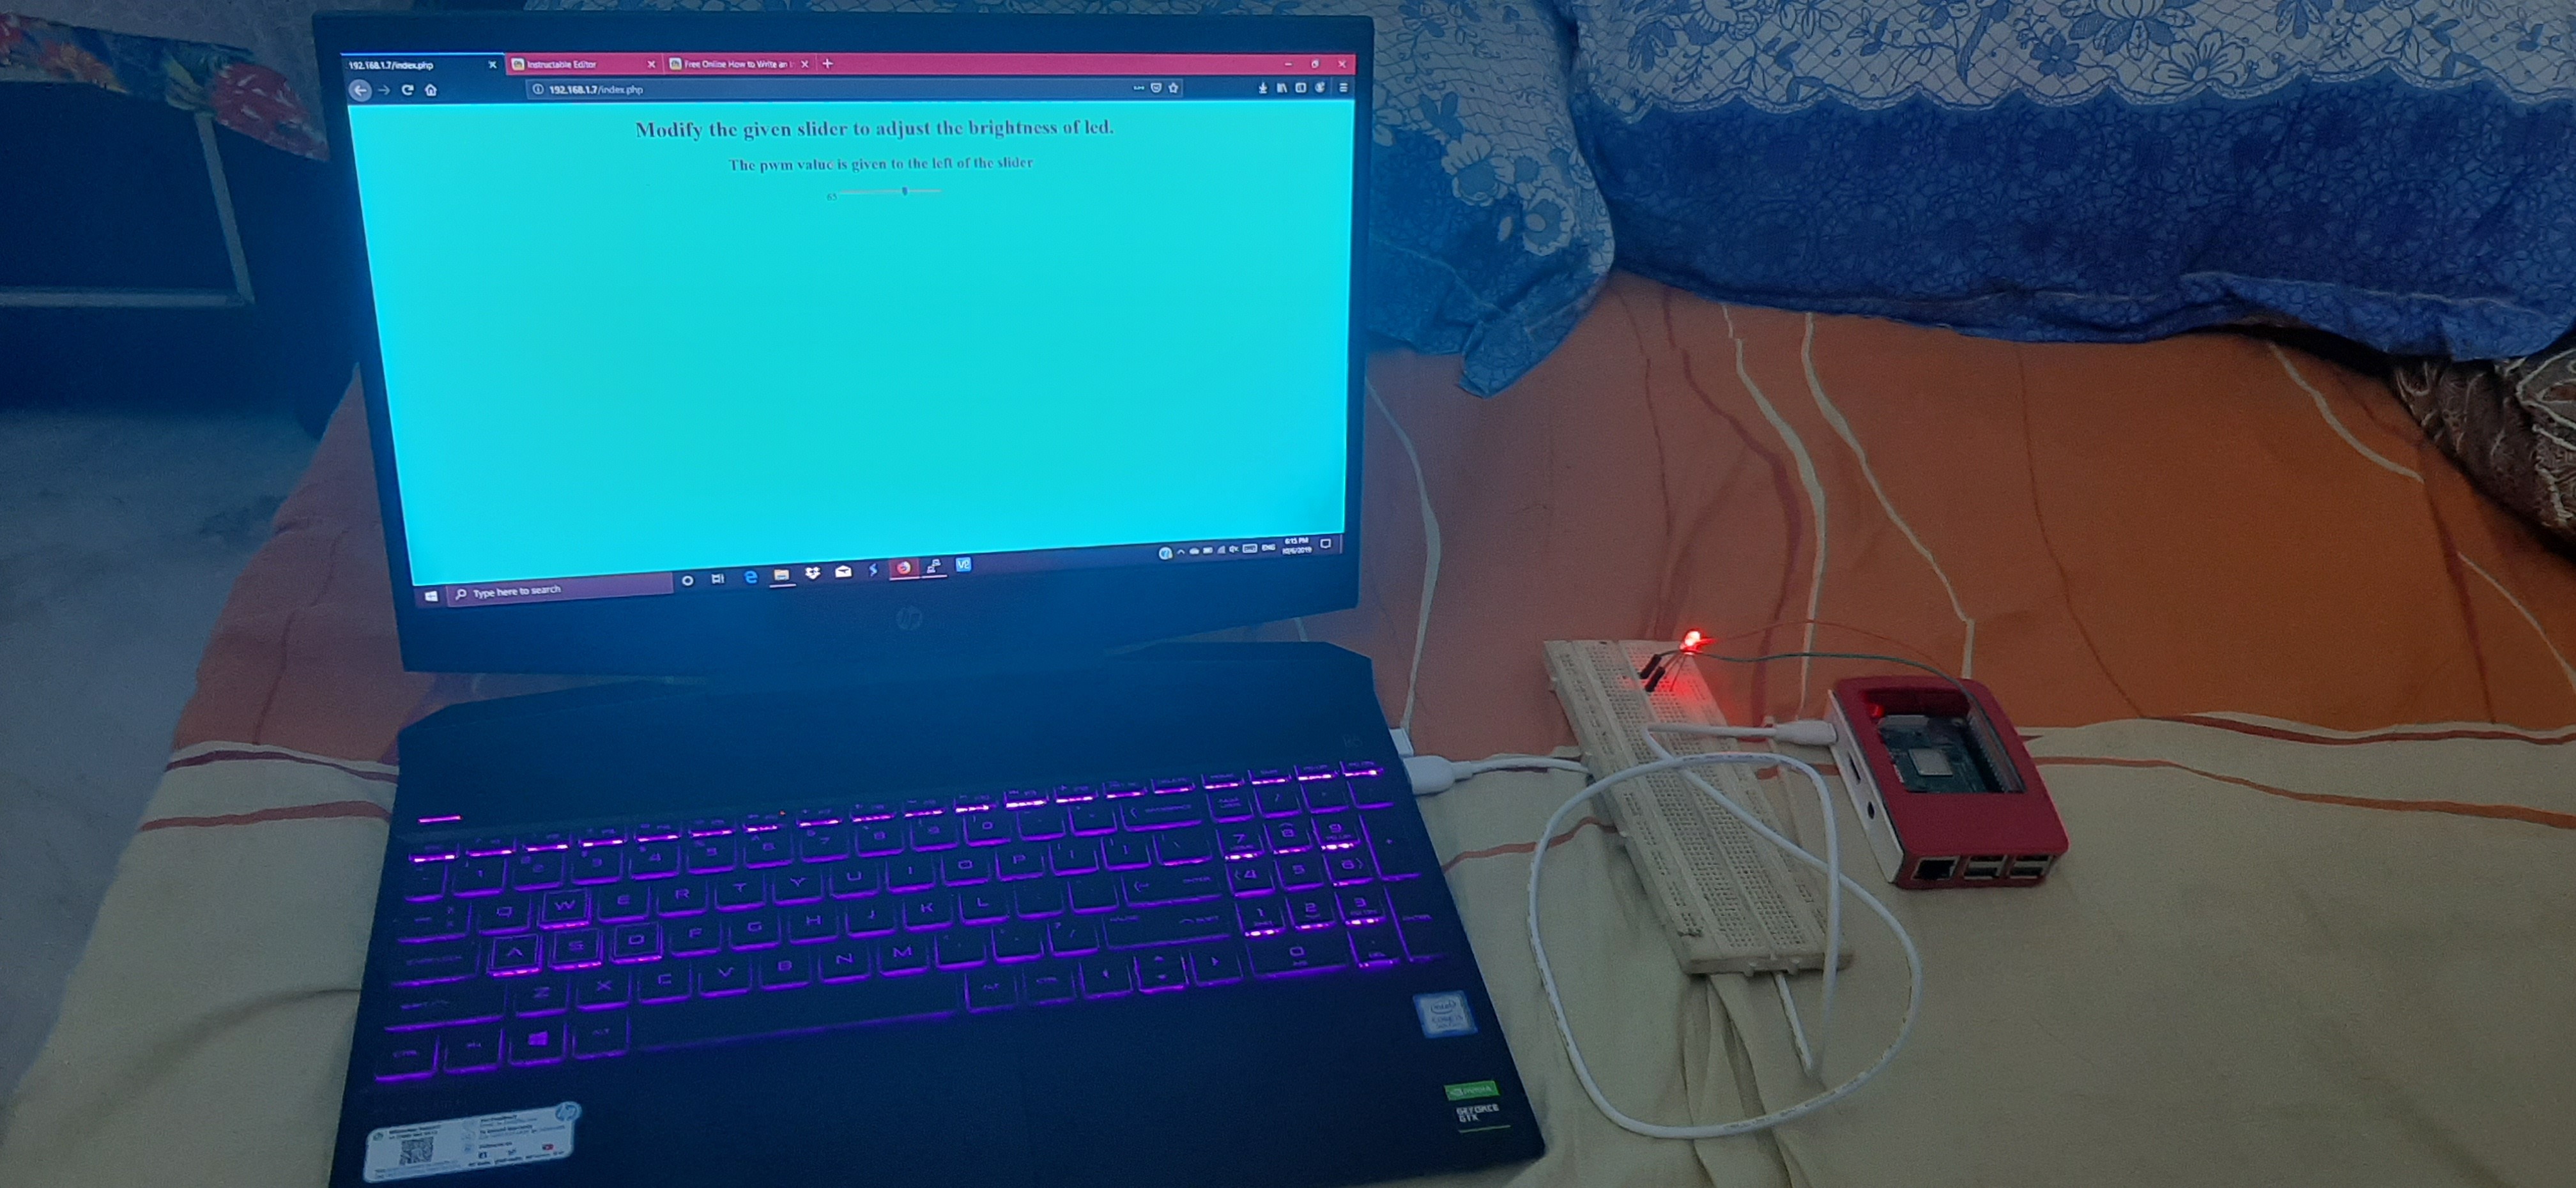
Using an apache server on my pi with php, I found a way to control an led's brightness using a slider with a customized webpage that is accessible on any device connected to the same network as your pi.
There are a lot of ways in which this can be achieved, however they require advanced CSS, Javascript and HTML skills. My method tends to be a bit user friendly.
Supplies
What you will need:
A raspberry pi with a Linux based OS installed(a 3 b+ in my case with Raspbian Buster)
A raspberry pi case for your pi(optional)
An led of any color and a resistor to go along with it(Am using a red led with no resistor)
male to female jumper wires(x2)
OR
male to male jumper wires(x2) and female to female jumper wires(x2)
A breadboard
Basic HTML, PHP and Javascript skills(If you don't know, then don't worry. I shall explain the commands)
Step 1: Setting Up the Server

- This step involves the setting up of your Apache server with PHP on the raspberry pi as well as the development of the web page to control led's brightness
Part 1: Downloading and setting up your Apache server
Go to the terminal and type the following command to install Apache server on your pi
sudo apt-get update

sudo apt-get install apache2 -y
Go to your browser and type http://localhost if you are using pi's browser or type http:://*your pi's local ip* if you are using another device(ensure your device is connected to the same network as your pi)
You must get this webpage
If you get the above web page in your browser then your installation works fine, If not then here are some troubleshooting tips:
Ensure that your device and your pi are on the same network
If you are sure of the above step or you are viewing the webpage on your pi then try re-installing Apache server
After you have ensured that your Apache installation is working and the website is displaying correctly use the following code for installing the PHP module(in the terminal).
sudo apt-get install php libapache2-mod-php -y
now, in the terminal type the following code one by one
cd /var/www/html
sudo chown pi: index.html
The folder html in /var/www is the file in which your webpage is saved in the form of an html file called index.html
By default the ownership of index.html belongs to root, the 2nd line of code changes the ownership of the file to the user pi, if your username is not pi then edit the pi in the 2nd line of code to your username
In html format, you cannot execute php code(which we need for our program) therefore we can convert the file index.html into index.php using the following code
sudo mv index.html index.php
Note that the file ownership does not change and still belongs to pi
go to the site again and you will find that nothing changes except the fact that your index.html file is now index.php
now we want a blank page to modify our page but if you open the file with nano(command line text editor), you will find that the code is very large to delete, what we can do is delete the file index.php and replace the file with a new blank index.php. To do that type the following code in the command line one by one
sudo rm index.php
the rm command deletes the file
To make a new file:
sudo nano index.php
press ctrl+o, then hit enter, then hit ctrl+x
You will find that it's a blank page, try editing it with whatever html skills you have(Don't worry they'll work in a .php file) in nano and see what you get. Use the above command to open the file in nano type in whatever you want.
Use this code in your file and see what happens;)
<?php echo "Hello World"; ?>
Now might be a good time to explain the working of our project
We will add a slider to our html page to control the led's brightness
The value of the slider will be saved in a text file called "output.txt"(for which purpose we require php)
We will add some python code which will scan the output.txt file and write it's value to our led
So basically we just need one more file "output.txt"
Type this command in the terminal in your /var/www/html directory
sudo nano output.txt
Now press ctrl+o, press enter, then press ctrl+x
now type in the following code one by one to change directory settings(you cannot write to the file using php unless you type the following code due to permission issues)
sudo chown www-data:www-data /var/www/html/output.txt
sudo chmod 644 /var/html/output.txt
now using nano go the index.php file and type in the following code(The code will be explained later)
<?php
$myfile = fopen("output.txt", "w");
fwrite($myfile, "hello world");
fclose($myfile);
?>
Now check the output.txt file using nano and see what's written ;)
Now our server has all the prerequisites and all that is required is the setting up of the webpage.
Step2 : Setting Up the Webpage

Using nano edit the index.php(make sure it is blank) then paste the following code:
<html>
<body bgcolor = "cyan">
<center>
<h1>modify the given slider to adjust the brightness of the led</h1>
<h2>the pwm value is given to the left of the slider</h2>
<?php
$myfile = fopen("output.txt", "r");
$pwm = fread($myfile, filesize("output.txt"));
echo $pwm;
echo'<input type = "range" min = "0" max = "100" value = "'.$pwm.'" id ="pwm" onchange = "adjust_pwm()"/>';
fclose($myfile);
?>
<script>
function adjust_pwm(){
var x = document.getElementById("pwm").value;
window.location.href = "main_php.php?name=" + x;
}
</script>
</body>
</html>
Now make a new file called main_php.php using the following code:
sudo nano main_php.php
Paste the following code inside main_php.php
<html>
<body>

<?php
$myfile = fopen("output.txt", "w");
fwrite($myfile, $_GET["name"];
fclose($myfile);
echo "<script>window.location.href = 'index.php'</script>";
?>
</body>
</html>
Explanation of the code(index.php):
consider the index.php part of the code
the <html> part marks the beginning of the html file and is commonly used to do so.
note that </html> marks the end of the file
the <bgcolor = "cyan"> makes the background color of our webpage to be cyan.
the <center> makes whatever that is between <center> and </center> to be aligned in the center of the web page.
the lines <?php and ?> mark the beginning and the end of the php code.all php variables begin with $ symbol and each php line ends with ";"
we have opened the file output.txt in read mode and saved it in the variable $myfile using the code $myfile = fopen("output.txt", "r"); the "r" in the fopen() command(used for opening files) after the comma specifies that we have opened the file in read mode.
the fread() command is used to read the contents of any file that has been opened by the fopen() command.
the filesize("output.txt") command is used to specifiy to read the entire contents of "output.txt".
more on php read/write here:-file read/write using php
the echo command is quite obvious.
In this case we have used the echo command to make a slider with minimum range 0 and maximum range 100 and initial value to be whatever the last value is of the file "output.txt" if we change the slider position, it executes the javascript function adjust_pwm
PWM or pulse width modulation is what is used for changing the brightness of the led.
More on PWM here:- PWM
the fclose() command closes the file.
The javascript code is defined between <script> and </script> tags.
The function command defines the function.
Inside the function we have saved whatever value our slider has in the current position inside a variable x.
Note that variables in javascript are defined by using var.
then we change the url of our php file to main_php.php?name=whatever value our slider has using
window.location.href = "main_php.php?name=" + x;
the window.location.href command is used to change the url of our webpage, here we change the url to
main_php.php and also we give an extra parameter name containing the slider value along with it.
Explanation of the code(main_php.php):
consider the main_php.php part of the code
I have named this file main_php.php as this file is what writes the slider value(pwm value) to the file output.txt which is then read by our python code(in charge of writing the pwm value to our led).
its fairly simple, we open the file output.txt using fopen() command and write the value of our variable name to it using the fwrite() command, then we close the file using fclose() command and we move back to our index.php
Make sure that both of these files along with output.txt are in the /var/www/html folder.
Try opening the webpage and play around with the slider and see what happens to the output.txt file.
Here's how the webpage should look like
The Python Code
go to your /var/www/html folder and make a python file(any name of your choice, use nano)
paste the following code in your python file
import time
import RPi.GPIO as gpio
gpio.setmode(gpio.BCM)
gpio.setup(21, gpio.OUT)
pwm = gpio.PWM(21, 100)
pwm.start(0)
try:
  while 1:
    time.sleep(0.5)
    f = open("output.txt", "r")
    led_brightness = float(f.read())
    pwm.ChangeDutyCycle(led_brightness)

except KeyboardInterrupt:
  pass
pwm.stop()
gpio.cleanup()
the code is pretty self explanatory
we have imported the gpio library RPi.GPIO to control the led using the library's own pwm
we have connected our led to pin 40 or gpio 21 of my pi, you can use any pin you have on your pi.
in the try section, we have converted the slider value in the text to a float data type and then we have written the same to our led.
the code is only to stop if you press ctrl+c.
The Hardware
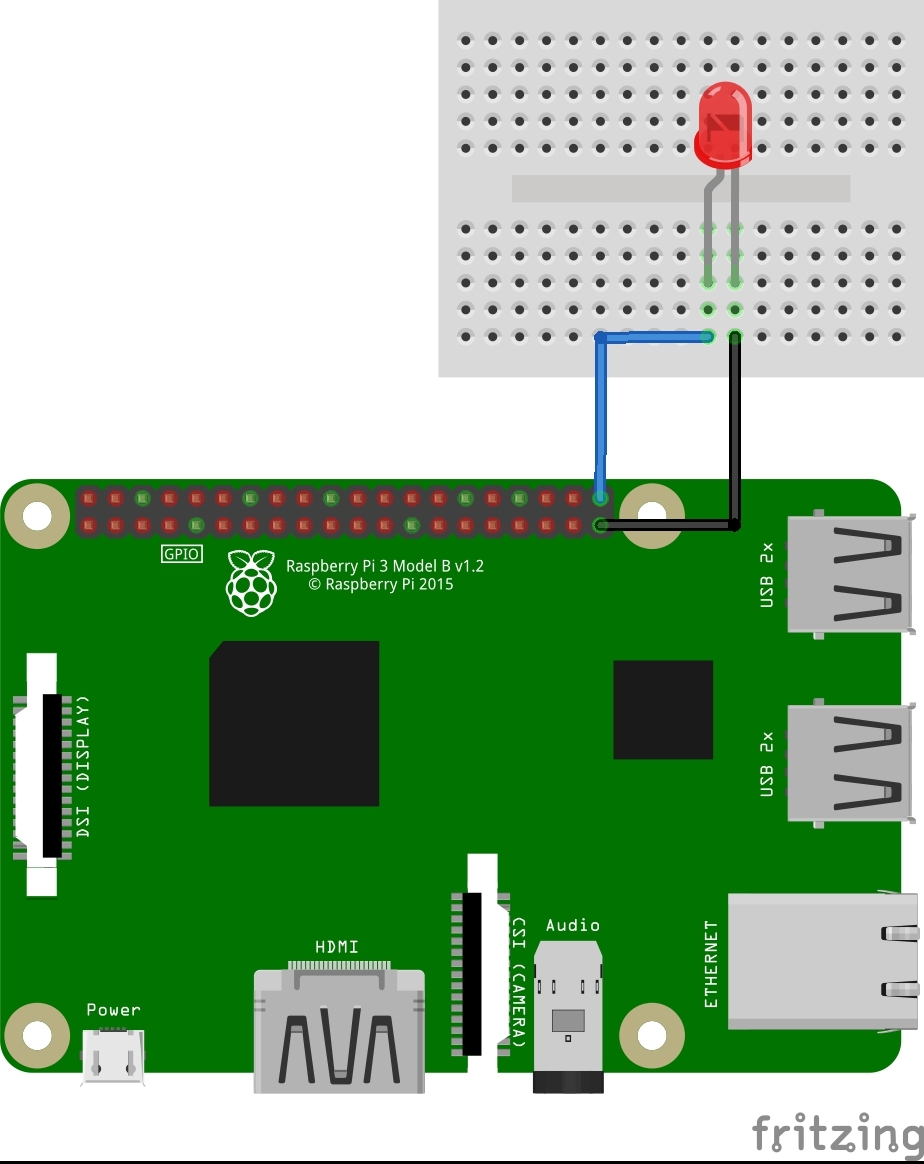
If not using a resistor:
The positive leg(the longer leg) of the led goes to the gpio pin specified in our code earlier,
The negative part goes to ground(use the pinout command in the terminal of your raspberry pi to find the ground pin in your pi, works only in raspbian, for other OS's use the official docs)
In my case the ground pin lies right next to the gpio pin 21(see the circuit)
Connect the pins to the breadboard using jumper wires
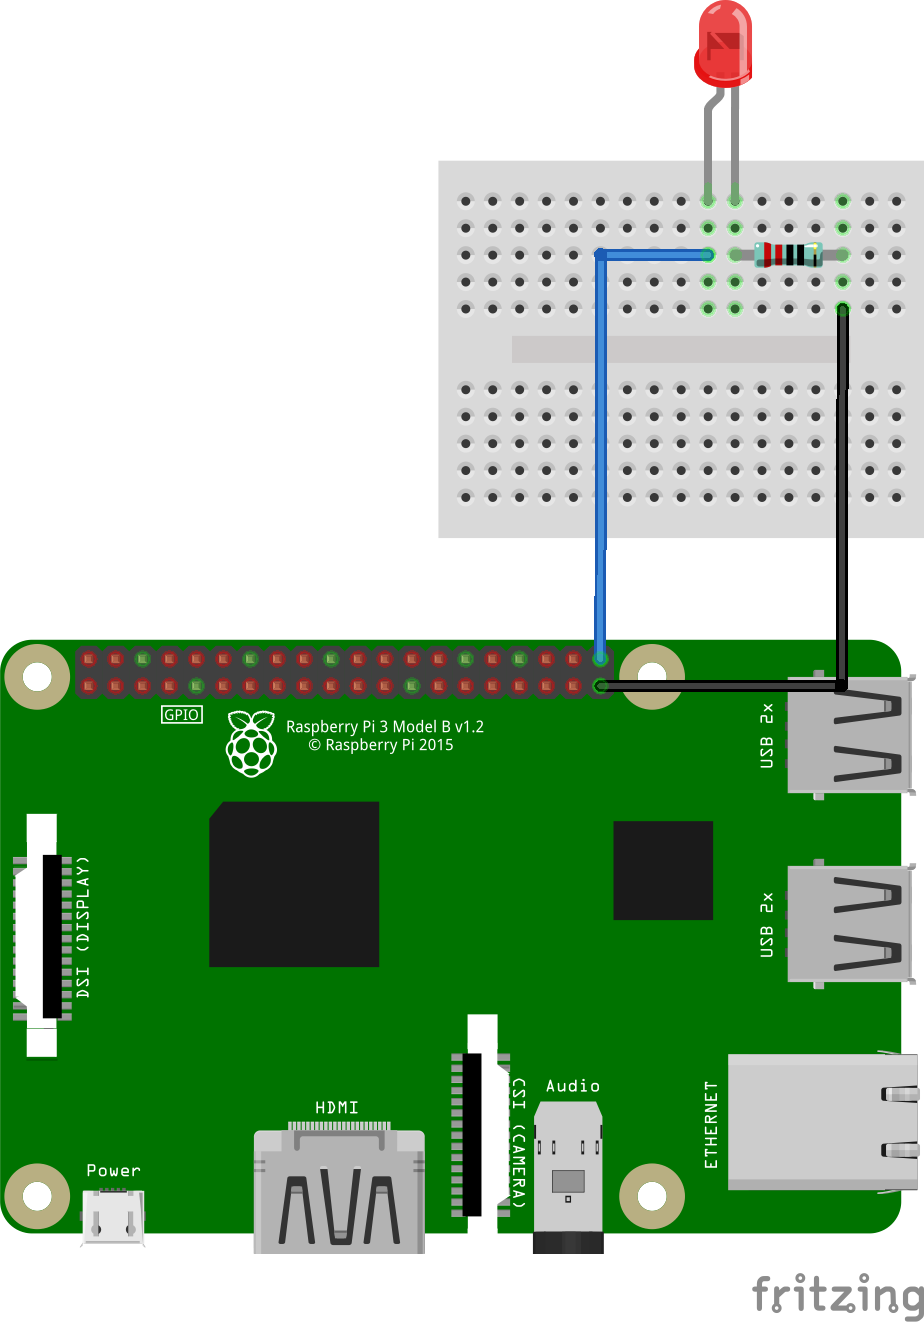
If using a resistor:
The positive part of the led goes to the gpio pin specified in our code earlier
Connect one end of your resistor to the negative leg(the shorter leg) and the other one to ground(use the pinout command in the terminal of your raspberry pi to find the ground pin in your pi, works only in raspbian, for other OS's use the official docs).
In my case the ground pin lies right next to the gpio pin 21(see the circuit)
Connect the pins to the breadboard using jumper wires.
Demo
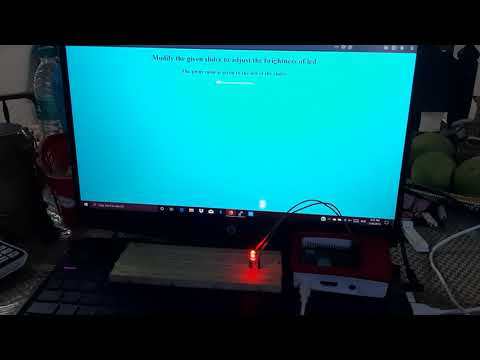
The completed project should work like this