Control Raspberry Pi GPIO Using Amazon Echo (ngrok)
by rockonfool in Circuits > Raspberry Pi
11742 Views, 29 Favorites, 0 Comments
Control Raspberry Pi GPIO Using Amazon Echo (ngrok)
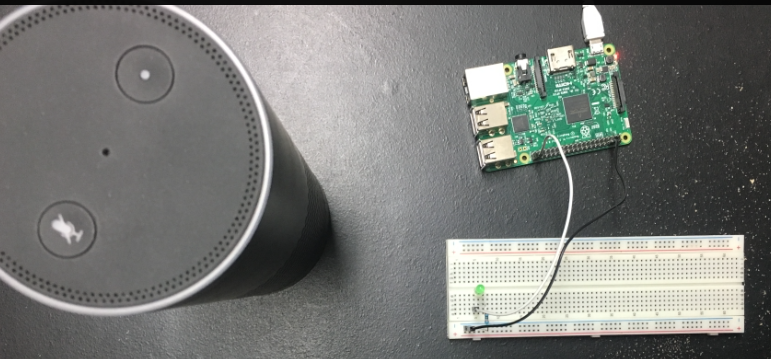
This is an extension of my previous instructable Control LED using Raspberry Pi GPIO. Once you have the LED connected you can use Amazon Echo to control Raspberry Pi GPIO.
This instructable is adapted from PatrickD126's instructable: Control Raspberry Pi GPIO With Amazon Echo and Python. Thank you PatrickD126 !
In this, the idea is to customize the control script and intent to use voice commands such as 'Turn on lights', 'Turn on tv' etc.
Setup
Please follow the instructable to setup the LED connections to Raspberry Pi. You do not need the python script described as we will cover the customized version in this instructable.
Using a terminal on RPi install the following packages using commands:
- sudo apt-get update && sudo apt-get upgrade -y
- sudo apt-get install python2.7-dev python-dev python-pip
- sudo pip install Flask flask-ask
Setup Ngrok

- Visit https://ngrok.com/download and get the latest Linux ARM release as a zip and unzip inside the home directory:
- unzip /home/pi/ngrok-stable-linux-arm.zip
- Run it from the command line with:
- sudo ./ngrok http 5000
Your screen should look like the image above. The 'Forwarding' URL will be used later.
Note: Unfortunately the ngrok URL changes every time the service is started so it is not a permanent solution if you are trying to run this full time. I am working on a solution using Fauxmo and will publish if its a better solution. You can use the current method as a POC.
Script - Interaction With Echo and GPIO

We will use a python script which acts as an interface between Alexa Skill and RPi GPIO. You can download the script from here and run it on RPi using a terminal command:
python gpio_control.py
The script handle the device which you can trying to control, 'lights' for example in this case. It also has error check if see if you can trying to turn on/off a device which is already turned on/off respectively.
Note that you need to use separate terminals to run the ngrok from previous step and the script, since we need both services running simultaneously for the skill to work.
Create Alexa Skill


To create a Alexa Skill:
- Create or login to your AWS Developer Account.
- In the developer console select 'Alexa' and 'Alexa Skill Set' as shown in the snippet.
- On the next page select 'Add a new skill' on the right hand side.
Alexa Skill - Information
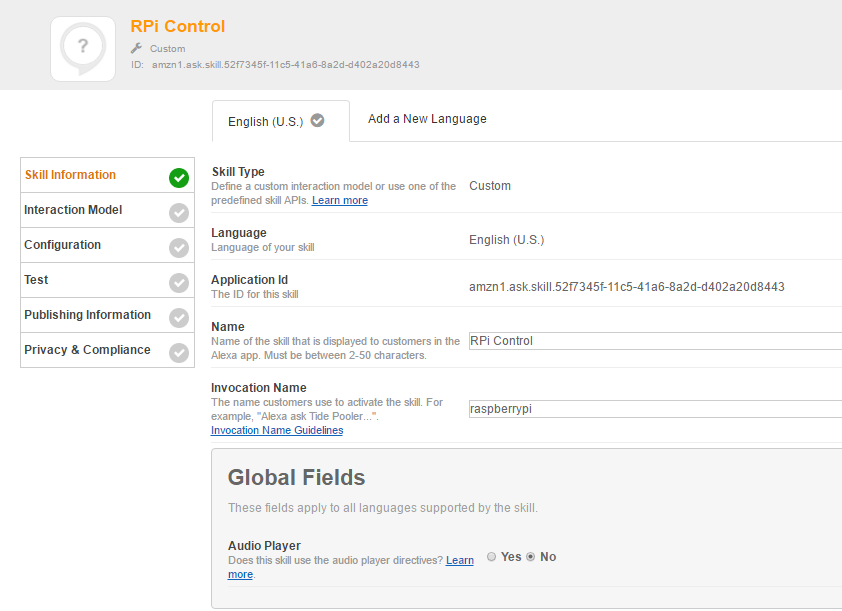
- Set the Skill Name to RPi Control
- Invocation name to 'raspberry pi'
Refer to picture above for other options.
Alexa Skill - Interaction Model
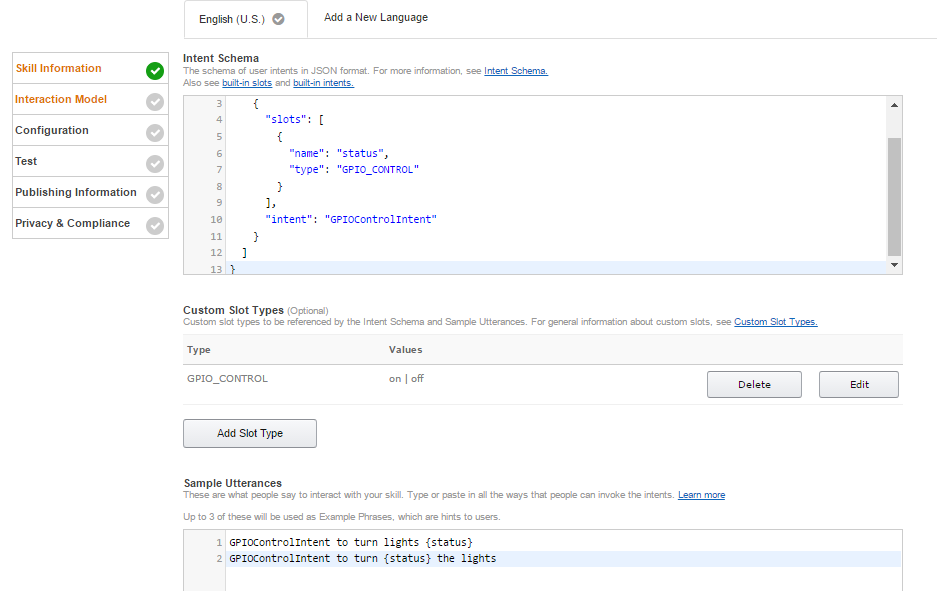
- Paste the intent schema in the 'Intent Schema' box.
- Click 'Add Slot Type' and under 'Enter Type' write in 'GPIO_CONTROL'. Under 'Enter Values' write:
- on
- off
- In the sample utterance enter:
- GPIOControlIntent to turn lights {status}
- GPIOControlIntent to turn {status} the lights
The sample utterances as the name suggests as examples of how you/user will interact while giving a command to Echo.
Alex Skill - Configuration and SSL
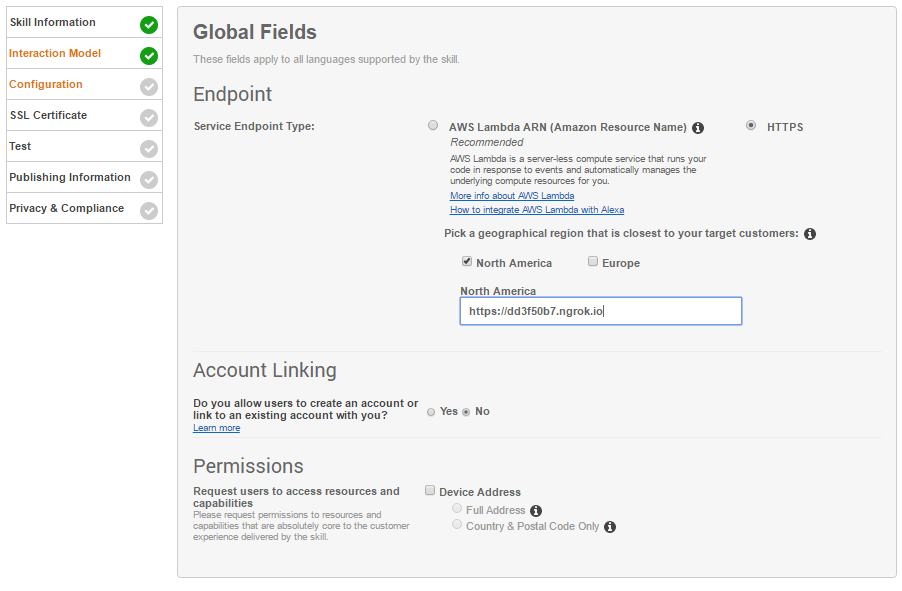
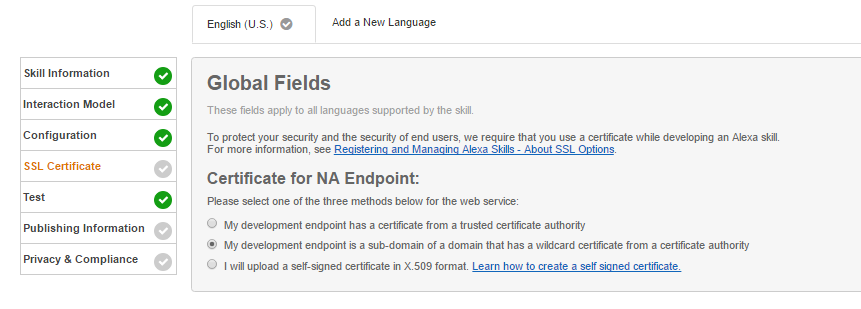
- Select 'HTTPS' as the Service Endpoint Type and select a region.
- Enter the ngrok URL from step 2. The URL should be like:
- Select the 'My development endpoint is a sub-domain of a domain that has a wildcard certificate from a certificate authority' option.
Alexa Skill - Testing
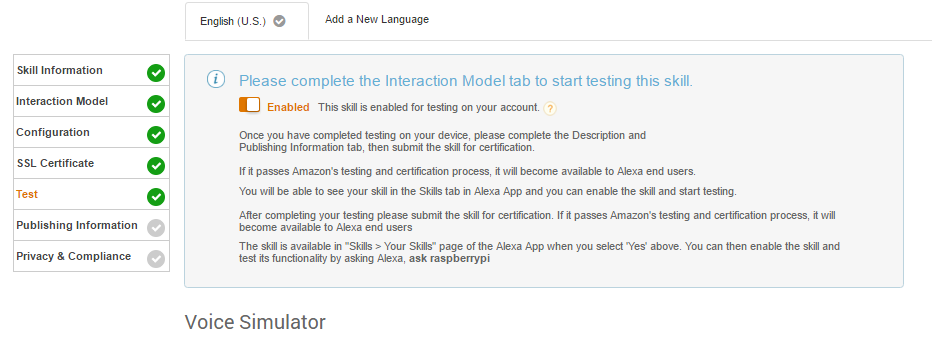
The skill can be tested using the test page.
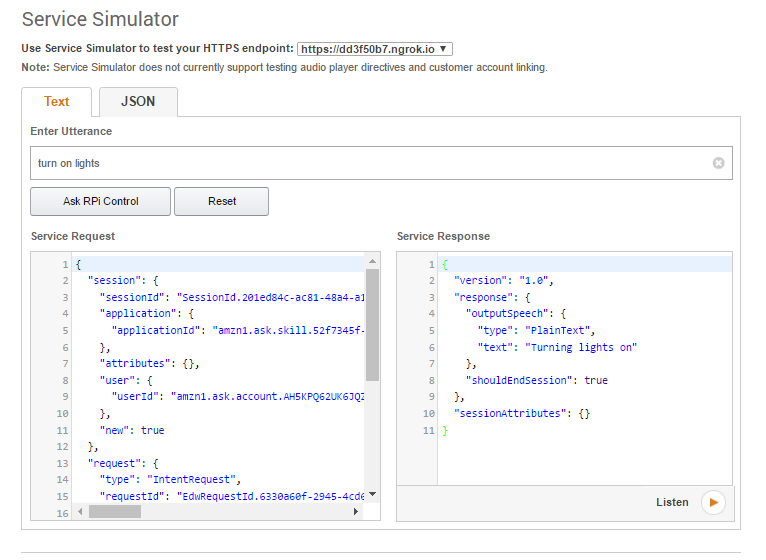
Use the service simulator to test the skill. Enter an utterance like "turn on lights". If everything is setup properly you should get an response similar to above. Also the LED connected to your RPi should turn on with the test utterance.
You can also use Amazon Echo using voice commands. For example:
'Alexa, tell Raspberry Pi to turn light on.'
Summarizing ...
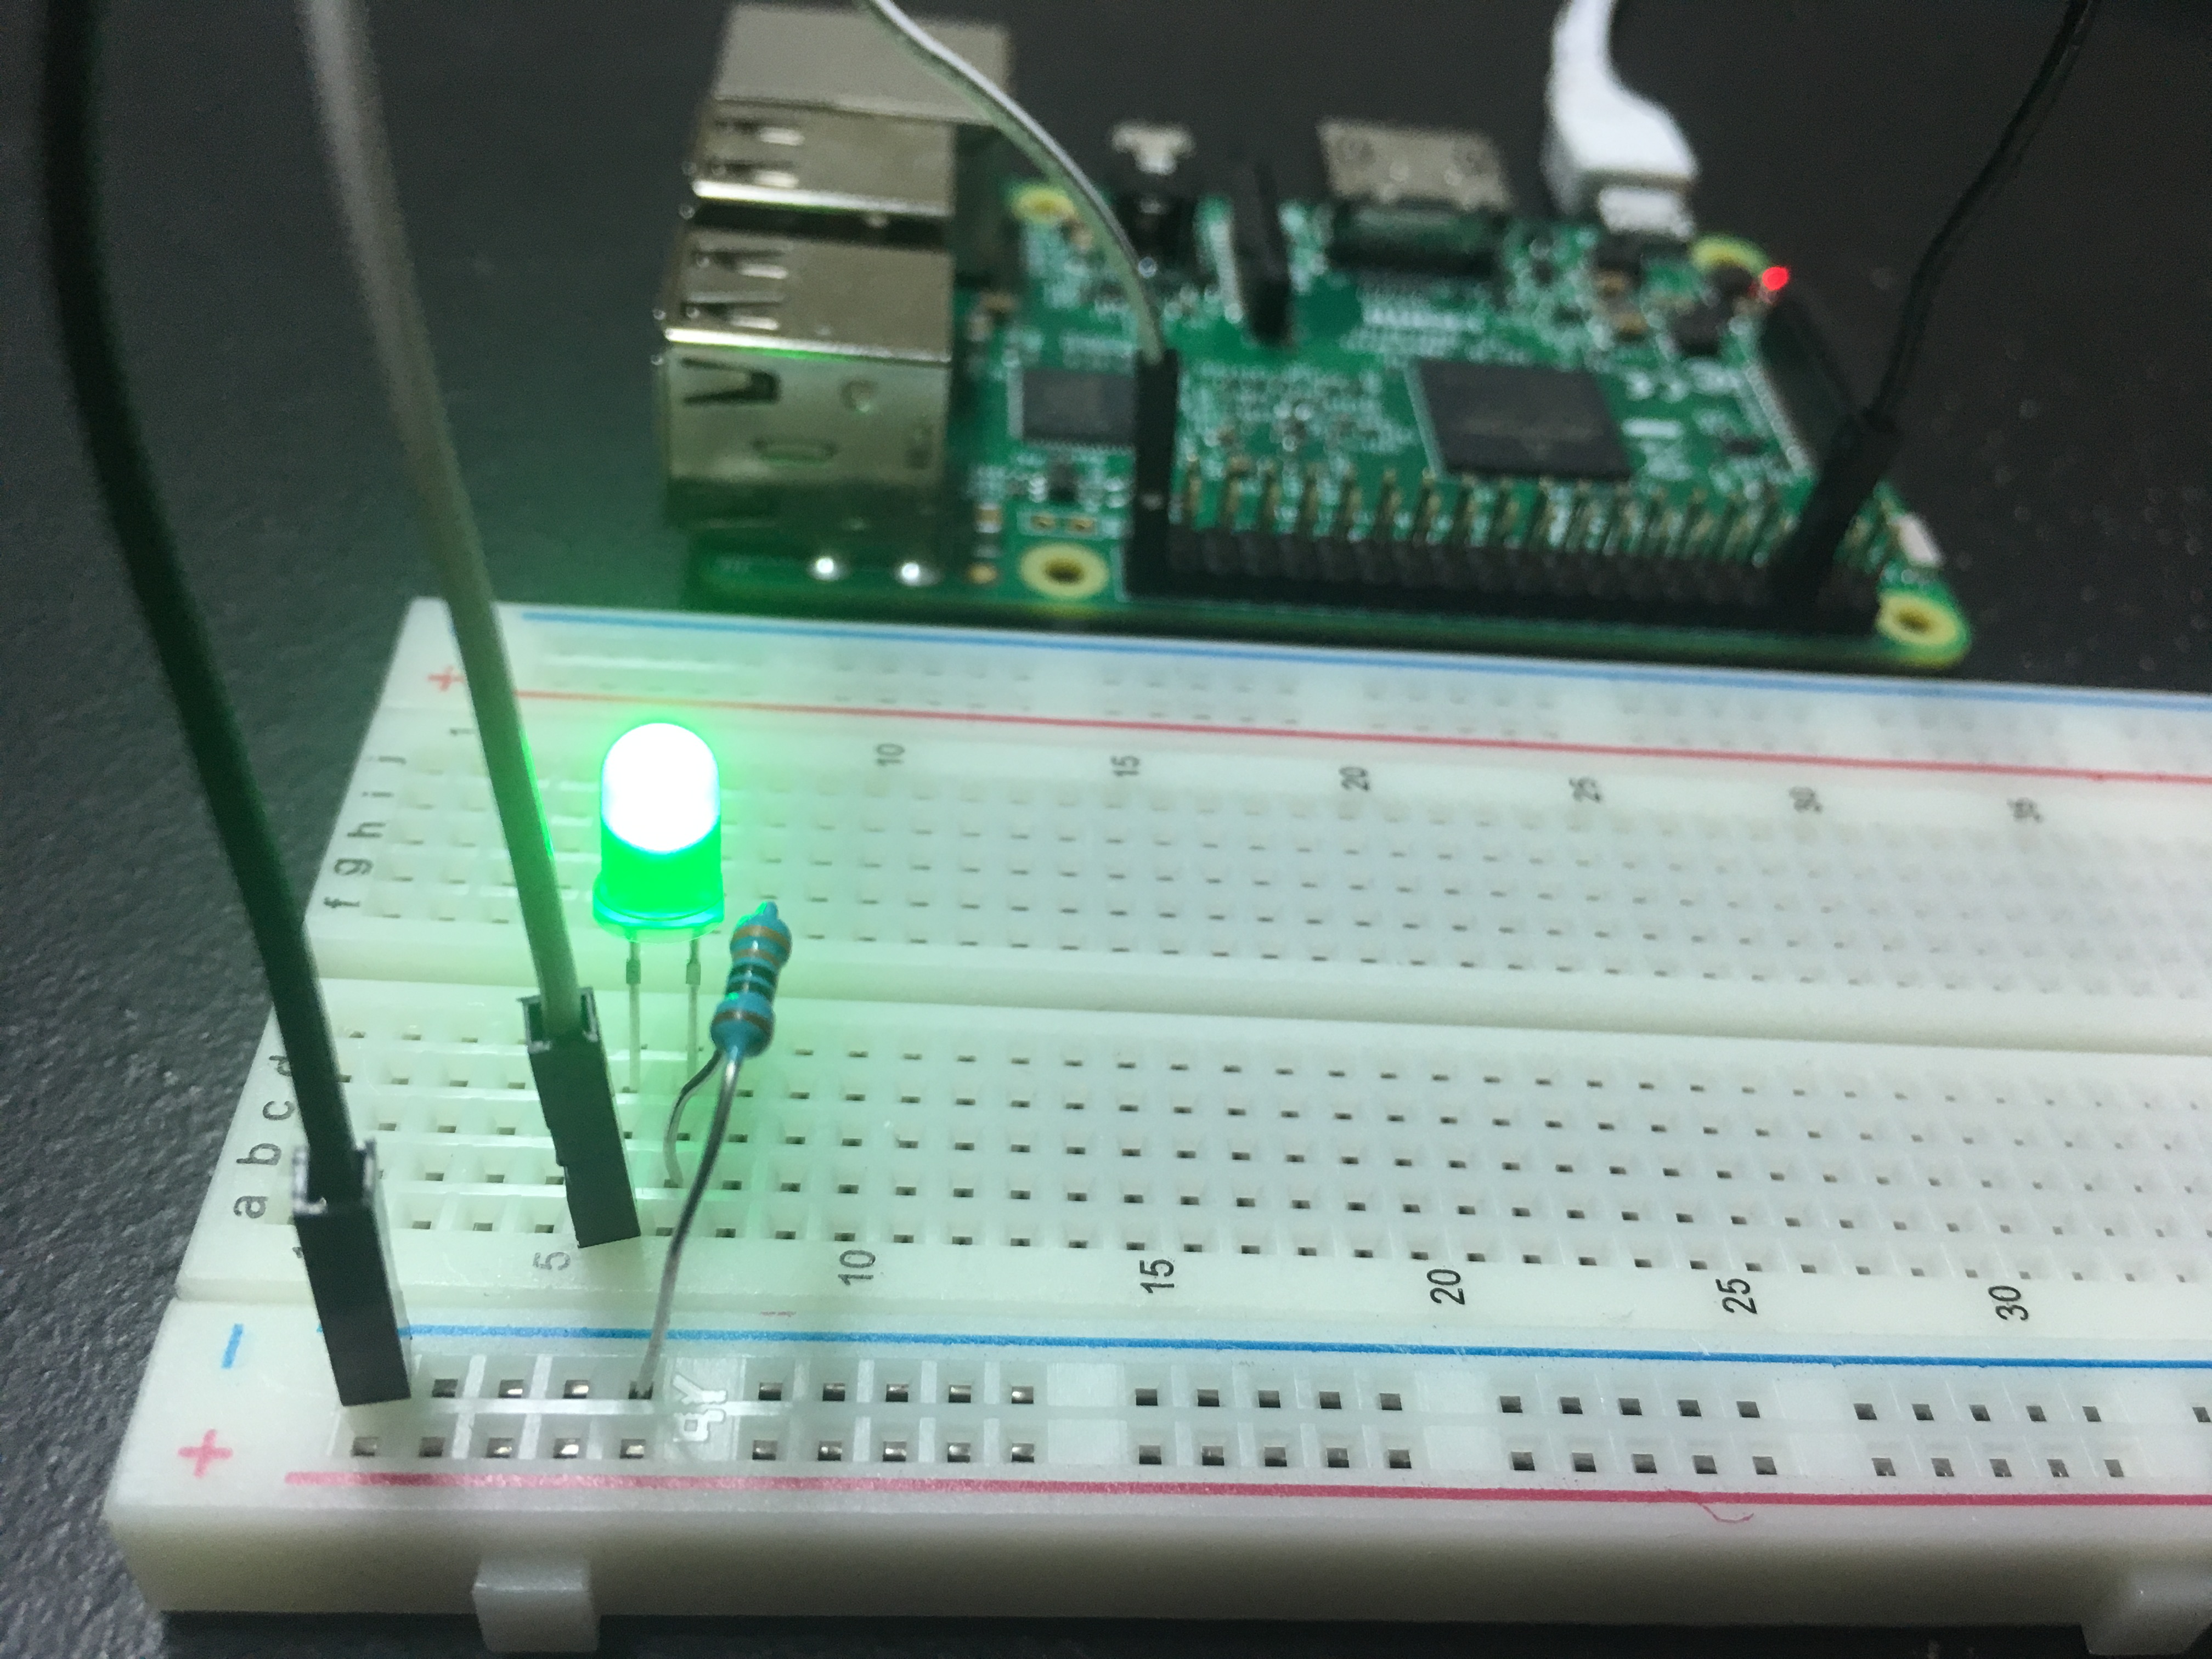
The intent schema and python script can be modified to add further components and error checks. Please let me know if this useful and any feedback you might have.
I am working on finding free/better alternatives to using ngrok, since it has the limitations of changing forwarding URL for every instance. Please feel free to suggest if you have already figured out one.