Control Living Room With Alexa and Raspberry Pi
by CharlesA96 in Circuits > Raspberry Pi
1923 Views, 27 Favorites, 0 Comments
Control Living Room With Alexa and Raspberry Pi
.)
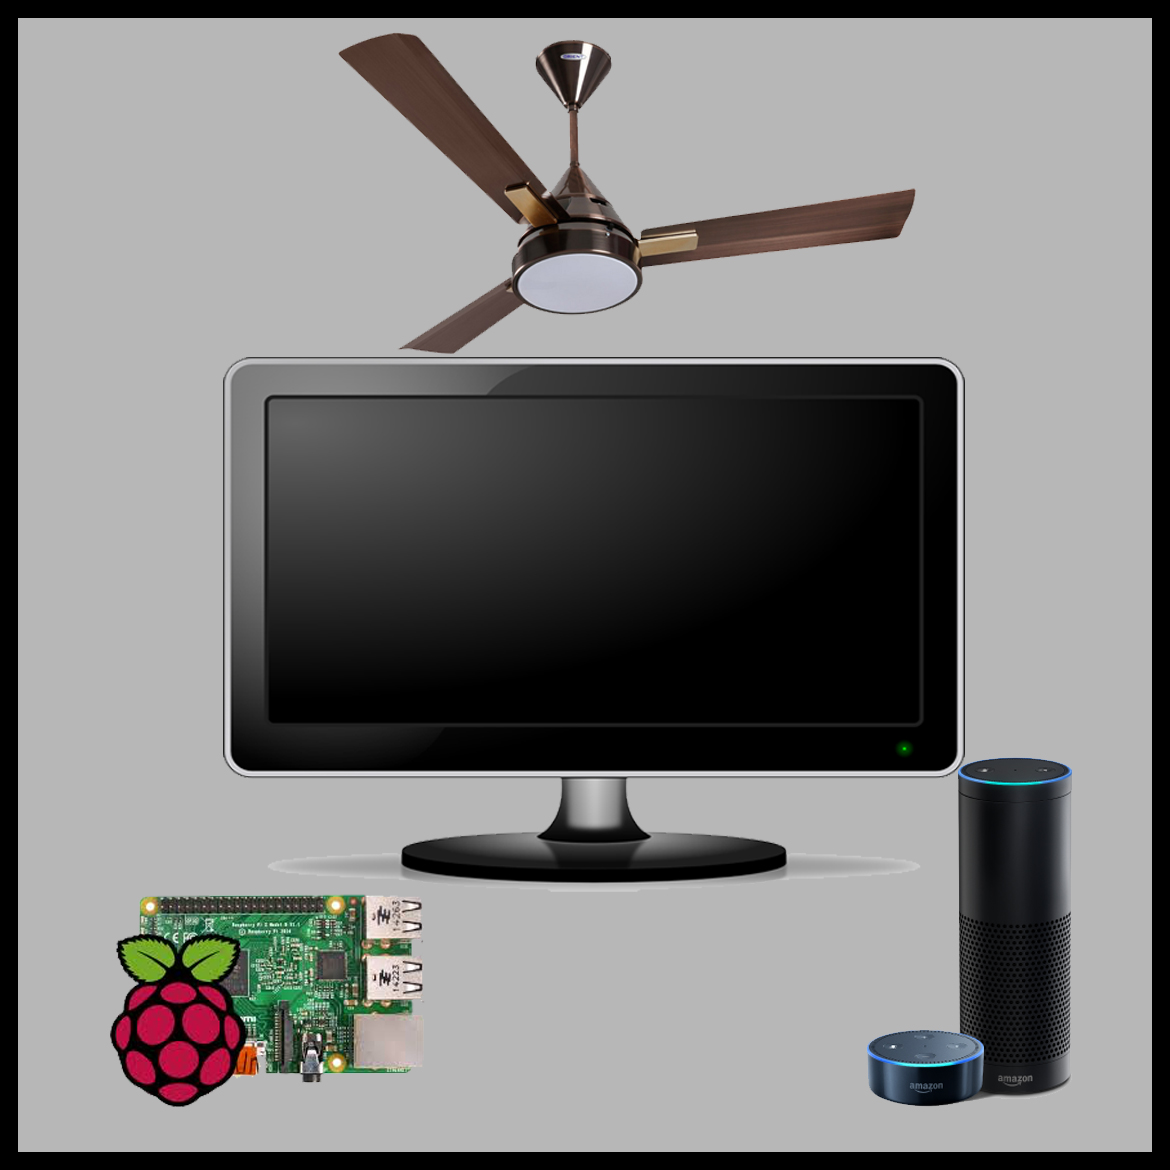
Control your living room TV, lights, and Fan with Alexa (Amazon Echo or Dot) and Raspberry Pi GPIO.
Initial Setup
I used a Raspberry Pi 2 and a Raspbian Jessie image downloaded from https://www.raspberrypi.org/downloads/raspbian/
Once logged in, enter the following commands to install the required packages and python libraries:
sudo apt-get update && sudo apt-get upgrade -y<br>sudo apt-get install python2.7-dev python-dev python-pip
sudo pip install Flask flask-ask
sudo apt-get install lirc
Setup Ngrok

Visit https://ngrok.com/download and get the latest Linux ARM release as a zip and unzip inside the home directory:
unzip /home/pi/ngrok-stable-linux-arm.zip
Open a new terminal and enter the following command:
sudo ./ngrok http 4000
Open another new terminal and enter the following command:
sudo ./ngrok http 4500
Open third new terminal and enter the following command:
sudo ./ngrok http 5000
Python Script for Light Switch Control
Open a new terminal session and create a new python file named light_control.py:
nano light_control.py
Copy/paste the following code into the new file:
from flask import Flask<br>from flask_ask import Ask, statement, convert_errors
import RPi.GPIO as GPIO
import logging
import os
GPIO.setmode(GPIO.BCM)
app = Flask(__name__)
ask = Ask(app, '/')
logging.getLogger("flask_ask").setLevel(logging.DEBUG)
@ask.intent('LightControlIntent', mapping={'status': 'status'})
def light_control(status):
    try:
        pinNum = 27
    except Exception as e:
        return statement('Pin number not valid.')
    GPIO.setup(pinNum, GPIO.OUT)
    if status in ['on', 'high']:    GPIO.output(pinNum, GPIO.LOW)
    if status in ['off', 'low']:    GPIO.output(pinNum, GPIO.HIGH)
    return statement('Turning {} the Living Room Lights'.format(status))
if __name__ == '__main__':
    port = 4000
    app.run(host='0.0.0.0', port=port)
Save and close the file.
Start the flask server with:
sudo python light_control.py<br>
Leave both ngrok and light_control.py running
Python Script for Fan Control
Open a new terminal session and create a new python file named fan_control.py:
nano fan_control.py
Copy/paste the following code into the new file:
from flask import Flask
from flask_ask import Ask, statement, convert_errors
import RPi.GPIO as GPIO
import logging
import os
GPIO.setmode(GPIO.BCM)
app = Flask(__name__)
ask = Ask(app, '/')
logging.getLogger("flask_ask").setLevel(logging.DEBUG)
@ask.intent('FanControlIntent', mapping={'status': 'status'})
def fan_control(status):
    try:
        pinNum = 22
    except Exception as e:
        return statement('Pin number not valid.')
    GPIO.setup(pinNum, GPIO.OUT)
    if status in ['on', 'high']:    GPIO.output(pinNum, GPIO.LOW)
    if status in ['off', 'low']:    GPIO.output(pinNum, GPIO.HIGH)
    return statement('Turning {} the Living Room Lights'.format(status))
if __name__ == '__main__':
    port = 4500
    app.run(host='0.0.0.0', port=port)
Save and close the file.
Start the flask server with:
sudo python fan_control.py
Leave both ngrok, light_control.py, and fan_control.py running
Installing and Configuring the LIRC Package
In order to control the TV you must configure a pin on the Raspberry Pi to generate infrared (IR) signals for your specific TV. Open terminal and enter the following command to install an LIRC package that emulates the infrared signals of many remote controls.
sudo apt-get install lirc
Next, you need to enable and configure the lirc_rpi kernel module. To do so, open modules in the Nano editor
sudo nano /etc/modules
Add the lines below to the file (Make sure that the gpio_out_pin parameter points to the pin controlling the IR LED):
lirc_dev
lirc_rpi gpio_out_pin=17
Next, open the hardware.conf filein Nano as before with sudo:
sudo nano /etc/lirc/hardware.conf
Add the following configuration to the file:
LIRCD_ARGS="--uinput"
LOAD_MODULES=trueDRIVER="default"
DEVICE="/dev/lirc0"
MODULES="lirc_rpi"
LIRCD_CONF=""
LIRCMD_CONF=""
Now, reboot the Raspberry Pi:
sudo reboot
Python Script for TV Control
Open a new terminal session and create a new python file named ir_control.py:
nano ir_control.py
Go to http://lirc-remotes.sourceforge.net/remotes-table...
Find a remote that is compatible with your TV. In my case I have a Sanyo TV that works with the sanyo-tv01 config file. Once you find a file that supports your TV open it and look through the command options.
Copy/paste the following code into the new file and replace sanyo-tv01 with the file name that works with your TV. Also ensure that the tv commands are supported by your TVs config file; You may have to modify the KEY_POWER, KEY_VIDEO, KEY_VOLUMEUP, KEY_VOLUMEDOWN, and KEY_MUTE commands to work correctly with your TV's config file:
from flask import Flask<br>from flask_ask import Ask, statement, convert_errors
import RPi.GPIO as GPIO
import logging
import os
GPIO.setmode(GPIO.BCM)
app = Flask(__name__)
ask = Ask(app, '/')
logging.getLogger("flask_ask").setLevel(logging.DEBUG)
@ask.intent('GPIOControlIntent', mapping={'status': 'status'})
#'pin': 'pin'})
def tv_function(status):
    if status in ['turn on']:
	os.system("irsend SEND_ONCE sanyo-tv01 KEY_POWER")
	return statement('Turning on the TV')
    elif status in ['turn off']:
	os.system("irsend SEND_ONCE sanyo-tv01 KEY_POWER")
        return statement('Turning off the TV')
    elif status in ['change input']:
	os.system("irsend SEND_ONCE sanyo-tv01 KEY_VIDEO")
        os.system("irsend SEND_ONCE sanyo-tv01 KEY_VIDEO")
        return statement('Changing input on the TV')
    elif status in ['increase volume']:
	os.system("irsend SEND_ONCE sanyo-tv01 KEY_VOLUMEUP")
	os.system("irsend SEND_ONCE sanyo-tv01 KEY_VOLUMEUP")
	os.system("irsend SEND_ONCE sanyo-tv01 KEY_VOLUMEUP")
	os.system("irsend SEND_ONCE sanyo-tv01 KEY_VOLUMEUP")
	os.system("irsend SEND_ONCE sanyo-tv01 KEY_VOLUMEUP")
	return statement('Increasing Volume on the TV')
    elif status in ['decrease volume']:
	os.system("irsend SEND_ONCE sanyo-tv01 KEY_VOLUMEDOWN")
	os.system("irsend SEND_ONCE sanyo-tv01 KEY_VOLUMEDOWN")
	os.system("irsend SEND_ONCE sanyo-tv01 KEY_VOLUMEDOWN")
	os.system("irsend SEND_ONCE sanyo-tv01 KEY_VOLUMEDOWN")
	os.system("irsend SEND_ONCE sanyo-tv01 KEY_VOLUMEDOWN")
	return statement('Decreasing Volume on the TV')
    elif status in ['mute']:
	os.system("irsend SEND_ONCE sanyo-tv01 KEY_MUTE")
        return statement('Muting the TV')
    elif status in ['unmute']:
	os.system("irsend SEND_ONCE sanyo-tv01 KEY_MUTE")
        return statement('Unmuting the TV')
    else:
	return statement('Remote function not found.')
if __name__ == '__main__':
    port = 5000
    app.run(host='0.0.0.0', port=port)
Save and close the file.
Start the flask server with:
sudo python ir_control.py
Leave all three ngrok terminal windows, light_control.py, fan_control.py, and ir_control.py running
Login to AWS Account
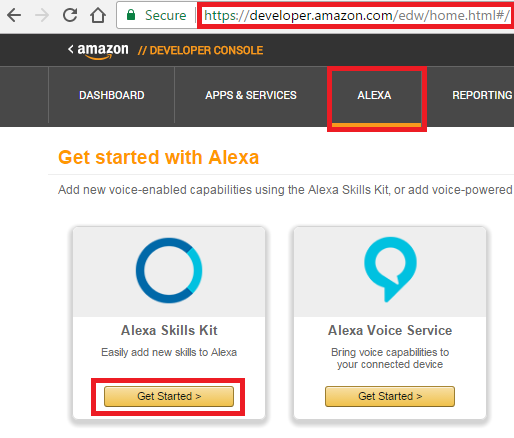
First create or login to your AWS Developer Account and open your list of Alexa Skills.
TV Alexa Skill Setup
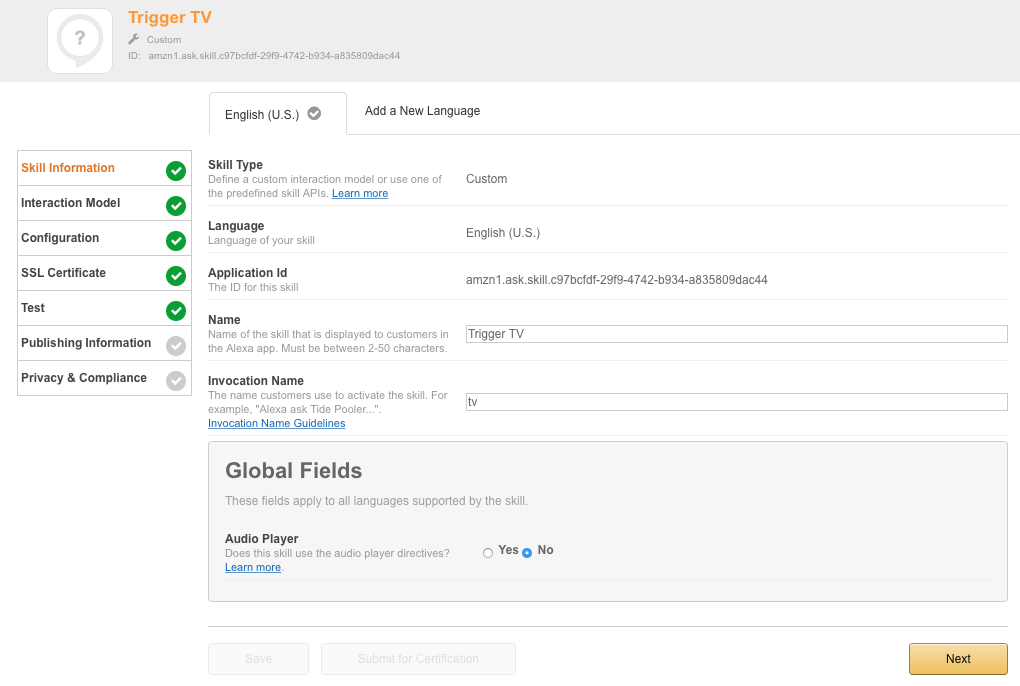
Select "Add a New Skill".
Set the Skill Name to 'Trigger TV' and the Invocation Name to the word(s) you want to use to activate the skill.
Click 'Next' to continue.
Copy/paste the following into the 'Intent Schema' box:
{  "intents": [{
      "slots": [{
          "name": "status",
          "type": "TV_Function"
        },
        {
          "name": "amount",
          "type": "AMAZON.NUMBER"
        }],
      "intent": "GPIOControlIntent"
    }]
}
Next, click 'Add Slot Type'
Enter TV_Function in the 'Enter Type' field.
Enter the following values in the 'Enter Values' field:
turn on
turn off
change input
increase volume
decrease volume
mute
unmute
Next, Copy/paste the following into the 'Sample Utterances' box:
GPIOControlIntent {status}

GPIOControlIntent {status} by {amount}
Click 'Next' to continue.
Select 'HTTPS' as the Service Endpoint Type and select a region.
Enter the ngrok URL from step 2 and click 'Next'. The URL should be something like:
https://ed6ea04d.ngrok.io
Click 'Next' to continue and press 'Save'.
Lights Alexa Skill Setup
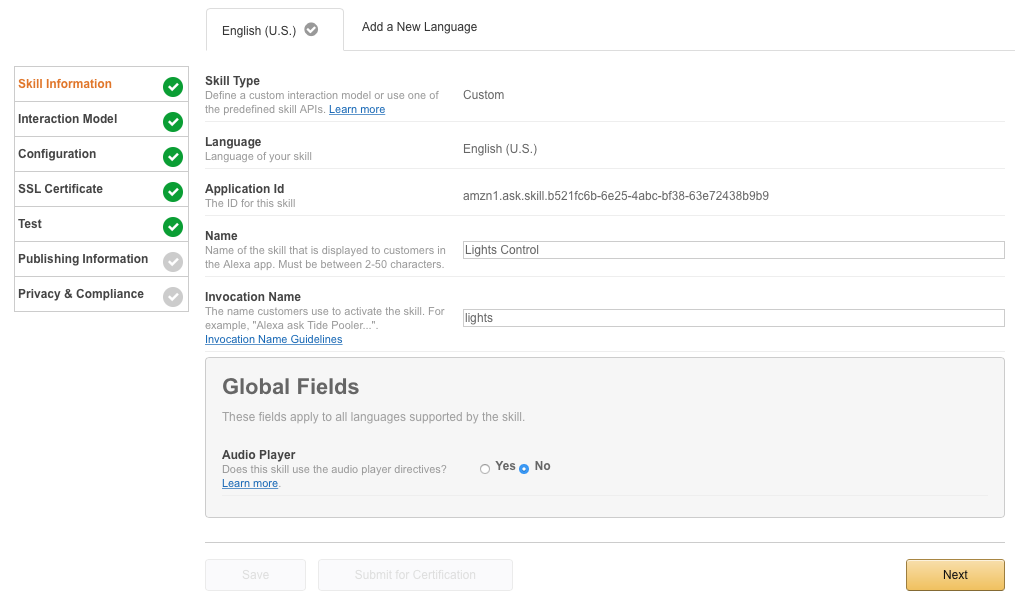
Close the open skill and select "Add a New Skill".
Set the Skill Name to 'Lights Control' and the Invocation Name to the word(s) you want to use to activate the skill.
Click 'Next' to continue. Copy/paste the following into the 'Intent Schema' box:
{
    "intents": [{
      "slots": [{
          "name": "status",
          "type": "LIGHTS_CONTROL"
        }],
      "intent": "LightsControlIntent"
    }]
}
Next, click 'Add Slot Type'.
Enter "LIGHTS_CONTROL" in the 'Enter Type' field.
Enter the following values in the 'Enter Values' field:
on
off
Next, Copy/paste the following into the 'Sample Utterances' box:
LightsControlIntent turn {status}Click 'Next' to continue. Select 'HTTPS' as the Service Endpoint Type and select a region. Enter the ngrok URL from step 2 and click 'Next'. The URL should be something like:
https://ed6ea04d.ngrok.io
Click 'Next' to continue and press 'Save'.
Fan Alexa Skill Setup
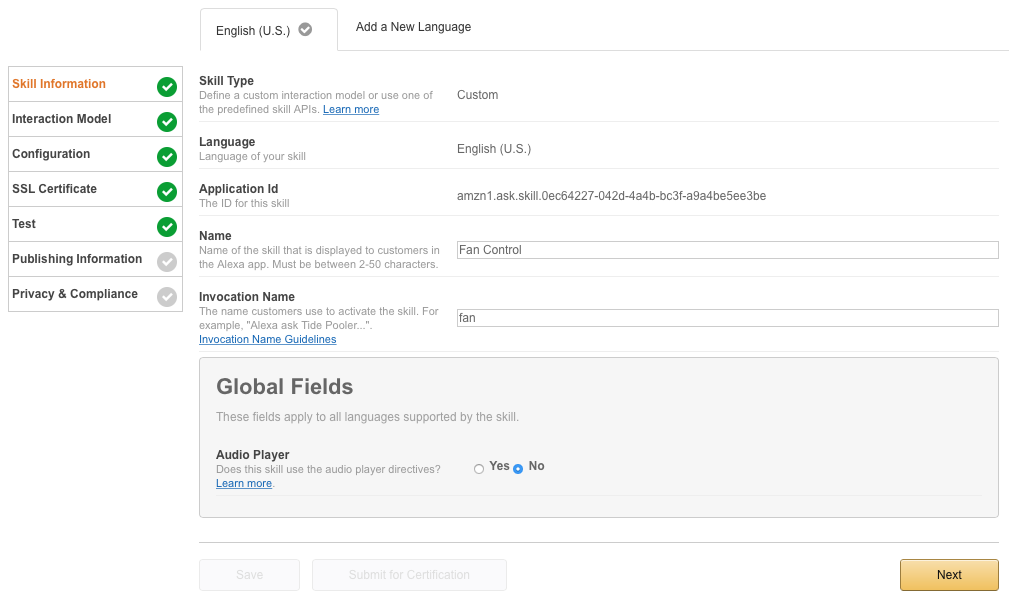
Close the open skill and select "Add a New Skill".
Set the Skill Name to 'Fan Control' and the Invocation Name to the word(s) you want to use to activate the skill.
Click 'Next' to continue.
Copy/paste the following into the 'Intent Schema' box:
{
  "intents": [{
      "slots": [{
          "name": "status",
          "type": "FAN_CONTROL"
        }],
      "intent": "FANControlIntent"
    }]
}
Next, click 'Add Slot Type'.
Enter "FAN_CONTROL" in the 'Enter Type' field.
Enter the following values in the 'Enter Values' field:
on
off
Next, Copy/paste the following into the 'Sample Utterances' box:
FANControlIntent turn {status} Click 'Next' to continue. Select 'HTTPS' as the Service Endpoint Type and select a region. Enter the ngrok URL from step 2 and click 'Next'. The URL should be something like:
https://ed6ea04d.ngrok.io
Click 'Next' to continue and press 'Save'.
Build the Ciruit
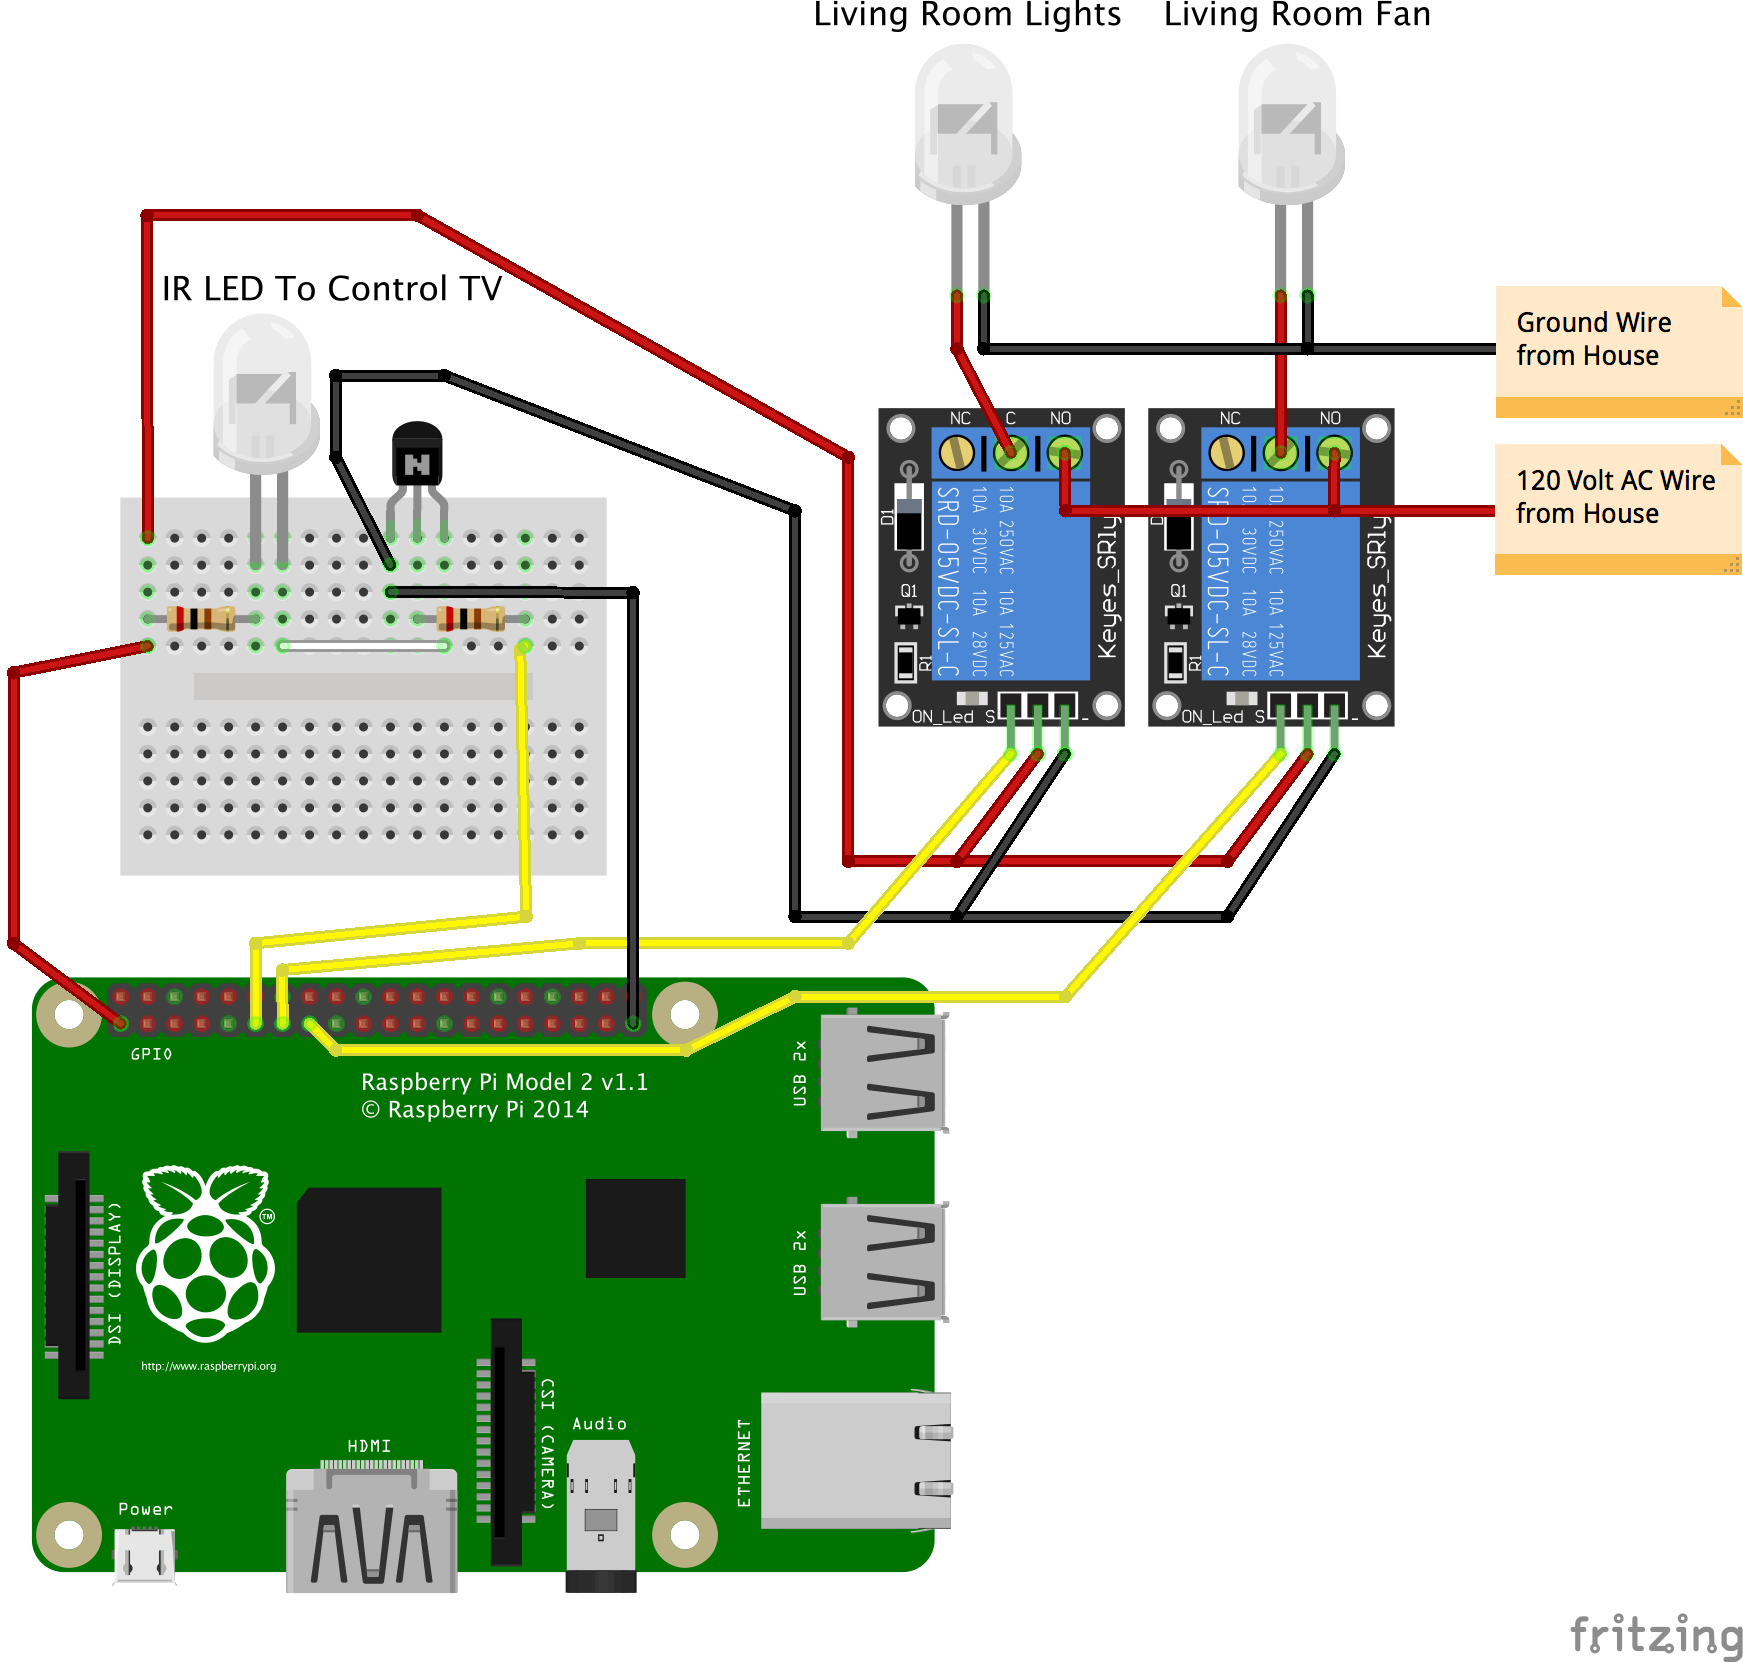
Connect the circuit as shown in the diagram. I used a JBtek 8 Channel DC 5V Relay Module to connect to my homes AC 120v line and ground.
Alexa Commands
Now the following commands can be spoken to Alexa to control you living room.