Control Led by Pushbutton | Raspberry Pi 3 | Tutorial - 2
by Tatsu Technologies in Circuits > Raspberry Pi
5083 Views, 3 Favorites, 0 Comments
Control Led by Pushbutton | Raspberry Pi 3 | Tutorial - 2
Requirements:
- Raspberry Pi
- Led
- Pushbutton
- BreadBoard or T-Cobbler
- Jumper Wires
Setup
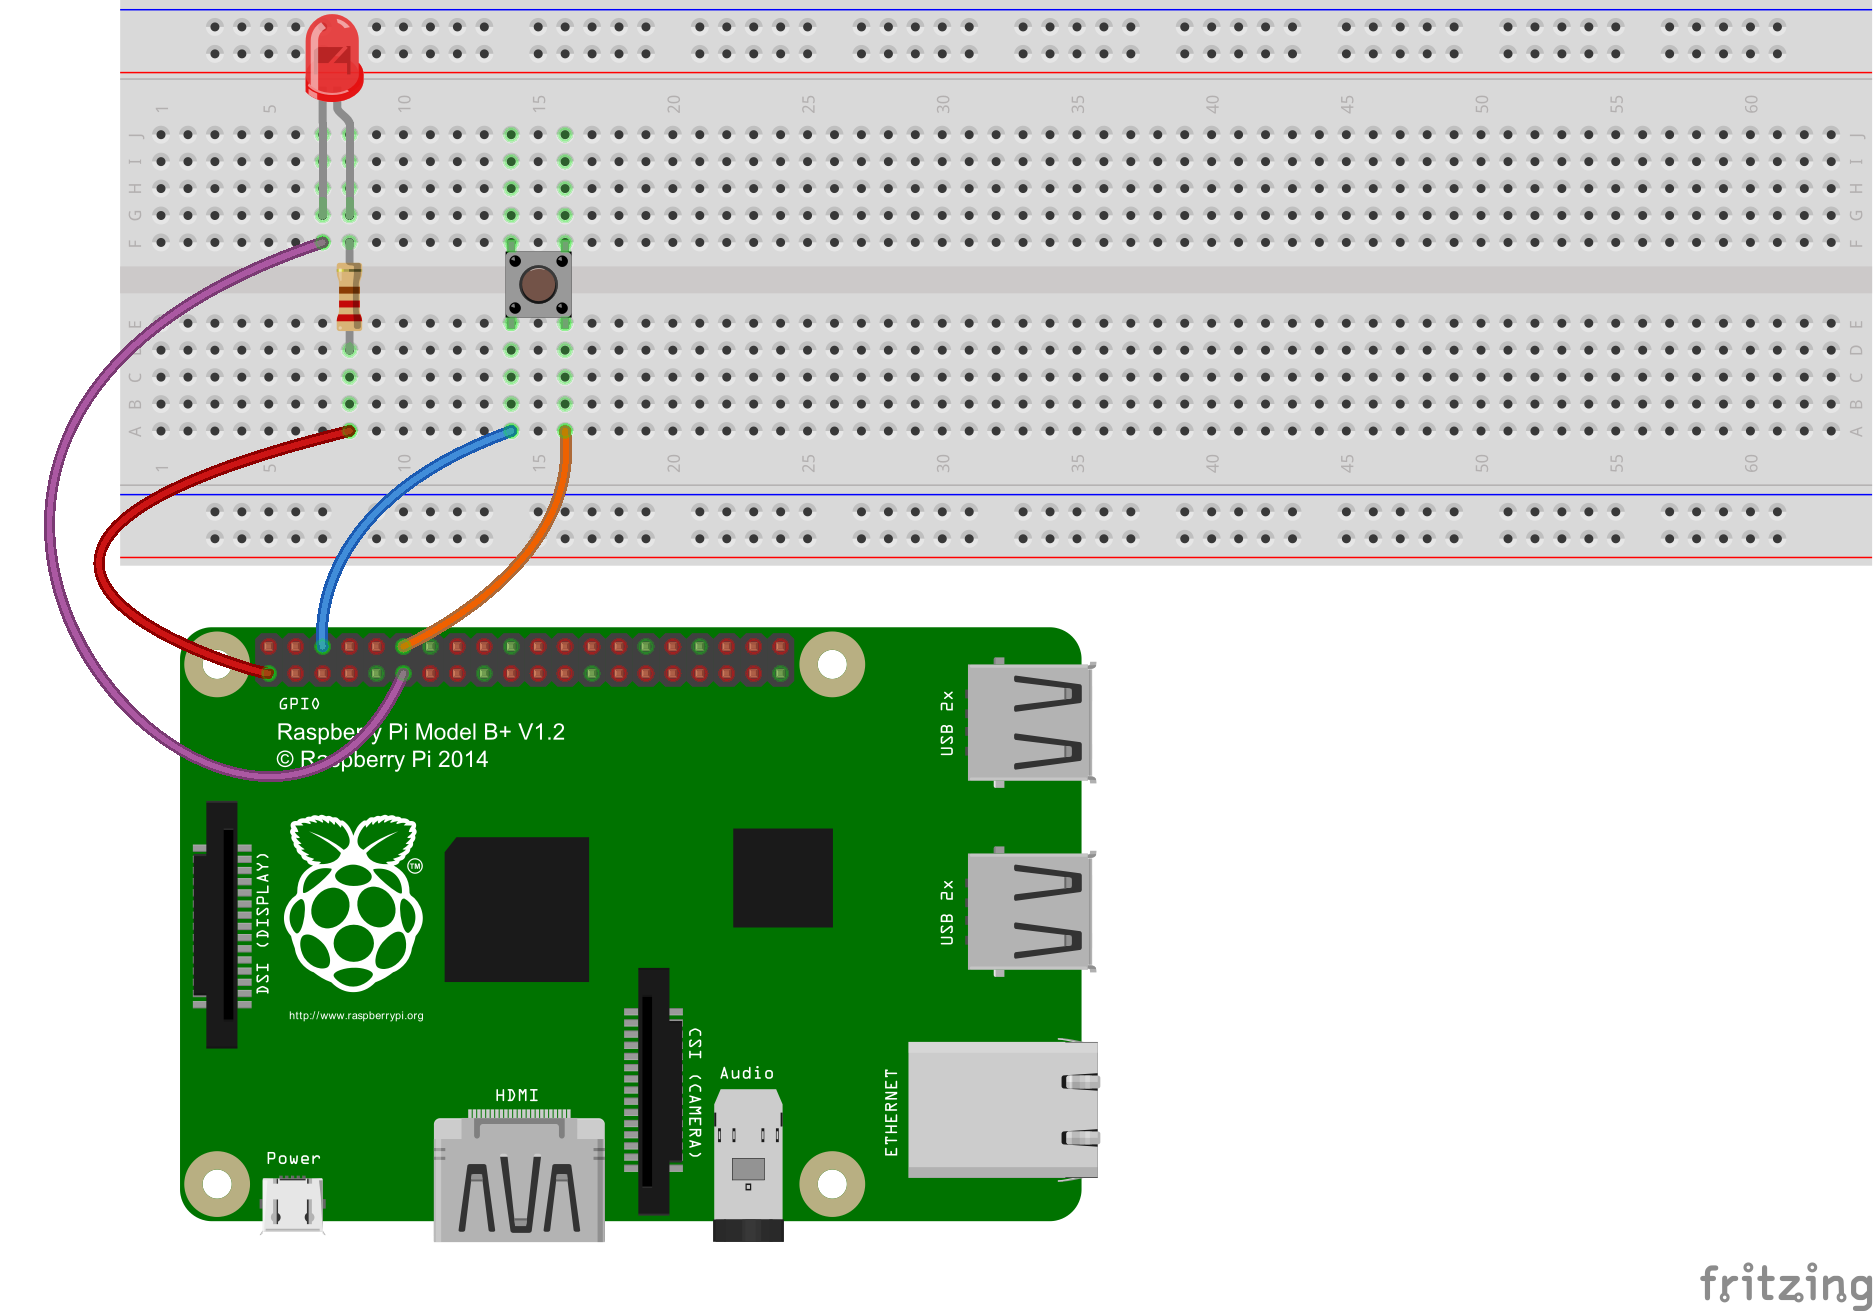
Connect led and Pushbutton as per Video or Photo and write the code and change it according to your connection on breadboard.
Install Libraries for GPIO
$ sudo apt-get update
$ sudo apt-get install python-rpi.gpio python3-rpi.gpio
Python Program
import RPi.GPIO as GPIO
import time
GPIO.setmode(GPIO.BCM)
GPIO.setwarnings(False)
GPIO.setup(18,GPIO.OUT)
print "LED on"
GPIO.output(18,GPIO.HIGH)
time.sleep(1)
print "LED off"
GPIO.output(18,GPIO.LOW)
Understand Program Lines
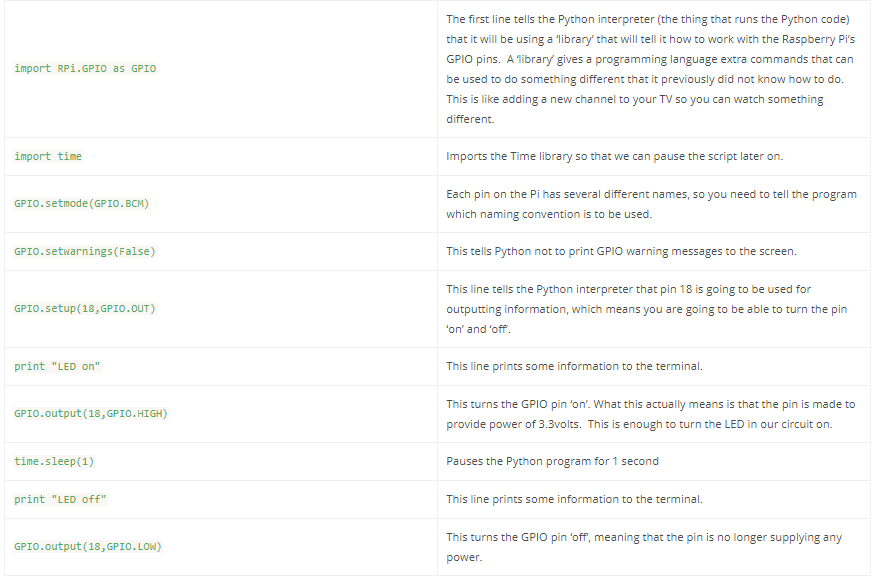
Read this all code line instruction for better understanding