Control Daikin AC From Anywhere With Beautiful UI and Losant
by raphael.michaels712 in Circuits > Microcontrollers
5147 Views, 29 Favorites, 0 Comments
Control Daikin AC From Anywhere With Beautiful UI and Losant
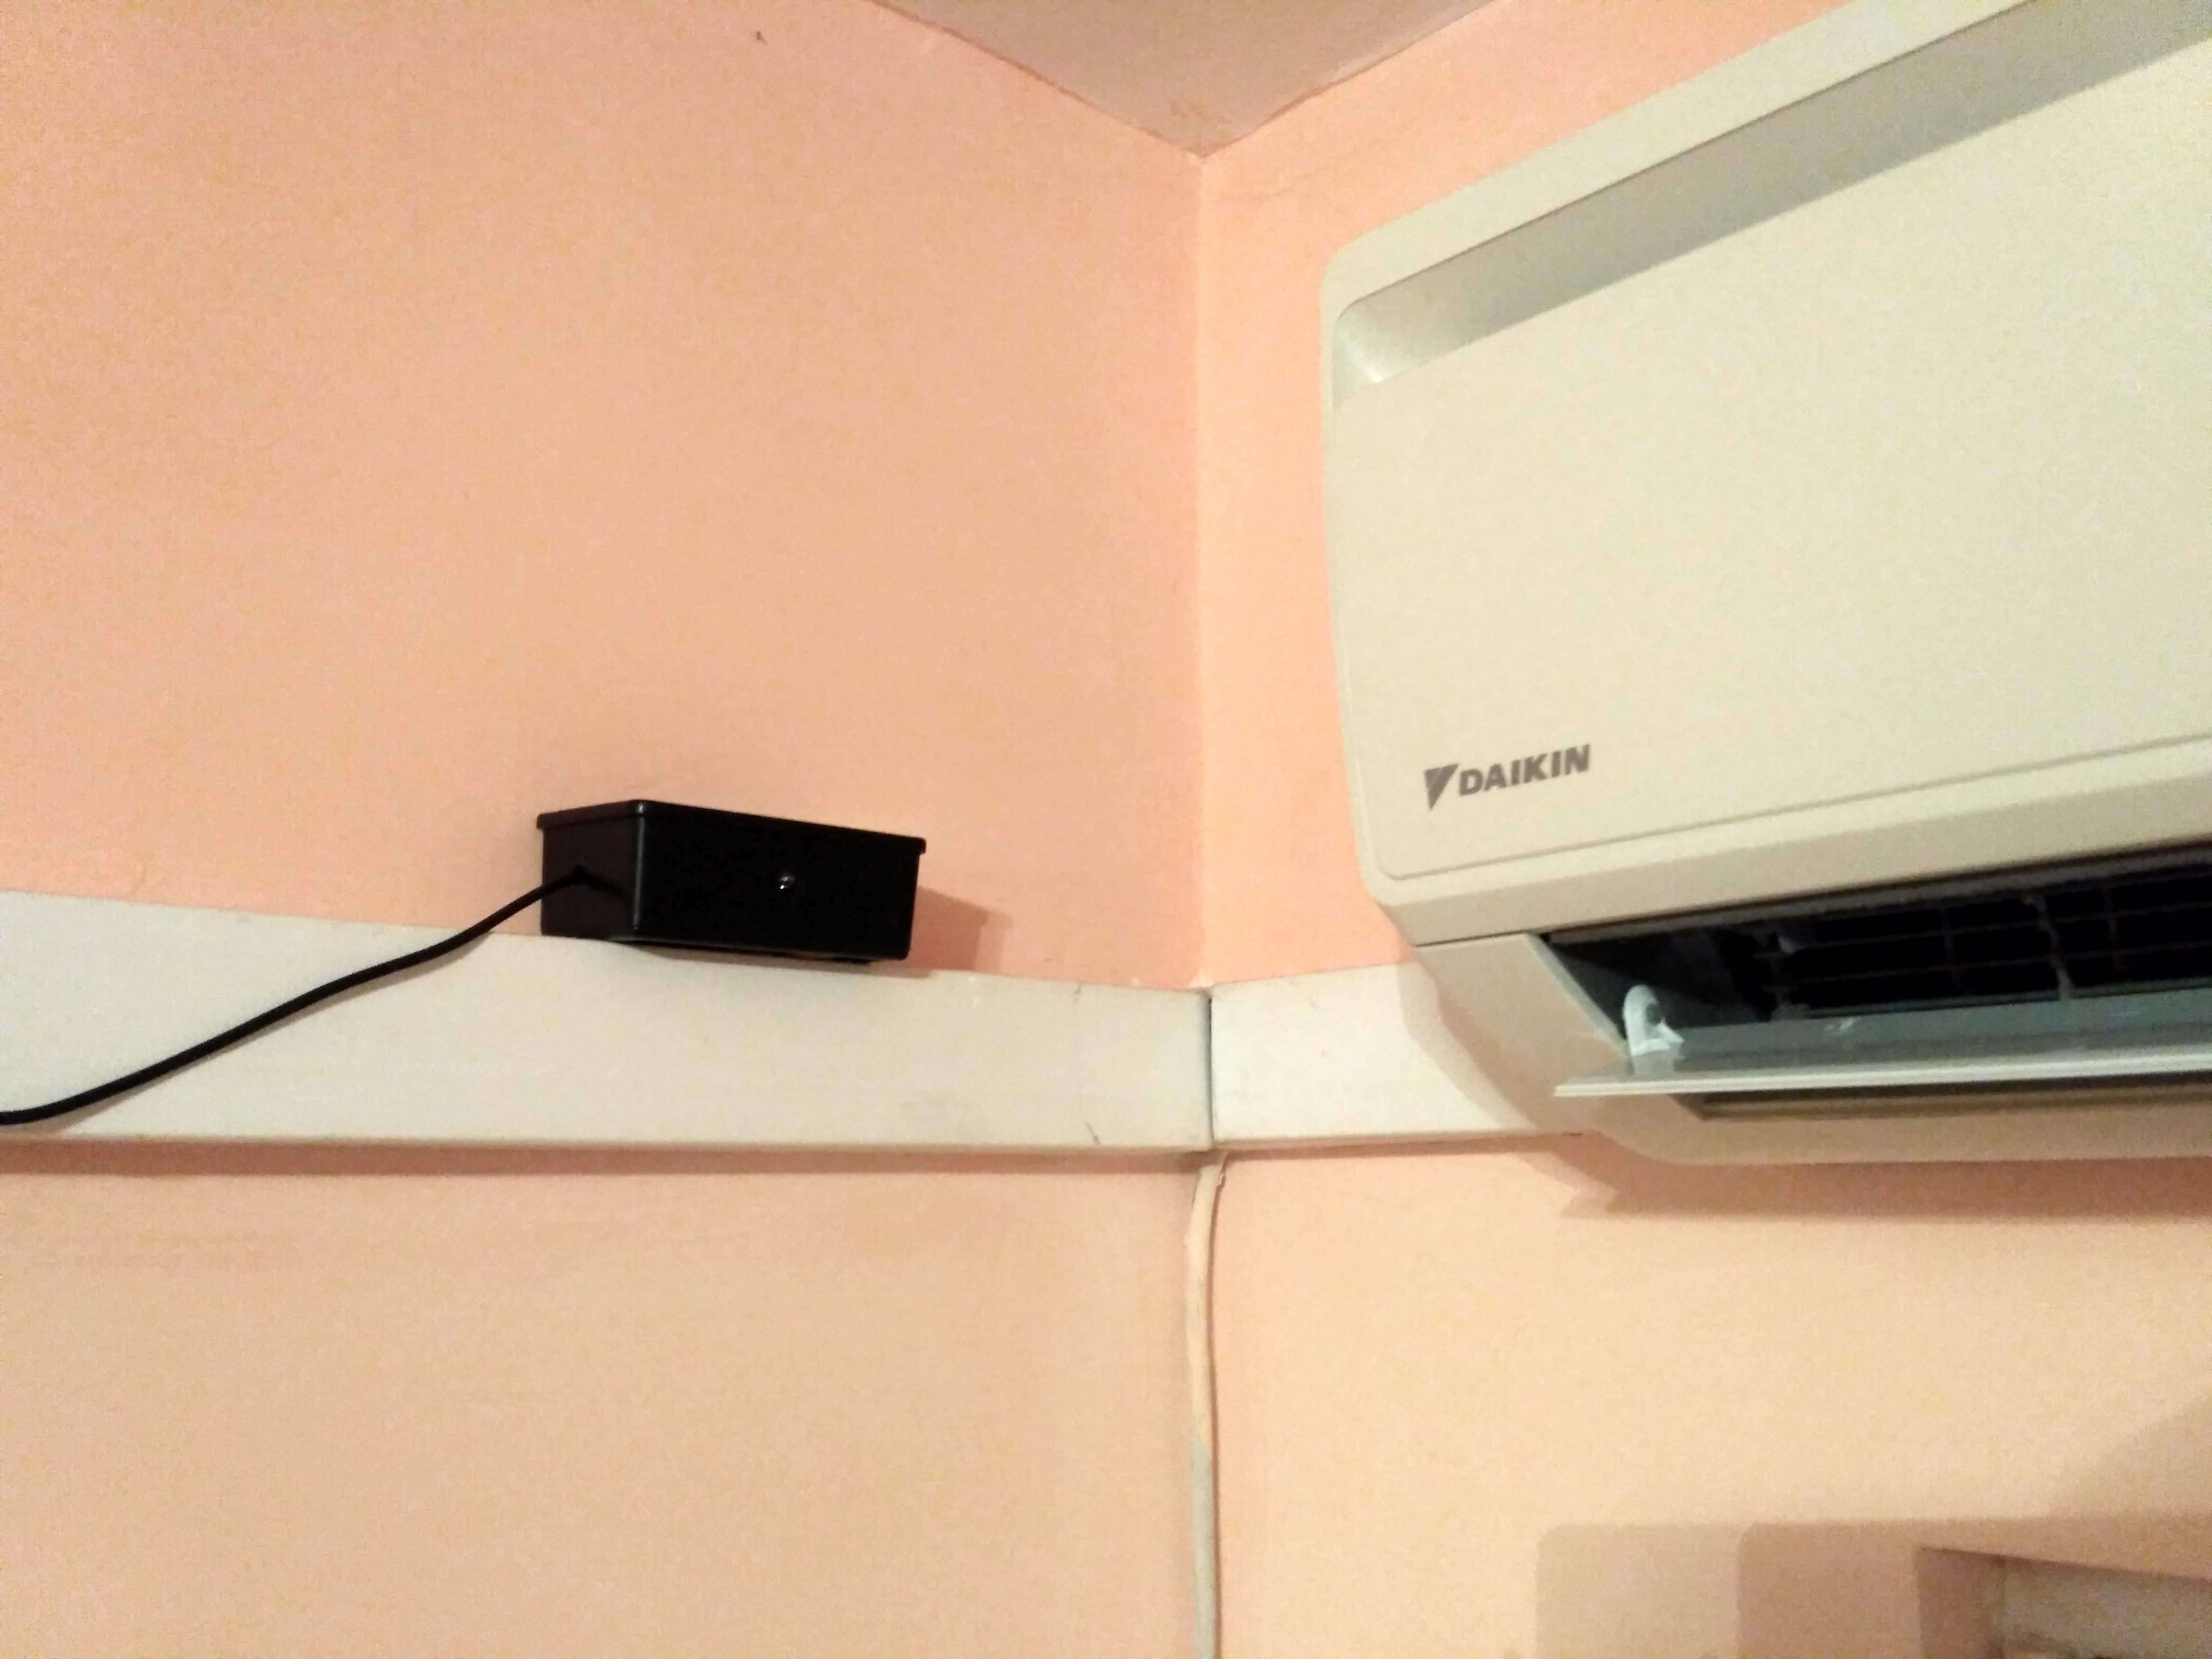
Hello,
In this instructable we will learn how to control Daikin air-conditioner from any point in the world using Losant IoT Enterprise Platform and their amazing UI dashboard
The ESP8266 is a low-cost Wi-Fi chip with full TCP/IP stack and MCU (microcontroller unit)
How It Works
The microcontroller (ESP8266) connects Losant IoT platform and waits for input (user changes something in the dashboard) then the IR sensor sends information to the Daikin air-conditioner
Make sure the IR transmitter is as close as possible to the AC
Required Parts and Components
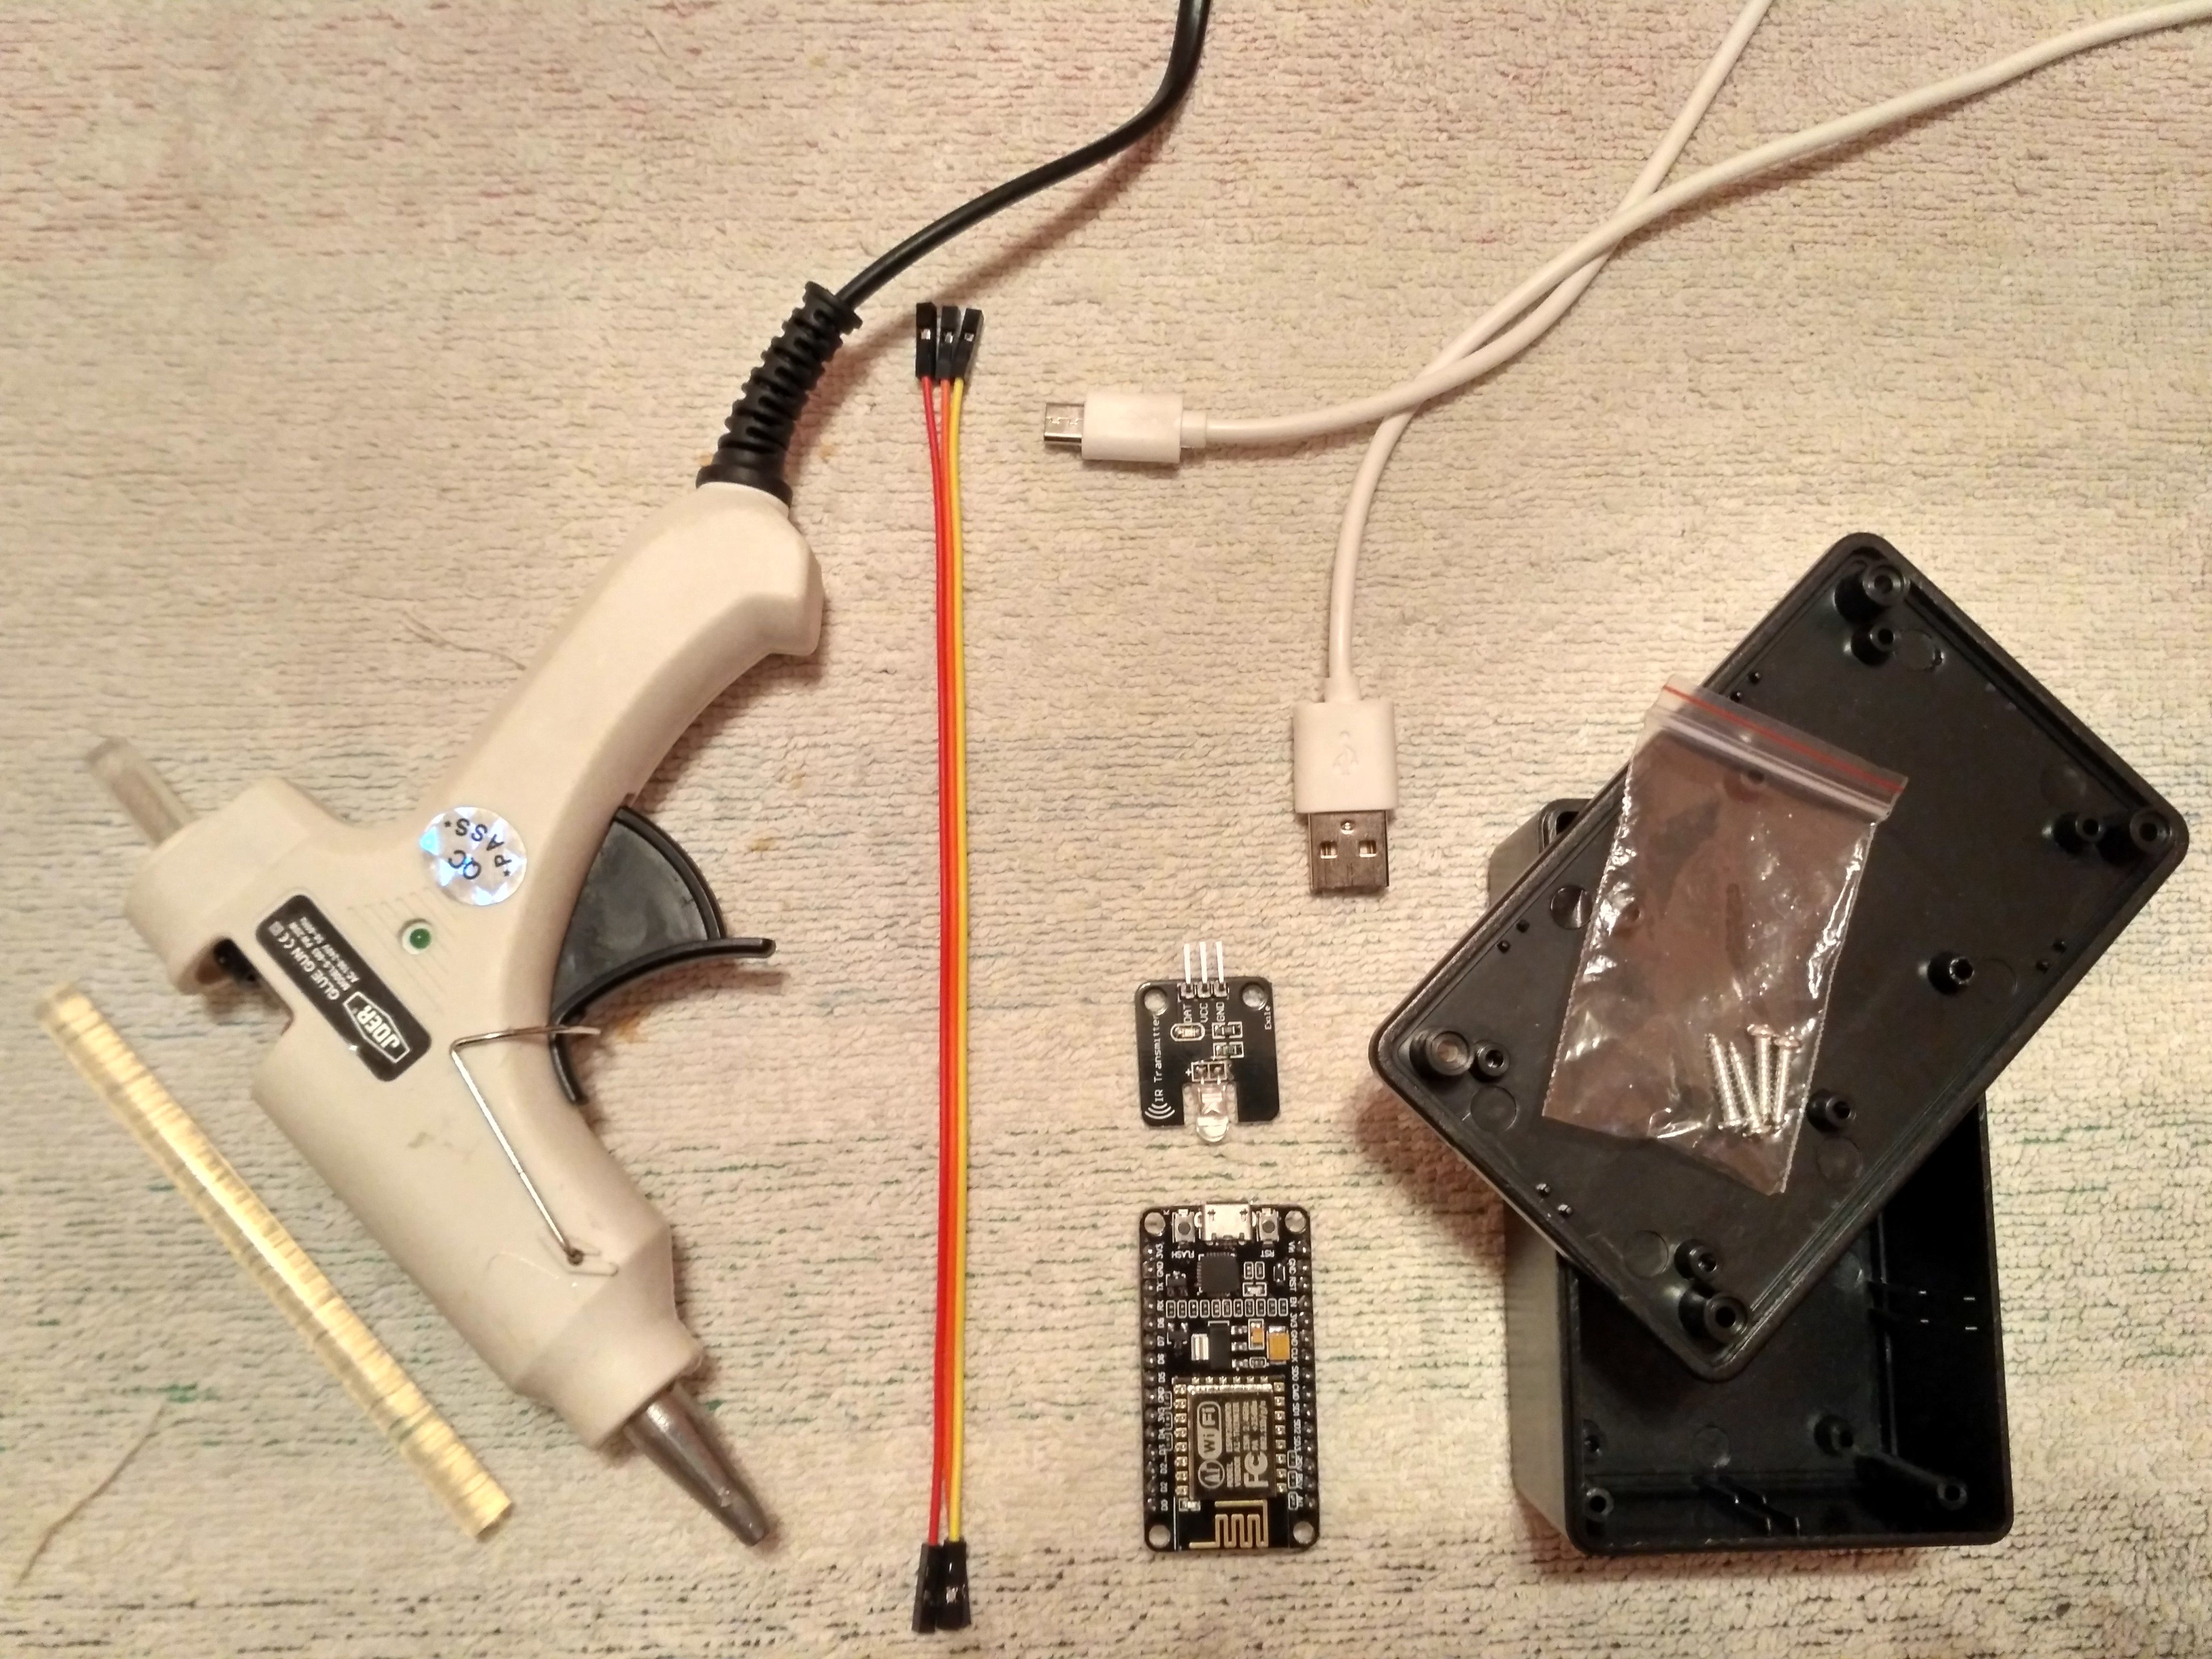
Assembling the B0X

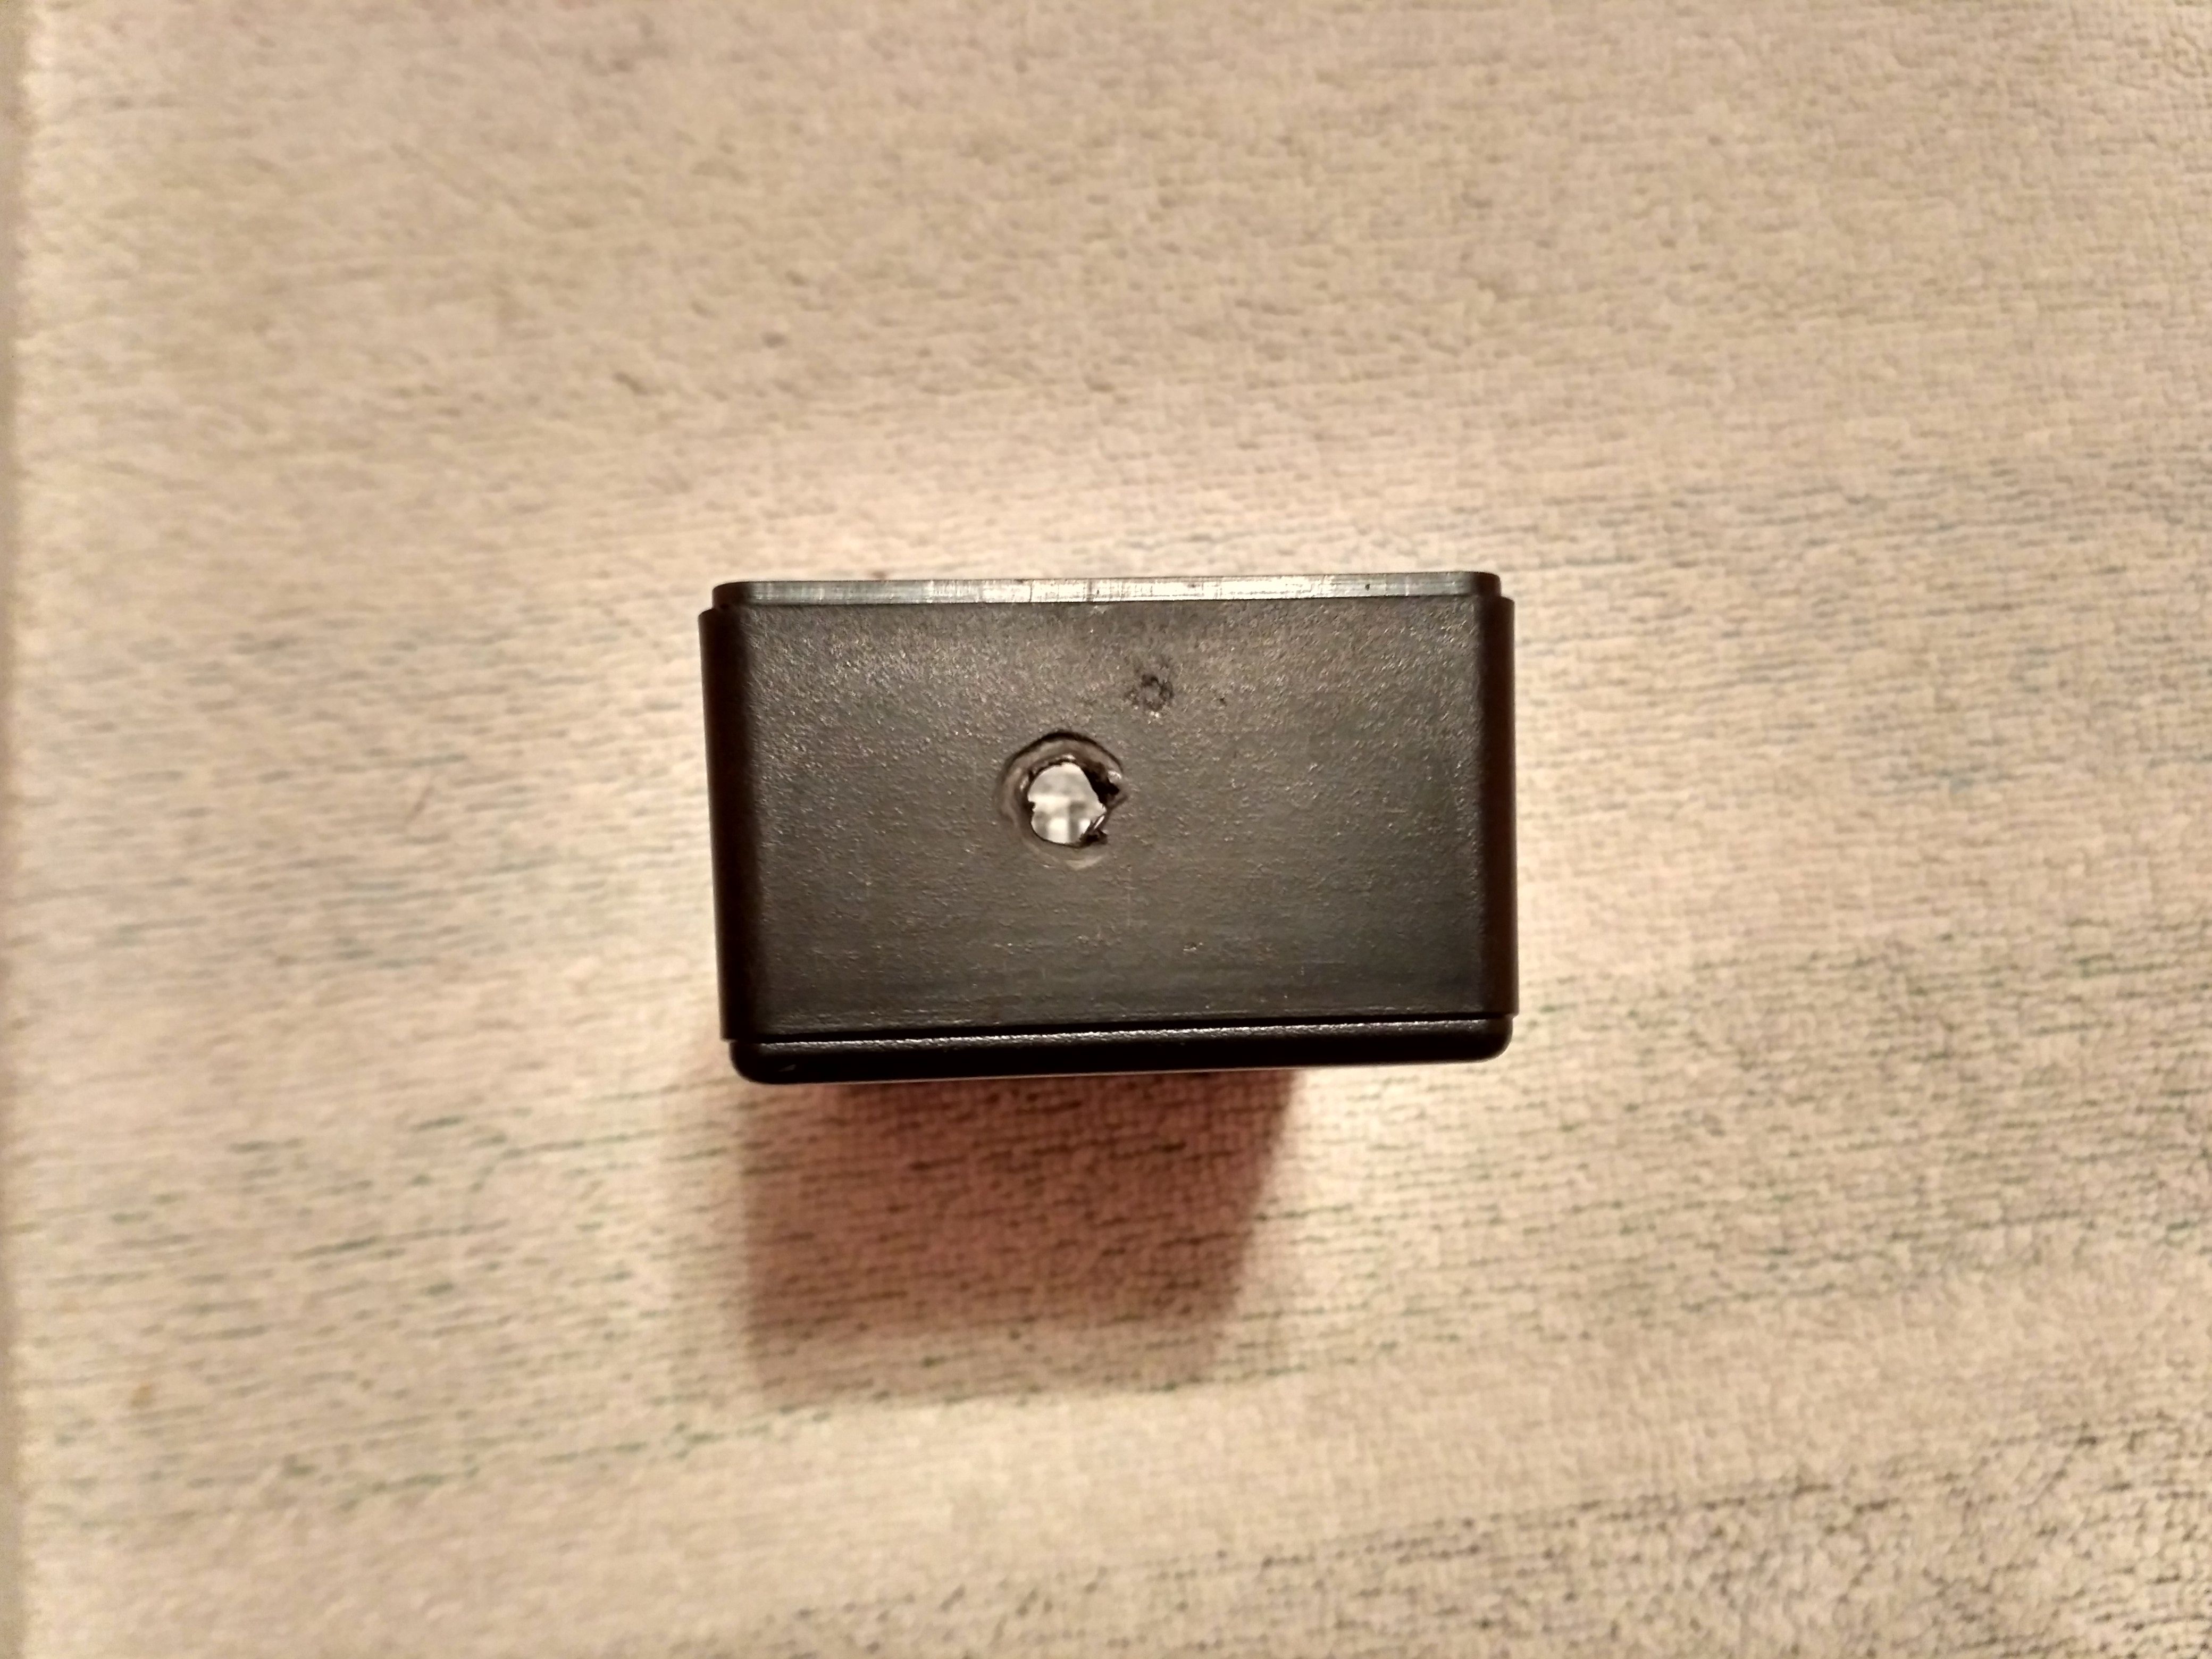
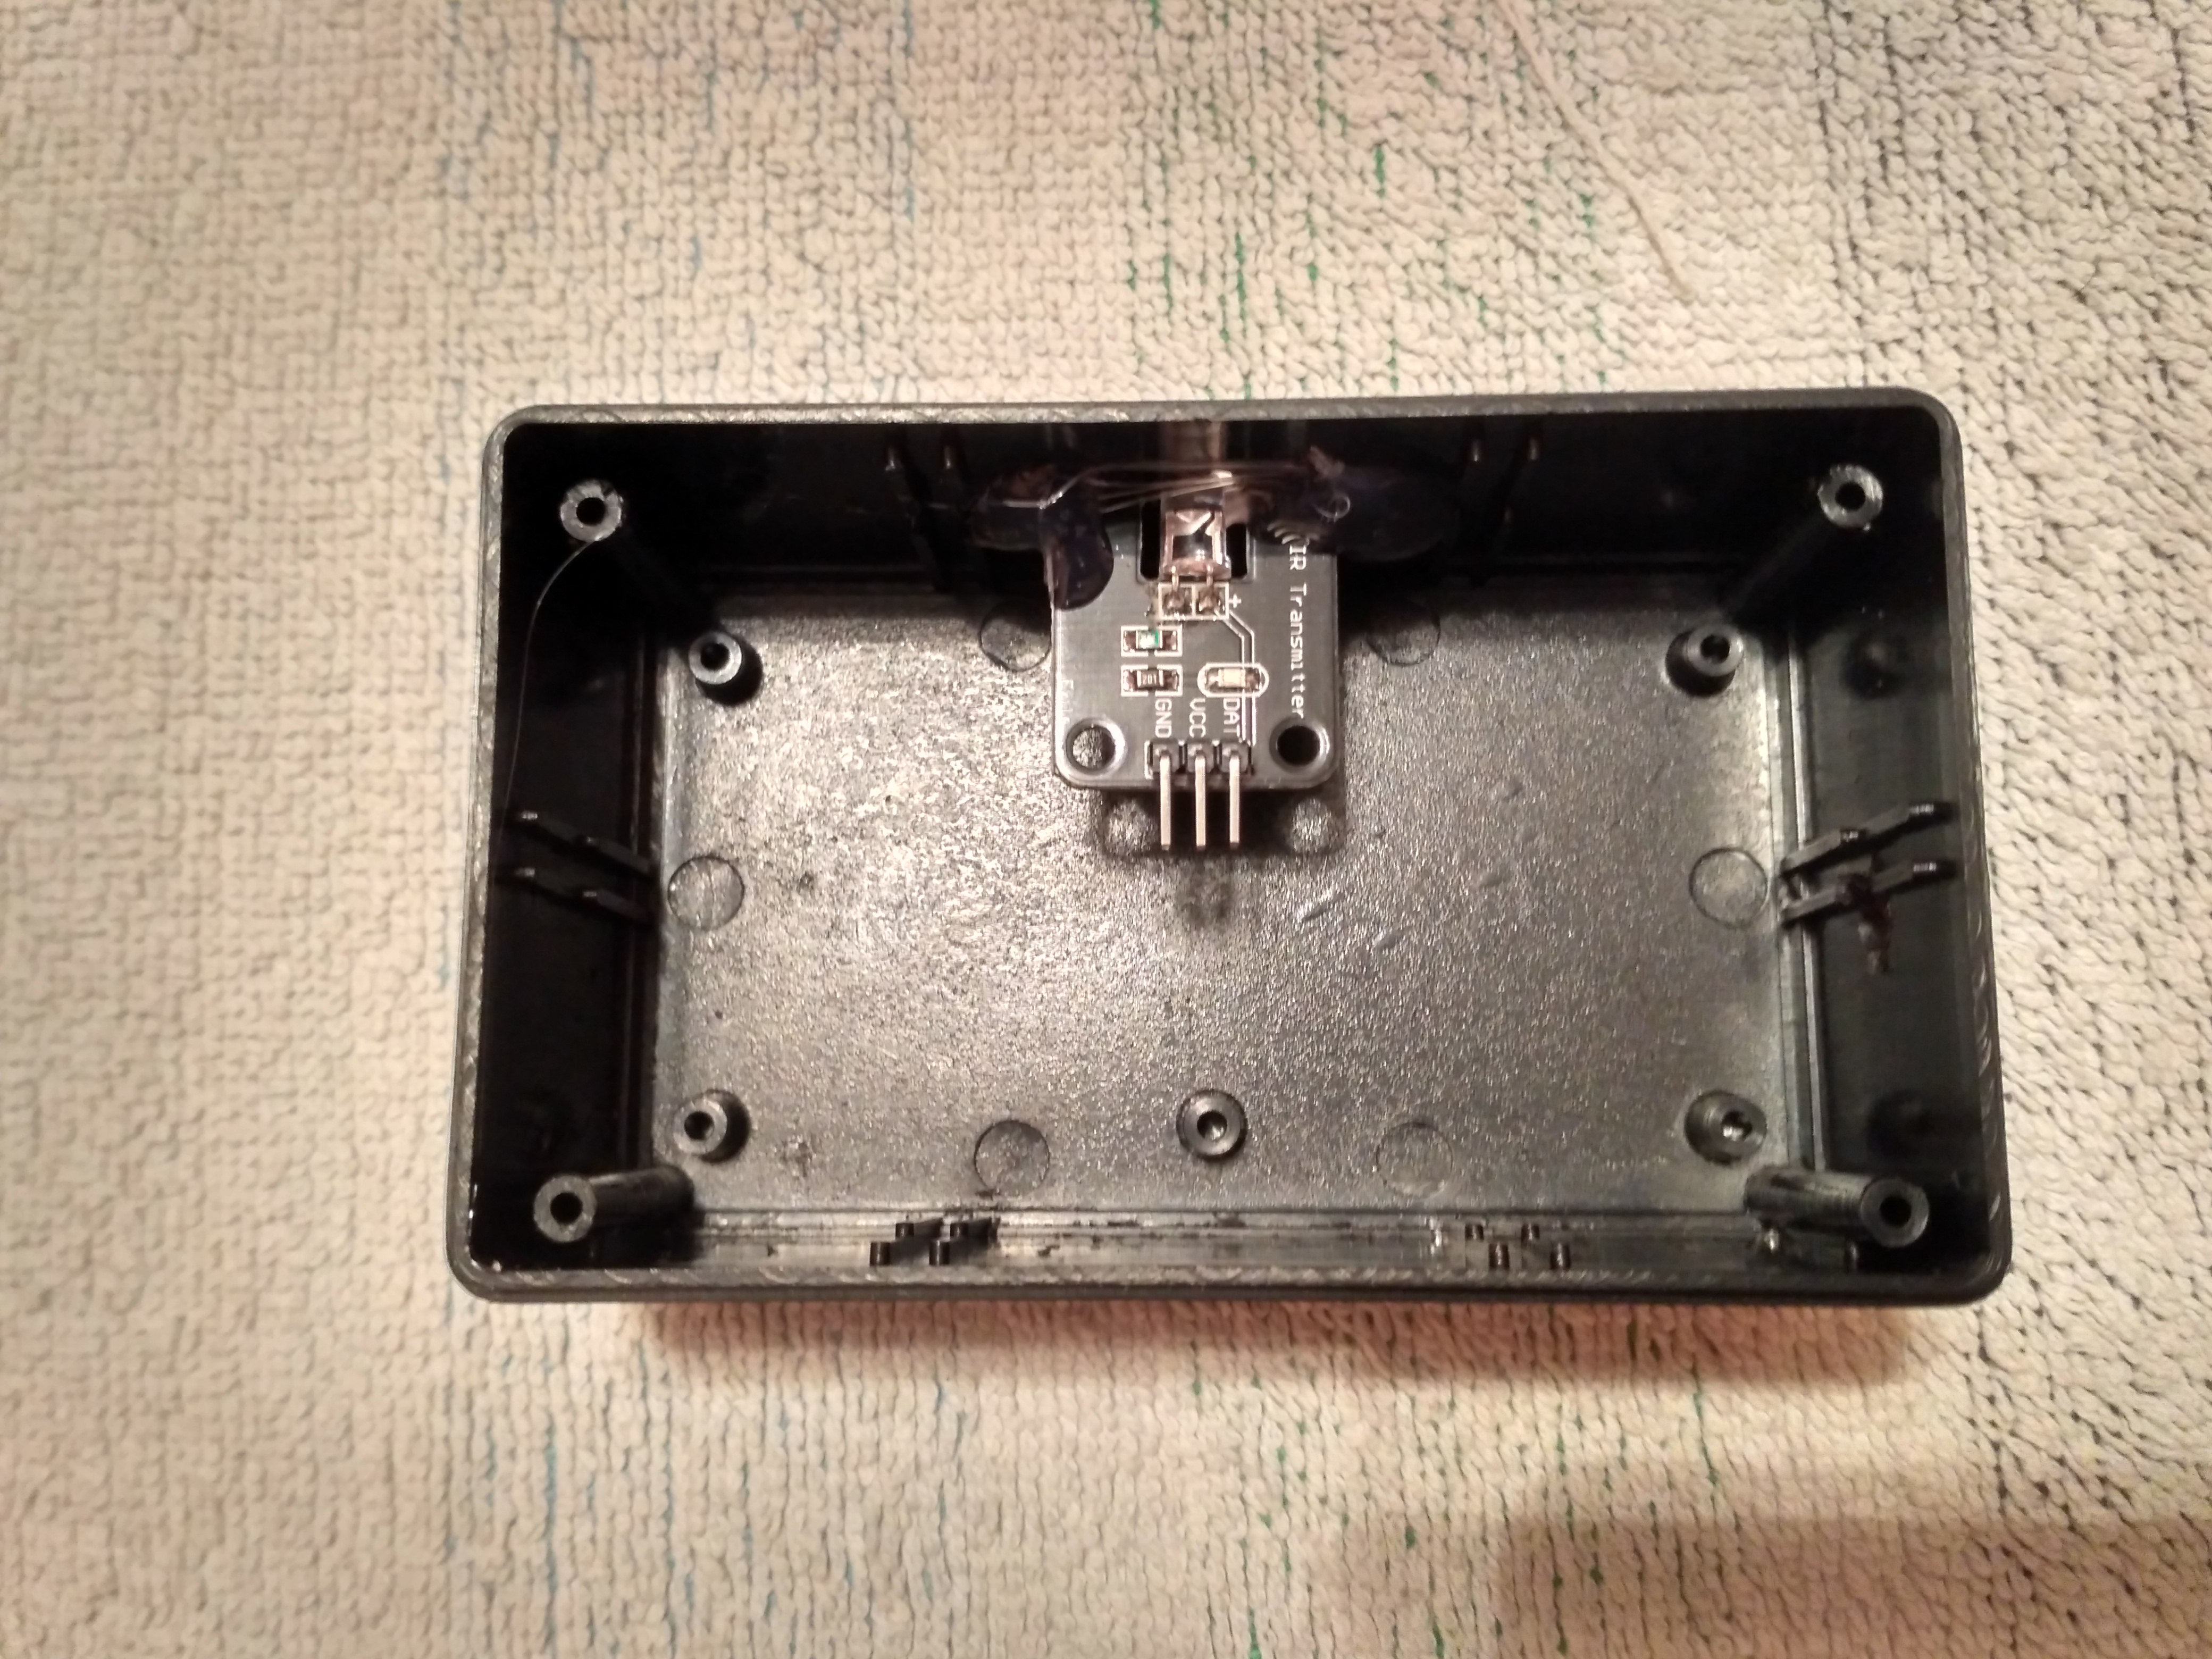
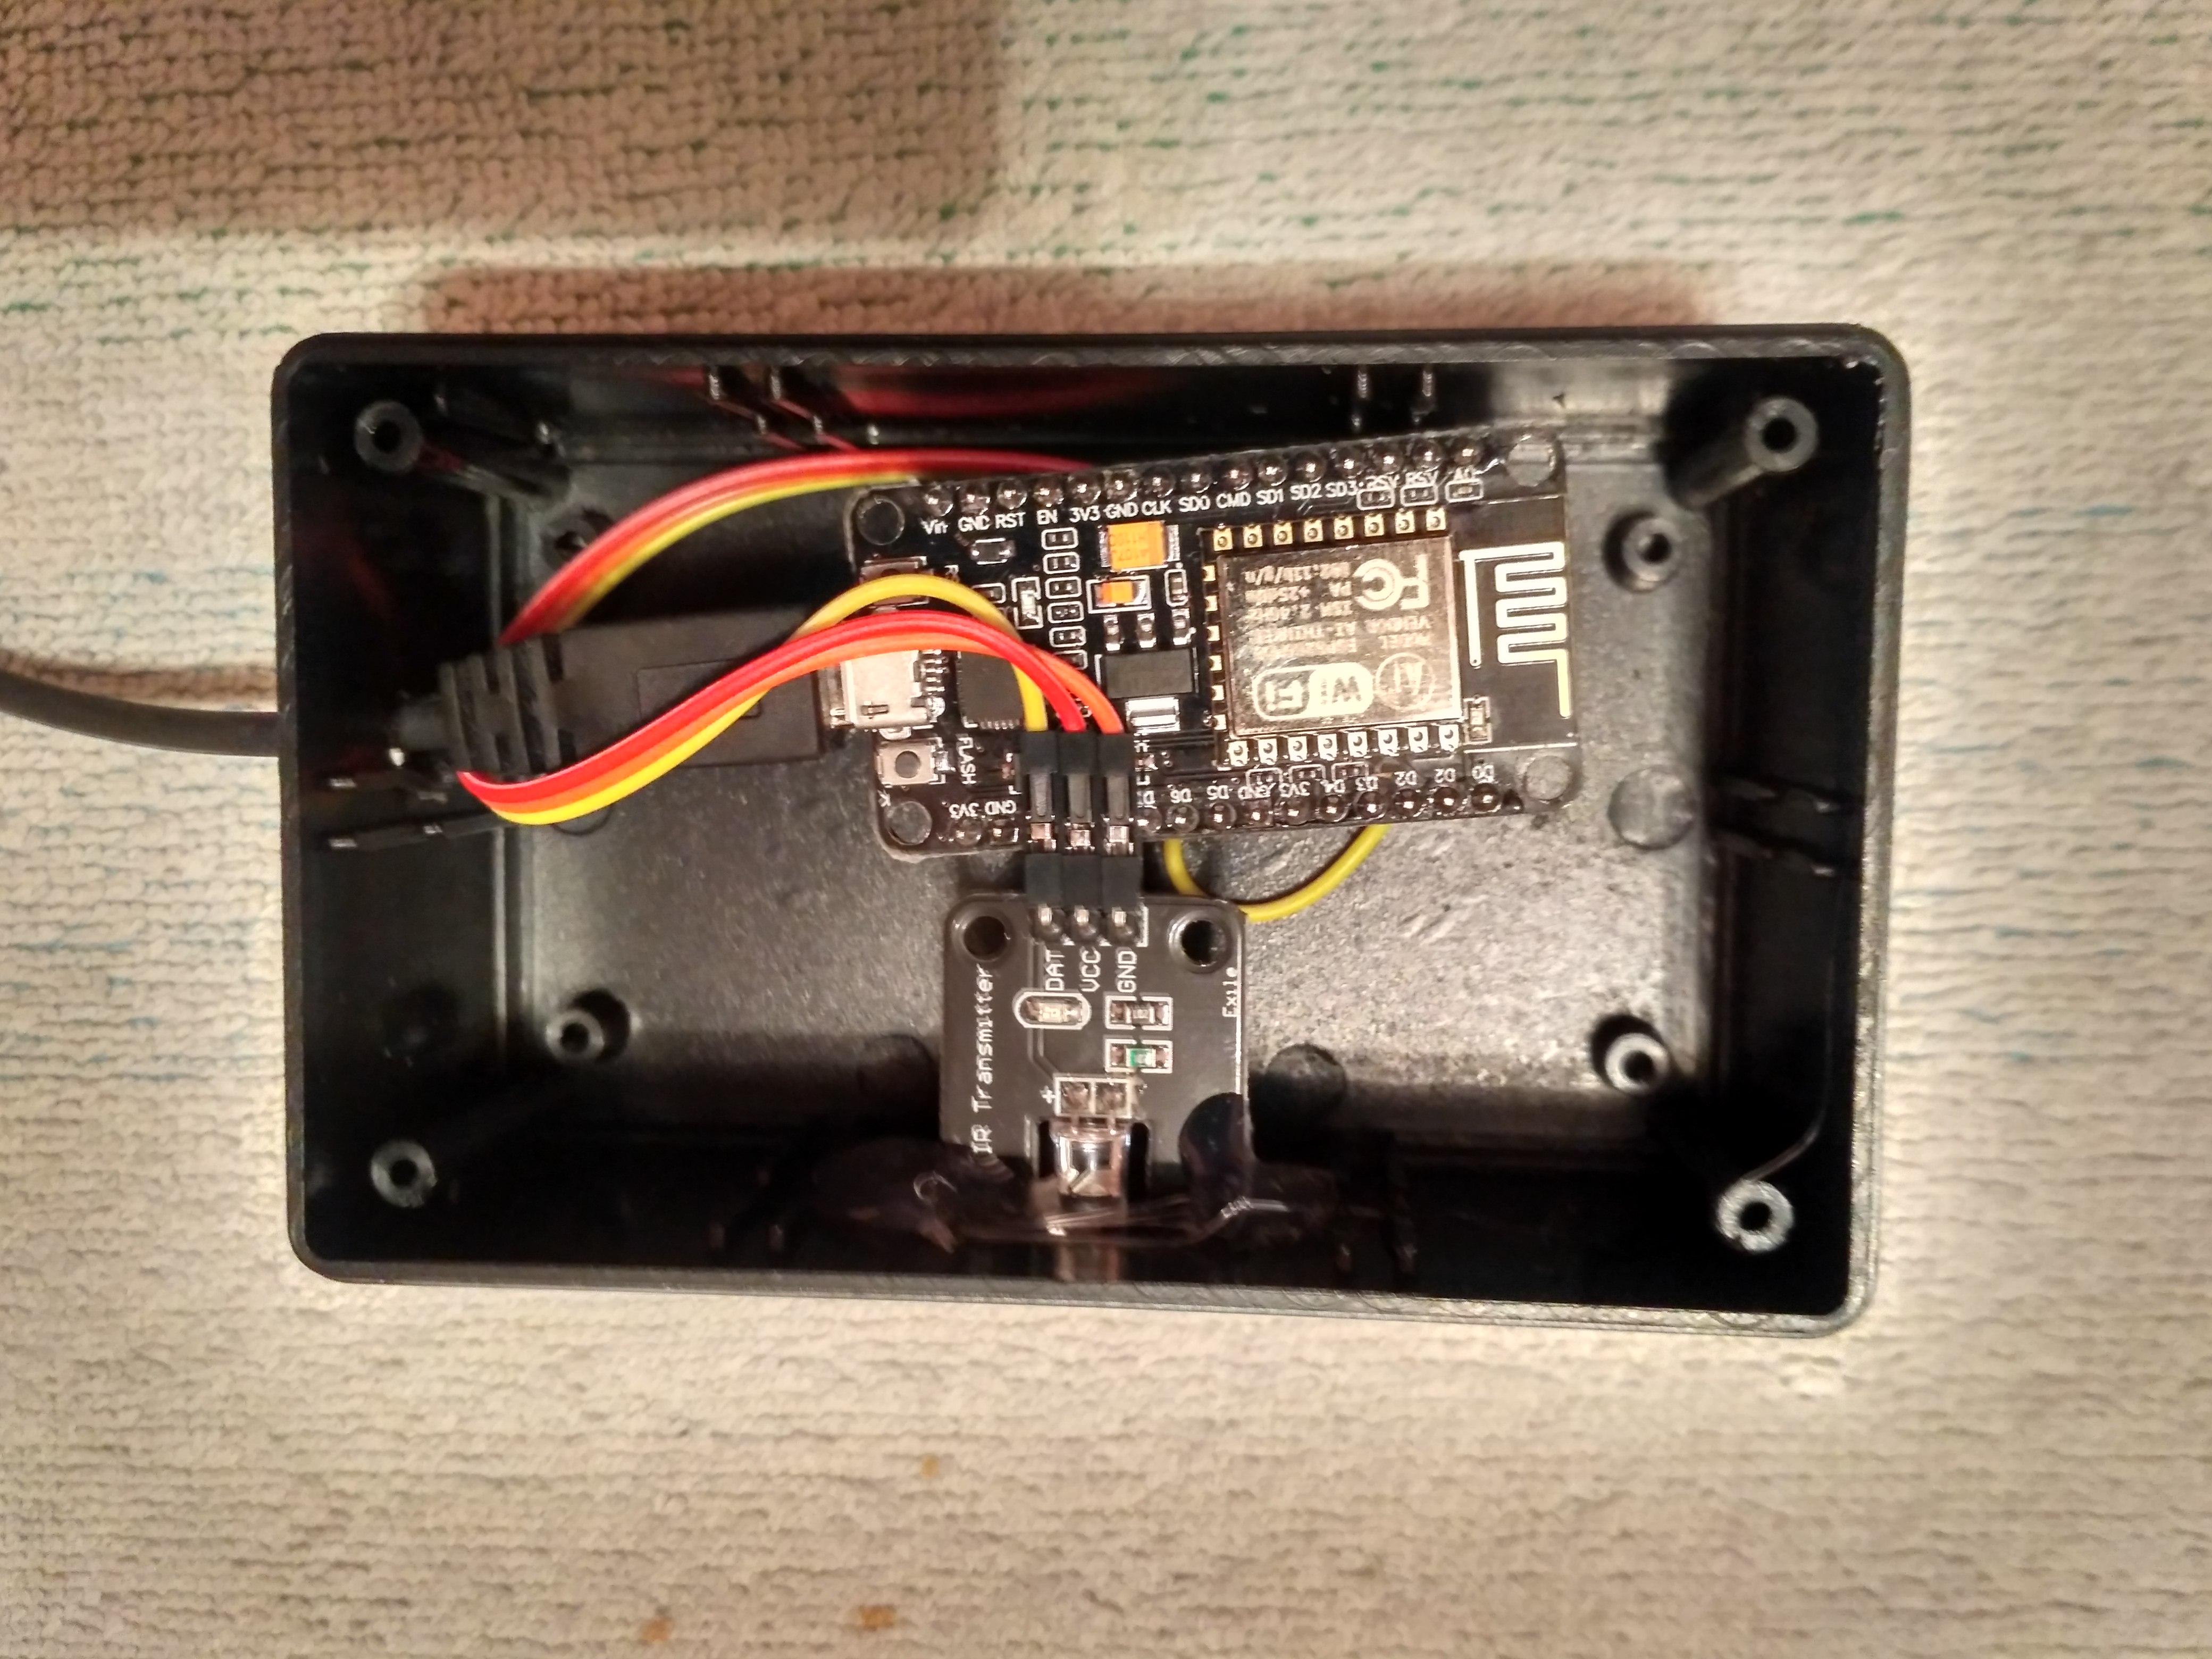
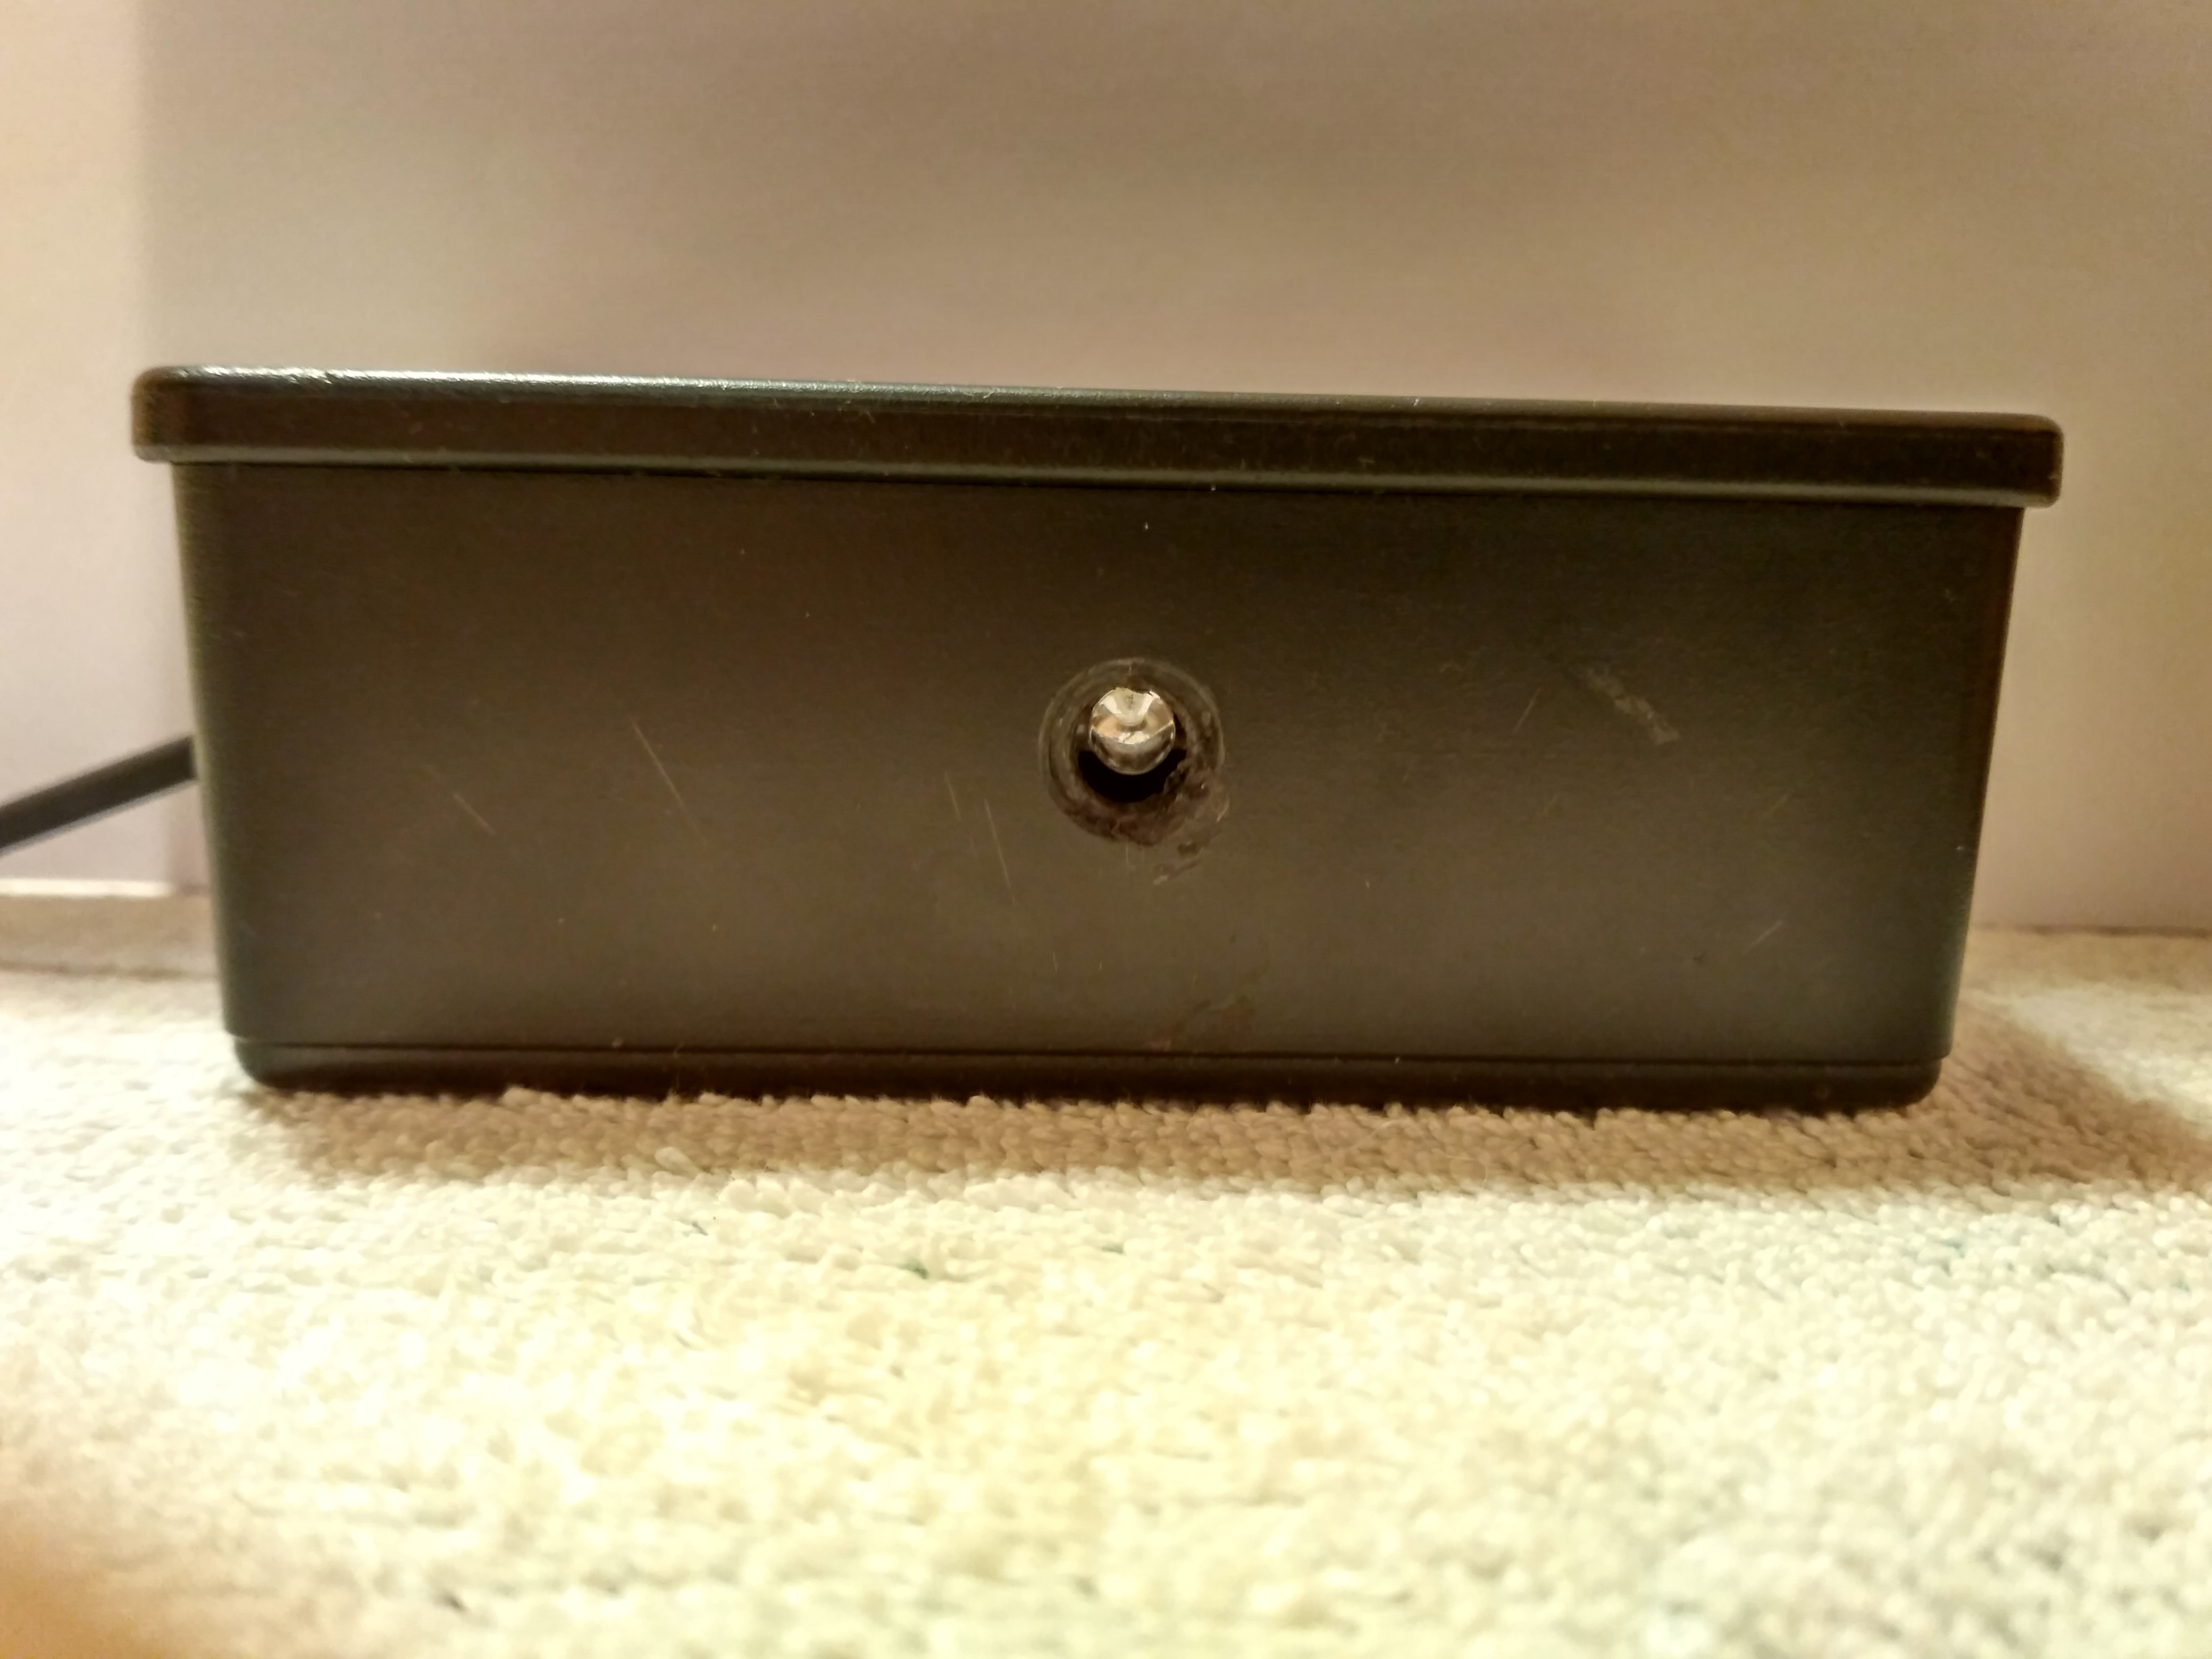
- Drill 2 holes with screwdriver or drill or whatever is easy for you
- Hot glue the transmitter to one of the holes (the one which will point to the AC)
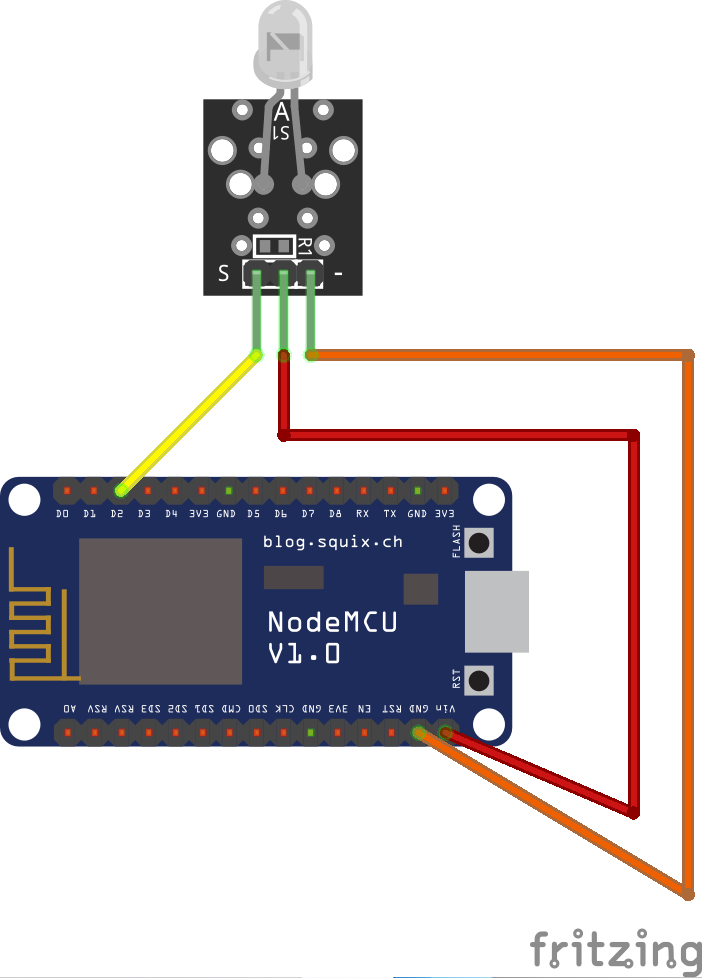
- Connect ESP8266 to the IR Transmitter
- Connect the USB cable to the ESP8266
- Run the USB cable through the other hole
- Close the case with 4 screws
- You are done :)
Wiring the IR Transmitter to the ESP8266
IR Transmitter - EPS8266
- (minus, GND) - GND
+ (plus, VCC) - VIN
S (DAT) - D2
Setting Up the Device in Losant
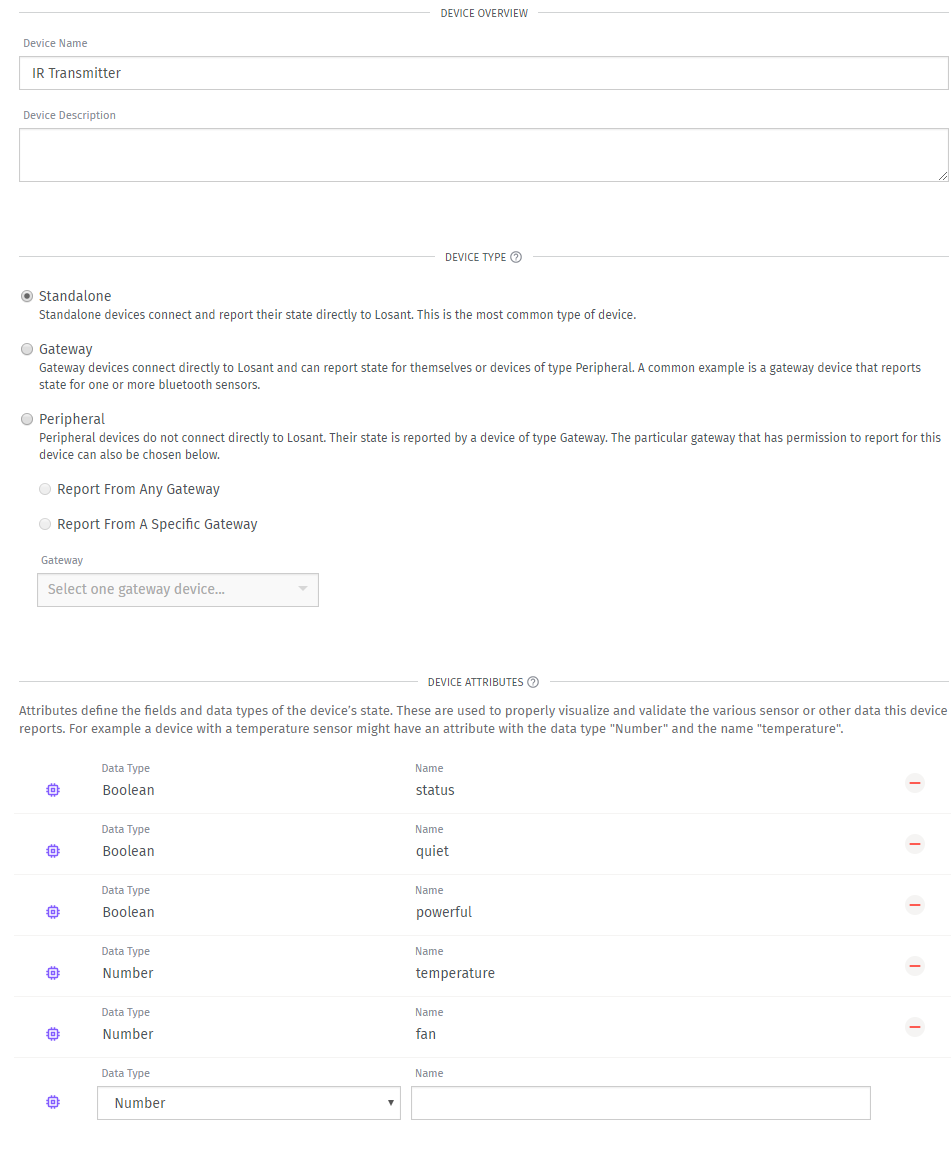
- Create a device called IR Transmitter
- Add 5 device attributes
- Data type - Boolean with Name status
- Data type - Boolean with Name quiet
- Data type - Boolean with Name powerful
- Data type - Number with Name temperature
- Data type - Number with Name fan
Making the Dashboard
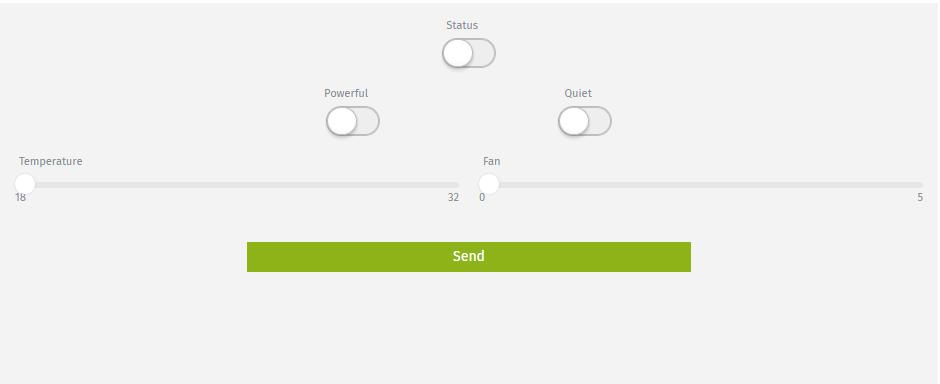
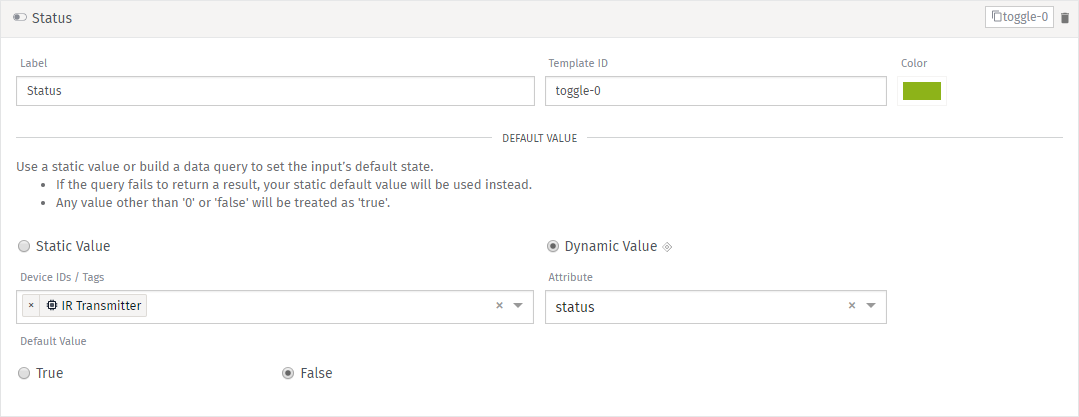
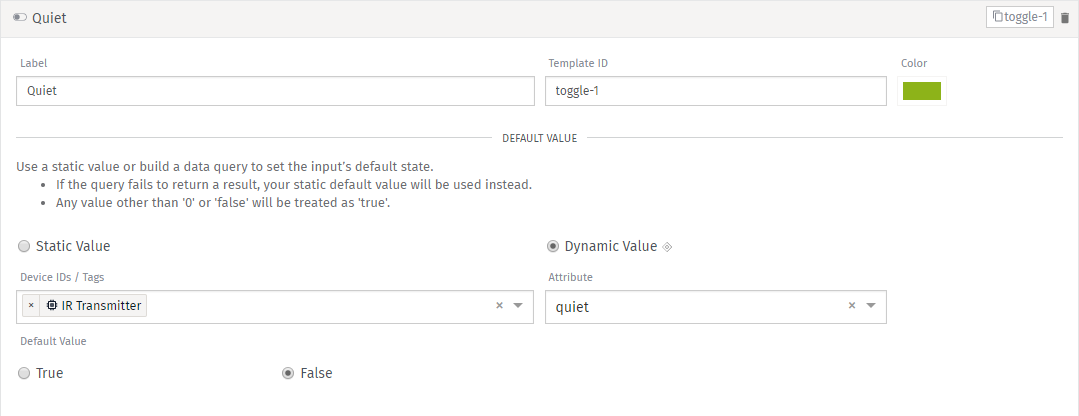
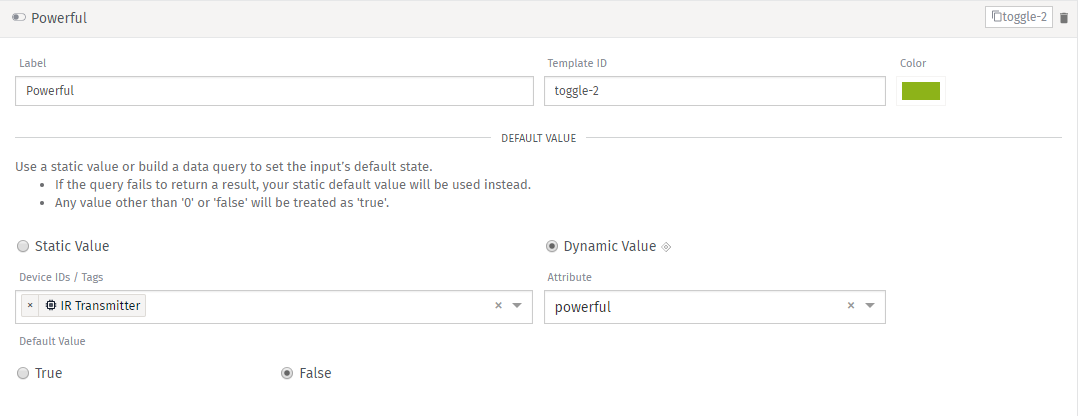
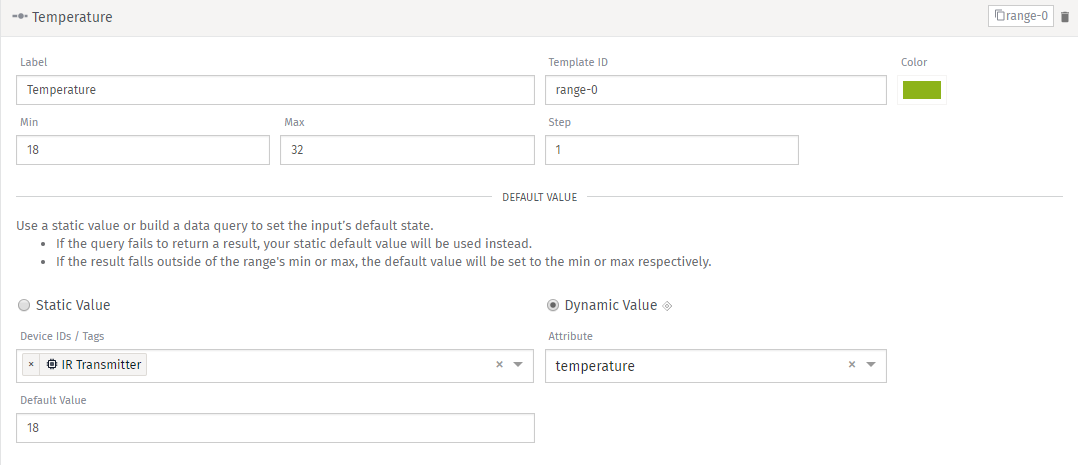
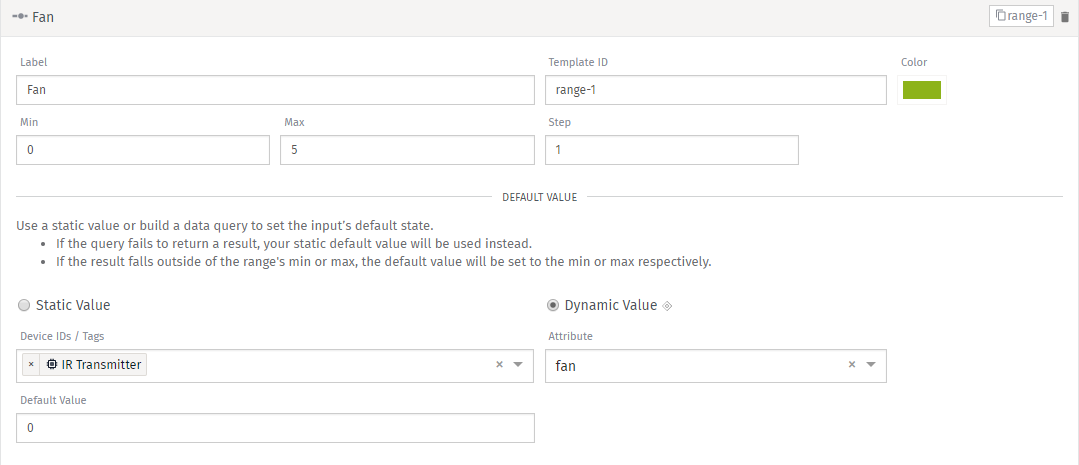
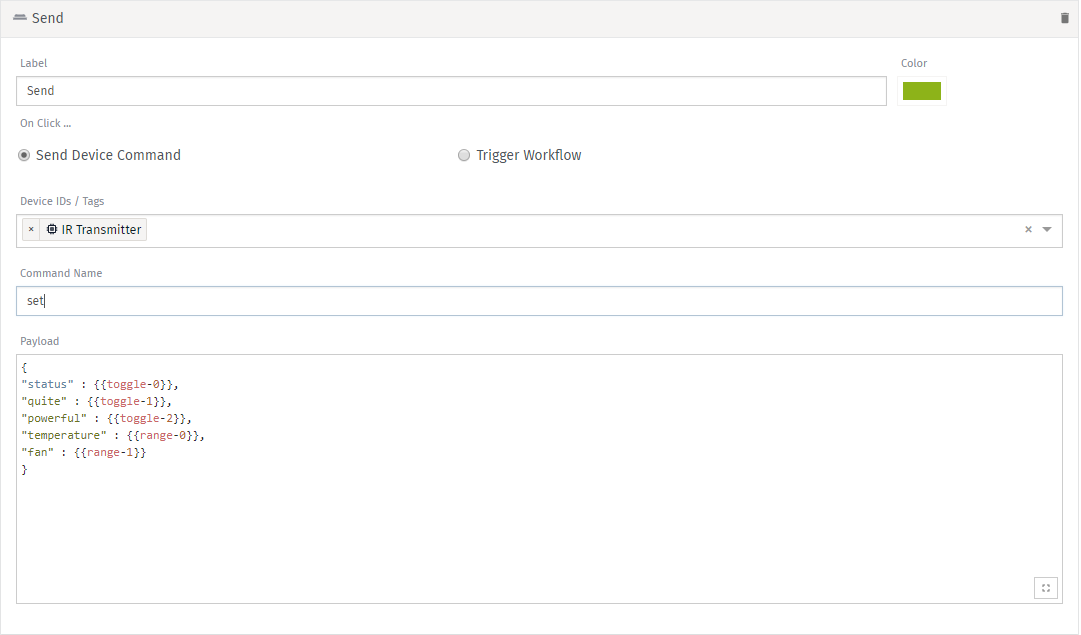
Create a dashboard called AC DASHBOARD and Input Controls Block
Add 6 Controls
- Toggle Input with Label = Status, Template-ID = toggle-0, Dynamic Value, Device IDs/Tags = IR Transmitter, Attribute = status, Default value = false
Toggle Input with Label = Quiet, Template-ID = toggle-1, Dynamic Value, Device IDs/Tags = IR Transmitter, Attribute = quiet, Default value = false
Toggle Input with Label = Powerful, Template-ID = toggle-0, Dynamic Value, Device IDs/Tags = IR Transmitter, Attribute = powerful, Default value = false
Range Input with Label = Temperature, Template-ID = range-0, Min = 18, Max = 32, Device IDs/Tags = IR Transmitter, Attribute = temperature, Default value = 18
Range Input with Label = Fan, Template-ID = range-1, Min = 0, Max = 5, Device IDs/Tags = IR Transmitter, Attribute = fan, Default value = 0
Button trigger with Label = Send, On Click = Send Device Command, Device IDs/Tags = IR Transmitter, Command name = command, Payload = check below
Payload:
{
"status" : {{toggle-0}},
"quite" : {{toggle-1}},
"powerful" : {{toggle-2}},
"temperature" : {{range-0}},
"fan" : {{range-1}}
}
Upload the Code to the ESP8266
You need to add the Losant library
Upload it to the ESP8266
Congratulations you can now control your AC from anywhere
#include <ESP8266WiFi.h>
#include <IRremoteESP826.h> #include <IRsend.h> #include <Losant.h> #include <ir_Daikin.h>const char *WIFI_SSID = "ssid"; const char *WIFI_PASS = "pass";
const char *DEVICE_ID = "device-id"; const char *ACCESS_KEY = "access-key"; const char *ACCESS_SECRET = "access-secret";
WiFiClientSecure wifiClient; IRDaikinESP dakinir(D2);
LosantDevice device(DEVICE_ID);
void handleCommand(LosantCommand *command) { Serial.println(); Serial.print("Command received: "); Serial.println(command->name);
if (strcmp(command->name, "command") == 0) {
JsonObject &payload = *command->payload; payload.printTo(Serial); char json[400];
StaticJsonBuffer<200> jsonBuffer;
payload.printTo(json, sizeof(json));
JsonObject &root = jsonBuffer.parseObject(json);
if (!root.success()) { Serial.println("parseObject() failed"); return; }
bool status = root["status"]; bool quiet = root["quite"]; bool powerful = root["powerful"];
int16_t temperature = root["temperature"]; int16_t fan = root["fan"];
if (status) { dakinir.on(); } else { dakinir.off(); } dakinir.setFan(fan); dakinir.setTemp(temperature); dakinir.setQuiet(quiet); dakinir.setPowerful(powerful);
dakinir.send(); } }
void connect() { Serial.print("Connecting to "); Serial.println(WIFI_SSID);
WiFi.begin(WIFI_SSID, WIFI_PASS);
while (WiFi.status() != WL_CONNECTED) { delay(500); Serial.print("."); }
Serial.println(); Serial.println("WiFi connected"); Serial.println("IP address: "); Serial.println(WiFi.localIP());
Serial.println(); Serial.print("Connecting to Losant...");
device.connectSecure(wifiClient, ACCESS_KEY, ACCESS_SECRET);
while (!device.connected()) { delay(500); Serial.print("."); }
dakinir.begin();
Serial.println("Connected successfully"); }
void setup() { Serial.begin(115200);
device.onCommand(&handleCommand);
connect(); }
void loop() { bool toReconnect = false;
if (WiFi.status() != WL_CONNECTED) { Serial.println("Disconnected from WiFi"); toReconnect = true; }
if (!device.connected()) { Serial.println("Disconnected from Losant"); Serial.println(device.mqttClient.state()); toReconnect = true; }
if (toReconnect) { connect(); }
device.loop(); }