Built Your Own Dvorak Keyboard
by MakerConvent in Living > Education
2269 Views, 2 Favorites, 0 Comments
Built Your Own Dvorak Keyboard
In 1936, August Dvorak conducted several studies to design a keyboard layout that would make typing more comfortable and faster. As a result of these studies he obtained the keyboard that is called in his honor "Dvorak Keyboard".
Find a Keyboard
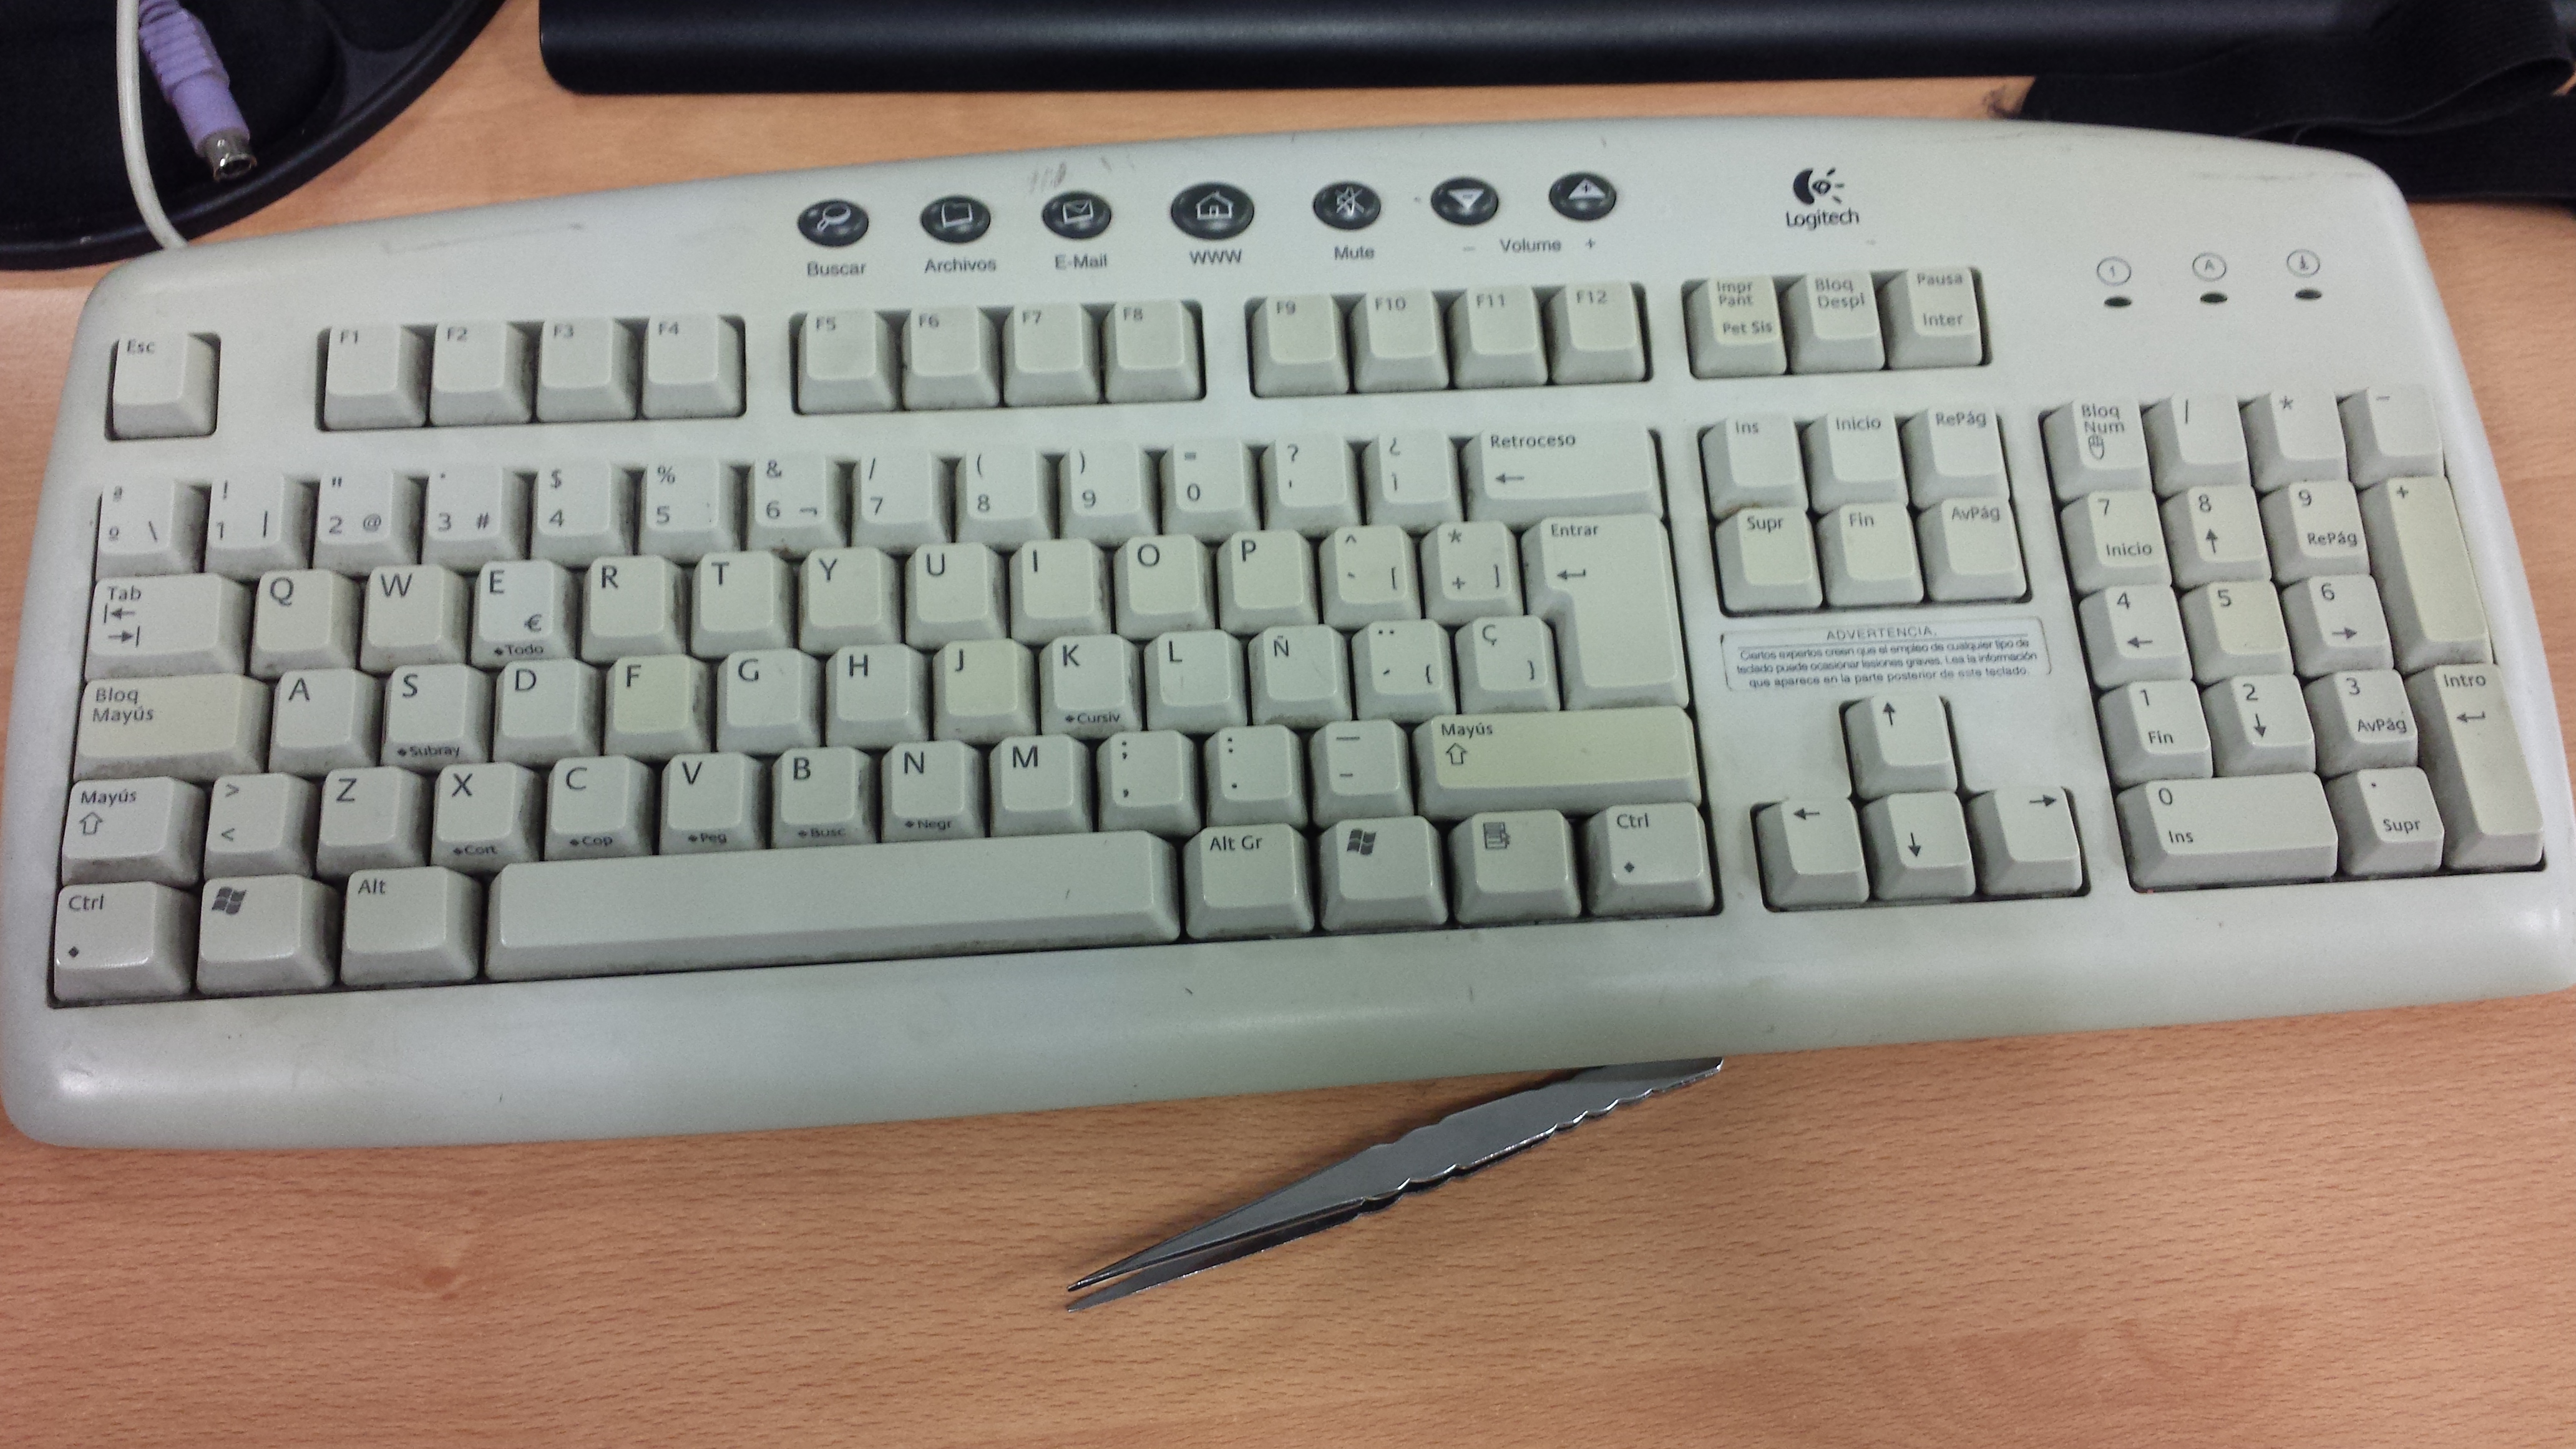
Serves almost any keyboard. Watch out for the latest Logitech keyboards. They have plastic parts on the keys that keep you from moving them around.
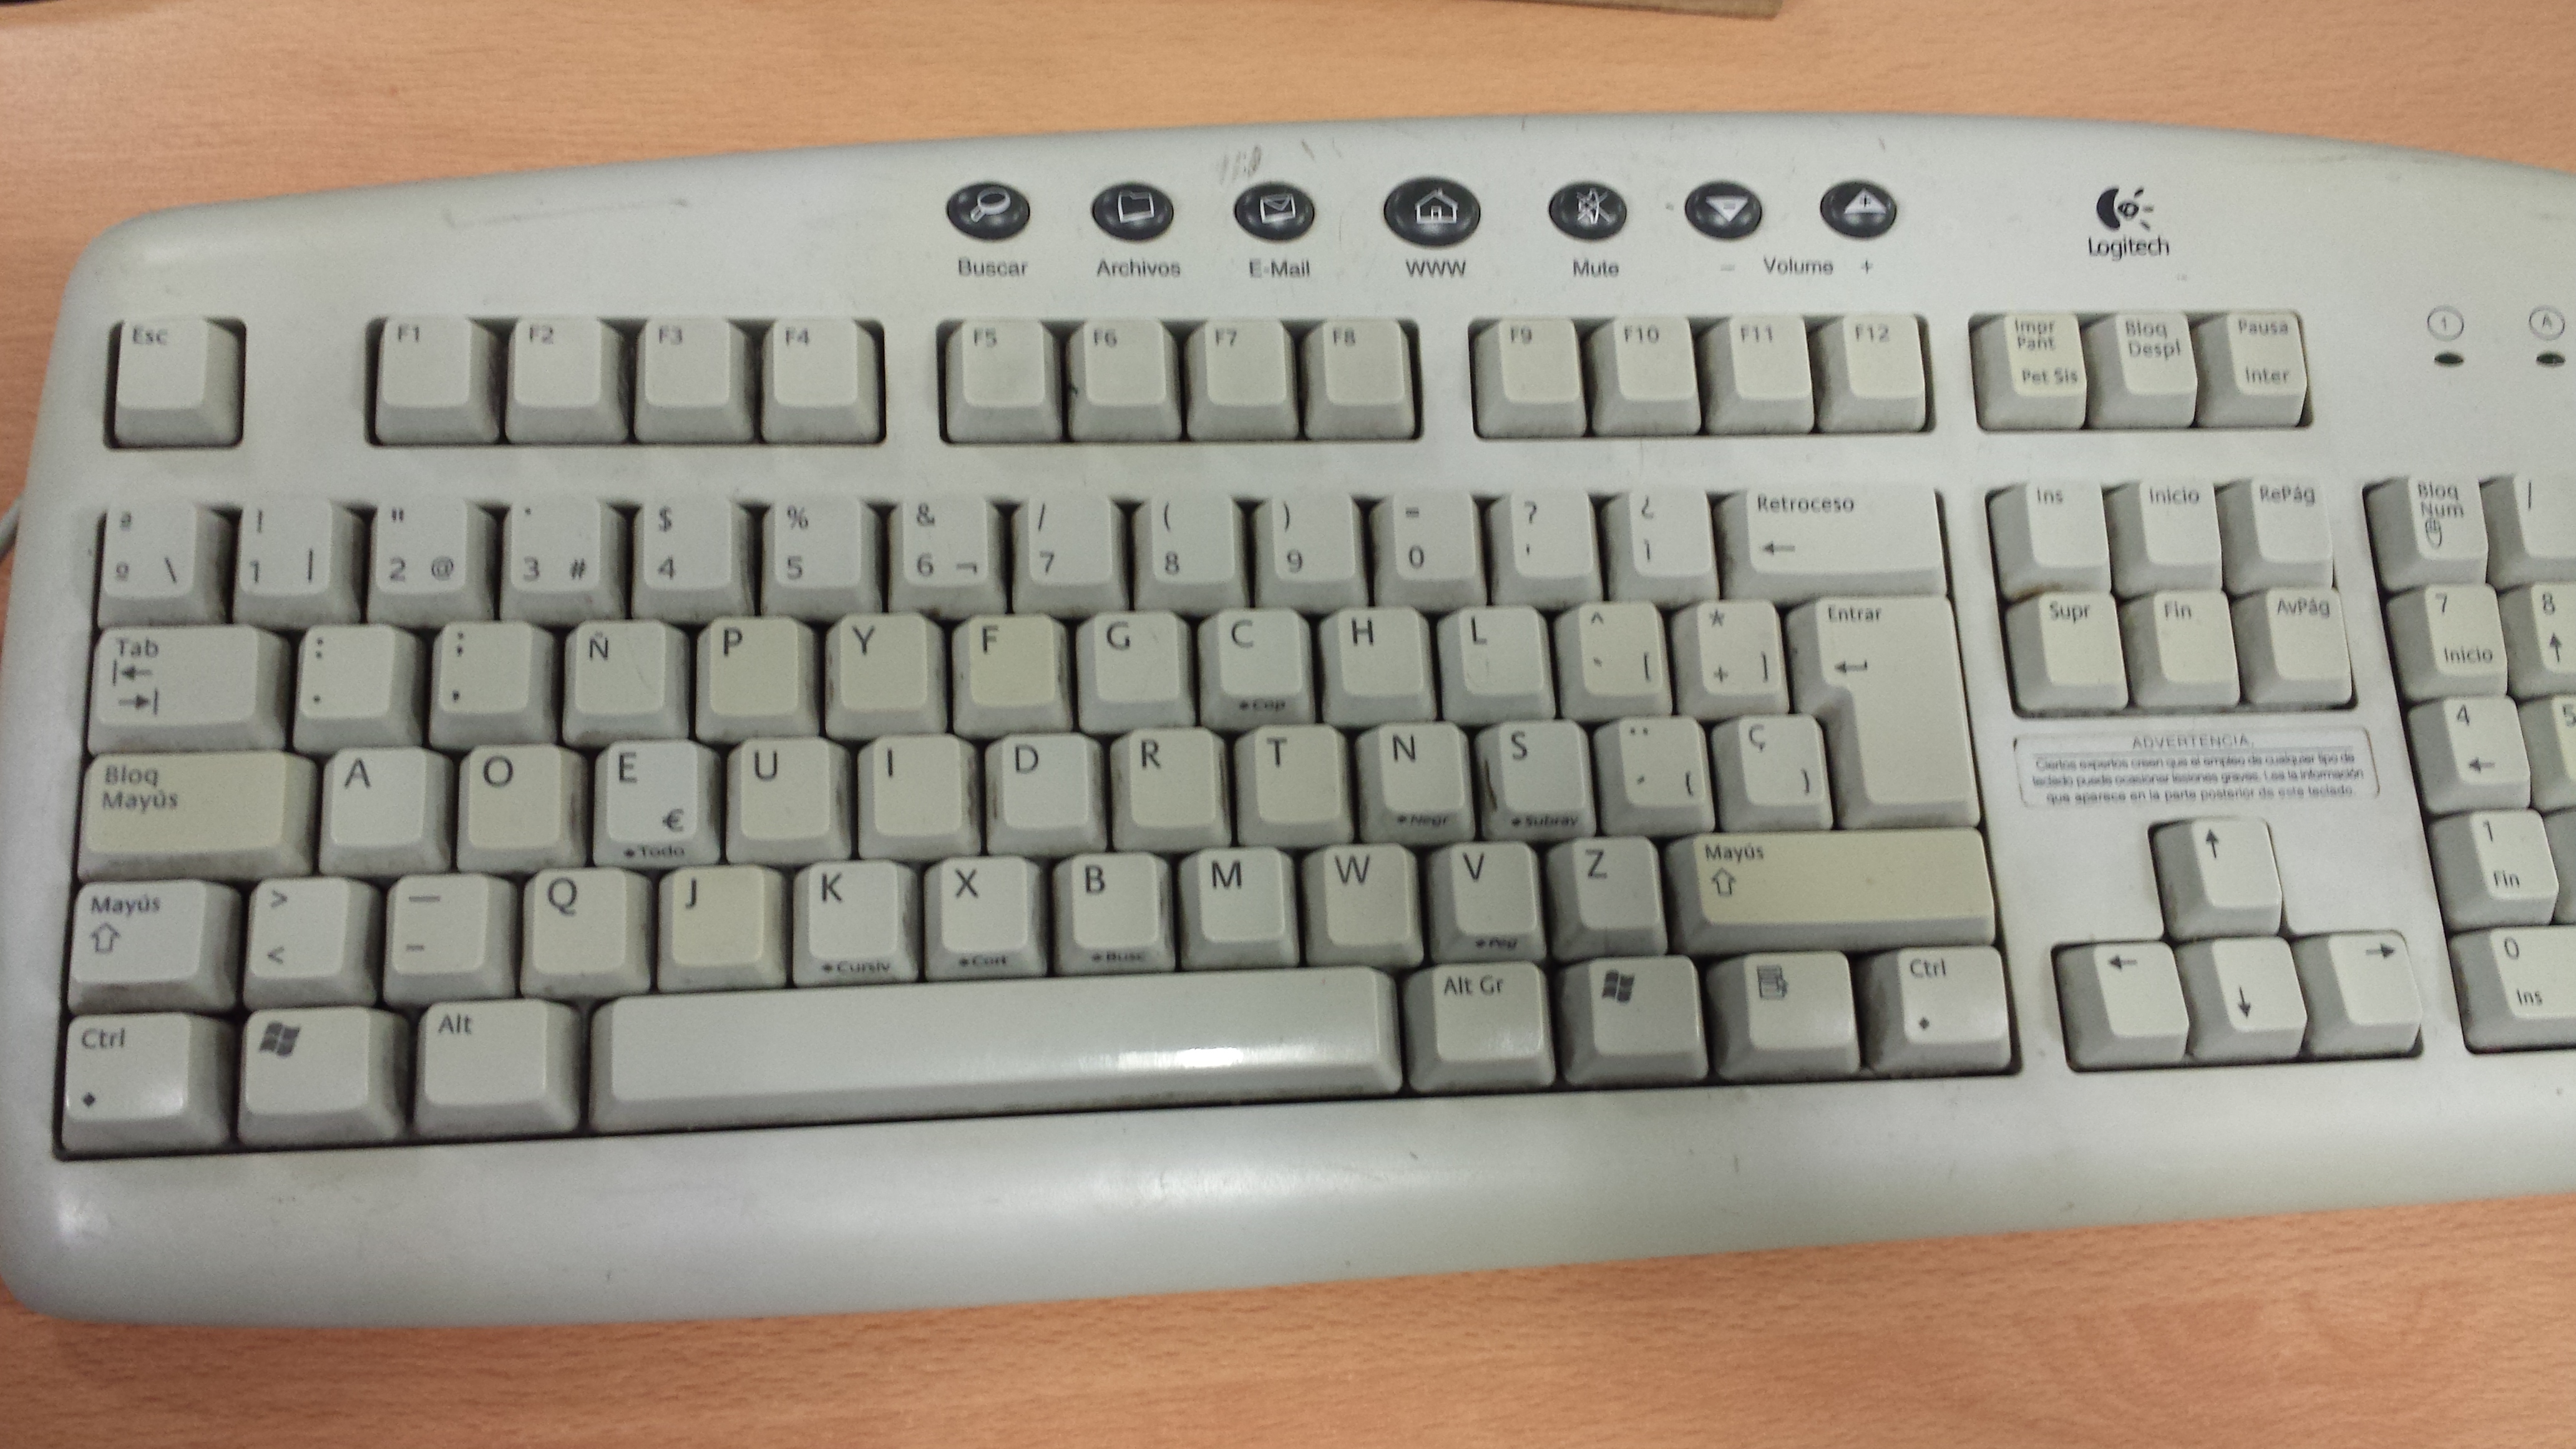
Removing the Keys
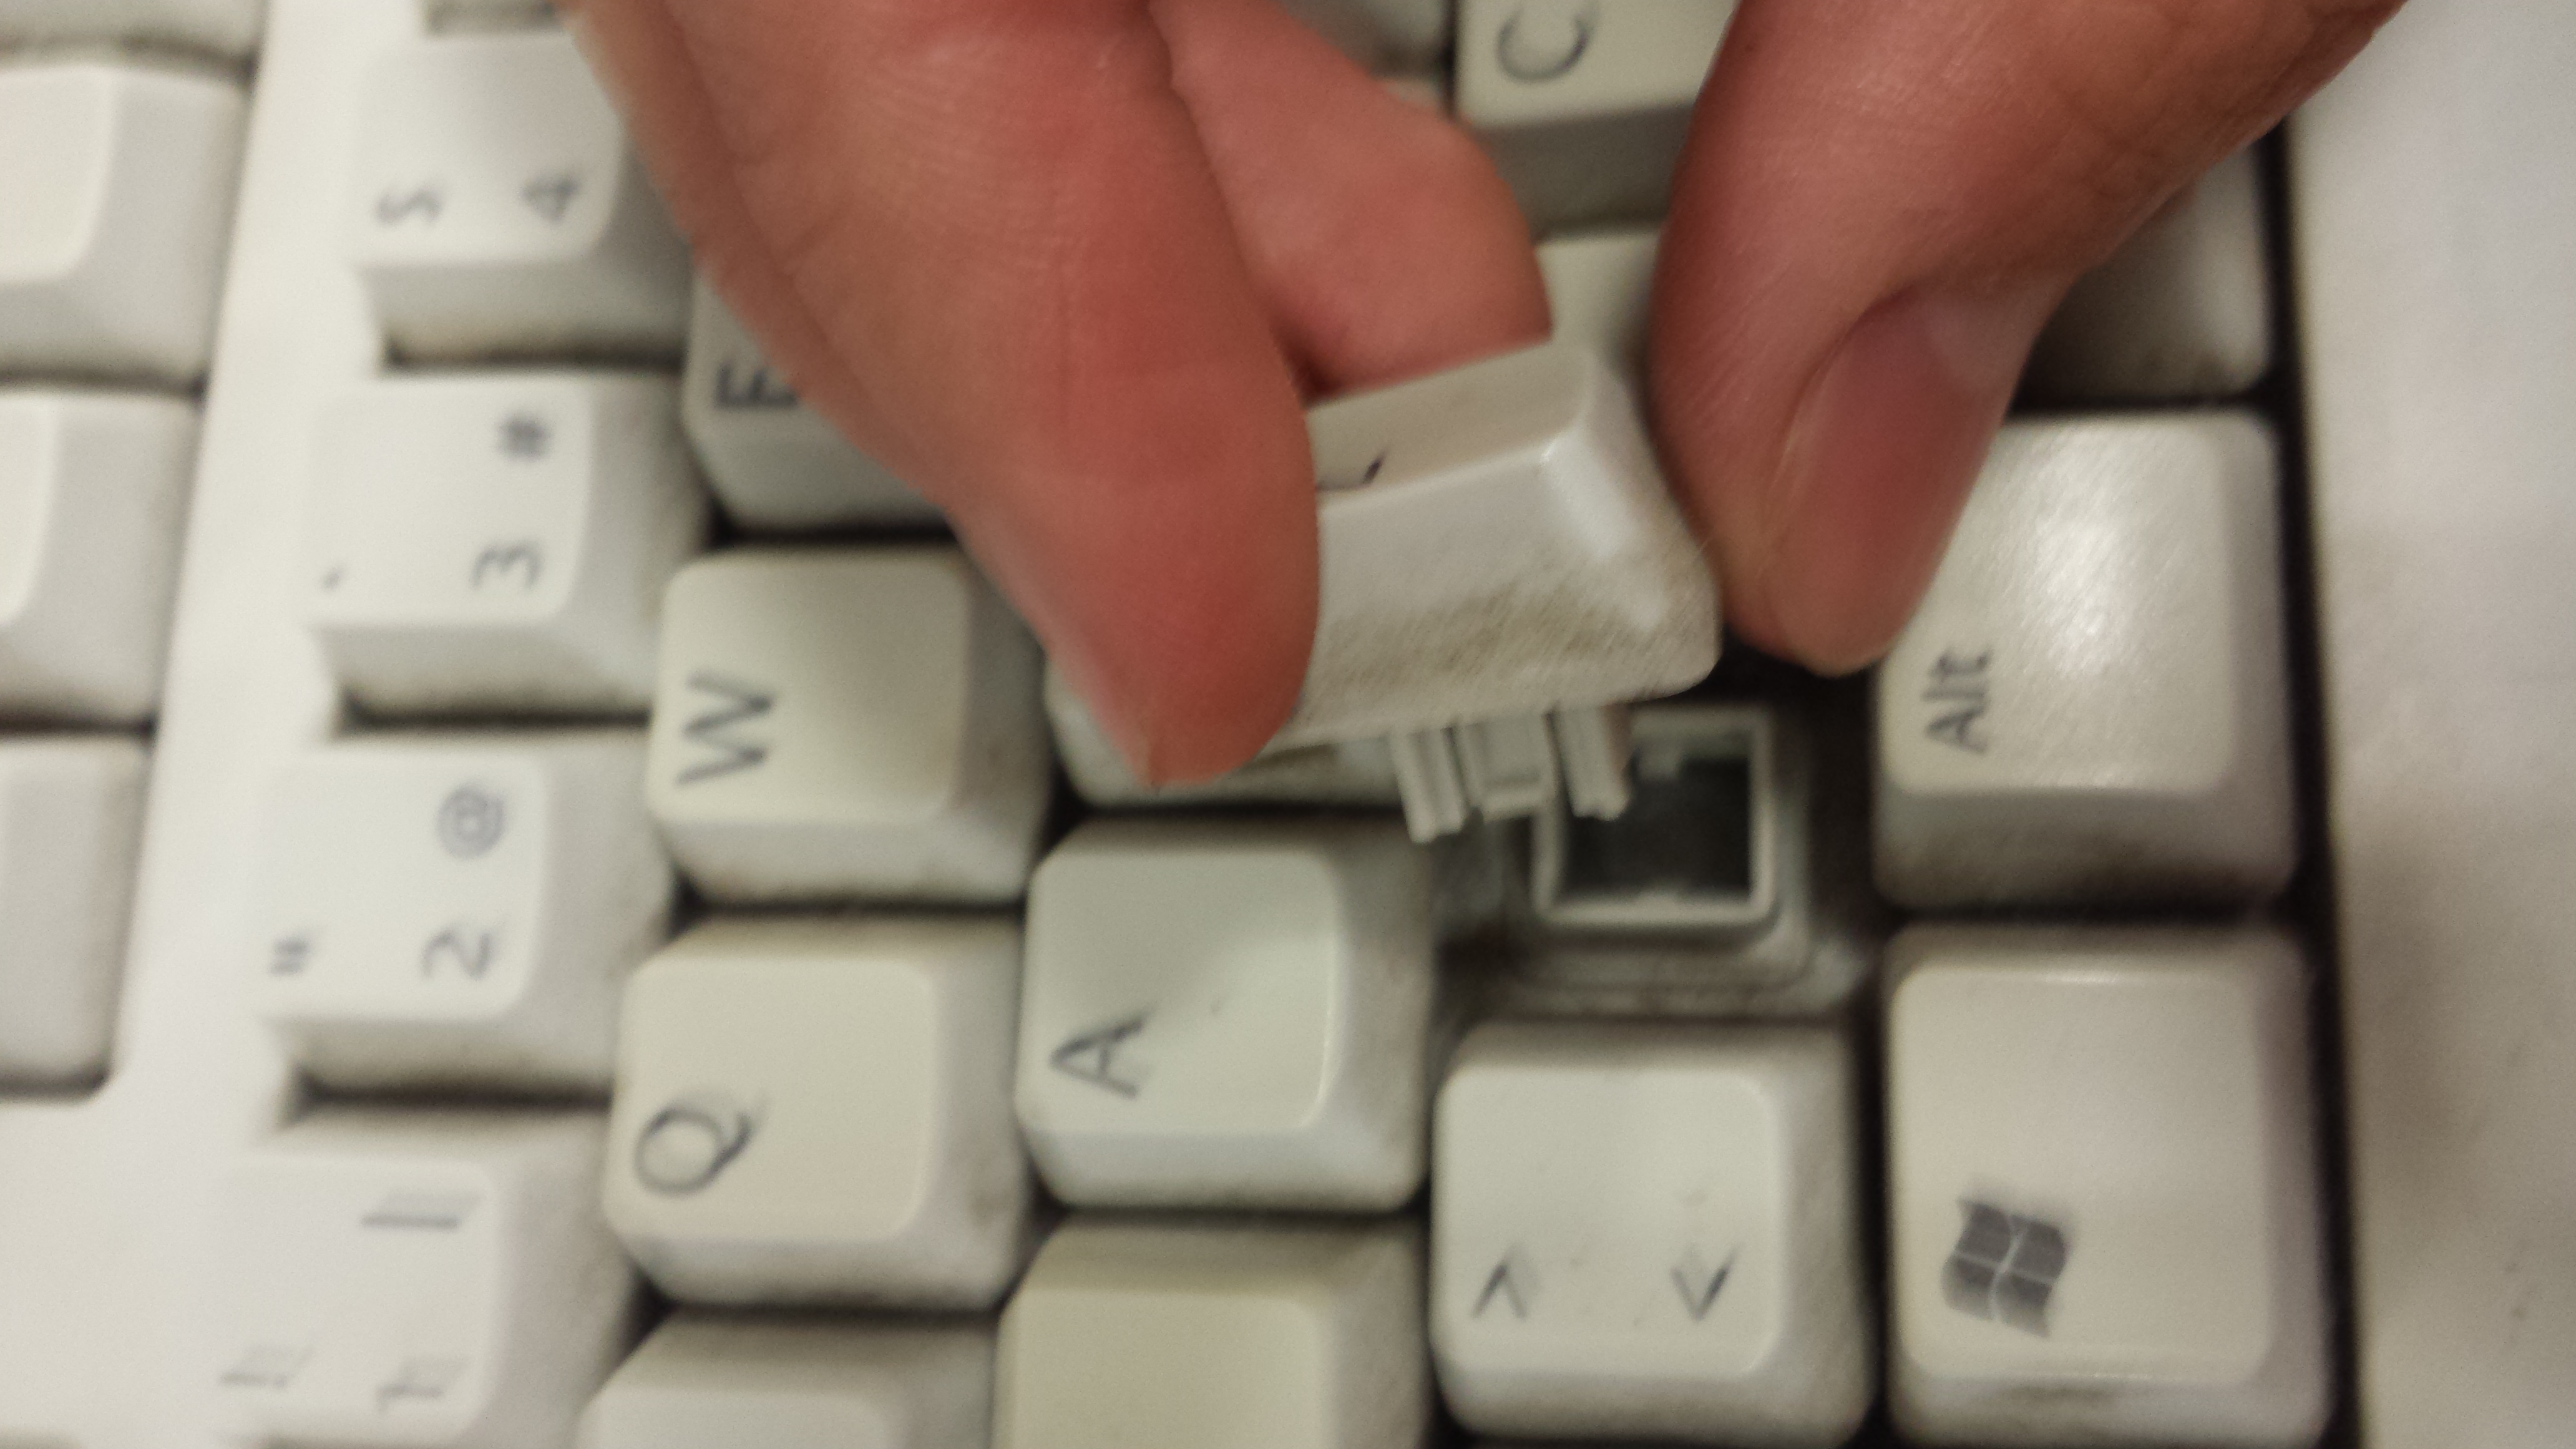
We must take the keys off the keyboard (all the letters except A and M). There are special pliers for this, but we have used a flat screwdriver.
The Keyboard Should Look Like This
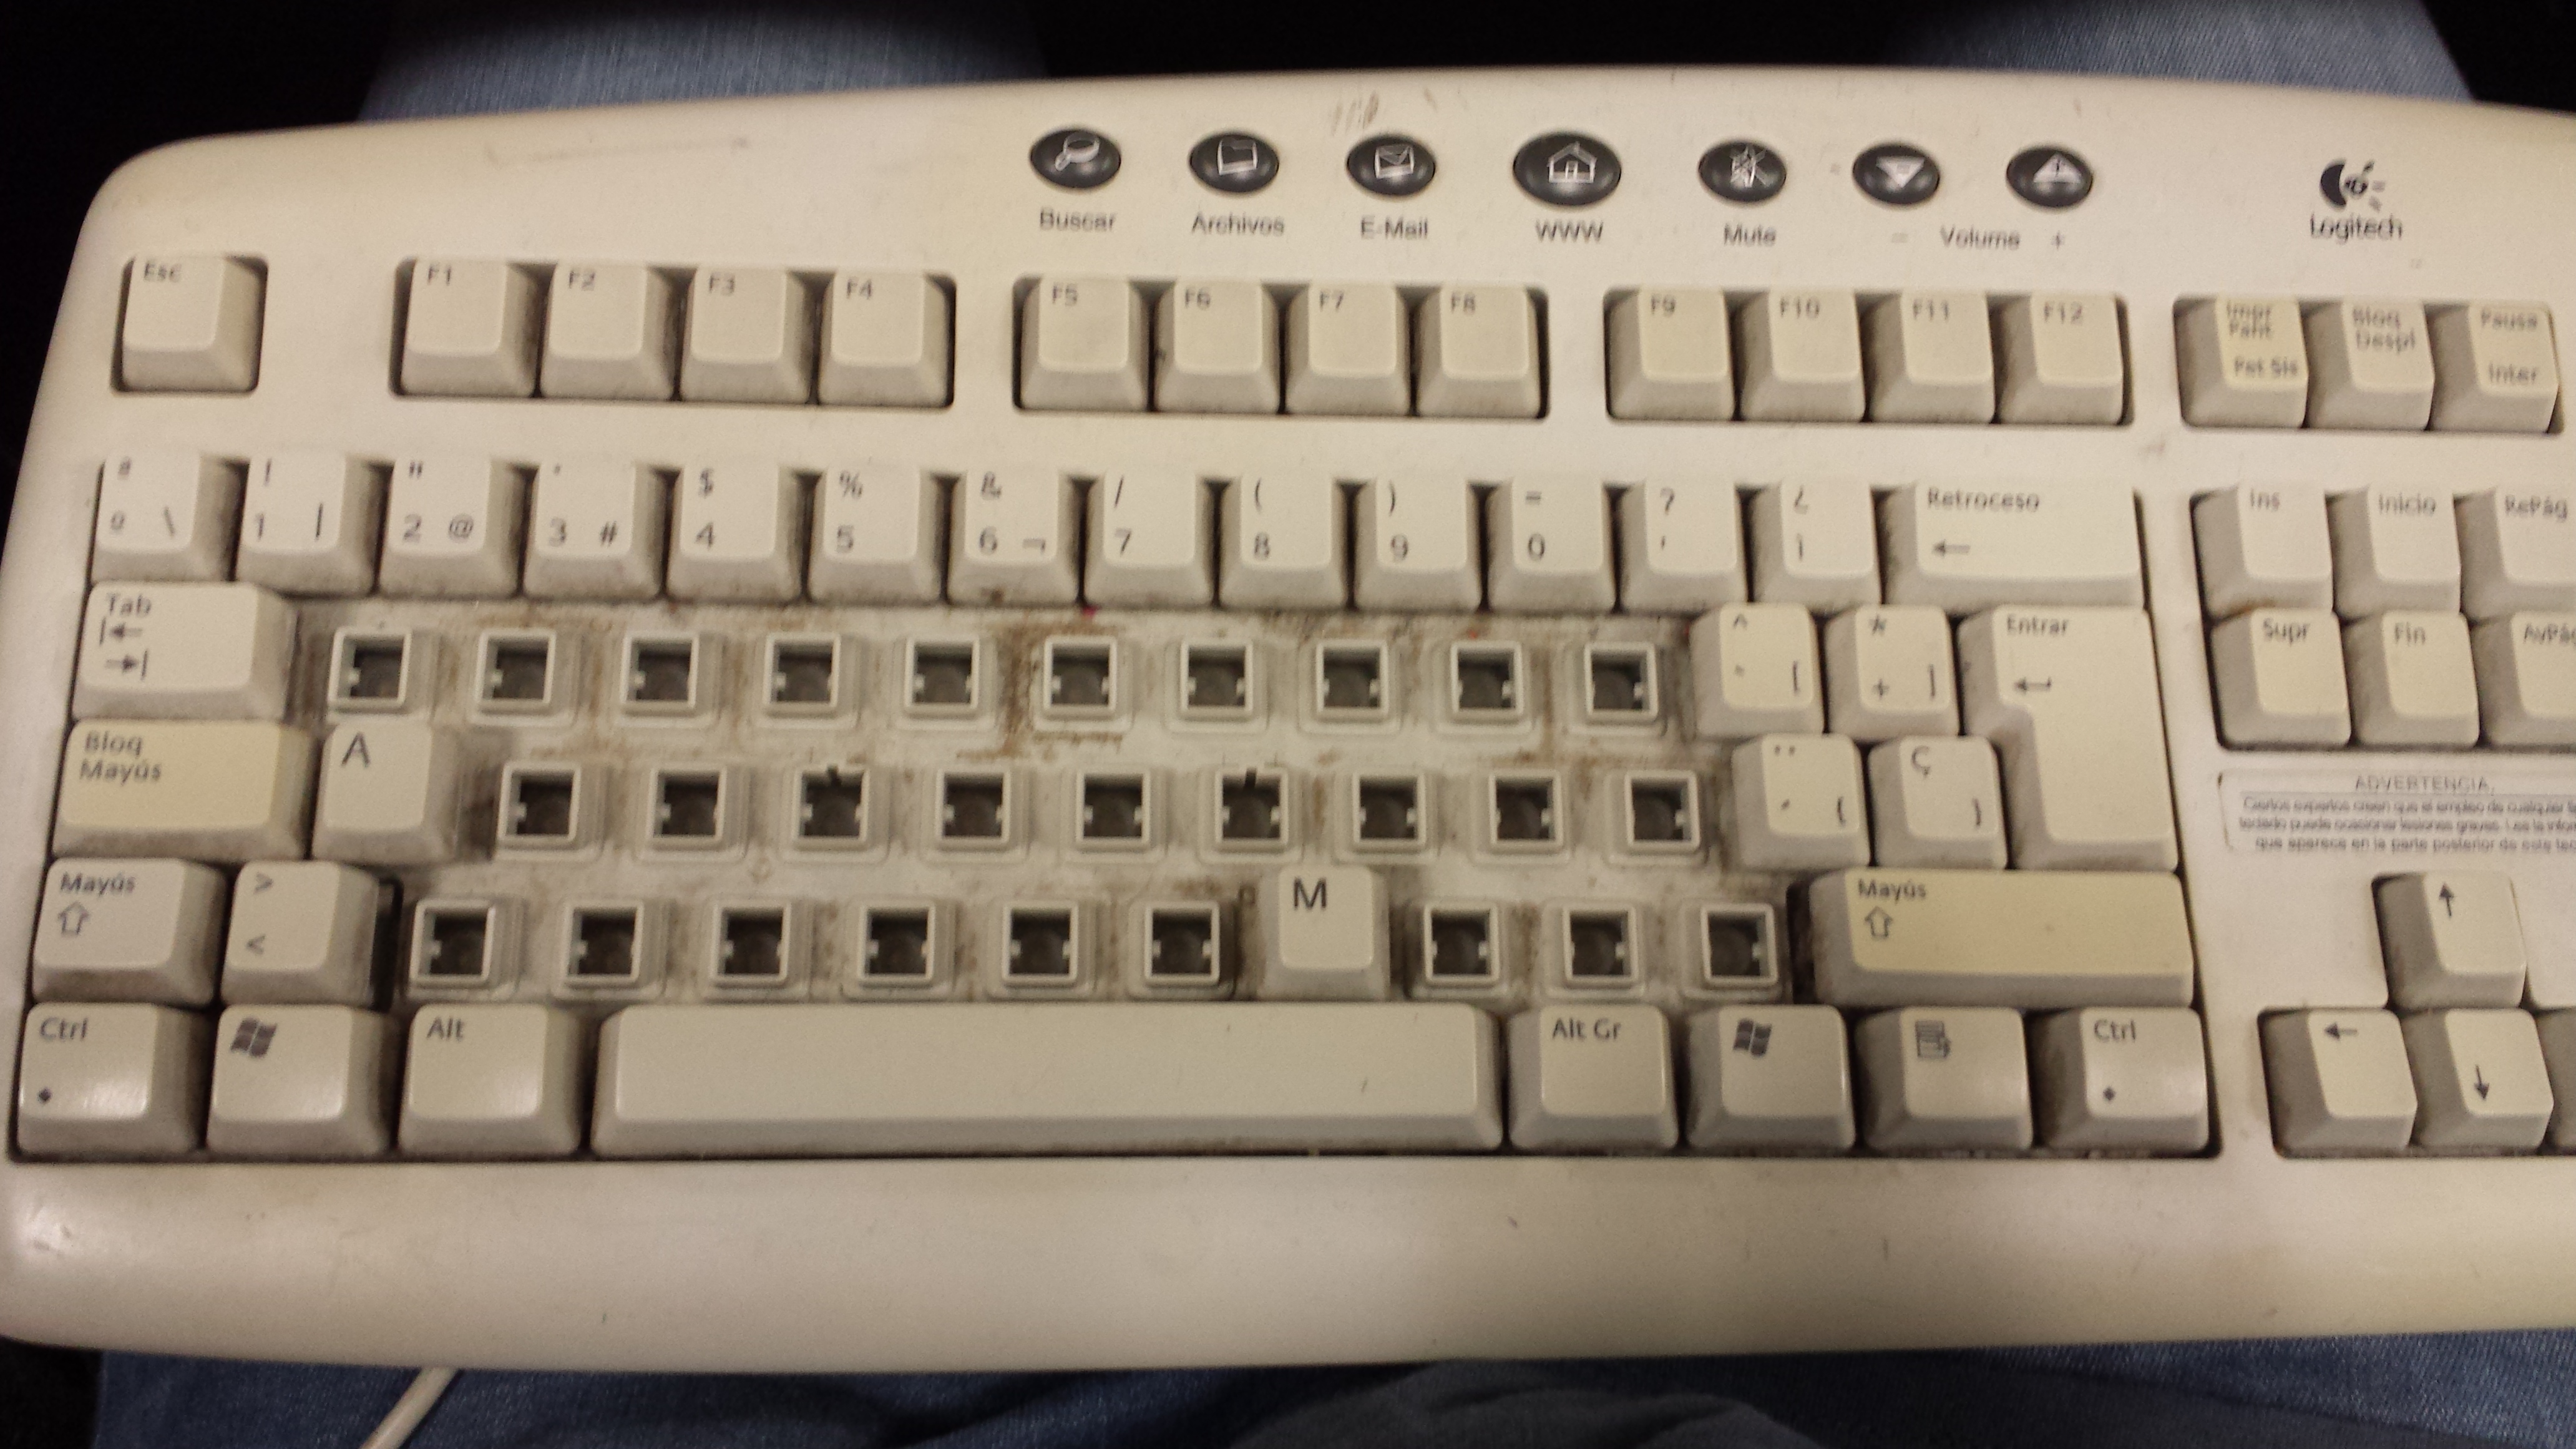
When we have finished removing the keys we should have something similar to the image.
Re-ordering the Keys
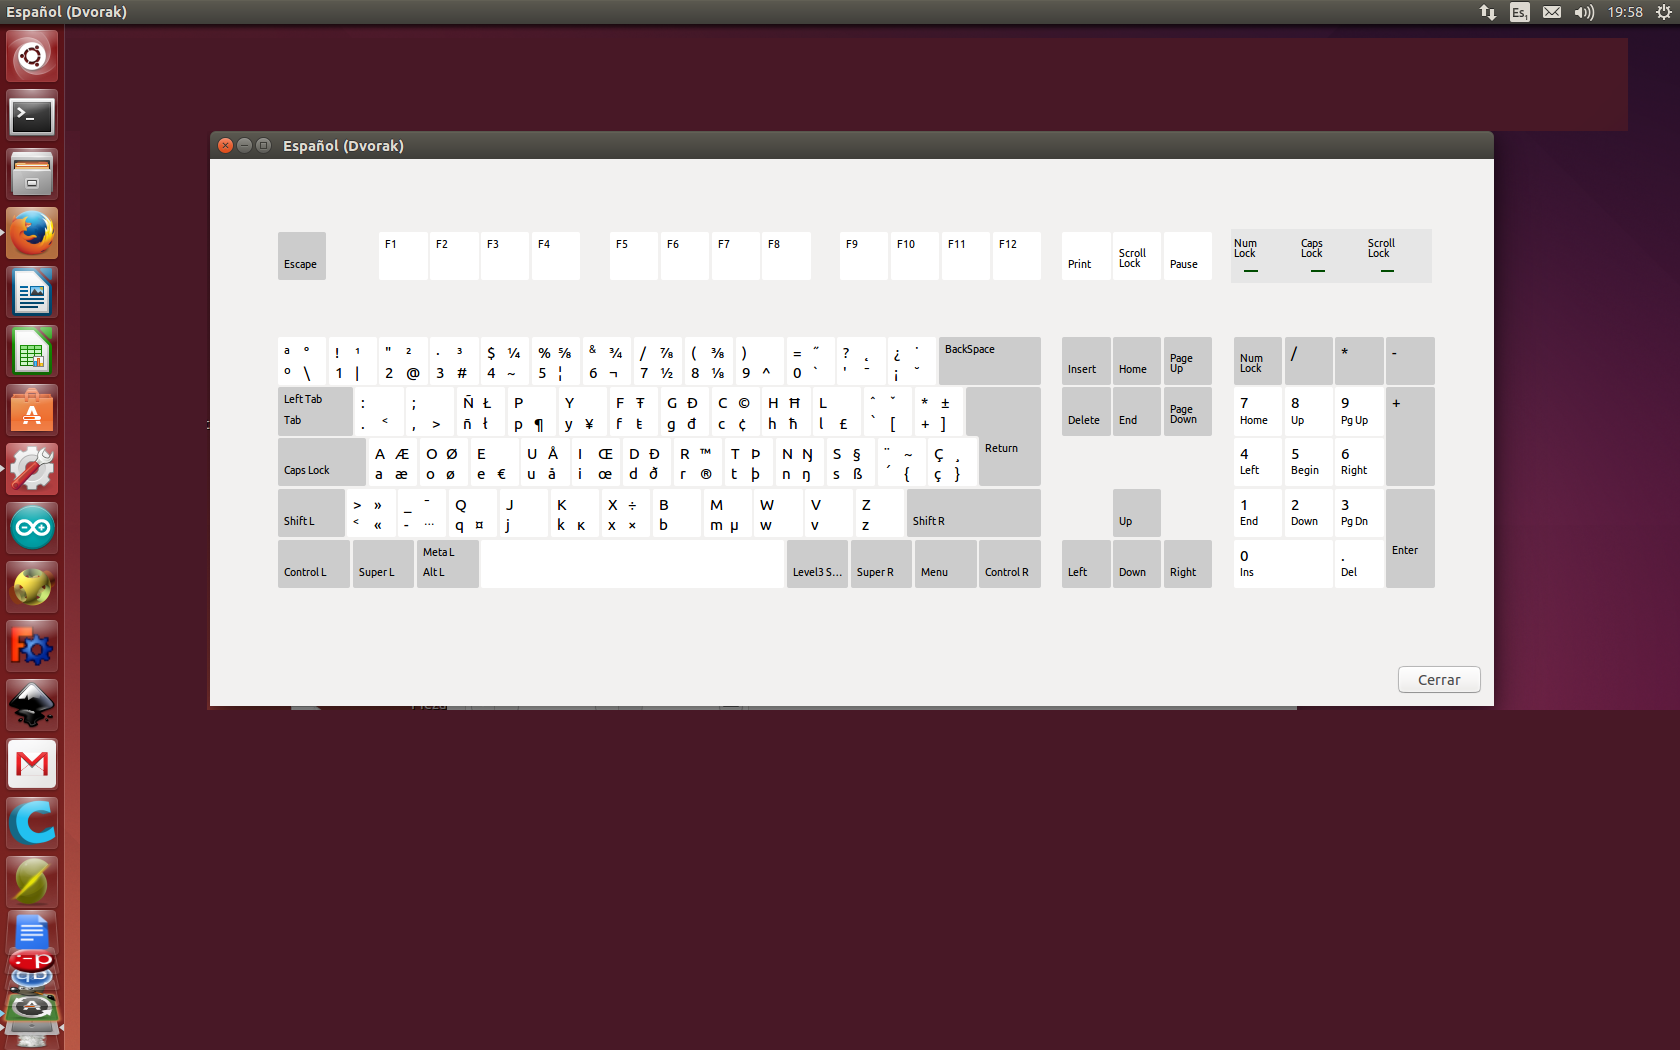
We follow the distribution of Dvorak, as in the image, and place them one by one.
It Should Stay That Way.
Settings
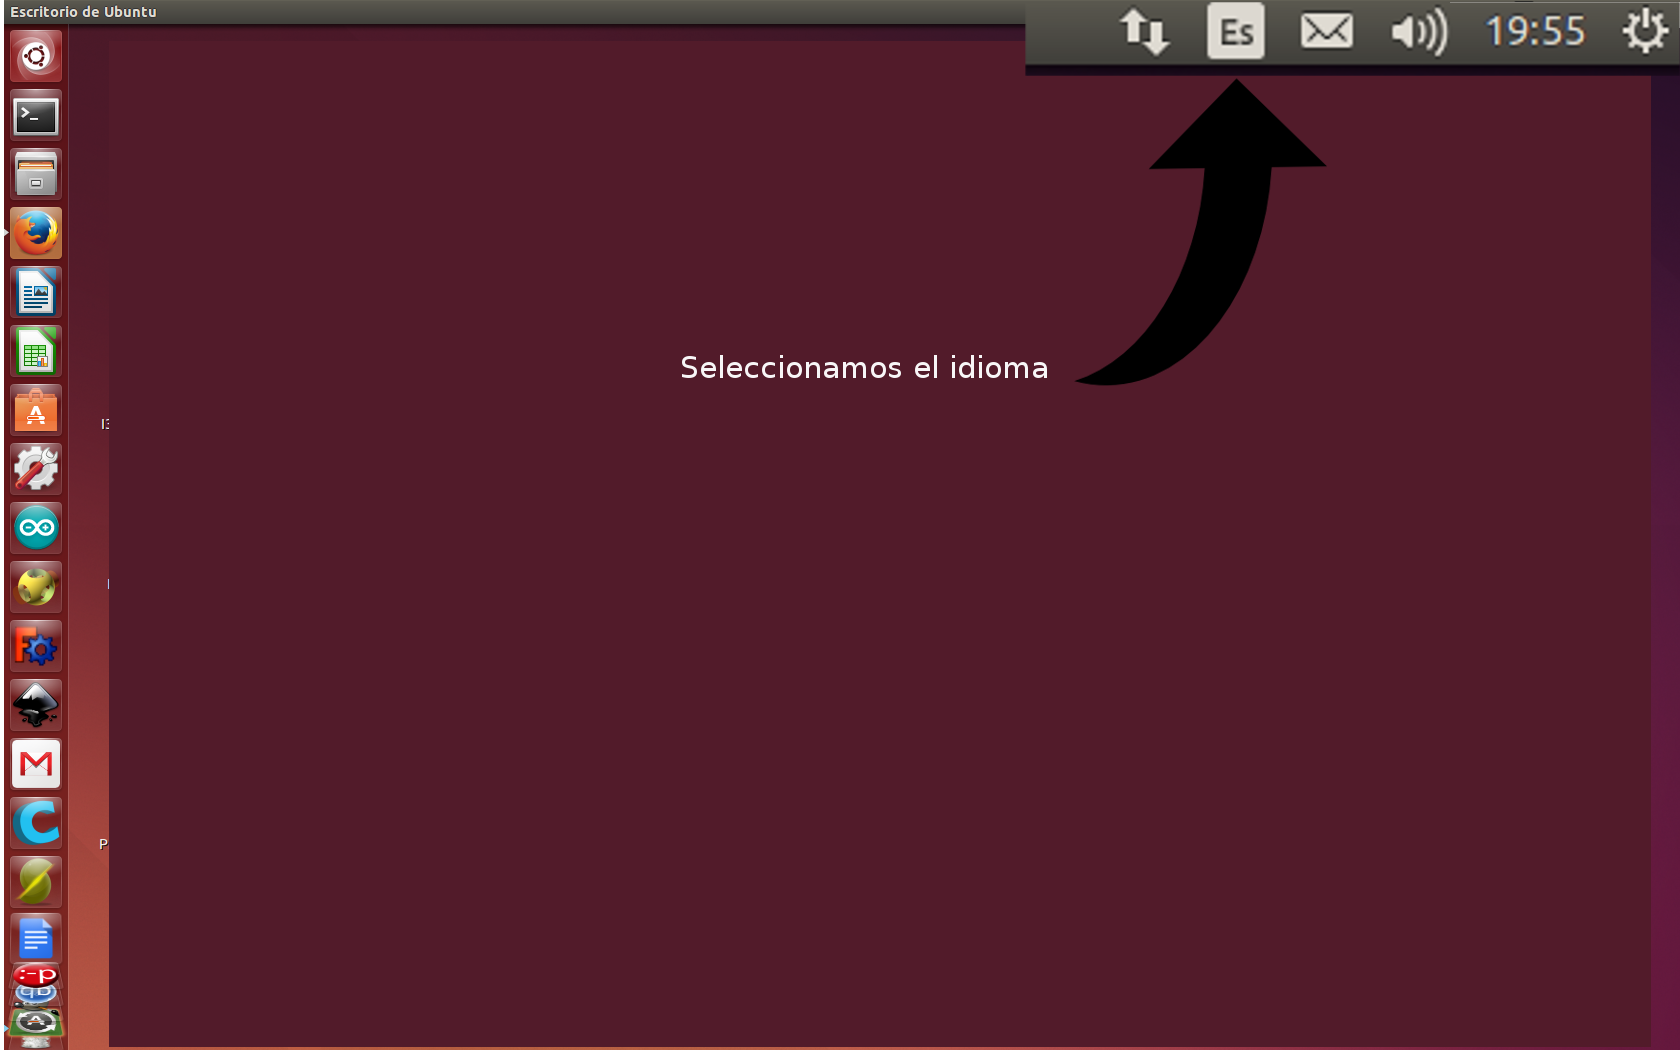
To configure the operating system and have it recognize the distribution we must follow the following steps.
In this case we have used the Ubuntu 14.04 distribution.
Select the language in the bar.
Select "Text Input Settings"
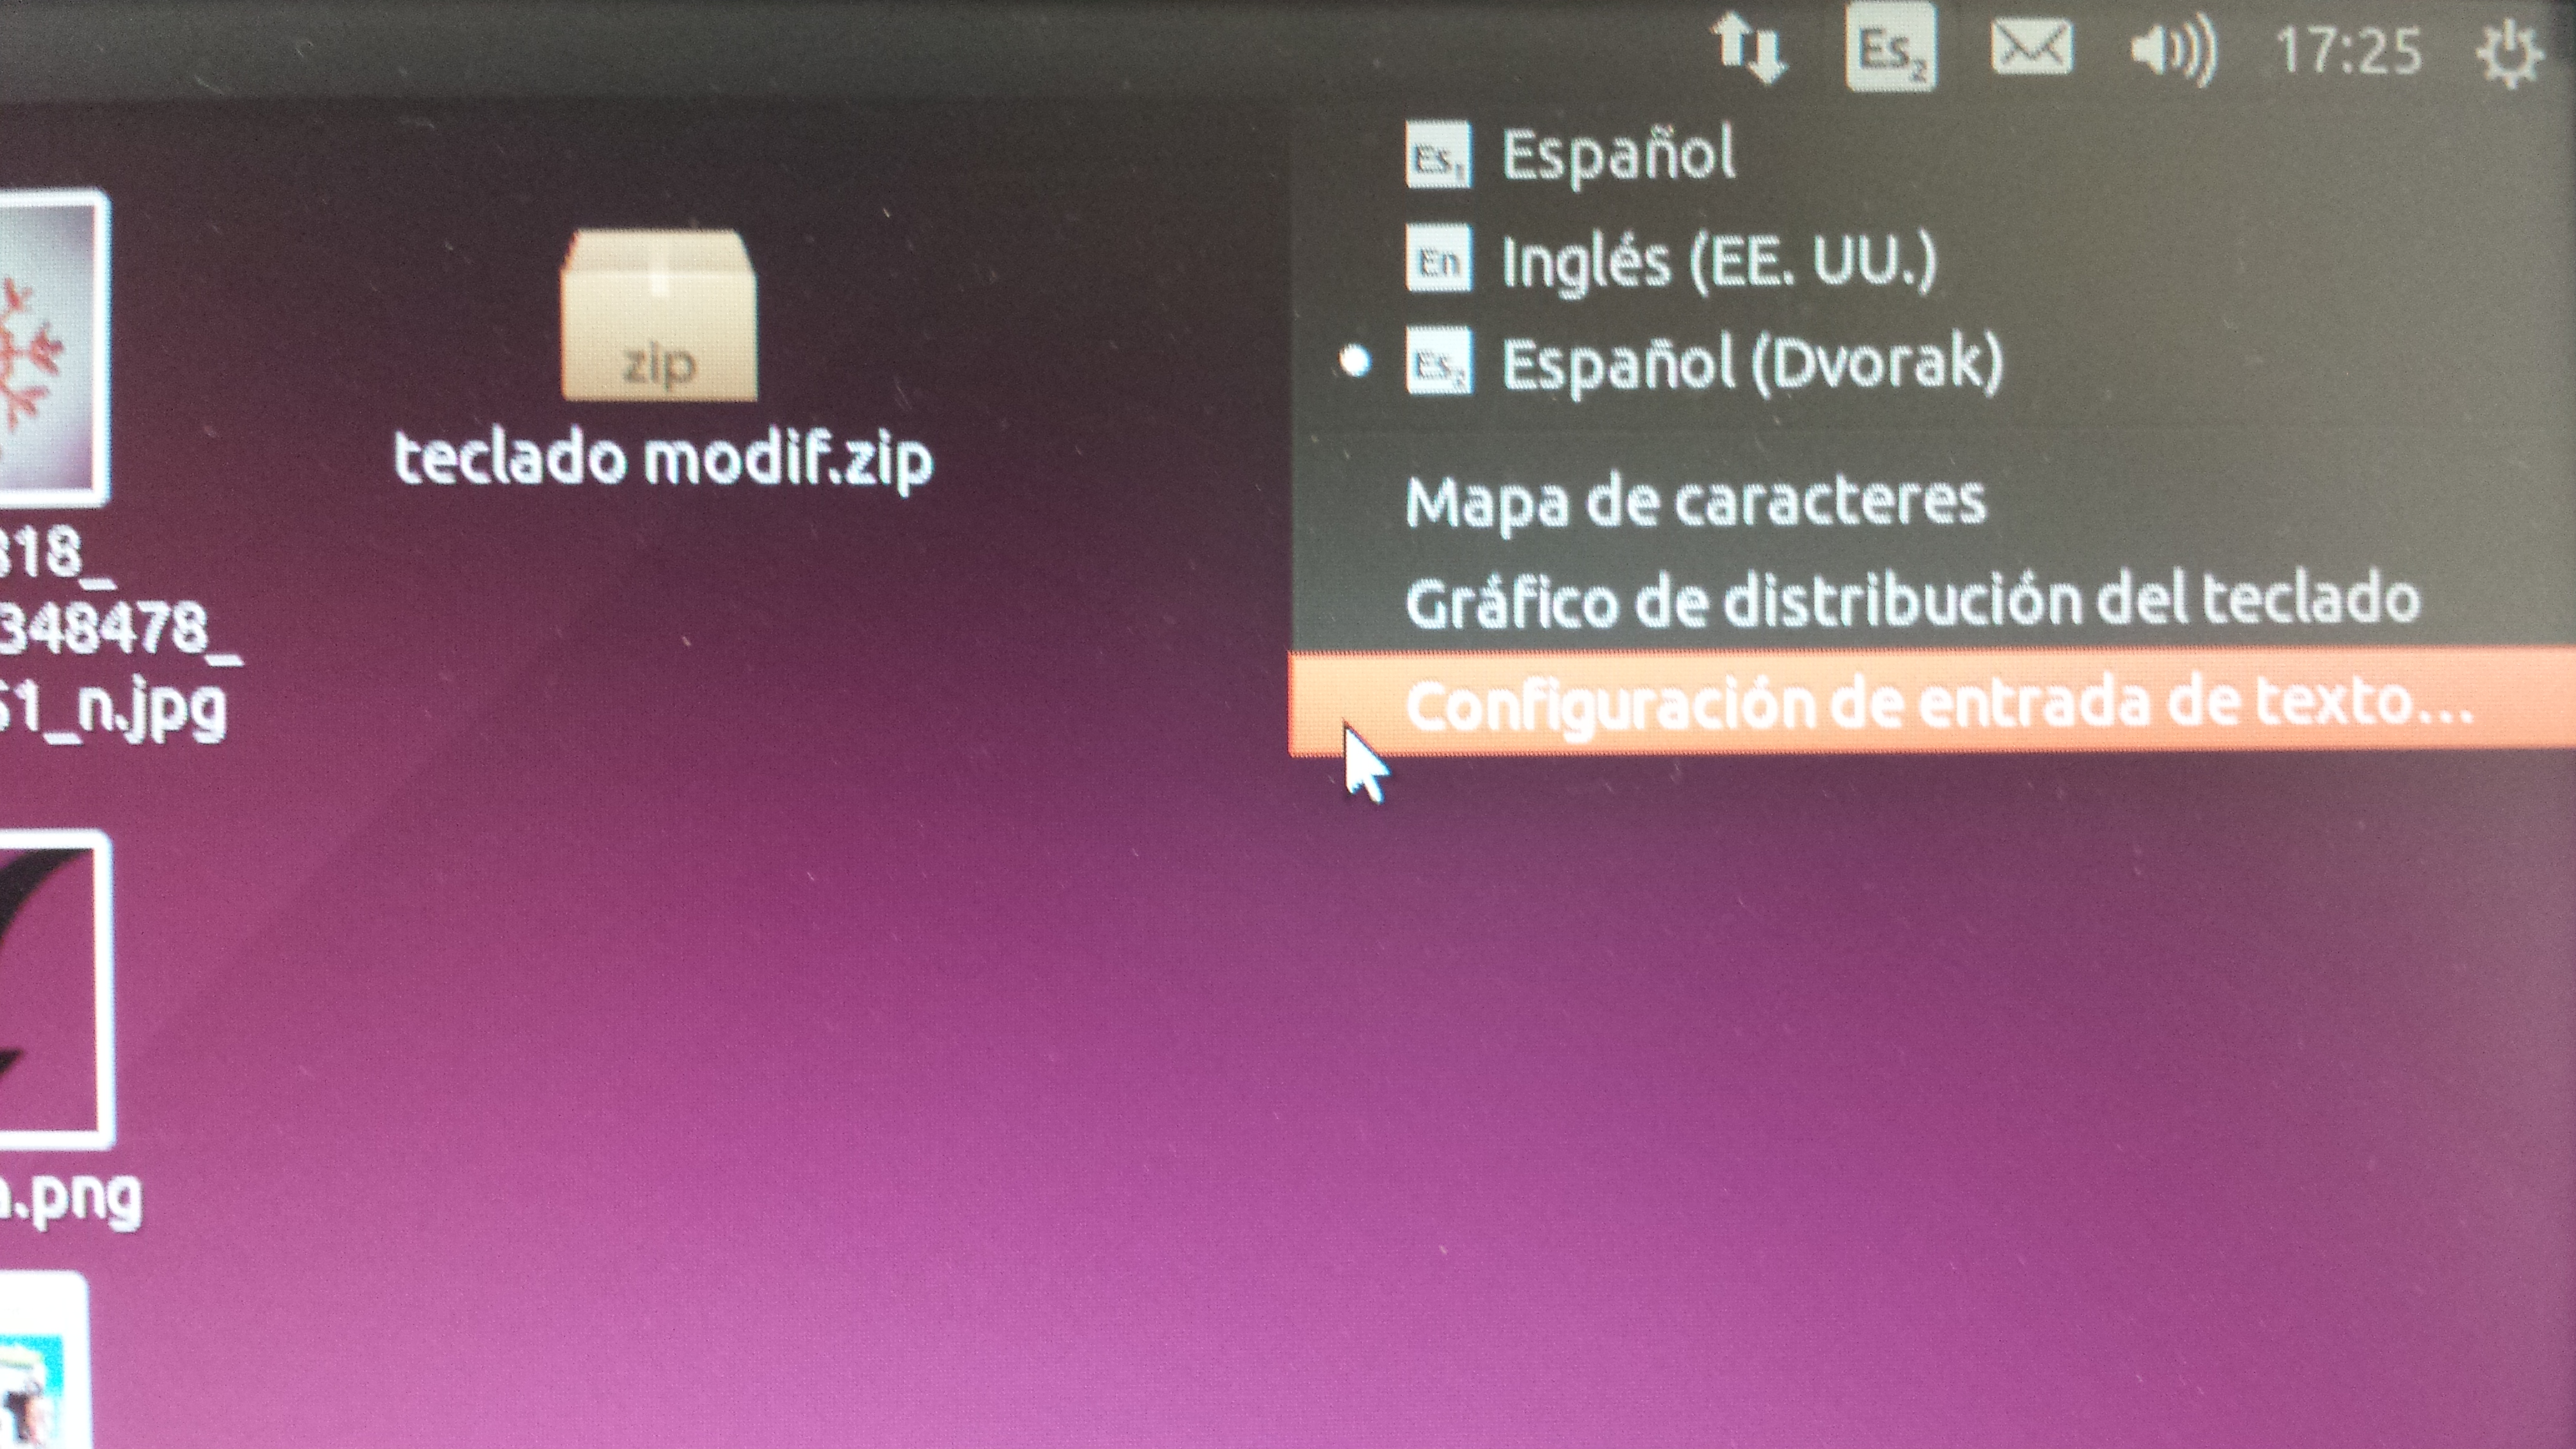
Select "Add a New Distribution"

Select "The Distribution We Want to Use".
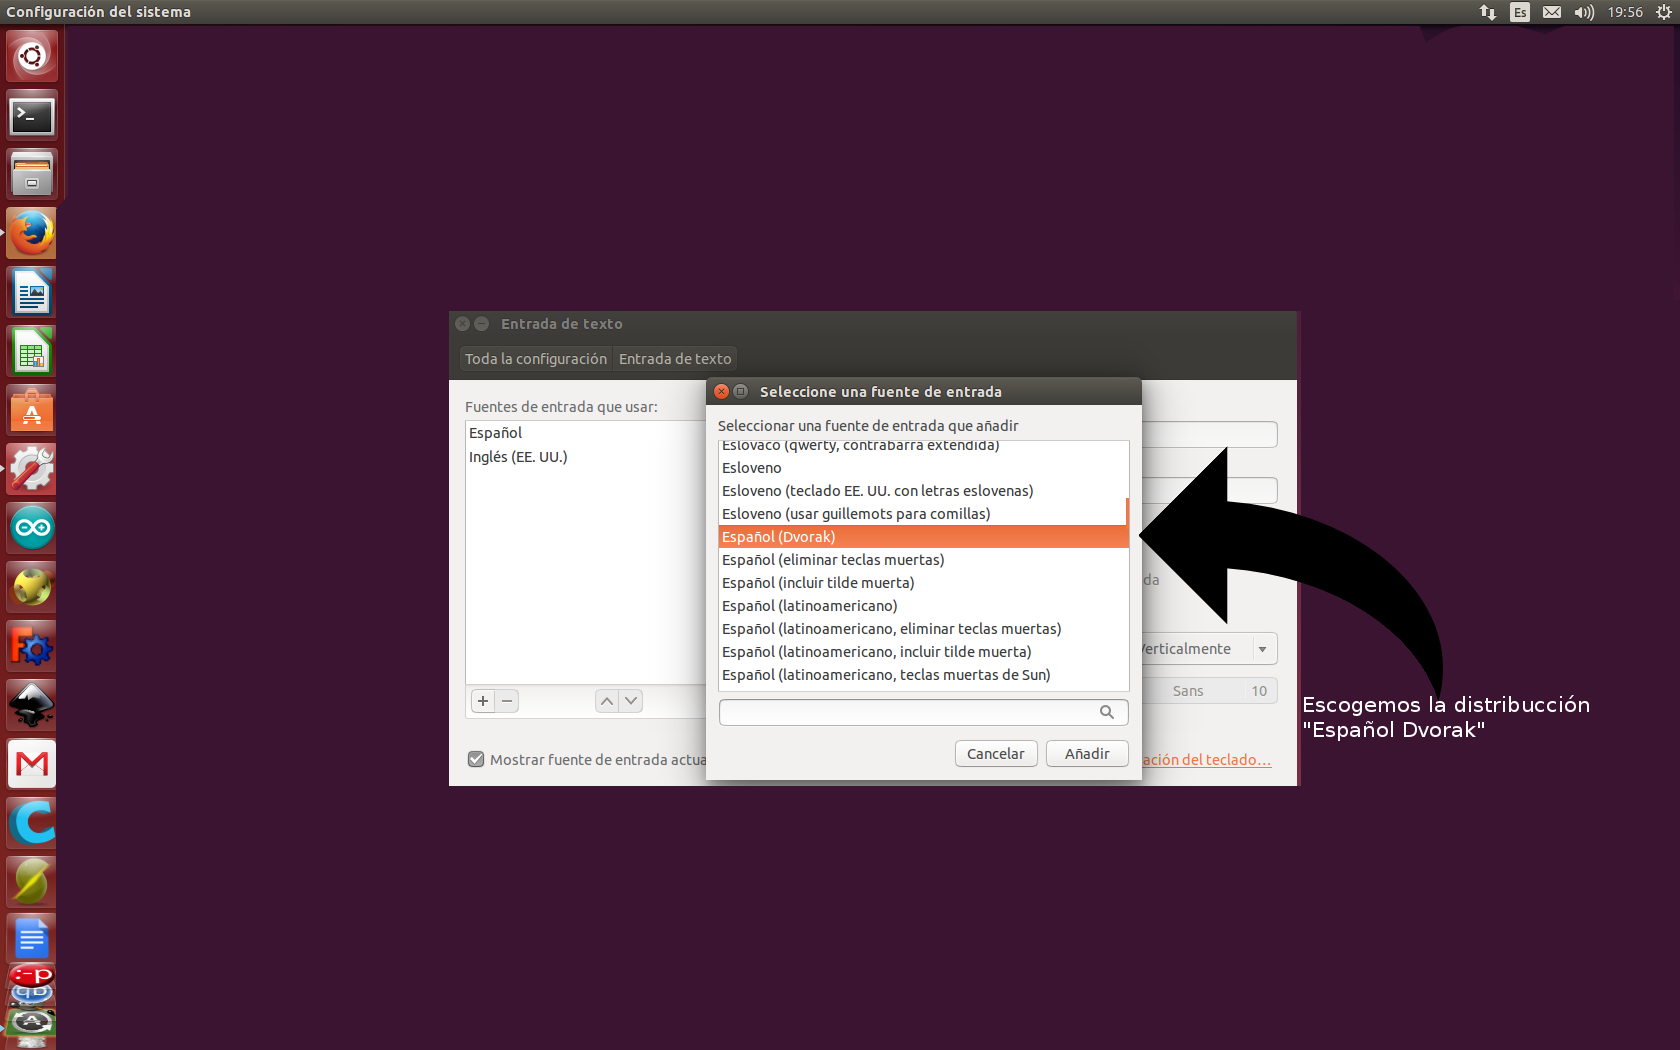
We looked at the options inside the Spanish keyboard, which in Ubuntu comes pre-installed.
Select "Distribution As Default".
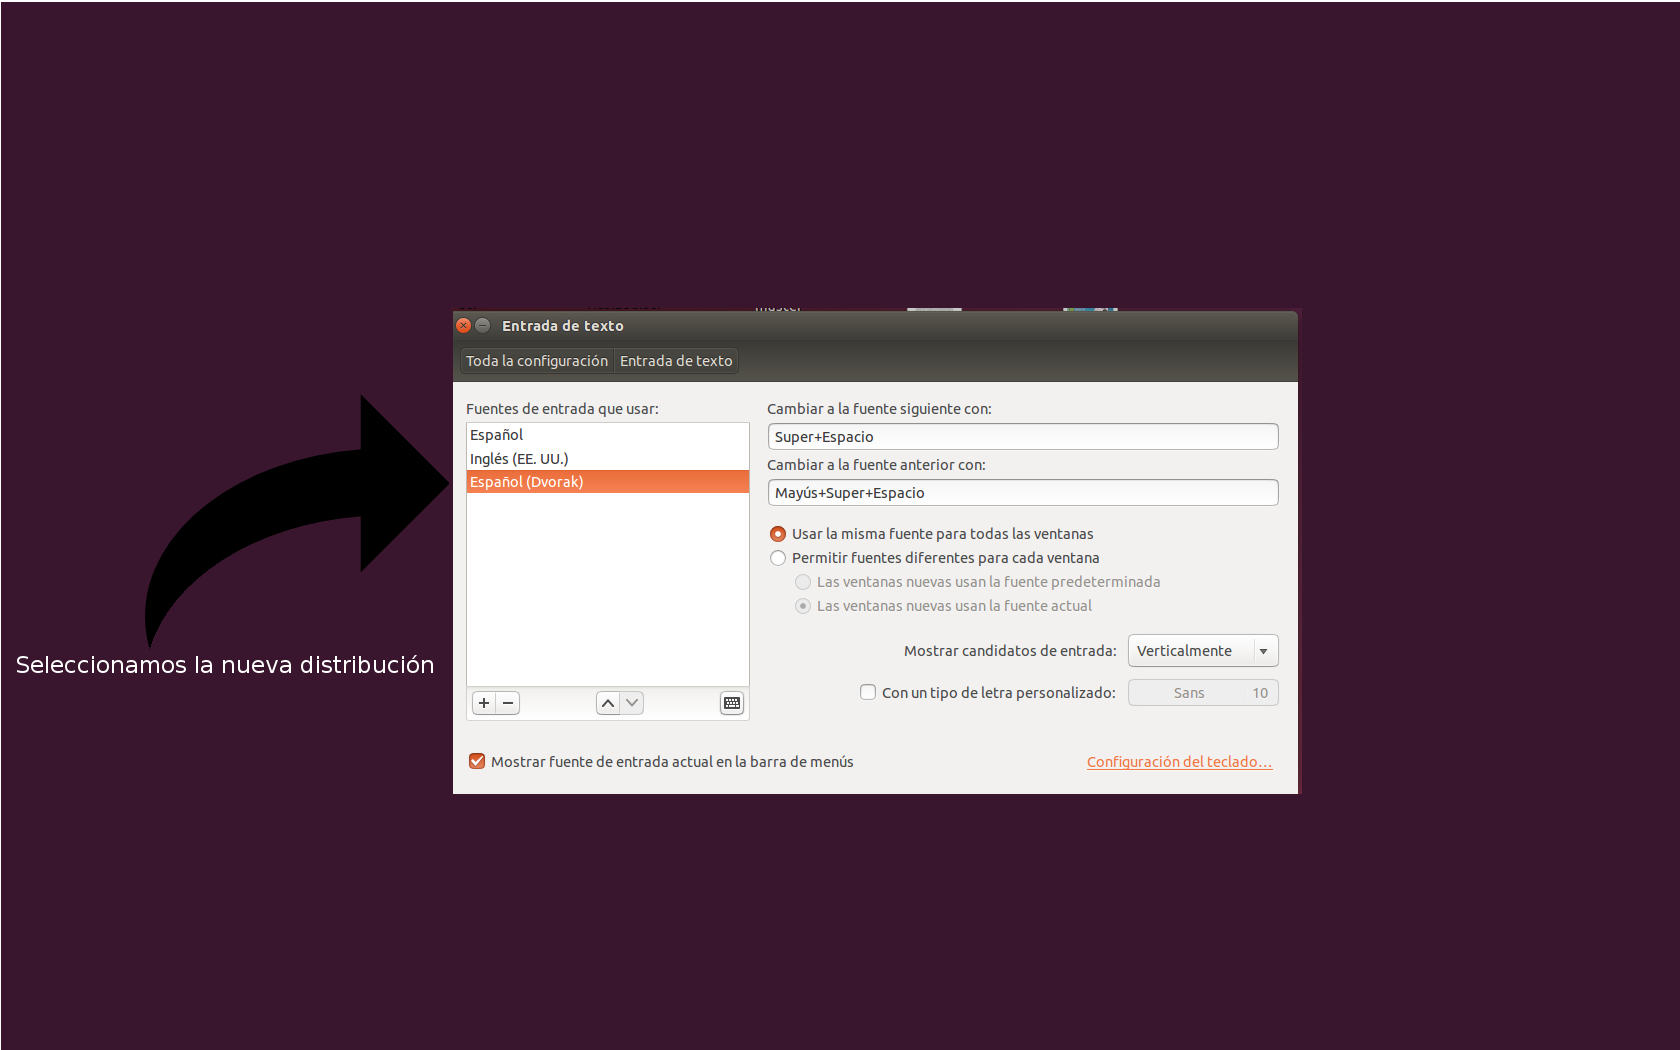
Once we have done the previous step, we only have to select it as the default distribution.
Credits
