Connect to Raspberry PI Via USB to TTL Serial Cable
by adachsoft in Circuits > Raspberry Pi
13982 Views, 12 Favorites, 0 Comments
Connect to Raspberry PI Via USB to TTL Serial Cable
This is a guide how to connect Raspberry PI via USB. There are situations in which we do not needgraphical interfaces, and the command line is sufficient. I personally use my Raspberry PI as an HTTP server and an broker of MQTT. I had a situation that I lost the connection via ethernet with Raspberry PI and then to solve the problem it was useful to connect via RS232 port. The serial port is a good debugging tool.
This article can also see here:
Connect to Raspberry PI via USB to TTL Serial Cable

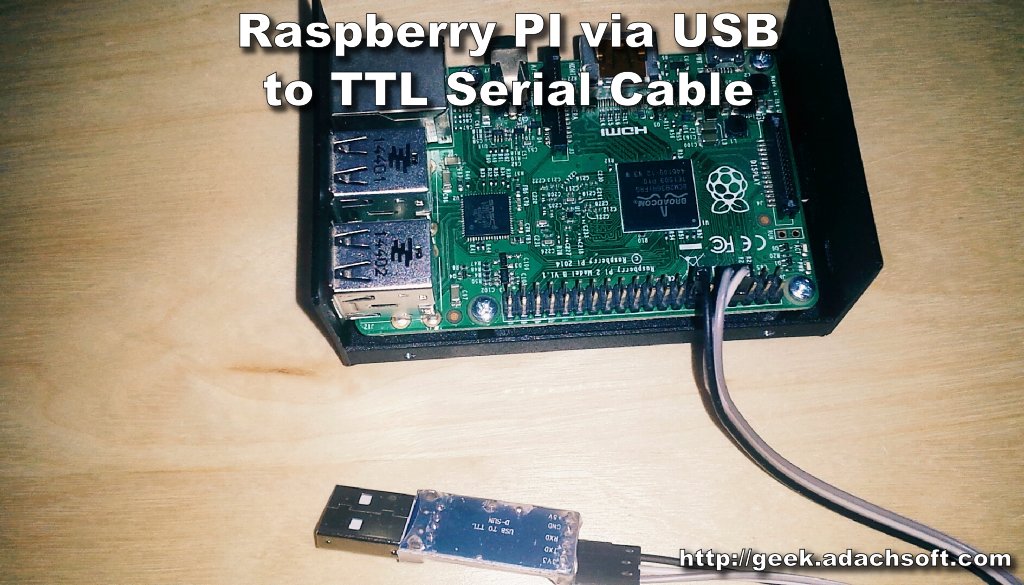
Components
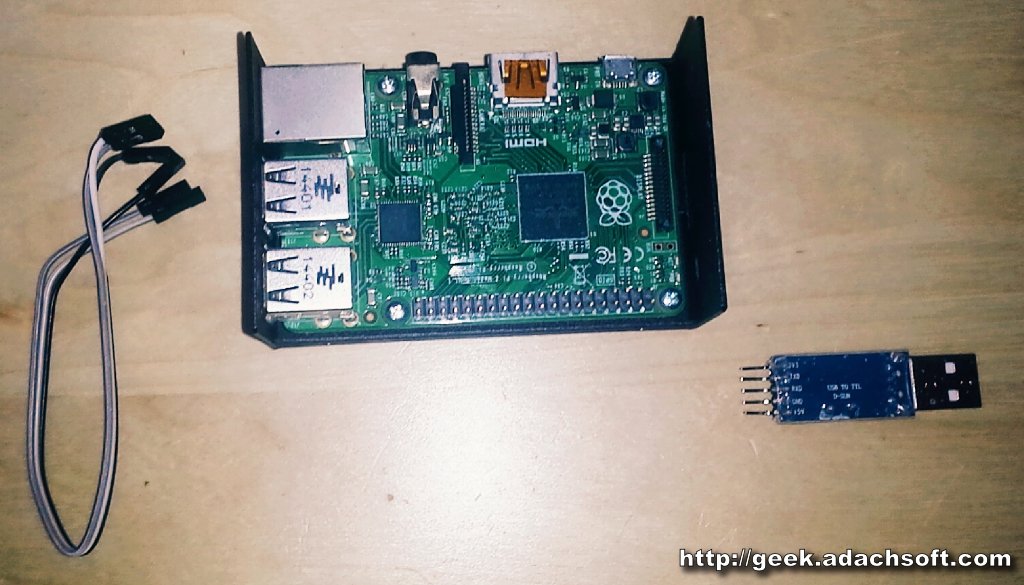
- PL2303
- USB cable
- Some wires
- Raspberry PI (I am using Raspberry PI 2)
Connection PL2303 to Raspberry PI
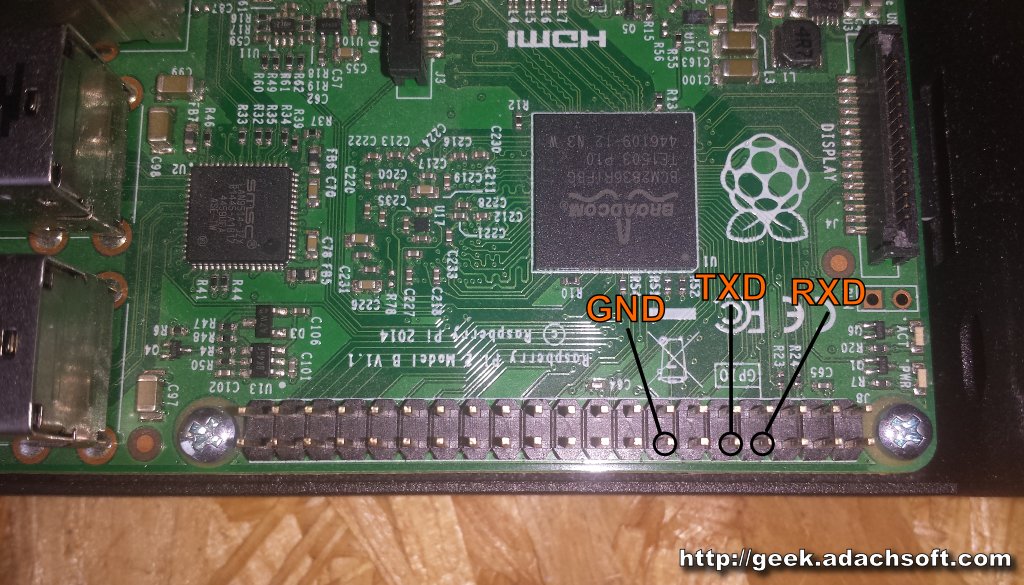
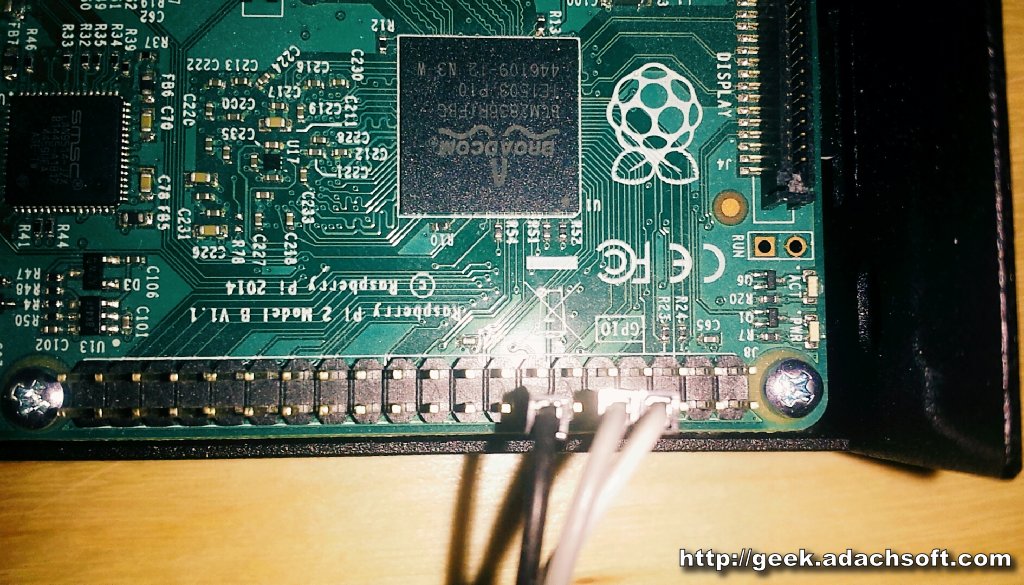
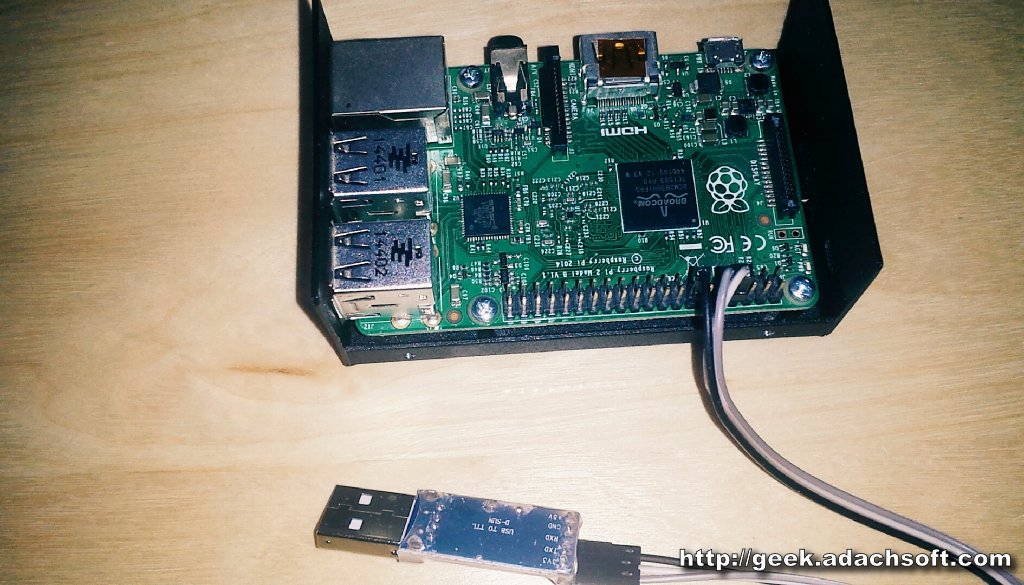
Now we connect PL2303 to the Raspberry PI 2 as shown below in the table:
| PL2303 | Raspberry PI 2 |
|---|---|
| GND | GND |
| RXD | TXD |
| TXD | RXD |
Connection USB to PL2303
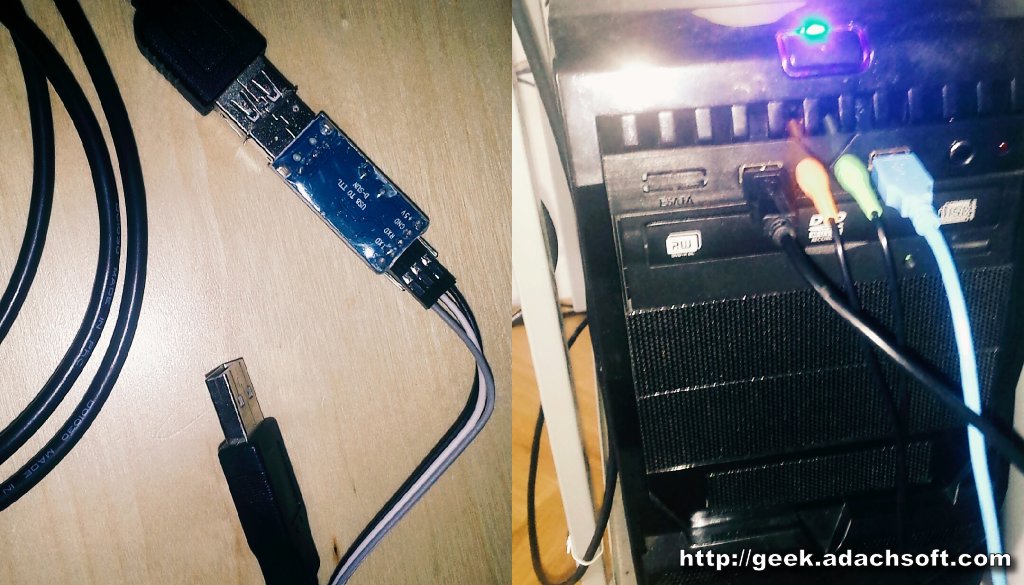
For PL2303 to work properly you must have the driver installed on your system.
Login to Raspberry PI Via Serial Port Using Putty

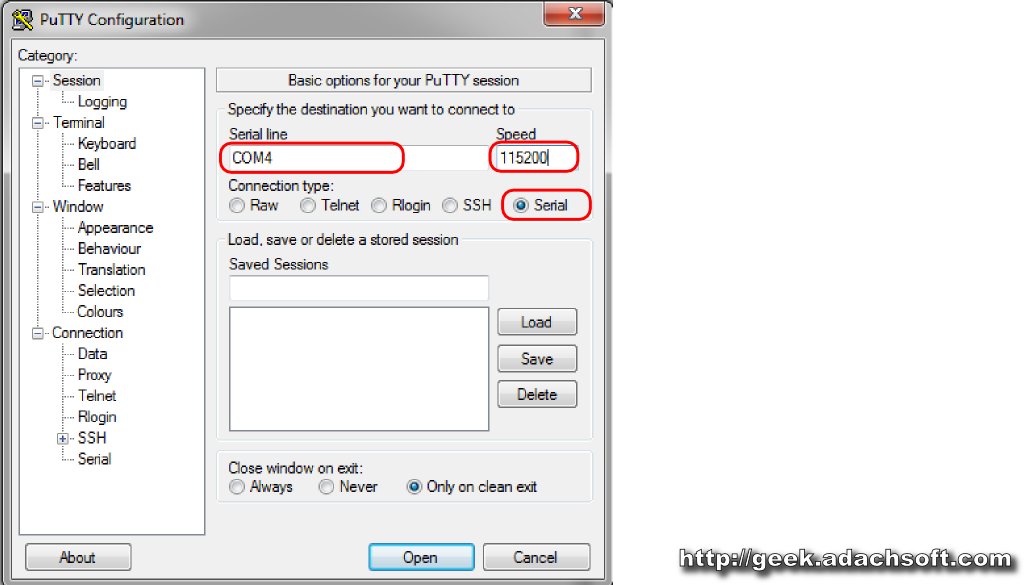
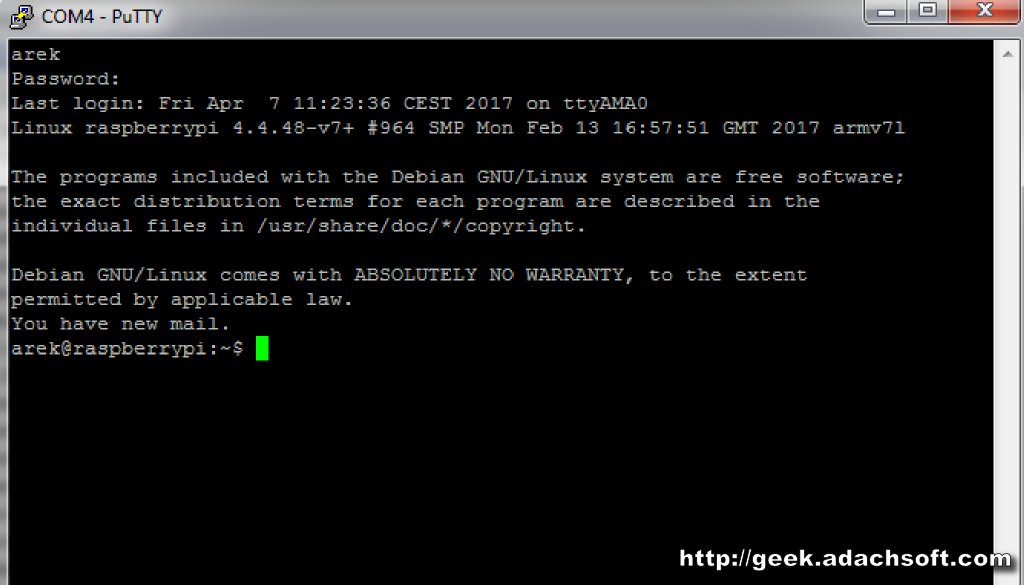
- Now we open the device manager and look for our serial port. In my system, he showed up as COM4.
- We open putty and configure the connection. . Set the connection type to Serial. In my case I set COM4. It is also important to set the correct speed: 115200.
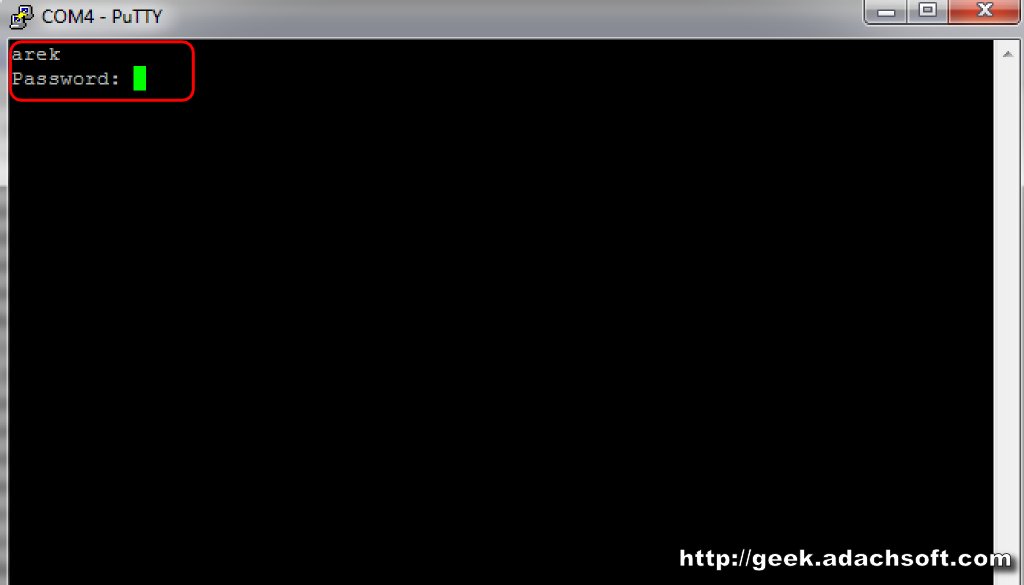
- We enter login and password.
- Now we are logged into the Raspberry PI via the Serial Port.