Configuring Home Remote for Use With Zmote
by urmilparikh in Circuits > Remote Control
6008 Views, 33 Favorites, 0 Comments
Configuring Home Remote for Use With Zmote
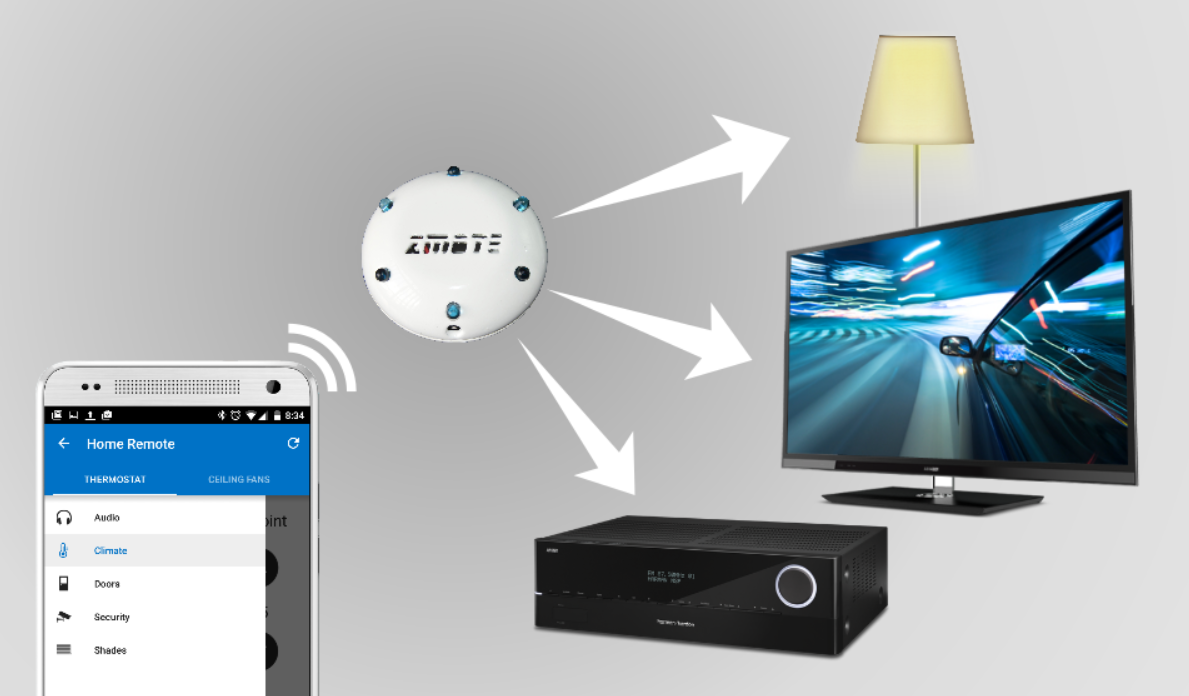
zmote is an open-source, Wi-Fi enabled IR blaster / receiver widget that offers full control through simple REST APIs, which enables it to be controlled from a simple web page or a mobile app.
zmote comes with its own web-app that allows you to add remotes from its database. This web-app even lets you customize your remote and learn new key presses from your existing remote. zmote works out-of-the-box with many 3rd party apps, but if you want maximum flexibility (and don't mind spending some time to get that flexibility), then Home Remote is your answer.
Home Remote is a multi-platform mobile app using which you can turn your phone or tablet into the perfect remote control for your household. It gives you complete control over the layout and content of the app.
This instructable describes configuring Home Remote to use with zmote in order to control your IR-enabled gadgets from your phone or tablet using your custom Home Remote layout.
Before we start, you need a zmote, a smartphone or tablet and a Windows PC at minimum.
Download and Install Home Remote Designer
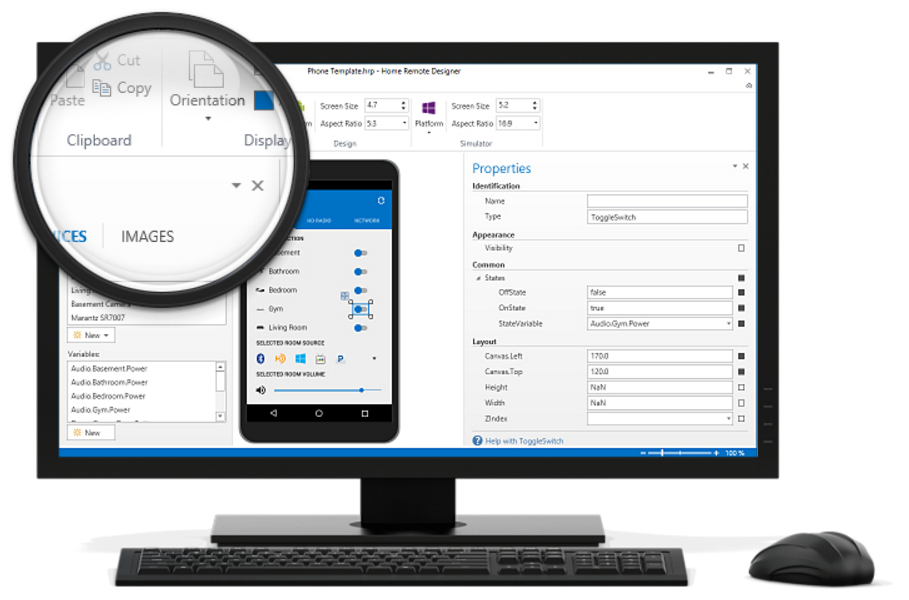
First, we need to download Home Remote Designer and Home Remote app for our mobile device. Both can be downloaded from here.
The designer is used to create a custom layout, add action buttons, etc and assign functional properties to them.
You can start with a new / blank project or from a default Phone or Tablet templates downloadable from the web.
Let us start with a new project, by clicking File -> New.
Add Zmote As a Device
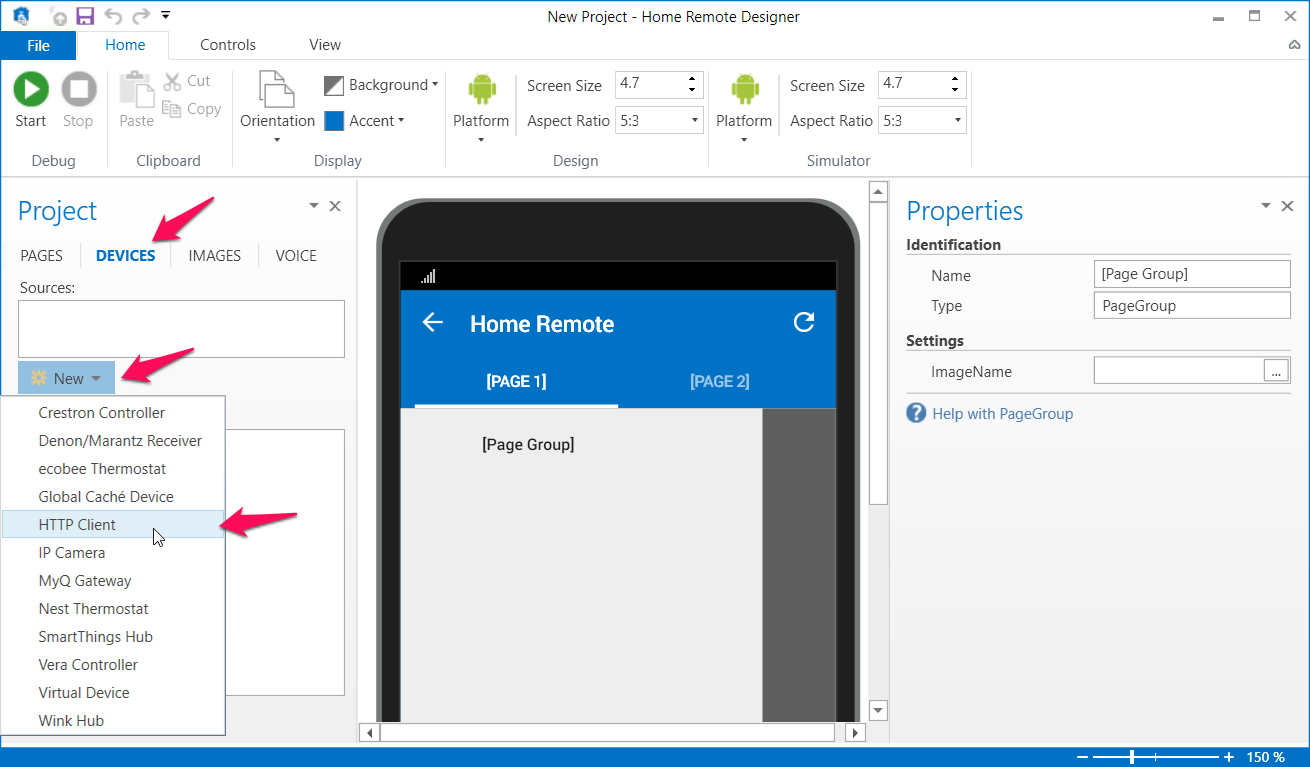
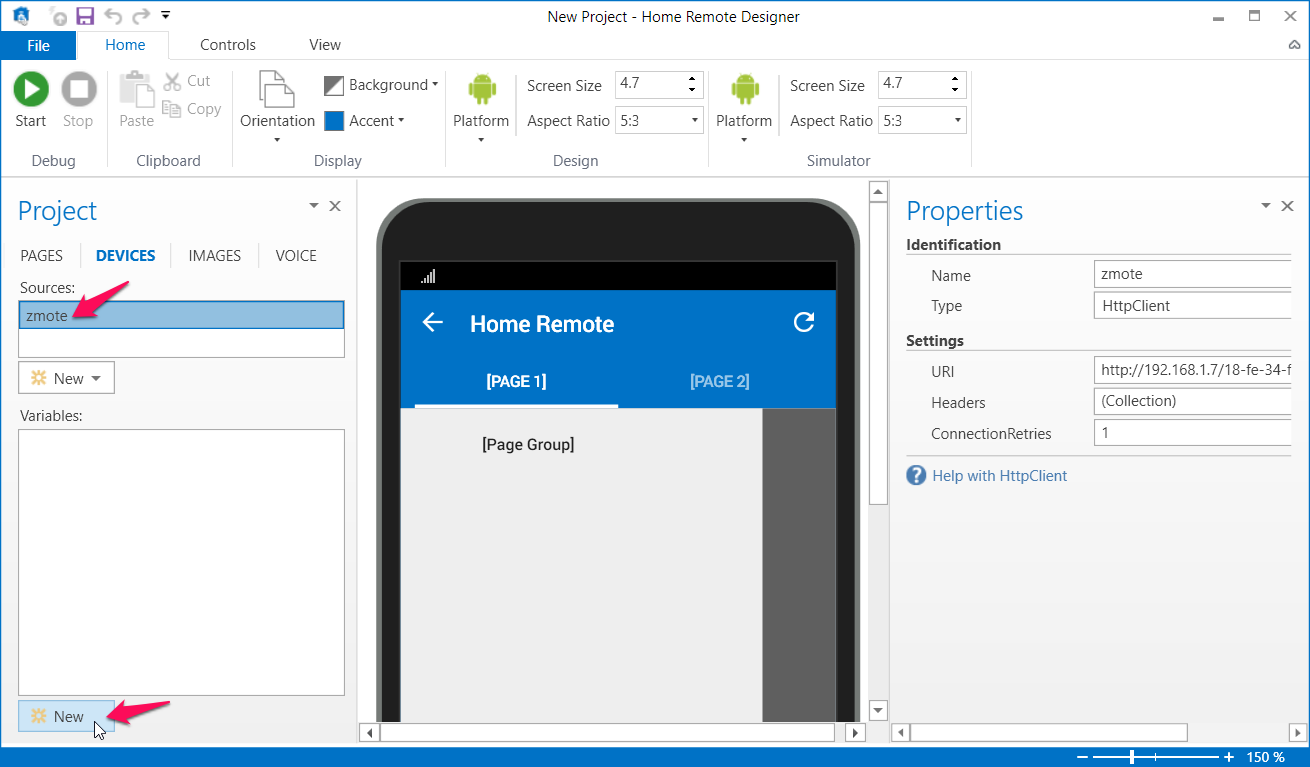
Under Project, select DEVICES tab and click on New button below Sources to add a new HTTP Client source.
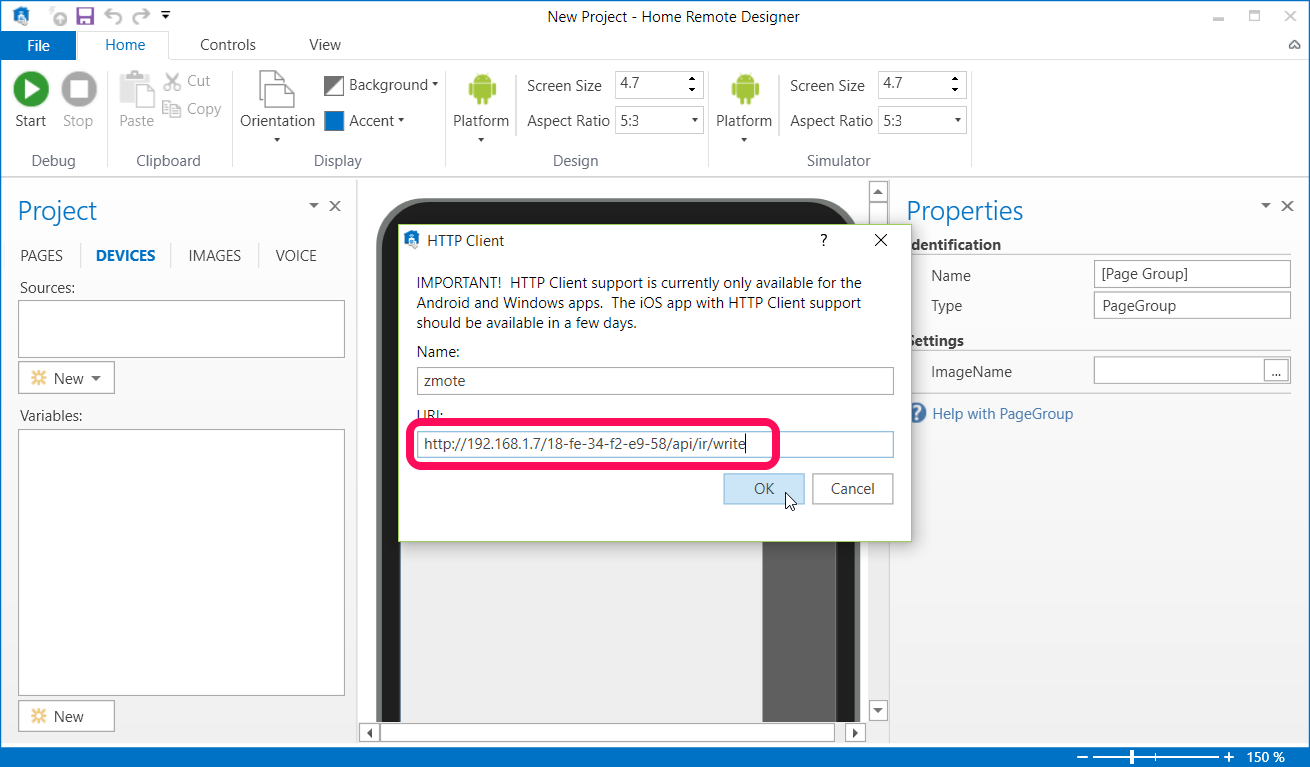
In the HTTP Client addition box, write the complete URL for zmote's IR sending API. It is of the form:
http://[IP]/[MAC]/api/ir/write
Note that in the image above, zmote's IP is 192.168.1.7 and its MAC address is 18-fe-34-f2-e9-58. You may need to access your router's web interface to know zmote's IP and MAC address.
It is a good idea to configure your router to reserve IP for zmote.
Add Variable for Each IR Command
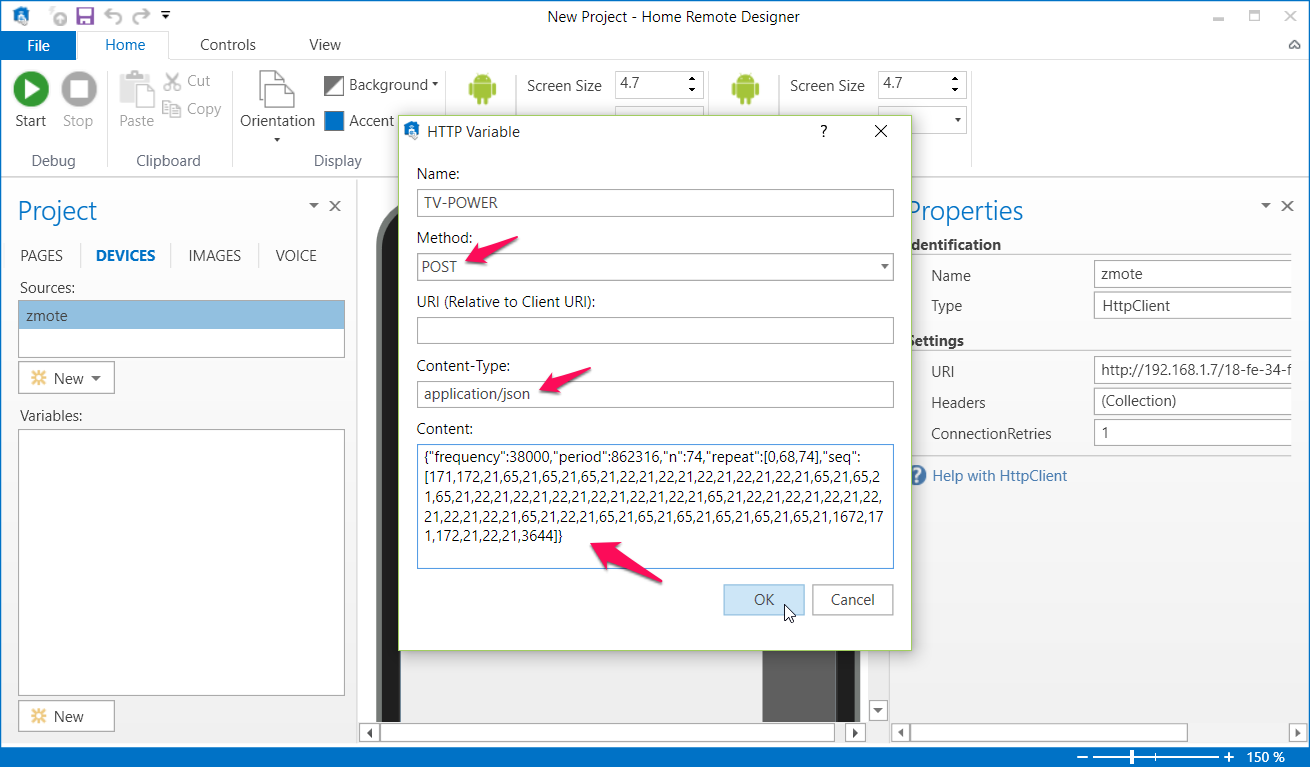
Now that we have configured zmote as a source, we need to add one variable for each IR command we want to our Home Remote to be able to send.
Let's add a variable named TV-POWER that corresponds to POWER key of a Samsung TV remote. We know that most Samsung TVs use protocol NECx2, device 7, subdevice 7 and obc 2 for POWER key.
We need such protocol information for each key we want to program. This can be obtained from various sources available on internet.
Once we know the protocol, we can convert it to a format that zmote understands using IR encode service provided by zmote.io. It is of the form:
http://zmote.io/irp/encode/[protocol],[device],[subdevice],[obc]
For our case, the URL would be:
http://zmote.io/irp/encode/NECx2,7,7,2
It gives following response, which can be configured for TV-POWER key as seen in the image:
{"frequency":38000,"n":68,"repeat":[0,0,68],"seq":[171,172,21,65,21,65,21,65,21,22,21,22,21,22,21,22,21,22,21,65,21,65,21,65,21,22,21,22,21,22,21,22,21,22,21,22,21,65,21,22,21,22,21,22,21,22,21,22,21,22,21,65,21,22,21,65,21,65,21,65,21,65,21,65,21,65,21,1672]}We can add as many such variables, each representing an IR command.
Create Layout and Assign StateVariables
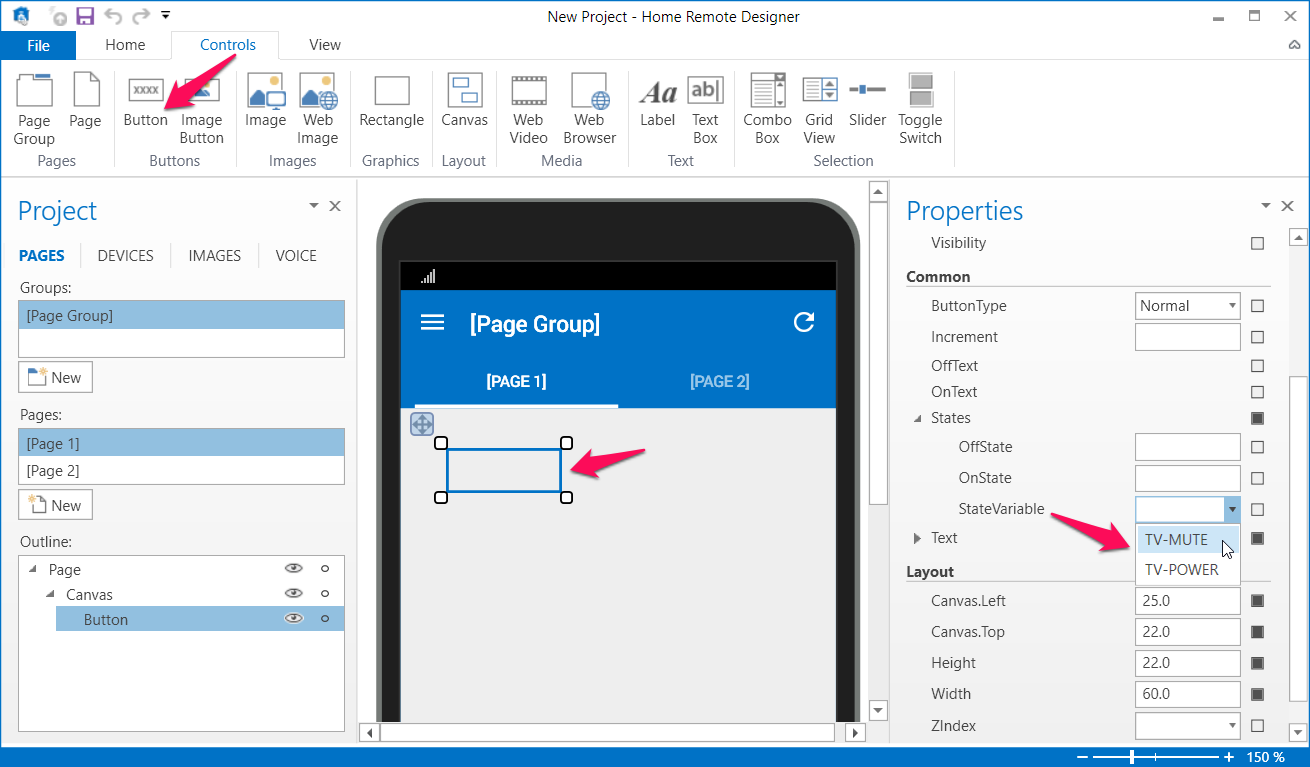
Now that we have created variables for each IR command we want to send, let's start creating remote layout.
We can add various control elements to our remote layout using Controls menu. Let's add a button by selecting Button from Controls menu and dragging a small rectangle in empty area of [PAGE 1] to define its position and size.
Now, in the Properties pane on the right, locate Common -> States -> StateVariable and select the variable we want to assign to this button. Once selected, IR code corresponding to the selected variable will be sent to zmote whenever this button is tapped from the Home Remote app.
You can test it by starting the Home Remote simulator right from the designer.
Once you are done with adding controls and testing them with simulator, save the project and transfer it to your phone or tablet for use with Home Remote app.