Configure Arduino IDE for Atmega 328P to Use 8MHz Internal Clock
by Adeel Ijaz in Circuits > Microcontrollers
32695 Views, 8 Favorites, 0 Comments
Configure Arduino IDE for Atmega 328P to Use 8MHz Internal Clock

If you are making Arduino on breadboard using Atmel Atmega 328P then traditionally you need a 16MHz crystal and a couple of capacitors. But in some cases, we don't have crystal or capacitors.
To solve this problem, we can configure Atmel Atmega 328P with internal 8MHz crystal. To do this we need to configure Arduino IDE to program the Breadboard Arduino using internal 8MHz clock oscillator (Crystal).
If we successfully configure Arduino IDE to use 8MHz clock of Atmel Atmega 328P, we no longer need to attach capacitors and crystal to Atmel Atmega 328P.
Just follow the following instructions to make programming for Atmel Atmega 328P easier.
Download the .zip File
First of all download breadboard.zip file, attached with this step and extract it. Please don't mess up with the folder named "breadboard" after extraction because it can cause change in fuse settings for Atmel Atmega 328P.
Downloads
Open Arduino IDE
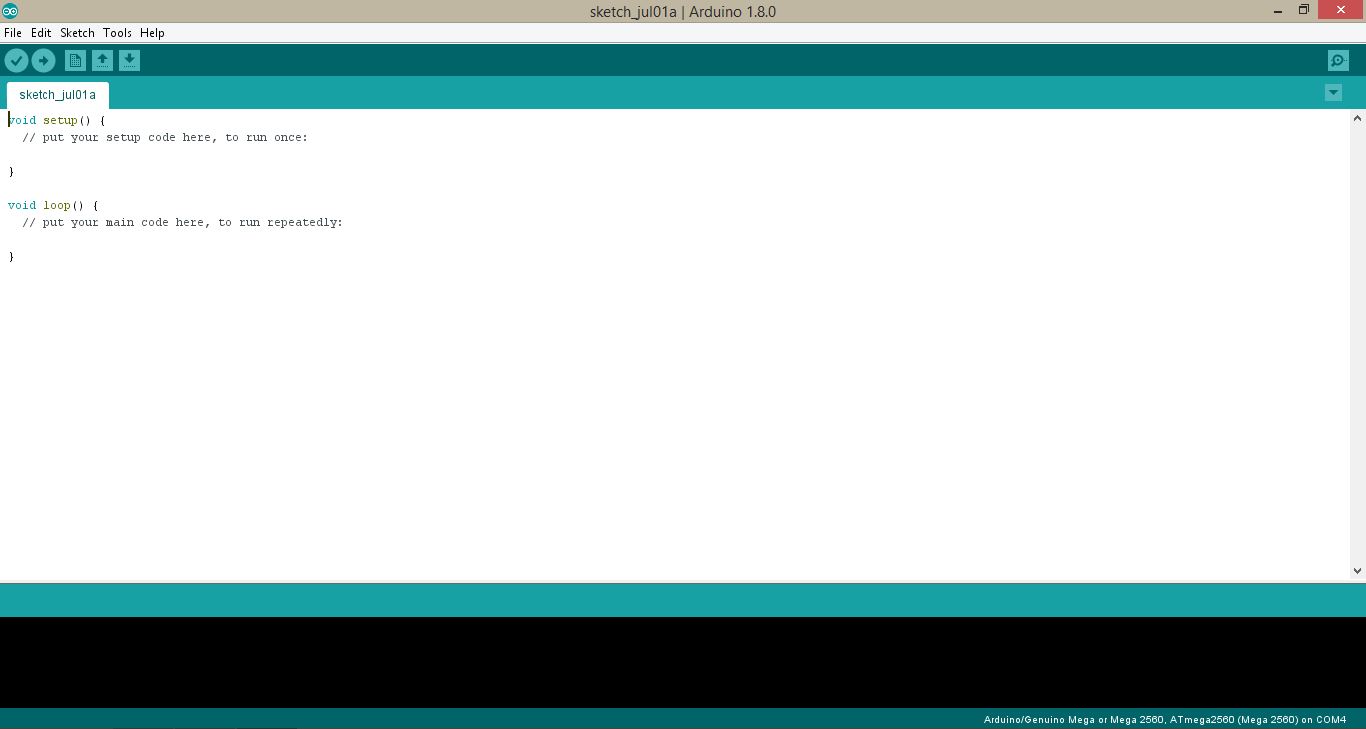
After the extraction of folder from .zip file, open the Arduino IDE Installed on your computer. (I recommend Windows).
Open Preferences of Arduino IDE
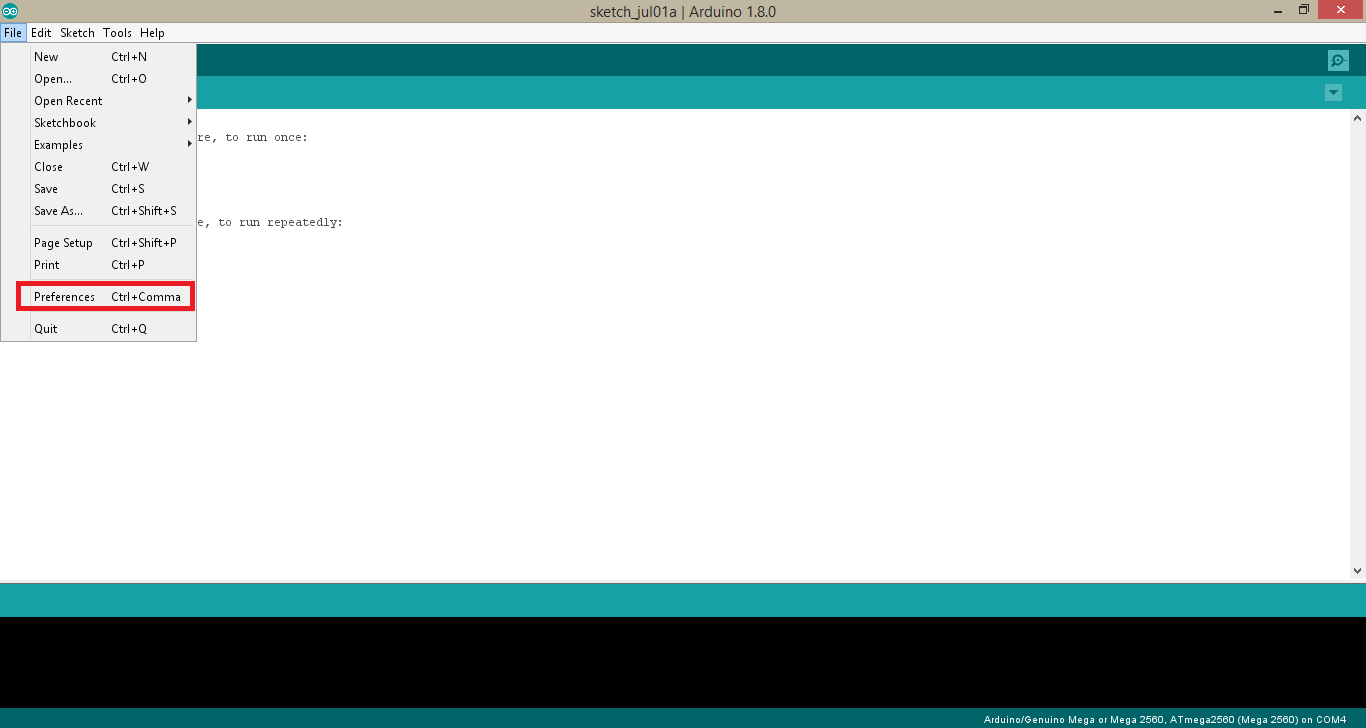
When you opened Arduino IDE, then open Preferences from File menu of Arduino IDE, as shown in figure.
Copy Sketchbook Location
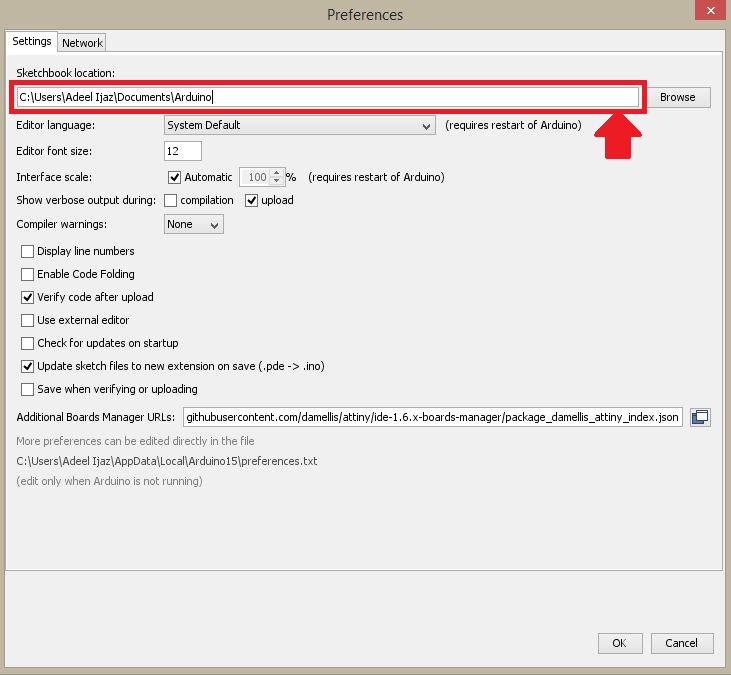
When Preferences of Arduino IDE opened, then copy the address of Sketchbook Location. This is also shown in given figure.
After this step, close Arduino IDE.
Open File Explorer
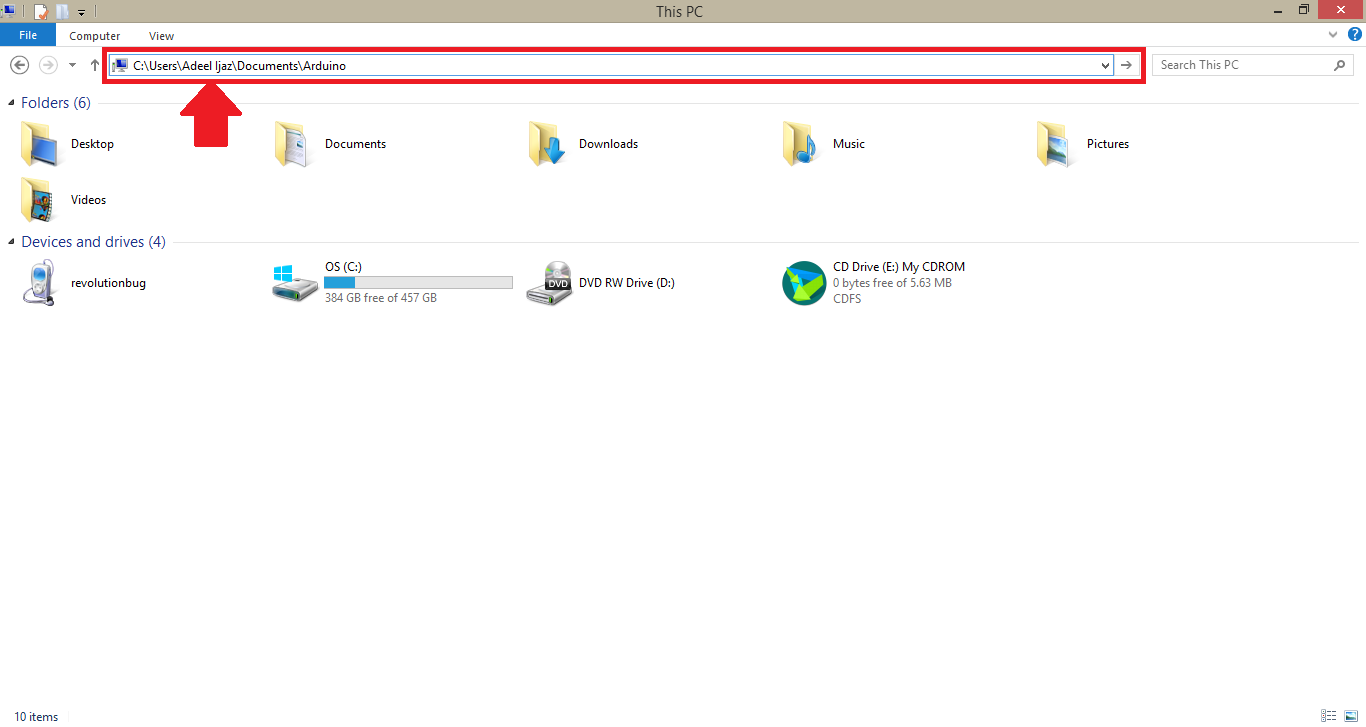
After copying of Sketchbook Location address, open This PC or File Explorer. Now, click on address bar of File Explorer or This PC and paste the Sketchbook Location address which you copied from Preferences of Arduino IDE. Then press Enter.
Hardware Folder
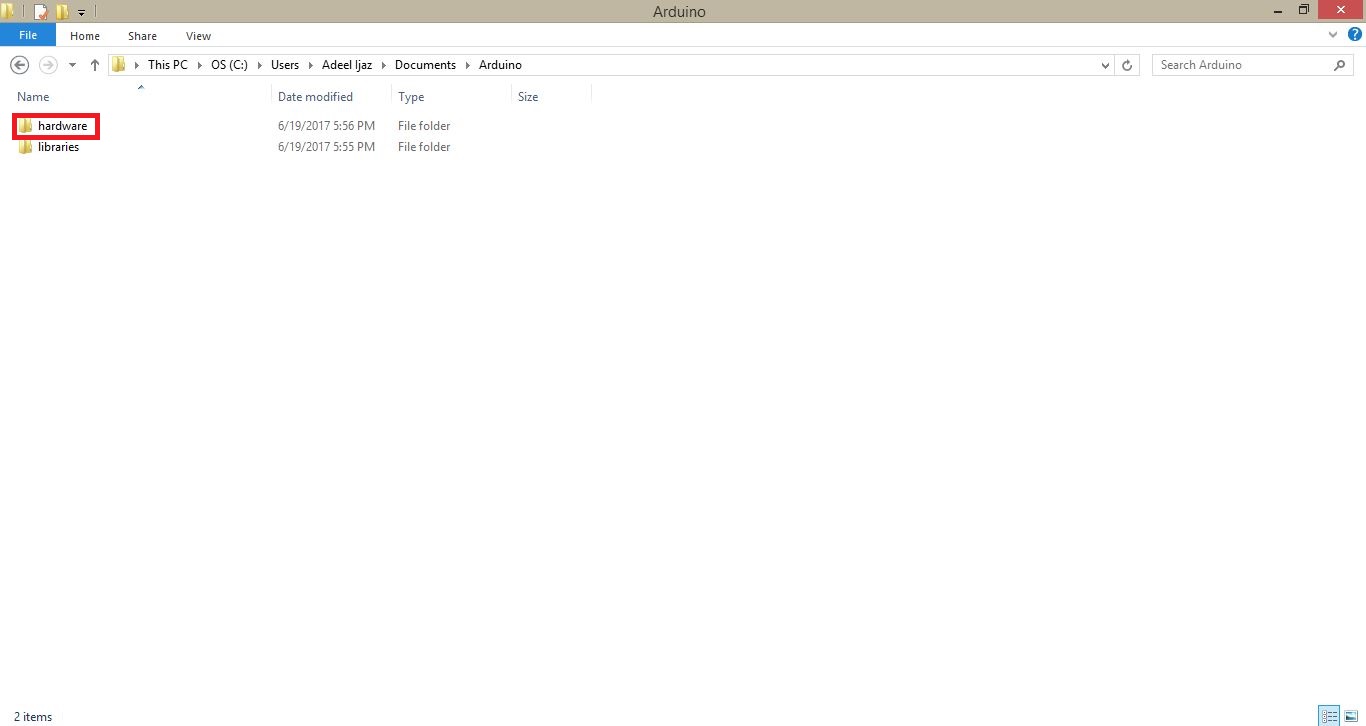
After opening the Sketchbook Location, you'll see a folder named "hardware". If you don't see any hardware folder then make a new folder and name it as hardware. Now open the hardware folder. This step is shown in figure.
Placing "breadboard" Folder
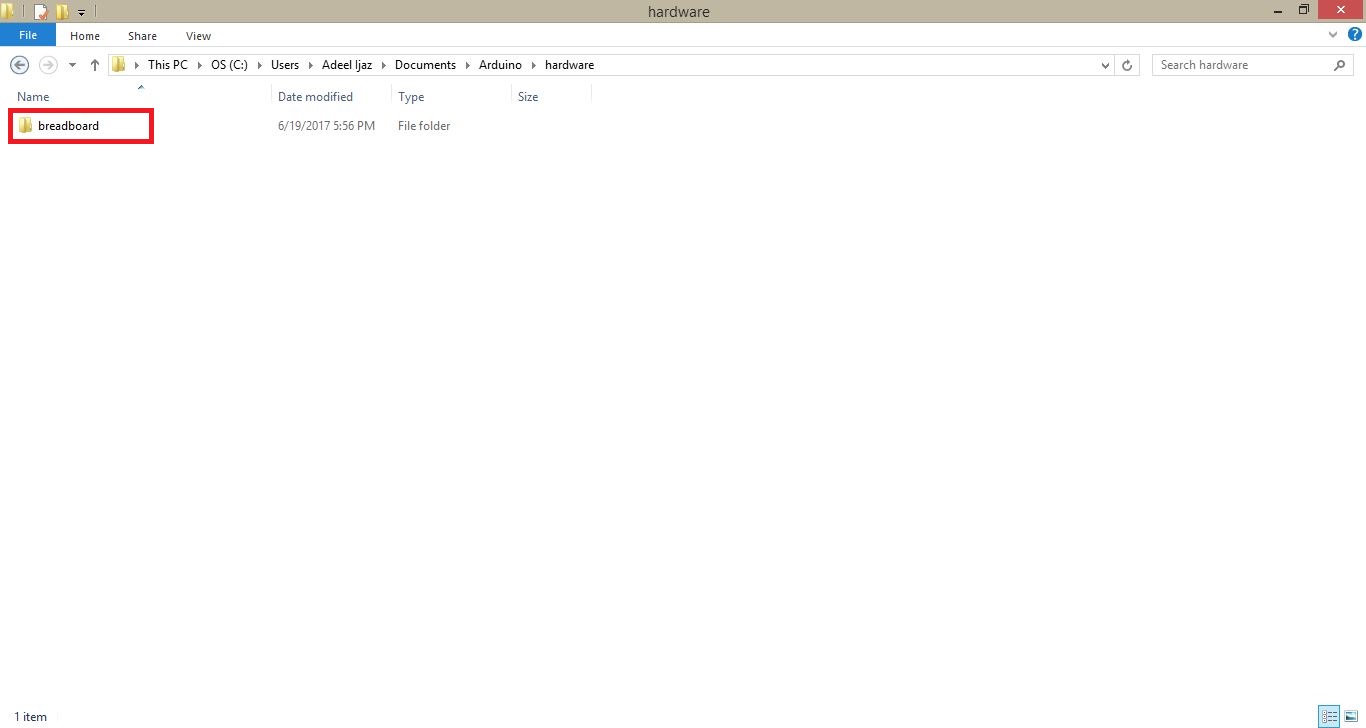
When hardware folder is opened, then copy the extracted folder named "breadboard" from Step-1 of this tutorial and paste it inside hardware folder. this is shown in given figure.
Confirmation
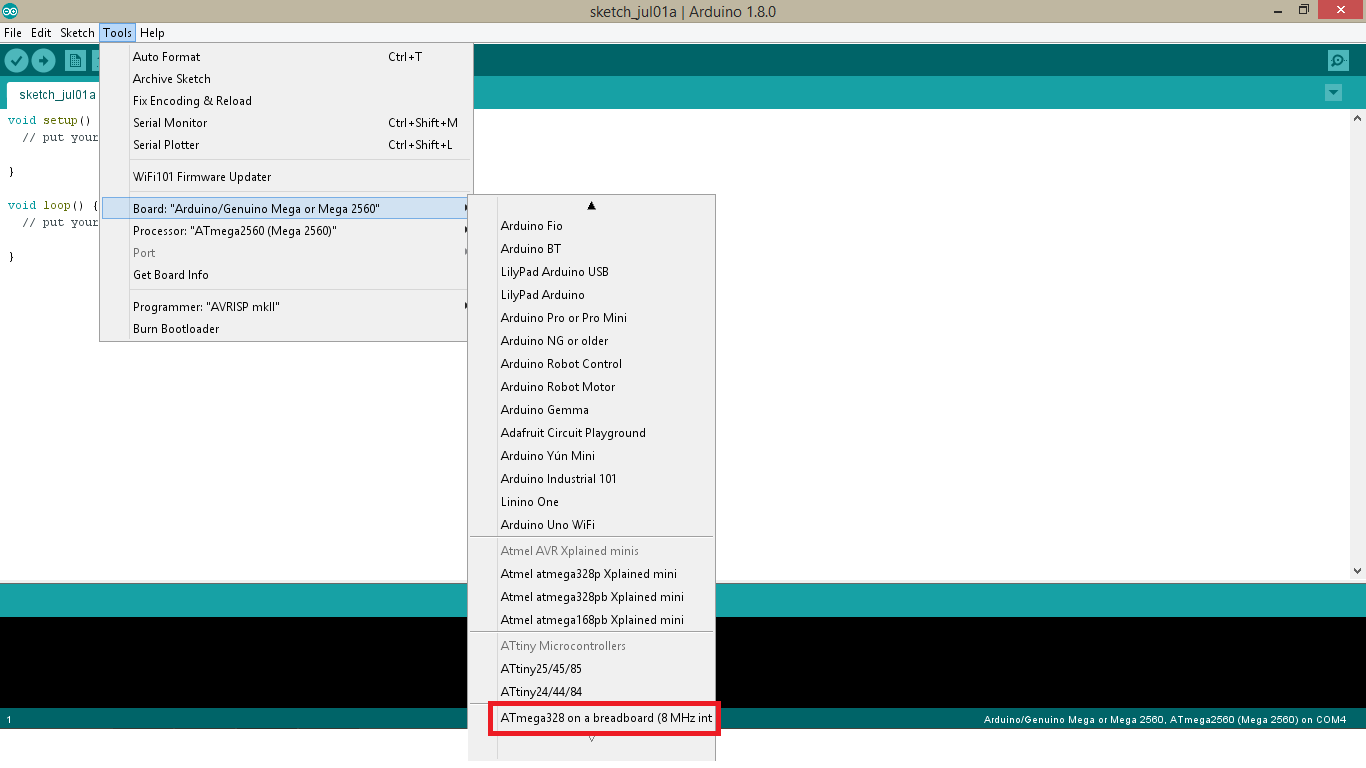
After you successfully paste "breadboard" folder in hardware folder, open Arduino IDE installed on your computer and open Tools>Board: . Now, scroll to the bottom of the drop-down menu and you'll see a option named "Atmega 328 on breadboard".
This means that you have successfully configured Arduino IDE to use Internal 8MHz Clock of Atmel Atmega 328P for programming. Now, you can use this option to program Atmel Atmega 328P to program without crystal and capacitors.
This step is also shown in attached figure.