Complete Garage Re-do PART 1


This project is the result of many years dreaming . After saying "whenever we have time I'd like to have this or that on our garage" Well the day has come.
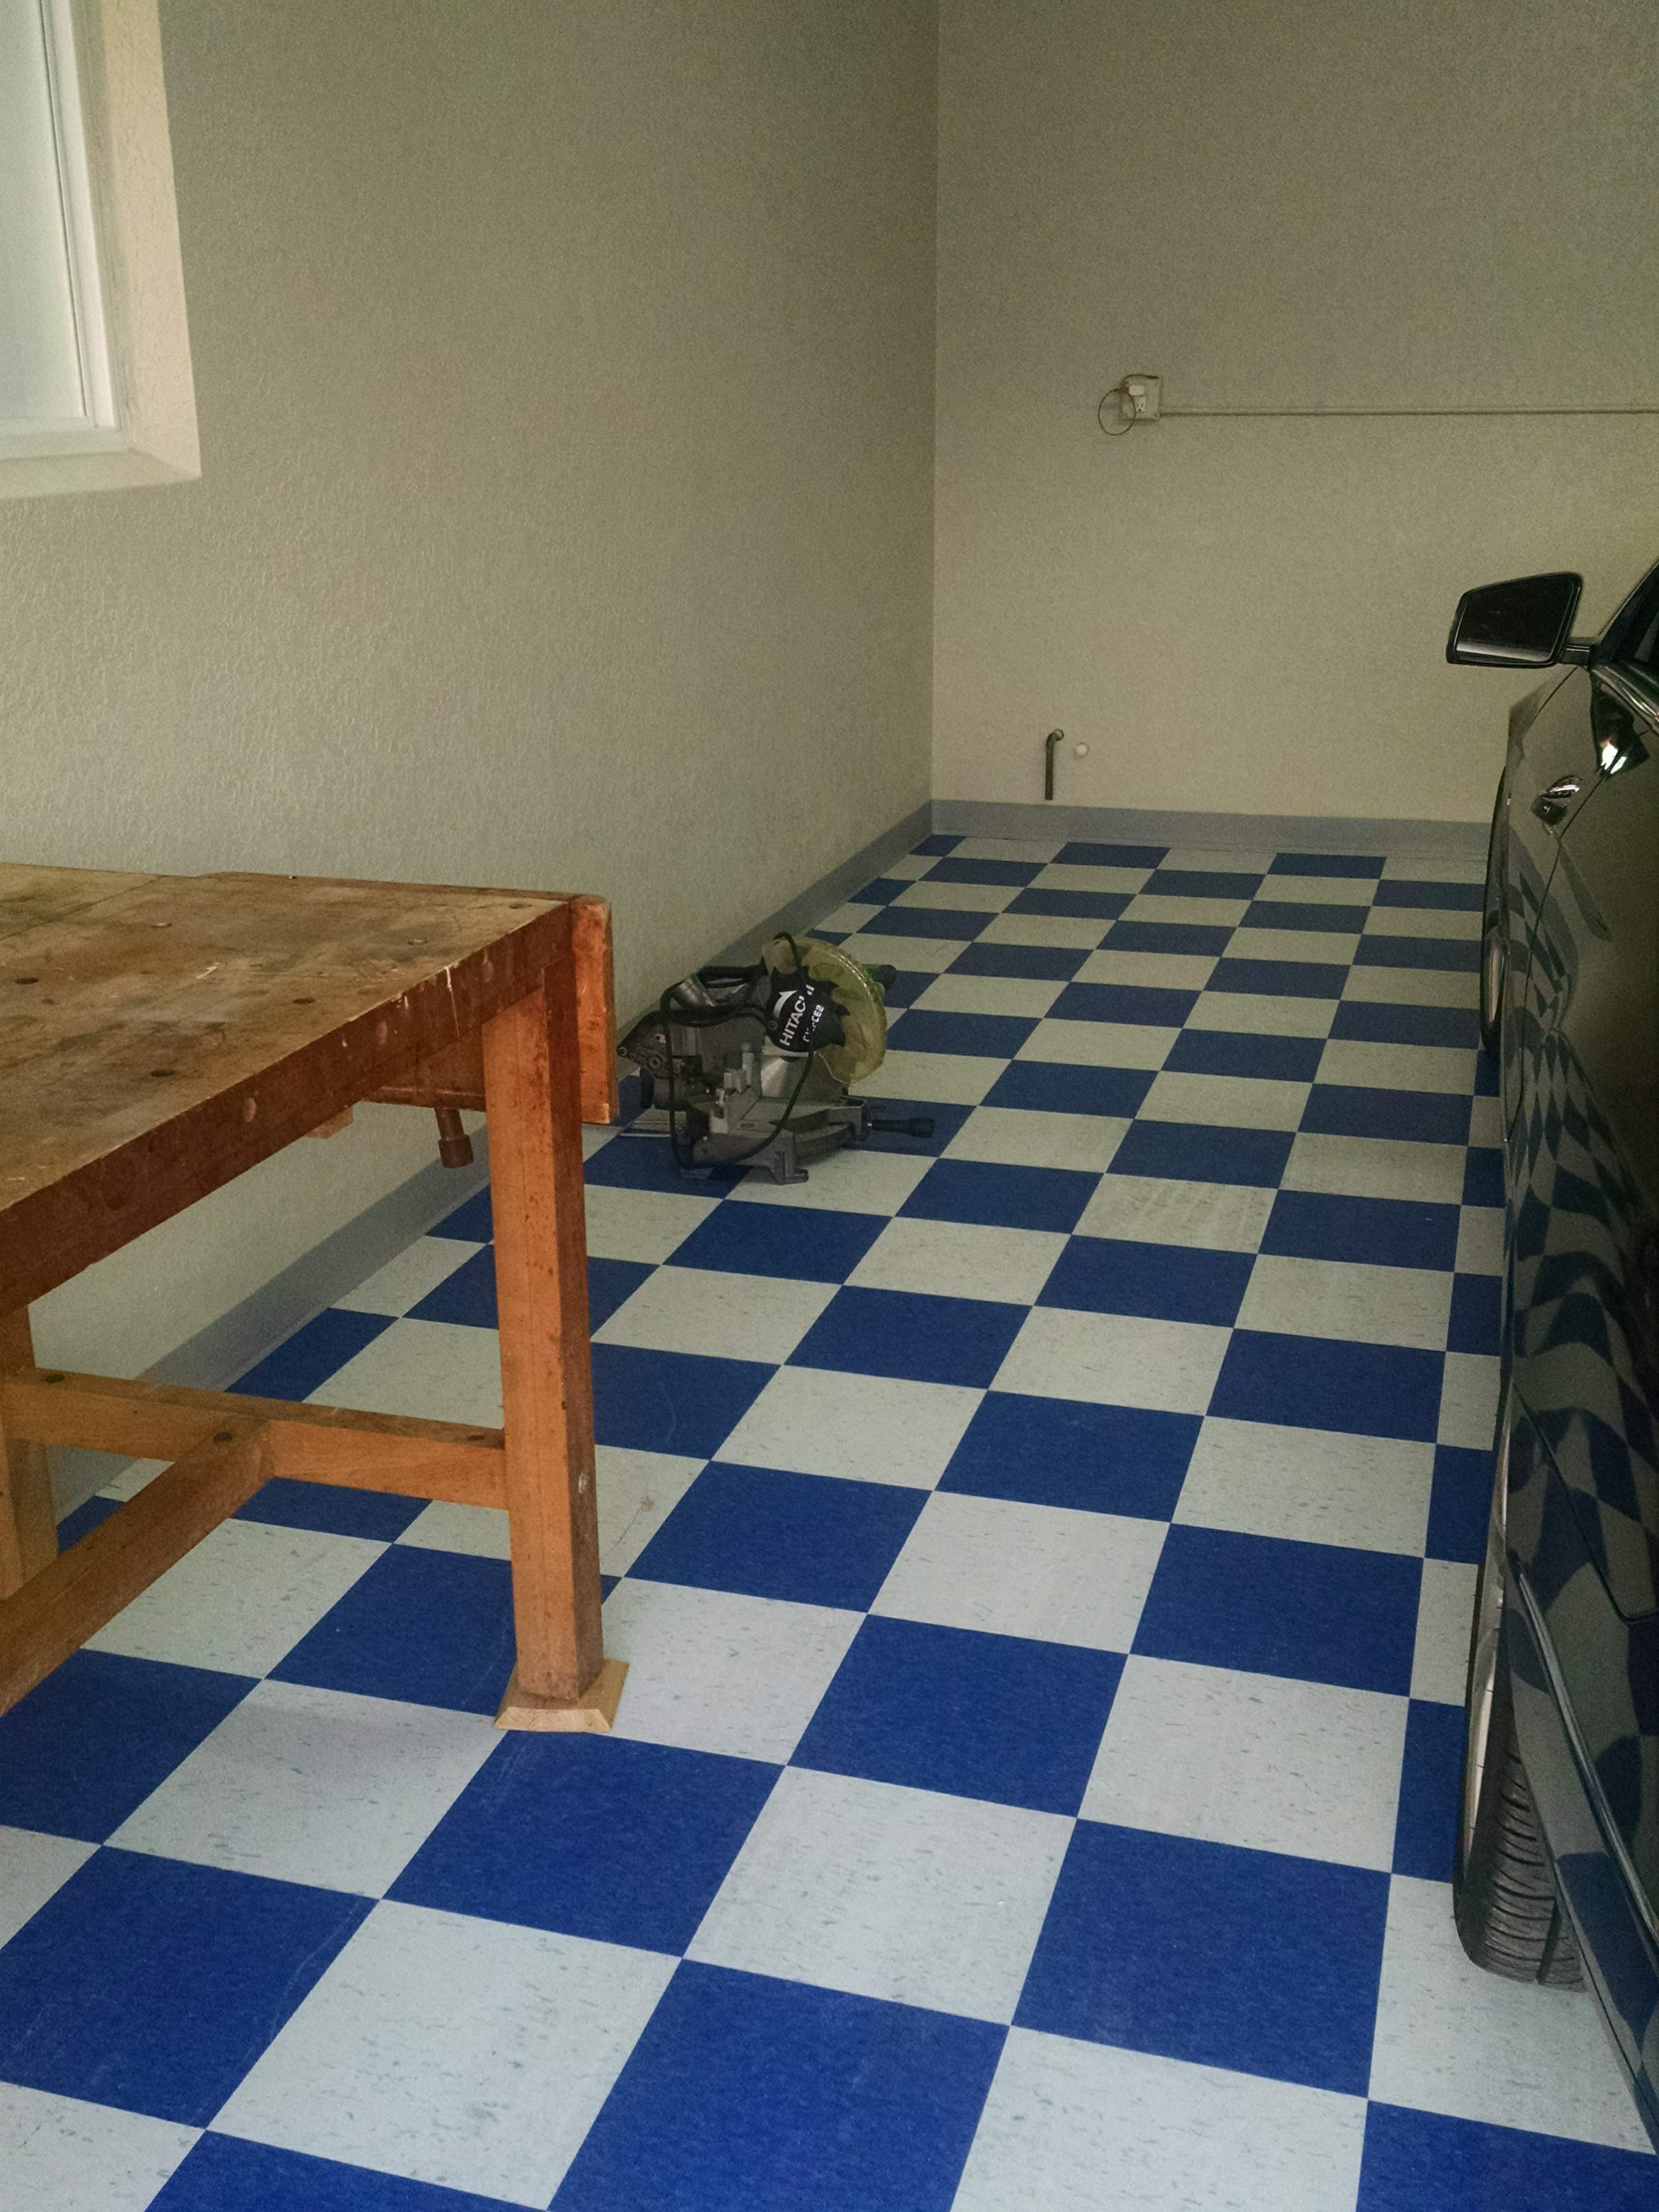
The garage is a 2 car garage of average size. When we bought the house it looked pretty amazing, the previous owner covered the floor with vinyl tile (checkerboard design), installed air conditioner and included the garage door to the alarm system. For a while it was perfect but it was more form than function, looked pretty but no real way to organize and store even the most basic things.
One day surfing on the instructables pages I saw Easy-Garage-Storage-and-Bench by marcjoli. That was such a source of inspiration! I printed the steps and keep the hardcopy.
Few years went by, and the garage got more cluttered little by little, up to a level that became unacceptable, don't have pictures of the mess (and not sure I'd publish them if I had them). One day we noticed some fragments of vinyl tiles in the driveway... what??? the floor started to brake off on the locations directly under the tires of the car, we believe it was due to the heat of the tires when driving it in.
That event accelerated the decision. The garage will be emptied, vinyl tiles removed from the floor, all the little shelves, cabinets, hooks and nails will go. From that moment all we could think of was the garage, until then we had done a few good projects around the house, but nothing this big.
I'm presenting this project as an inspiration for others. I realize this is "Instructables" but at least Part 1 will not be a "step by step" set of instructions. We didn't keep track of every tool used or exact quantities of materials, the beginning of this re-do is pretty basic. Anyone who wishes to Re-Do their Garage only needs to want it bad enough. Obviously you need to be somehow handy with a variety of tool but don't need to be an expert, just careful and patient.
The direct part of the project started in March 2018 by emptying the garage into the shed and guest bedroom, but it really started many years before. Deciding what color to paint the walls, what material to use on the floor, what would be the use of the garage after the project is completed. Can we afford what we are dreaming? Can we deal with the mess for months at a time?
So far this Part 1 was completed without serious injuries because we were lucky, even following directions some of the required tasks are just difficult with intrinsic risk of bodily harm... for sure mental stress on some of them. Do not blame us or anyone else but injuries to your mind or body, In order to be 100% risk free you need to leave your garage as is.
The project is being done without specific schedule, it isn't completed yet. I started documenting it because if I wait until is done, I'll probably forget half of the stuff. But I feel optimistic that there will be a last step with a garage inauguration party!
Planning
Before taking all the clutter out, we tried to anticipate as many issues as possible. Did more and more research in spite of believing that we knew exactly what we wanted. Tried to collect ideas from all over the DIY world.
The first thing I noticed is that people say you have to empty the garage but there's never a picture of their garage empty. During the planning stage I was ridiculously judgmental of other people's projects, for that I apologize now. It is hard enough to do the job, when you add the task of documenting it following some order, it becomes overwhelming sometimes. Regardless of your frame of mind when looking at other people's projects just keep reading them. Even if you don't like what they did for whatever reason, they may describe a problem they encounter that applies to you, or better yet a short cut on certain procedure that will save you time, money or extra gray hairs.
In any case, the following was our high level outline:
PART 1
- Replace floor tiles
- Paint walls
- Put insulation on garage door
PART 2
- Create 2 working stations:
- Model making area with: paint booth, storage for little tools & materials, monitor on wall.
- Everything else work area to tinker with dive gear, house issues, kids projects, other.
PART 3
- Make wall cabinets for storage
- Hang a shelf from the ceiling if the cabinets didn't hold all the seasonal stuff
- Leave enough room for the car to go in every-night with few exceptions.
Remove the Floor


Tools & Materials
- Scraper with a long handle
- Commercial floor polisher/scrubber
First we took 80% of the garage contents to a room of the house that was supposed to be the guest room. Then we installed wheels to the big tools that couldn't go to the room. With movable items each day they where rolled out to the drive way to allow working space and back in at the end of the day.
Actual removal of the vinyl tiles wasn't terrible, but the glue left behind in the concrete was a nightmare to eliminate. There was plenty of YouTube videos, glue removal liquids, different scrapping tools, most everything would do just a little of removal but not enough to call it done.
Went to a known hardware store chain and rented a floor polisher. Please be careful if you go this route, the YouTube video makes it look very easy, I don't know if we had the wrong attachment or the machine itself had issues. We followed the instructions to the T, but the thing grabbed my husband and threw him against a wall like he was a feather, a young strong guy (younger and stronger than my husband and I) couldn't control the evil device. After more homework we went to a dedicated equipment rental place, and after testing the unit at the shop we use a 200 pound machine that clean all the glue from the concrete. I think being so heavy was the key, the one from the hardware store was probably to light for its motor, or maybe there's a secret technique to use it that we didn't know. The picture shows the monster machine in the back of the jeep.
Paint the Walls


Tools and Materials
- Sponges
- Spatula
- Brushes and rollers
- TSP for prepping the walls
- Tape to cover elements that won't be painted
- Paint
There may be different philosophies about the proper timing for painting but even if we need to touch up every single wall, it was mentally worth it to paint at this point.
After removing all the hooks, nails and different types of shelves, you have the big dirty walls staring at you doing nothing for your motivation.
After the painting is done, the place looks great even if the guest room is full with the garage stuff and that friend or relative that finally comes for the weekend has to sleep on an air mattress` between the living room and the hallway.
There was spider webs, and some suspicious shells in some corners in addition of being dirty all over and having many holes.
First thing we did was to wash the walls with TSP and warm water. Used big sponges and gloves. One round to apply it and then another round with clean warm water.
It felt like a waste of energy and time but do not underestimate the value or this step, looking at the color of the water in bucket after rinsing with a big sponge made definitely made me understand the why of this step
Filled all the holes, tape the doors and window frames and went to town with the roller. Wished the walls were flat instead of having pretty texture but the previous owner obviously liked the texture.
Enjoy the Moment and Get Ready.


Take time to enjoy your walls while you visualize the next steps.
Think about the tools and materials you need for the floor.
We had the tiles for many months but had to get the glue and tools for the installation. Watched another batch of YouTube videos on vinyl tile installation and gathered all the items needed.
Time for the Floor


.jpg)


Tools and Materials
- Snap line with chalk
- Proper spatula to spread the glue
- Small sharp knife, exact or similar to cut tile
- Knee pads. The gel filled ones are very good.
- Bucket with warm water and rags for clean up as you go
- Glue
- Tiles
We probably measure the area 3 or 4 times, figure what works bests for your situation. Remember nothing in your place is square, the floor is no exception. Measure the width by the entrance, mid-way and the back, same with the length . Do dry runs, place 3, 4 or 5 full rows to see what will look better. Supposedly the rule is that you start in the middle and go to the walls, but perfect math only works with perfectly parallel walls, not the case in our garage.
DO NOT RUSH. At this point we were anxious to see some results, doing the dry run provokes a bit of an adrenalin ... resist the urge to "let's just do" Read again the instructions on the glue, different manufactures have different cure times, if you've see 10 videos of how to do it, there's way to many thoughts in your head. Get a cup of coffee or whatever.. You need to know exactly how long is the wait for the glue. The only way is by testing a small portion, because even the can doesn't know what it takes to be just right. Your location is the key, my South Florida weather in April was no where close to the recommendations.
After you marked the beginning that works for you, deciding which section will go first, now you are ready.
Spread the glue - wait - place the full tiles - then cut and place the tiles on the edges.
Cutting the vinyl tiles is very easy but do not rush the process. You score and bend for a clean edge, but if you don't bend uniformly it will produce a jagged result.
Final Details for the Floor.


Tools and Materials
- Gloves
- X-acto knife
- Baseboard
- Threshold
- Rubber seal for garage door.
- Liquid nails
After all the vinyl tiles are in place, the floor looks nice but not quite finished. I found vinyl baseboard in the local hardware store in rolls, easy to apply with liquid nails.
Now you need to put a new threshold, because the older one looks too crappy to put over the new stuff, Piece of cake, hardware store has a kit with the instructions and the glue for it. Of course we YouTube a few installations just in case.
Then after you look at everything, the corners by the garage door and you feel so proud of yourself because it looks like a professional did it, you noticed there's daylight coming under the door... what? that means my AC is escaping through that gap. Oh no, not in our garage.
Turns out the rubbery seal on the doors was all dry rotted and twisted. The old one came out pretty easy, so we rushed installing the new one. Instead of checking some videos on the installation we made the mistake of over-confidence... "we got this" not so much... after sliding a couple of feet in the track things got difficult. Ended up with my husband shoving and me pulling the darn thing inch by inch until all our fingers severely cramped. Afterwards I saw videos of people either soaking the thing in warm soapy water to soften it and make it slippery, or just spraying any of many lubricants that everyone has handy.
That was a lesson learned. Do not underestimate the level of difficulty on any task. If we haven't done it before we just DON"T KNOW
Insulation for the Door


Tools and Materials
- Cutting devices
- Measuring tape
- Insulation
There are 2 options for the insulation, the solid board or the fluffy kind. Watched several videos of the installation of both kinds and didn't have a preference We opted for the fluffy kind because it was on sale.
The instructions are very good in the kit and only took an afternoon to complete the task.
The difference in heat transfer was noted even before completing the full door. The garage door faces north but summer in South Florida is what it is, without AC it wouldn't be comfortable to be in the garage, and with AC the electric bill would be higher than necessary without insulation.
Planning for PART 2
Now is when the real work begins.
Until now we were just trying to create the proper canvas for out project. Now we have clean walls, good floor and clear area to figure out how to complete our objectives.
Keeping our inspiration unit Easy-Garage-Storage-and-Bench as the main design of the project, we figure what tools will be on top of the bench and how to adapt that design for the model-making station.
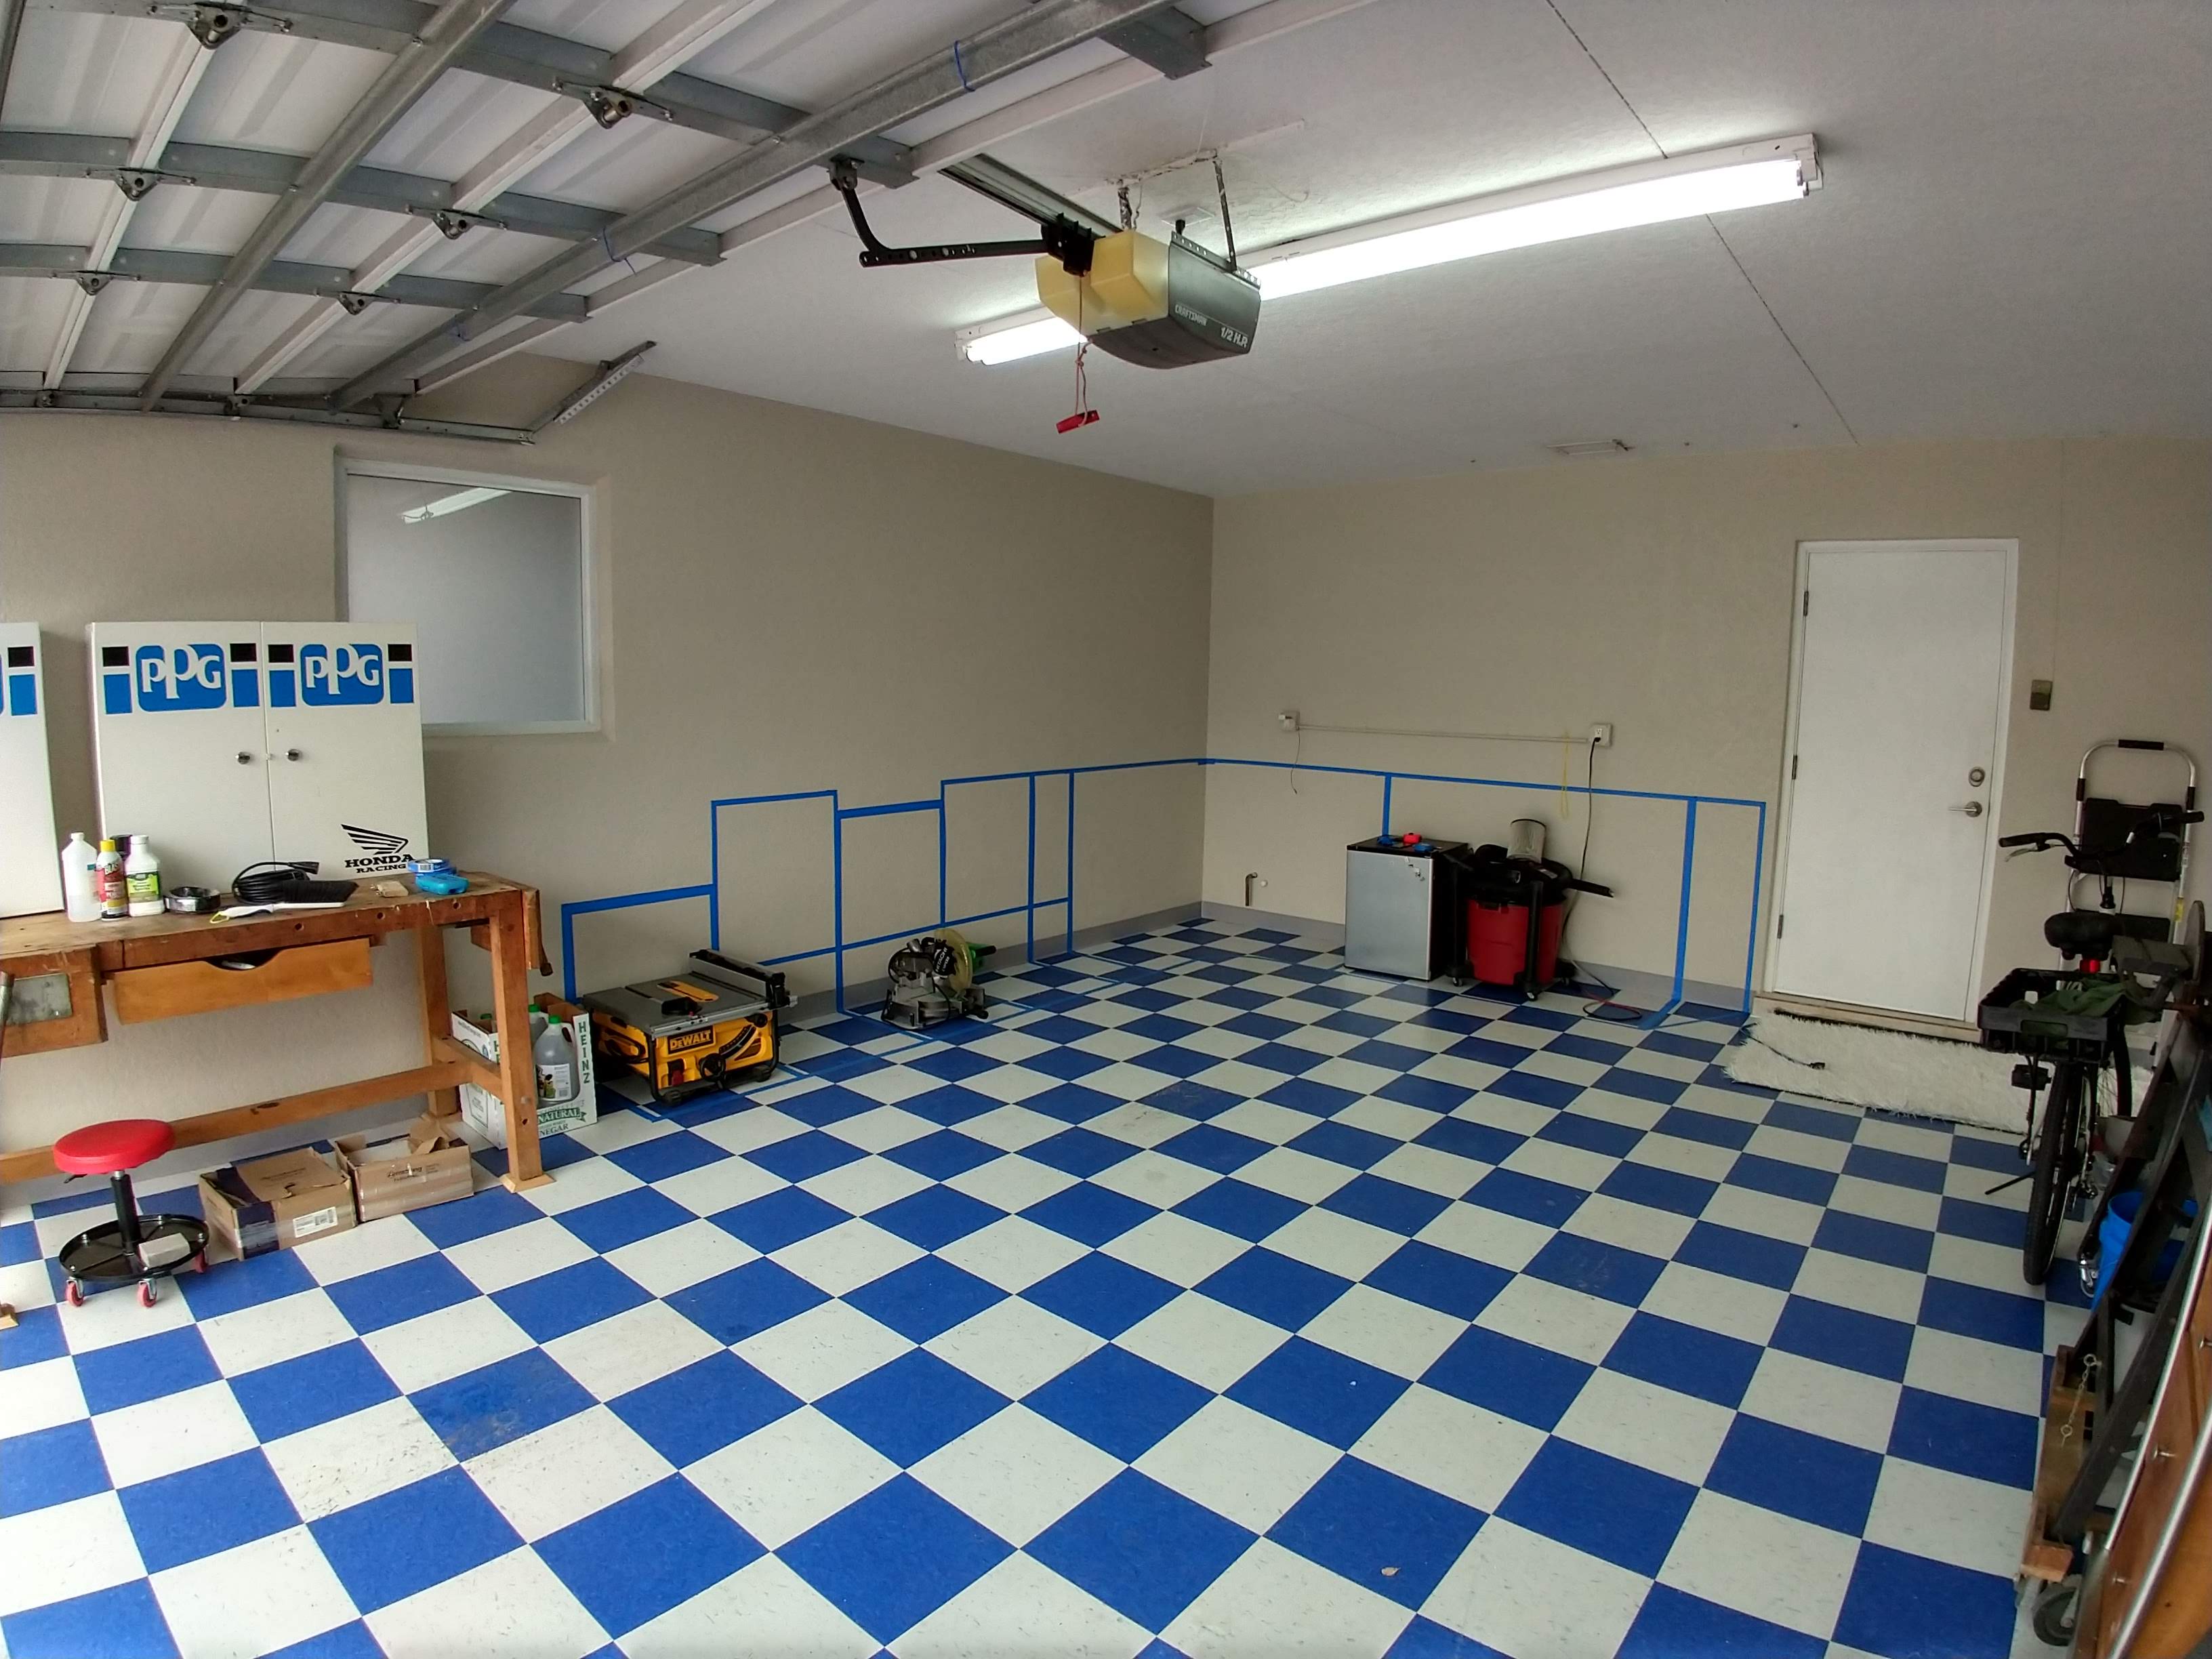
The corner will be the actual user location, with a final height similar to a drafting table will allow us to get a suitable chair from a local chair store (or amazon) without having to get into "how to make a tall comfortable chair"
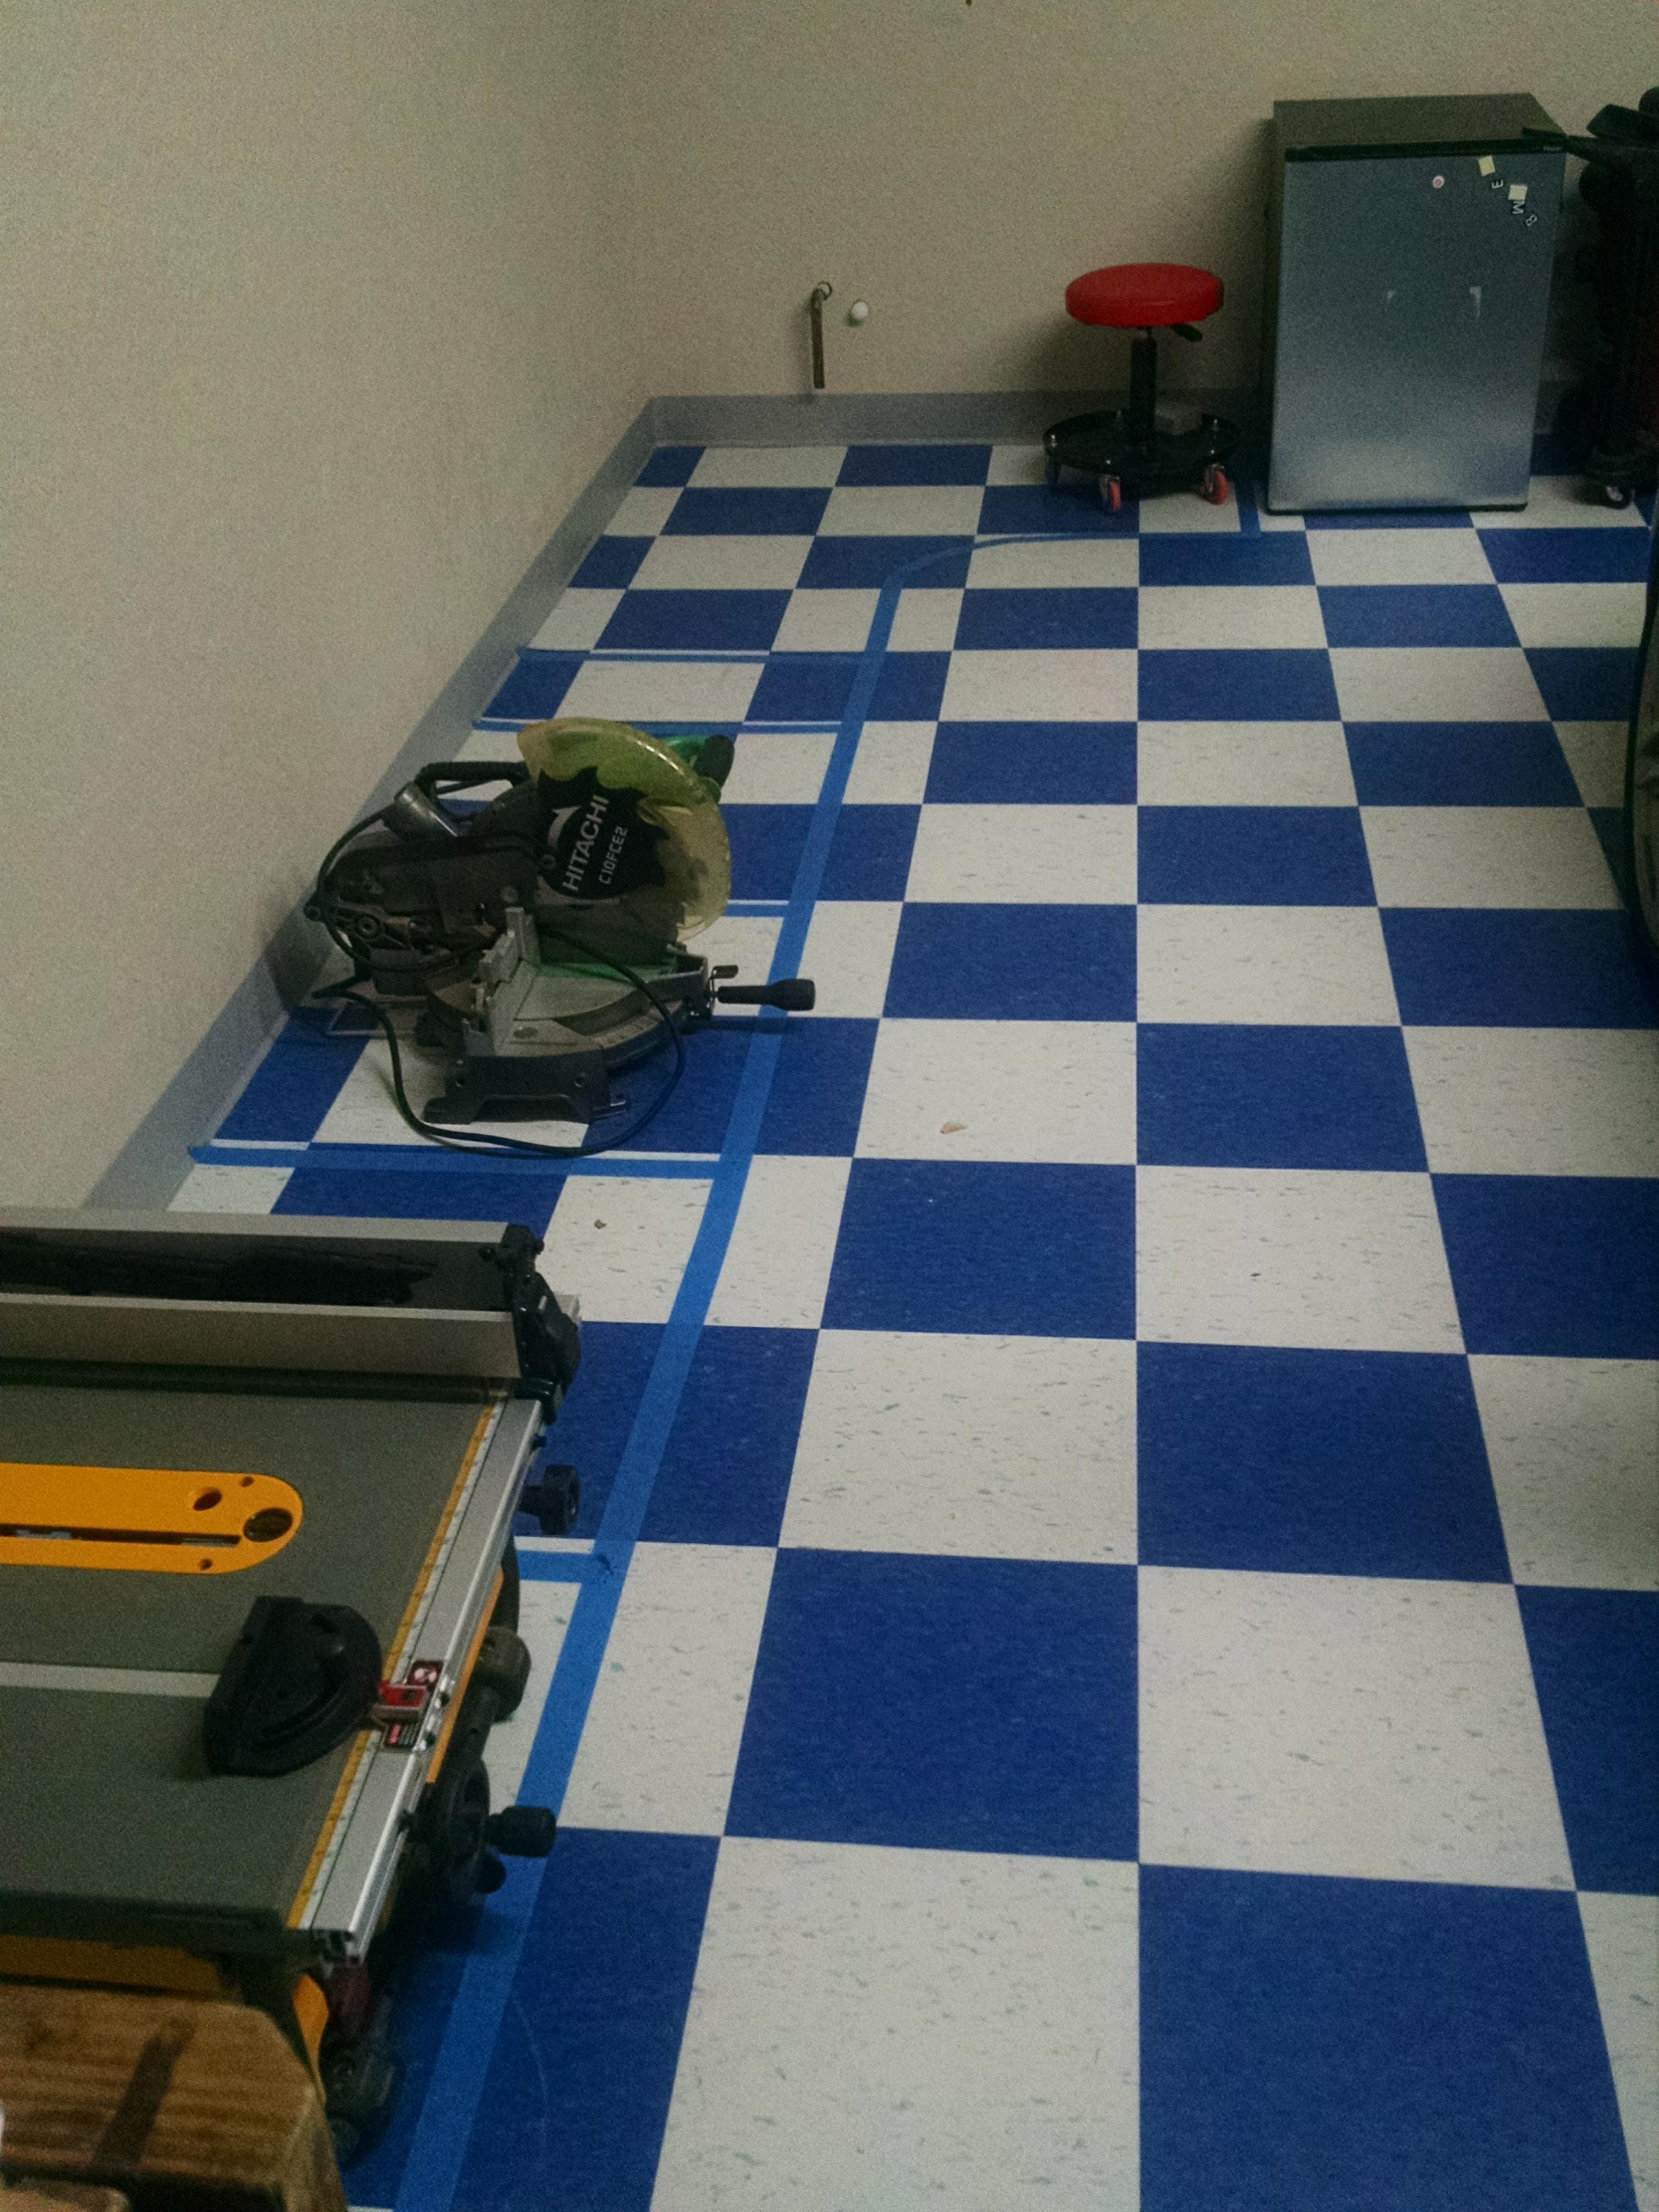
The tape on the tile shows the proposed foot print on the floor, allowing room for the car. The tape on the wall shows the level of the top counter allowing for recessed areas to accommodate the table and miter saws.
We wouldn't want to fill the garage with sawdust or any other material burrs, but if you need to make a quick cut to one or two items, we'd like to have a level surface to do it without having to set up a table outside, get an extension cord, move the saws out, yadah yadah... That means much care should be taken when making and installing each module so that the final product is level all the way.
So the corner will be just the bench supported by the floor units to the left and to the right more bench over: a small refrigerator, wet-vac and a future compressor for the small paint buzz on the model making station.
The floor units will have different size drawers. The module closest to the model station will have many shallow drawers (no more 2" depth) to accommodate all the small tools and little paint cans.
PART 2 is about to happen.