How to Control a Lamp With Alexa and ESP32
by HorizonLab in Circuits > Electronics
1517 Views, 1 Favorites, 0 Comments
How to Control a Lamp With Alexa and ESP32
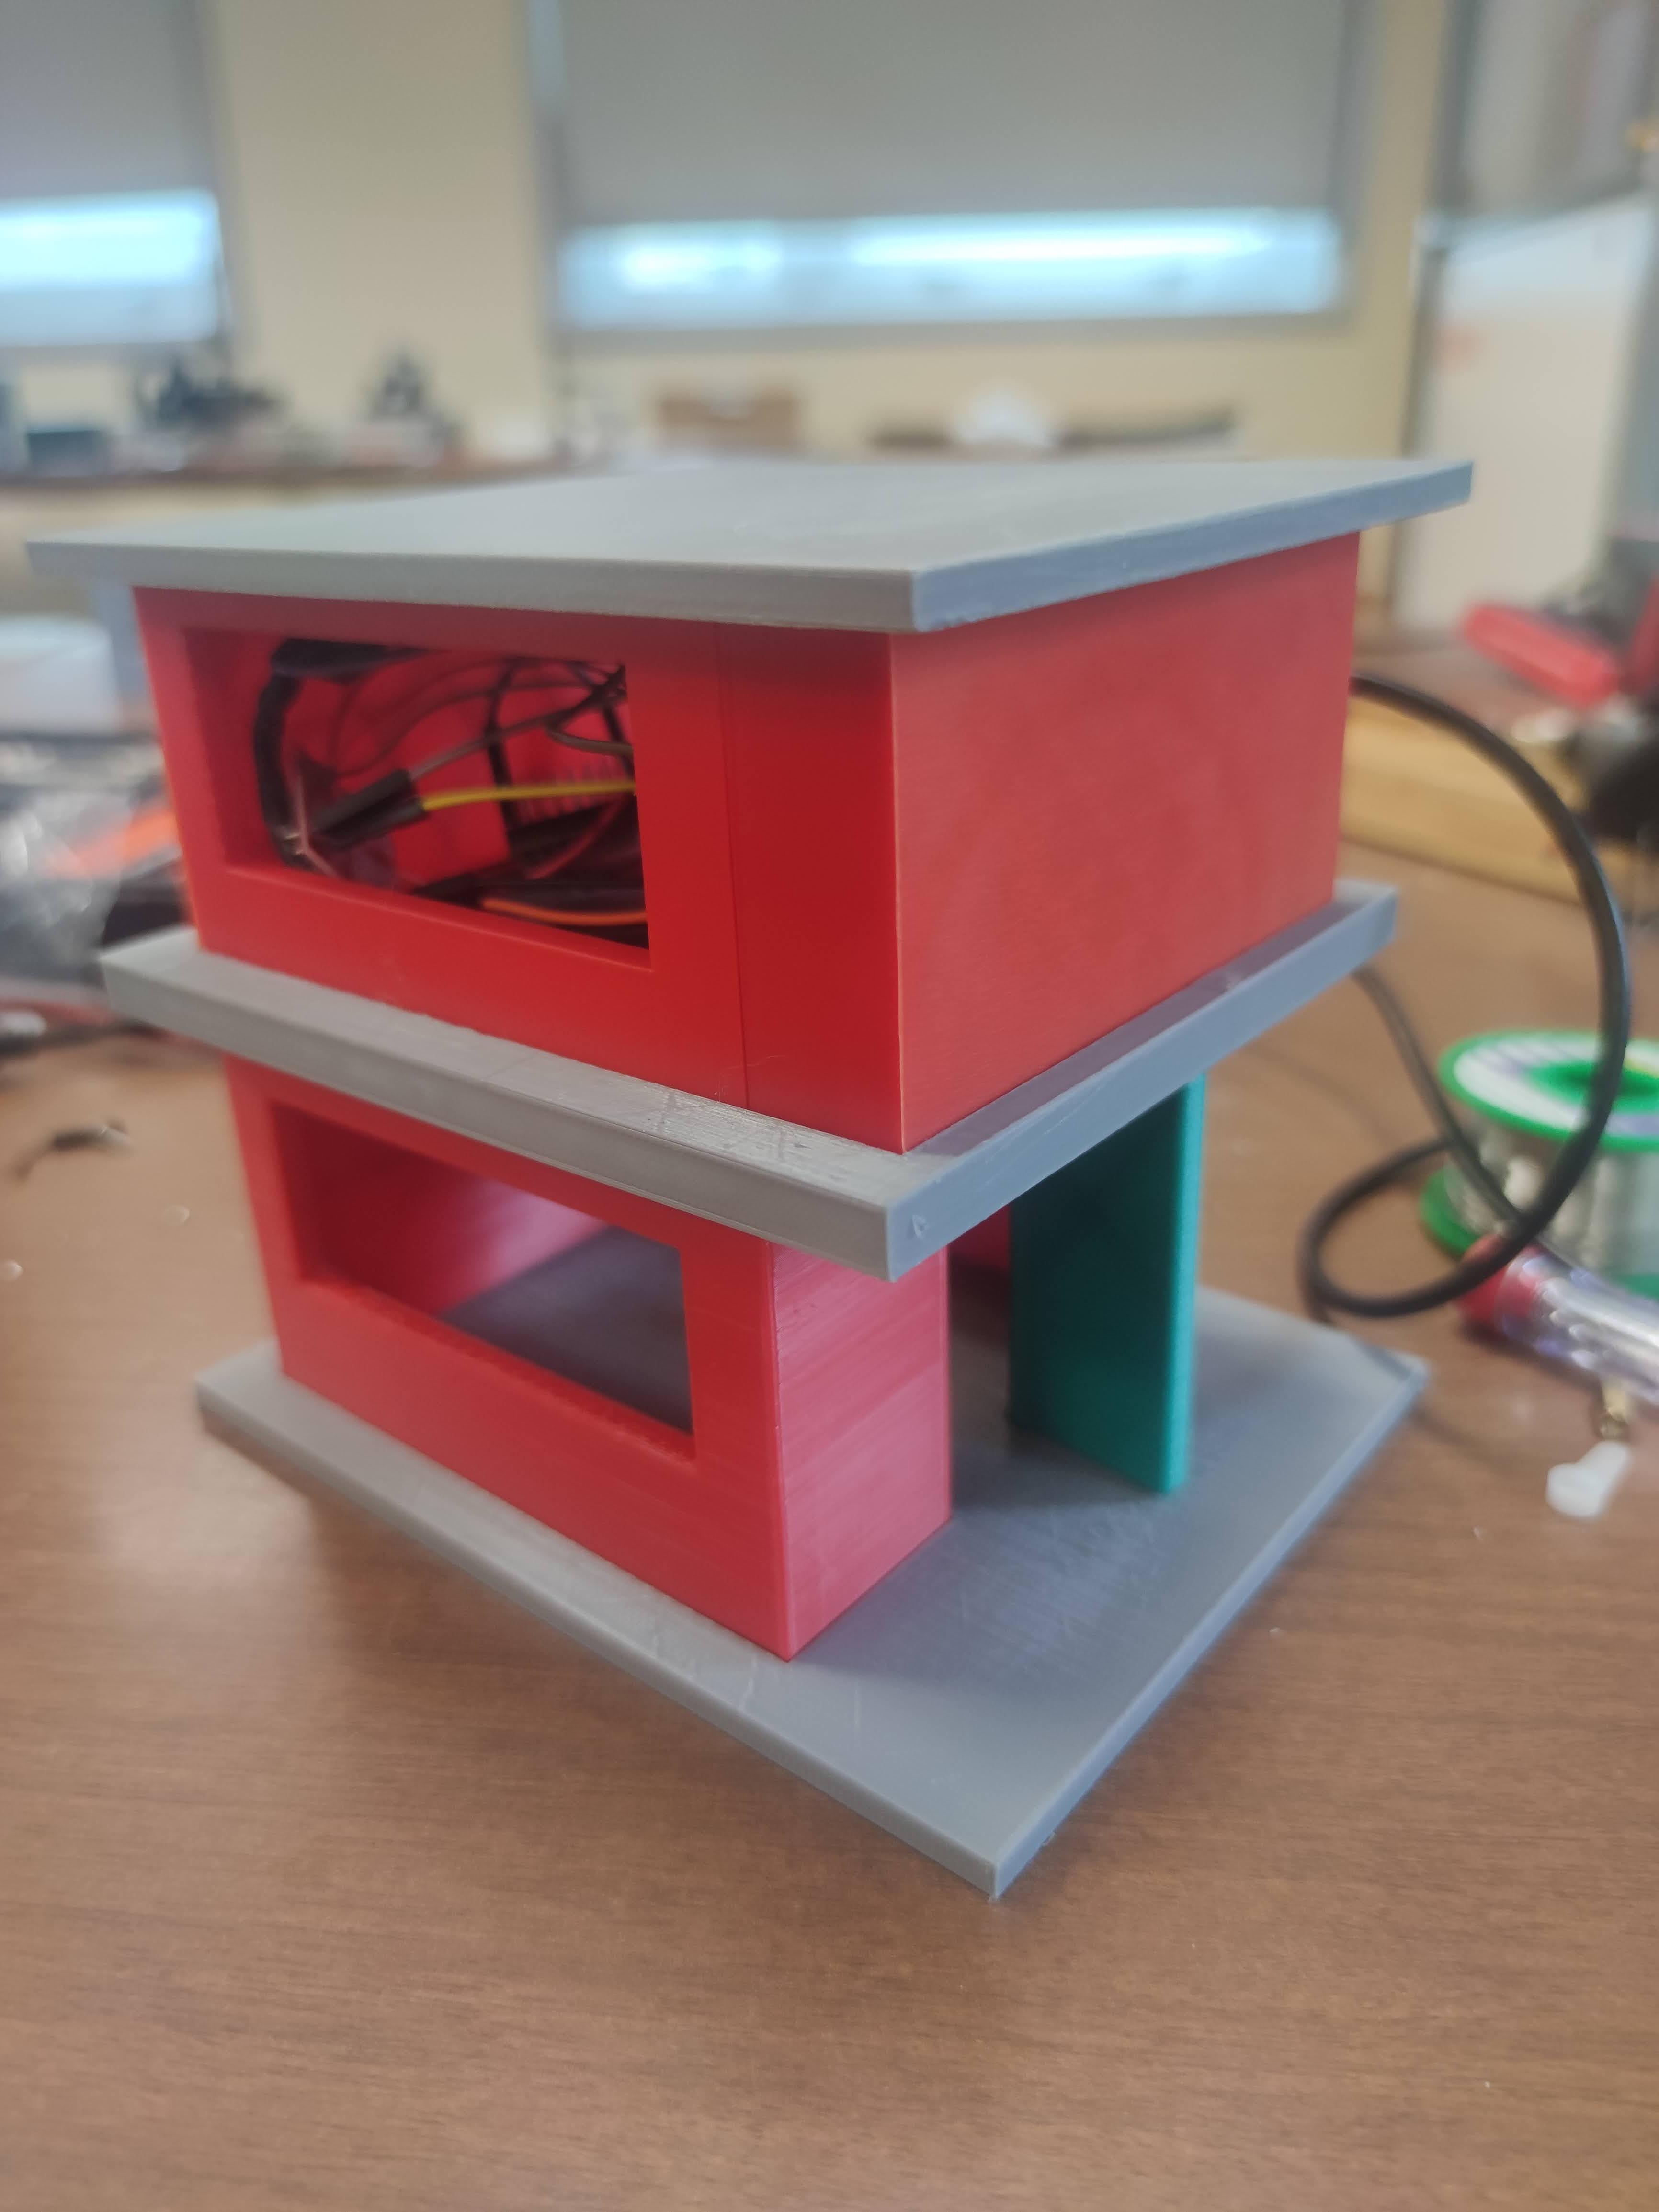
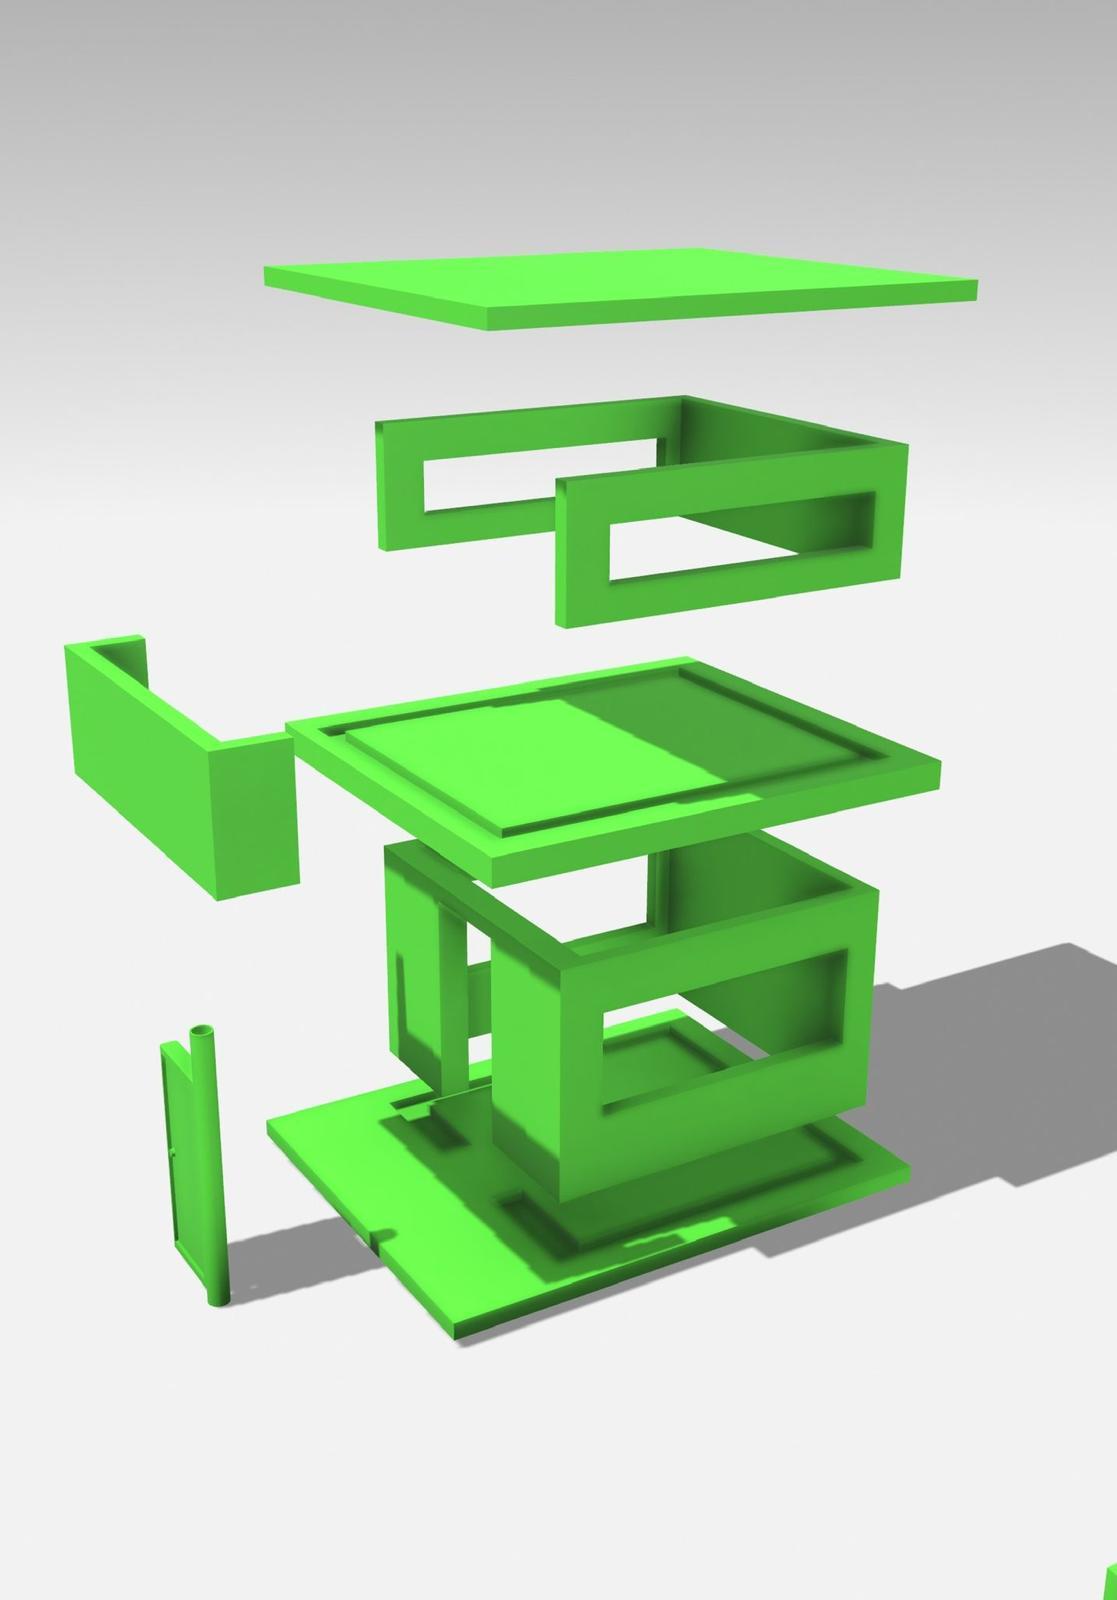
As part of the European Project "Internet of Tricks", this is a tutorial to develop a device that simulates, on a small scale, a smart house with IoT functionalities controlled by a voice assistant. This device has educational purposes and is designed to increase user awareness about risks (and advanteges) of connected devices in domestic environments. The smart house is equipped with the following functionalities: doors that can be opened and closed, fans and lights that can be turned on and off.
An intruder that acquired illegally the access to the IOT system, gets the opportunity to check the status of the devices. He can figure out when no one is in the house (or learns daily habits), by checking the appliances' status. Another learning experience for the user is to recognize that, in absence of security measures, an intruder could manage to control the devices with ease.
Of course, daily actions leverage IoT features to simplify operations. However, it is necessary to take some precautions so that domestic habits are not publicly accessible by people with malicious intents.
In this tutorial, we'll show you how to use Alexa voice commands to turn a lamp on or off. The tutorial shows how to connect an ESP32 to a LED and how to program it to receive commands through MQTT protocol from Alexa.
What We Need
Let's firstly procure:
- An Alexa device connected to the internet (a smartphone with the Alexa app running is fine);
- Breadbord;
- Jumpers;
- LED and a 100Ohm resistor;
- ESP32 Microcontroller;
- Laptop connected to the internet;
- Wi-Fi router.
Connection Diagram
.png)
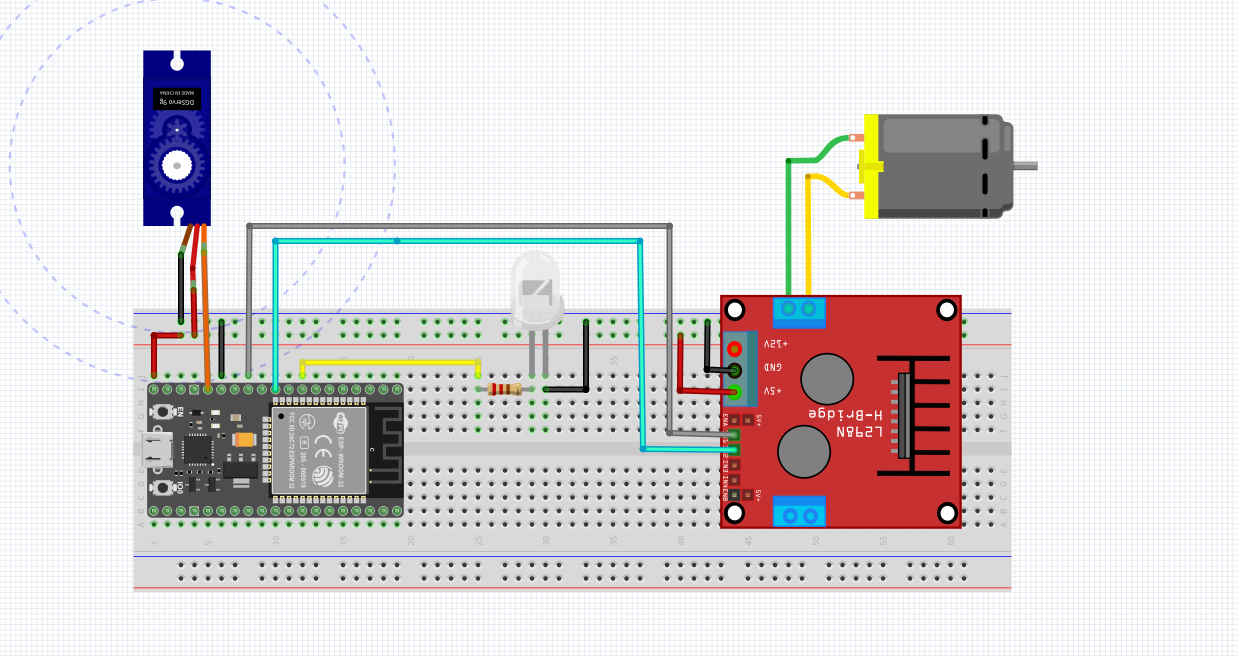
The picture shows the connections between the ESP32 to the LED.
The Positive wire of the LED must be connected to PIN 33 through a resistor.
The servo motor control pin must be connected to PIN 13.
Node-RED
.png)
.png)
.png)
.png)
.png)
Take a look at the Node-Red installation guide.
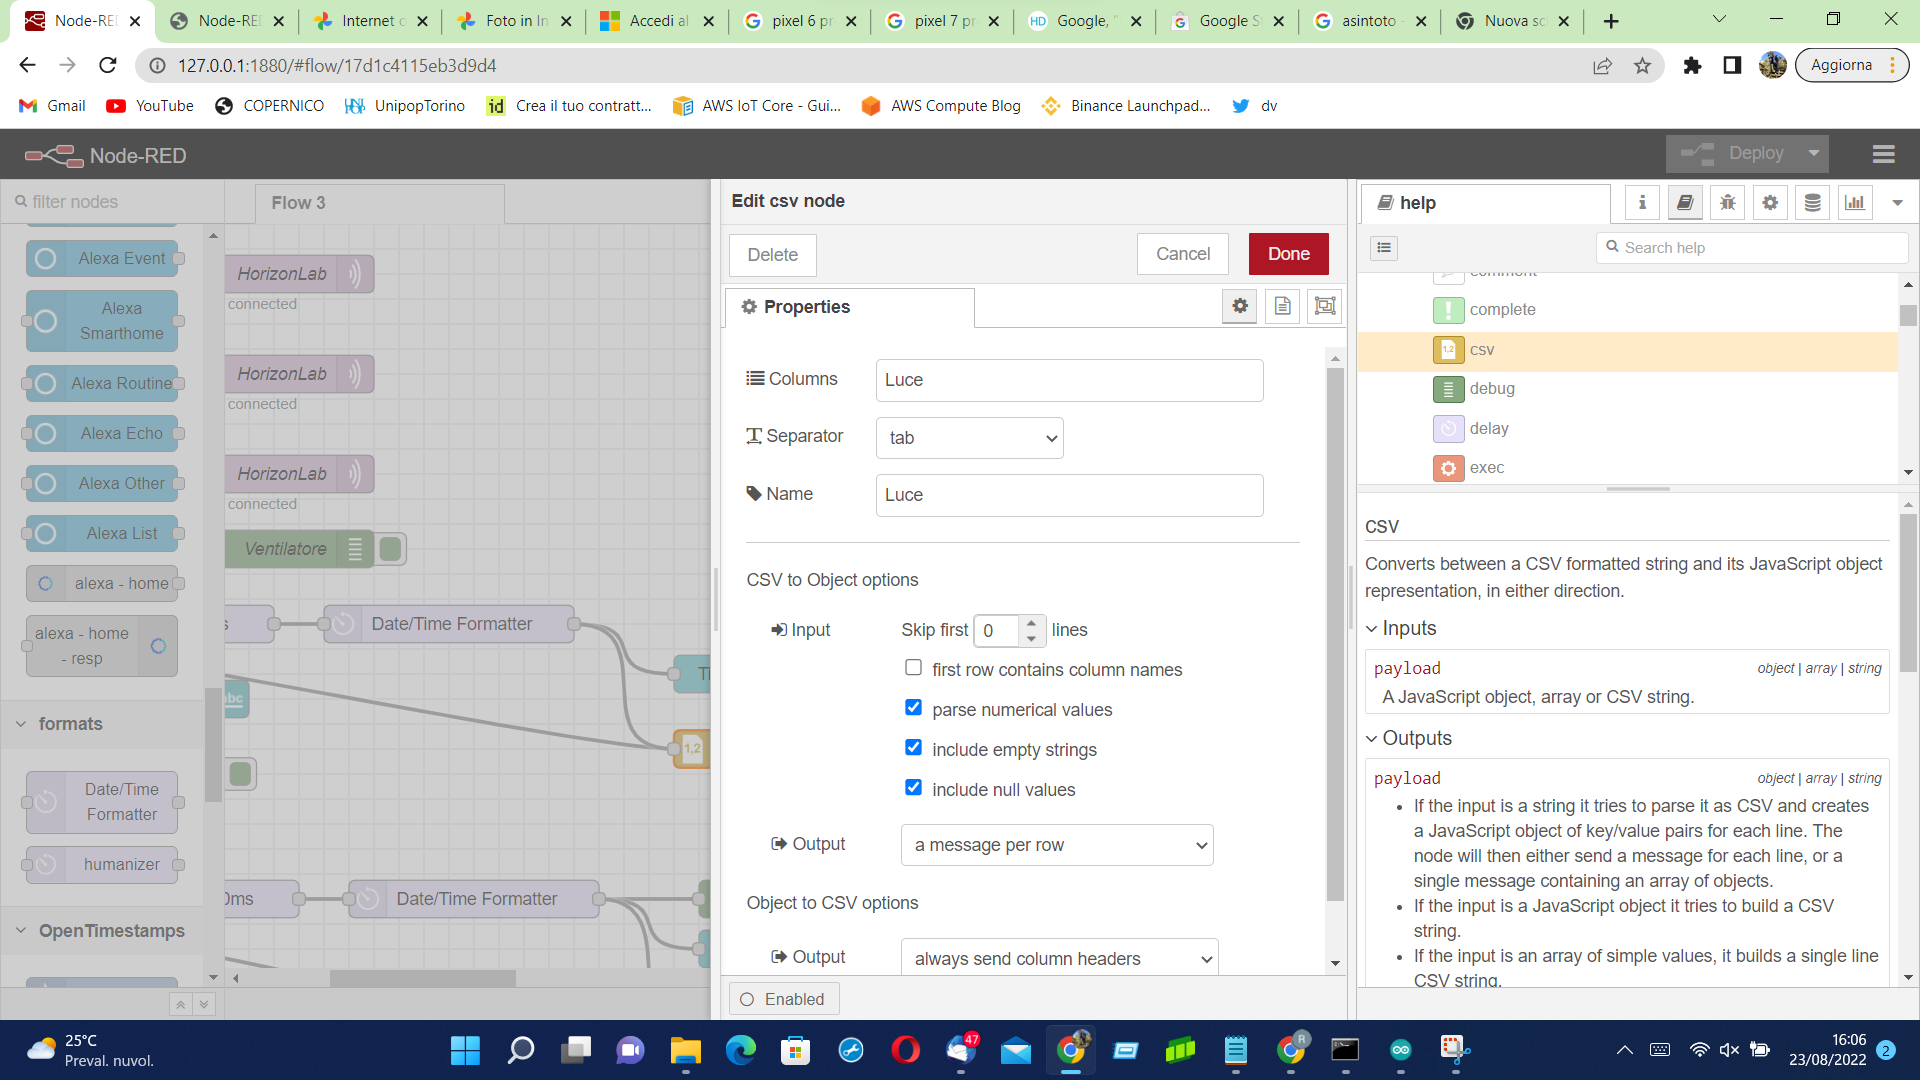
This Nore-RED scheme receives commands from Alexa to control the ESP32. Specifically, it manages the LED connected to the ESP32 creating the log of the events.
Step by Step process:
- Once Node-Red is running, install from Manage Palette the following packages: "node-red-contrib-alexa-home-skill", "node-red-contrib-moment" and "node-red-dashboard";
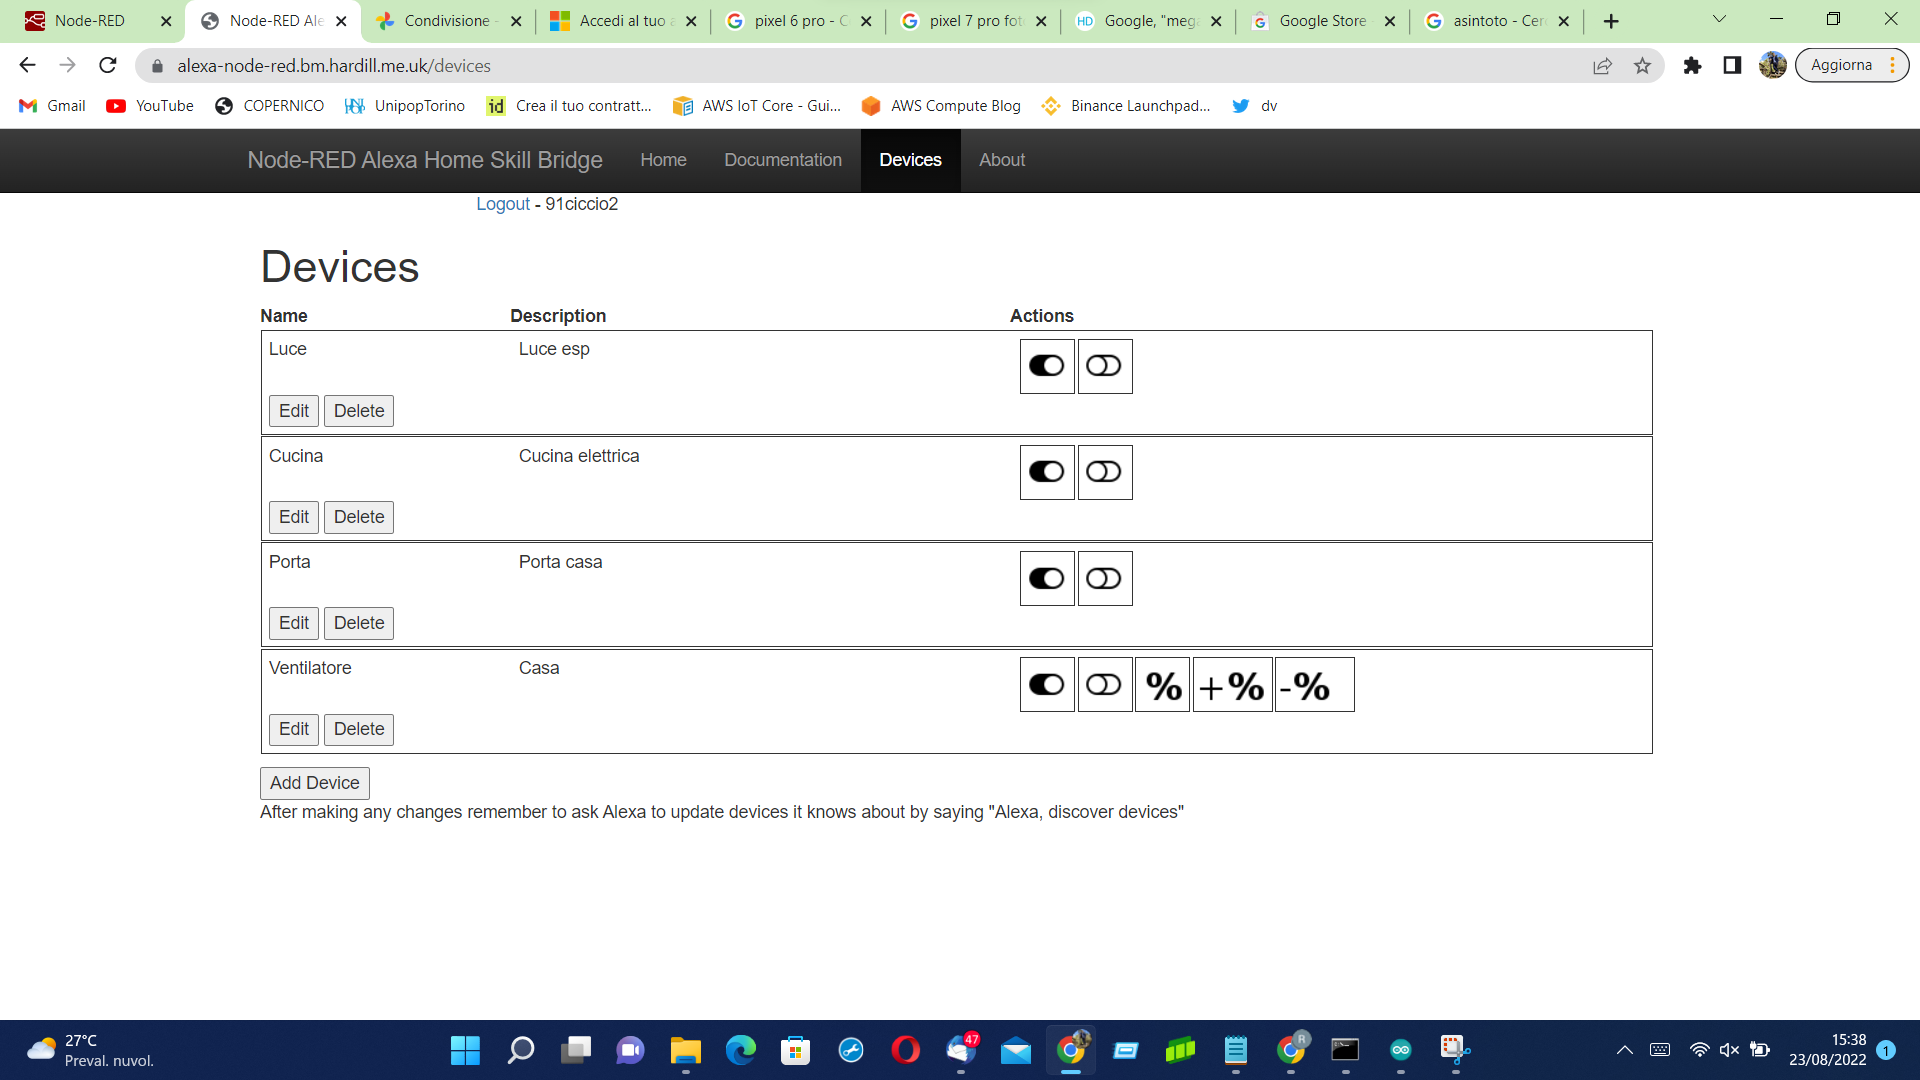
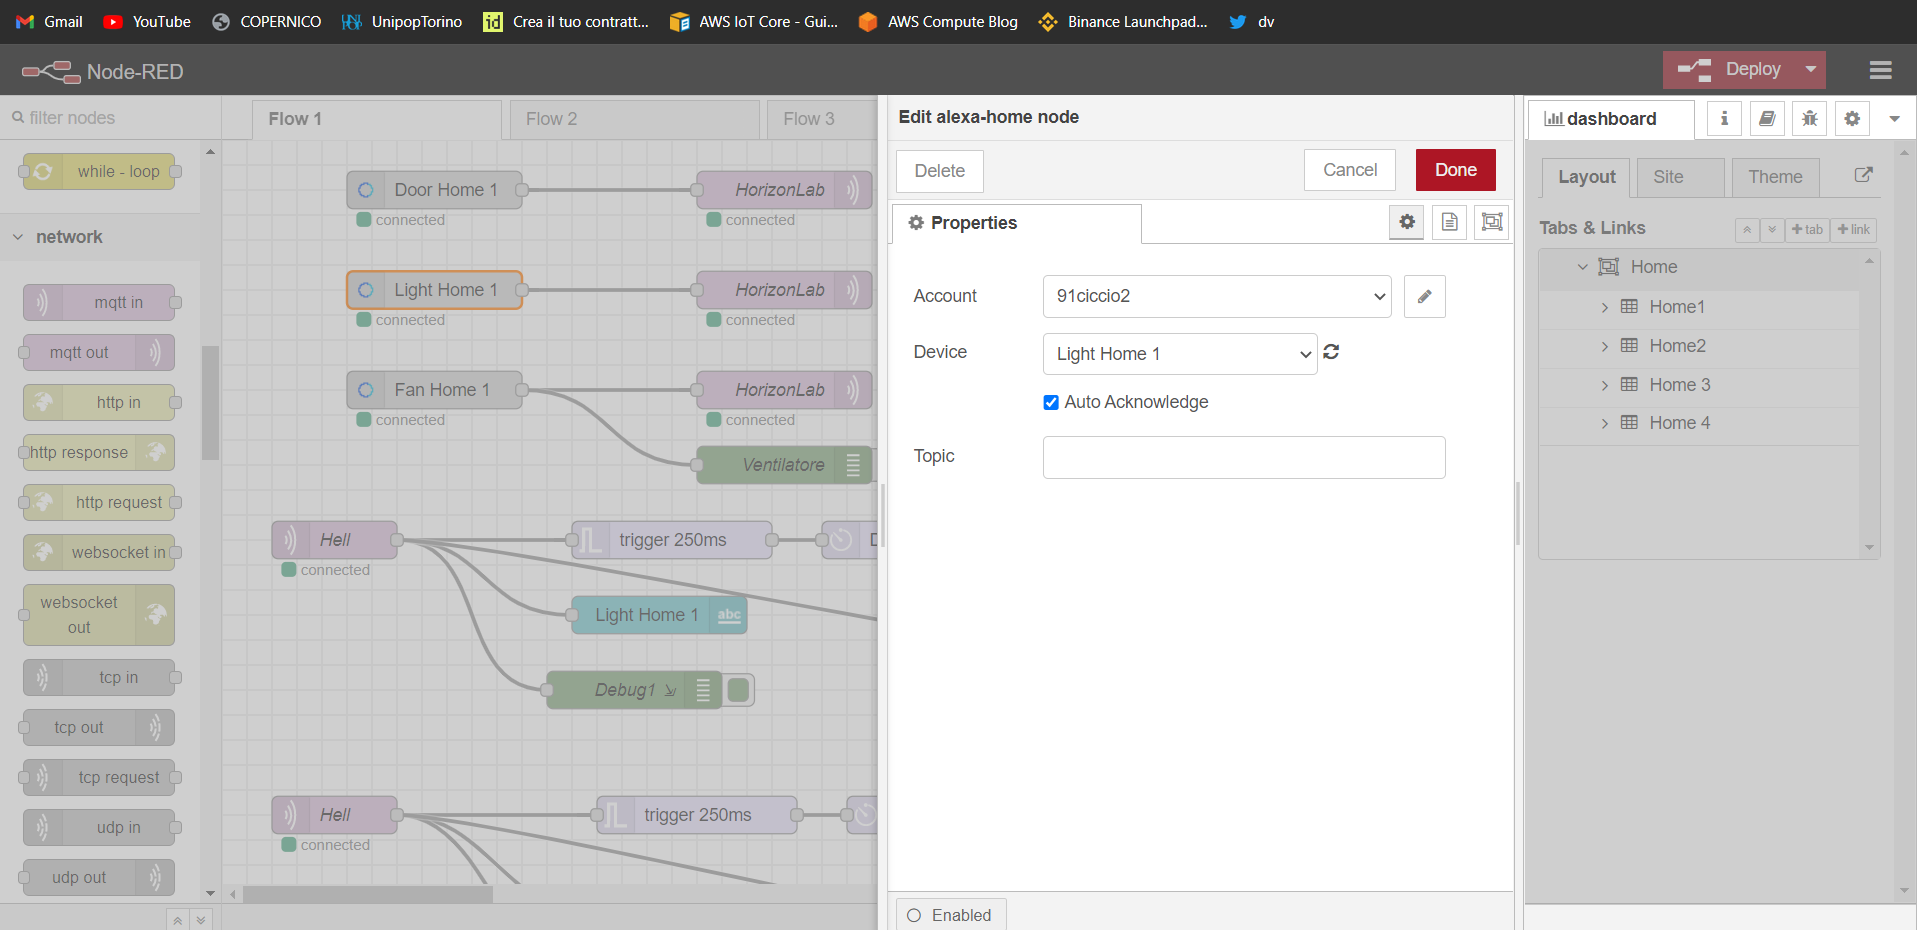
- insert the alexa-home node then, in the help menu to the right of node-red, open the link to configure the devices: "https://alexa-node-red.bm.hardill.me.uk/"; note down your username and your password;
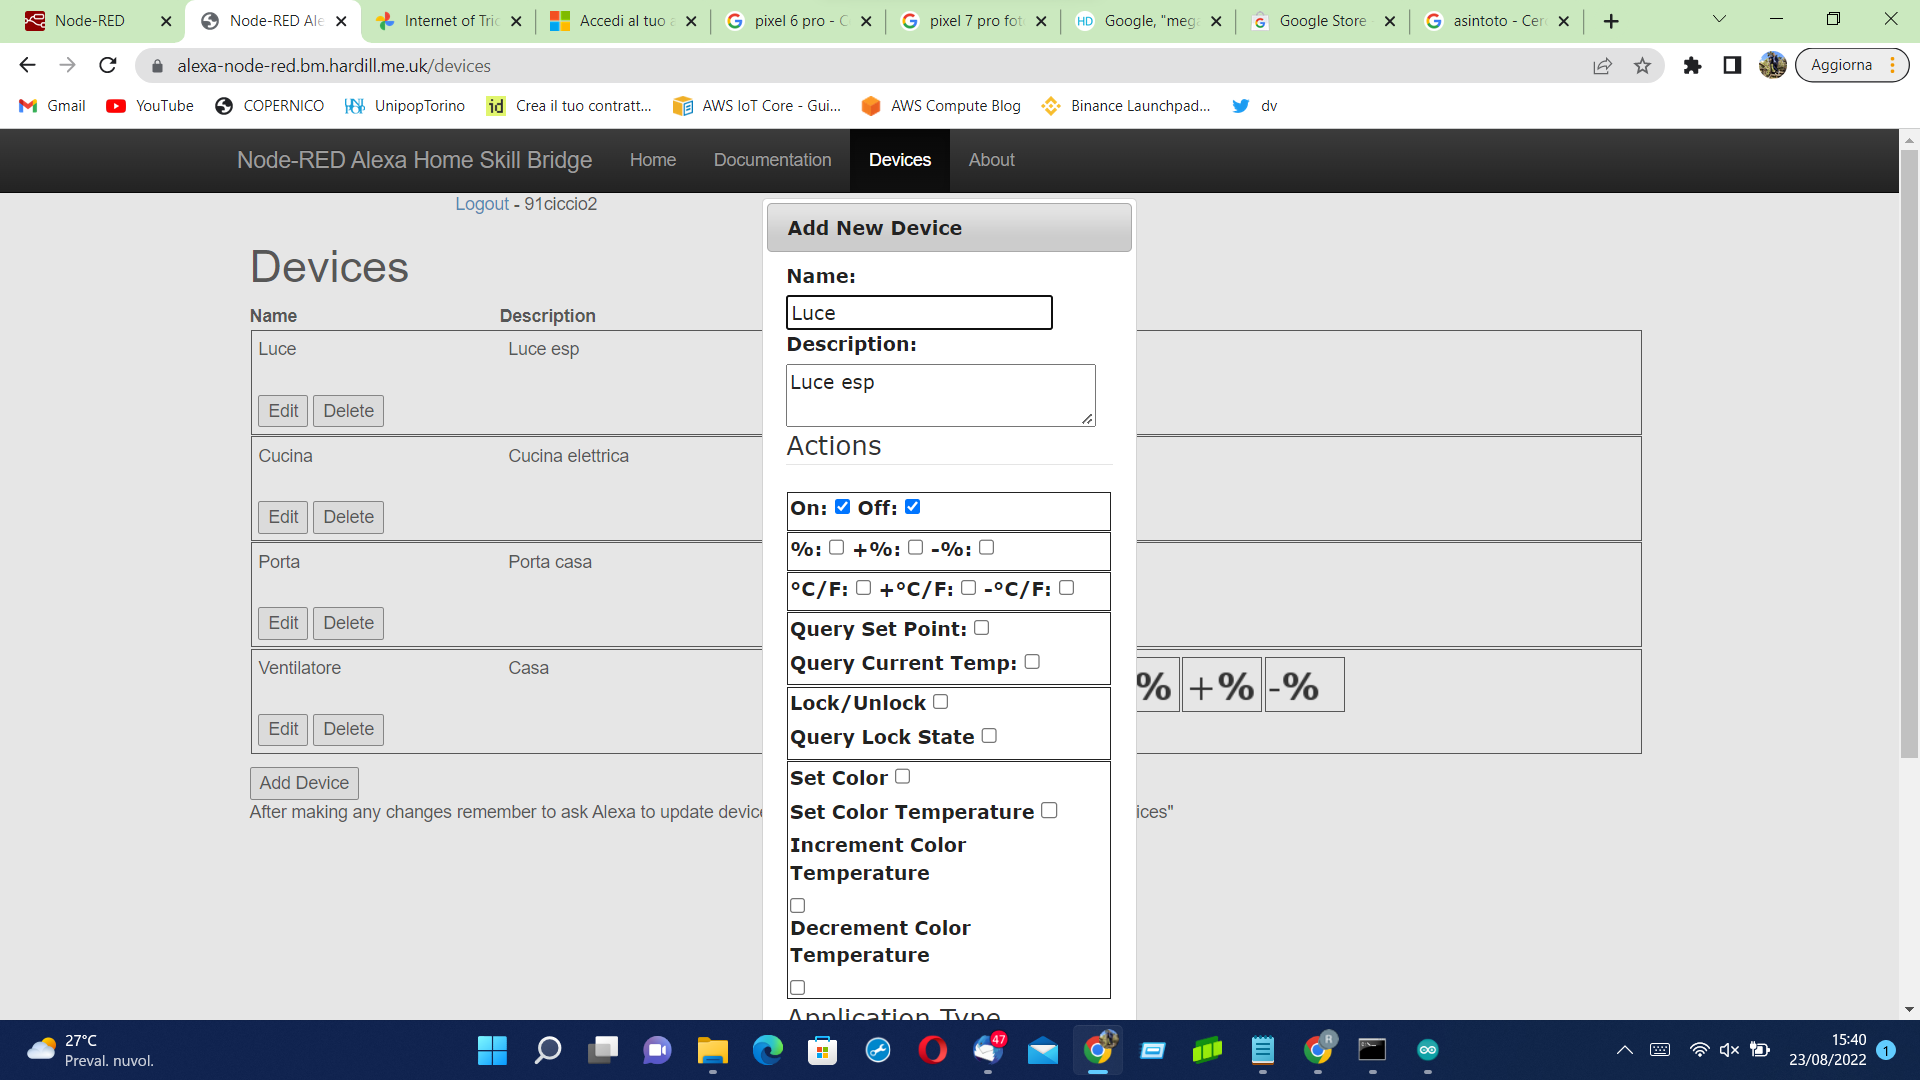
- Once registered on the site, go to device and press add device. In the menu that is shown to manage lights, choose the Actions "ON and OFF" and "Type Light" as Application;
- Fil the boxes with your username and the password you’ve chosen in step 2 into the settings of the Alexa Home in Node-Red;
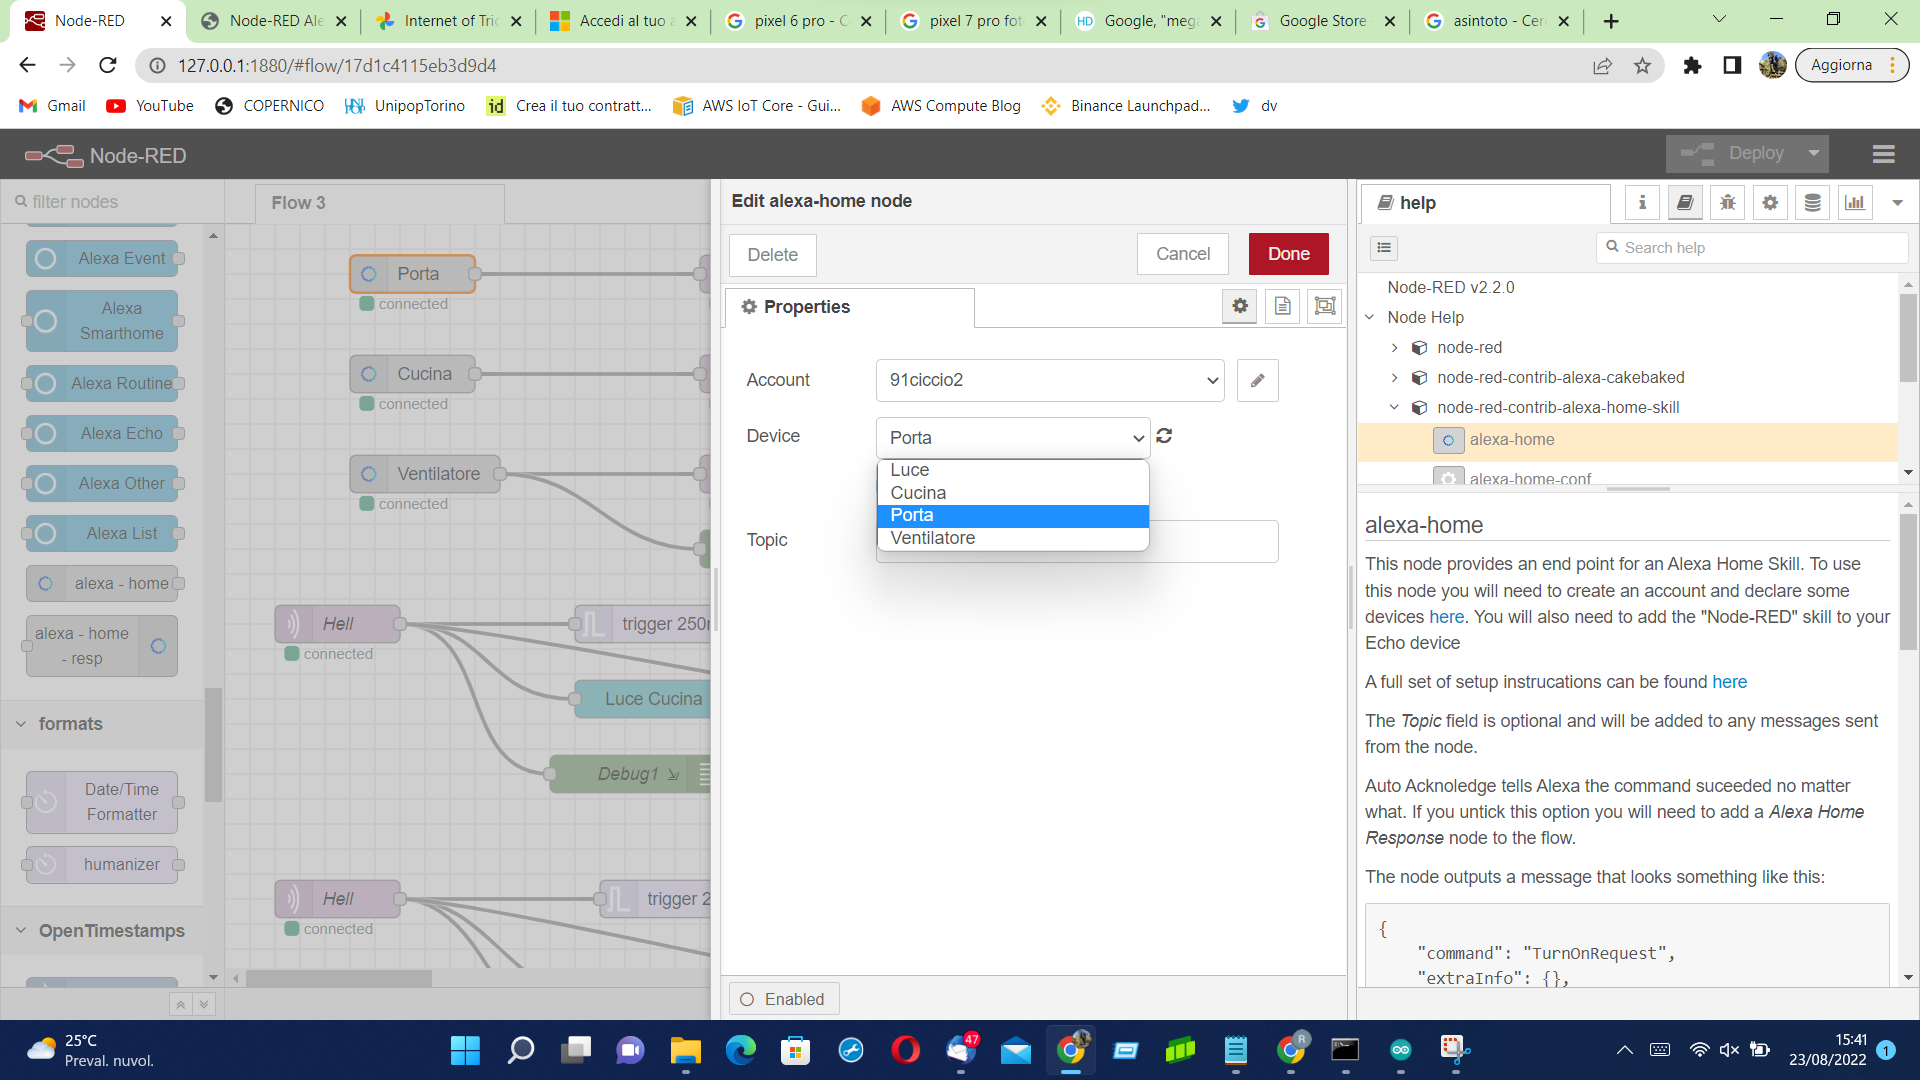
- Once the account is connected, the new device will appear into the device menu of the Alexa node;
- Connect the output Alexa Home node to the input of the "mqtt in" node;
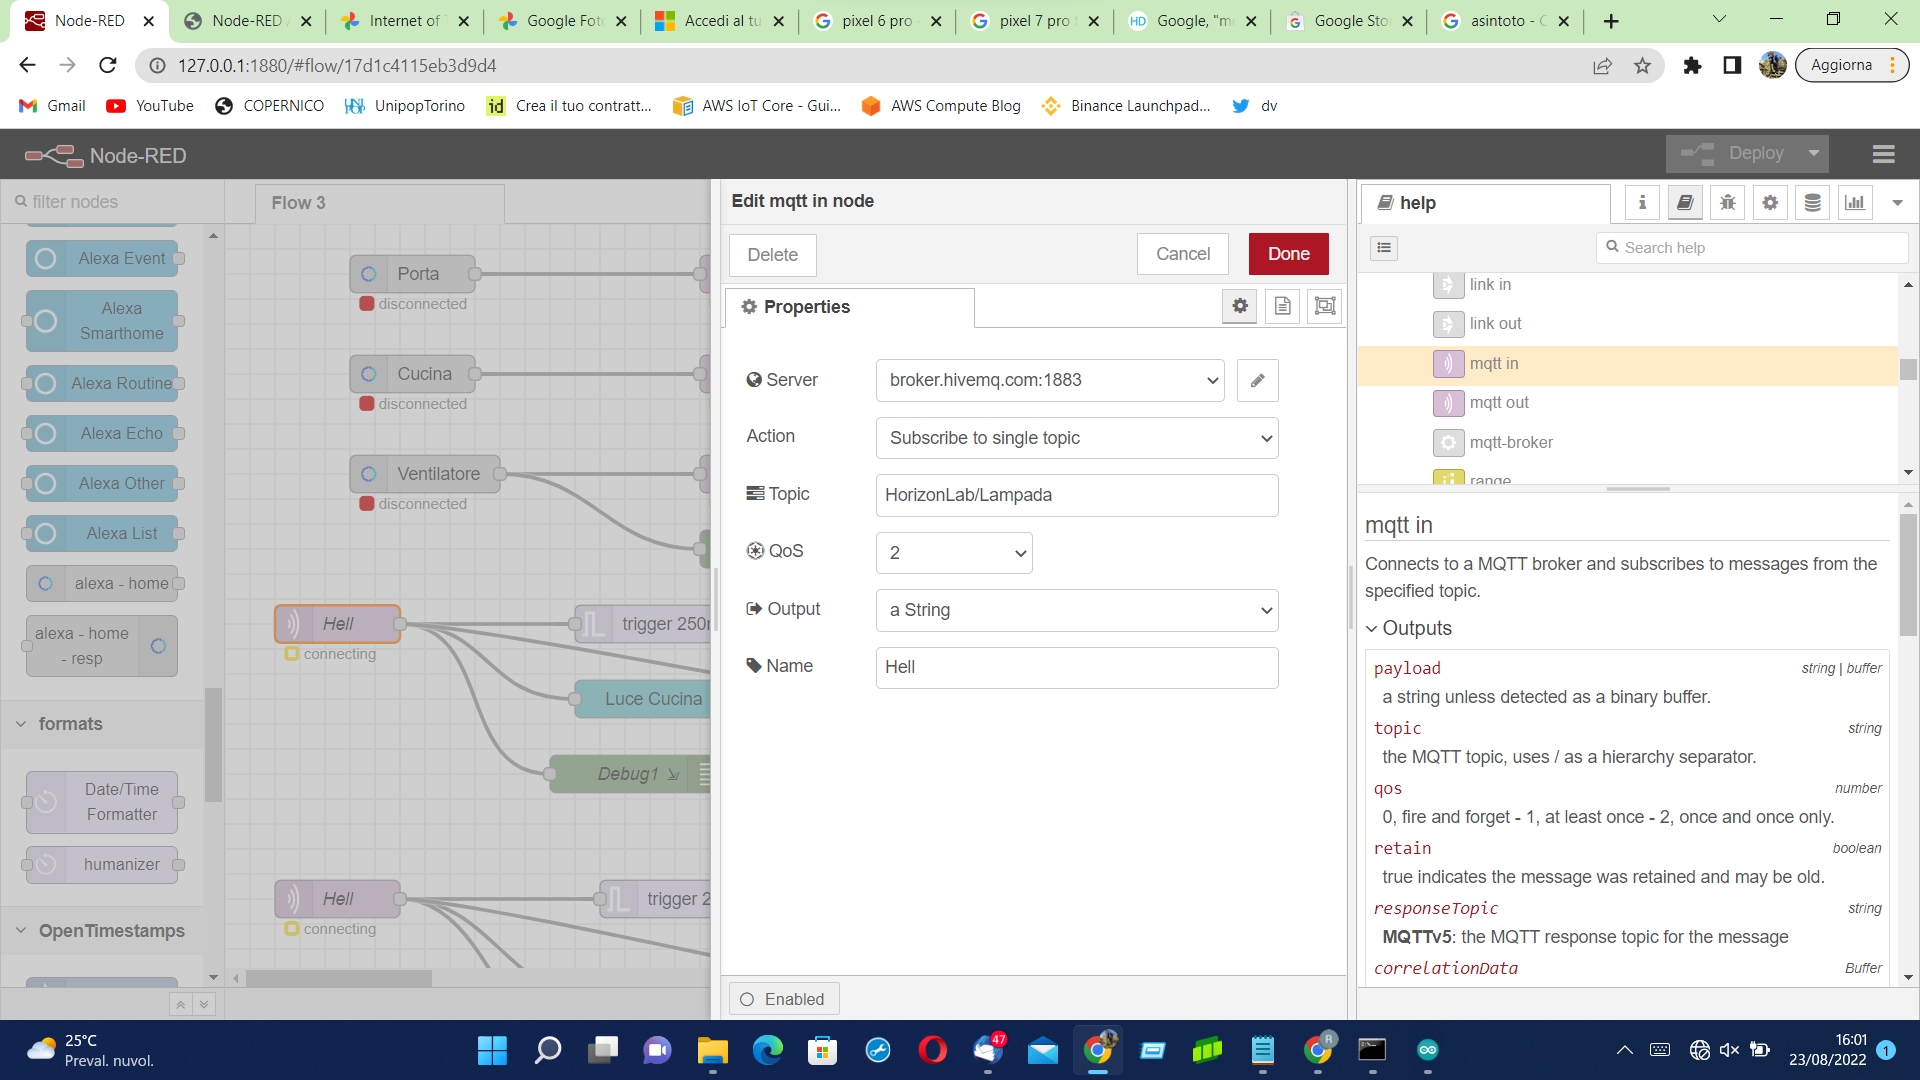
- Type the information of the broker (in our case, broker.hivemq.com port 1883) in the properties of the node "mqtt in".
Downloads
Alexa Skill - Voice Commands
.jpeg)
.jpeg)
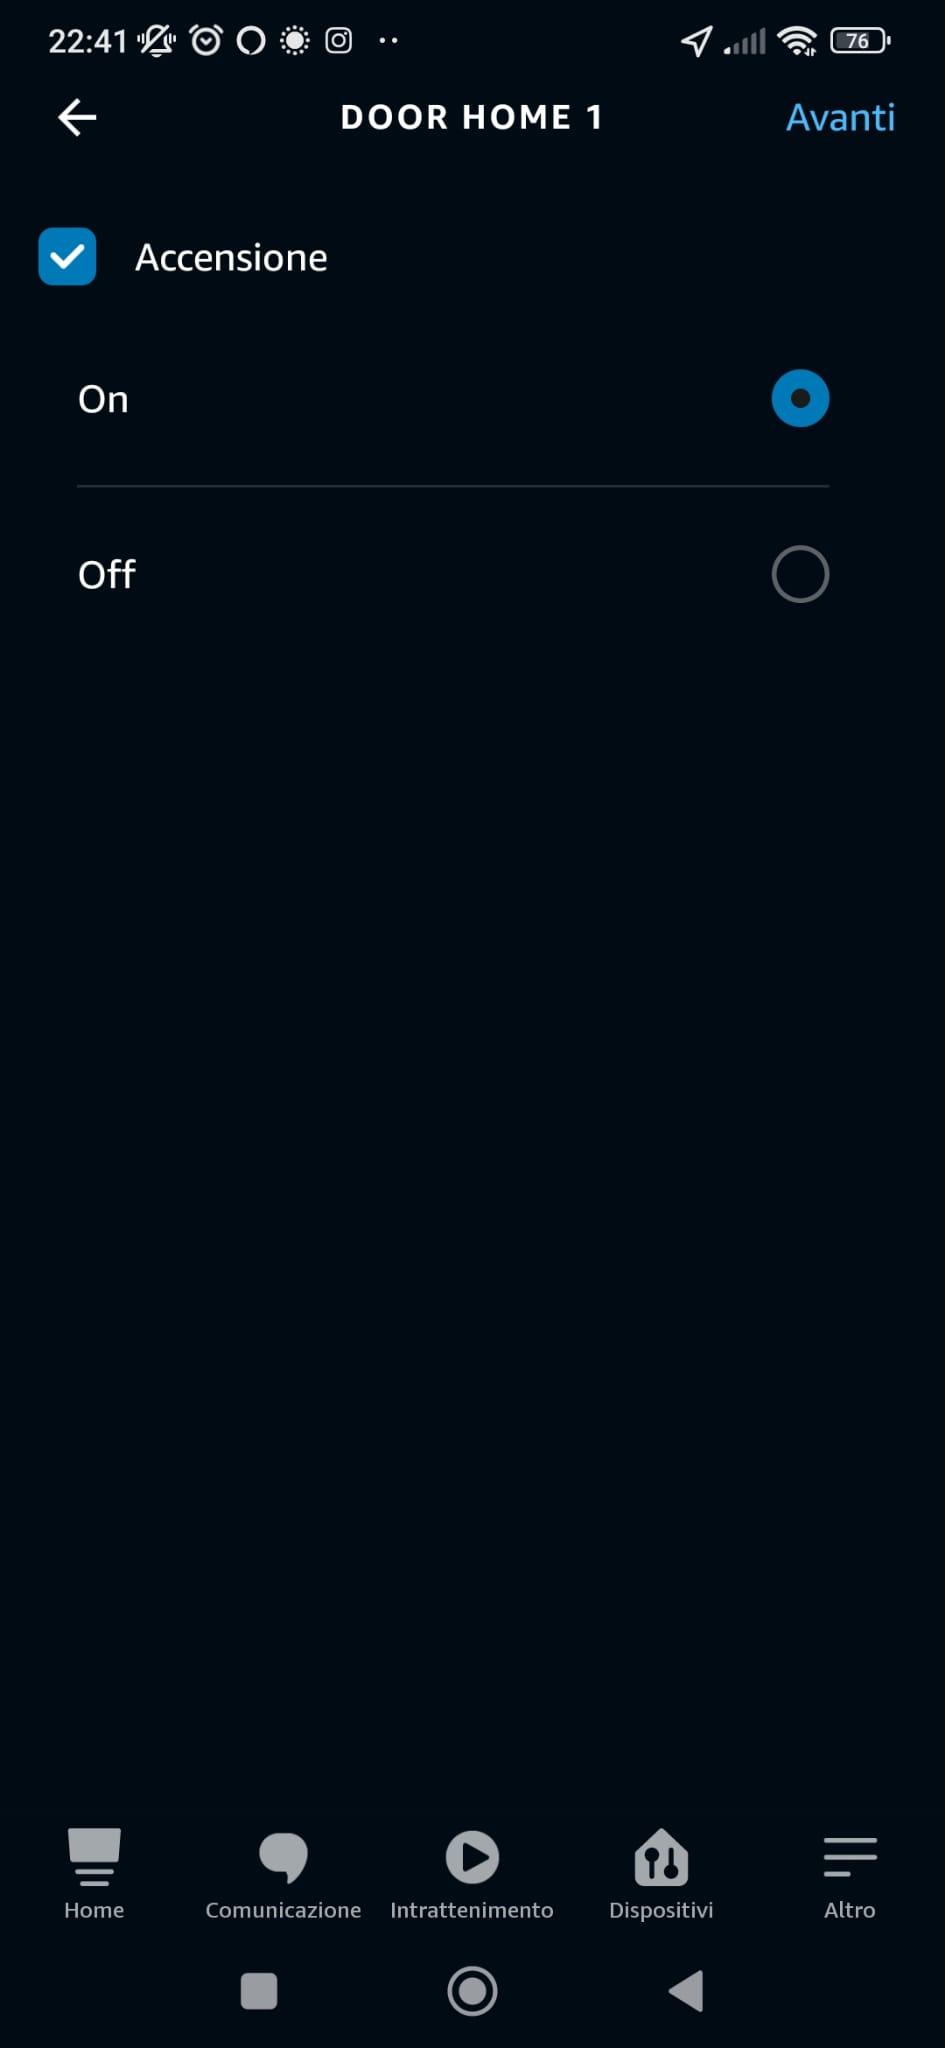
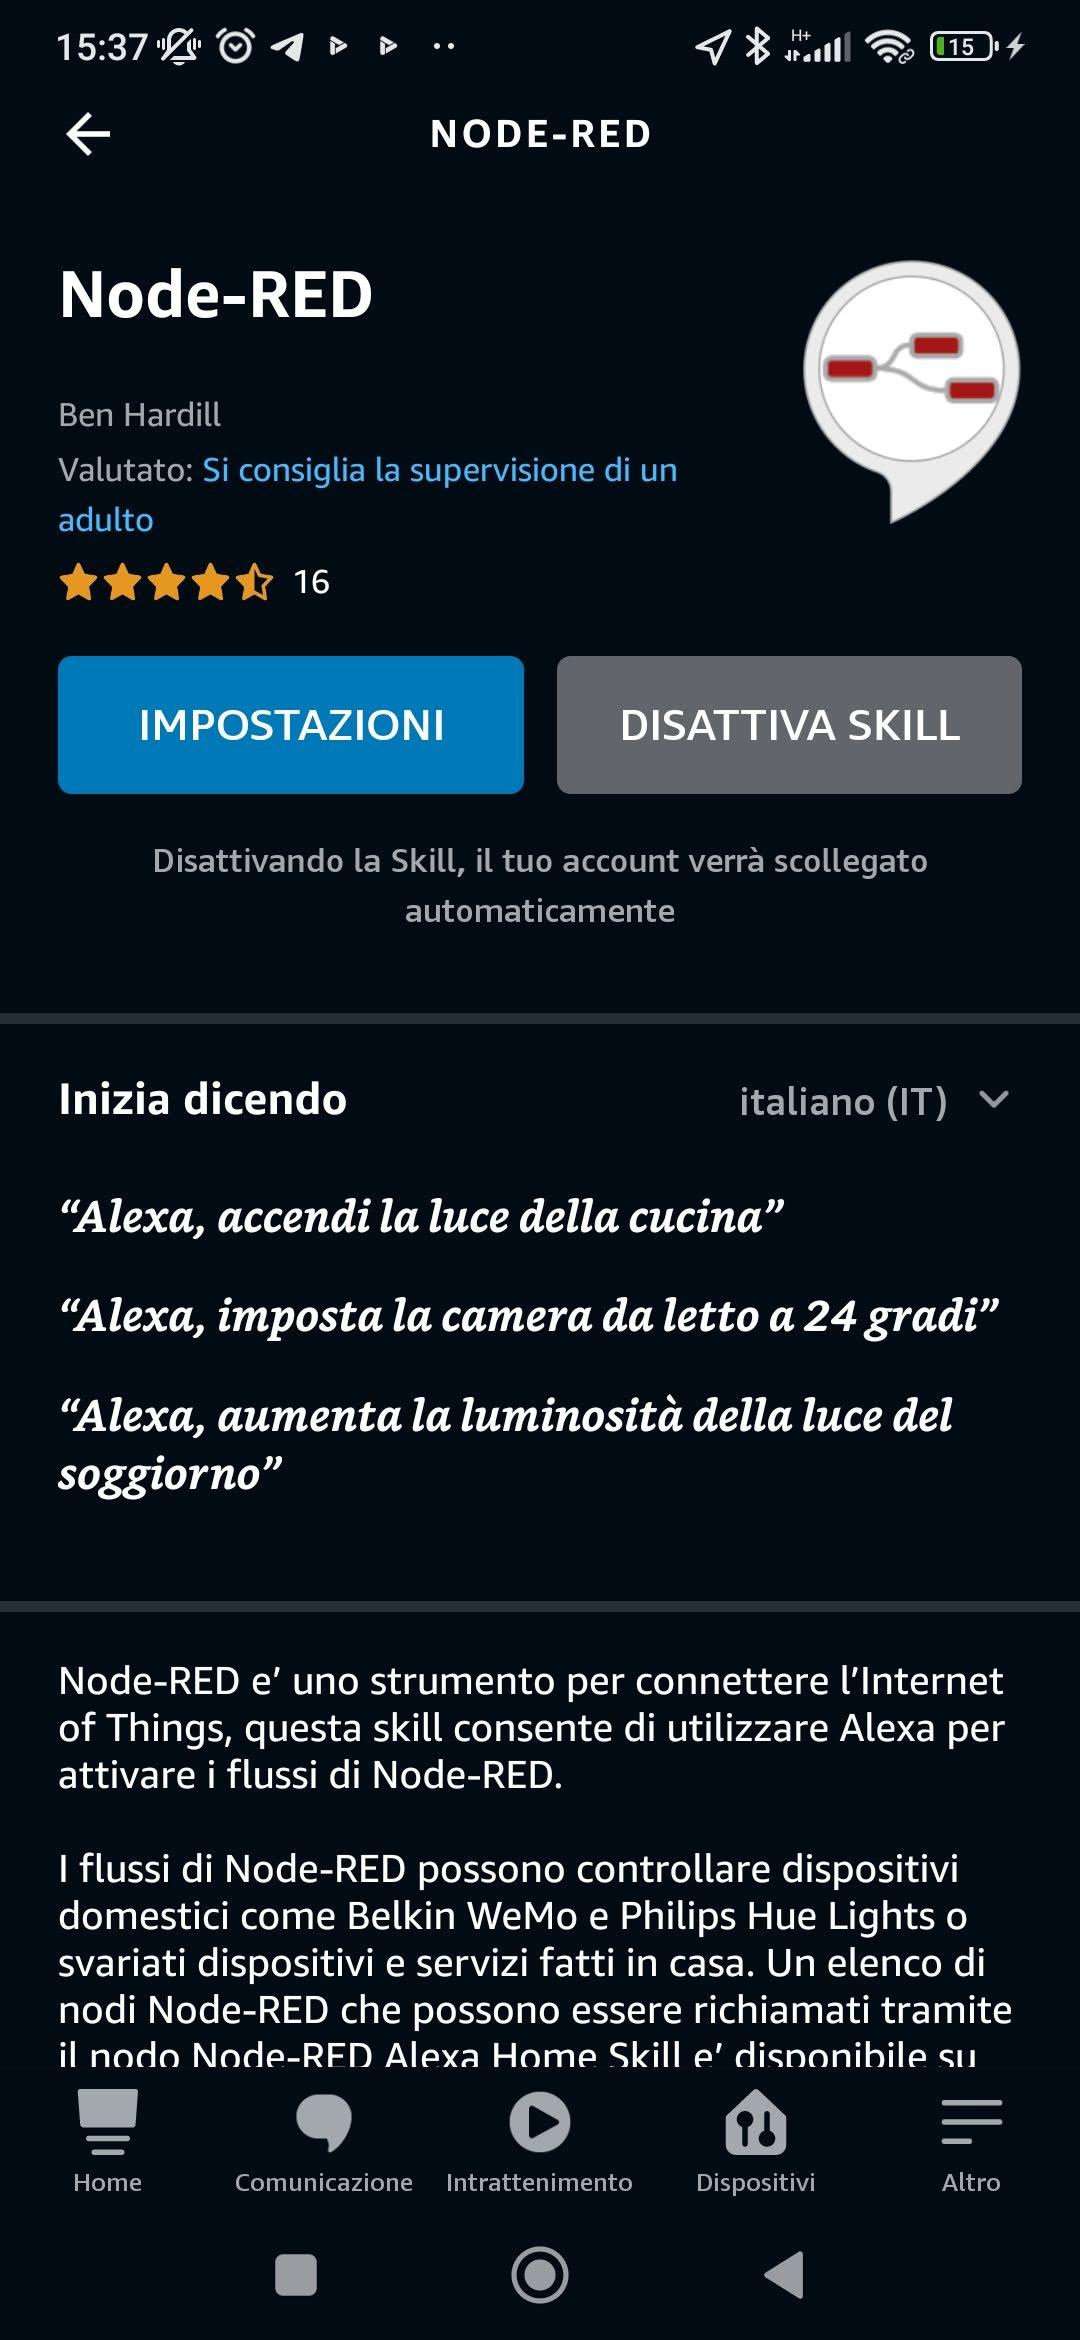
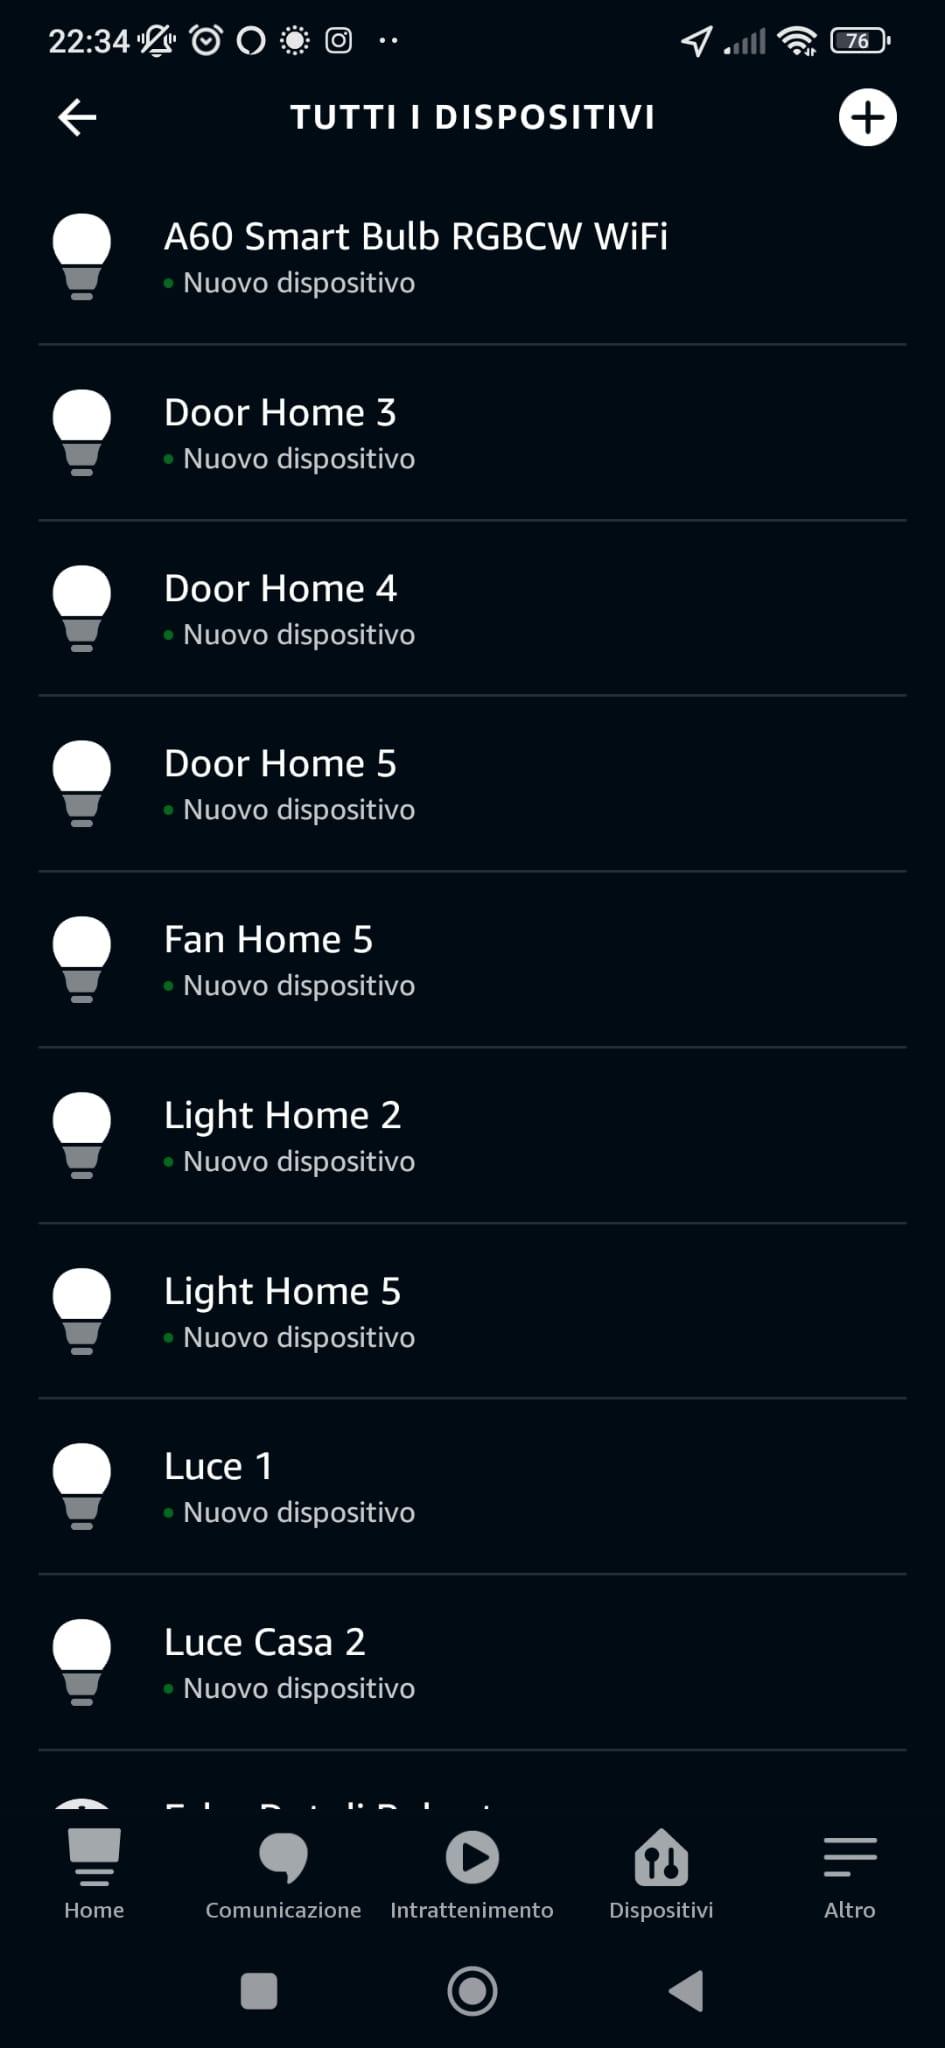
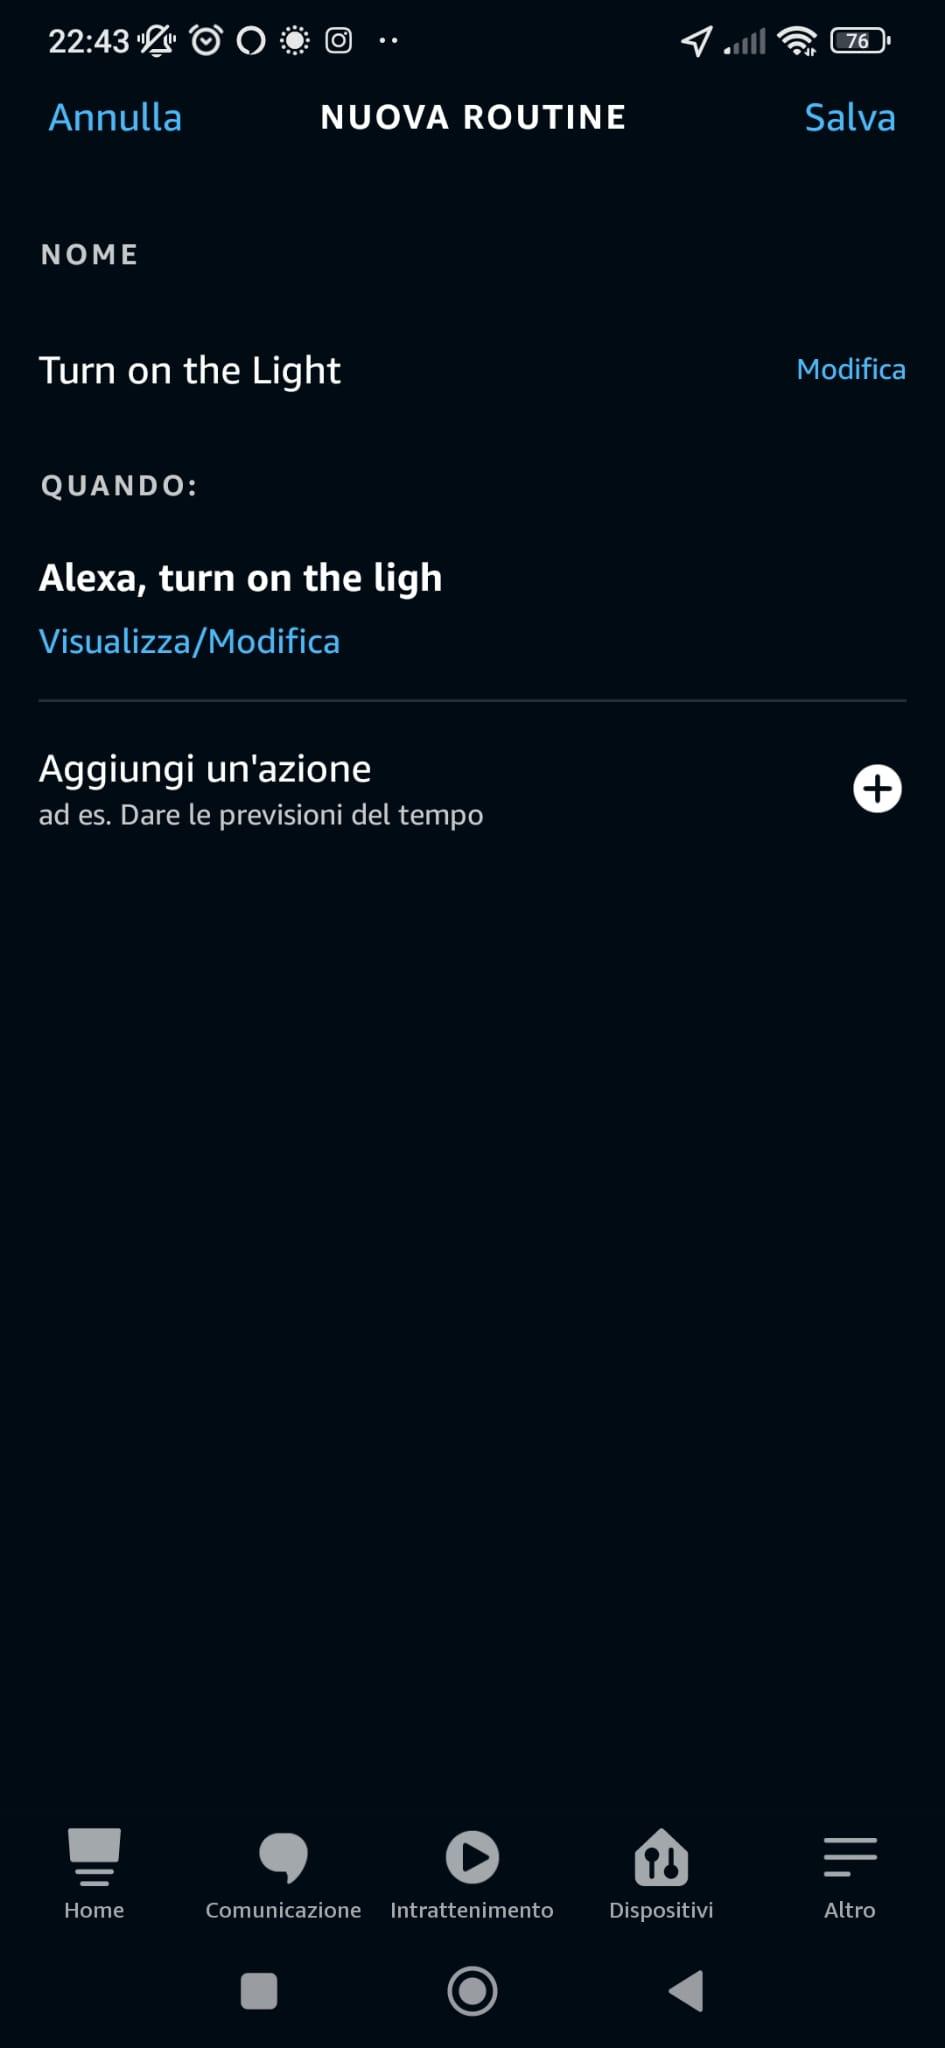
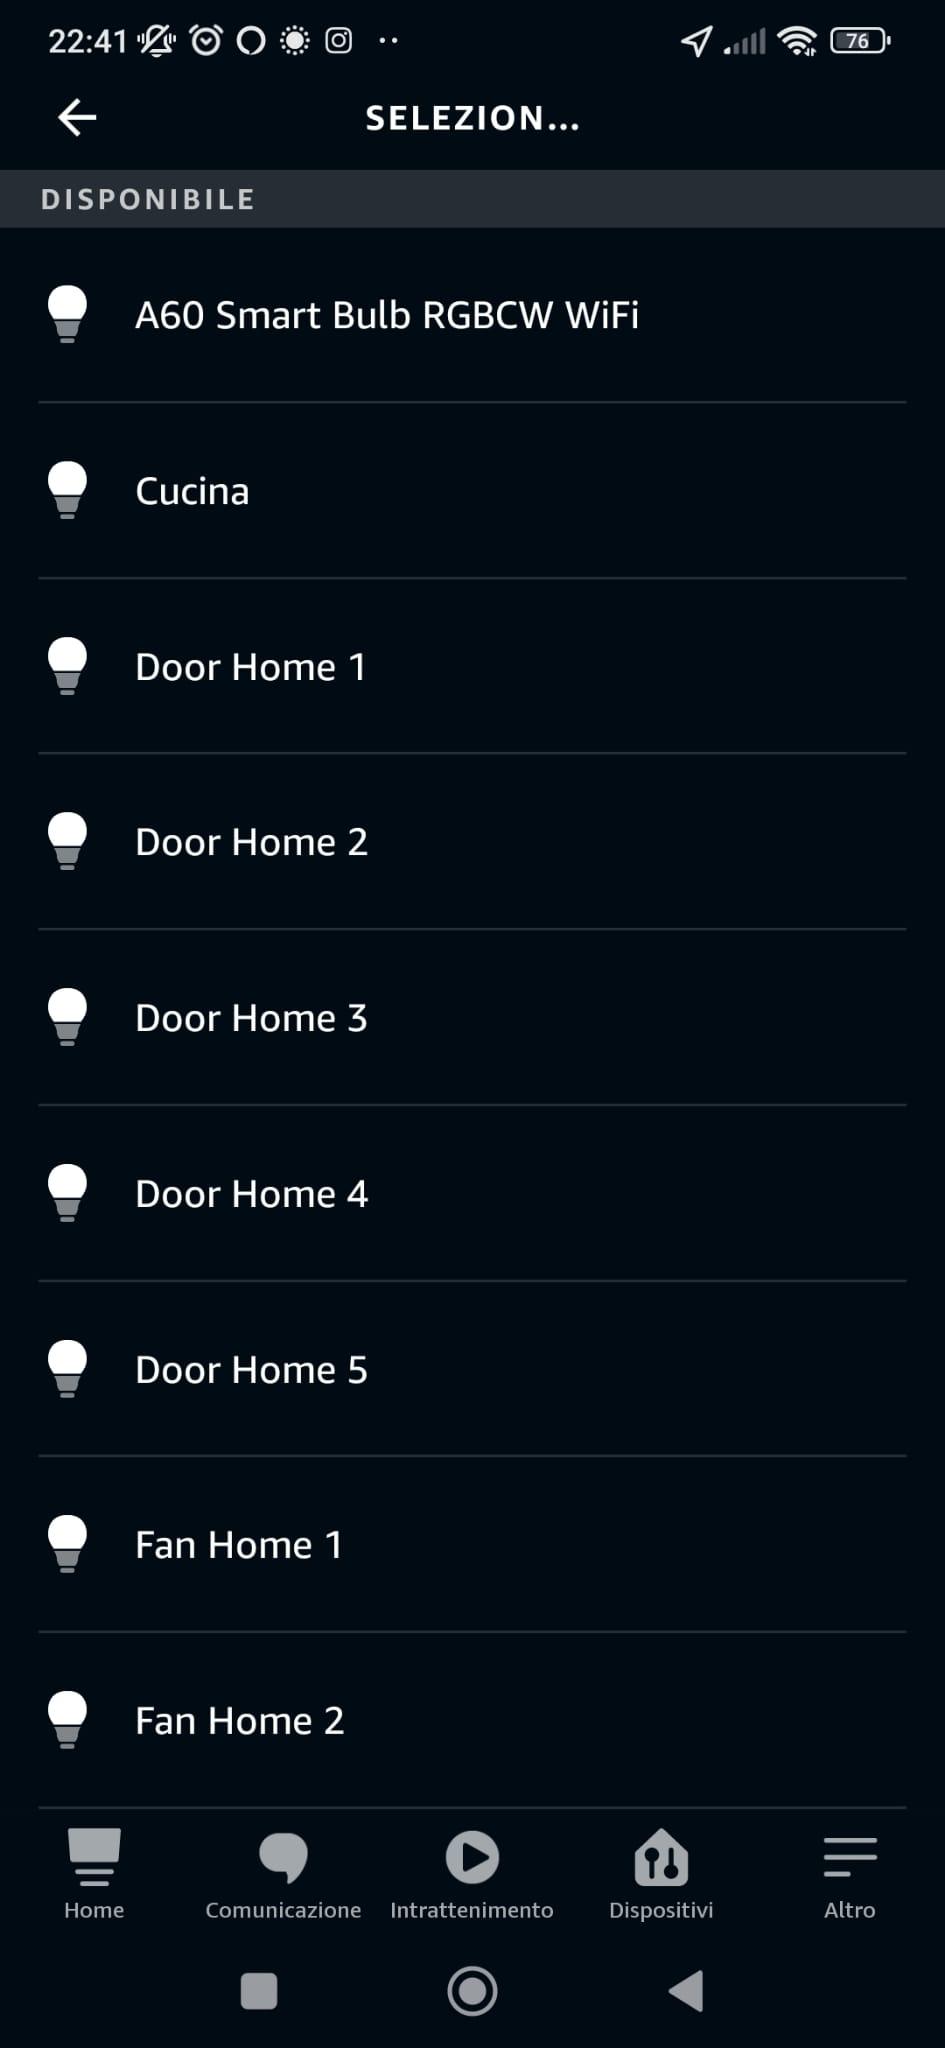
Install the Alexa skill to send requests to Nod-RED using voice commands, see attached screenshots. The steps to set up the Alexa skills are the following:
- In "Other" → "Skills and games" search and install the skill "Node-Red" as shown in the picture;
- Enable the Skill and enter the Username and Password;
- Alexa will automatically search for new devices, alternatively in "Devices" → "Your Devices" you can find and add new devices created on "https://alexa-node-red.bm.hardill.me.uk/";
- We can change the activation or deactivation command of a device by going to "More" → "Routine";
- In "Routines", add a new one by assigning a name, a trigger command in the Entry menu, and an action; In the Action menu select "Smart Home" and the device.
Firmware
.png)
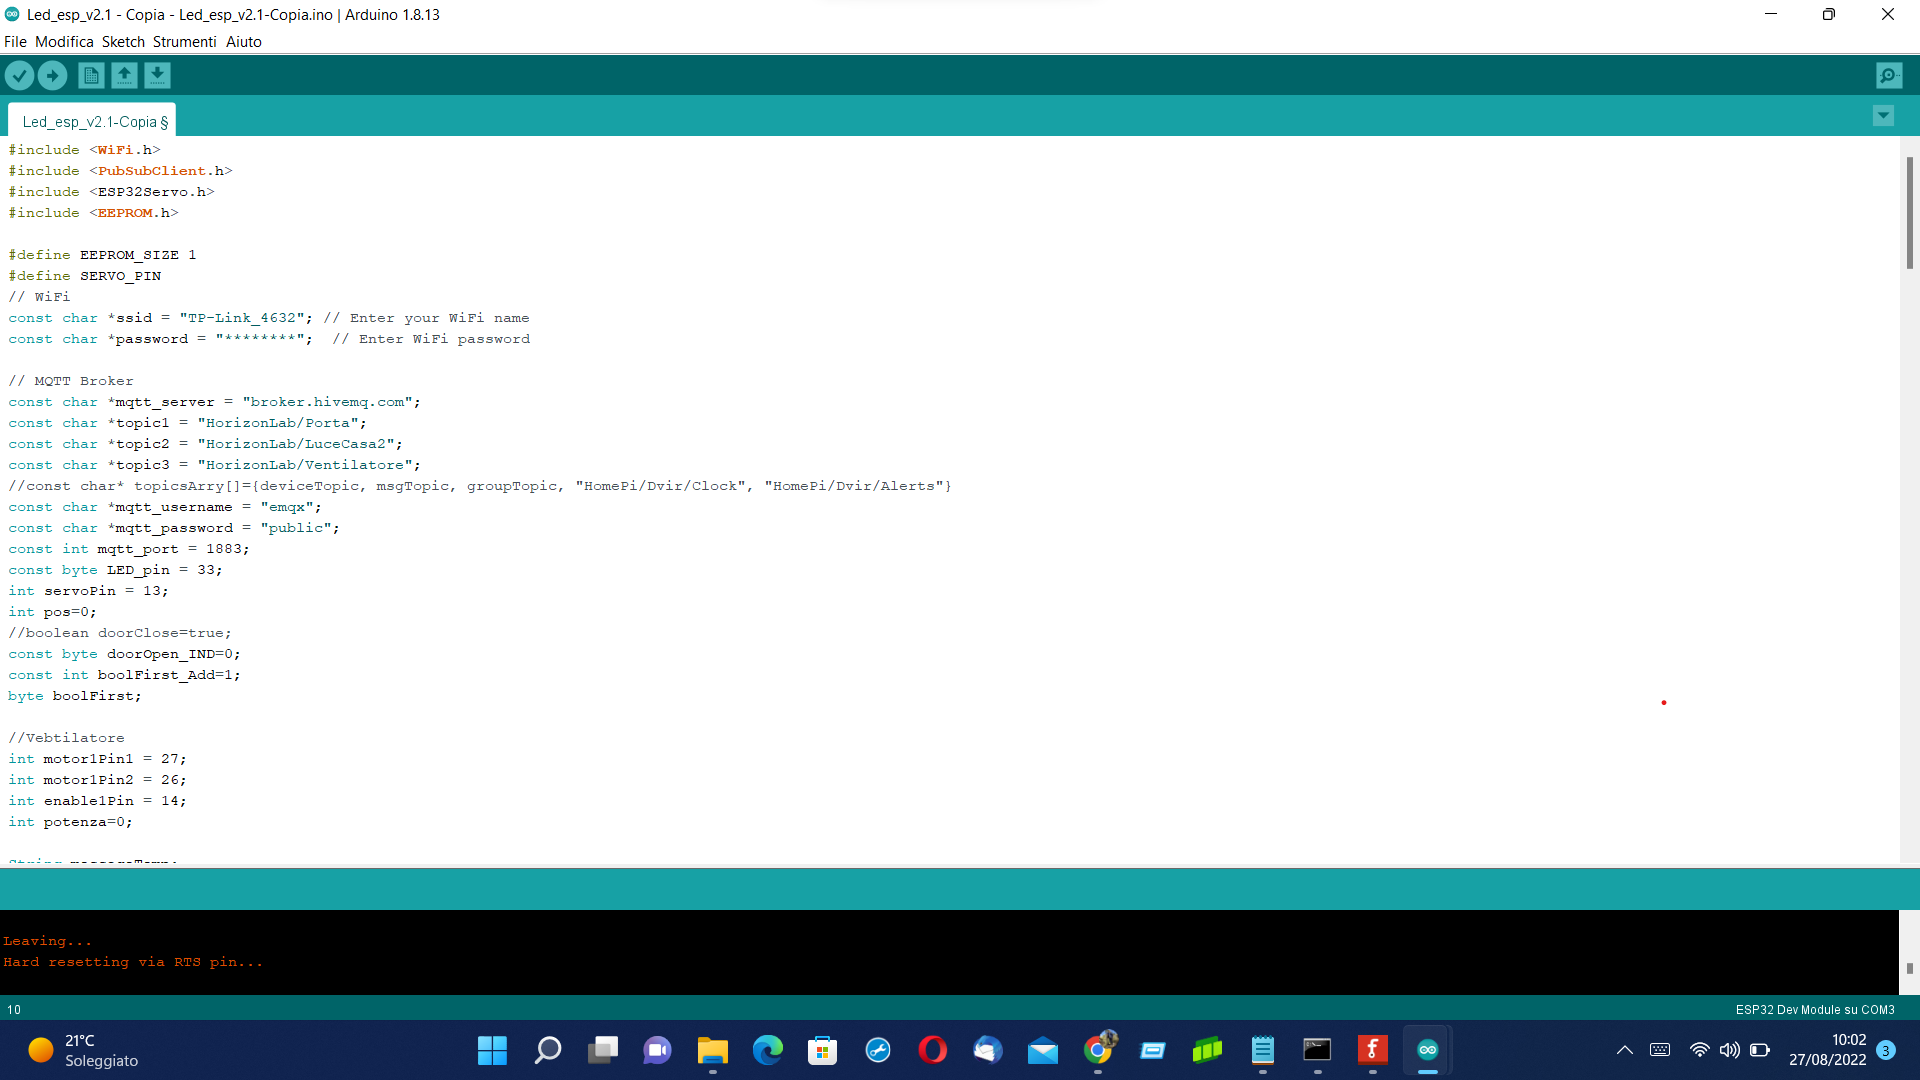
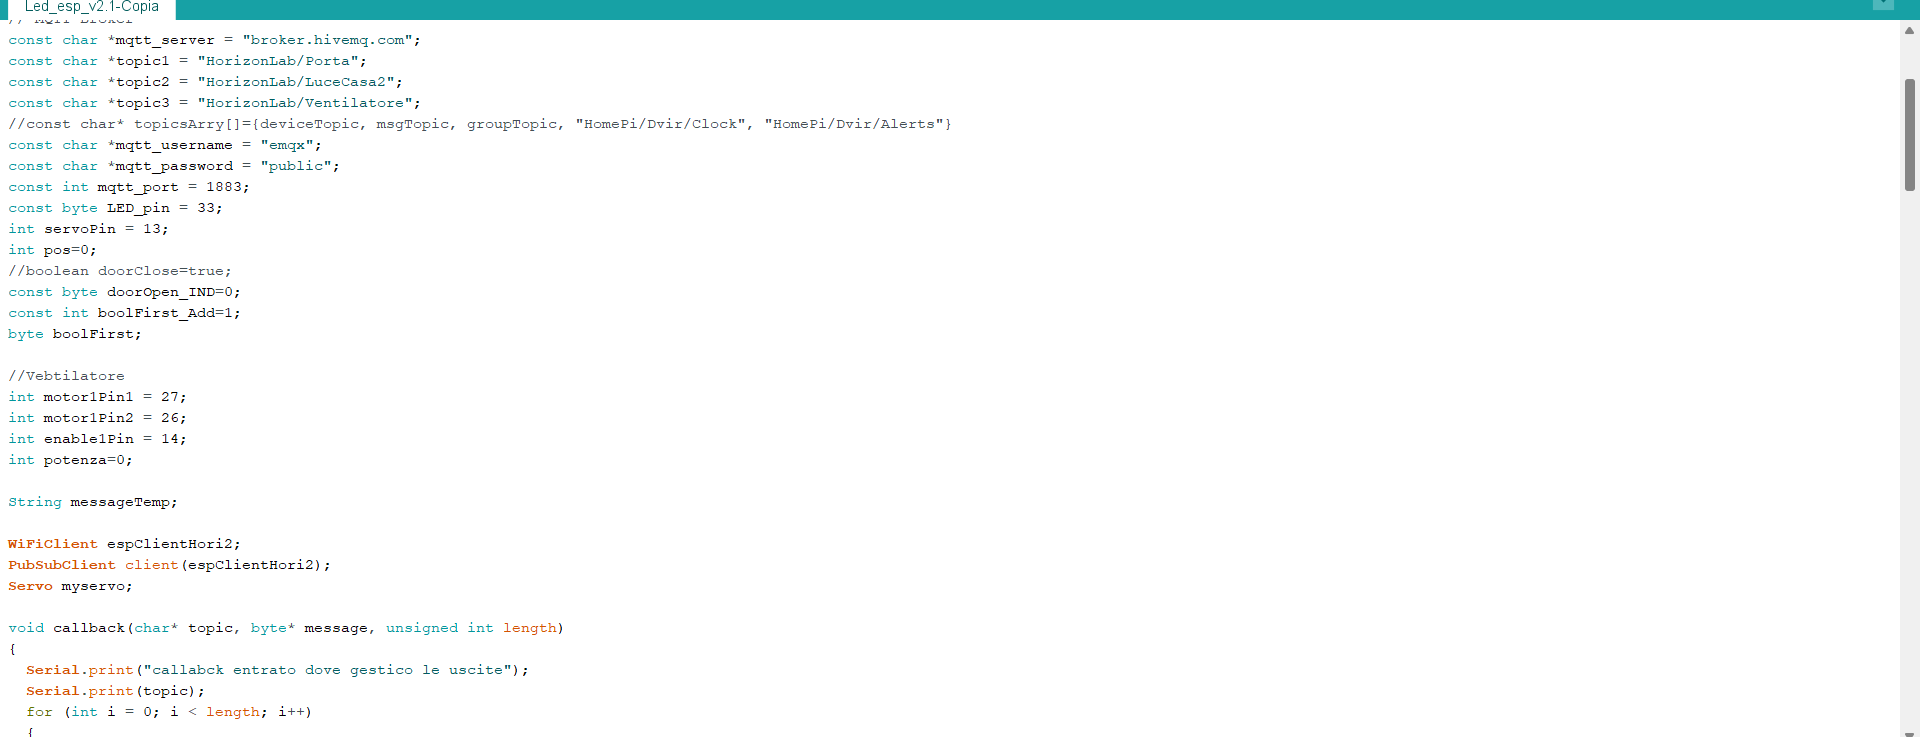
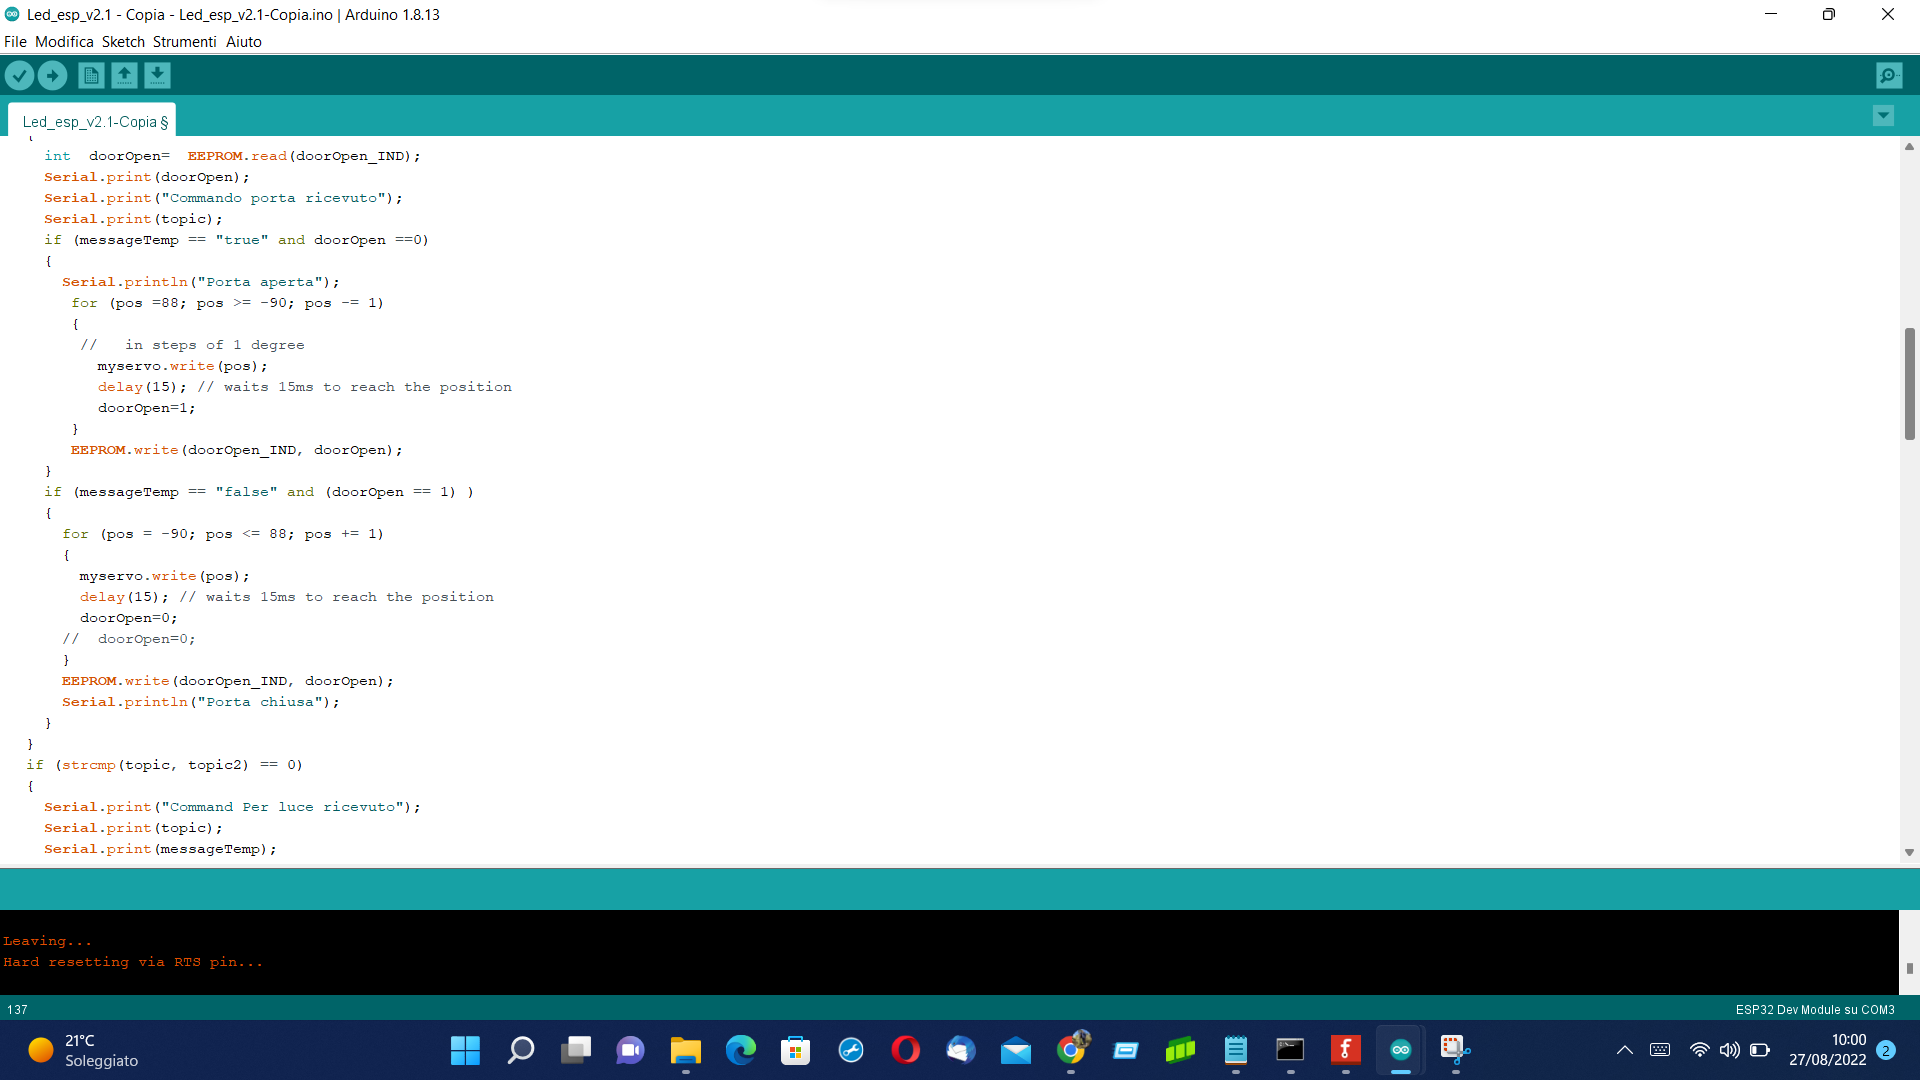
The Arduino IDE can be used to flash the firmware attached to this tutorial into the ESP32.
The first step is to set up the conncetion to the board. Go to FIle → Settings and add to the "Board Manager" this URL "https://dl.espressif.com/dl/package_esp32_index.json". Then, go to Tools "Board Manager" and search and install "esp32". Once the steps are completed, please select "ESP32 Dev Module" among the boards.
In order to connect ESP32 to the MQTT broker, flash the firmware you find attached below. Then, ESP32 receives commands from the MQTT broker and execute the action according to the vocal command.
To manage multiple houses, it is necessary to name every device differently. It is neccessary to assign different names to the WiFiClient (i.e. espClientHori2) and to the PubSubClient client (i.e. espClientHori2).
Dashboard
.png)
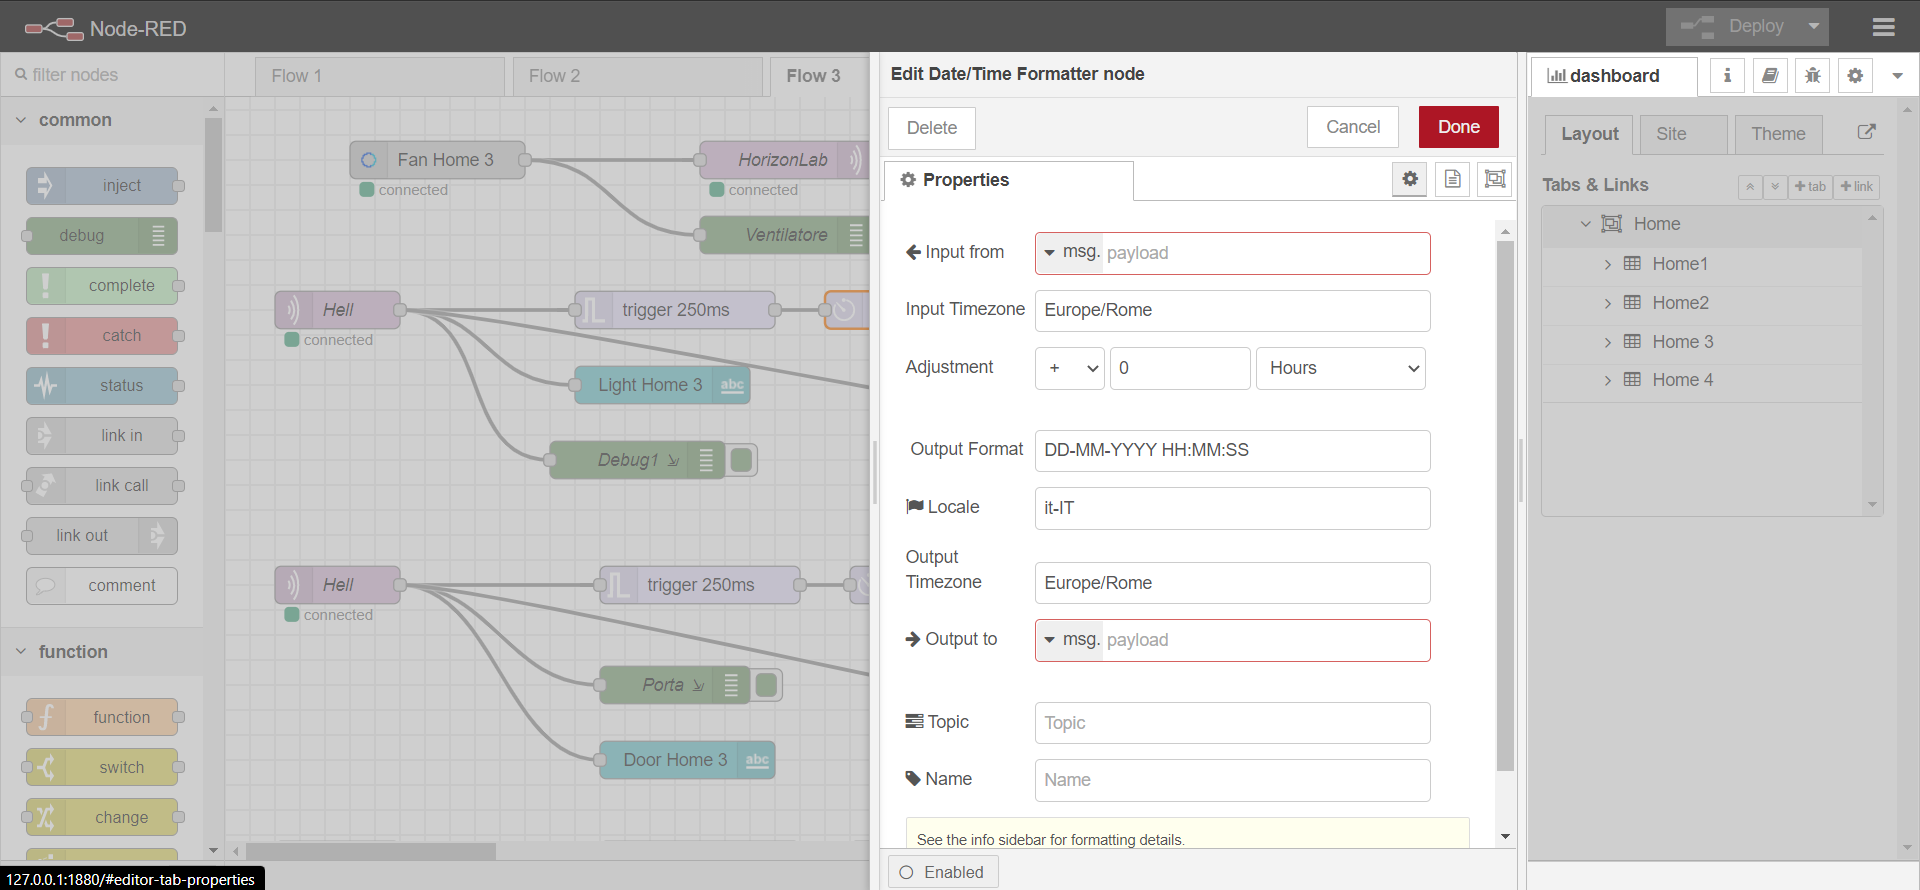
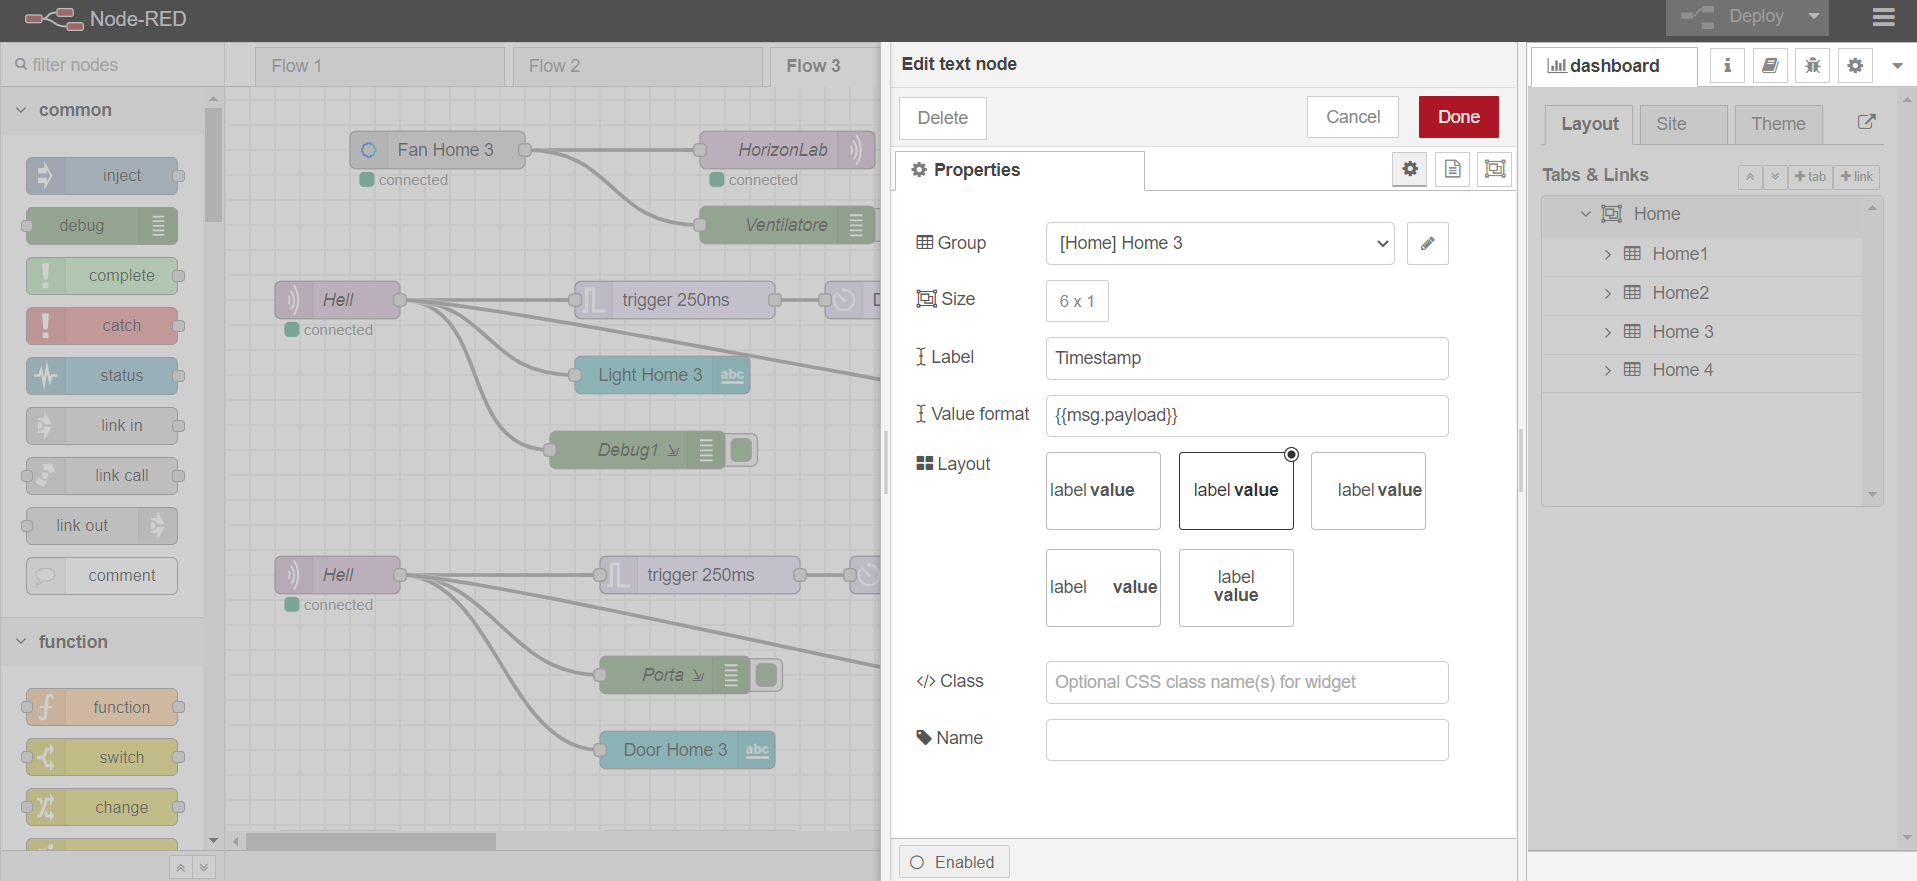
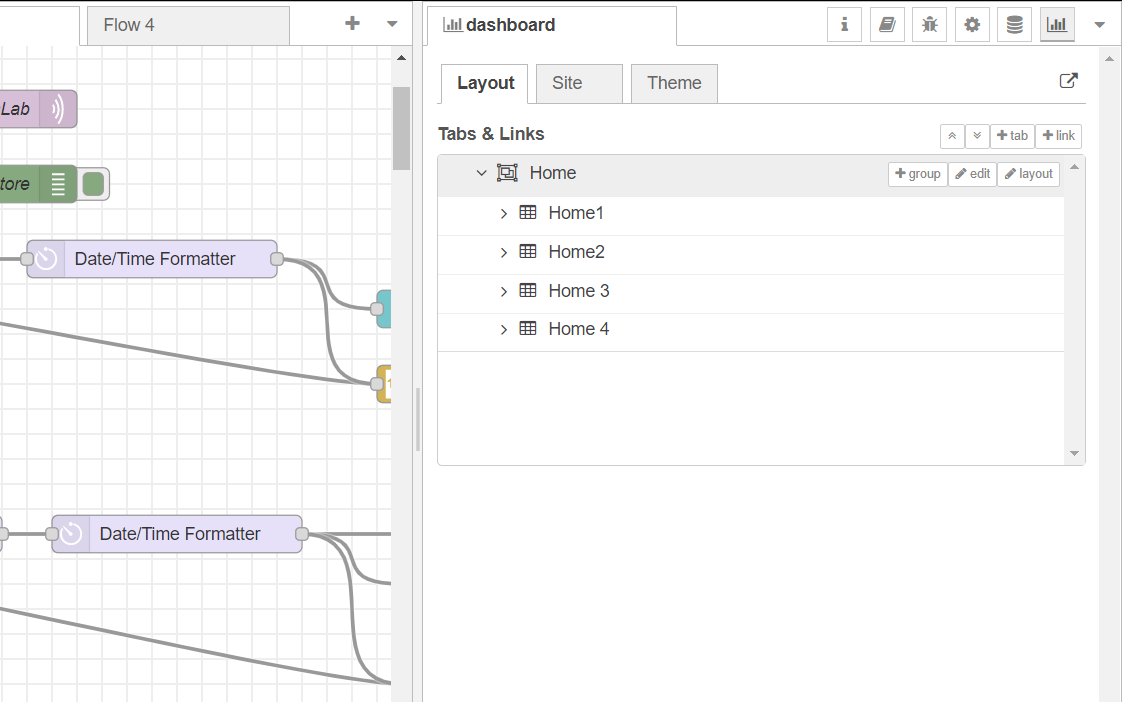
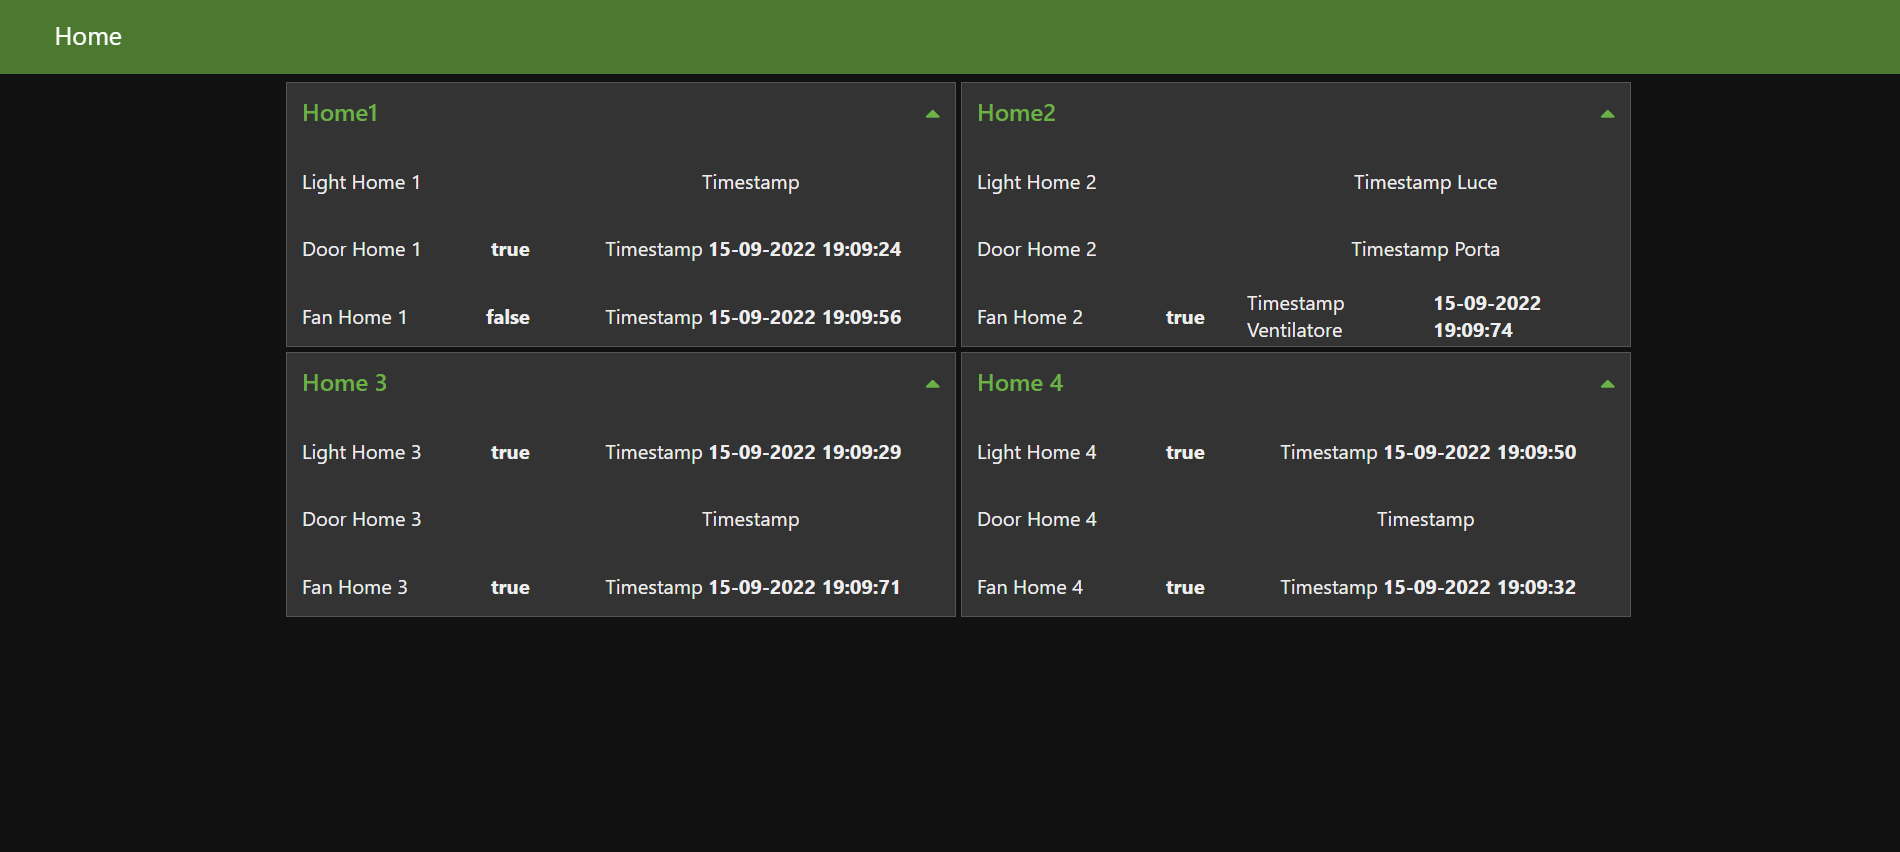
Node-Red allows user to create a Dashboard in order to visualize data and charts. Home habits monitoring could be realized by inserting widgets to track events (such as turning on a lamp).
To create the Dashboard, you need to:
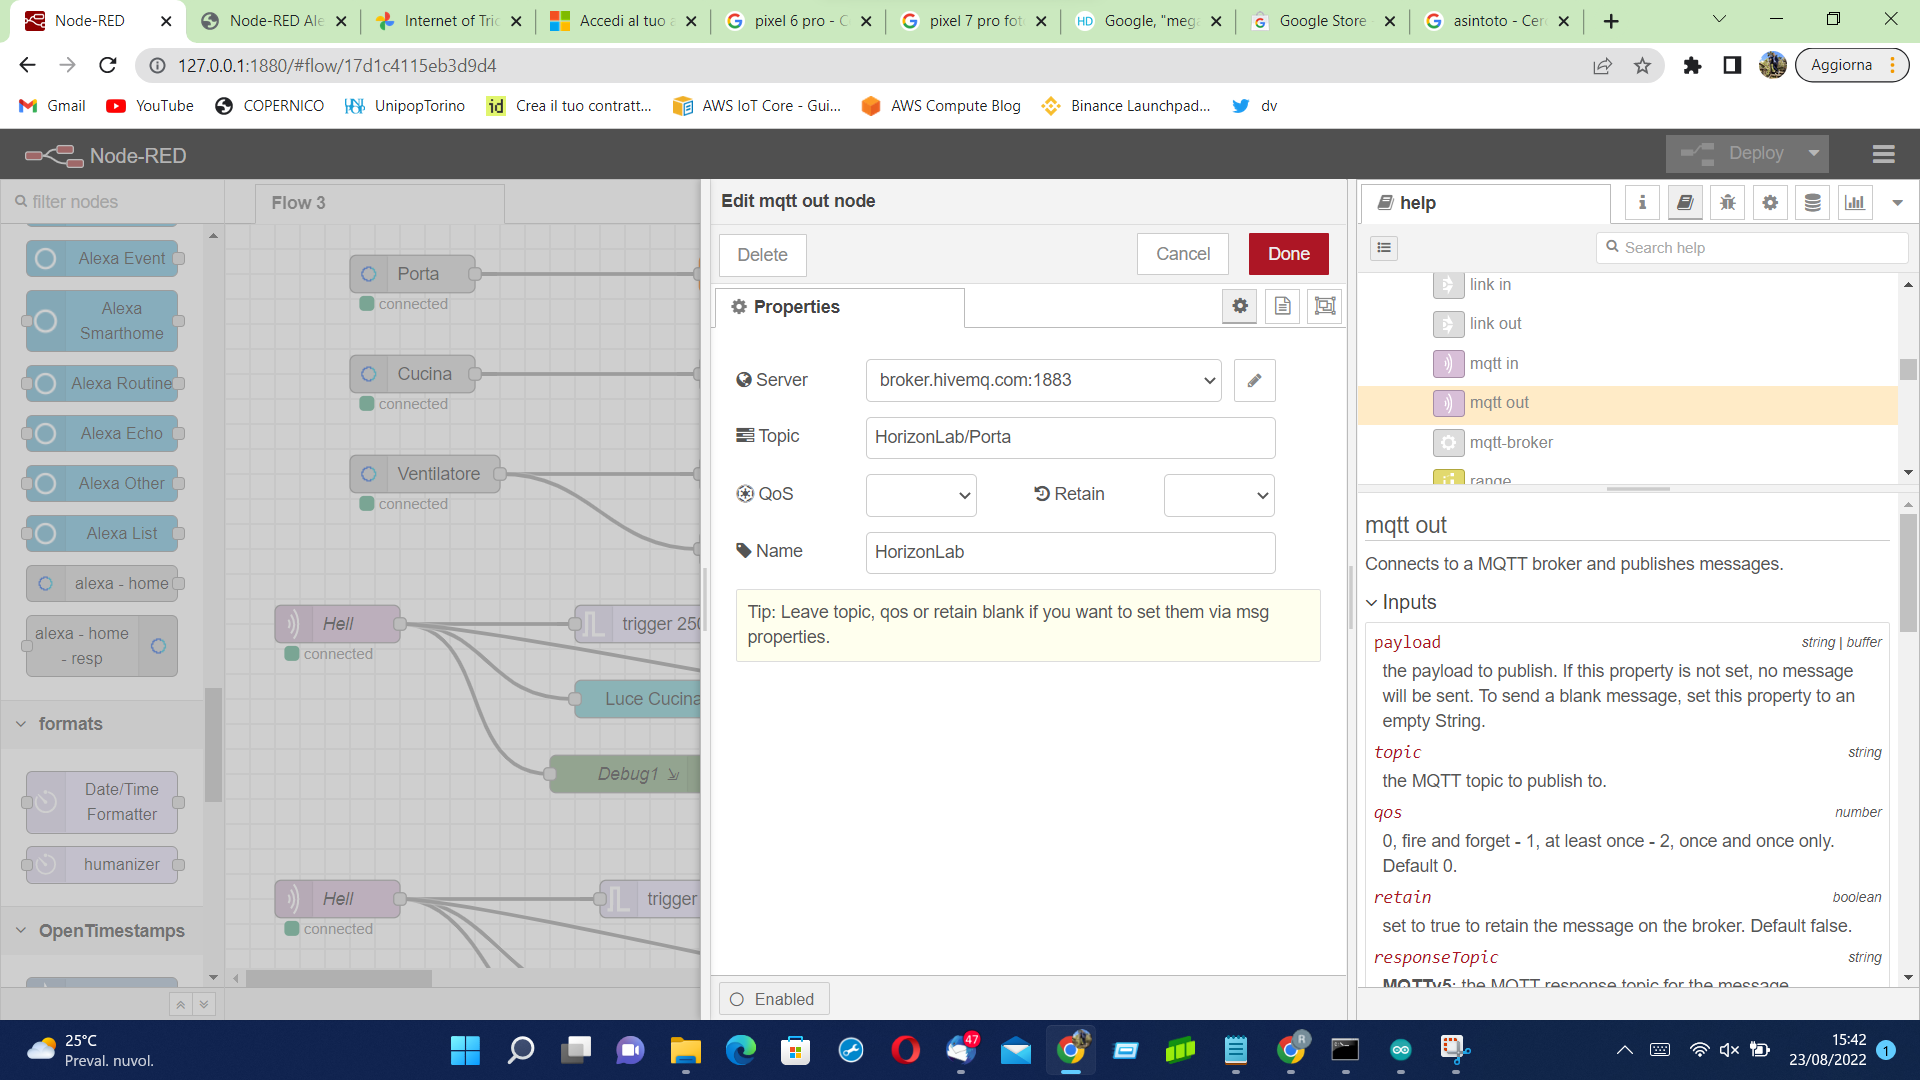
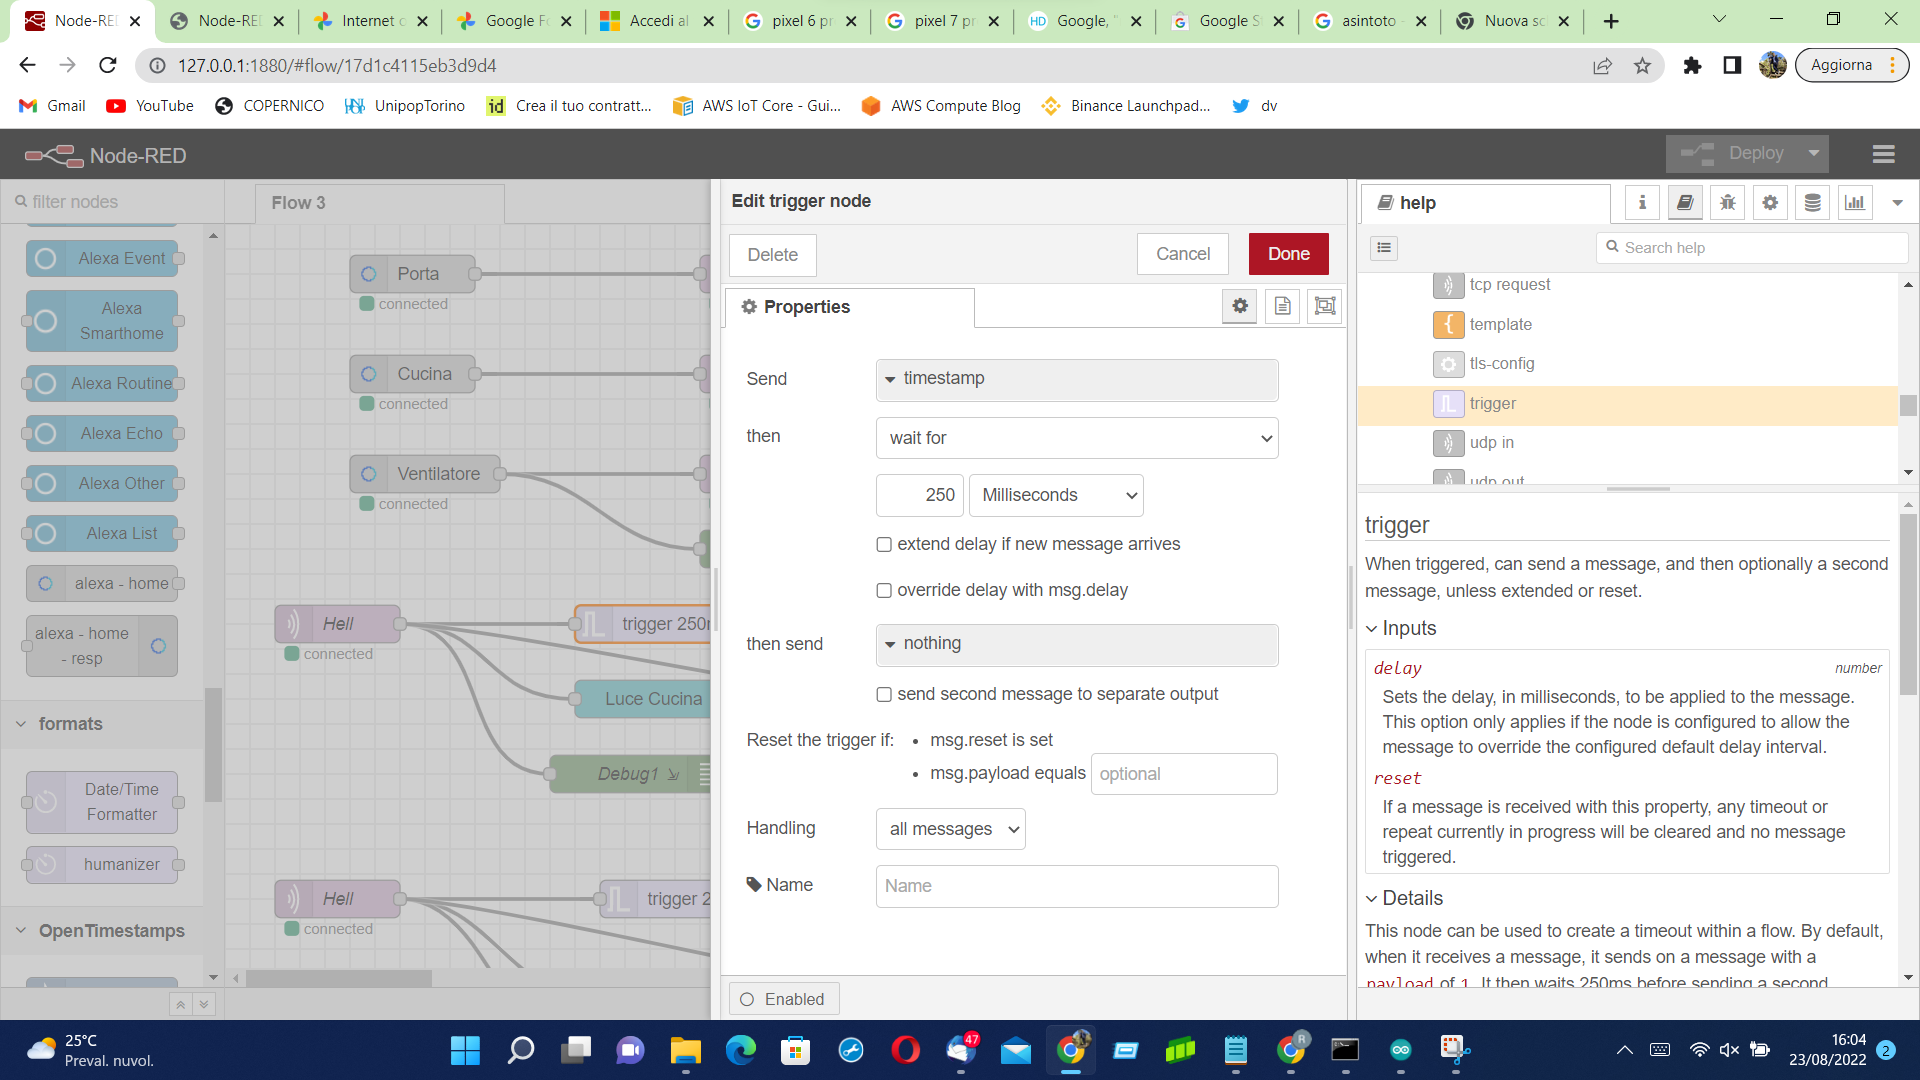
- Enter the first node "mqtt out" with the information related to the topic to be read (as shown in the image);
- Connect the output of the "mqtt out" node to a "Text" node to print the light status and the timestamp ("trigger", "Data/Time Format" and "Text");
- Create a new Tab containing a group for each house you want to shown in the Dashboard;
- Link the text node to the correct group by selecting the group in the properties of the Text node;
- Modify the layout of the Dashboard.
Let's Play!
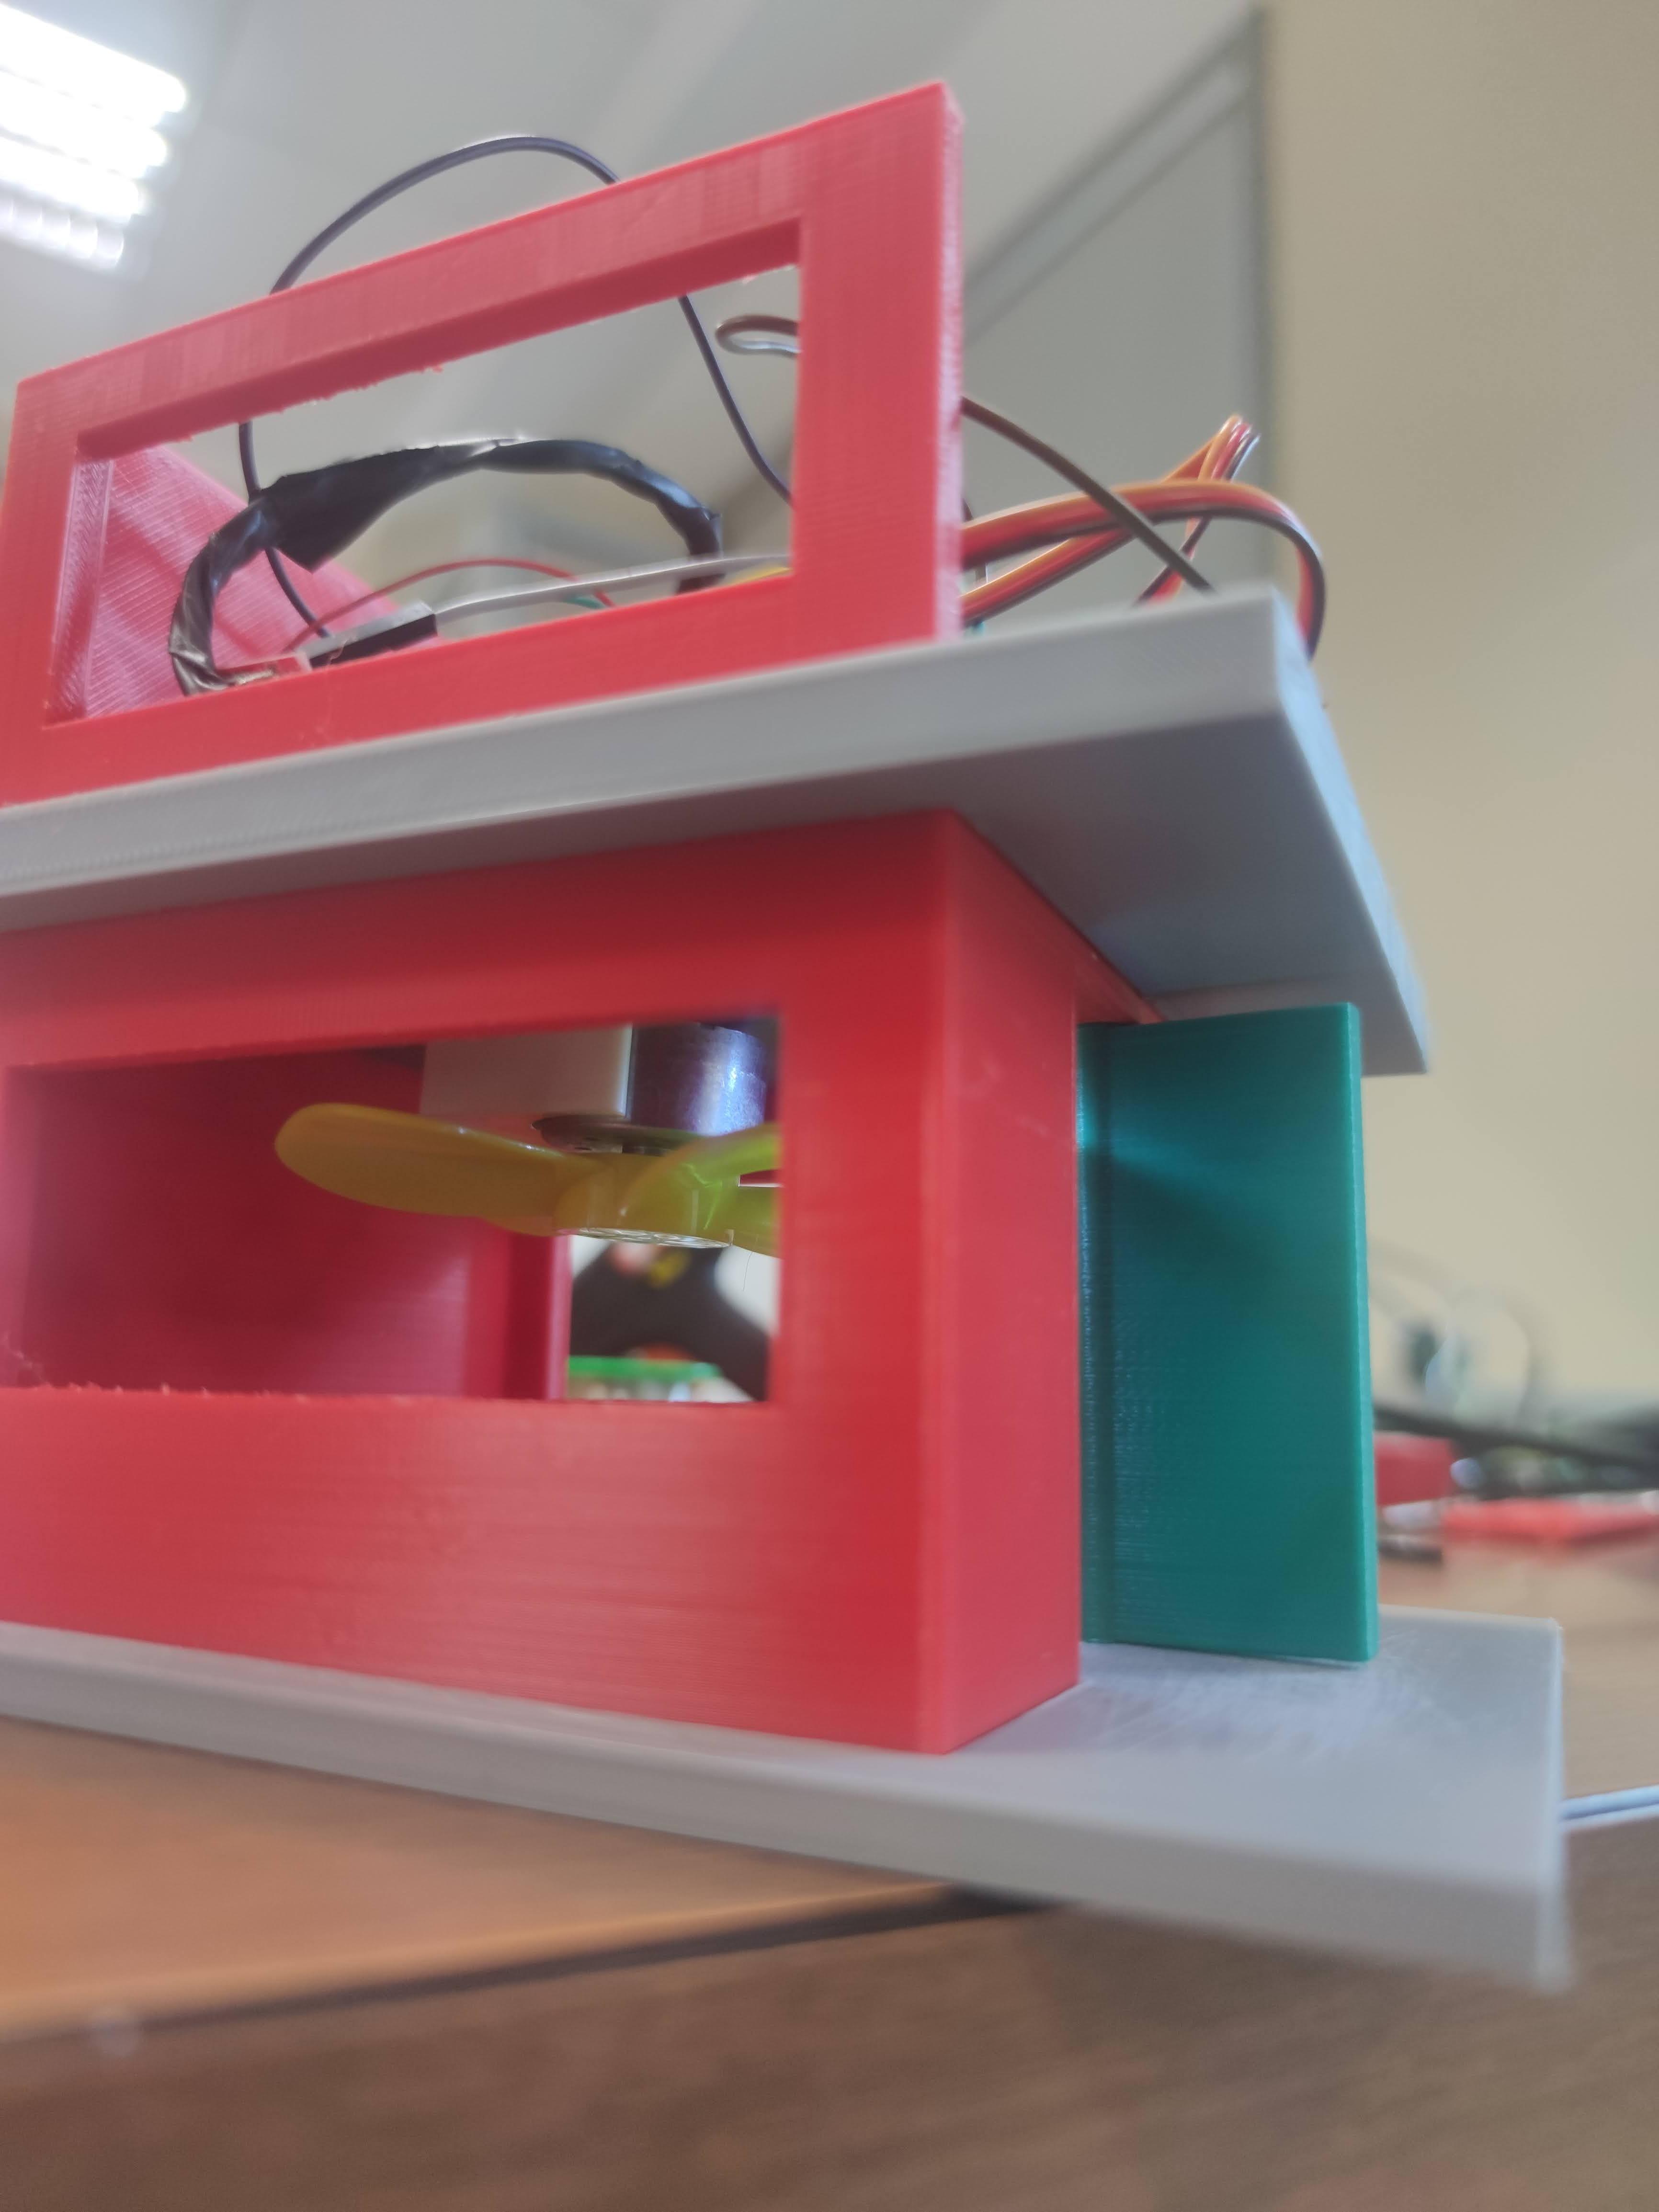
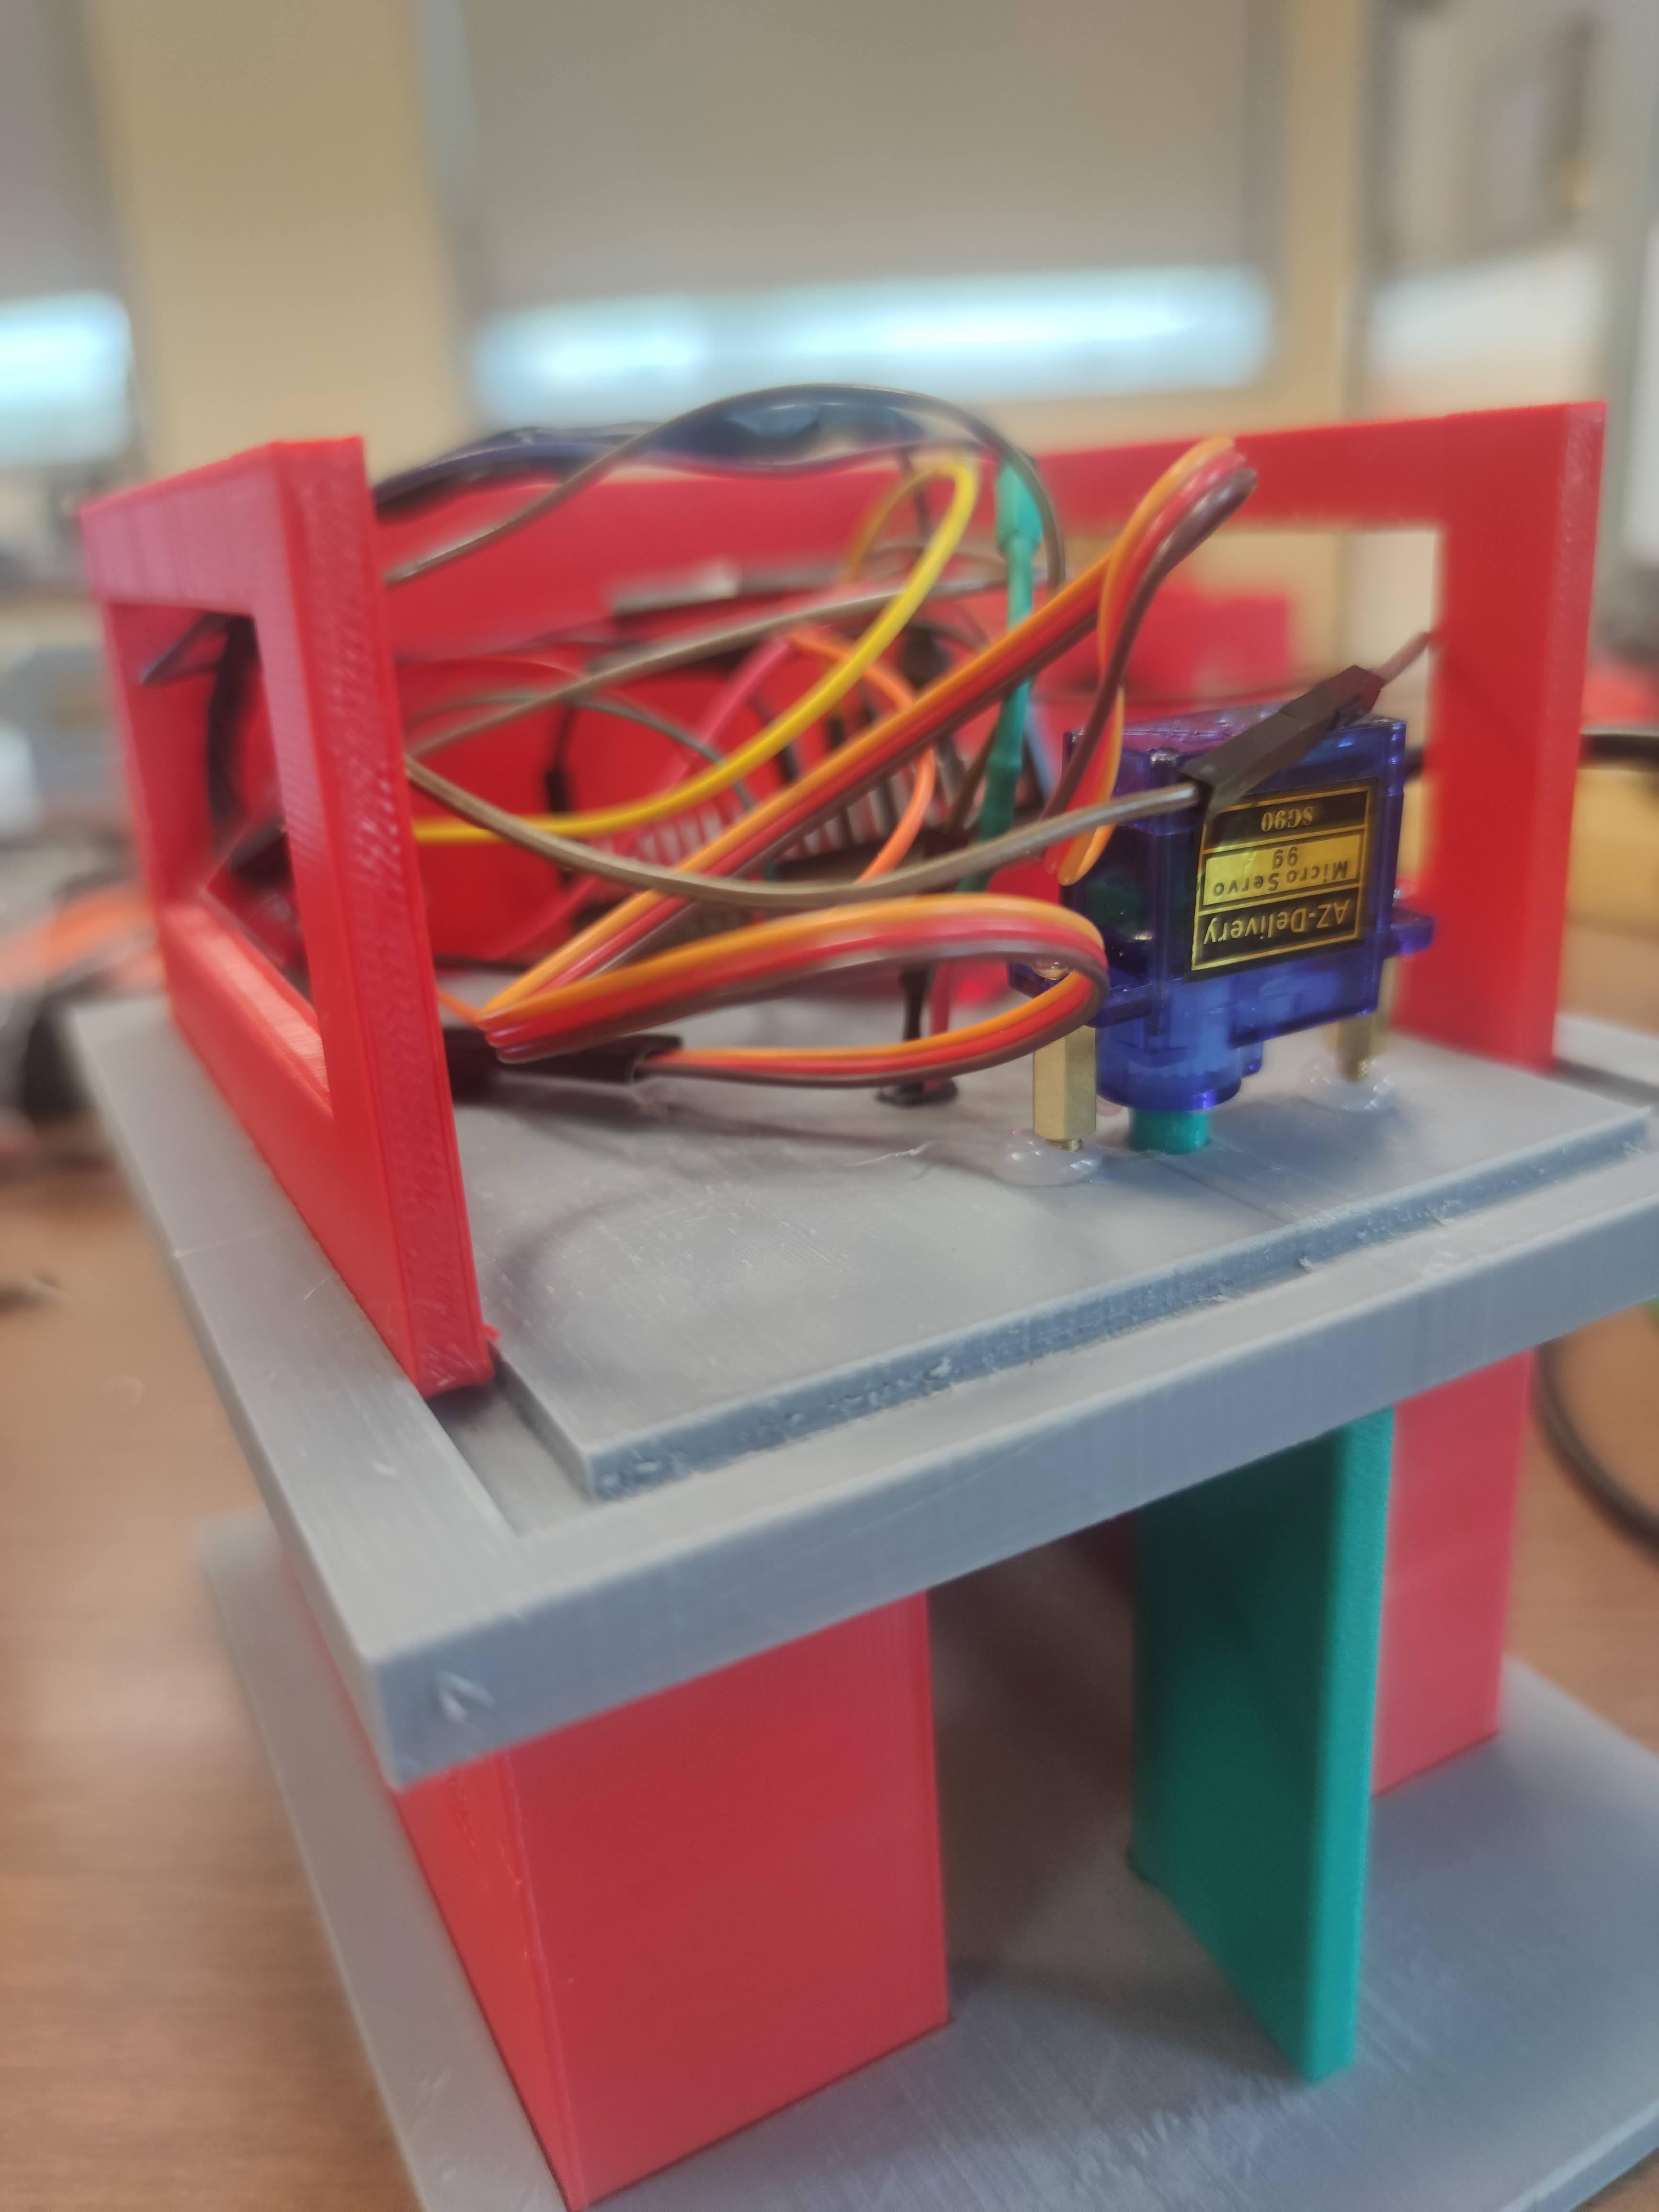
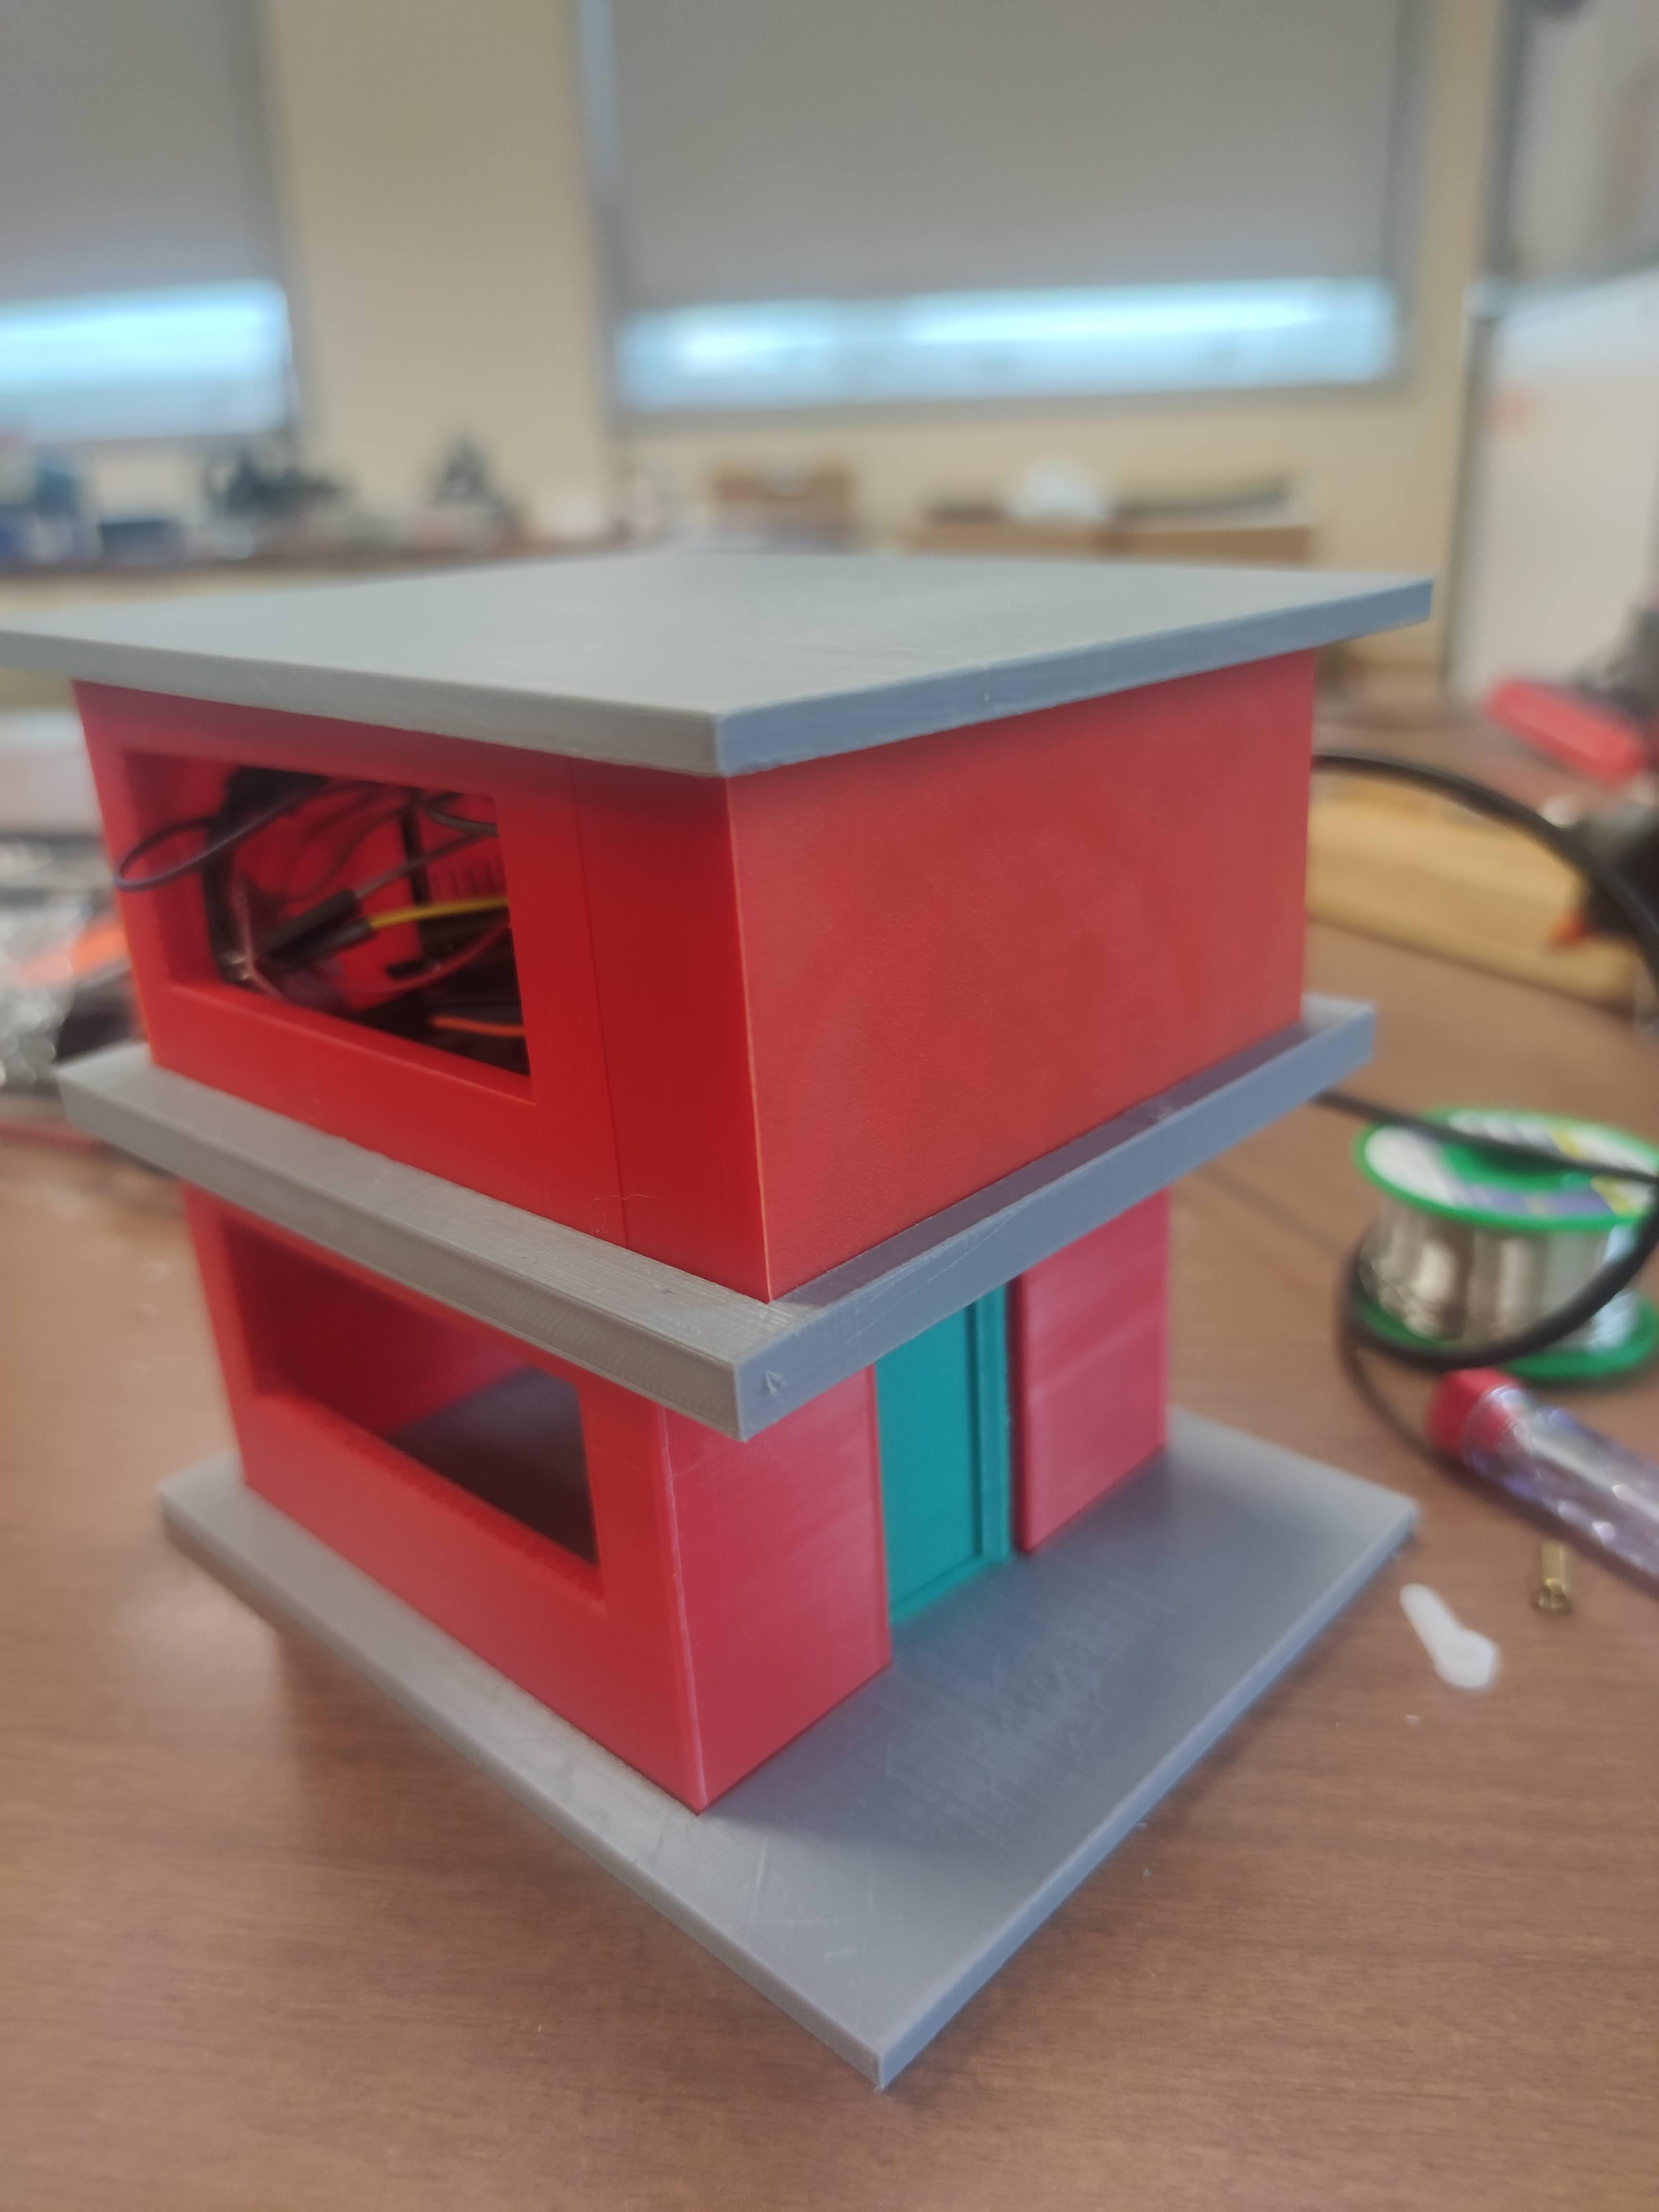
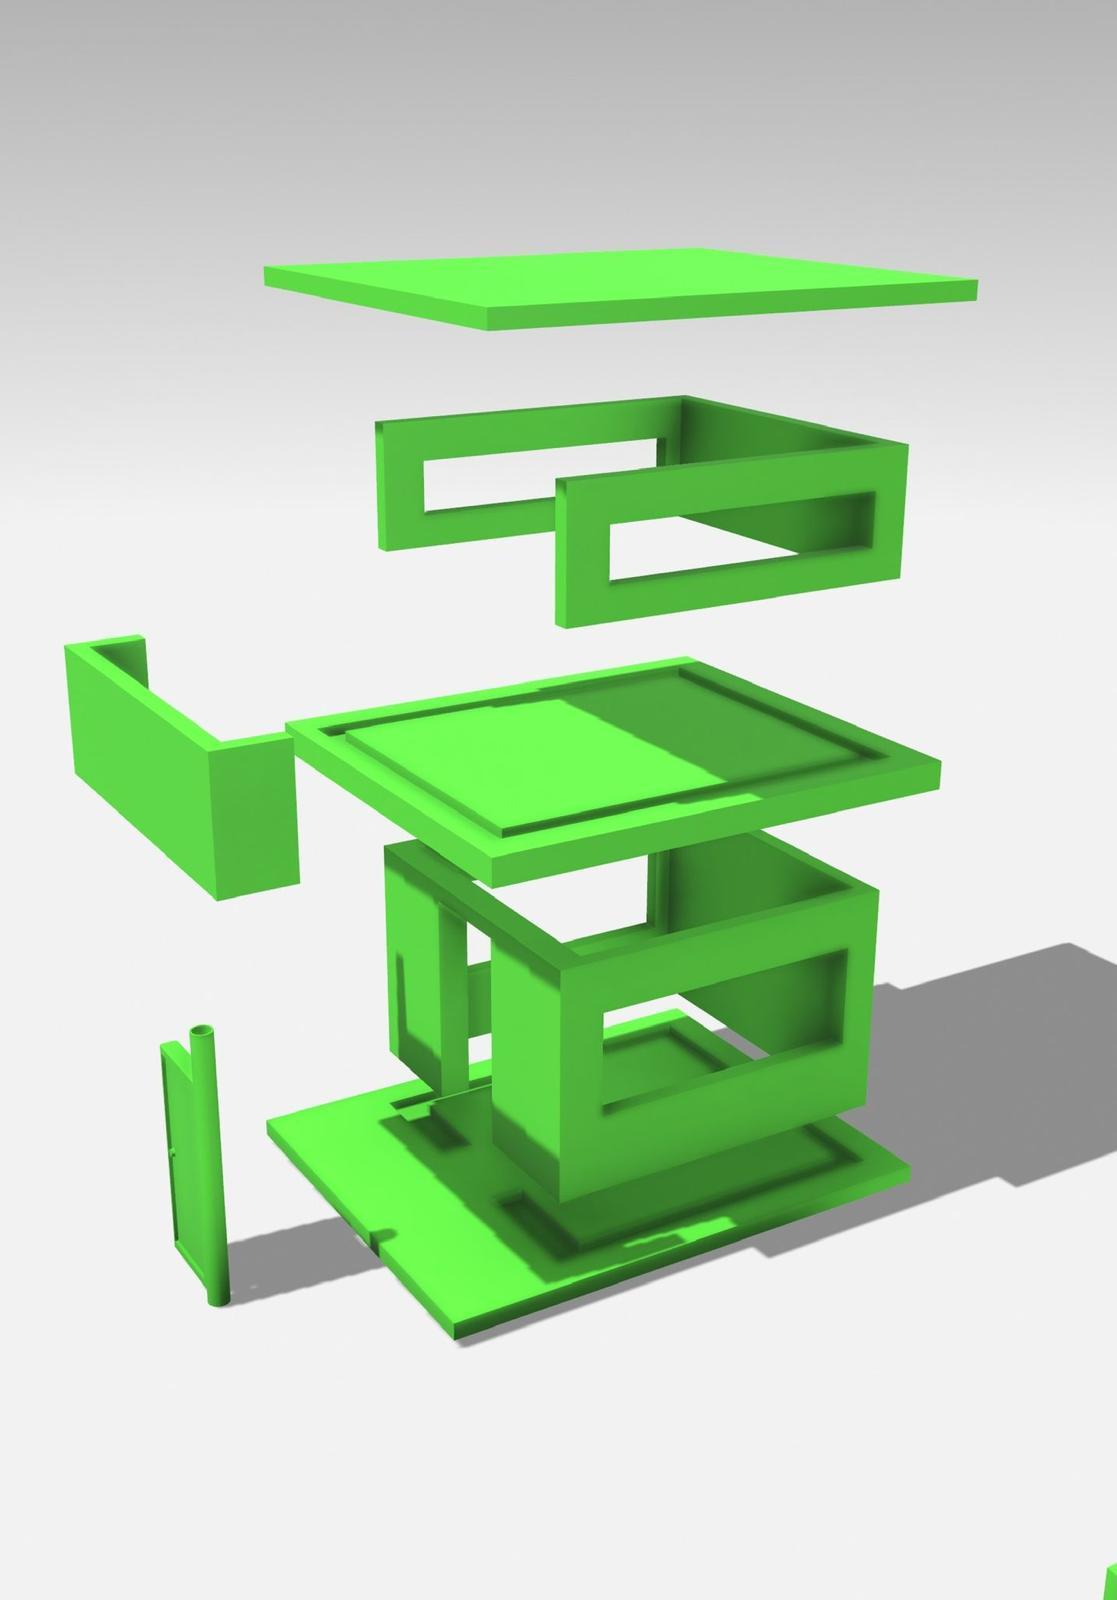
In the attached files you will find the project of the House for 3D printing.
Disclaim
This tutorial was developed as part of the Internet of Tricks project, co-financed by the Erasmus + program of the European Union. Project n°: 2021-1-SE02-KA220-YOU-000028971
The content of this publication does not reflect the official opinion of the European Union. Responsibility for the information and views expressed therein lies entirely with
The authors.
For more details contact info@horizonlab.eu