Colour Changing Packing Tape Art

I was inspired by this packing tape art created by Instructables member MadeByBarb. But I thought I could take it one step further, by creating art that is coloured. Not only that, but can be colour changing.
This takes advantage of polarised light, and a property of various plastic films which allow them to modify the polarised light. This modified polarised light appears as different colours, depending on how the plastic, and the polarising filters, are oriented. Successive layers of plastic film yield different colours.
It works like this: if you take two polarising filters and place them together, one on top of the other, you can vary the amount of light that is let through by rotating the filters with respect to each other. It works because the light gets polarised in one direction by the first filter, and then if the second filter is oriented at right angles to the first, the polarised light can't make it through. It's like trying to put a square peg in a round hole. Or more accurately, you're trying to put a square peg in a square hole, but you're trying to put it in sideways.
So what does the tape, or plastic film do? Well, it works in the same way as the polarising filters, but with different colours. The tape reorients the polarisation of the light, but with varying degrees depending on the wavelength, i.e. the colours. Not only that, but this effect changes depending on the orientation of the two filters and the tape or film, with the net result that you can change the colours on the fly, simply by rotating the filters and/or the film.
I've made a couple of pieces of artwork to demonstrate this process.
Supplies
- Polarising filter:
https://www.amazon.co.uk/gp/product/B0793PYDF7/ref=ppx_yo_dt_b_asin_title_o01_s00?ie=UTF8&psc=1.
This is a rather expensive way to go, however. Polarised sunglasses will work just fine, but you need two pairs, plus they are rather small for this application. Another option is to repurpose a polarising filter from an old LCD screen. There are a number of instructables that cover this subject; here are a few I found:
https://www.instructables.com/Privacy-monitor-made-from-an-old-LCD-Monitor/
https://www.instructables.com/How-to-Replace-the-Macbook-Unibody-Glass-LCD/
https://www.instructables.com/Continuous-Light-Panel-With-Regulated-Brightness-F/
https://www.instructables.com/Turn-a-broken-laptop-screen-into-a-portable-light-/
https://www.instructables.com/Window-like-Lamp-From-Old-Computer-Monitors/
These will probably yield only one filter however; often they are stuck to the glass, and are very difficult to remove. It varies, depending on the screen. You can always use polarised sunglasses for the second filter.
- Sheet of glass or acrylic
- Clear sticky tape (Different types will produce different results)
- Light table. You can always hold the thing up to a window while you work on it, but an easier way is to use a light table. The last three instructables I referenced above are also useful for this in addition to yielding a polarising filter.
Setup


Place the polarising filter over the light table, or up against a window. Place the sheet of glass or acrylic over it. This will be your artwork. Then place the second filter over that. Leave a gap between these two; you'll need access to the space between the two filters. Or, if you are using sunglasses, put them on. Remember, the sunglasses need to be polarised otherwise it won't work. You can test this by tilting your head from side to side. If the filter goes lighter or darker, the glasses are polarised. If the filter doesn't change, they are just ordinary sunglasses.
Select Your Colours


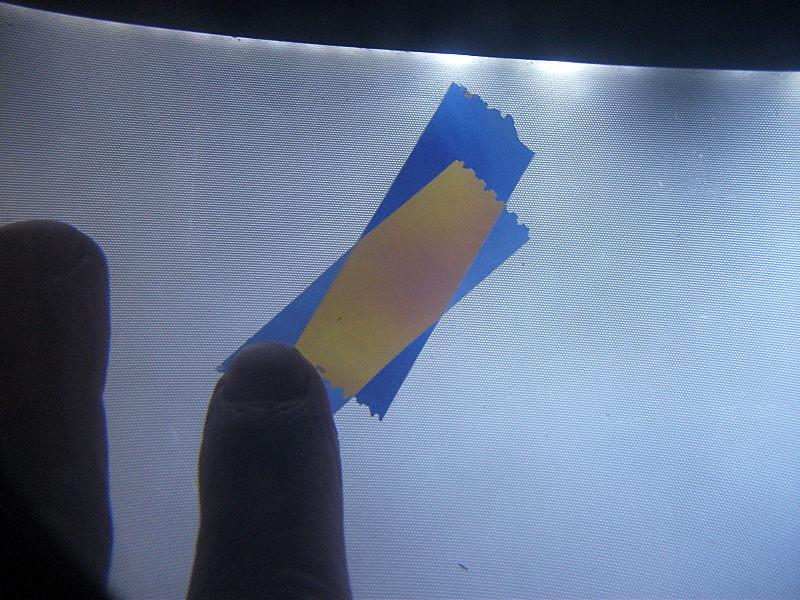

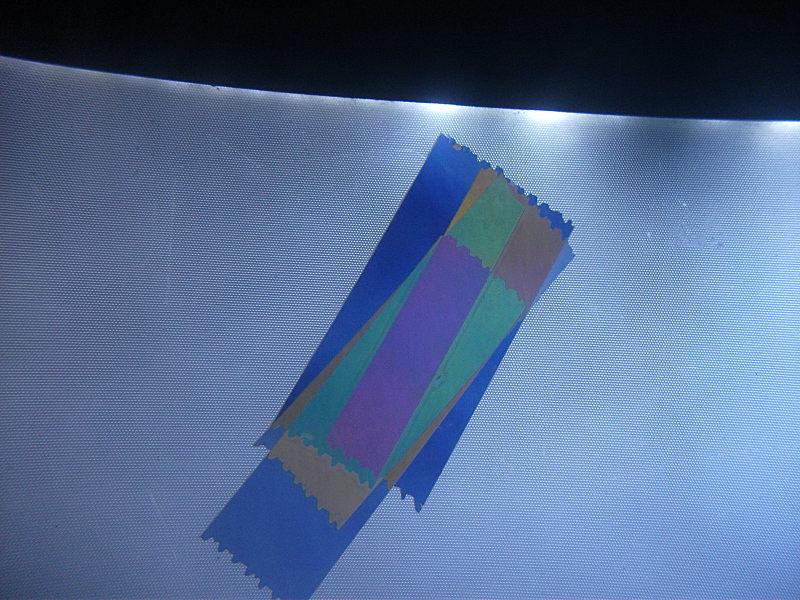


Now you have your setup, it's time to play around with the tape. Tear off a small length of tape and place it on the glass, sticky side up. You should have the sticky side up so that it doesn't stick to the glass, since you're going to be rotating the tape to check out the colours. In this demo, I just used ordinary sticky tape rather than packing tape, but it all works the same. All that is required is for the tape to be transparent
And that's it. Rotate the tape, and also the upper filter, and you will see different colours on the tape, and sometimes no colour at all.
Once you've got a colour you like, turn the tape over and stick it to the glass. You need to place the tape at exactly the same angle as when it was the other way up, so that you get the same colour. When you stick it down, fold the end of the tape over on itself so that you have a tab at the end that hasn't stuck. this is so you can remove it again later. This step is just a test so that you can get an idea of how this whole thing works.
Now tear off another piece of tape, and repeat the above process, but this time over the piece of tape you already put down. Notice how new colours appear that you didn't get with the first piece. This is how it works; successive layers of tape produce different colours.
And of course, rotating the filter changes all the colours. Try it!
Once done, you can remove the tape from the glass. We're going to draw some artwork next.
Draw Your Picture


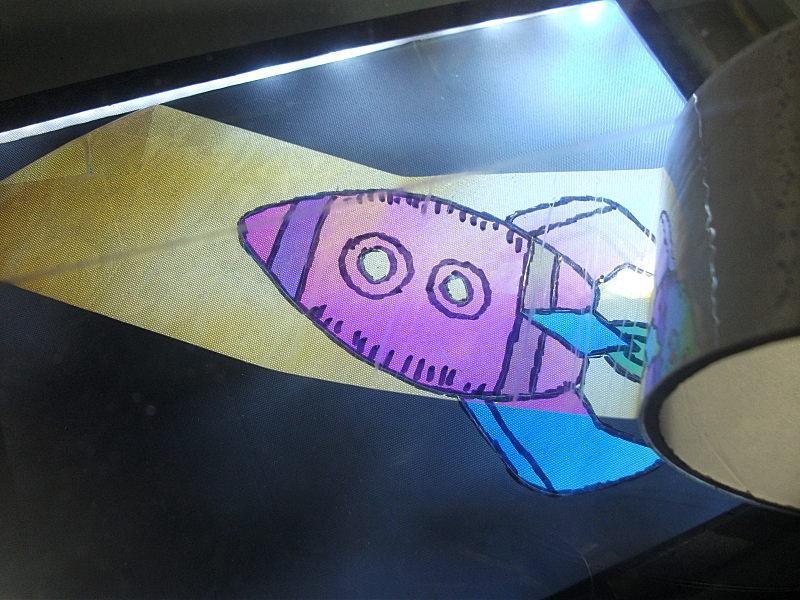


For my picture, I just picked some random clipart. Then I simply traced the design directly onto the glass with a Sharpie.
It's easy to simply place tape over the area you wish to colour in, and then trim it with a craft knife. And as you saw in step 2, simply add layers of tape to get different colours. It can be a bit tricky to add layers, then remove the unwanted tape without accidentally removing a previous layer, but practice makes perfect.
The Final Result
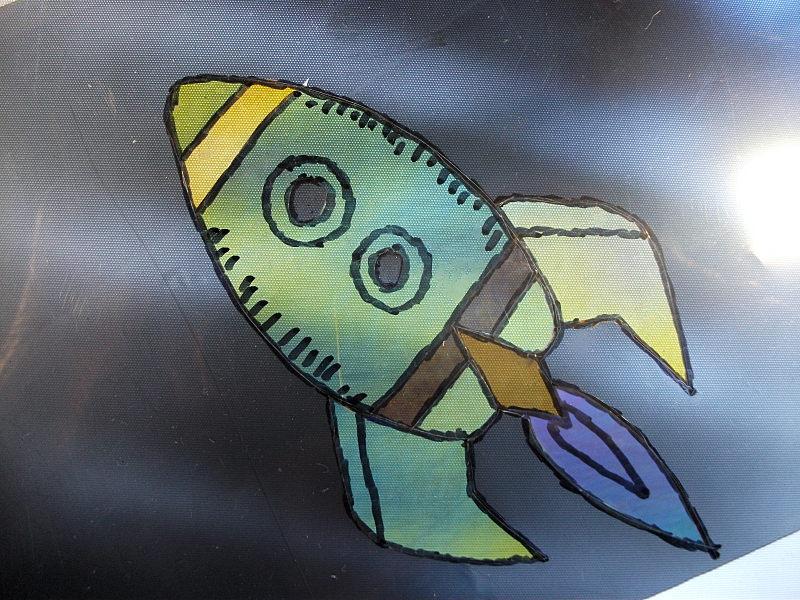
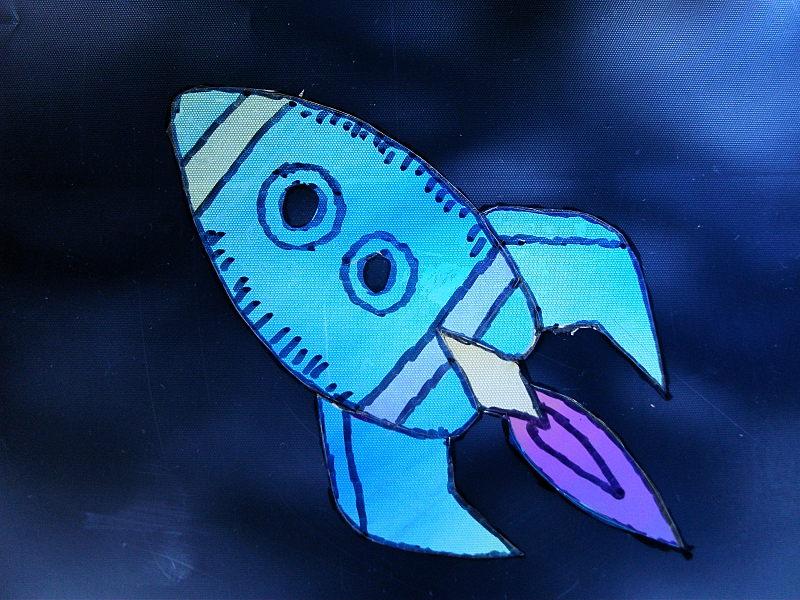
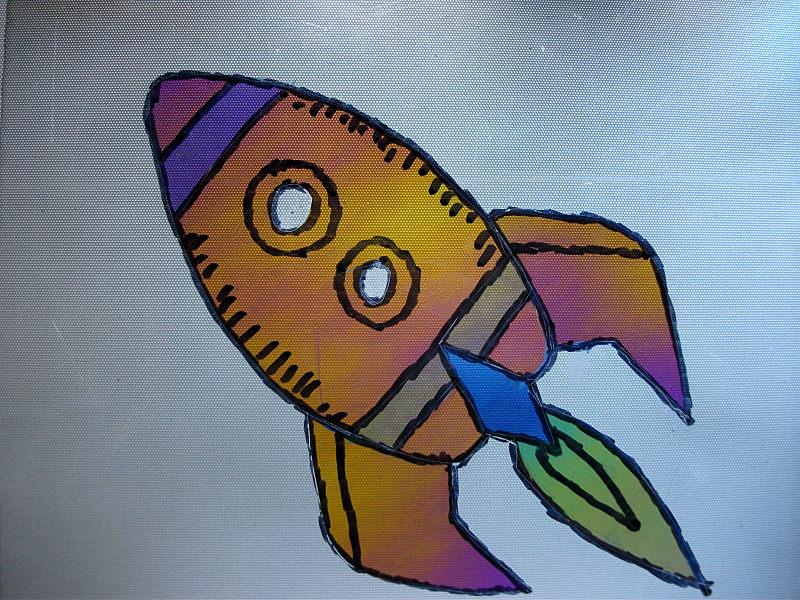
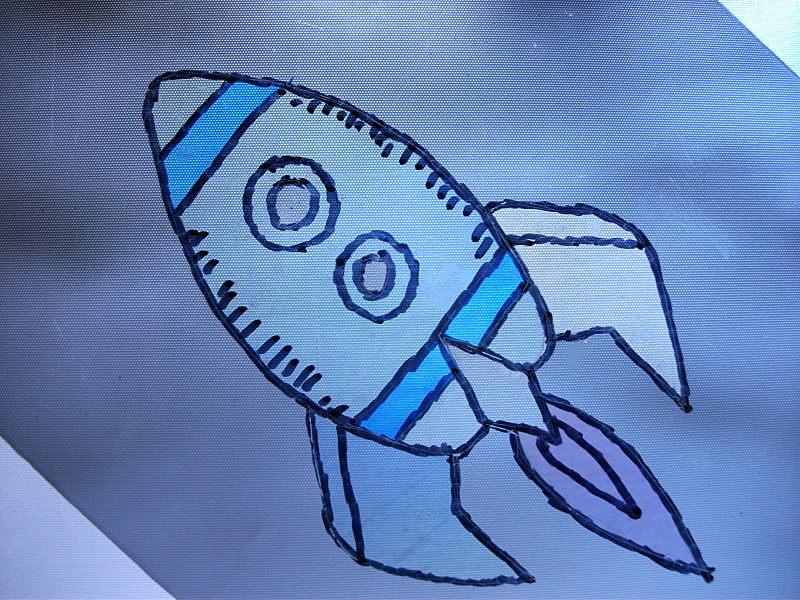
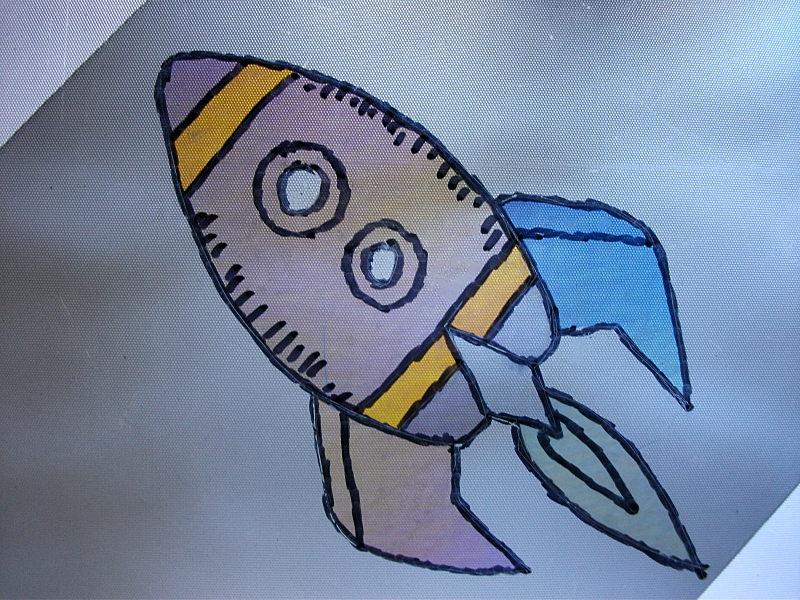
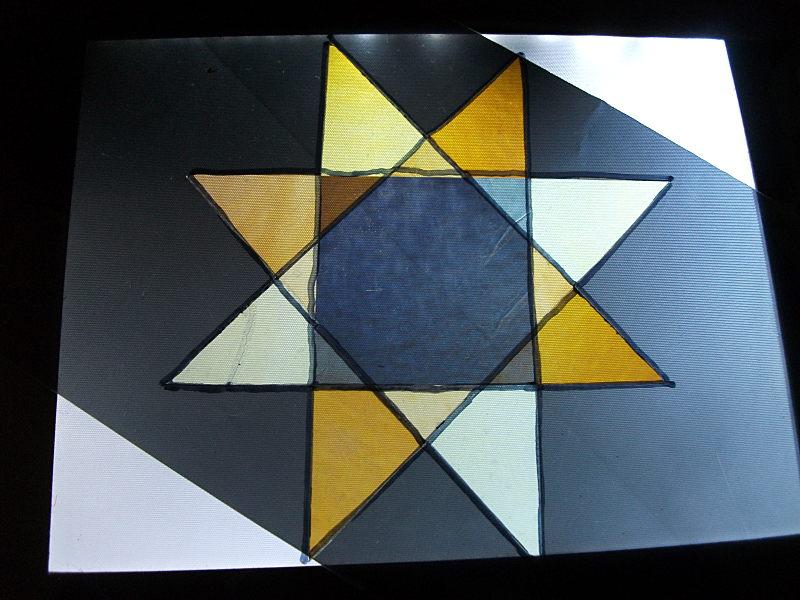


And here is the final result. As you can see, turning the filters changes the colours across the whole design.
I originally started this project using clear packing tape, but many different clear plastics exhibit similar effects. You might want to try it; find different clear plastic items around the house and see what they look like between the filters.
And that's it. I hope you enjoy this instructable, and feel inspired to try this yourself.