Color Instrument
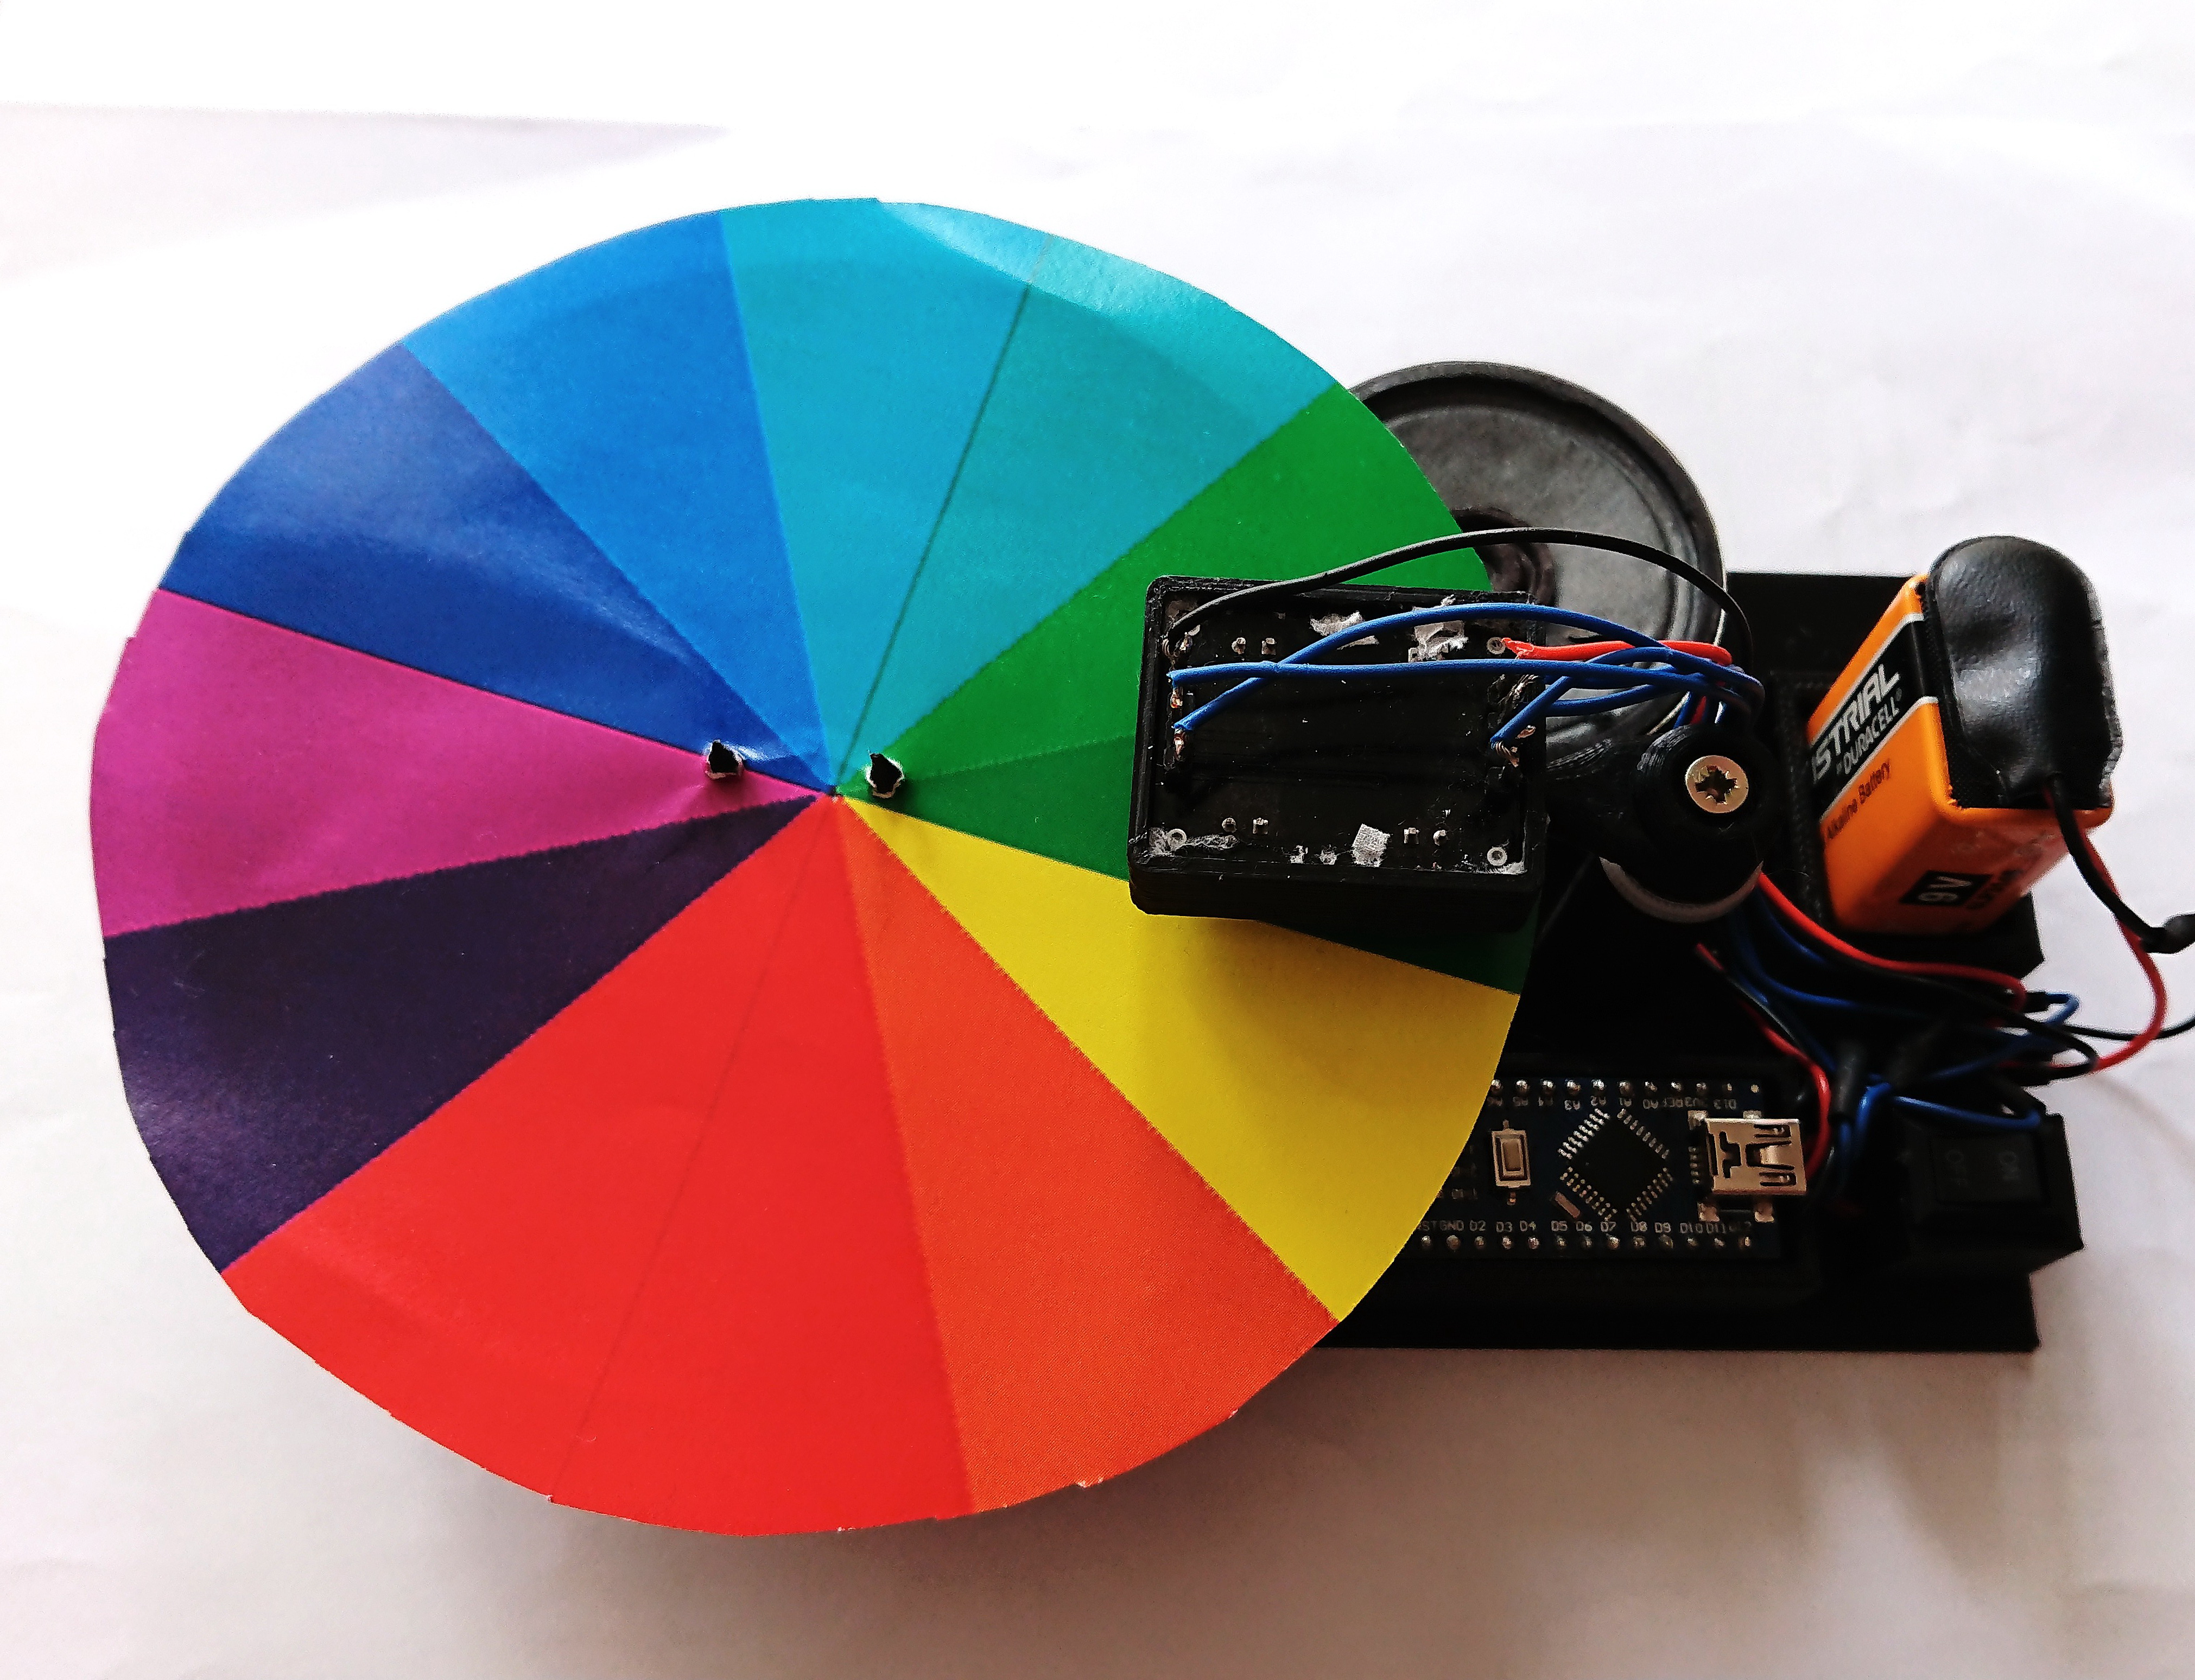
This a simple Arduino/3D printing project about colors and sounds. I made this device or as I call it ‘color instrument’ for activity for kids. It’s fun and it’s a good conversation starter about physics of colors and sound. The most interesting fact about colors, in my opinion of course, is that pink color doesn’t exists in physics.
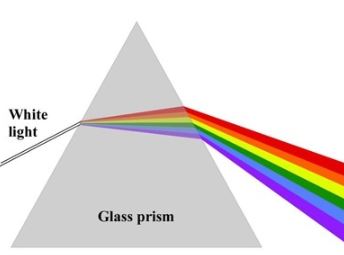
I know, I know, you all thinking it’s a lie, but next time you look at the rainbow try to find pink color! Basically white light is made of all the colors you can see in the rainbow from red to purple. Each color has a specific wavelength, and you can assign that wavelength to every color in spectrum except pink. On the image below (white light spectrum / rainbow) you can see purple, indigo and violet but there is definitely no pink. That’s crazy! Right?
Supplies
.
Pink Color

To explain that phenomena we have to learn about complementary colors. Complementary colors are pairs of colors which, when combined or mixed, cancel each other out by producing grey scale colors.
Almost every color in spectrum has its own complementary color, for example for red it’s light blue and for blue it’s yellow. For some reason green color is different. It’s not fully understood why but human brain basically invented new color - pink - which is a complimentary color to green. My theory is that nature likes symmetry and human brain created pink to maintain color – complimentary color symmetry.
OK, but why we see pink if it’s a complimentary color to green? Why we see colors at all?
We see colors of reflected wavelength. Let’s take banana, we see it as yellow because almost all visible spectrum is absorbed expect yellow light (570nm – 580nm). However this is a simple case when one wavelength is reflected. What if certain object reflects two or more wavelengths?
In that case human brain come up with the system to not to get confused. If object reflects red and green for example human brain interprets that as color in between them, which is yellow. If it’s purple and green than we will see blue and so on. Of course in case of more wavelengths it’s slightly more complex, but the principle is the same.
There is one specific case when human brain do something weird, something different. If the object reflects red and purple technically we should see green, but human brain decides to see complimentary color to green instead – pink, color invented by our brains.
Supplies
Parts:
- Arduino Nano v3 with USB cable
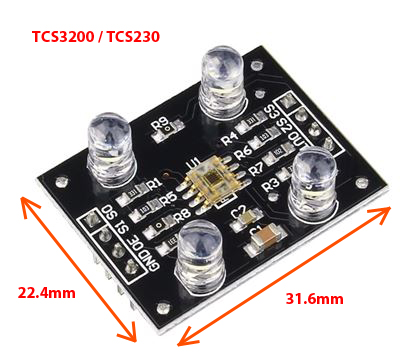
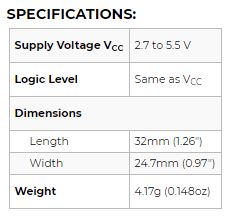
- Colour sensor TCS3200/TCS230 (22.4mm x 31.6mm version)
- SG90 servo
- Mini on/off rocker switch
- 9V battery clip
- 8Ω speaker
- Wires
- Screw (M3 x 20mm)
- Cable ties
- PLA for 3D printing
Tools:
- Solder and soldering iron
- Philips screwdriver
- Wire cutters
- 3D printer
- Stanley knife
Software:
- Arduino IDE [https://www.arduino.cc/en/Main/Software]
- Cura or any other slicer for 3D printing [https://ultimaker.com/en/products/ultimaker-cura-software]
3D Design and 3D Printing
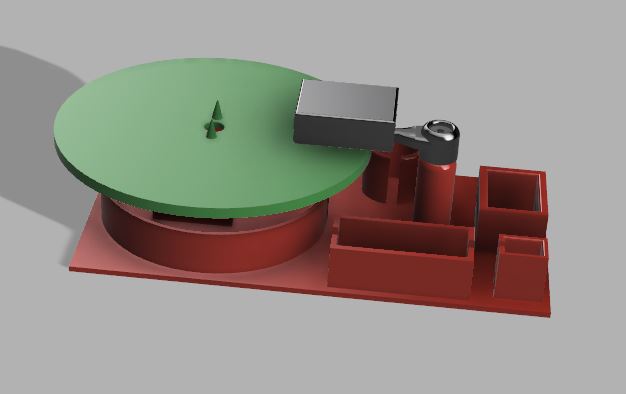
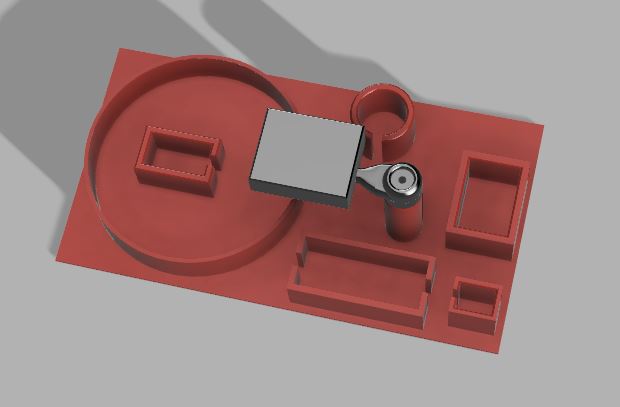
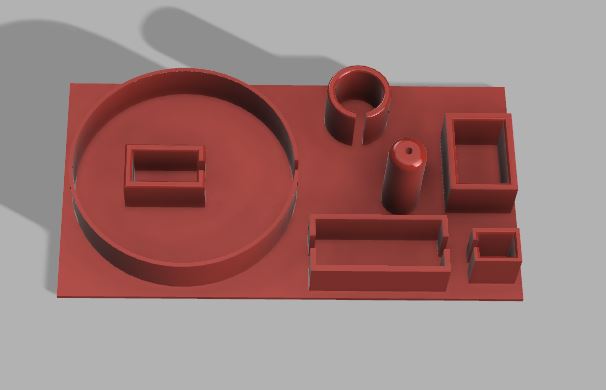
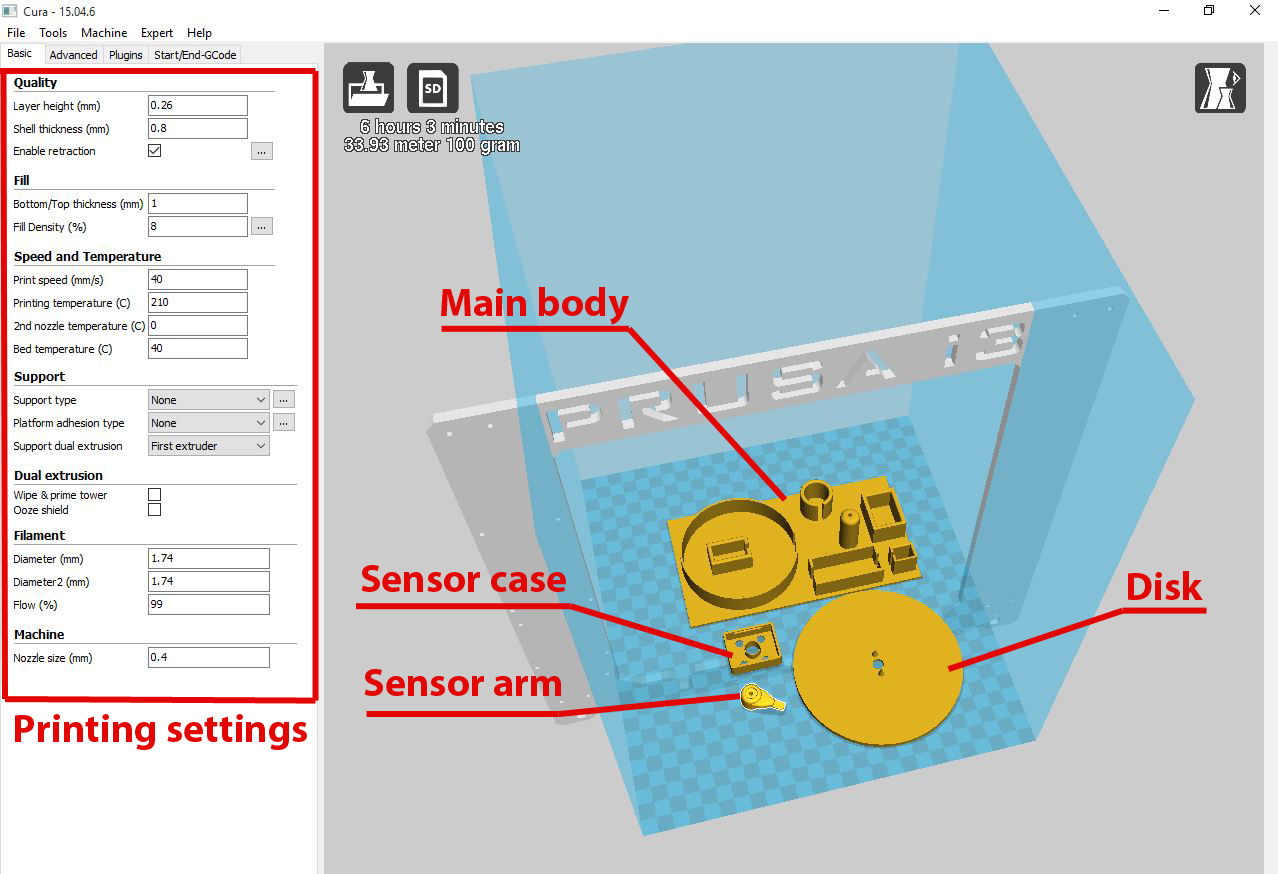
I used Fusion 360 to design the device case. The model comes in 4 parts: main body, disc, color sensor case and color sensor arm. It took about 5 hours to make this model and after test print I only made few small adjustments.
I would recommend to use Cura for slicing model, but if you have your favorite slicing software that works well there is no reason not to use it. I printed model in PLA, no brim or raft (except for the small sensor arm) and 20% infill is more than enough. It takes about 4 hours to print main body with 0.26mm layer resolution and another 2 hours to print rest of the parts with 0.2mm layer resolution, but that depends on the speed of your printer of course.
Assembly - Servo
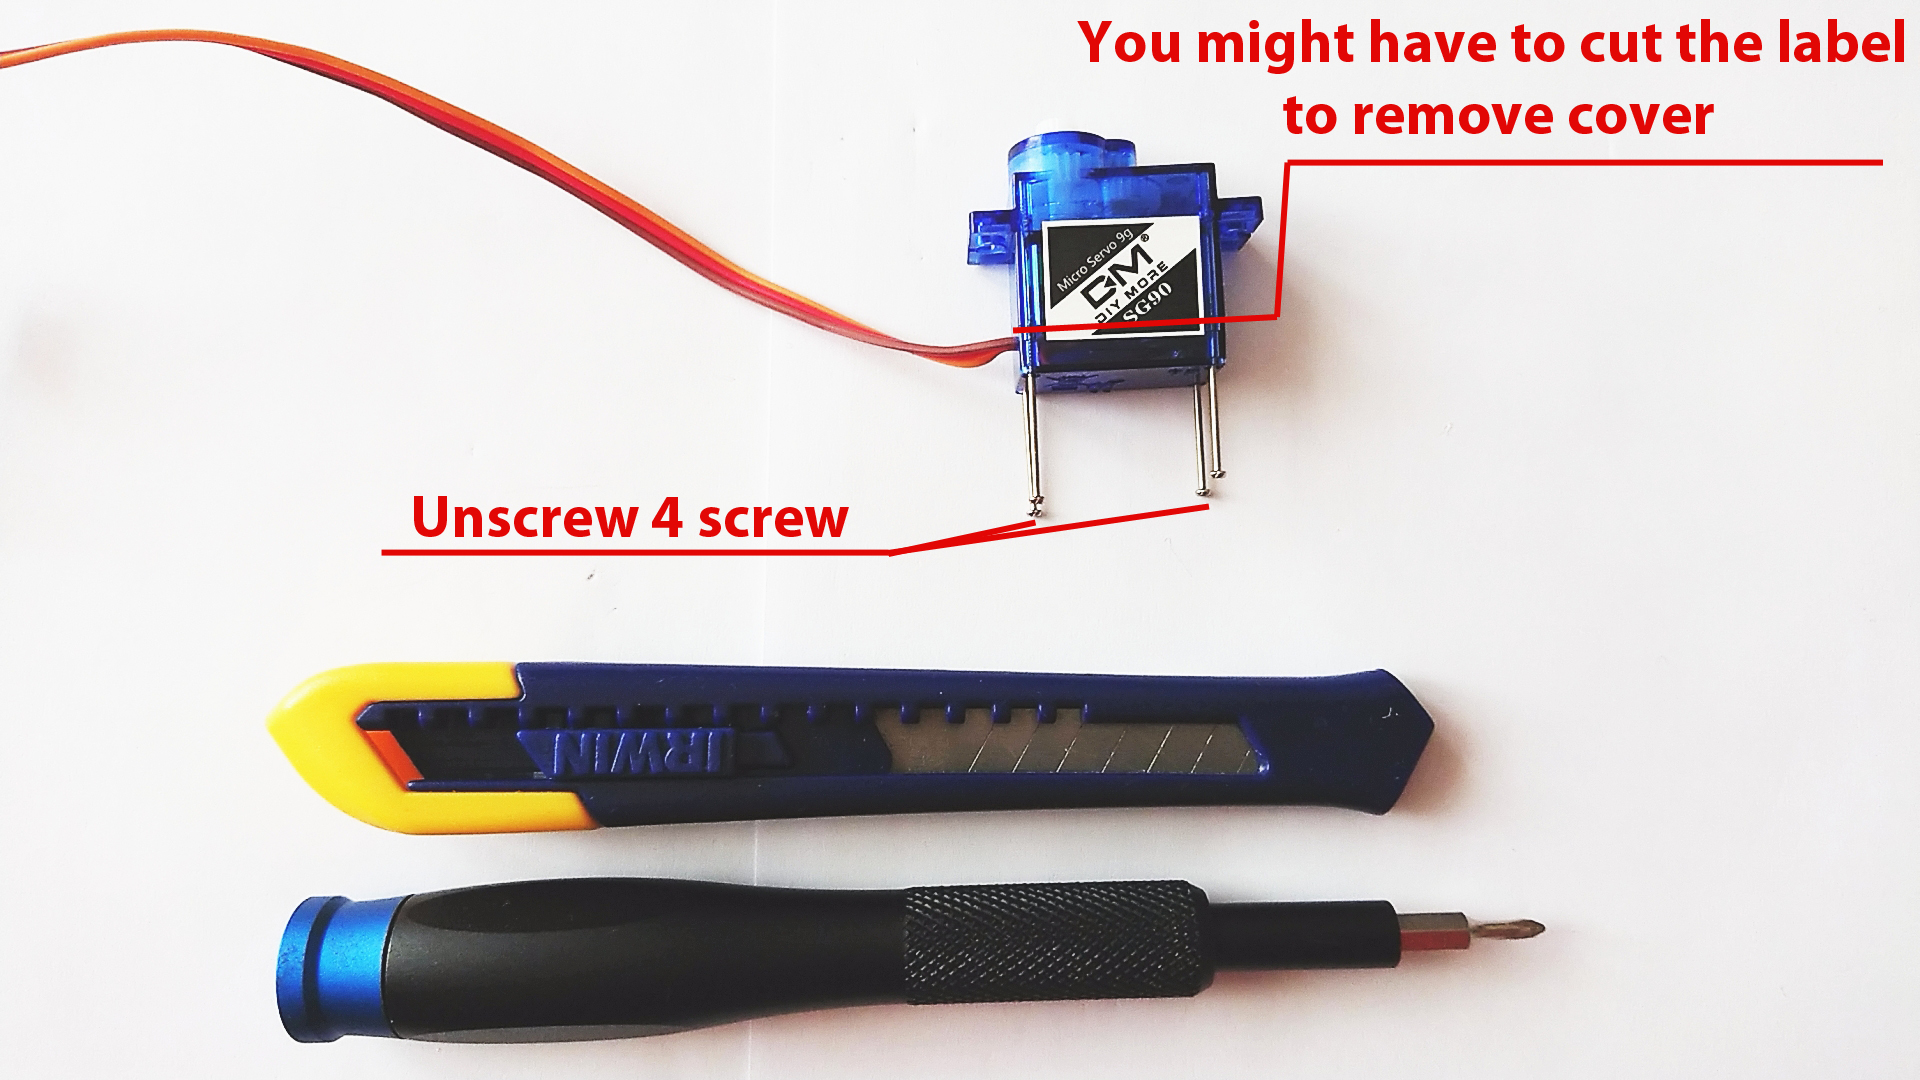
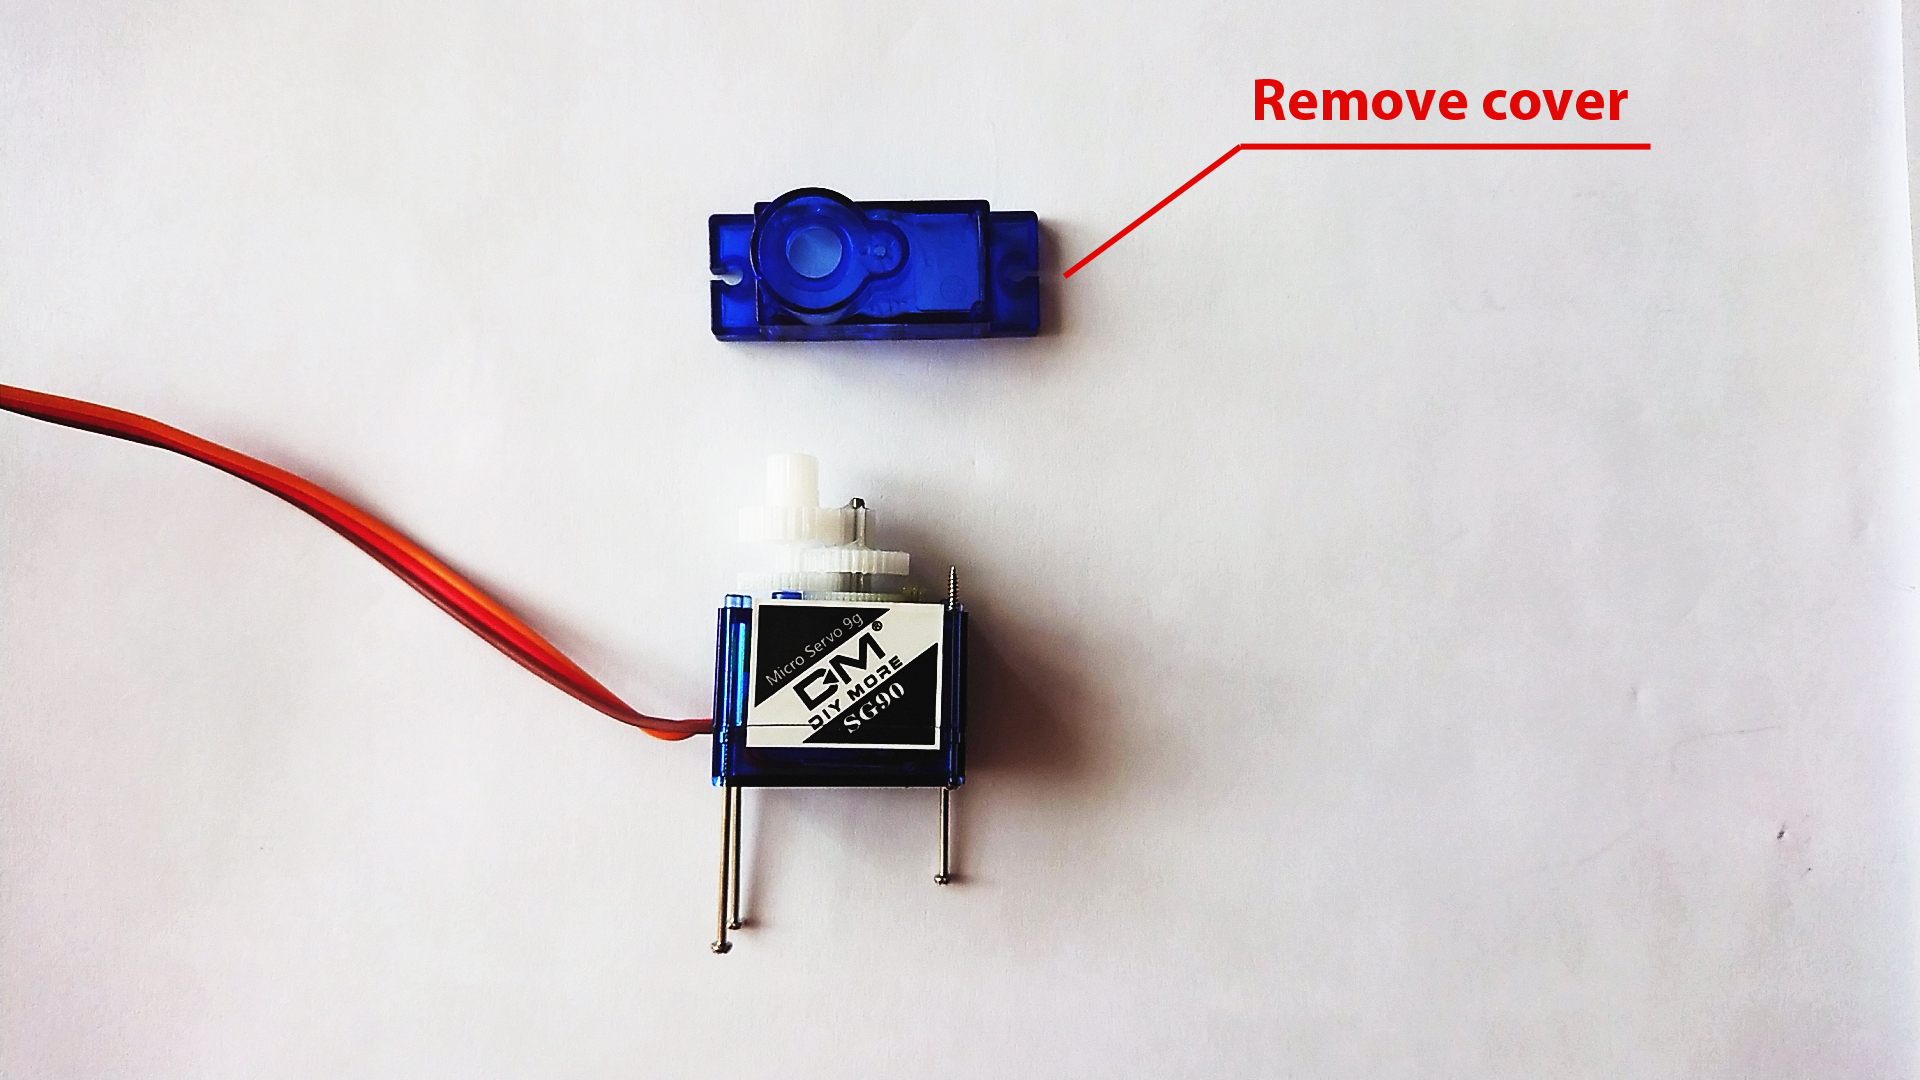
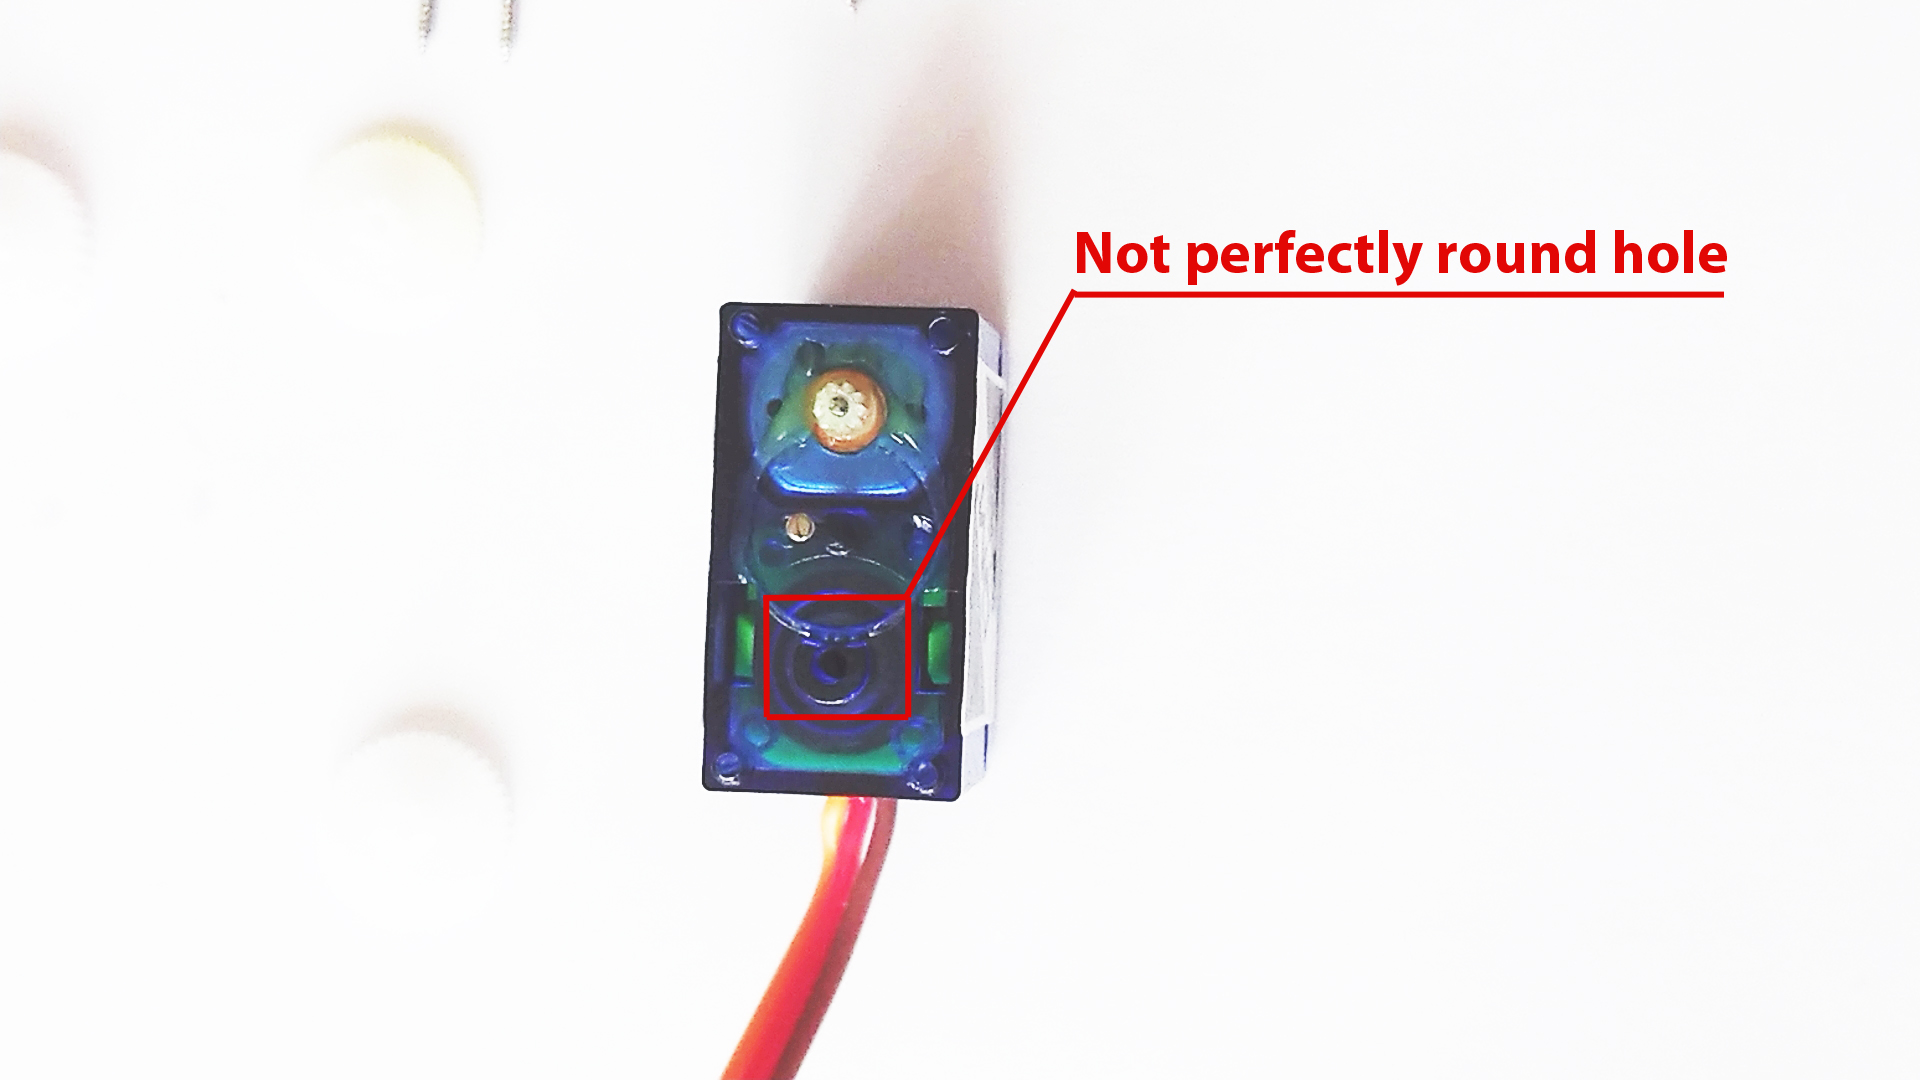
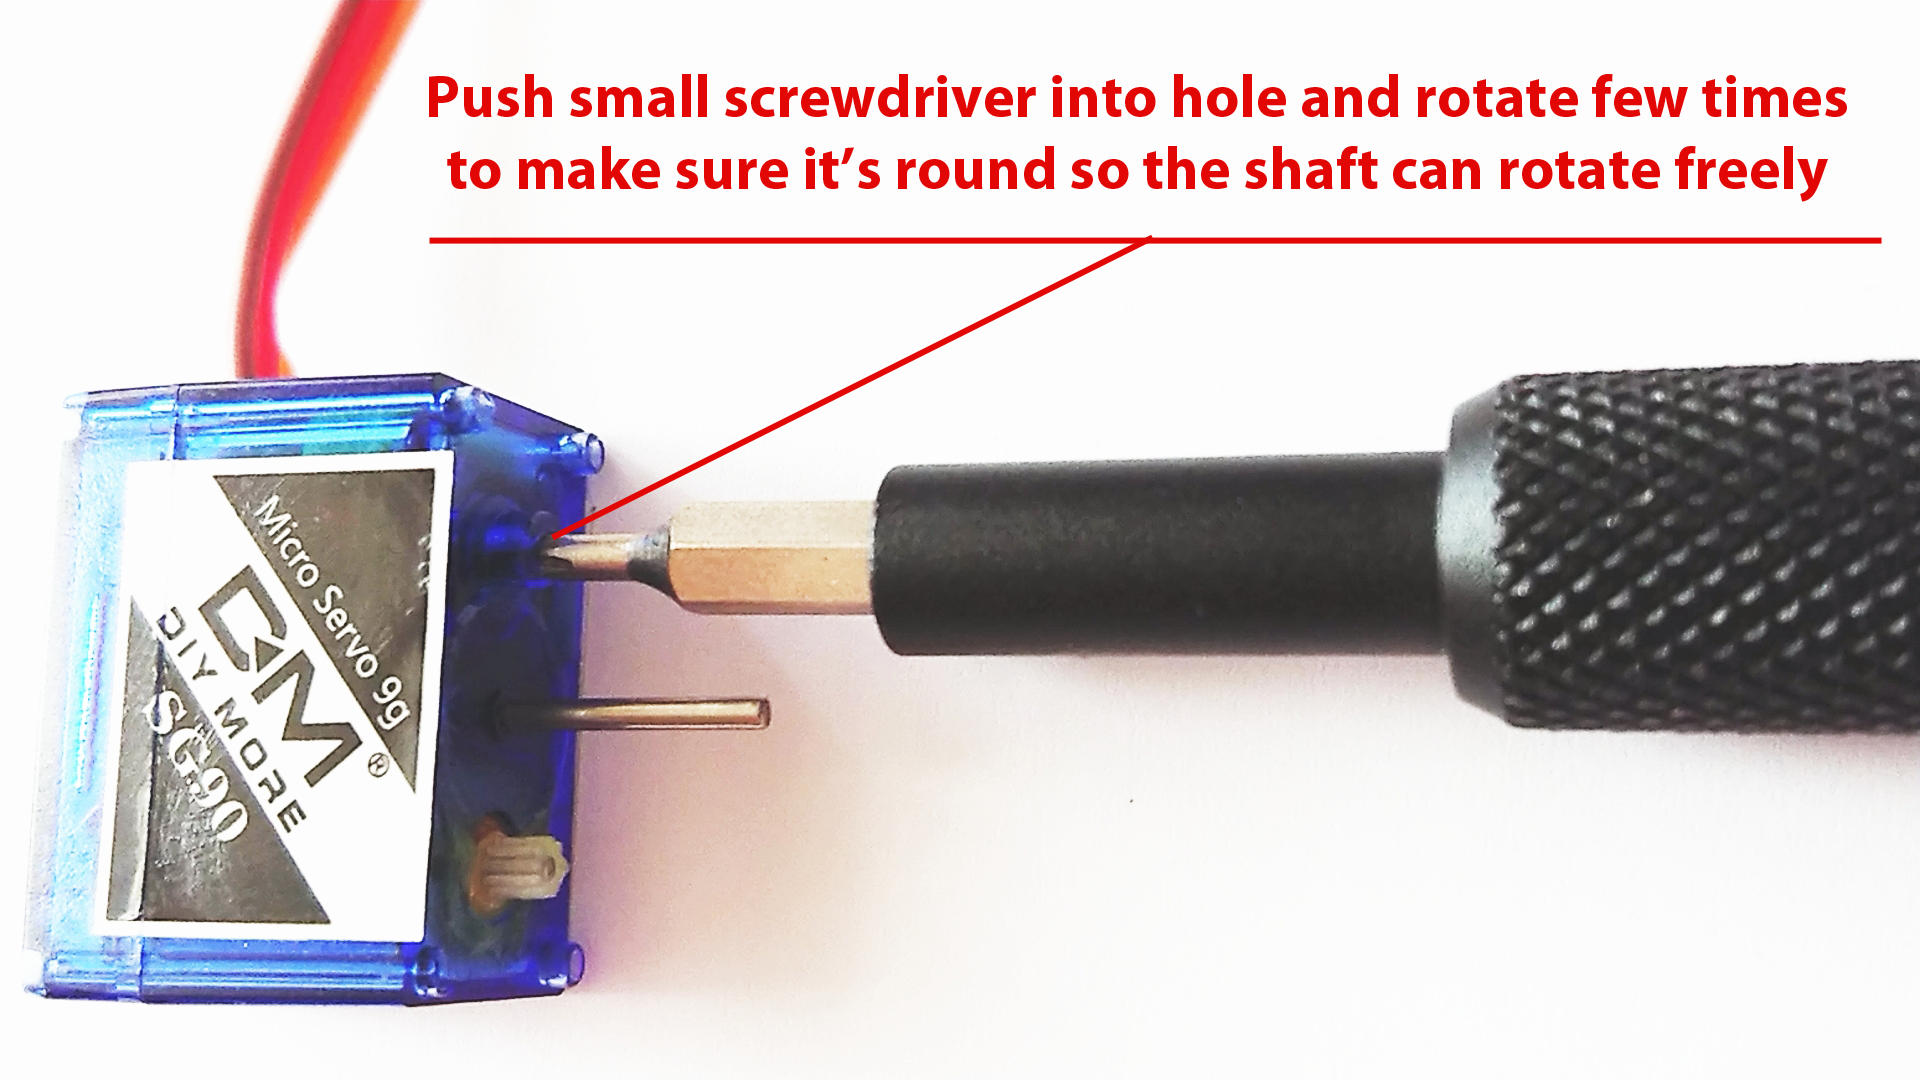
Standard SG90 servo is limited to 180 degrees movement and you
have two options: either buy 360 continues rotation servo (expensive) or hack 180 degree servo and convert it to continuous rotation (cheap).
Here is how to do it:
- Use Philips screwdriver and unscrew 4 small screws at the bottom of the servo and then remove the plastic cover.
- Make sure to put all the cog wheels back in the same configuration like on the picture below.
- Make a hole with small screwdriver where the shaft (see picture) supposed to go.
- Put all the cog wheels back in place and then screw the servo cover
You might come across different version of the SG90 servo and to change it to continuous rotation servo might need to follow instructions on this YouTube video https://www.youtube.com/watch?v=zV_5wUo7Kxs&t=104s
Assembly - Electronics
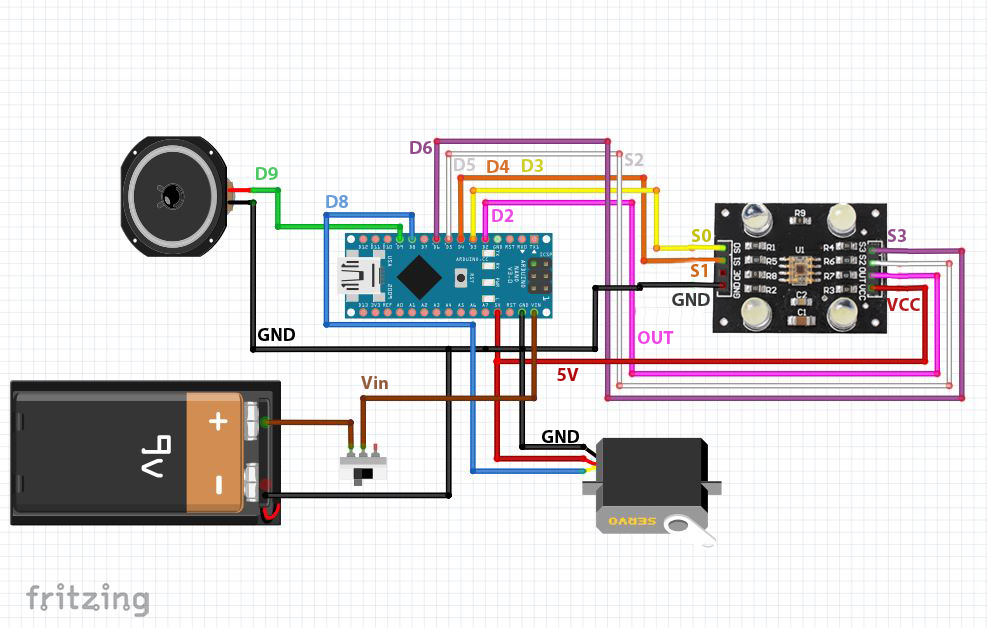
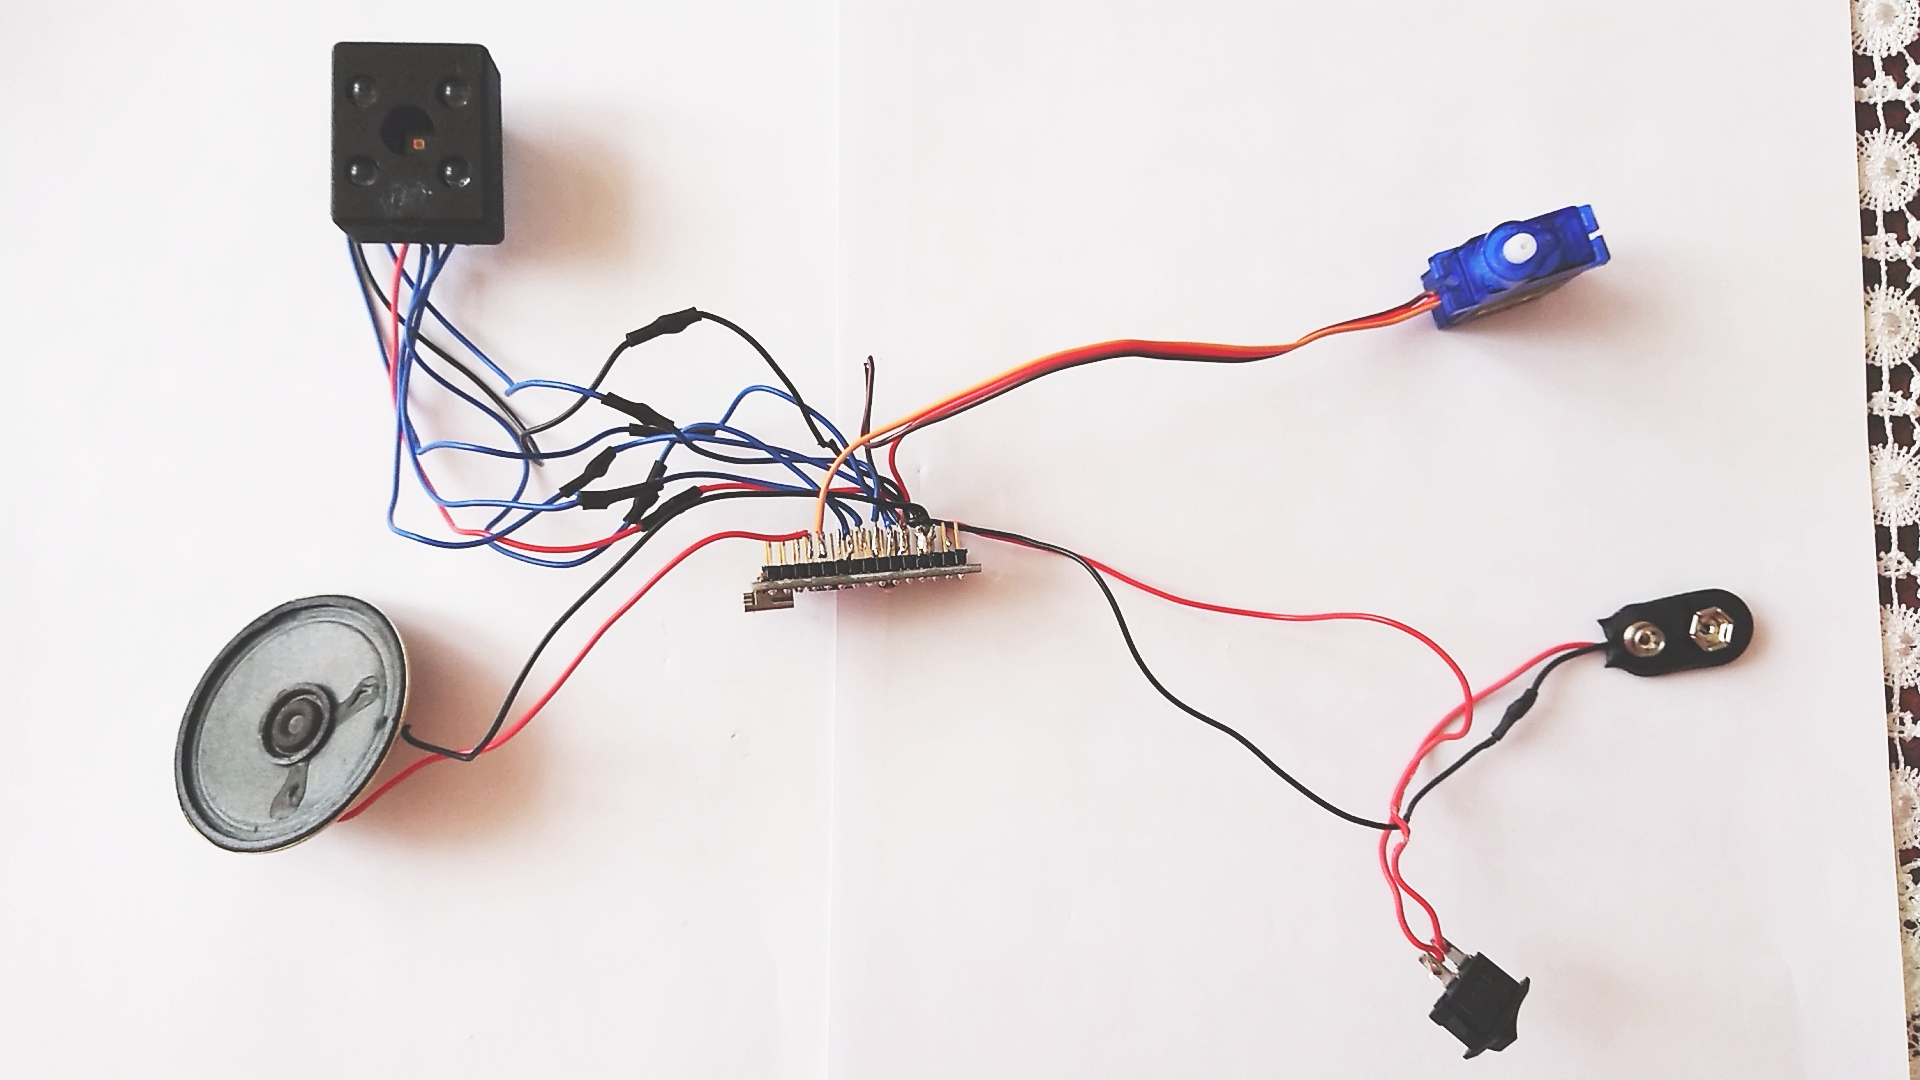
Here is a diagram how to connect (solder) the components together.
I recommend soldering all wires (preferably various colors) to Arduino Nano first. Then you can mount Arduino into the 3D printed main body and start soldering rest of the components trimming wires to right length.
Assembly - Device
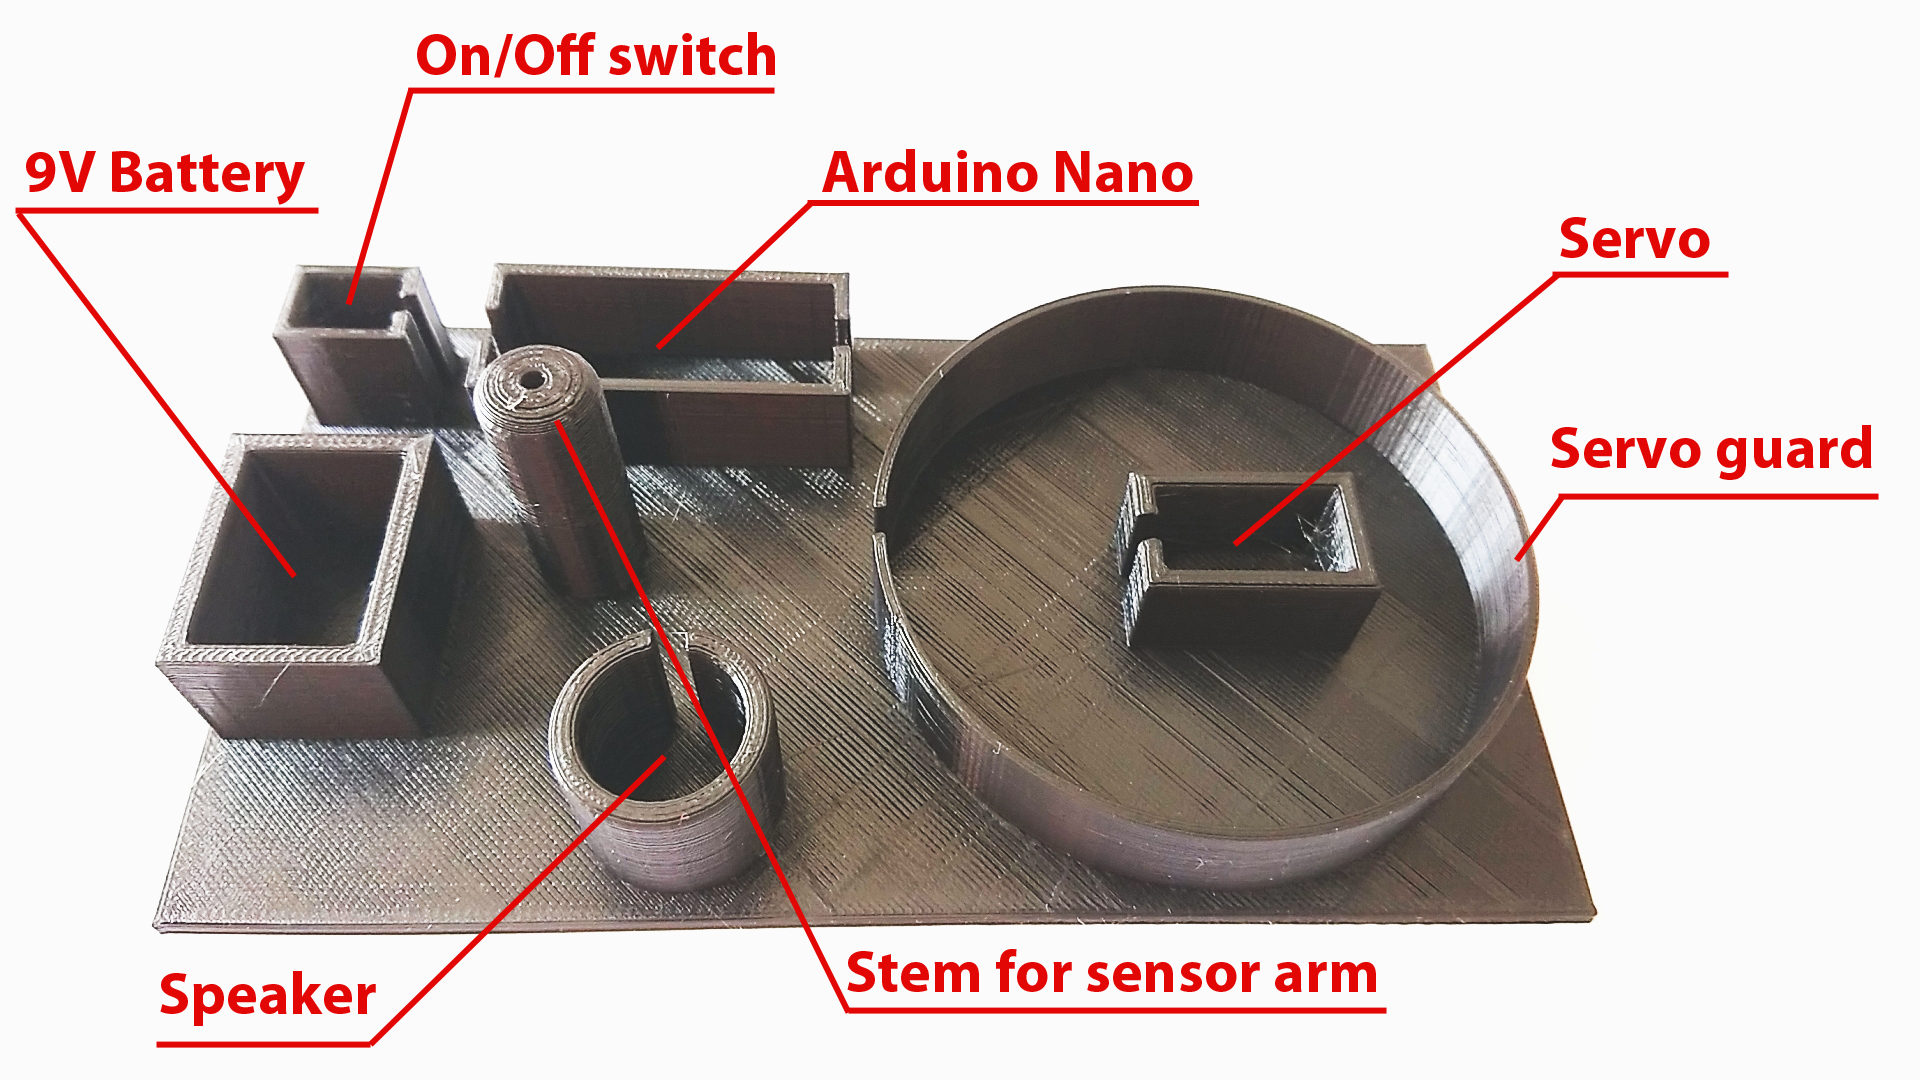
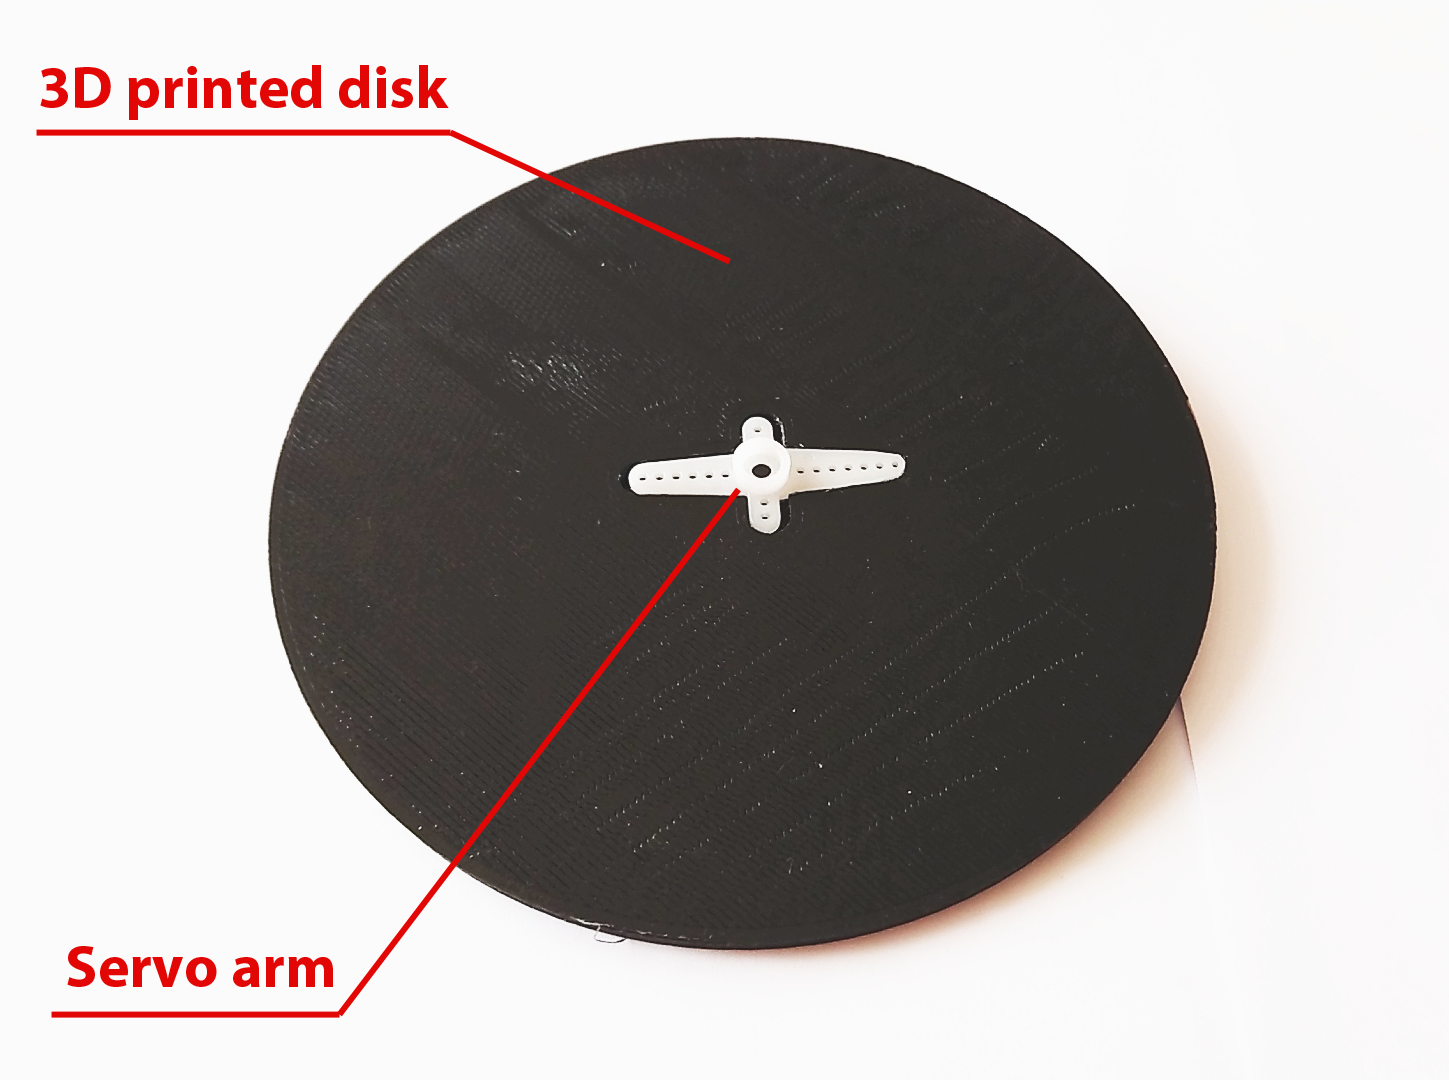
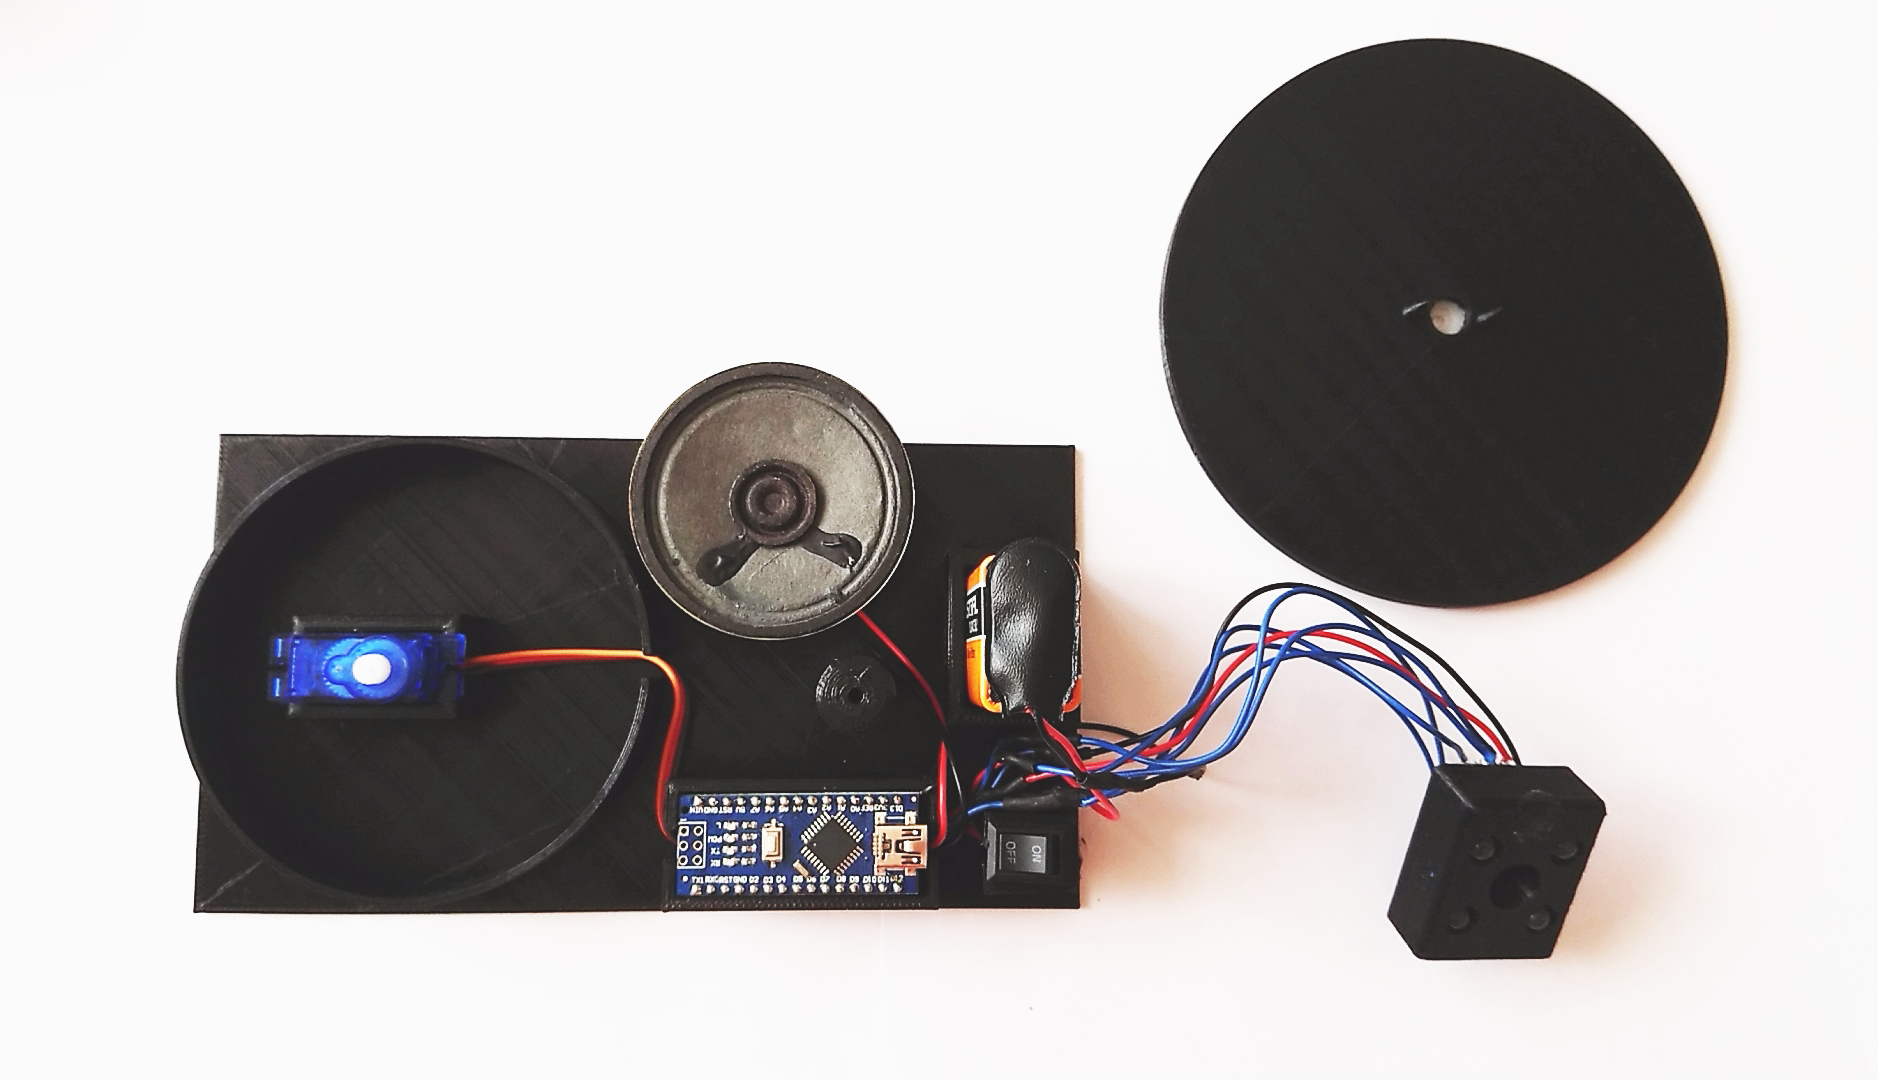
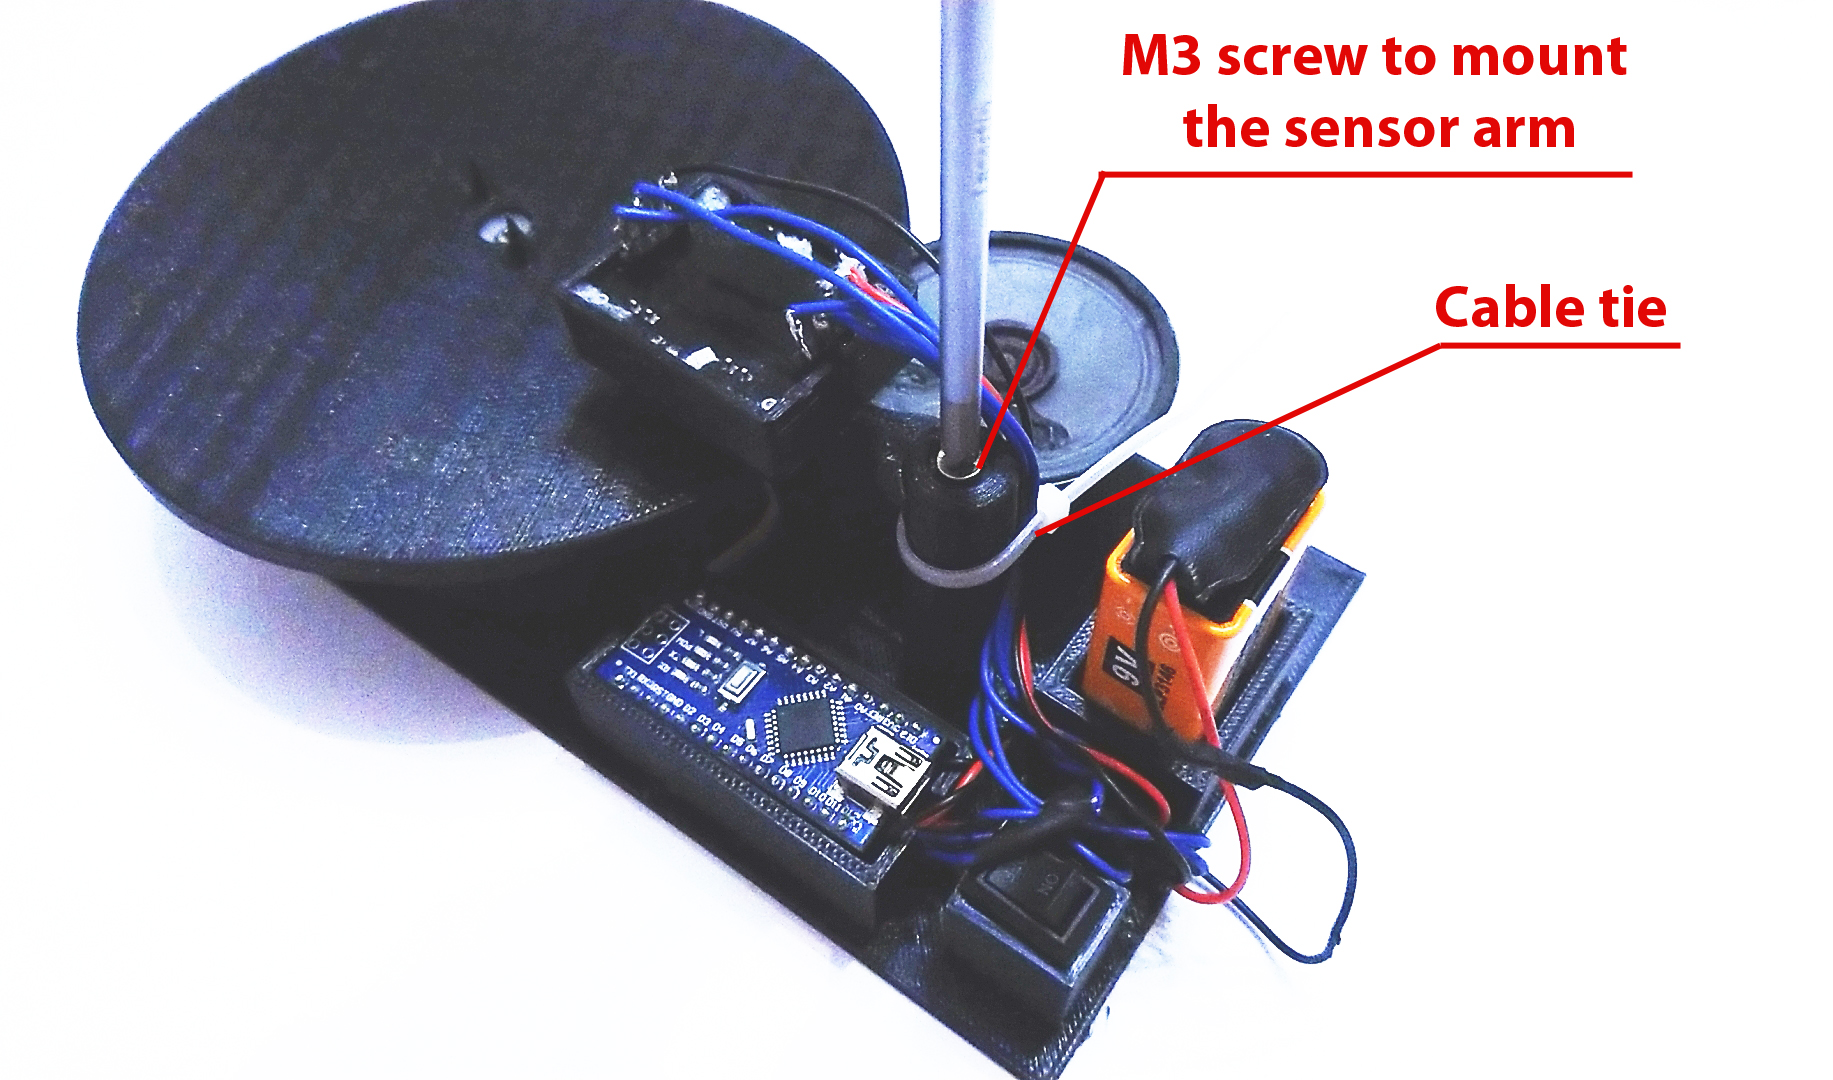
Once you solder all the components together and 3D print all files you can start putting everything together. Glue the servo arm (usually included with servo) into a disc (like on the picture above).
Then put the TC3200 sensor in 3D printed case and glue the printed arm to it. Once it's ready screw the arm with sensor to the 3D printed main body (see pictures).
Arduino - Uploading Code
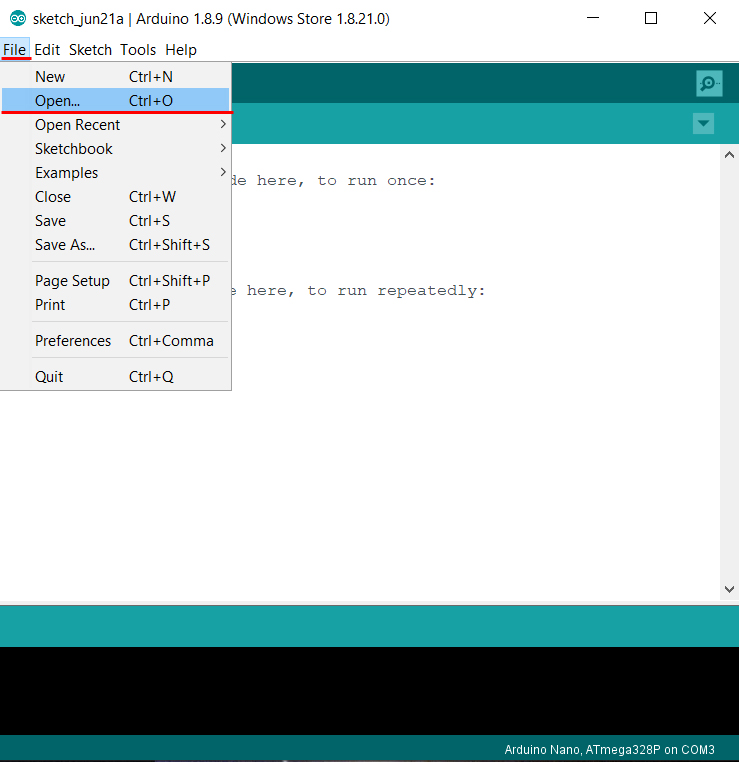
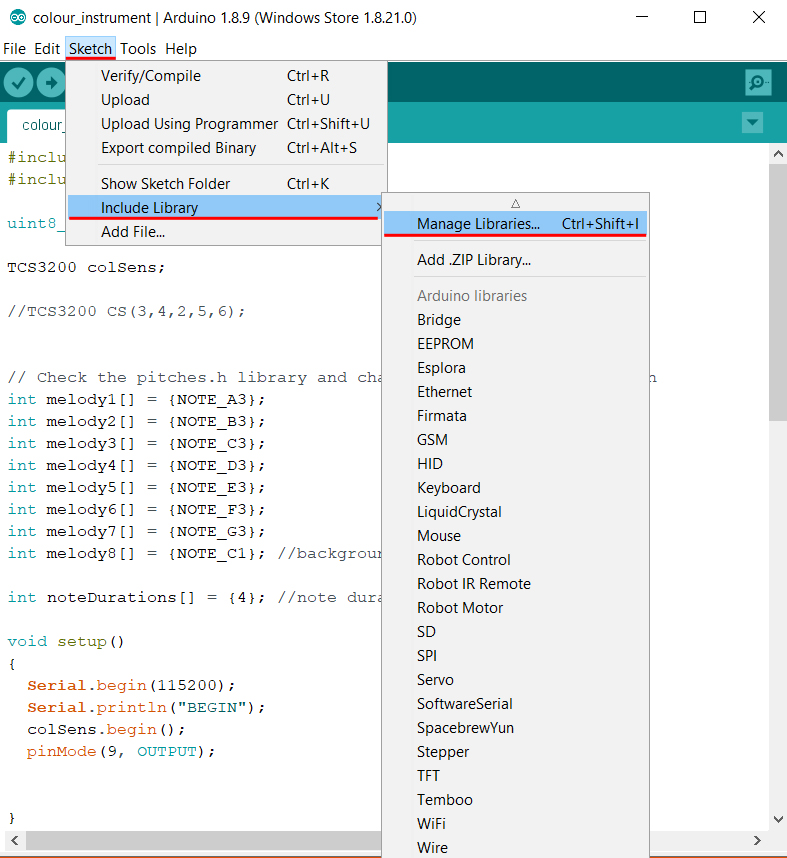
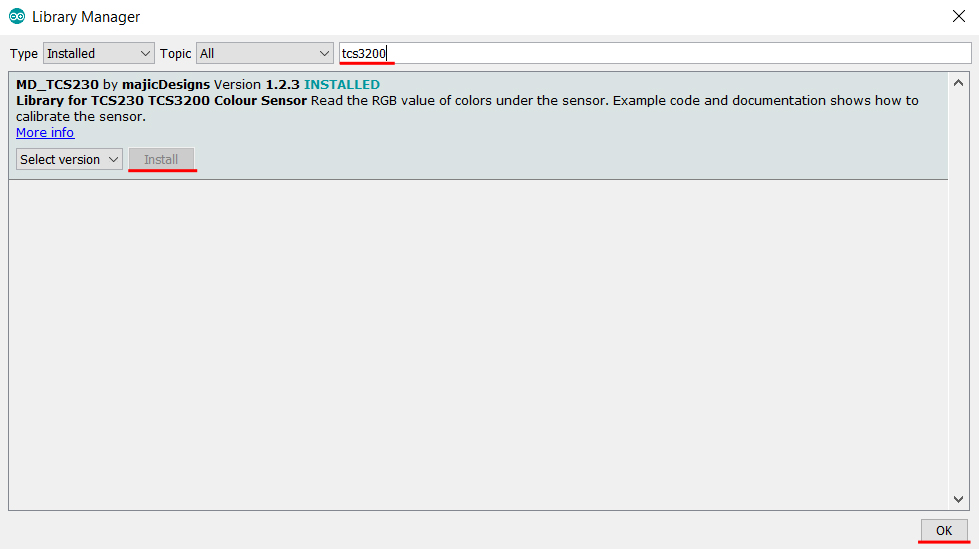
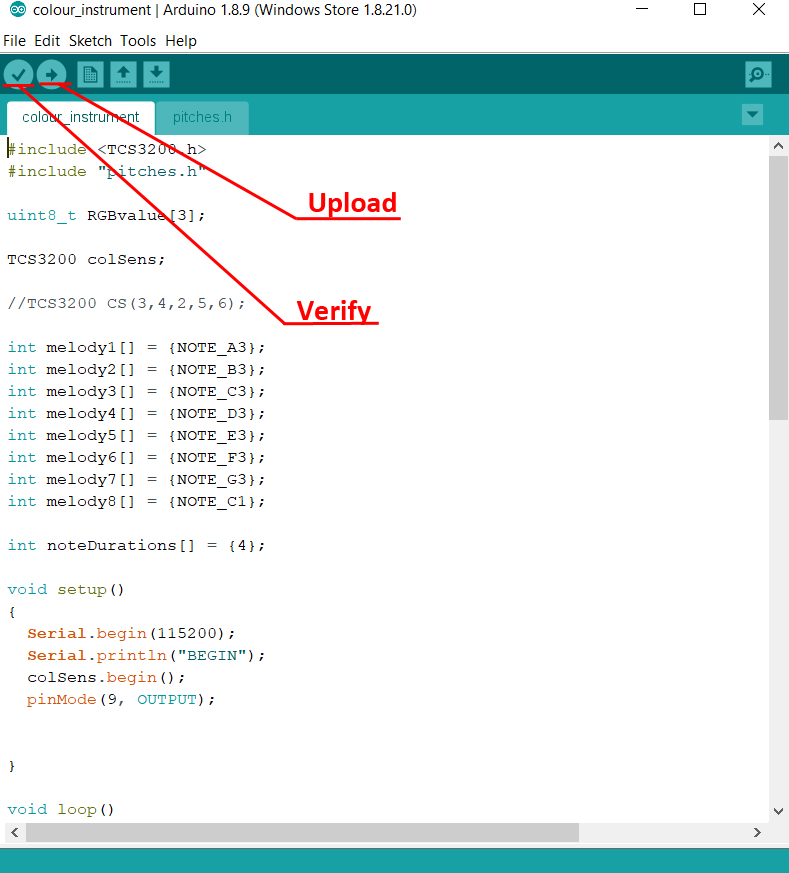
Here is the code that you have to upload using Arduino IDE
and instructions how to do that.
- Open Arduino IDE
- Open the code [File -> Open -> colour_instrument.ino]
- Install TCS3200.h library [https://github.com/MajicDesigns/MD_TCS230]
If you are using new version of Arduino IDE see instruction below, otherwise download the library (link above) and copy it to location: C:\Program Flies (x86)\Arduino\libraries…
- Connect Adruino Nano to PC/Laptop using USB cable
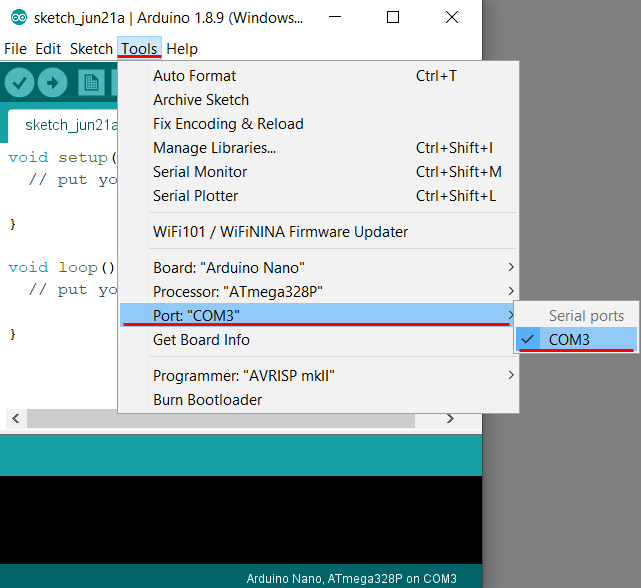
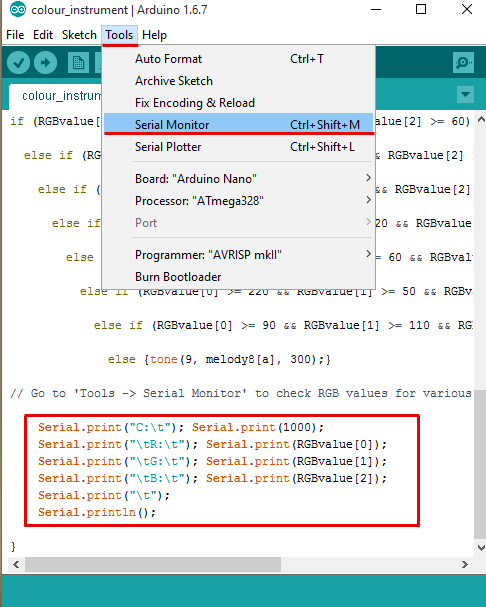
- Choose COM port [Tools -> Port “…” -> COM…]
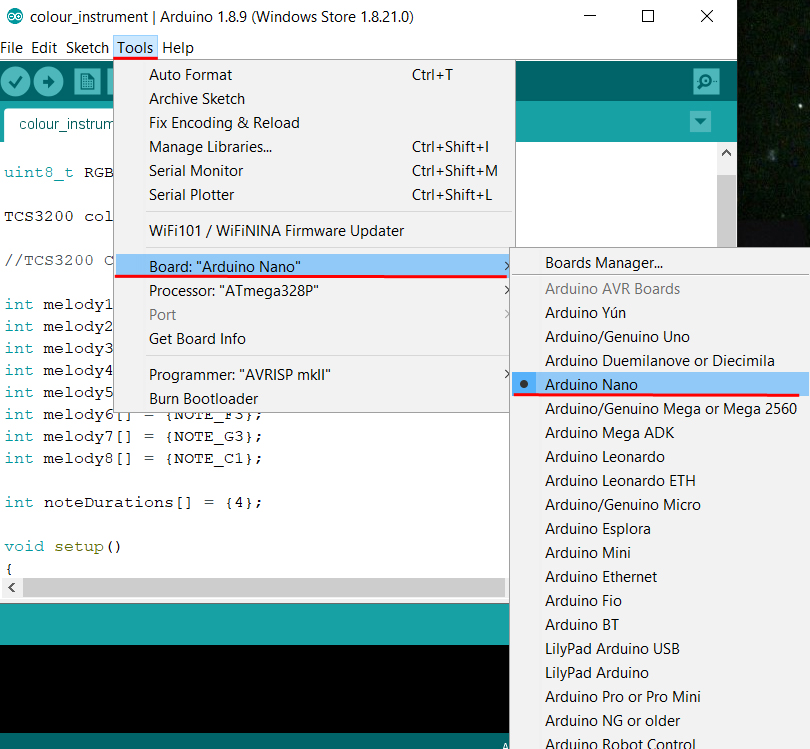
- Choose Arduino board type [Tools -> Board: “…” -> Arduino Nano]
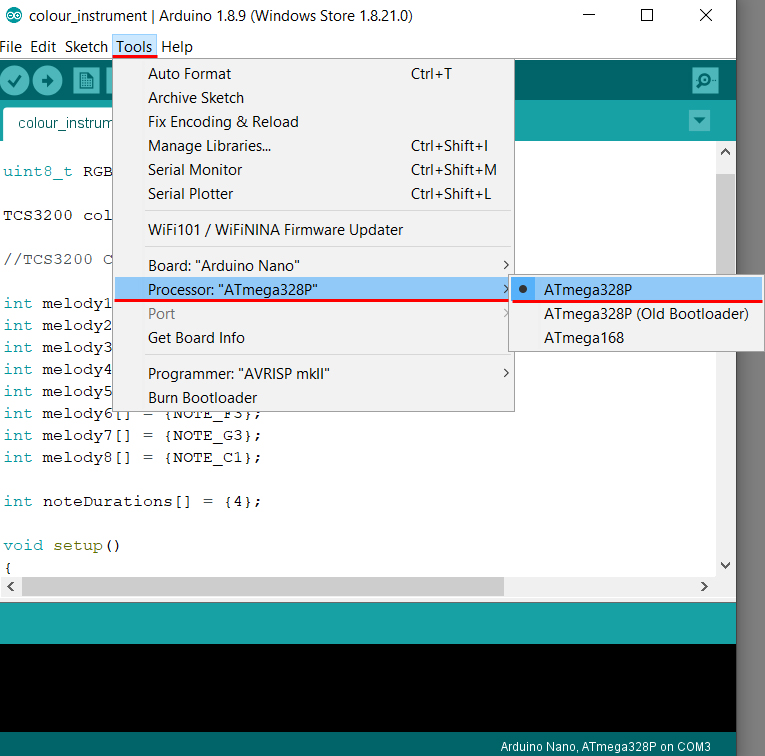
- Choose Arduino Nano processor type [Tools -> Processor: “…” -> ATmega328P]
[It is possible that you will need to change it to ATmega328P (Old Bootloader) depending on Arduino Nano]
- Verify the code
- Upload
Arduino - Calibration

There are two things that need calibrating, servo speed and sounds assigned to colors.
- Each servo is slightly different and with the supplied code it might actually move faster than you want or might not move at all. Just change the x value in myservo.write(x); and upload the code to see how fast the servo is moving. Once you finish disconnect Arduino Nano from computer and power everything from 9V battery just to make sure the servo still rotates slowly (sometimes the speed might be different when powered from computer USB port than powered from the Battery)
Make sure to that the disc spins very slowly, simply because it takes about 0.5 seconds for the sensor to recognize the color and play assigned to it note.
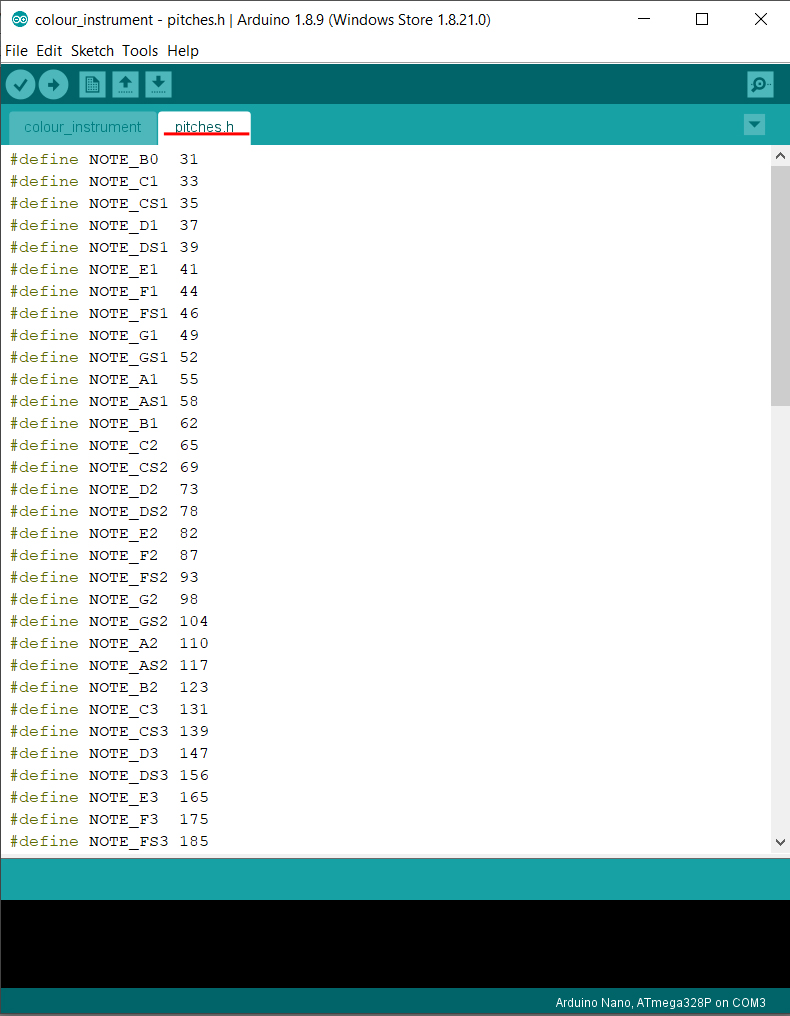
- The original code contains 6 notes, but you can add more or change the notes I used for my device. All you have to do is check the attached library with various notes and change to any note included in the library (for example A3, A2, B1, C3, D2 etc.)
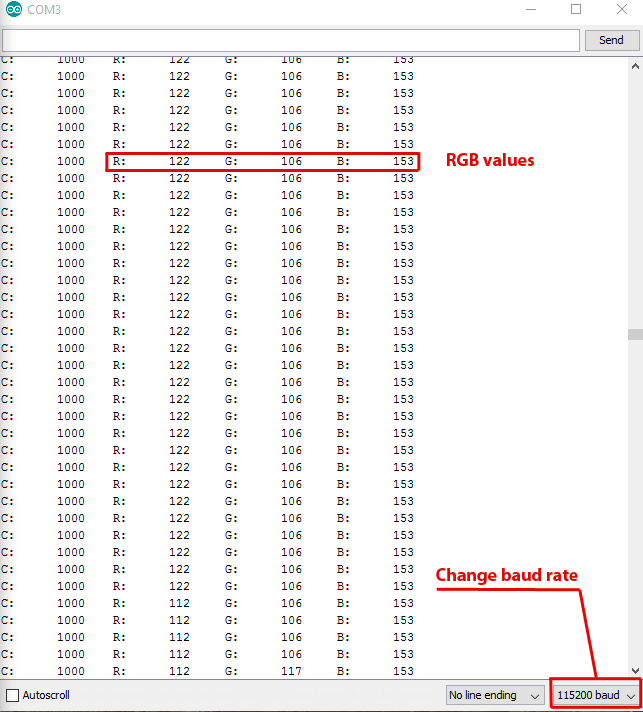
- The code contains serial.print command which allows you observe the RGB values for each color. It’s useful if you wish to add more notes for this project.
- Open serial monitor [Tools -> Serial Monitor]
- New window will pop out with RGB values for the color currently under the sensor (make sure you change baud rate to 115200)
Creating Simple Tunes
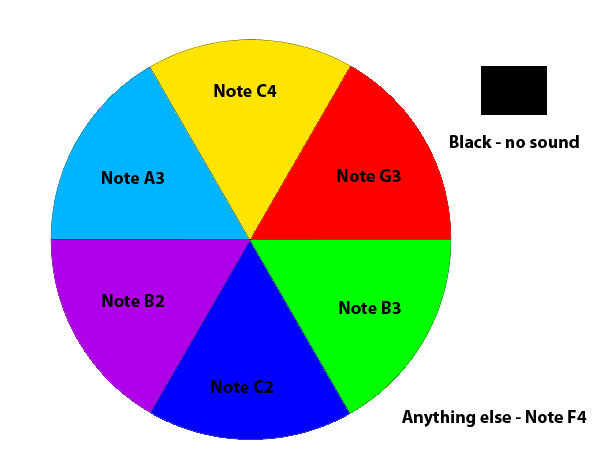
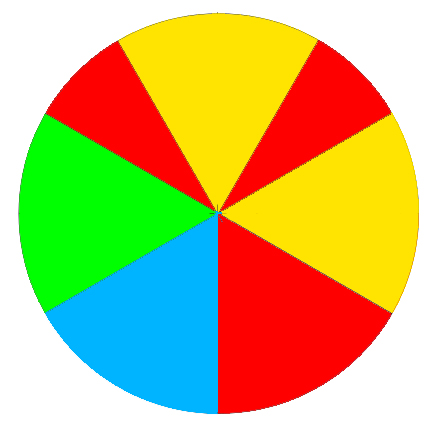
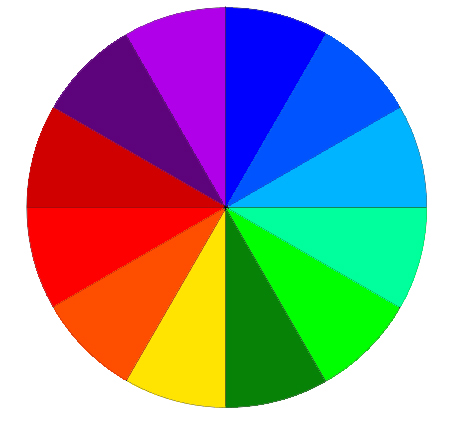
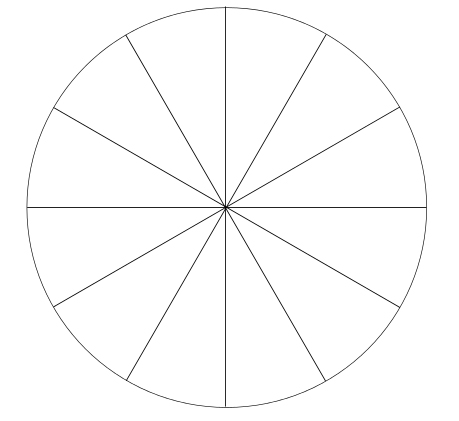
For each basic color of the spectrum I assigned different note. You may experiment with the code and create more notes if you like. The color disc I used for calibration is above and few other colored discs inducing template so you can create your own.
Below you can find simple midi tune made of only 4 notes. When I run the activity kids really enjoyed it. Some come up with really good simple tunes plus who doesn’t like coloring :)
Links to working device playing simple tune:
Downloads
Color – Complementary Color Symmetry Experiment

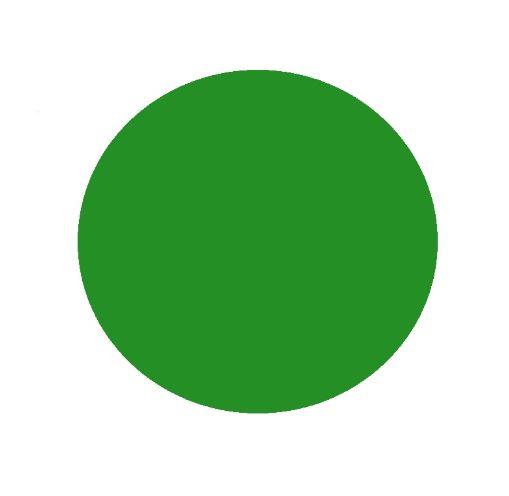
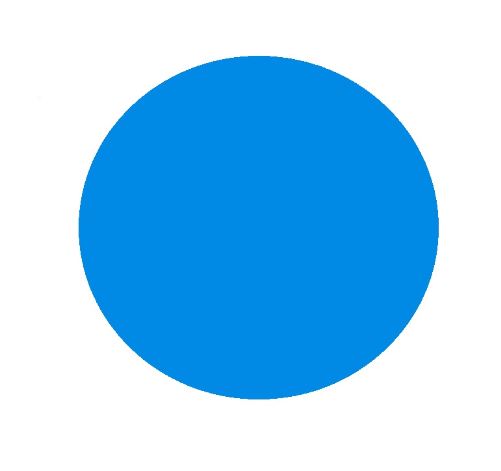
Here is interesting simple experiment about complimentary colors. Look at the dot (red, blue green) one at the time for about 30 seconds – 60 seconds. Then look at the white paper, standard A4 size printing paper is perfect.
You should see a dot, exactly same size as the dot you looked at for few seconds, but in different color (complimentary color to be exact).
What complimentary color do you see for green dot?