Color Detection Paint Machine
by Kassity Wu in Circuits > Arduino
2094 Views, 1 Favorites, 0 Comments
Color Detection Paint Machine


Color detection paint machine copy colors around you and let you draw with them. If you have the paint of primary colors, you can use the RGB color sensor to sense the color you want and mix it out. But remember, use the bright-color object.
Supplies
- Arduino Leonardo (Or other) _x1 - Buy here
- Breadboard _x1 - Buy here
- TCS3200 RGB Sensor (Or other) _x1 - Buy here
- Pushbutton (any kind) _x1
- 10kΩ Resistor _x1 - Buy here
- Carton
- Water Pump 5V 120L/H _x3 - Buy here
- Rubber hose (size is suitable for the water outlet of the motor ) _x3
- L298N motor driver _x3 - Buy here
Connecting All the Elements to the Breadboard
 #Arduino #Circuit #Arduino Cricuit)

.JPG)
connect to Arduino board.JPG)
馬達驅動器電路接法.JPG)

Before we install everything at once, it is safer to test each item one by one. Because if you have installed everything but it doesn’t work, you can hardly find out what went wrong.
The wiring of different Arduinos will be different. If you are using other Arduino, you can search the wiring diagram and code from other projects.
Now we will introduce how to connect the wire:
- RGB color sensor
GND_there are two GND, both are connected to the negative pole of the breadboard (the negative pole should pull wire to the Arduino GND)
OUT_connect to pin8 of Arduino
S2→Arduinopin10
S3→Arduino pin9
VCC_there are two VCC, both are connected to the positive pole of the breadboard (the positive pole needs to pull a wire to the 5v of the Arduino)
S0→Arduino pin12
S1→Arduino pin11
- Button
Use the pin to insert the two-wire on the breadboard
Left-side wire_connect a 10kΩ resistor and then pull a wire to Arduino analog A5.
Right-side wire_Divided into two sides:
The first side: pull wire to the positive side of the breadboard.
The second side is: connect a 10kΩ resistor and then connect a line to the negative side of the breadboard.
- Motor (Water Pump 5V 120L/H) & Motor driver(L298N)
connect the motor to L298N (it depends on how many motors are used)
1. L298N (connected to yellow and blue motors): + → In1 / - → In2, + → In3 / - → In4
2. L298N (connected to red motor): + → In1 / - → In2
The outputs on L298N to Arduino pins:
motor 1(red): + → In1 / - → In2. Output to pin 6 and pin 7
motor 2(blue): + → In1 / - → In2. Output to pin 2 and pin 3
motor 2(yellow): + → In1 / - → In2. Output to pin 4 and pin 5
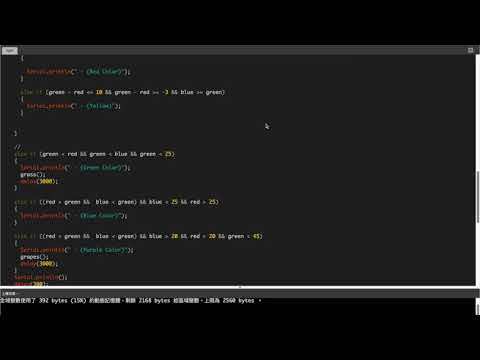
Writing Code
 #Arduino #Code #Arduino Code)
After the circuit is connected, you can start writing code.
Code is here:Here
Remember to test each part separately!!
Before plugging the USB cable into the Arduino, please carefully check whether all the cables are correct. If there is an incorrect circuit, it may cause damage to the computer or the Arduino board.
The pin can be changed by yourself, according to the circuit on your own circuit board.
Make a Container for Your Arduino
 #Arduino #Container #Arduino Container)

Measure the distance between your Arduino and the breadboard, and cut it out with a cardboard box. After bonding, place the component in.
The shell size:
- Length: 22cm
- Width: 21cm
- Height: 11cm
Using Your Color Detection Paint Machine
 #Arduino)
Connect the USB cable to the Arduino and after the power is turned on, you can start using it!
Adjust the three colors you want (recommended to use three primary colors: red, yellow, blue)
Suggestion: the more color the better, the lighter it will be unclear
If you want purple water, choose the bright purple object to sense, then it will mix blue and red together to become purple.
If you want green water, choose the bright green object to sense, it will mix blue and yellow together to become green.
Warning!!!
The position of the motor can't be higher than the cup, otherwise, the water will not be pumped.