Circuit Check - Software Debugger for Physical Computing!
by cs_michael in Circuits > Arduino
361 Views, 0 Favorites, 0 Comments
Circuit Check - Software Debugger for Physical Computing!
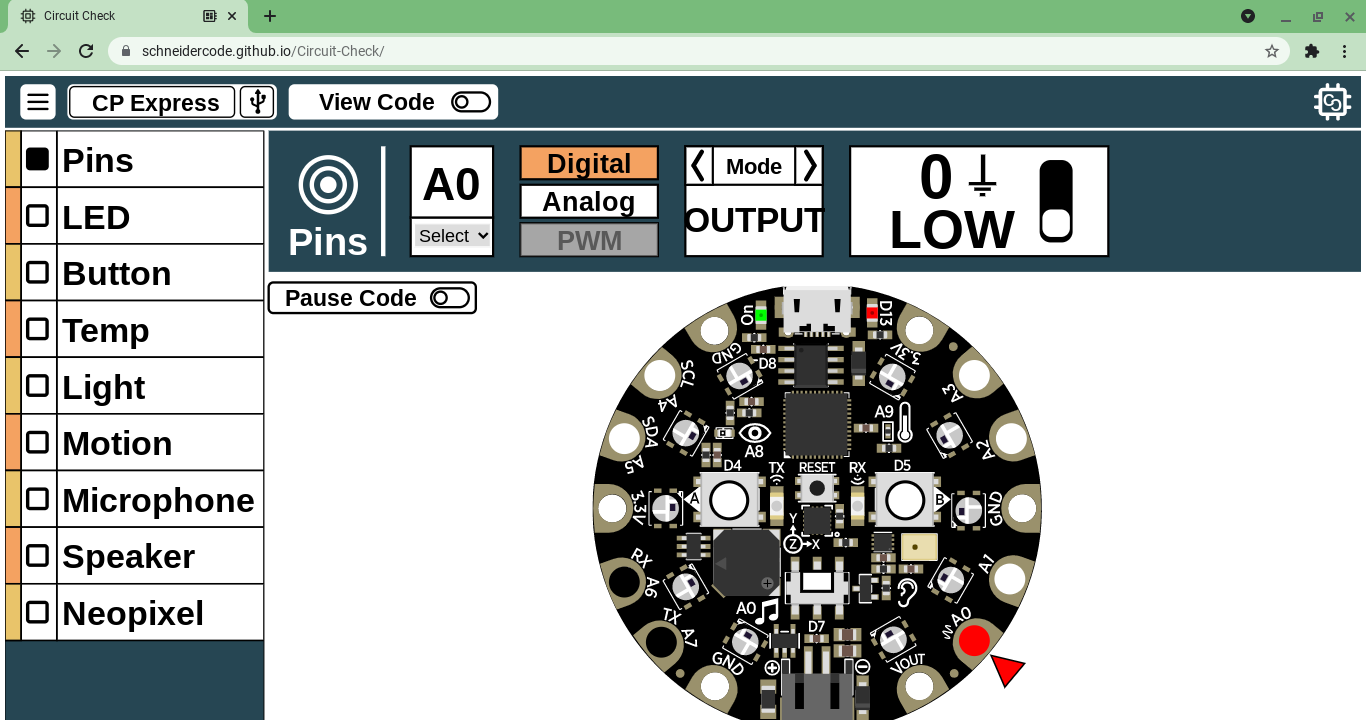
Circuit Check is a hardware debugger designed for testing to see if your hardware components are working properly. Circuit Check enables you to easily check onboard and external sensor information; drive onboard and external actuators like LEDs; as well as set pin states and PWM - all without the need to compile code after the initial setup. This Instructable will detail how you can prepare your microcontroller to be controlled by Circuit Check.
The Circuit Check website (beta) can be found here.
This material is based upon work supported by the National Science Foundation under Award #1742081.
The Debugging by Design project page can be found here. This project was developed in the Craft Tech Lab, ATLAS Institute, and Institute of Cognitive Science at The University of Colorado, Boulder.
Special thanks to my colleague in debugging Chris Hill!
Installing the Library
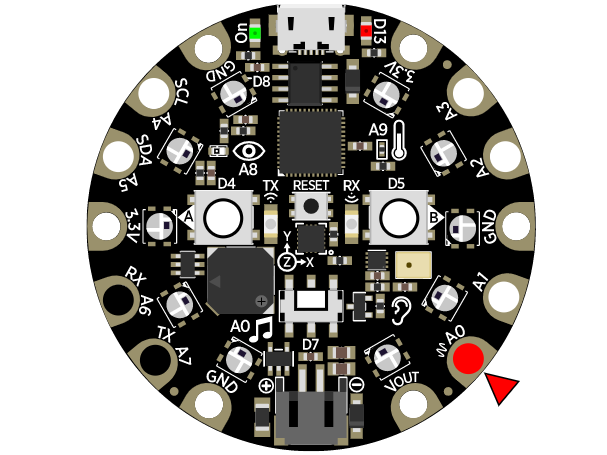
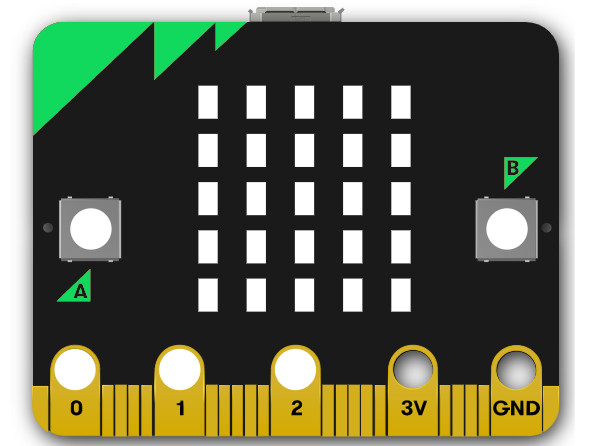
Circuit Check currently supports the following microcontrollers:
- Adafruit Circuit Playground Classic
- Adafruit Circuit Playground Express
- BBC micro:bit
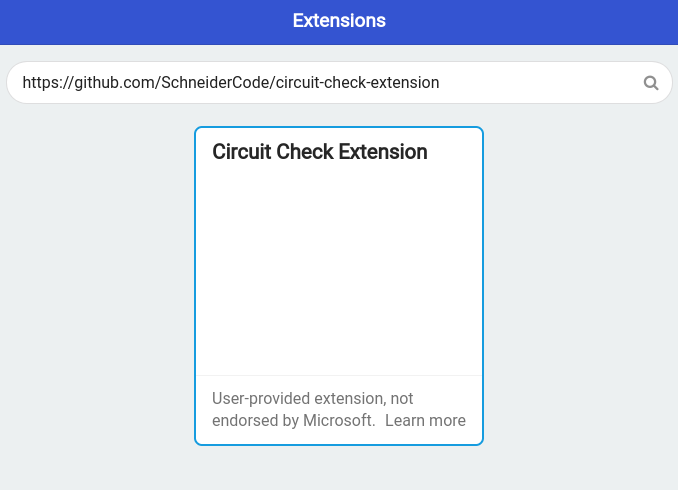
The Circuit Playgrounds are supported with an Arduino Library and the micro:bit is supported through extension for MakeCode. If you need help with importing a zipped Library in the Arduino IDE, check out this tutorial: https://www.arduino.cc/en/guide/libraries. For MakeCode, to add the extension you will need to enter the github url (provided below) in the extension search bar. This process is detailed in Sparkfun's guide for adding the gator:log extension to MakeCode: https://learn.sparkfun.com/tutorials/sparkfun-gatorlog-hookup-guide/adding-the-makecode-extension
The Arduino Library's Zip File: https://bit.ly/3xbGWnS
The MakeCode Extension's Github URL: https://github.com/SchneiderCode/circuit-check-extension
Including the Library - Arduino
.png)
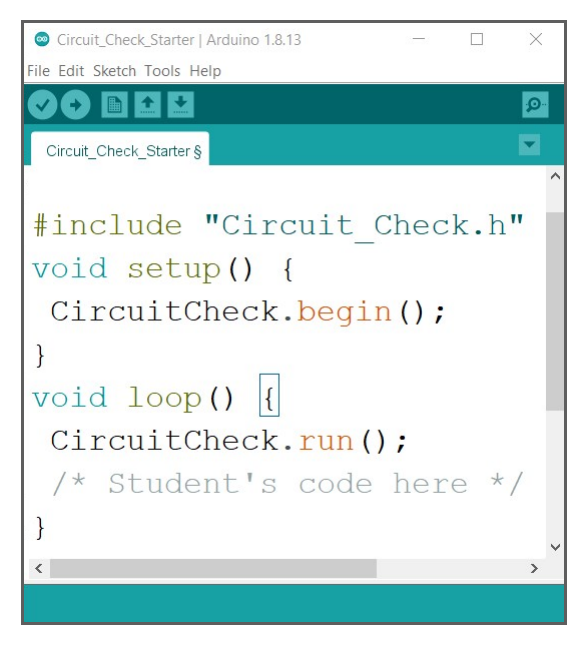
Once the Arduino Library has been installed you will have access to the starter program "Circuit Check Starter" which is listed under File > Examples > Circuit Check.
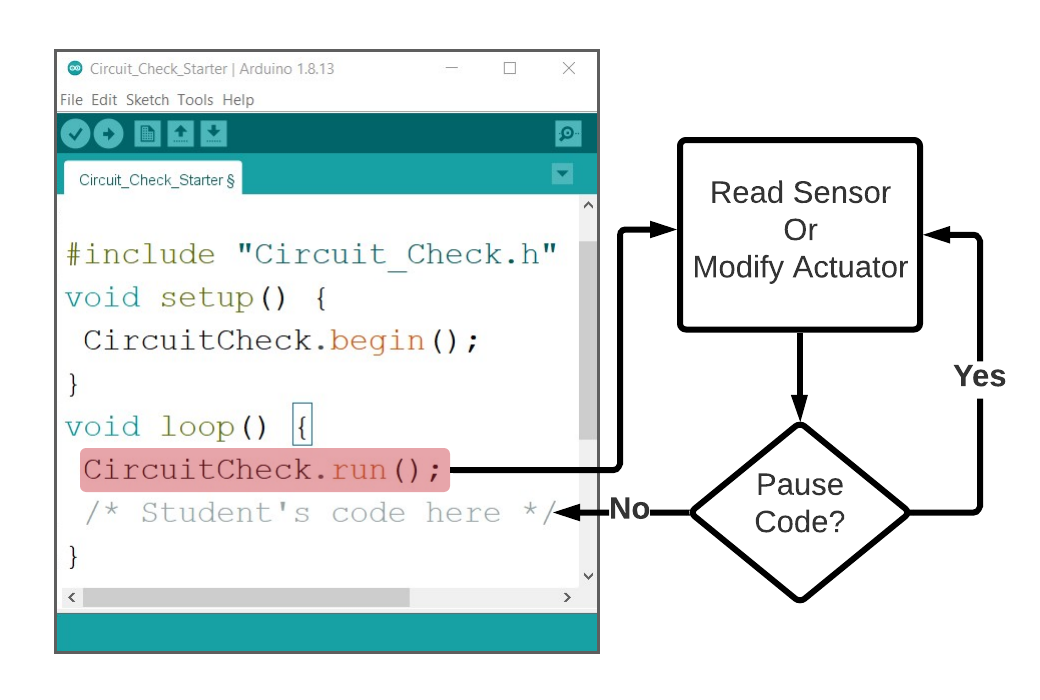
As you can see in the starter program, only three lines of code are needed to have your microcontroller connect to Circuit Check. It is important that the call to CircuitCheck.run() is alway at the start of your forever loop.
#include "Circuit_Check.h"

void setup(){
  CircuitCheck.begin();//Initialize Circuit Check's tools
}

void loop(){
  CircuitCheck.run();//Send sensor data to Circuit Check
  /* Your Code here */
}
Including the Library - MakeCode
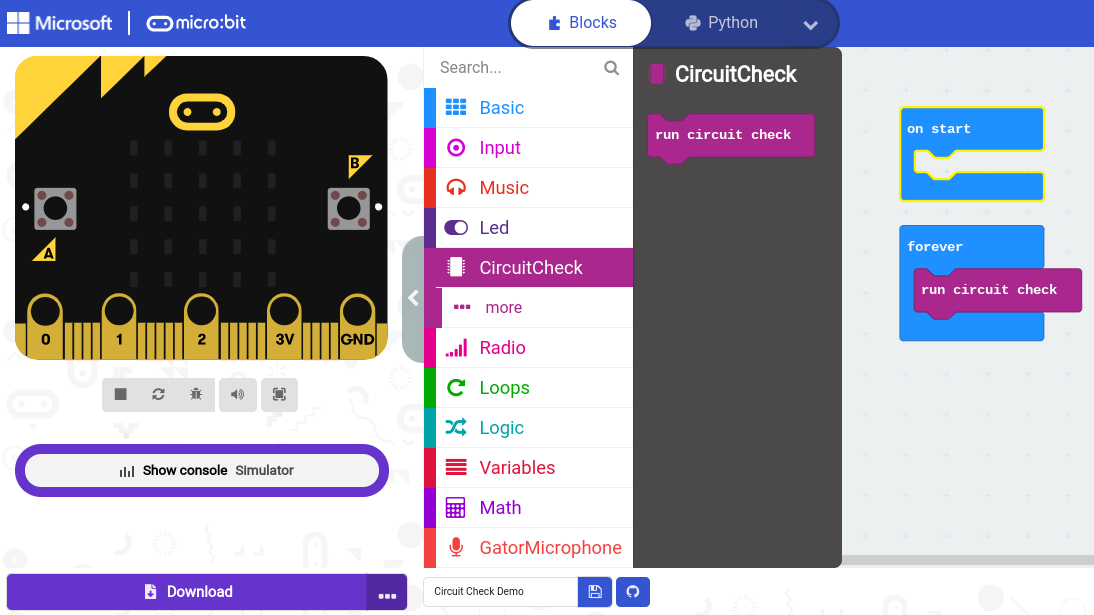
In order for your micro:bit to connect to Circuit Check, you'll need to add the "run circuit check" block to the start of your forever loop. Once that block has been added you'll be able to view and control any of your on board sensors and actuators!
Connecting to Circuit Check
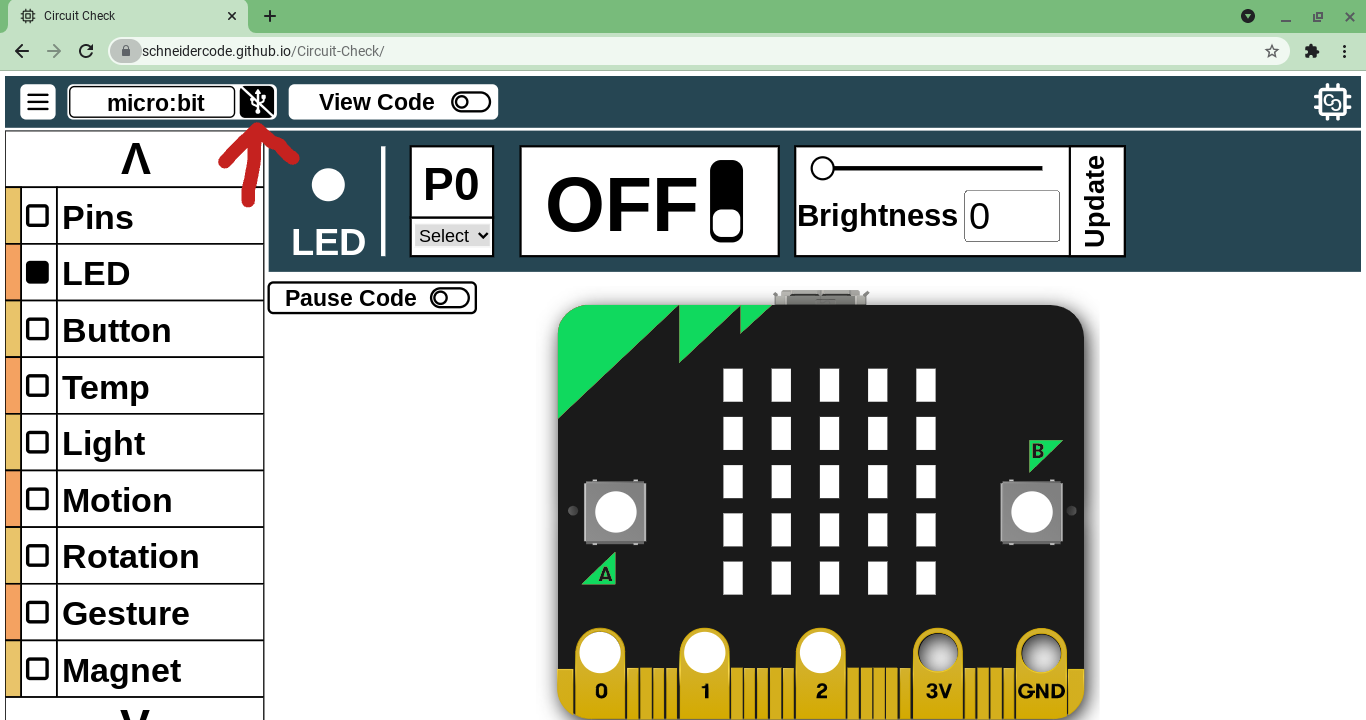
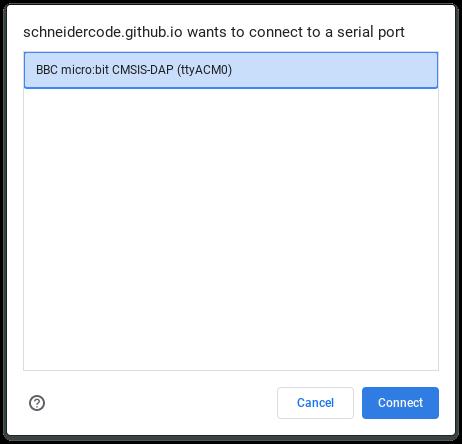
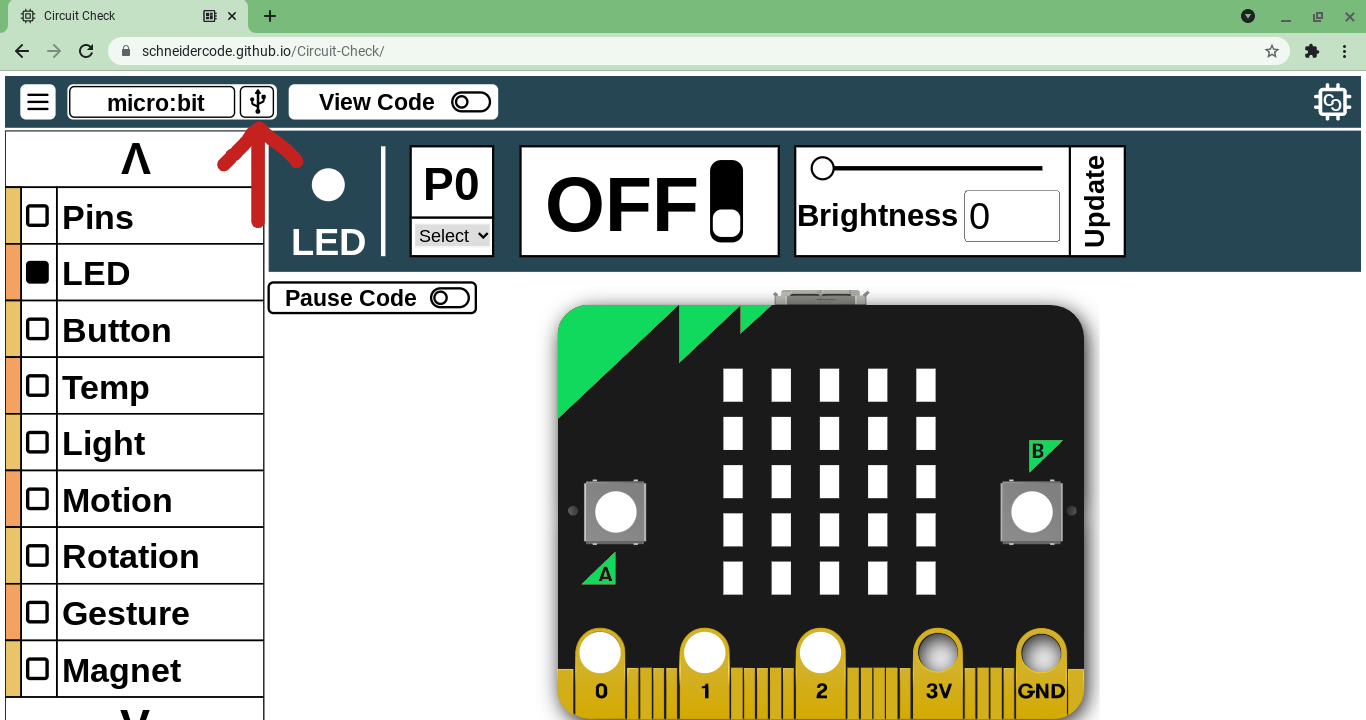
To connect your microcontroller to Circuit Check you will need to:
- Navigate to Circuit Check's website
- Make sure you are using a compatible browser - Chrome, Edge, Opera
- Click the USB icon in the top left corner
- Select your microcontroller from the pop-up list
- Click connect and make sure the USB icon turns white
Viewing Sensors
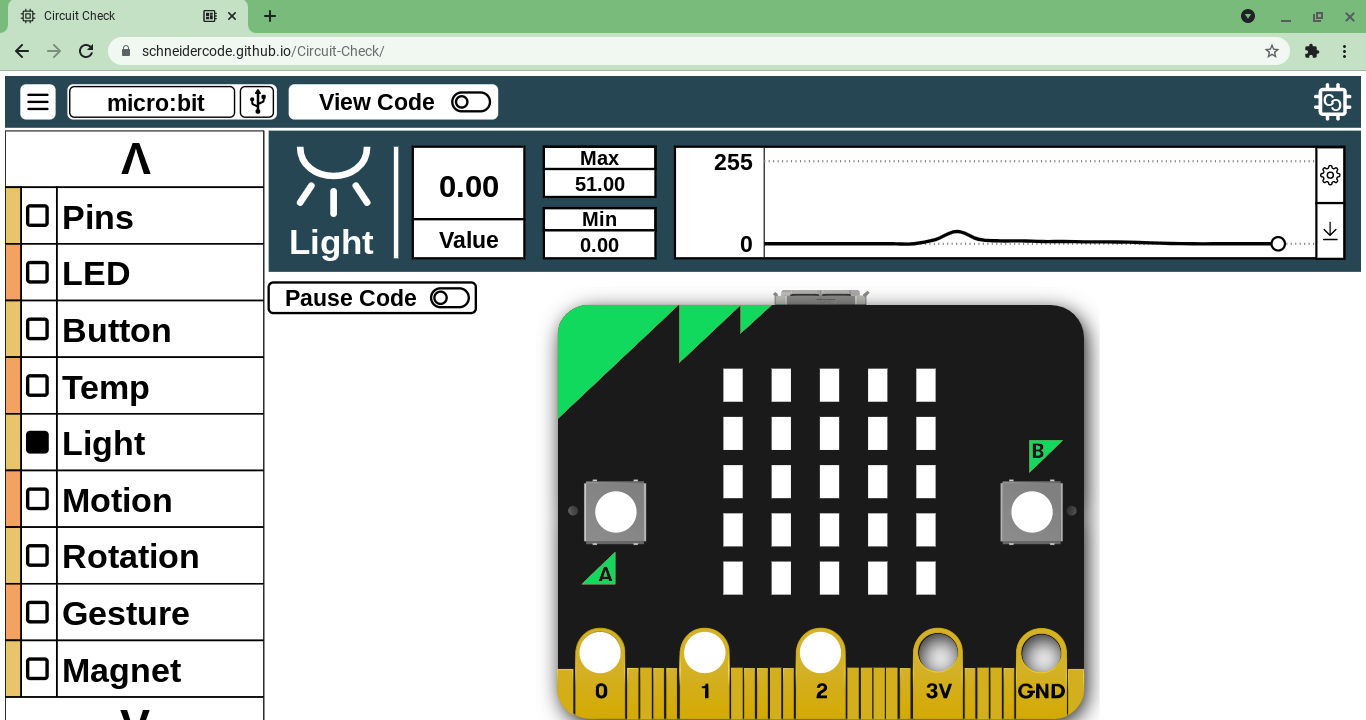
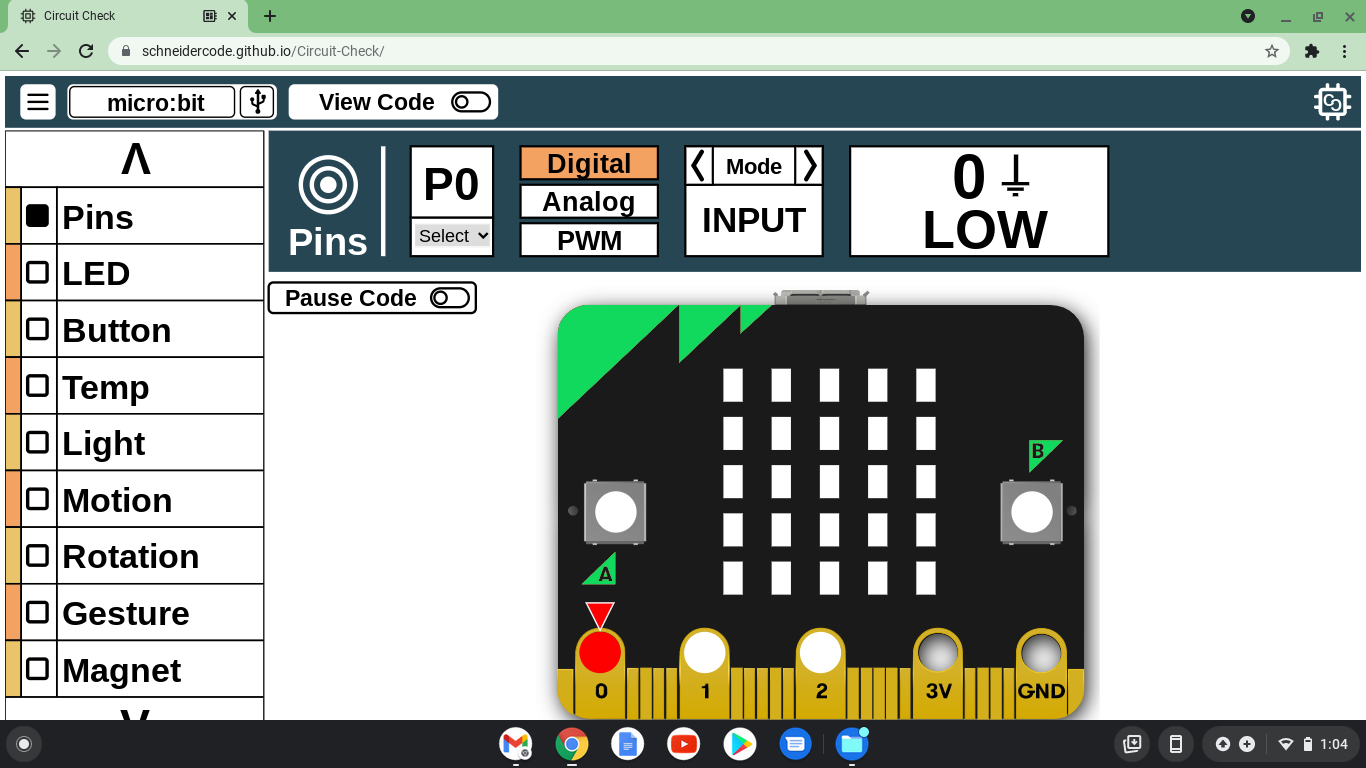
With Circuit Check you can read values from either an onboard sensor or a sensor attached to a pin. To read the value of an onboard sensor, select the sensor from the provided list on the left of the screen. If viewing a pin's value, select the "Pins" option in the sensor list. From here you can view both digital and analog values.
Modifying Actuators
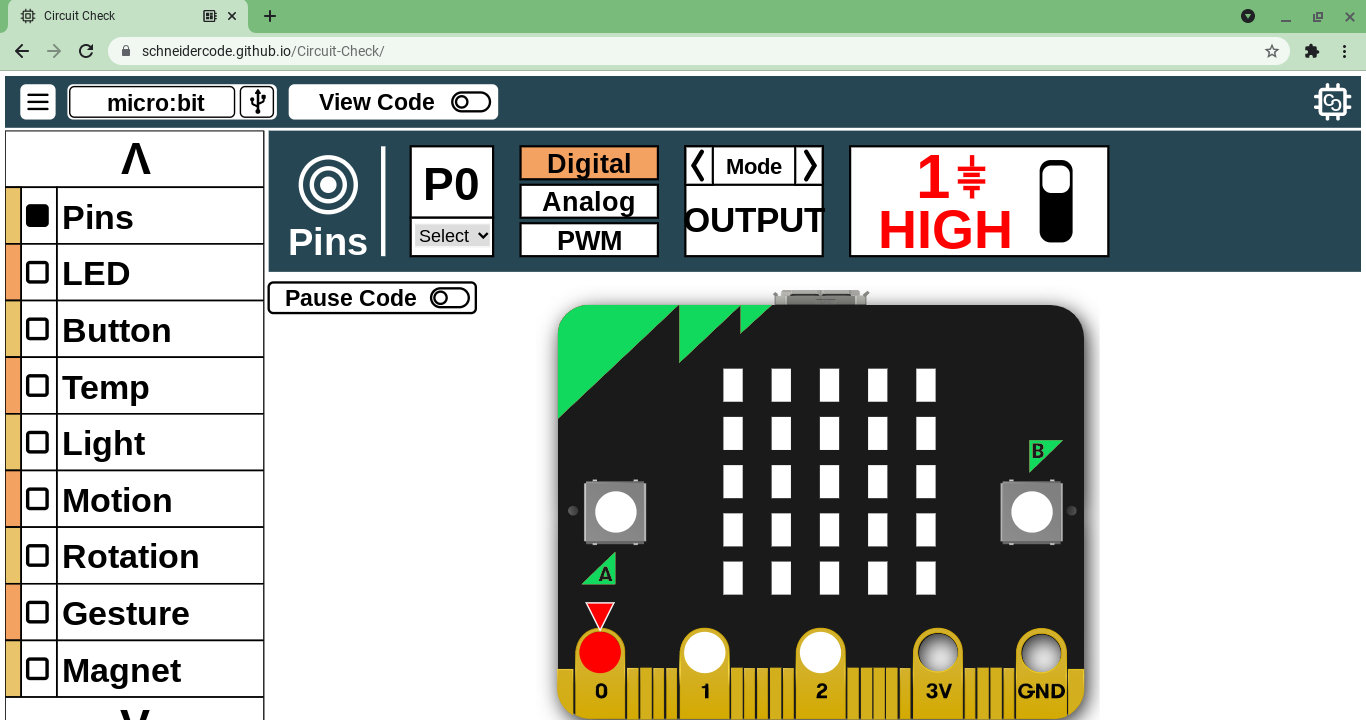
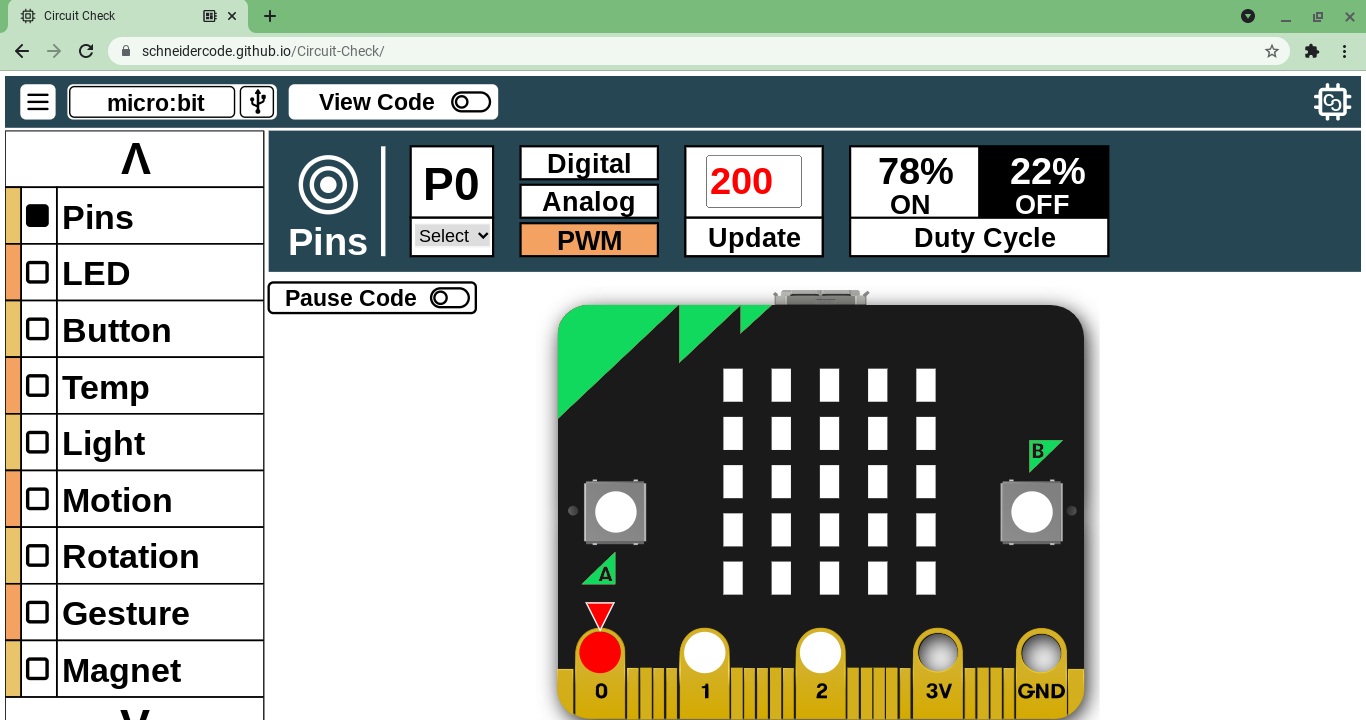
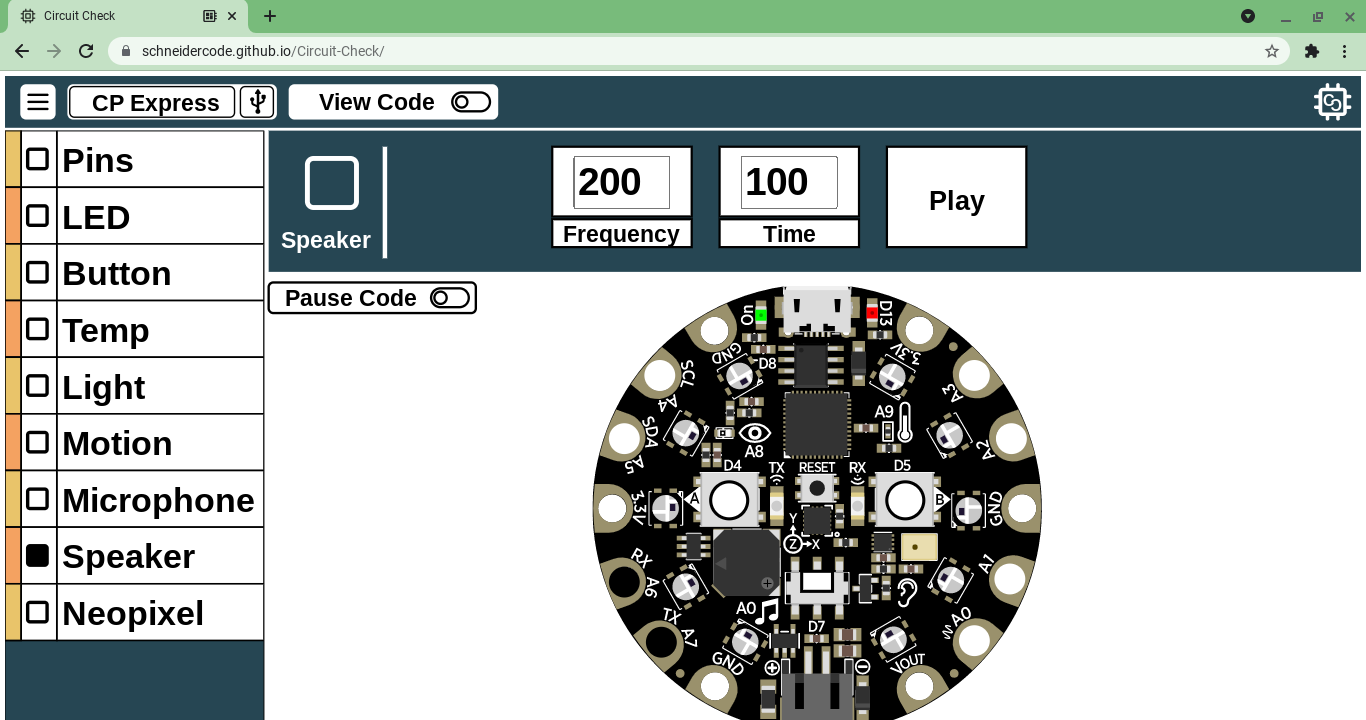
Circuit Check can be used to control onboard and connected actuators. For example, you can control turn an LED on/off by controlling the hardware pin it's connected to. To control your hardware pins:
- Select the "Pins" option from the sensor list
- Select the desired hardware pin
- Change the mode to "Output" for digital signals
- Change the mode to "PWM" to use a pwm signal
For controlling onboard actuators, the controls will change for each device. For example, the Circuit Playground's onboard speaker can be controlled by setting the frequency & duration time for playing a note.
Pausing Your Code
.png)
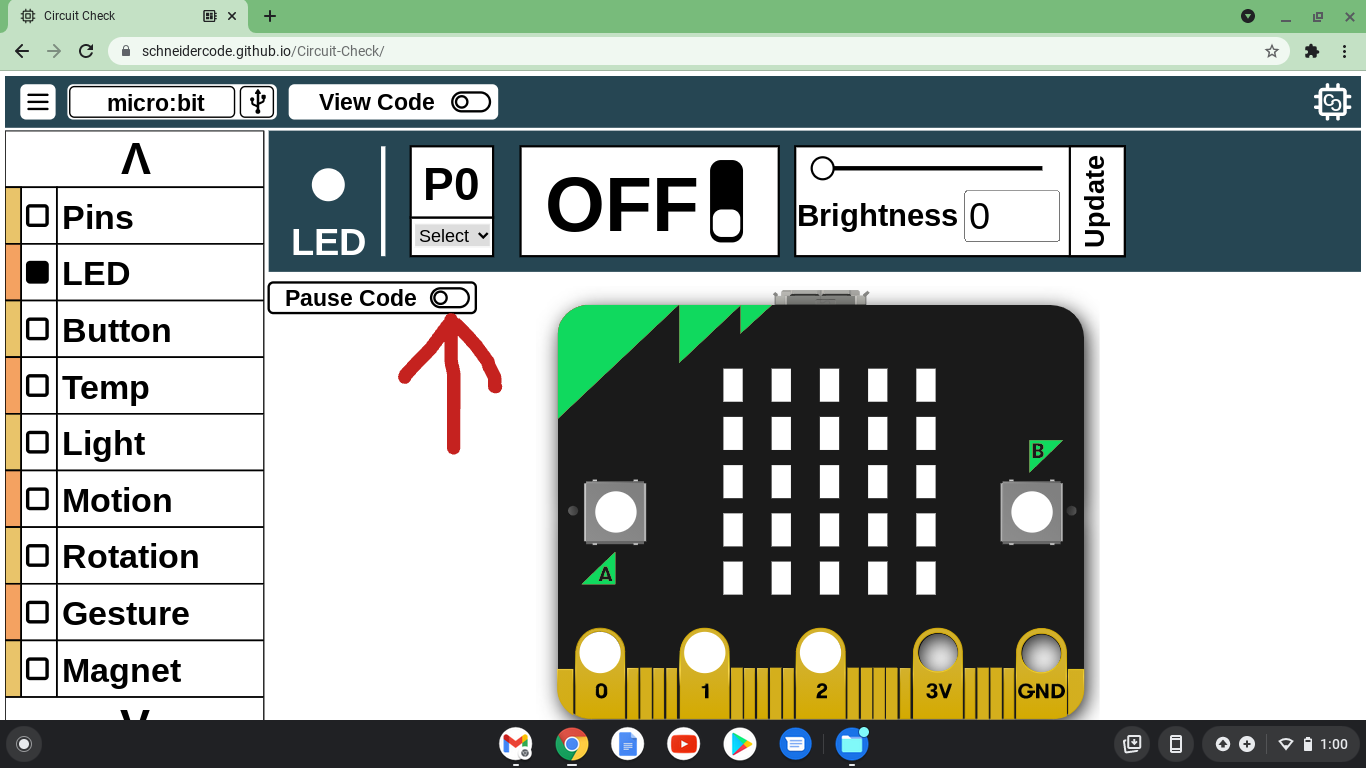
Circuit Check, by default, runs in tandem with your code. But what if you want to isolate and test just your hardware? All you need to do is is hit the pause button. This will stop the execution of your code, but still allow you to view sensor data and test your actuators.