Circle Area Calculator Using Arduino Uno R3
by NightmareHDH in Circuits > Arduino
699 Views, 1 Favorites, 0 Comments
Circle Area Calculator Using Arduino Uno R3
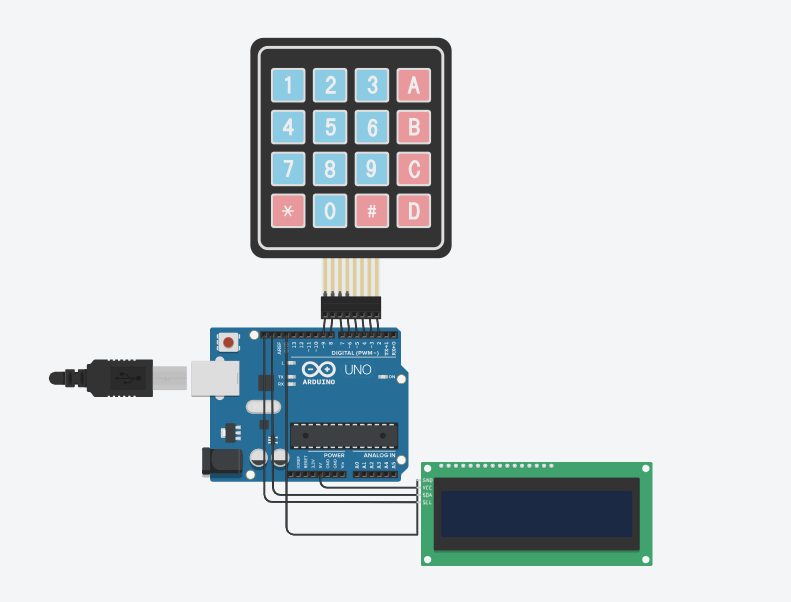
In this tutorial, we will create a Circle Area Calculator using Arduino Uno R3, a 16x2 LCD (I2C), a keypad, and jumper wires. The calculator will prompt the user to enter the radius of the circle via the keypad and then calculate and display the area of the circle on the LCD screen. We will be using Tinkercad, a virtual electronics platform, to simulate the circuit.
Supplies
- Arduino Uno R3
- 16x2 LCD (I2C)
- Keypad
- Jumper wires
.
.
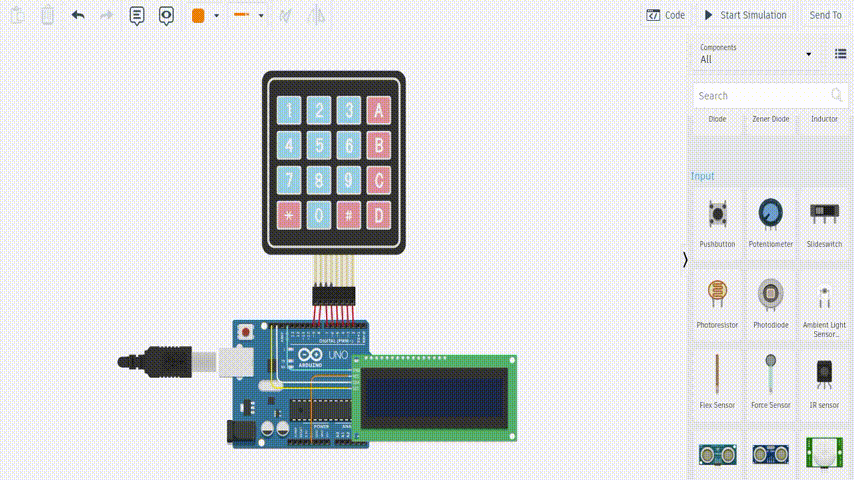
Tinkercad
Open TinkerCad

Start by logging into your Tinkercad account or sign up for free if you don't have one. Once logged in, create a new circuit simulation project.
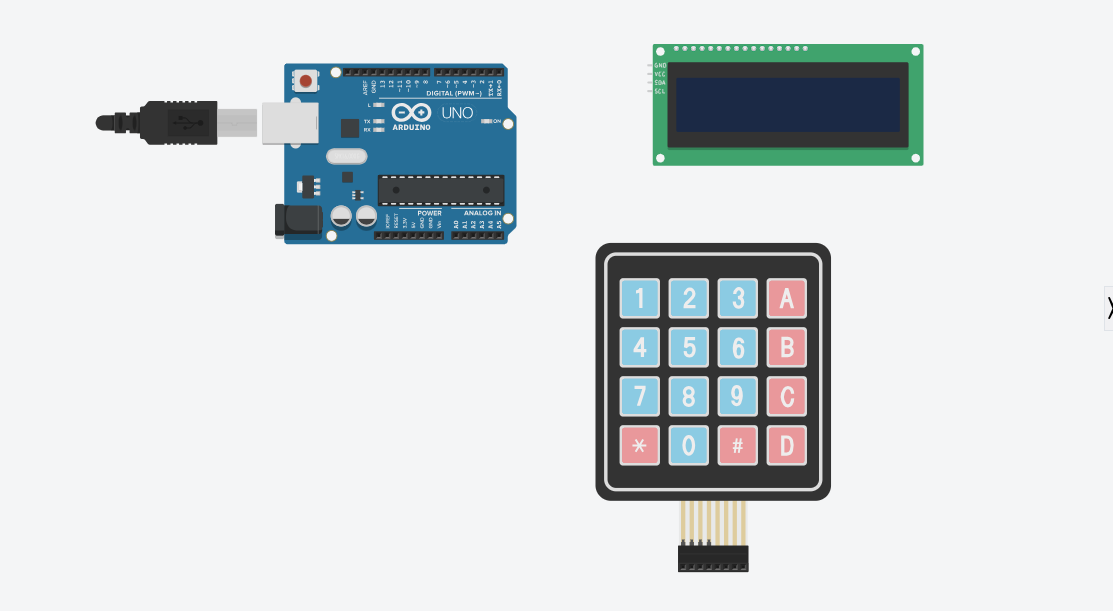
Add Components

In the Tinkercad editor, locate the components panel on the right-hand side. Drag and drop the following components onto the workspace:
- Arduino Uno R3
- 16x2 LCD (I2C)
- Keypad
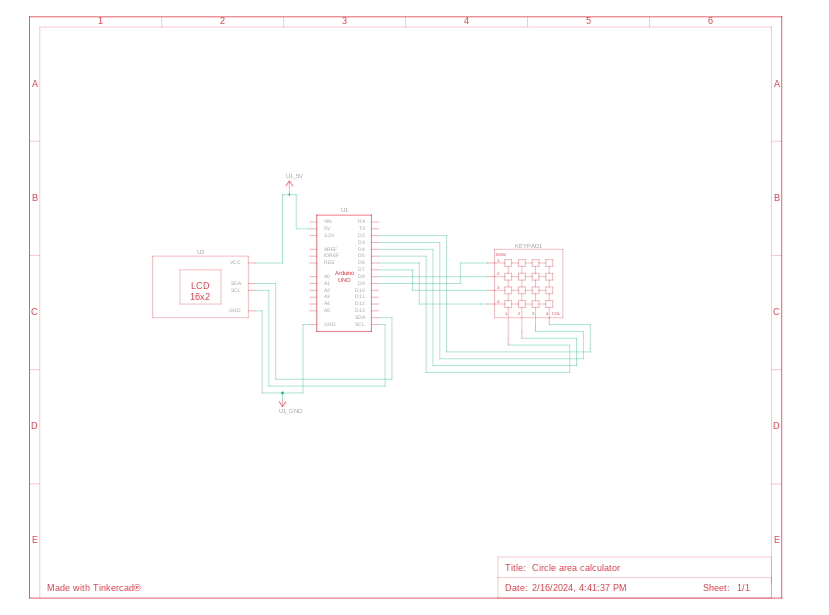
Connection
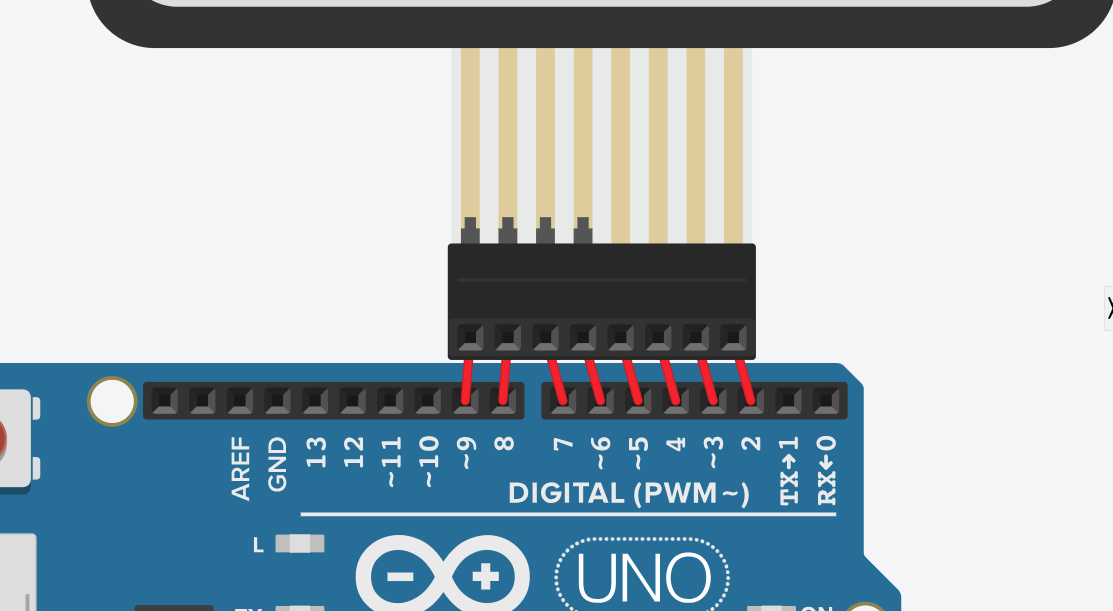
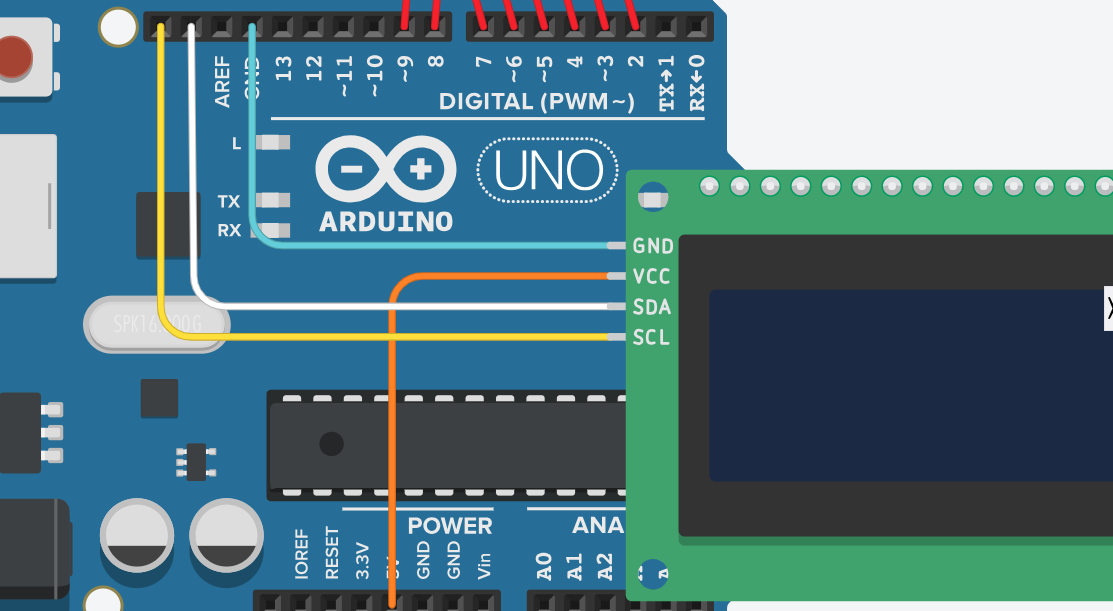
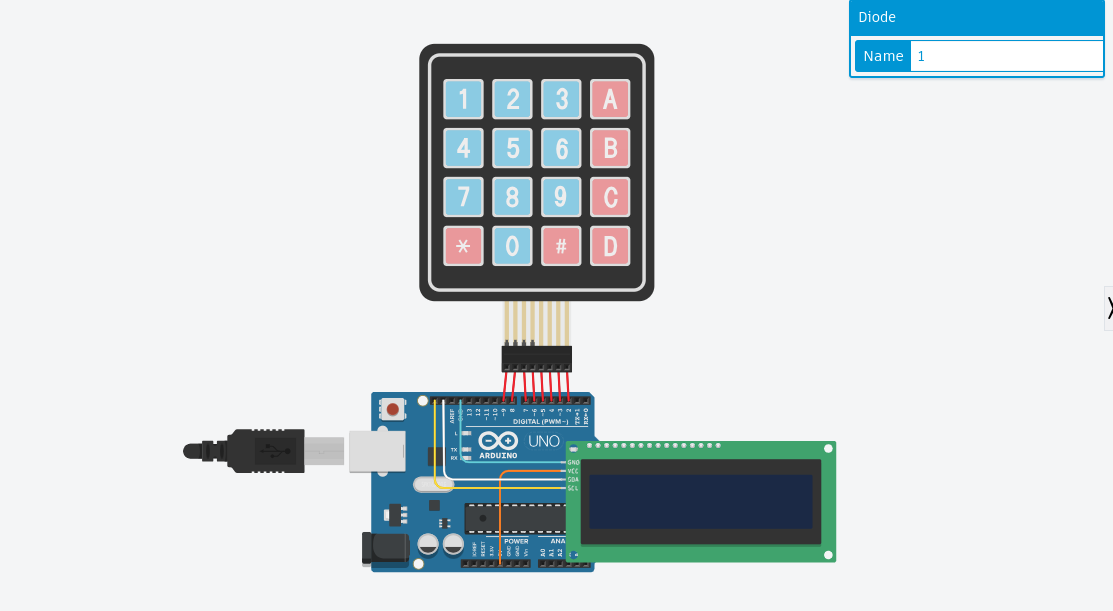
Connect the components within Tinkercad according to the images
Code in Arduino
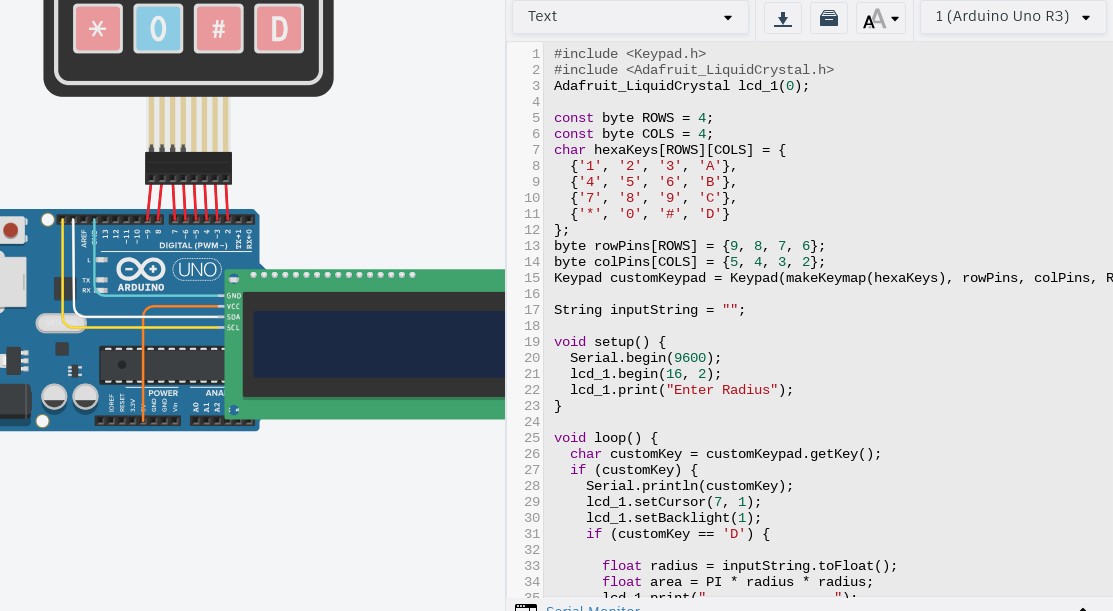
Next, we'll upload the provided Arduino code and understand its functionality. Here's a breakdown of the code:
cpp
#include <Keypad.h>
#include <Adafruit_LiquidCrystal.h>
Adafruit_LiquidCrystal lcd_1(0);

const byte ROWS = 4;
const byte COLS = 4;
char hexaKeys[ROWS][COLS] = {
  {'1', '2', '3', 'A'},
  {'4', '5', '6', 'B'},
  {'7', '8', '9', 'C'},
  {'*', '0', '#', 'D'}
};
byte rowPins[ROWS] = {9, 8, 7, 6};
byte colPins[COLS] = {5, 4, 3, 2};
Keypad customKeypad = Keypad(makeKeymap(hexaKeys), rowPins, colPins, ROWS, COLS);

String inputString = "";

void setup() {
  Serial.begin(9600);
  lcd_1.begin(16, 2);
  lcd_1.print("Enter Radius");
}

void loop() {
  char customKey = customKeypad.getKey();
  if (customKey) {
    Serial.println(customKey);
    lcd_1.setCursor(7, 1);
    lcd_1.setBacklight(1);
    if (customKey == 'D') {

      float radius = inputString.toFloat();
      float area = PI * radius * radius;
      lcd_1.print("                ");
      lcd_1.setCursor(0, 1);
      lcd_1.print("Area: ");
      lcd_1.print(area);
      delay(10000);
      lcd_1.clear();
      lcd_1.print("Enter Radius");
      inputString = "";
    } else if (customKey == 'C') {

      inputString = "";
      lcd_1.clear();
      lcd_1.print("Enter Radius");
    } else {

      if (customKey >= '0' && customKey <= '9') {
        inputString += customKey;
        lcd_1.print(customKey);
        if (inputString.length() % 3 == 0 && inputString.length() < 12) {

          lcd_1.print(',');

        }
      }
    }
  }
}
Explanation of the Code
- The code begins with including necessary libraries for the keypad and LCD.
- It sets up the keypad matrix and defines the row and column pins.
- Inside the setup function, it initializes the serial communication, initializes the LCD, and displays "Enter Radius" on the LCD.
- In the loop function, it constantly checks for keypad input.
- It performs the corresponding action if a key is pressed ('D' for calculation, 'C' for clearing input).
- When 'D' is pressed, it calculates the area of the circle using the entered radius and displays it on the LCD.
- The inputString variable stores the entered digits from the keypad.
Test the Circuit
Start the simulation in Tinkercad. Use the virtual keypad to enter the radius of the circle. Press 'D' when finished entering the radius. The LCD should display the calculated area of the circle.
Experiment and Modify:
Feel free to experiment with the code and circuit:
- Modify the code to add more features or improve functionality.
- Explore different components and circuit configurations to enhance your understanding.
Conclusion:

Congratulations! You've successfully created a Circle Area Calculator using Arduino Uno R3, a 16x2 LCD (I2C), and a keypad within the Tinkercad platform. This project provides an excellent opportunity to learn and experiment with Arduino programming and virtual electronics. Enjoy exploring further possibilities and expanding your knowledge!