Chore Wheel
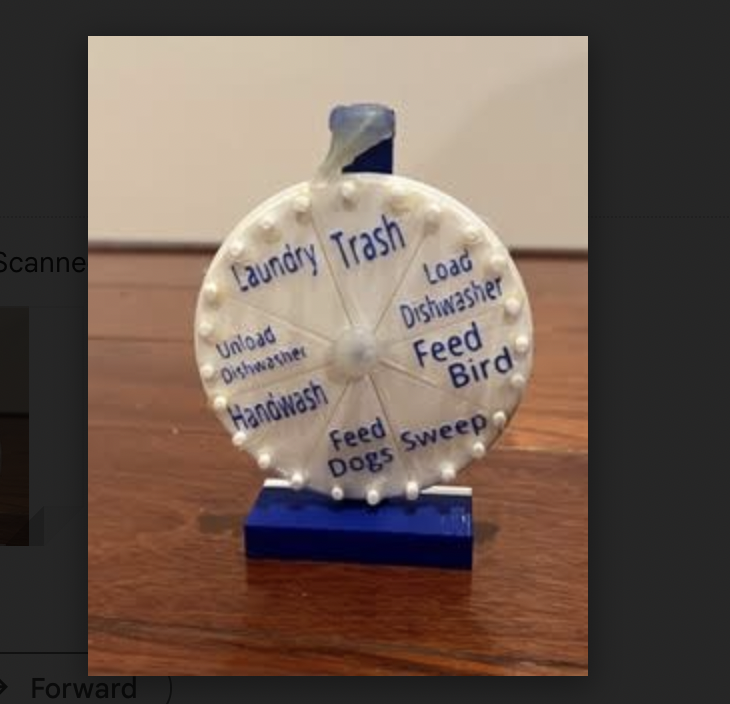
This project aims to solve a problem in any household with siblings: who has to do the dishes. The chore wheel involves several chores, which can be customized, and all spin until a chore is landed on.
Supplies
Tools needed:
- 3D printing program and printing capabilities (3D printer, filament, etc.)
- Hot glue gun
- Paper clip
The Wheel
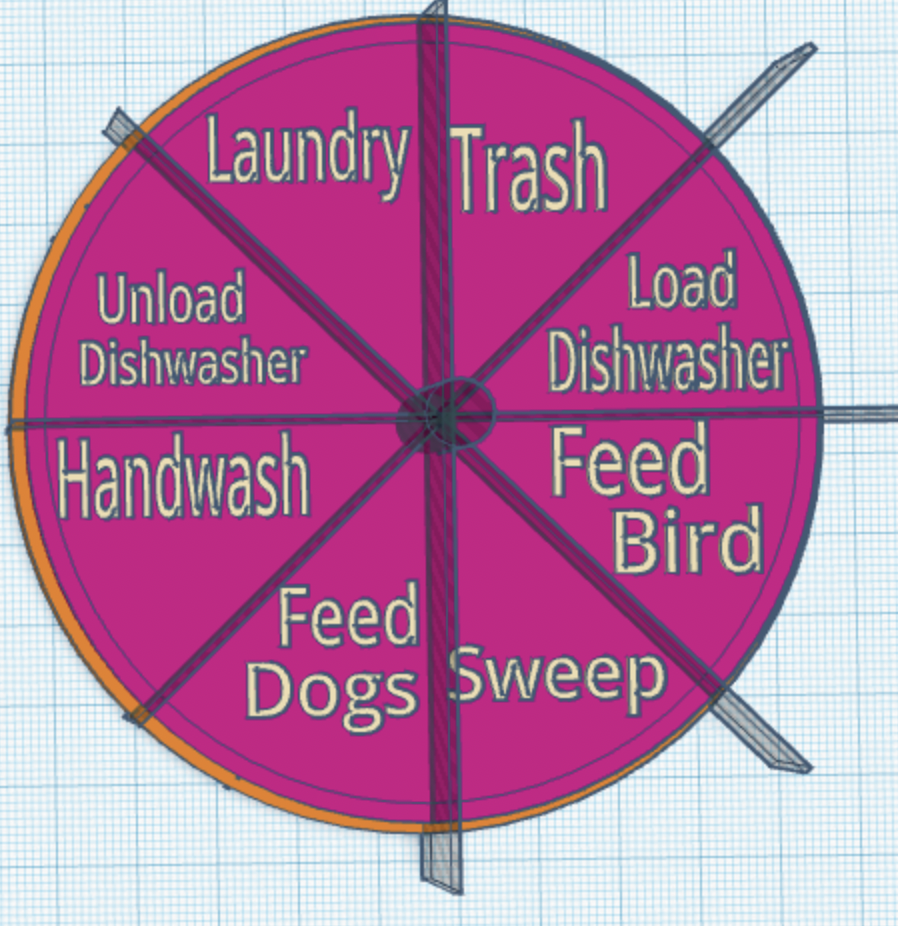
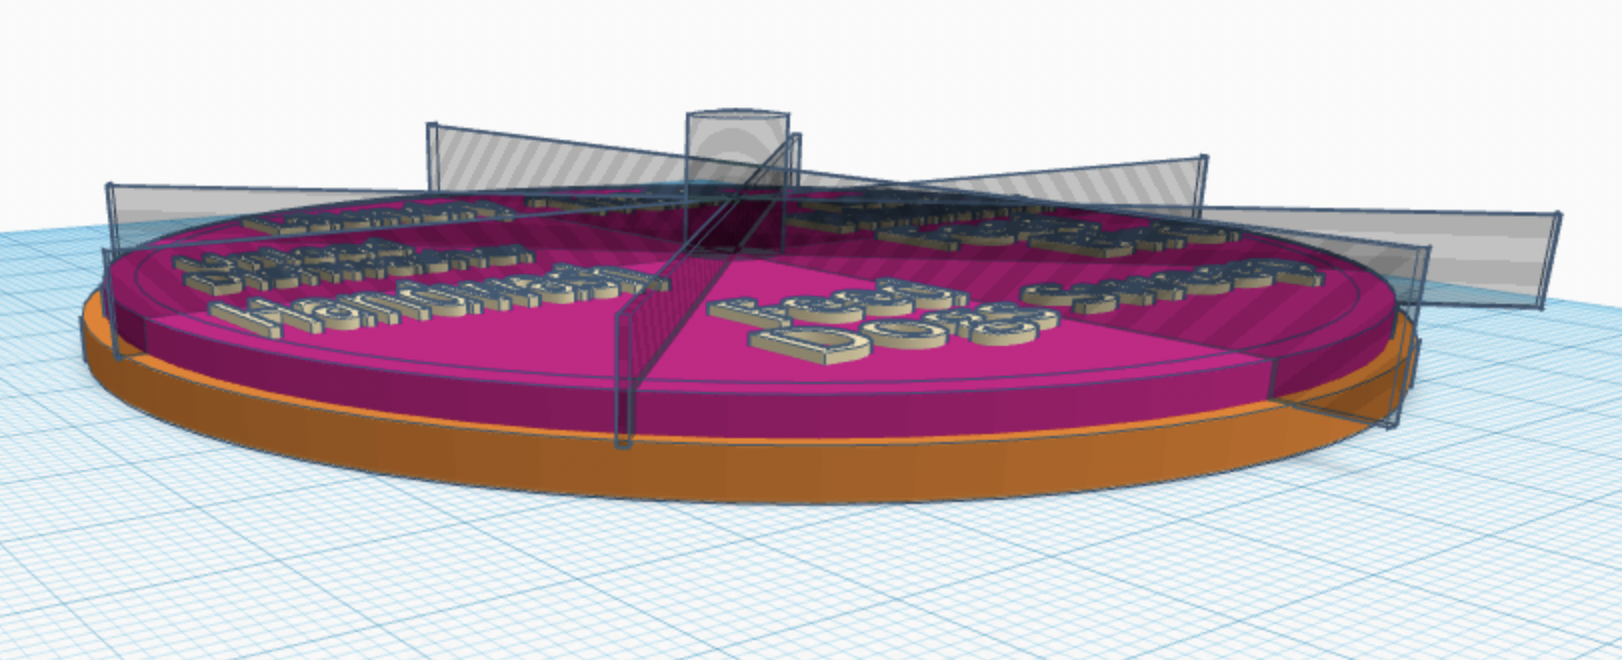
First, open your 3D design software. I used Tinkercad. I then went through and built my wheel. To do that, I started by placing a large, circular disk on the plate. Then place a smaller, also flat circle on top of the second one. Then use rectangular beam cutouts (subtractive shapes) to section the only the top circle into eight equal portions. After that, place a subtractive cylinder into the very center of the chore wheel. Then place your assigned chores onto the wheel. I personalized mine for my family.
The Base
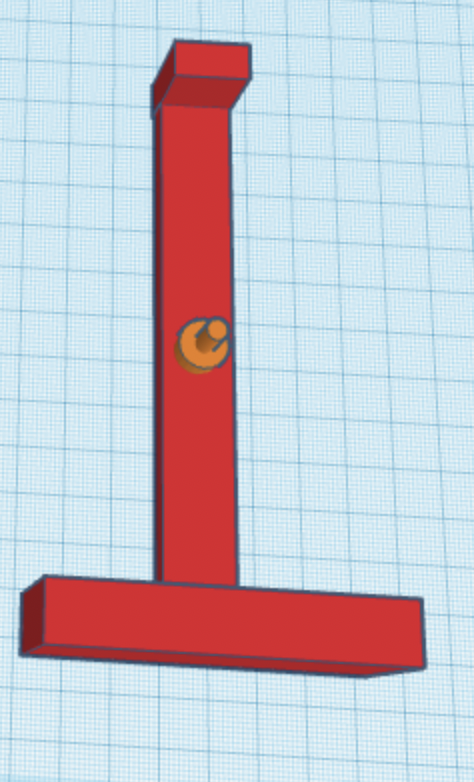
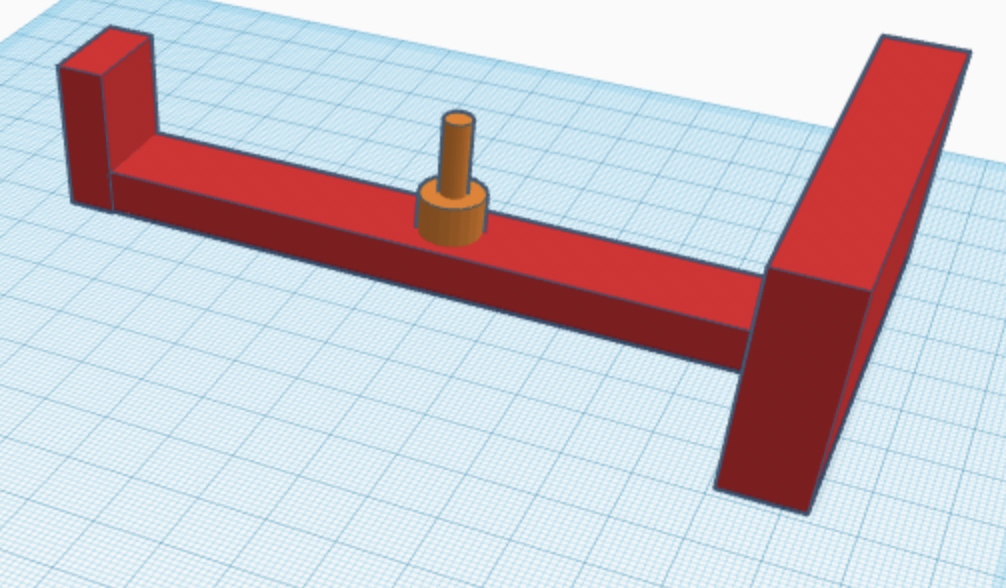
Then assemble your stand. I made the base a similar, but slightly smaller width as the wheel. Then make a back that is taller than the wheel itself and attach it to the base. Then add a top, which only needs to be taller than the wheel by about a centimeter. then add a tall cylinder to the center of the back of the stand, and a smaller cylinder to the centered, larger cylinder. Make sure the small cylinder is just slightly smaller than the hole in the wheel, and that the cylinder is centered , and has enough space on both sides for the wheel to fit.
Pegs
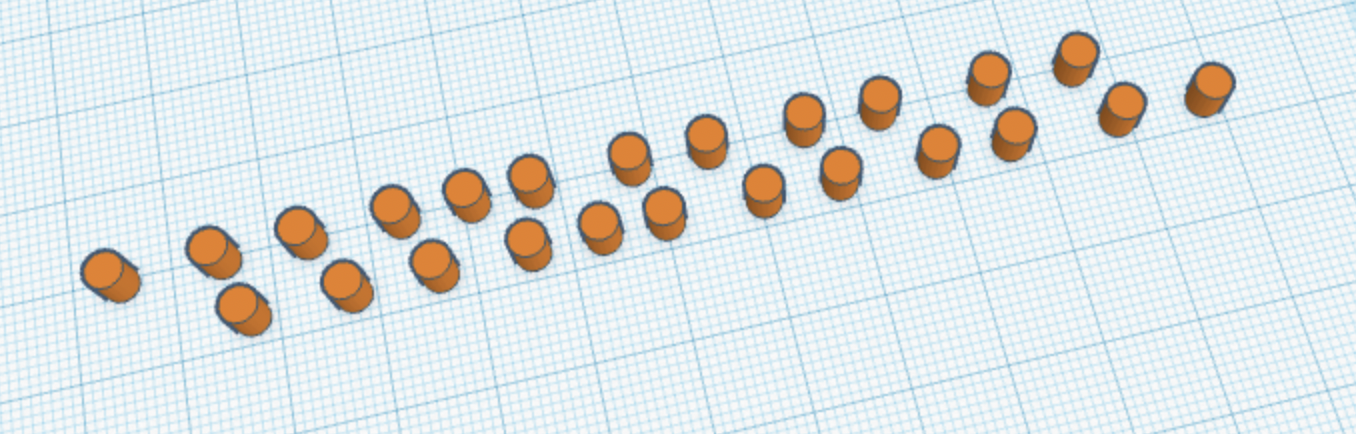
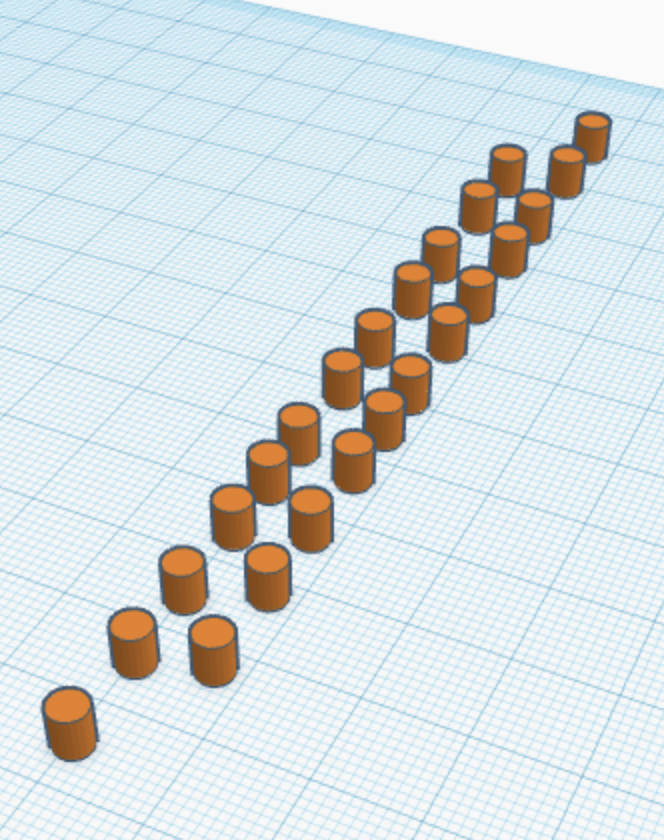
After that, make about 24 small, circular pegs that you'll glue on later. place them off to the side on the board.
Printing
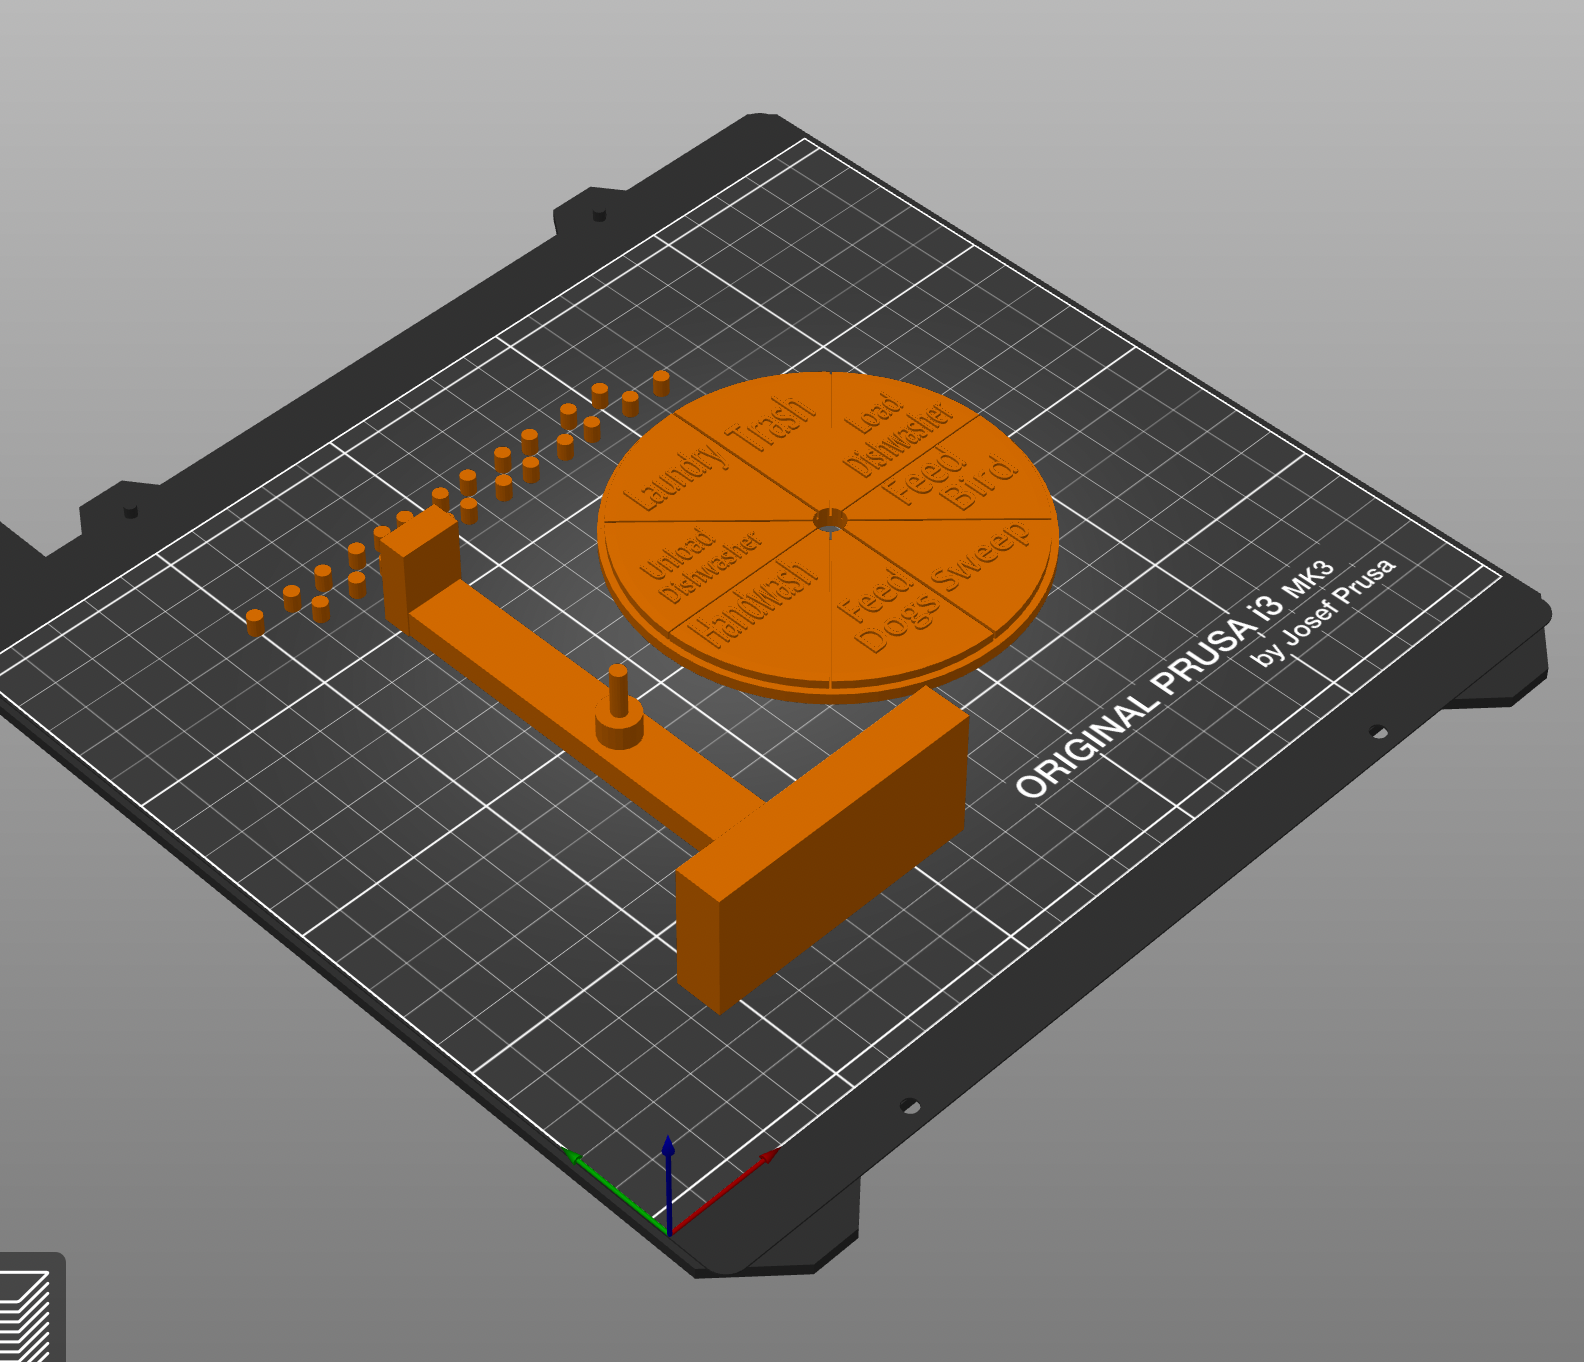
Then import to PrusaSlicer. Make sure your model is in an stl file when exported out of Tinkercad. Make sure your model is attached to the base. Then print!
Construction

Finally, glue the pegs at equal intervals on the wheel. I used 3 per section. With one on the line between each chore and two on the edge in each section. Then I added created a cap to the axle out of hot glue. I just dropped enough glue in a circle to stop the wheel from falling off the axle. Lastly, I made a stopper pin out of hot glue and a paper clip. This acts to slow the motion of the wheel and to point to a chore when finished spinning. Because mine wasn't as flexible, I put it at an angle so that it cannot fully get caught and stop the wheel before spinning. One you glue that onto the top of the base, you're done!