Cheap, Effective and Modern Home Automation
by kasadawa in Circuits > Raspberry Pi
2366 Views, 33 Favorites, 0 Comments
Cheap, Effective and Modern Home Automation

In the 21 century the automation is everywhere - in the cars, and even on work we are automating so many processes. But why ? The answer is simple - It's more effective and easy.
In this instructable I will have the honor to show you what I've done with a less than 15$ in order to automate my home.
For the specific project you will need the following hardware :
- Raspberry Pi with (mine is model B+)
- 4 Array relay module ( or more if you want to control more devices )
- 4 wires
- wifi dongle (amazon )
It's not required to know any programming language or something more specific to accomplish this tutorial.
The project is build on Angular 2 API (MEAN application + Auth0 for authentication API).
Features :
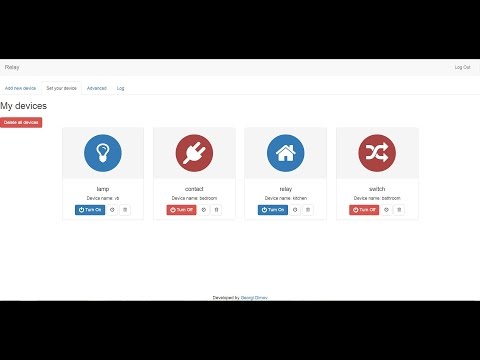
- Turn on/off relay
- Set timer on separate relay
- Login authentication
- Changing relay type/pin/name
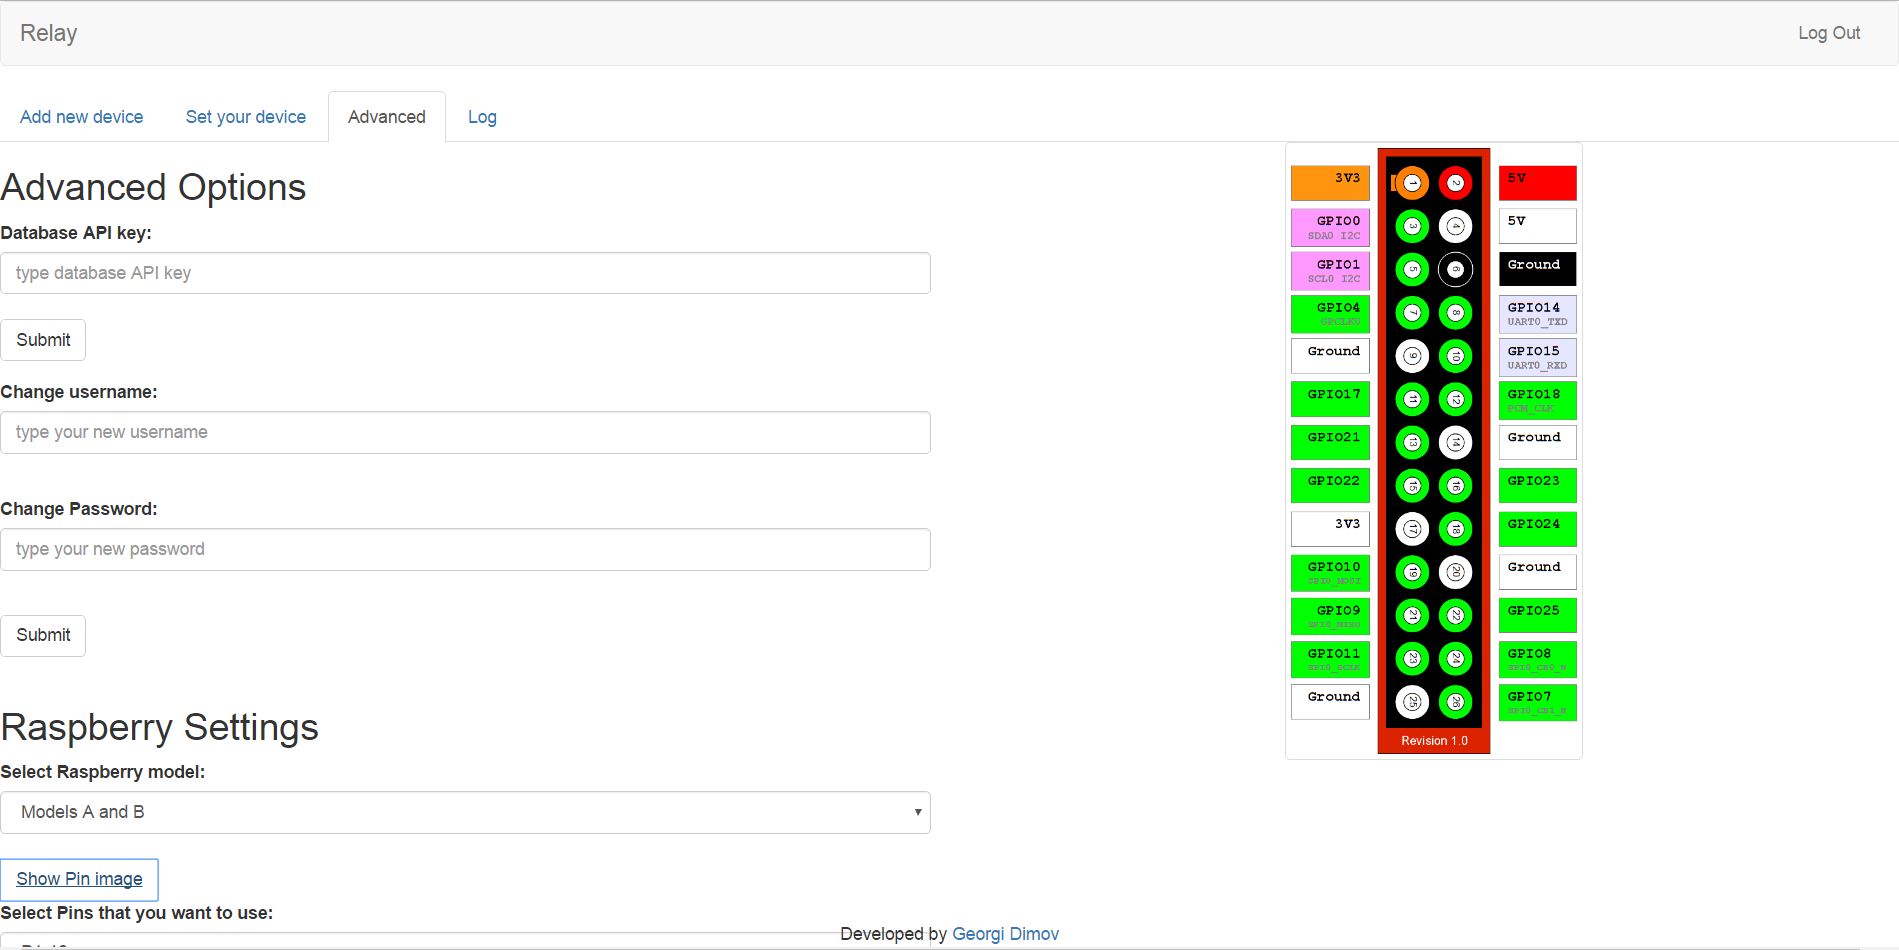
- Changing pin /adding new pin + showing the pin-out image for the different type of Raspberries
- responsive design
- History log ( shows your actions | coming soon )
For what this project can be used:
- Turning on/off any device ( up to 220V )
- Set timer to each device
For example you can control led strips, pumps, electrical motors and etc.
If you like my project and it was useful, you can give me a cup of coffee.
Setup the Hardware

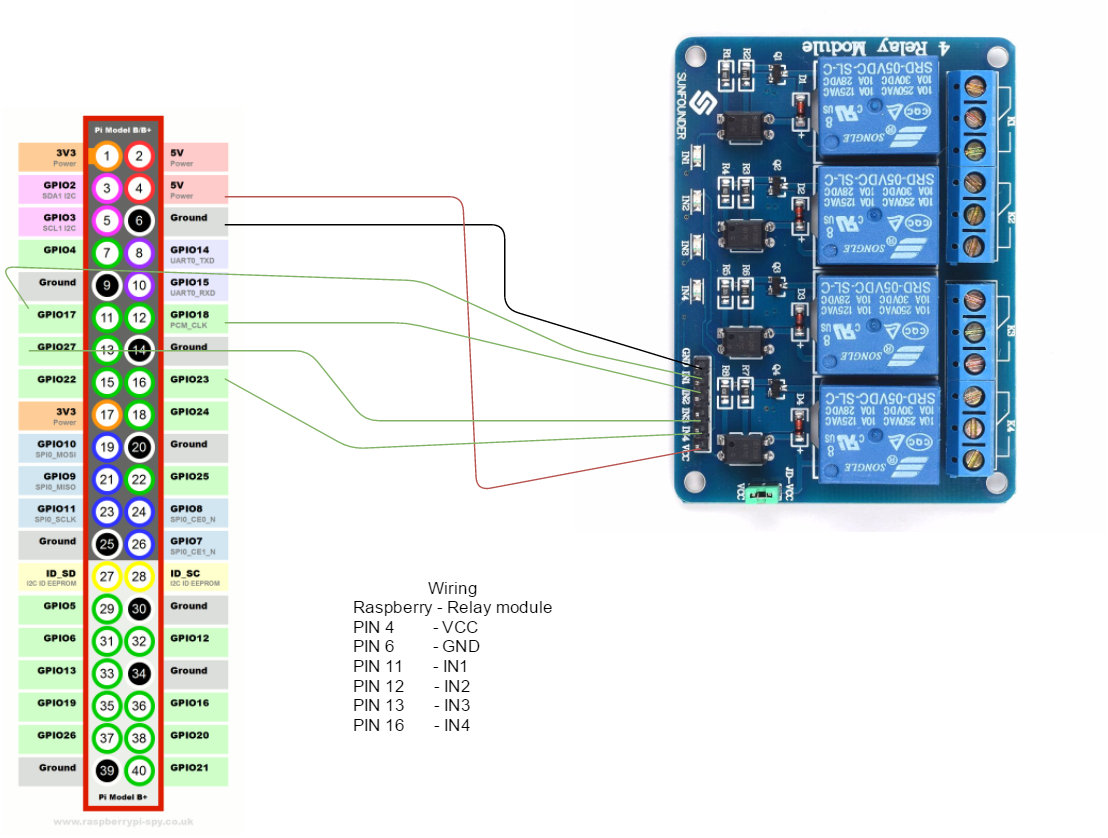
We need to wire the relay module and the raspberry .On the image you can read and see how you should wire them. Also there is an options on the api, so after successful installation you can add and manage more GPIO pins.We are displaying the pins by physical Pin number - read more.
Software You Need to Install
The raspberry OS has to be Raspbian. It also has to be connected to your wifi (wired or with dongle).
NOTE! After the fresh install of the OS don't forget to run the following commands :
% sudo apt-get update
% sudo apt-get upgrade
Setting SSH
When you have installed a fresh Raspbian distribution, we need to create a SSH connection between the Raspberry and our working station (PC or laptop). We need to download Putty on our PC - this is executable program which is a lite SSH(Secure Shell) client. The next step is to unlock SSH on our raspberry:
- Enter sudo raspi-config in a terminal window
- Select Interfacing Options
- Navigate to and select SSH
- Choose Yes
- Select Ok
- Choose Finish
Then we need to see our local IP address. Type in the terminal:
% ifconfig
This command will print all of the network devices and their settings. We need to search and find our ip address. If you are on the local network our IP should look like 192.168.100.00 .
Copy your IP and paste it in the Putty field , set the port to 22 and click open - additional terminal will pop up , you need to enter your raspberry credentials to access the terminal.
Filezilla
Filezilla is a FTP (File Tranfer Protocol) client which after setting the SSH, you can use.
VNCviewer ( if you prefer Raspberry User Interface)
To install VNC viewer on we need to run those two commands:
% sudo apt-get update
% sudo apt-get install realvnc-vnc-server realvnc-vnc-viewer
After the installation finish we need to :
- Enter sudo raspi-config in a terminal window
- Select Interfacing Options
- Navigate to and select VNC
- Choose Yes
- Select Ok
- Choose Finish
On the second part we need to download VNC viewer on our PC.
NPM and NodeJS
In terminal run the command:
% sudo apt-get install nodejs npm node-semver
If you occur some problem on the installation process just search on the web, because every time when I install those things I am occurring different error messages.
My versions :
npm - 4.2.0 ( to see your version type npm --v )
node - v7.0.0 ( to see your version type node -v )
Create Database


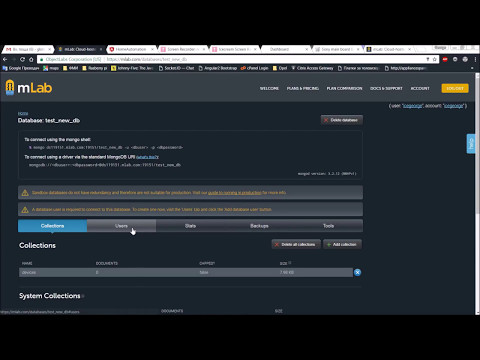
MLab is a database service that uses Mongo DB . Open the their official page and sign in.
When your account is activated :
- Log in
- Click "Create New Deployment from Scratch"
- Select free plan
- Under "Database Name:" type the db name (whatever you want)
-
Click "Create new MongoDB deployment"
-
Click on the newly created deployment
-
Click "Add collection" button and type "devices" in the field.
- Copy the Link below "standard MongoDB URI " and save it somewhere. Later you will need it.
- Click on "Users"->"Add database user"
- Type username and password and change them in the MongoDB URI .Lets say for username and password you've entered admin so that your uri should look like:
mongodb://admin:admin@ds117311.mlab.com:17311/mean_testhttps://youtu.be/HXOVrvyqAXg
Download the Project
For a pre-requirement we need git installed on the raspberry:
% sudo apt-get install git
Now we can proceed with the downloading the project:
% git clone https://github.com/kasadawa/home_automation.git
This command will create a folder home_automation with all files needed for the startup.
If your Raspberry local IP is 192.168.100.5 ( check it with ifconfig command) you just need dist and server folder from the whole project. You can feel free to delete the others. Otherwise you have two options :
- change raspberry local IP to 192.168.100.5
- Go to next Step "Change Default IP (optional)"
Navigate to the server folder:
%cd home_automation/
We need to install additional dependencies:
%sudo npm install
When you run this commnand johny-five lib will be installed. But johny-five requires ...
Raspi-io
Before installing this module please read carefully the pre-requirements .
To install Raspi-io run :
%sudo npm install raspi-io --save
Then start the node server:
%sudo node server
Go to your browser and type:
This will open the login page.
Add Your Own Devices

The default login credentials:
username: admin
password: admin
When you log for first time you need to change database API key. Go to Advanced tab , put you API key ,click submit and restart the node server:
Click two times CLTR +C on the terminal to stop the server and again type:
% sudo node server
Go to the web app and change the default username and password ( again from Advanced tab) .
Also don't forget to change your database ( click on the Advanced tab , paste the URI copied from the mlab website).
Then you will be able to Add your own devices.
Congrats, you have professional Home Automation application.
Change Default IP (optional)

This step for those who don't want to use 192.168.100.5 as default IP. We need to change some variables , install dependencies and re-build the project. I am not recommending to execute those steps on the raspberry PI. It;s better to do it on your PC and then to transfer the build and server folders.
Pre - requirements
You need to install npm, node (installation includes npm) and angular-cli on your PC. Check on the official pages how to install them.
Change, build & transfer
Download the project , unzip it .
Go to home_automation/src/app , open device.ts with text editor( Sublime or Note++ ).
Change variable host with what IP you prefer.
Open cmd, navigate to home_automation directory , run :
% npm install
When it's finished:
% ng build --prod
When it's done building, copy the build and server folders to the Raspberry using Filezilla .
Go back to the previous step ...