Charming Personalized Stationery
by tishamccoy1977 in Design > Digital Graphics
123 Views, 1 Favorites, 0 Comments
Charming Personalized Stationery
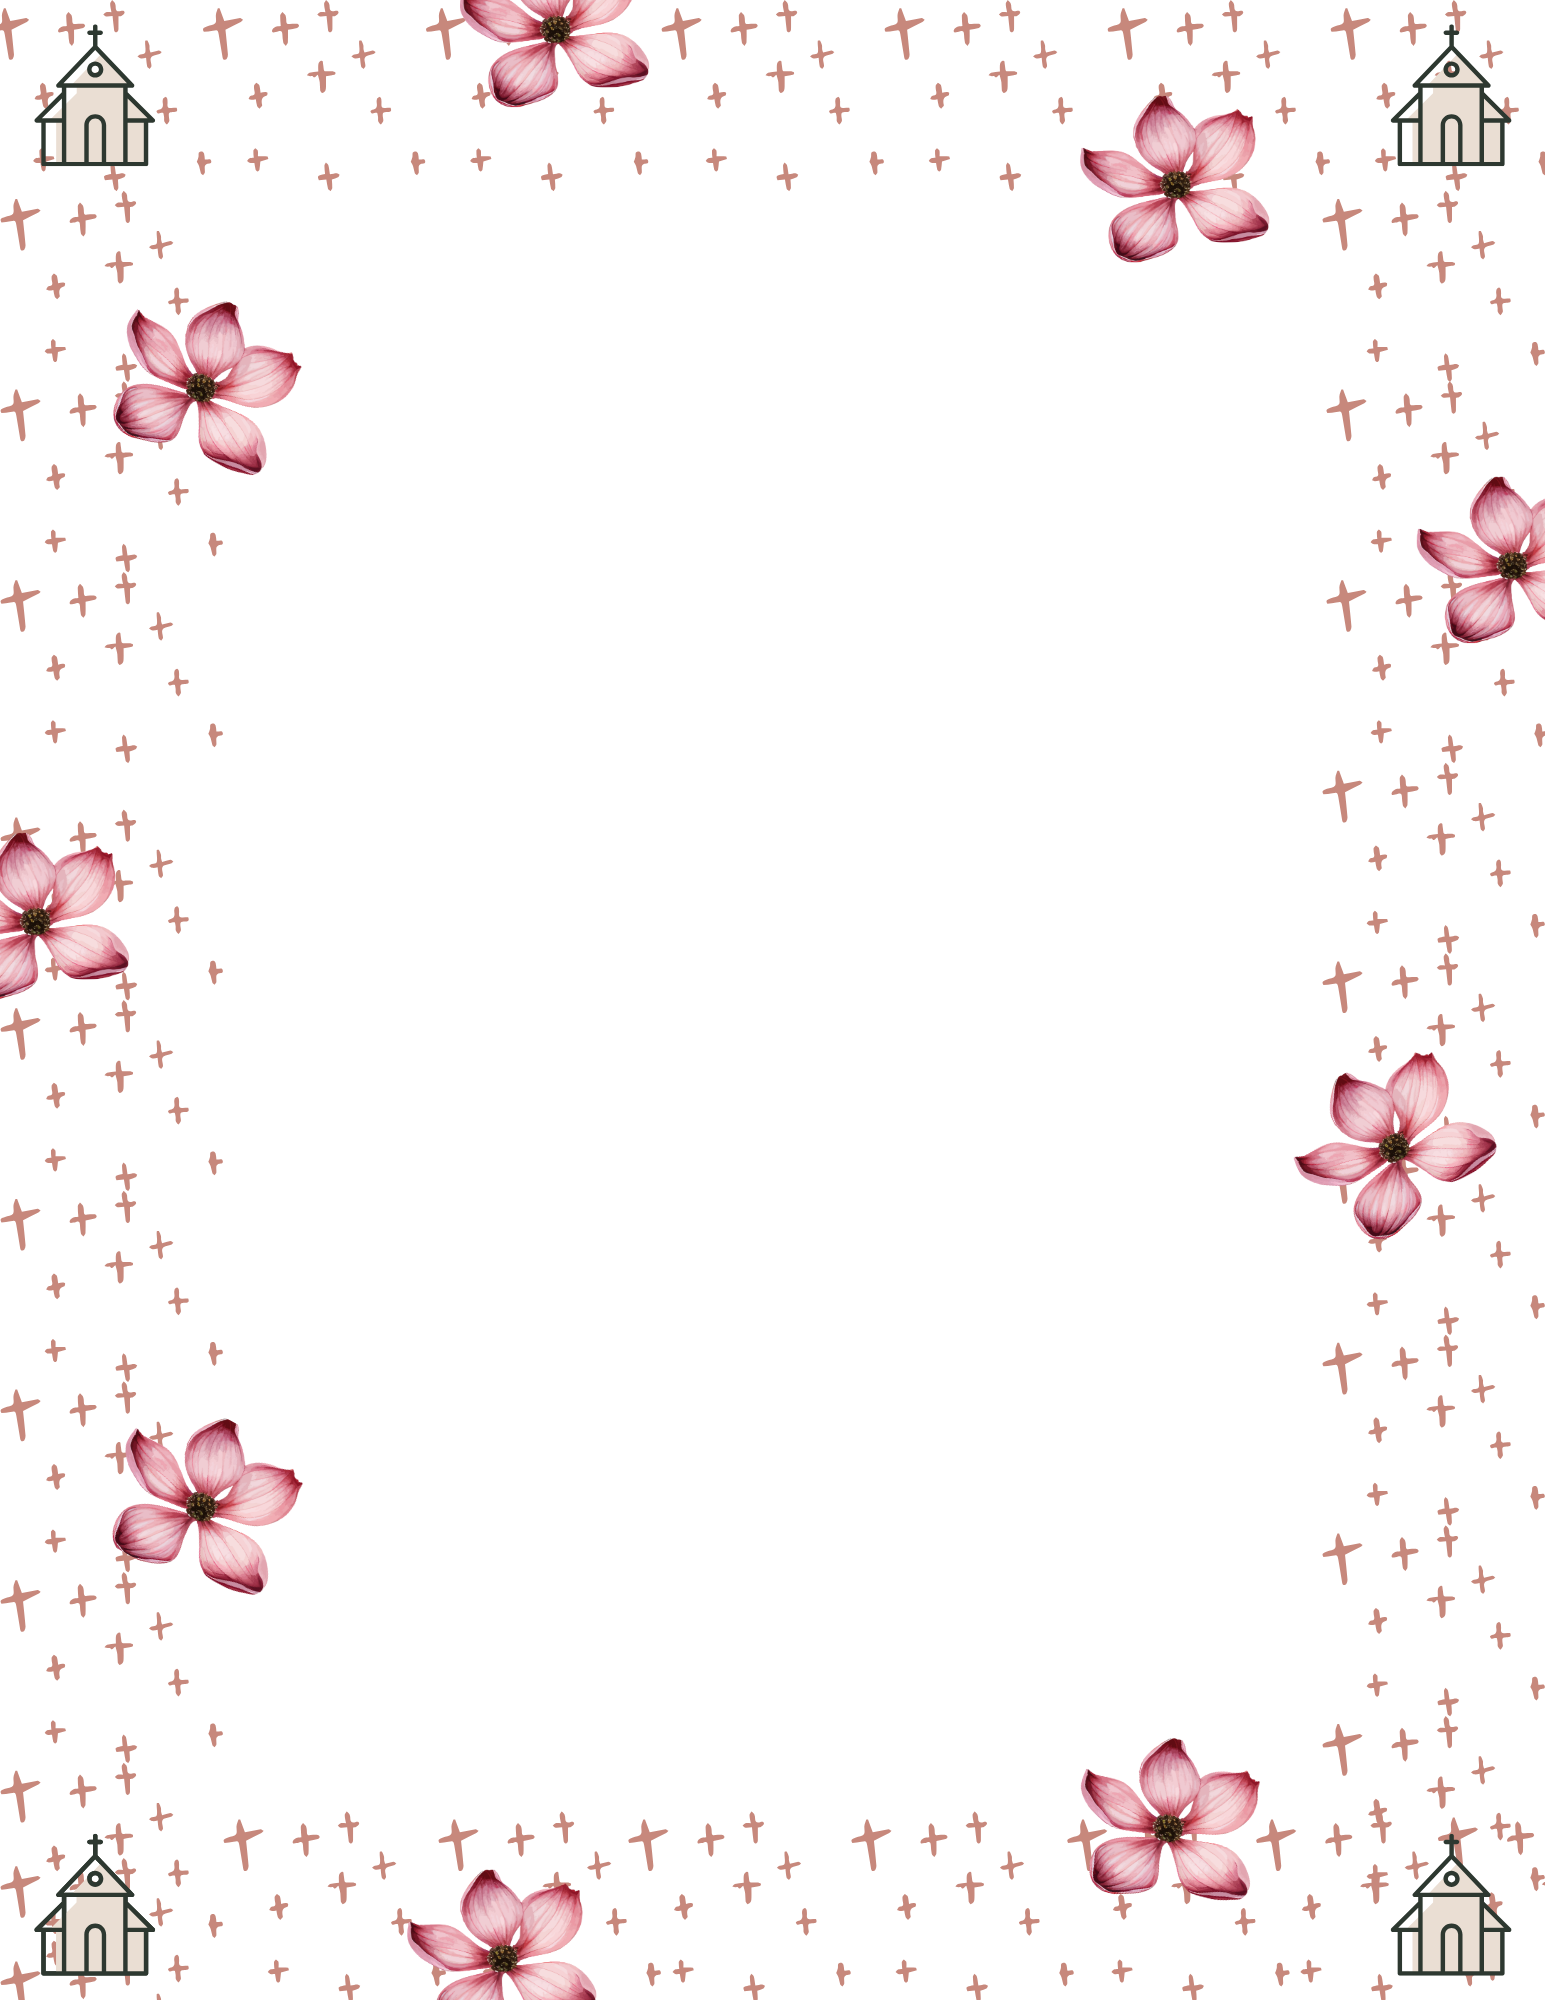
In a world full of texting, tweeting, and social media posting, wouldn't it be lovely to receive a handwritten letter? Better yet, why not add a little joy to someone's day with a personalized handwritten letter or love note on this charming stationery? Brighten up someone's mailbox with a little note of admiration, and leave the bills to those other guys!
This personal and customizable stationery is super simple to do! It took me less than 30 minutes and I've never used Canva before. I used the free version and still found plenty of options to my liking. Play around and see what kind of beauty you can create!
Supplies



- Desktop Computer or Laptop Computer
- Internet Access
- Canva Graphic Design Tool
- Snacks....lots and lots of snacks!!!
- Your Beautiful Imagination!
Open Up CANVA and Start a New Design
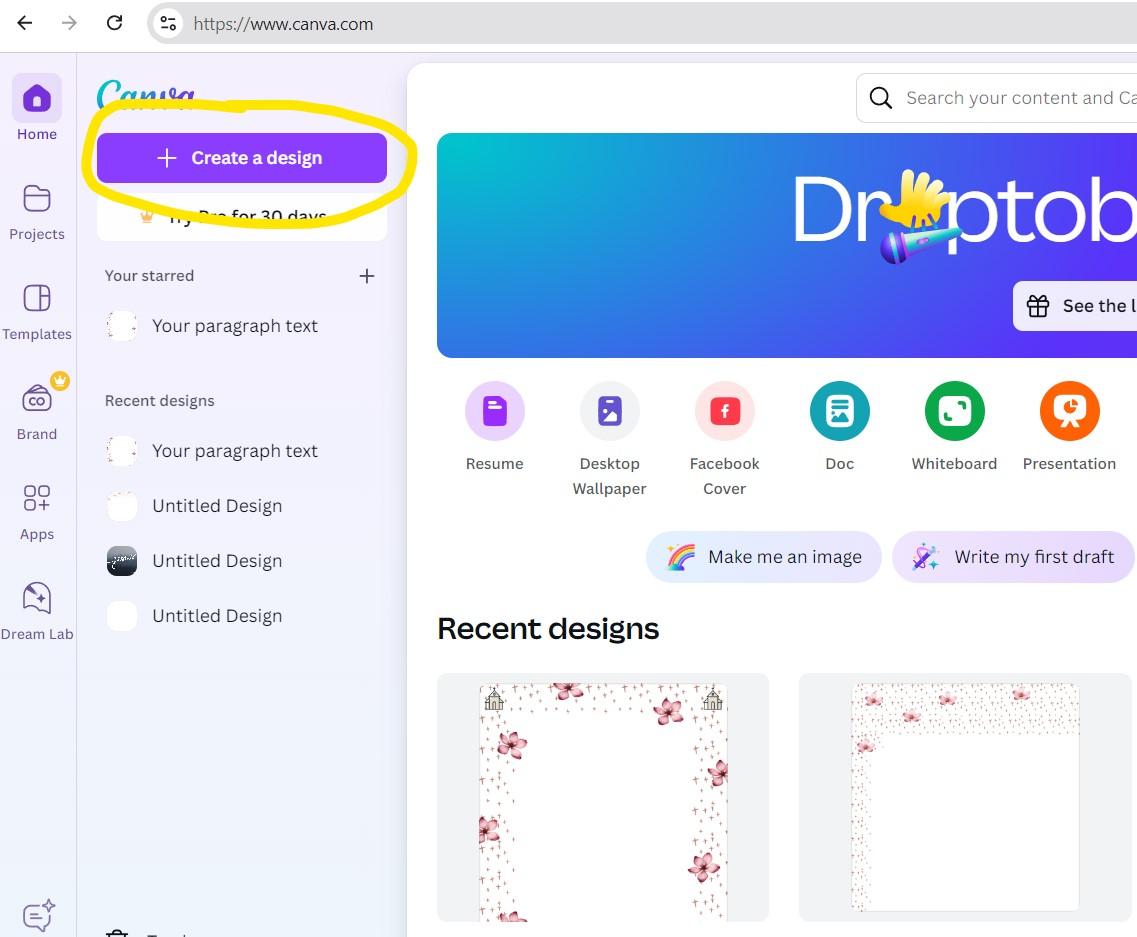
Open up your internet browser and go to www.canva.com. Click on "Choose a New Design" in the upper left corner of the screen.
Choose the Format for Your New Design Project
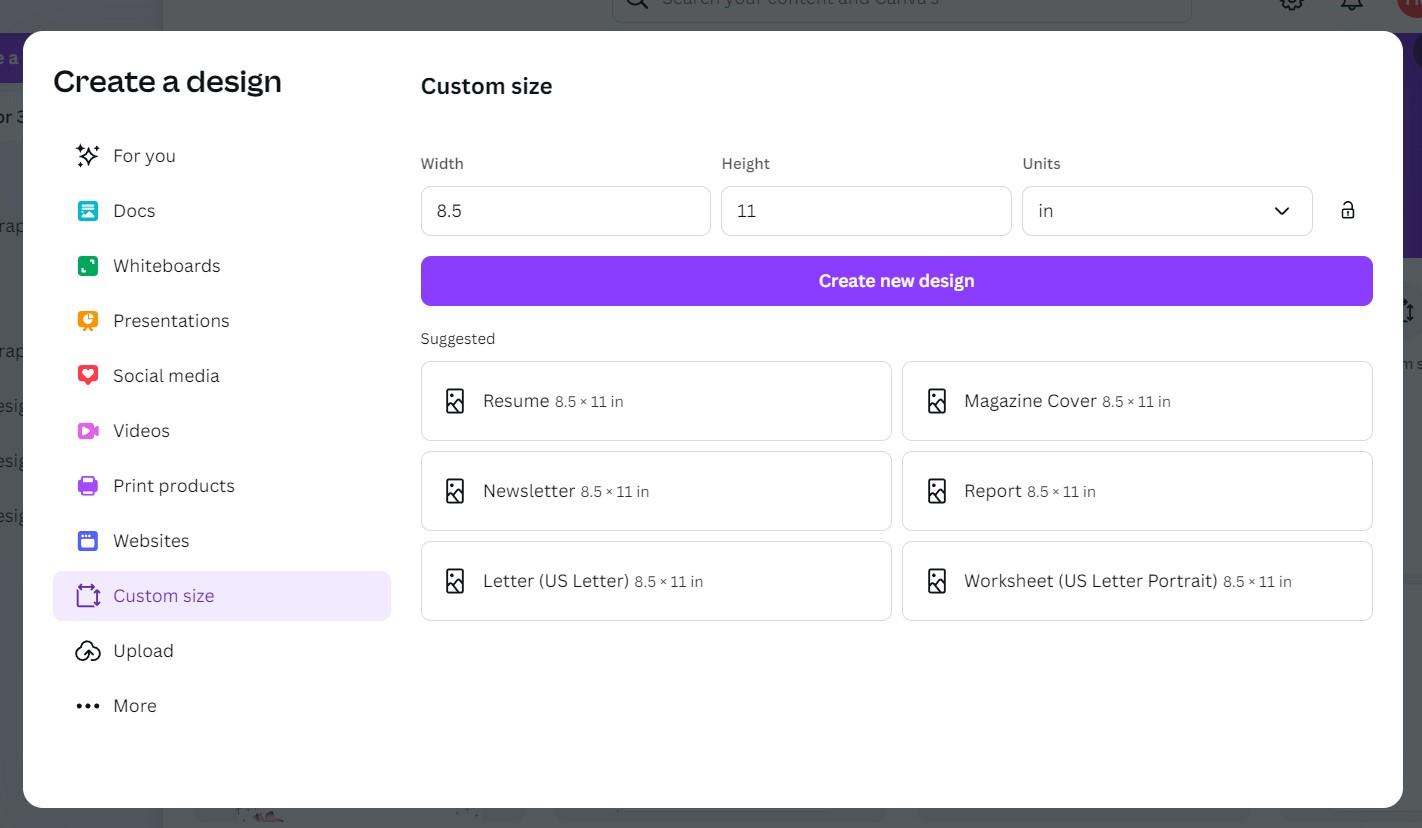
From the left side menu bar, choose "Custom Size" and input your width and height. For regular stationery, I chose 8.5" for the width and 11" for the height. You'll need to change the units to "in" from the dropdown box. Click on the "Create New Design" box underneath the dimensions.
Create Your Stationery Border
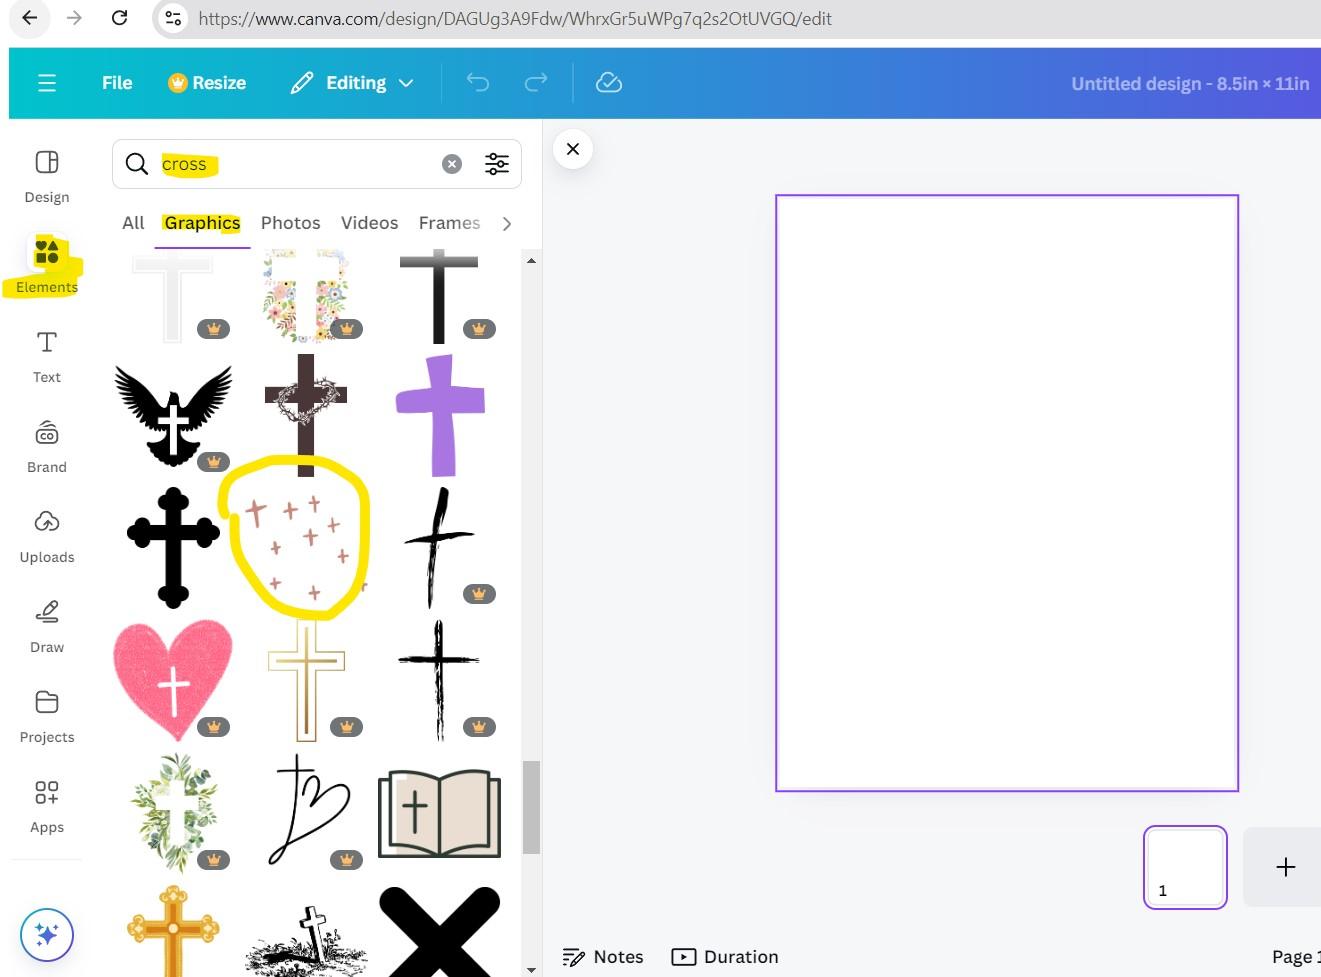
From the left menu, click on the "Elements" logo. Type in the search bar whatever it is you're looking for to be your stationery border. I chose to search for crosses. After entering your search word, click on the "Graphics" selection just below the search bar. This will pull up a ton of graphics of crosses to use! There are a lot of free options (no crown emblem beside the graphic), but if you purchase Canva, you'll have a whole lot more!!! When you find your border graphic, click on it to add it to your blank stationery page. From this point, you can make adjustments to the size of your graphic. Just click on one of the 4 circles on the edge of your graphic and pull inward or outward to make your graphic smaller or larger. Once you have it appropriately sized, right click on the center of your graphic (continuously holding down the left click button) and drag your graphic to the upper left corner of your paper. This will start your border design!
Complete Your Border and Add to the Design
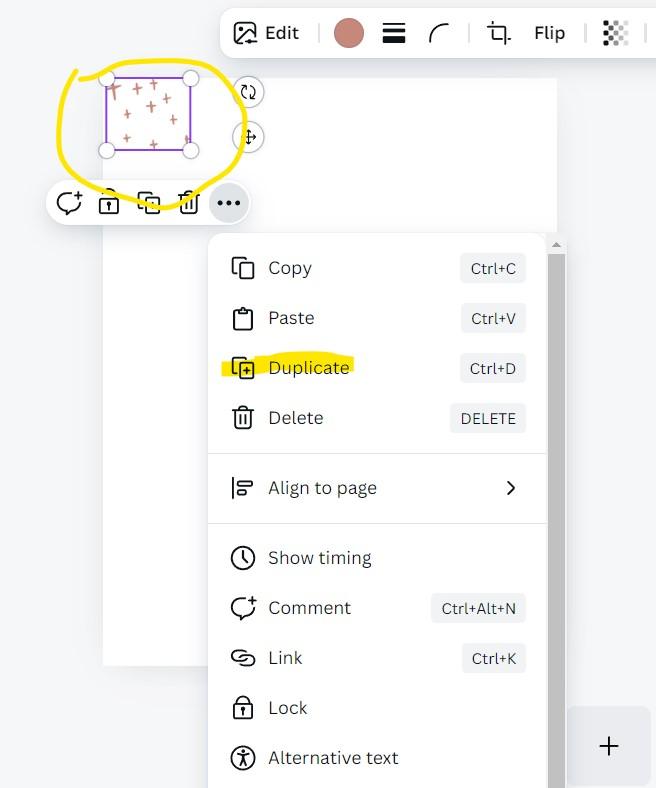
Click on your graphic to highlight it. This will bring back up the 4 circles. Now right click inside the graphic box and choose "Duplicate." This will add a 2nd exact copy of the first graphic. You can now repeat the step of dragging your graphic to place it to the right of the first graphic or underneath the first graphic. You are now building your border! Continue repeating this step until you have a complete stationery border.
**Tip: Once you have done the first duplicate step, you can simply hold down your CTRL + D as a shortcut to duplicate your graphic. You can do this once or 50 times! It saves a lot of time! :)
Add More Decor to Your Stationery
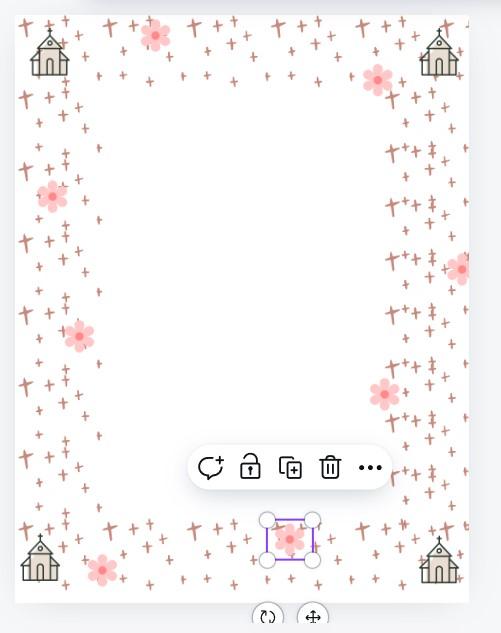
Repeat step 3 above and add any additional graphics or "flair" to your stationery design. I chose an adorable little church and pretty pink flower. Your imagination is your key tool here....be as creative as you want!!! If you add something and change your mind, simply left click on your graphic and click on the little trash can icon that pops up underneath your graphic to delete it.
Save Your Project and Enjoy Your New Stationery!
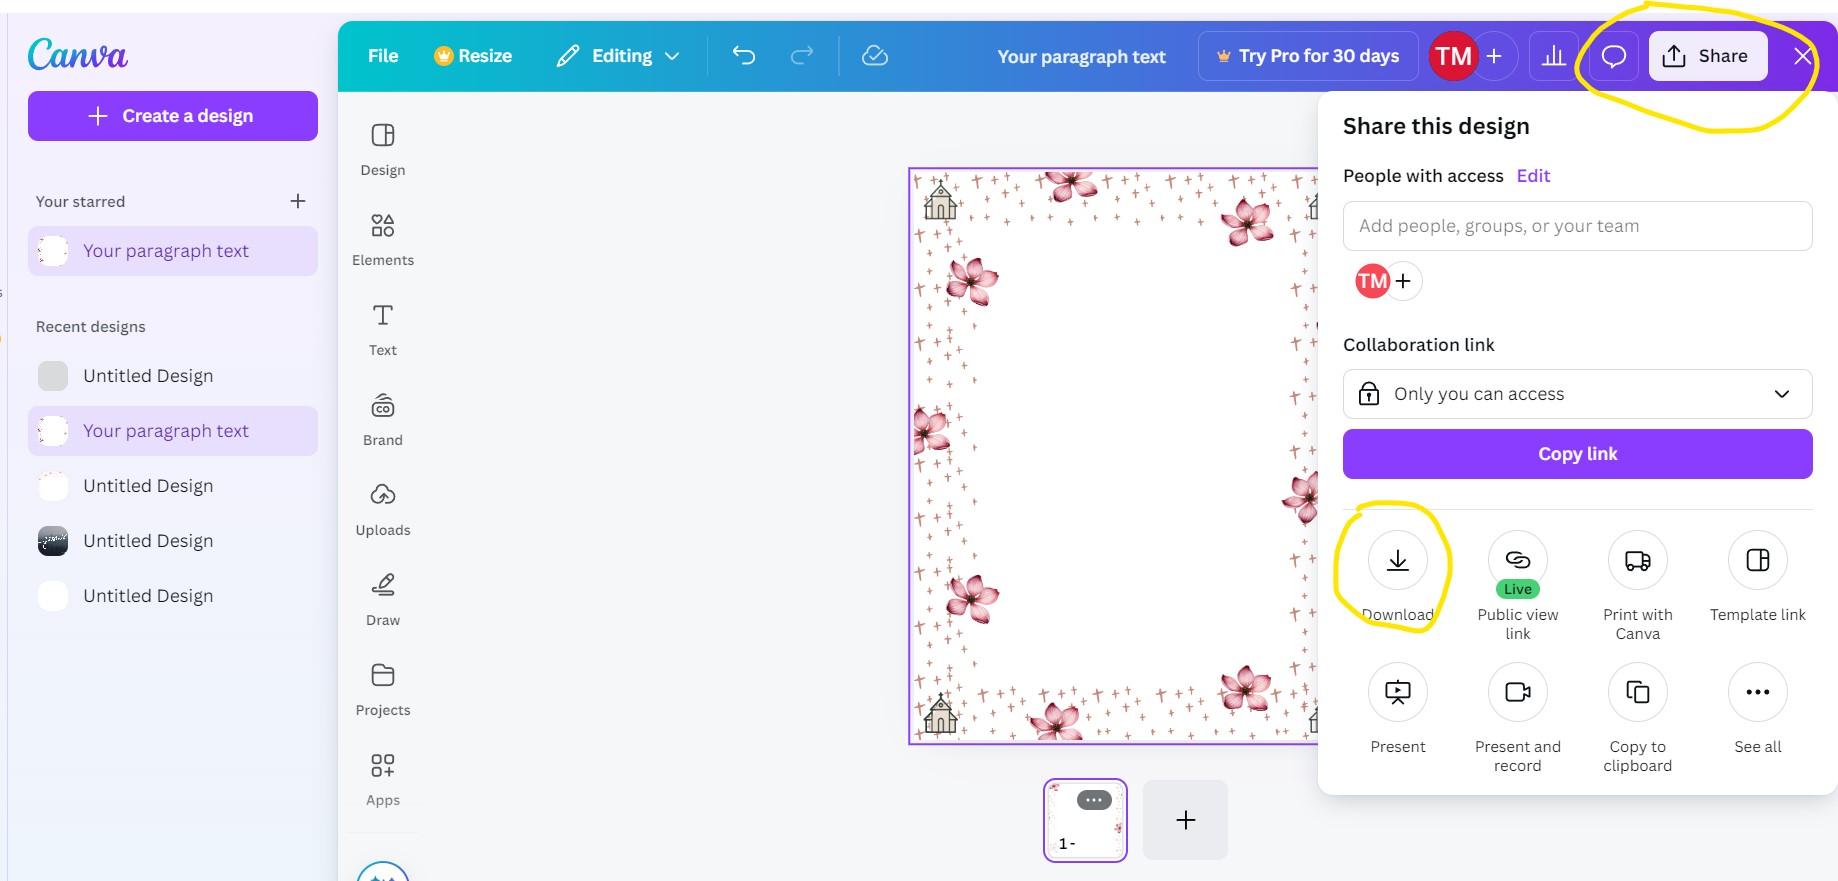
Once you have your custom stationery perfected to your liking, it's time to save it for easy access any time you'd like to use it or email it to a friend to use! Simply click on "Share" in the upper right hand corner of CANVA and then the "Download" button at the bottom of that box. This will give you the option of file type (I choose to leave it as the suggest PNG file", as well as a custom size (I left it as what was already there) and to make any additional final changes. When done, click on the purple "Download" button. This will save your new stationery design to wherever your computer downloads automatically go. Usually, it's just in the computer's "downloads" folder. From here, you can rename your stationery and print it out for personal use, or email it as a link so a friend or family member can use!
Write Someone a Letter and Enjoy Your Snacks!
Think of who may enjoy a nice little handwritten note on charming stationery. Who comes to mind? Not sure? Eat some of your snacks and think on it for a bit! Write that letter! <3