Chain Reaction Workshop Elements
by tinkeringstudio in Workshop > Tools
9530 Views, 32 Favorites, 0 Comments
Chain Reaction Workshop Elements


Chain reaction is an intuitively simple concept, but one that allows for an incredibly complex and deep investigation into the relationship between cause and effect. In the Tinkering Studio, a chain reaction is always built as a collective contraption; each participant is given a chunk of real estate on a table onto which to build a sequence of events. The only constraint is that it has to set off the machine built by the next participant. In the end, this results in a continuous chain reaction that goes from start to finish seamlessly, with each section having been contributed by a different participant.
In our workshop, we offer a wide variety of materials for participants to use when building their piece of the chain reaction. Some of the more common elements involve physical motion (ramps, tracks, balls, blocks), electrical parts (battery packs, motors, fans, aluminum foil), inspirational objects (roller skates, traffic cones, giant foam fingers, drawing figures) as well as objects chosen to fit a theme.
Special Parts


In addition to a collection of evocative materials, we have also constructed some custom parts to help builders accomplish their goals for the chain reaction section.
These special chain reaction elements are grouped into the categories of electrical parts, swings, and stands. They can be thought of as elements to be customized to fit your workshop needs and should be adjusted accordingly. This guide also shows how to make several other pieces such as connecting blocks, a table spanner, and ideas for a finale which can all contribute to the environment and activity design of the workshop.
Gather These Materials
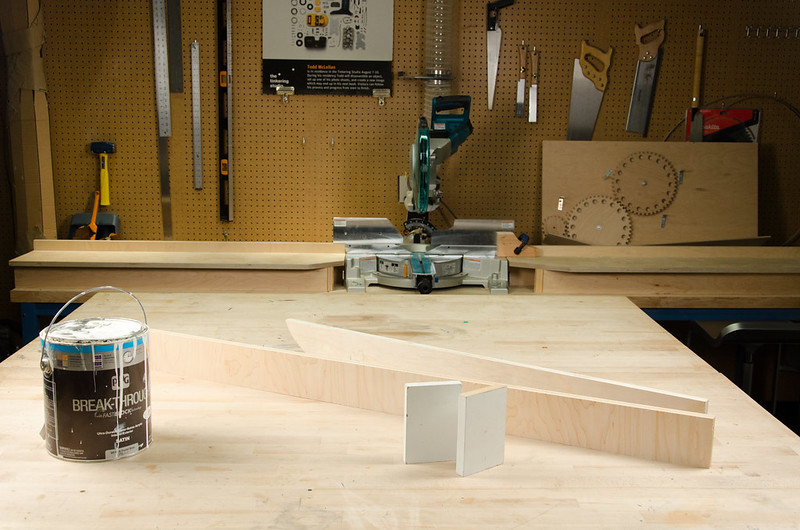
connecting blocks
1x4 plywood board
white paint

Electronic
Old mechanical toys (mechanical plush animals, dancing santas, and more) NOTE: Thrift stores are a great resource for finding interesting toys to take apart; give them a good clean when you get home
4.5V and 6V battery packs - http://www.jameco.com/webapp/wcs/stores/servlet/Pr... - http://www.jameco.com/webapp/wcs/stores/servlet/Pr...
Alligator Clip Leads - https://www.sparkfun.com/products/12978
Wooden Blocks
Heat shrink tubing
Extra coated wire
Copper nails
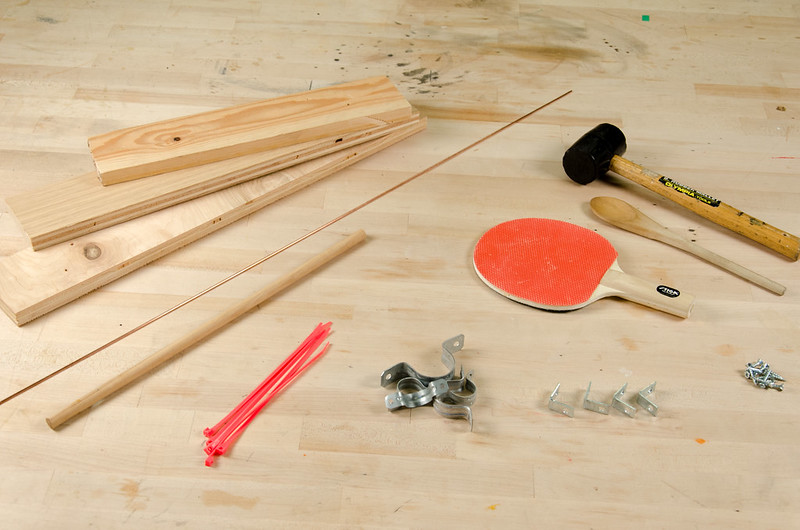
Swings
Objects that can swing (ping-pong paddles, mallets, wooden spoons, rulers, etc)
1 x 4 plywood board
1/4 in. dowel
'L brackets'
Small wood screws
Zip-ties
Pipe clamp
Welding rod
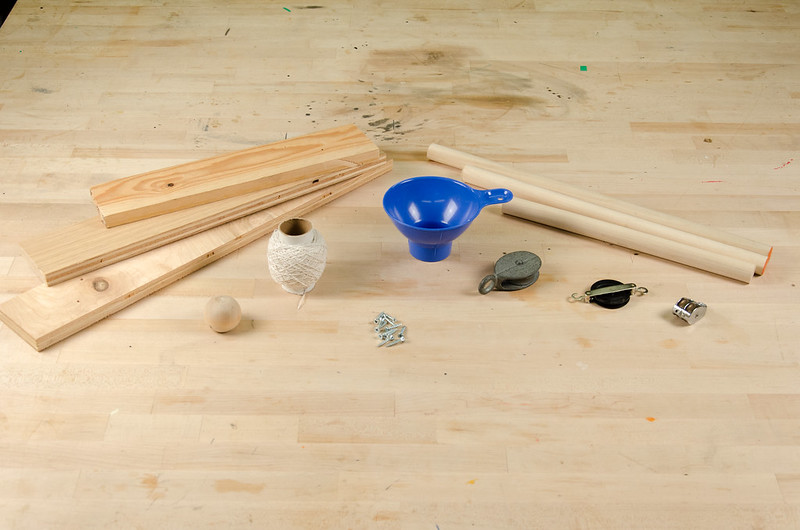
Stands
1x4 plywood board
1in wooden dowel
Funnels or traffic cones with handles
String
Wooden balls
Metal Pulleys
Wood screws
Nails
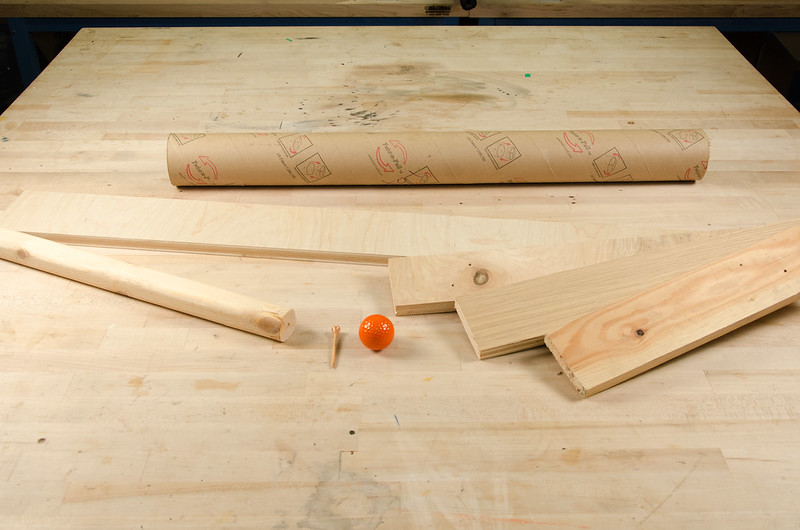
Table Spanner
1x4 plywood board
cardboard poster tube
Golf ball
Golf tee
Find These Tools
Attaching
Soldering iron
Solder
Hot glue gun
Hot glue sticks
Power drill or drill press
Drill bit
Driver bit
Screw driver
Hammer
Mallet
Heat gun
Wood glue
Cutting
Scissors
Exacto knife
Utility knife
Chop saw or hand saw
Band saw
Scroll saw or coping saw
Sanding paper
Wire cutter
Wire stripper
Safety
Googles
Clamps
Vice
Connector Blocks
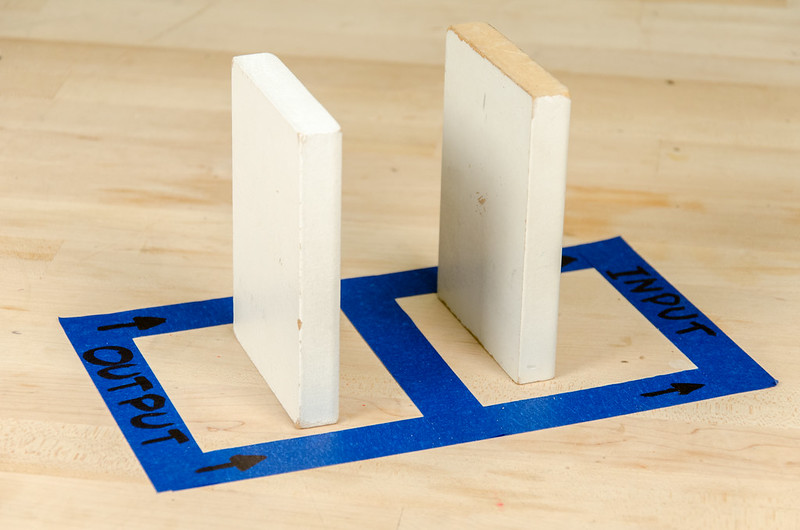
When we prepare the chain reaction workshop, we like to provide participants with a set 'input' and 'output' on each table. These starting and ending points help to give a frame for each person's inventive building. The system allows groups to focus on their section and not worry as much about how to connect to the people behind and in front of them. The blocks can trigger switches, knock balls down ramps, pull strings and more.
To build the blocks:
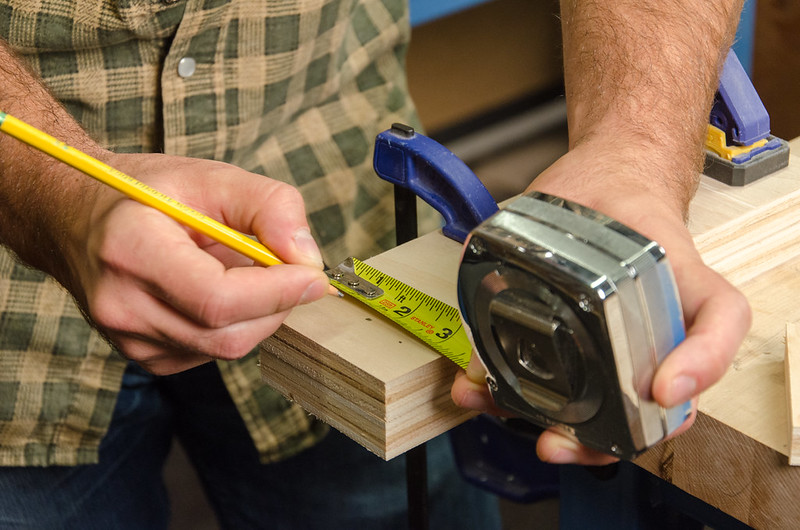
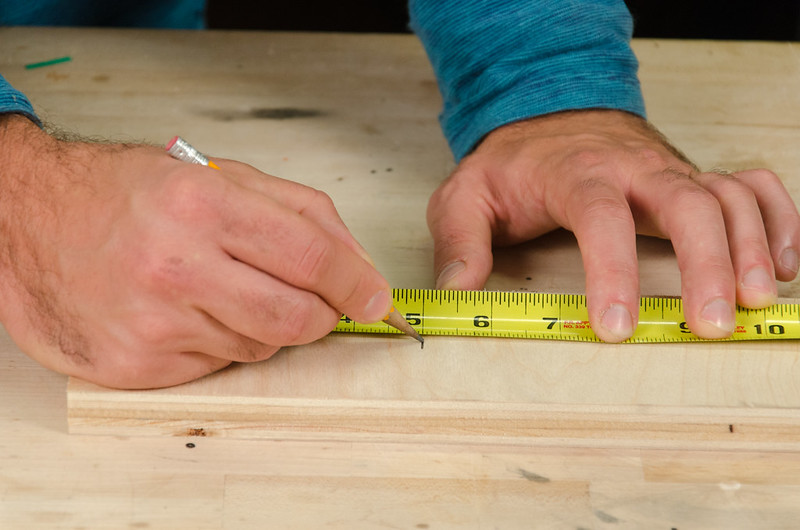 Get the 1x4 board and mark 5 in. pieces
 Cut along the marks
Sand them as necessary so that they can stand up
 If you like, you can paint these pieces white so they stand out from the other wooden elements in the chain reaction set
As you are setting up for the activity, you can make a rectangle out of masking tape as a set area for the blocks where ever you want the transition between the sections. Draw an arrow on the tape with a sharpie so that people remember the direction of the machine.
Electronic Parts

Having electronic parts mounted in sturdy ways can help to encourage learners to move from simply connecting physical objects to incorporating circuits and switches into their creation.
Prep the toy
Get a singing/dancing toy.
Using the exacto blade and scissors, cut away the skin and remove the stuffing from the toy. As you dissect, work carefully so as not to cut any wires hidden just below the surface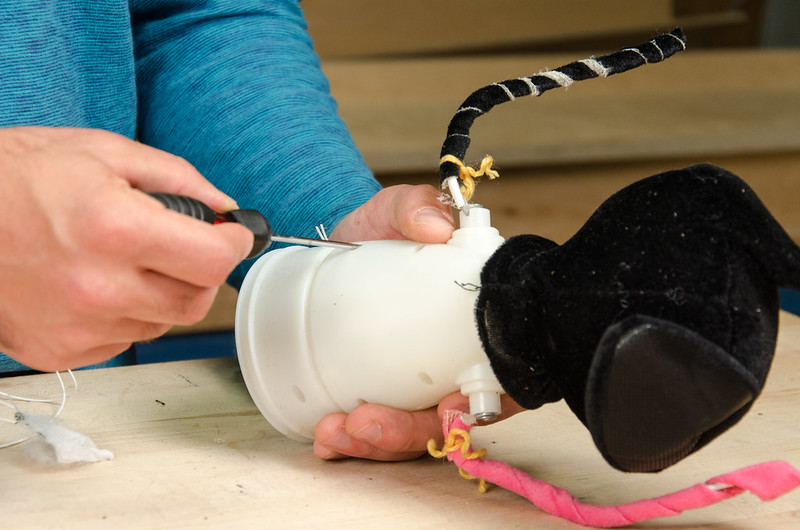
Once the fur and stuffing is removed, unscrew or cut the body so that you can see the electronic components. 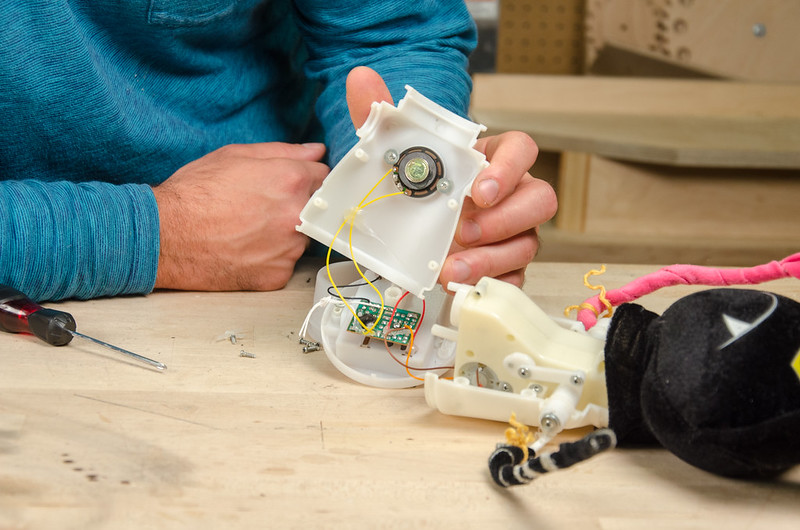 Trace the wires to discover what elements they control.
Cut off the wires leading to the battery pack and the switch (usually in the hand or foot).
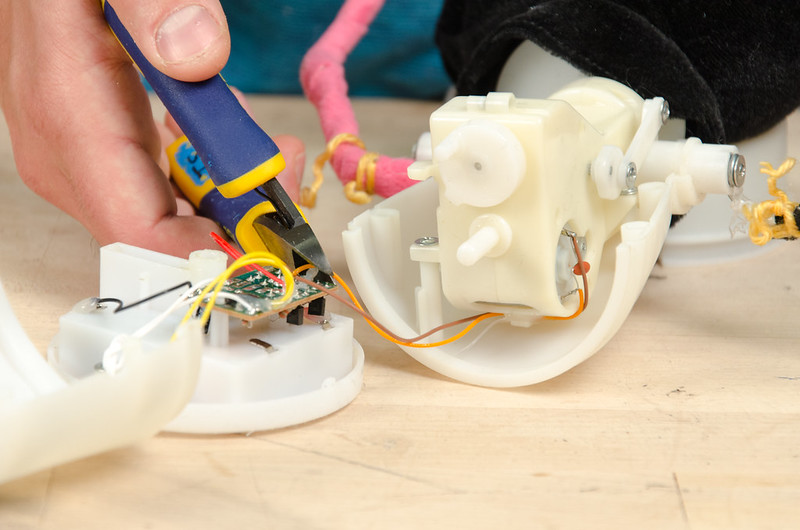 Find the motor that you want to activate (sometimes there's more than one), cut the wires close to the circuit board (away from the motor) and strip the ends of the leads.
 You might have to solder on more of the coated wire to extend the leads.
 Carefully put the toy back together so that the wire leads extend outside the plastic body.
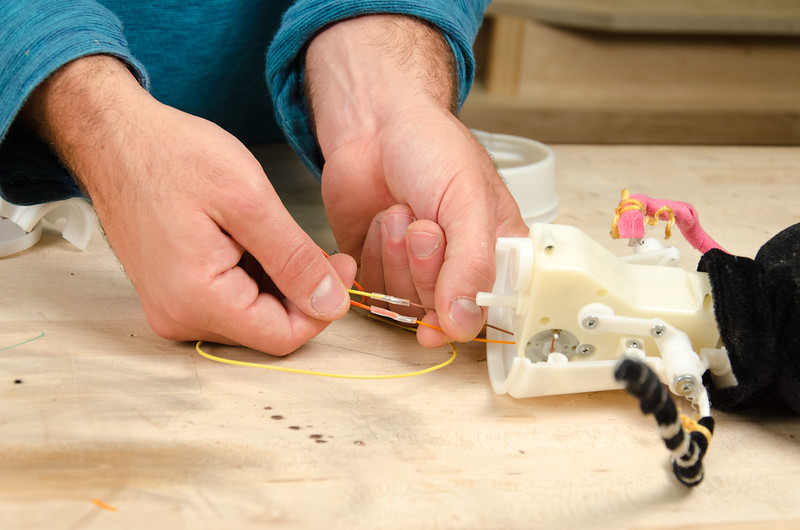
Mounted Toys
If there's no 'feet' for the toy to walk on it's own, it may be best to mount the moving part of the toy on a block of wood with nails for stability and ease of connection.
Cut and sand a block of wood to be about two times larger than the part that will be mounted on it.
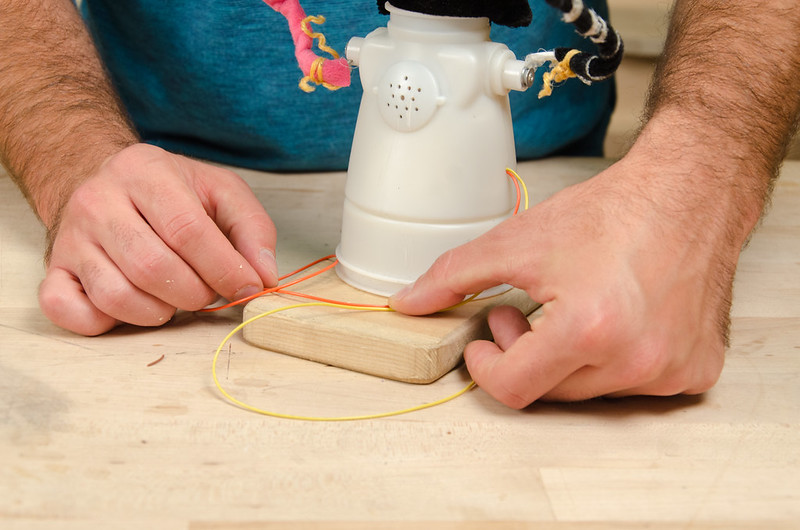 Figure out the best orientation for mounting the electronic part on the block. You may need to drill a hole and tie a zip-tie, or you may have to devise another method of mounting.
Pound two copper nails into the block near the front of the toy.
Solder the leads of the wires to the nails.
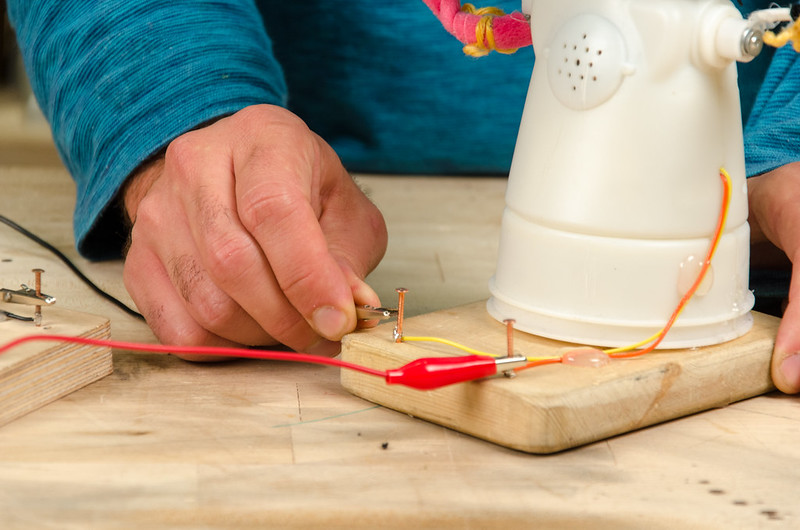 Put a drops of hot melt glue on top of the wires somewhere in the middle to help prevent them from breaking during use.
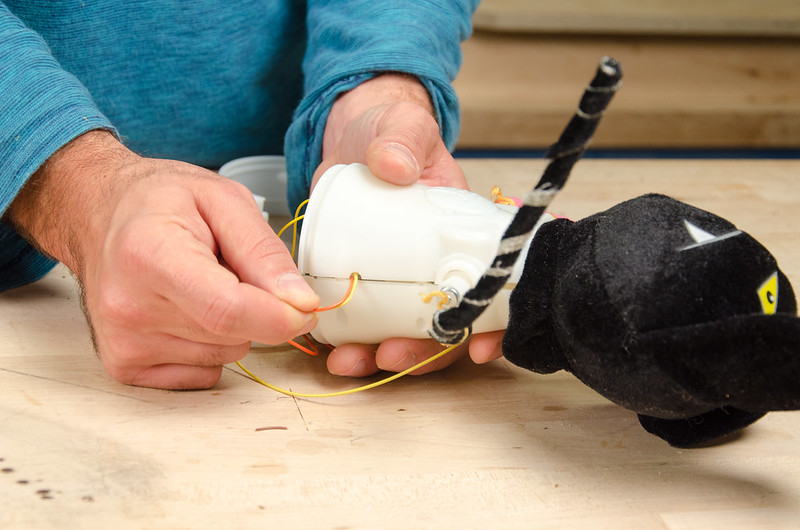
Moving Toys
If the parts remaining include 'feet' that allow the toy to stand on it's own, it's best to prepare so that the toy "walks"
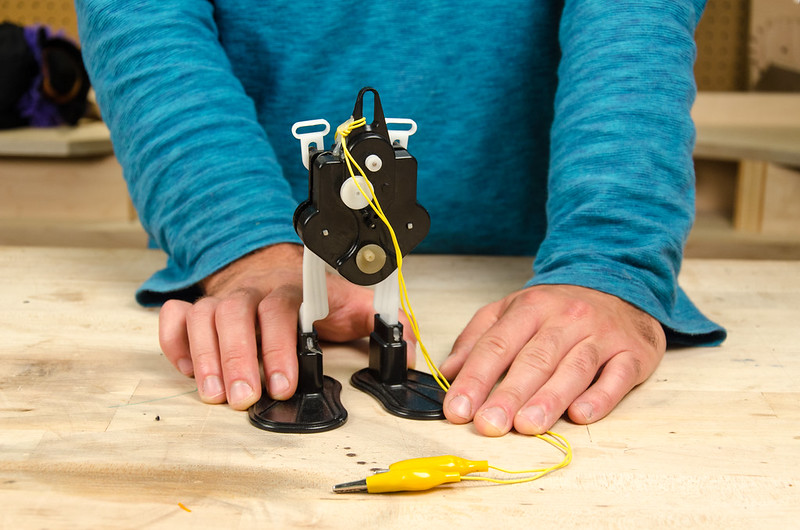
Take an alligator clip wire and cut off one of the clips.
Strip the end of the wire and solder it to one end of the wire connected to the motor.
Repeat for the other side of the motor.
Battery Packs
You can also mount battery packs on blocks of wood in a similar way with copper nails. With these extra parts, you can use alligator clips and aluminum foil switches to trigger the electronic movements as parts of the chain reaction.
Swinging Elements

Many elements like mallets, ping-pong paddles, and kitchen utensils work best in the chain reaction when they can swing freely.
Prepare the base
Cut a piece of the board that is about 6 in longer than your object is wide.
Cut two more equal sized pieces to be a few inches taller than the element that you want to mount.
Set aside the piece for the base and clamp the two other boards together. 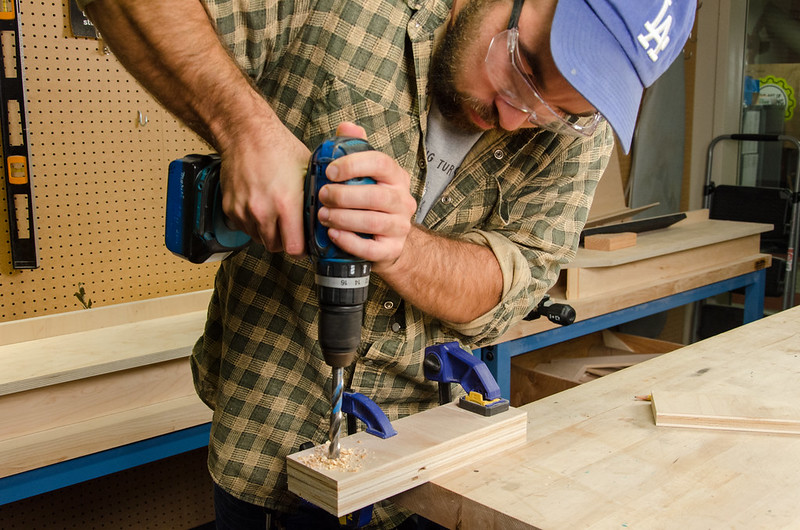
Drill a 1/4in hole in the center of the boards about 1in from the top.
Cut the dowel to be at least 4 inches longer than the width of the object that you want to mount. 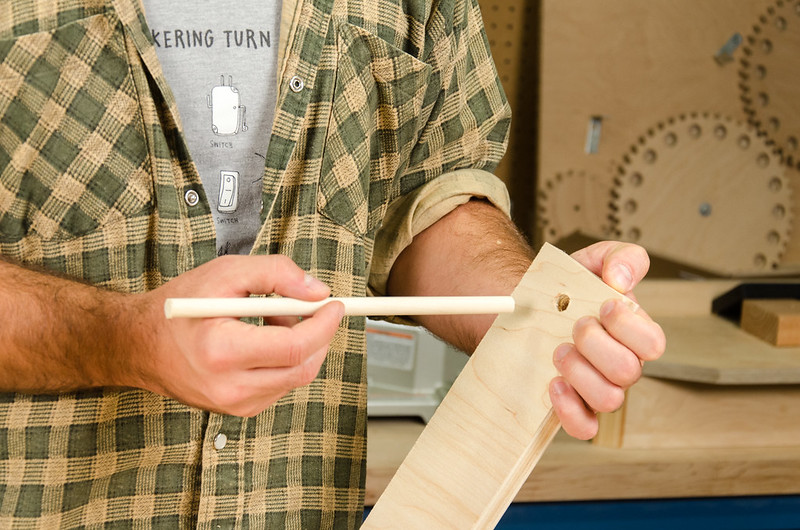
Press fit the dowel into the two holes and add a bit of wood glue.
Prepare the swinging object
Hold the object on the dowel at the proper height 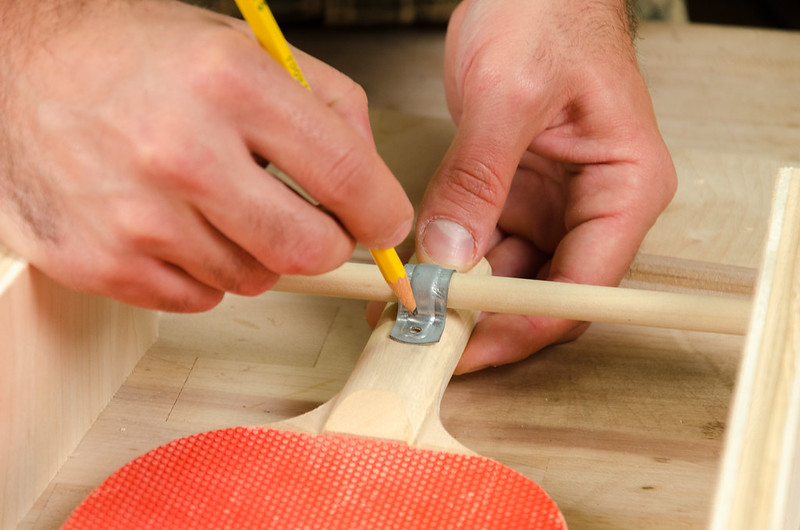 Place the pipe clamp on the handle of the object and mark the place of the two holes.
Drill the two holes about 1/2 in deep.
 Place the object next to the dowel and screw the pipe clamp in place over the dowel.
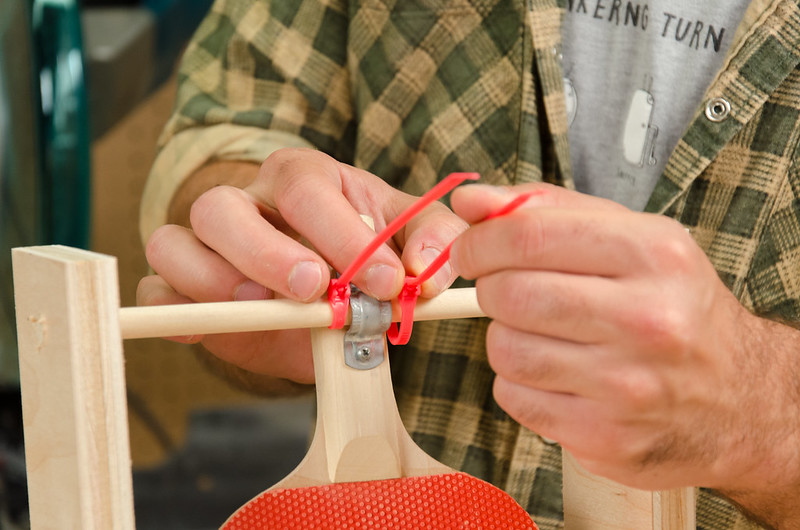 Tie two zip ties close to the pipe clamp so that the object can't move side-to-side but can still swing freely.
Cut off the ends of the zip ties.
Finish the construction
Place the swinging object with the two side pieces in the center of the base board
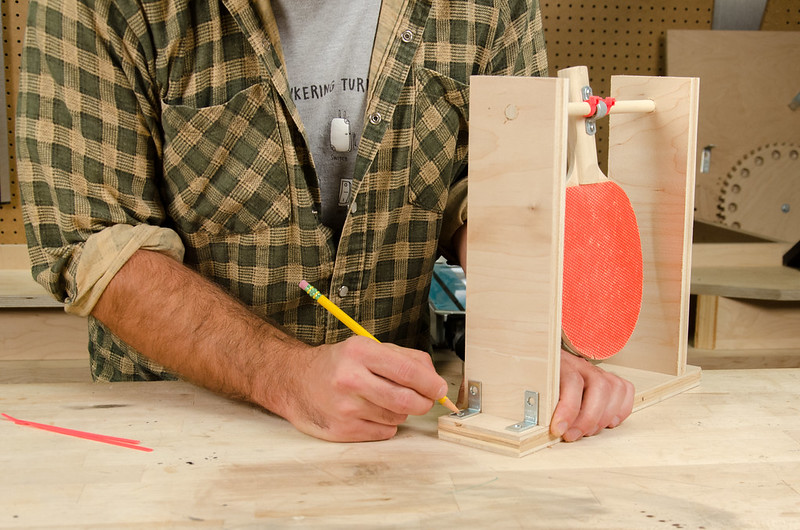
Put the L brackets in place and mark the spots for the screws
Drill pilot holes and screw the brackets in place so that everything is attached together
For thinner objects
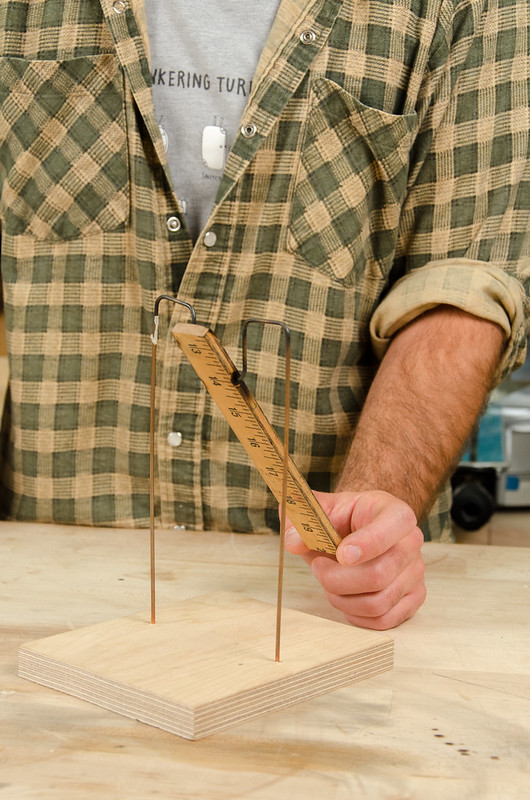
For skinnier objects (rulers, kitchen utensils), drill a small hole crosswise through the handle
Thread a piece of welding rod through the hole once the object is in the middle, use the pliers to bend the wire up on each side.
At the top of the object bend the wire out at 90 degree angle and then bend the wire back down.
Repeat for other side
Mark where the wire touches on a block of wood
Drill two holes and press the wire into them
Make sure that the object can swing freely
Add Some Height
A chain reaction typically moves horizontally across the table, but it's helpful to have the option to add some height to each section.
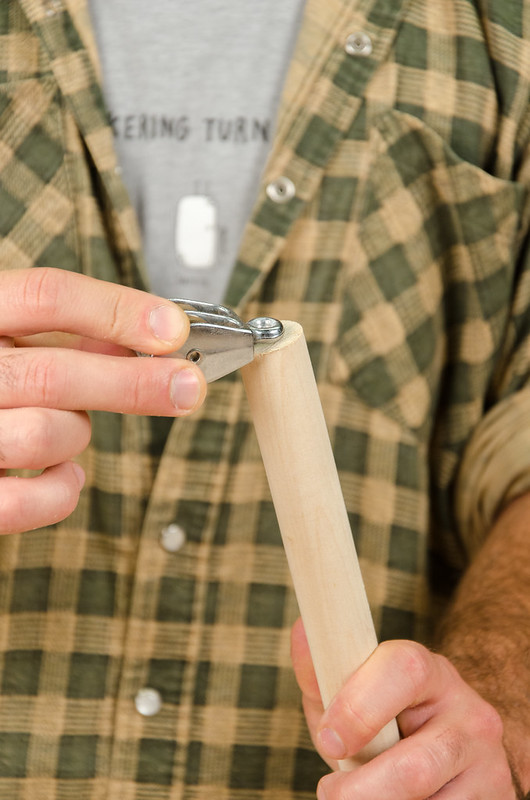
Build the stand
Cut a block of the 1/2 in ply approx 4 inches long.
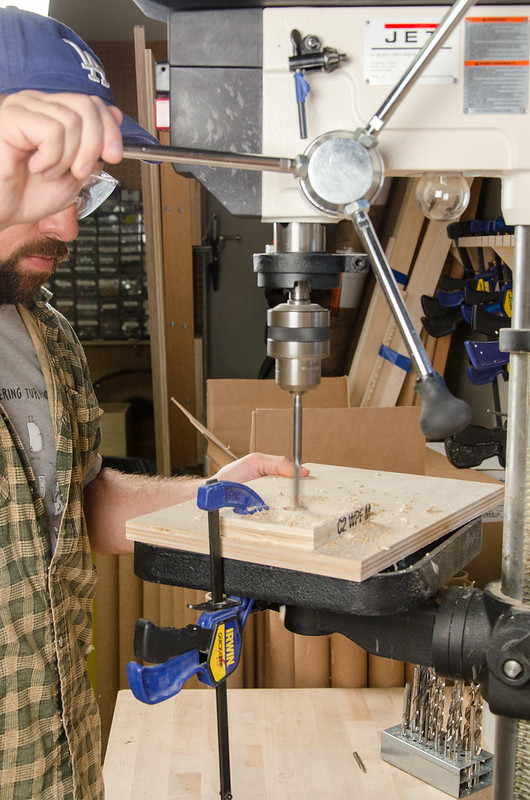
Clamp the wood down and use the power drill (or a drill press) to make a hole in the center that is the same size as your dowel.
Cut the dowel approximately 18 in 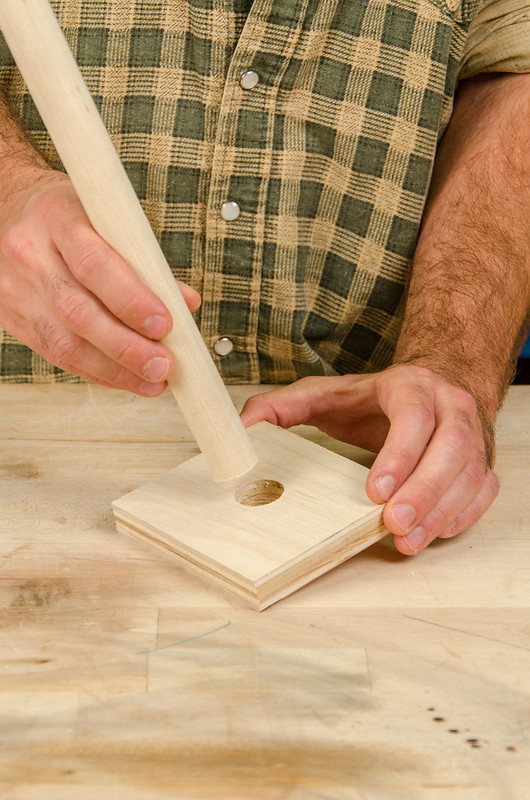
Put a bit of wood glue in the hole and press fit the dowel in the hole.
Add a funnel
Get a plastic funnel with a handle.
Drill a hole through the center of the handle 
Screw the funnel to the top of the dowel
Add a pulley
Using a screw or a hook, attach the metal pulley to the top of the stand
Swinging ball
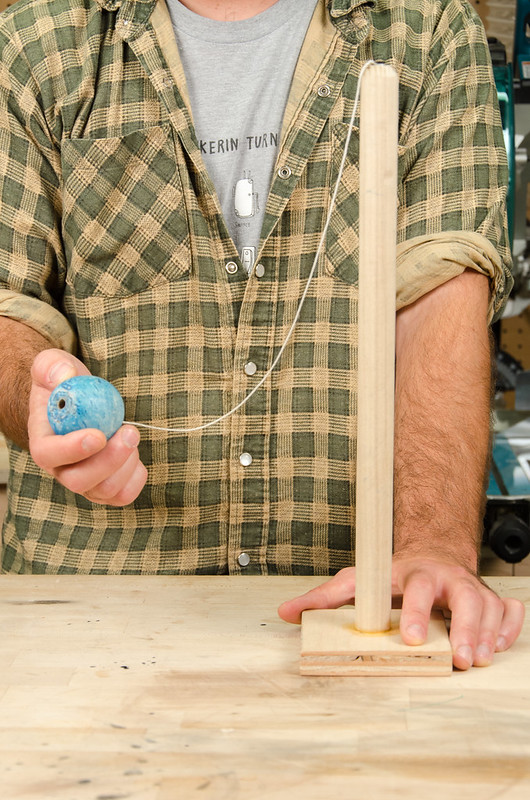
Drill a wood screw into the top of the dowel
Tie a piece of string around the screw
Drill a hole into a wooden ball and thread the other end of the string through
Put a dab of hot glue on the end of the hole to keep it in place
Table Spanner
Depending on the set-up in your makerspace or classroom, it might be helpful to create a break in the tables. This allows facilitators to easily move around the room and participants to access materials in a central location.
It can be a good challenge to get the groups to figure out their own unique way of bridging the gap, but if that seems too complicated, we like to have a sturdy and reliable spanner on hand.
A 3 ft. table spanner works well so that people can easily move through a gap in the tables.
Prepare the tube
Cut the poster tube to 36 inches in length 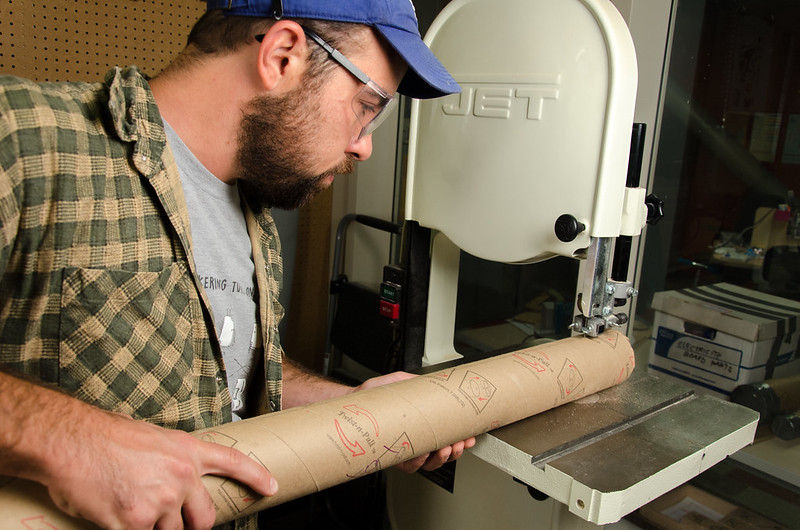
Use the band saw to cut the tube in half crosswise
NOTE: This part of the project is much easier with a band saw.
Cut the supports
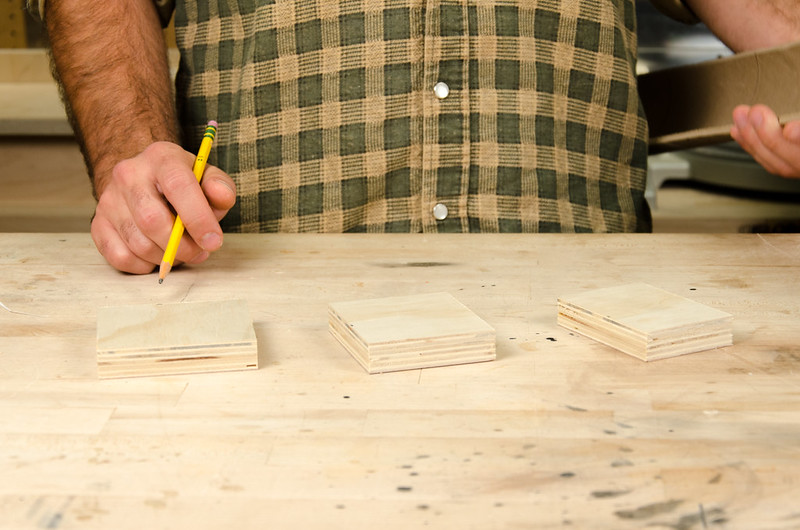
Cut three pieces of wood from the board in lengths of 2.5in, 3in, and 3.5in 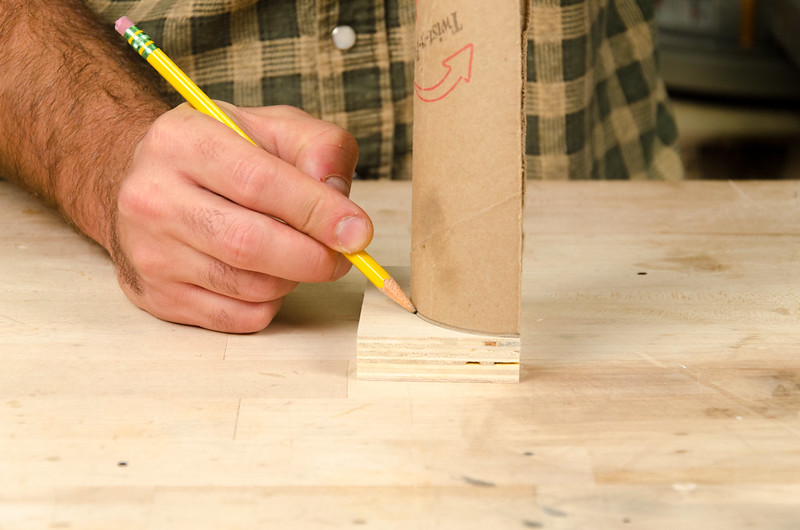
Line up the half piece of cardboard tube on the blocks and mark the curve 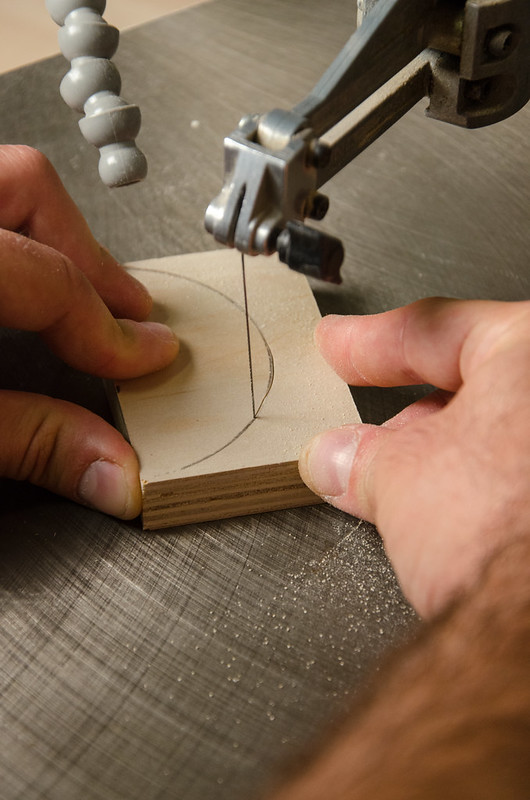
Use a scroll saw or a coping saw to cut along the lines
Assemble the Spanner
Cut a 42 in piece of the plywood board
Use screws and wood glue to attach the supports at even intervals starting about 6 in from the front of the board.
If you want, you can use small nails to hold the tube in place by nailing the tube to the supports
Drill a small hole the same diameter as your golf tee in the board in front of the high side of the track
Pound a golf tee into the hole
Rest a golf ball on the tee
When the ending block knocks the golf ball off the tee, it will roll across the tube and start the next element of the chain reaction. 
This may need some tweaking to perfect, but once you get it aligned is a really nice way to fill a gap in the tables of your chain reaction machine
Finale Ideas


It's nice to have a finale for the last table of the chain reaction. Here are a few that we've experimented with in the Tinkering Studio. Be creative with possible chain reaction finales; they can be part of a theme, draw people from the outside in, and add a sense of storytelling to the entire project.
Alarm Clock
A simple battery powered alarm clock wired so that the final block can trigger a switch to ring the buzzer. This small 'finale' is good for a low-key workshop in a classroom or maker space.
"Springles"
We bought a bunch of snakes in a can and took out the 'spring snakes' and pressed them into an empty pringles tube. Nicole built a spring powered system to release the snakes when a weight gets knocked off the table.This is the everyday finale in our Tinkering Studio workshop space.
Ping-Pong Launcher
In this contraption, a switch turns on a slow moving motor which releases a bowling ball down a chute, flinging ping-pong balls out of spoons on it's way down. We've used this finale at Maker Faire and for other festivals to involve a large crowd in the set-off.
Putting It All Together


With this set of collected objects and constructed elements, it's possible to create a space where people can collaboratively work toward building a large chain reaction machine.
There are a couple things that are helpful to keep in mind when setting up the environment for the workshop:
Groups of two or three people is a good number to work together on each section. Try to set up the tables in an interesting arrangement so that there's space for the participants to build comfortably. If it's possible, we like to ask people to start at every other table so that there's even more room in the space.
We like to place one evocative object in the center of each section and give people the prompt of building a machine that starts from the initial block and knocks down the final block while incorporating the 'special' element. This can help people who have a hard time deciding 'what to do first' get going with their process of constructing.
Chain reaction might feel a little bit different from some other tinkering activities as there is a set time period or moment where all tables need to be finished for the test run. Facilitation plays a big part in making sure the set off can happen at the right time. We often encourage people to be very ambitious at the start, but are ready to help simplify ideas as the time winds down.
You can find inspiration from many other chain reaction builders. Some of our favorites are Pythagoras Switch, Der Lauf der Dinge, and OK Go's music videos.
Thinking up an interesting theme can go a long way toward getting people invested in the process of building. We've tried love machines, Texas the chain reaction, Pi(e) day, and gift-giving which have all led to some whimsical and complicated creations.