Cayenne Wireless Jukebox

This project creates a cloud based jukebox using MyDevices Cayenne IoT infrastructure with an ESP-12 based Node MCU controller and the JQ6500 MP3 module.
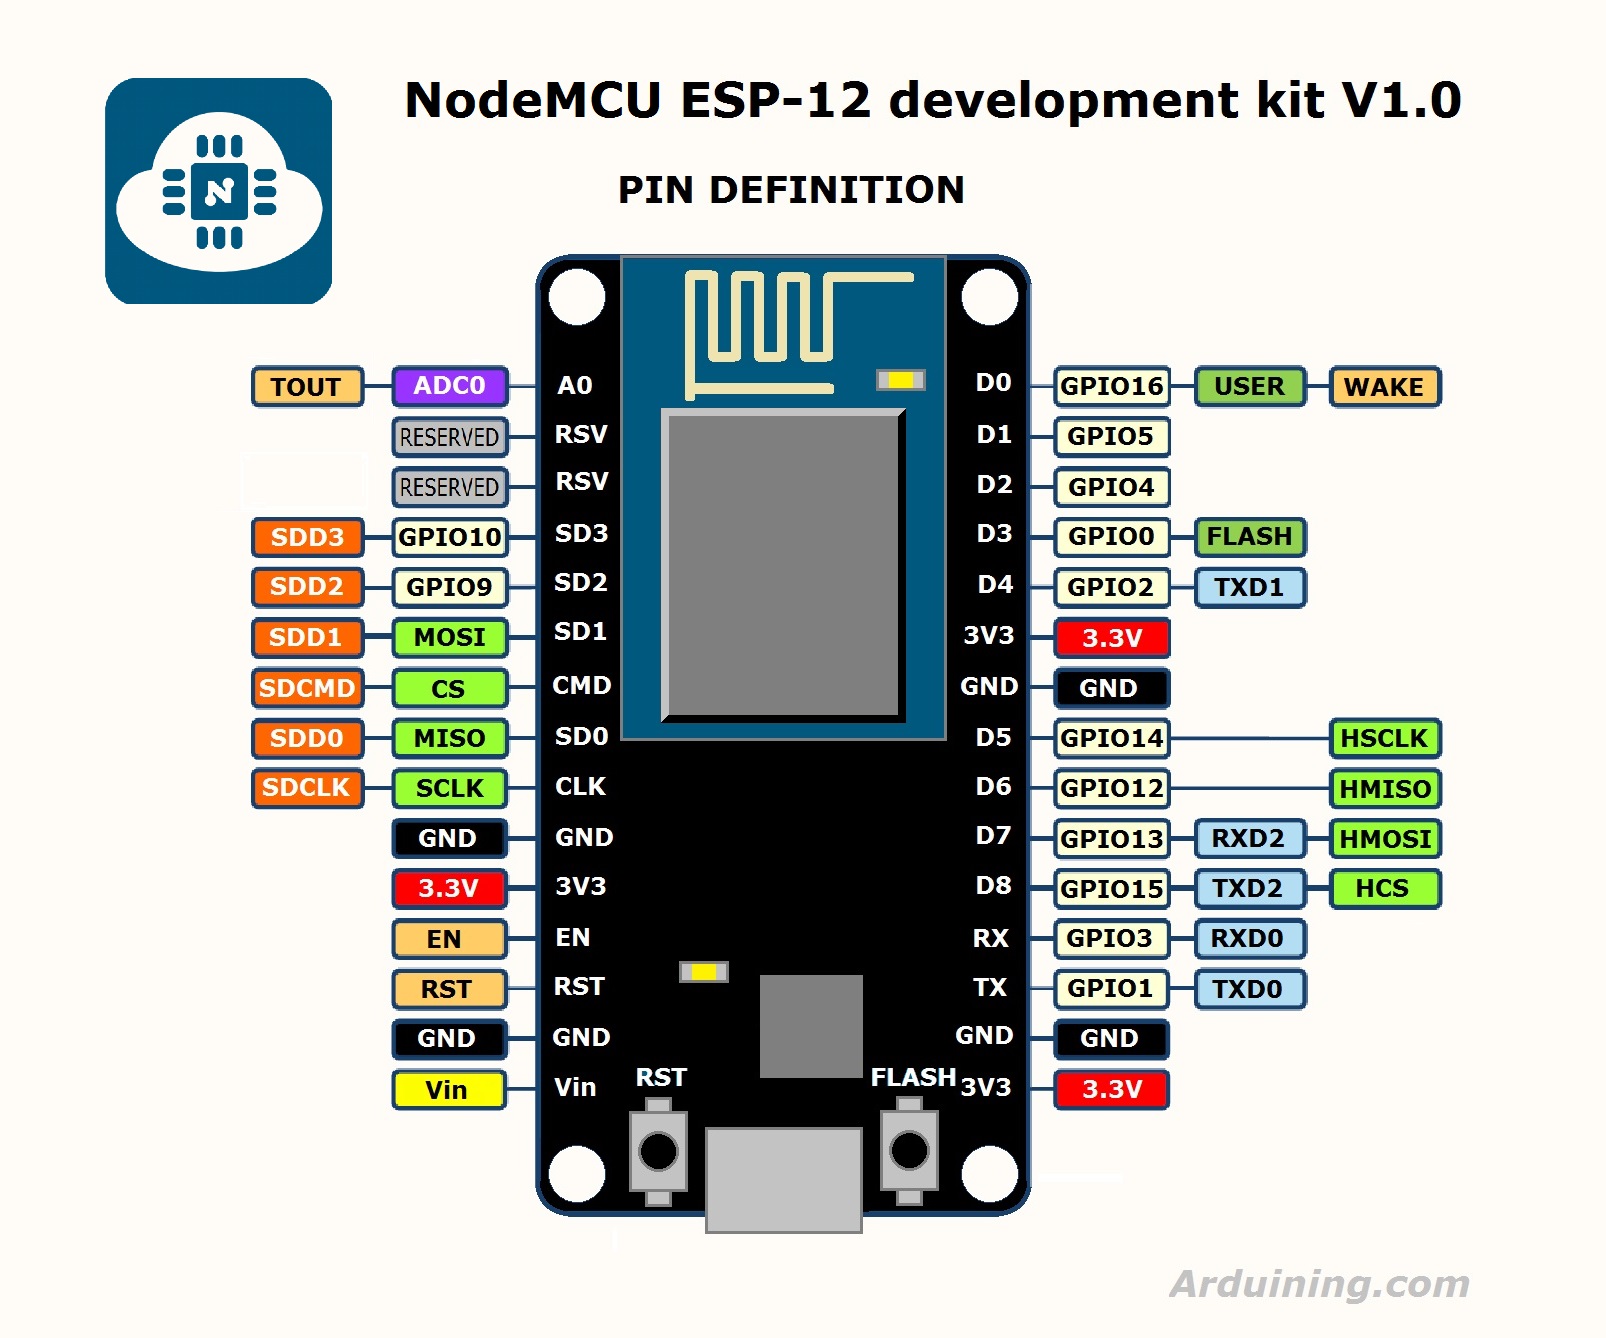
The NodeMCU module includes the serial converter to program the ESP-12 module as well as provide a linear regulator to reduce the voltage to the 3V3 needed.
You will also need a speaker and a microSD card.
Load the micro SD card with some sound files. The following sampling rates are supported: 8 / 11.025 / 12 / 16 / 22.05 / 24/32 / 44.1 / 48 kHz, although my Clash MP3s seemed to play just fine at 128k.
Wiring


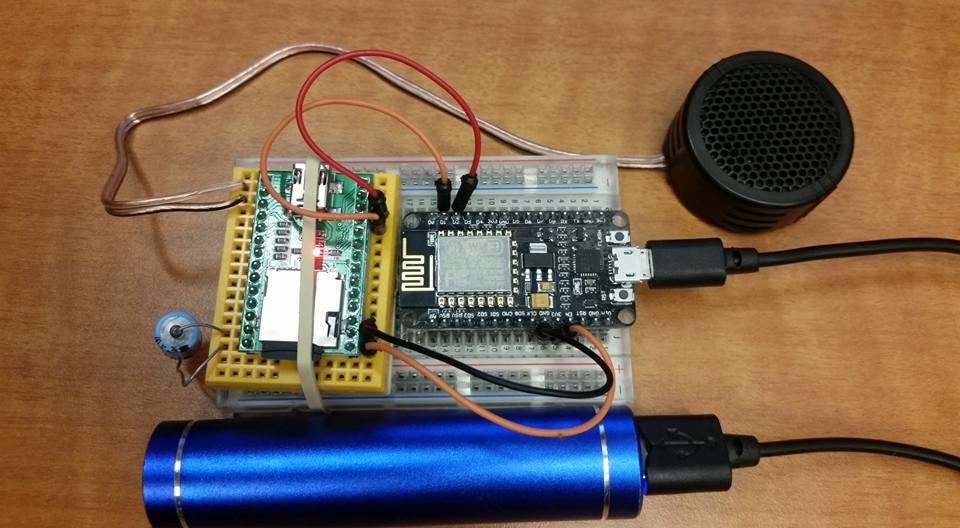
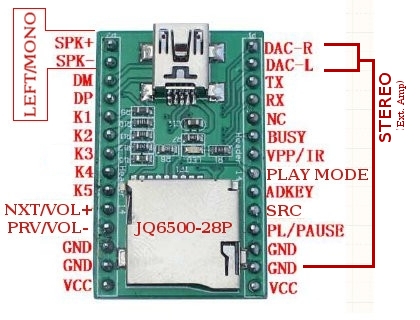
Attach a speaker between the SPK- and SPK+ lines of the JQ6500 module.
Connect 3V3 and GND from the NodeMCU module to VCC and GND on the JQ6500.
Connect D1 and D2 from NodeMCU to RX and TX on the JQ6500. Note D1 and D2 are actually GPIO5 and GPIO4 respectively on the ESP-12 module.
Arduino IDE Setup
The NodeMCU modules come pre-programmed with an AT command set for connecting to Wifi. For this project, the flash is pre-programmed using the Arduino IDE.
To get started, paste this link into the additional board files under preferences: http://arduino.esp8266.com/stable/package_esp8266c...
Now load the ESP stuff by going to the Board Manager and downloading the package that should have shown up.
Next, install the JQ6500 serial library from here.
Finally, install the Cayenne library from here.
Plug in your NodeMCU board and select NodeMCU 1.0 board and serial port.
The Sketch
Create an Arduino device in the Cayenne dashboard, and grab the token. Also, we will need your network ssid and password.
This sketch depends on the software serial library to bit bang the commands to the JQ6500 board and works well on the ESP GPIO pins 4 and 5. Other pins may be possible too, but note many have special functions. Best to avoid them if not necessary.
Also note that the sketch uses virtual functions to send commands and select songs.
Note that the volume function has two ways of scaling the volume output. The module takes volume from 0-30, but the desktop widget provides a value from 0-30000, so needs to be scaled down by a factor of 1000. If using the Android app, scale is from 0-1, outputting 0-1024, so scaling is used to tweak this down to the 0-30 range when the Android dashboard is used. I'm sure this will be fixed in the future, but this is my work around.
See attached sketch.
Downloads
Cayenne Dashboard
Add a Slider from under Custom Widgets, use Virtual register V0, and set the range to 0-30.
Add other Generic Output buttons for Prev(V1), Next(V2), Pause(V3), Play(V4), Fav #1(V5), Fav#2(V6), Fav#3(V7), Fave#4(V8), and Fave#5(V9).
...and Enjoy!