ESP32 IoT Water Heater
by JJ Slabbert in Circuits > Microcontrollers
5649 Views, 7 Favorites, 0 Comments
ESP32 IoT Water Heater
Cayenne IoT geyser (Hot Water tank in the USA) is a power saving device that will assist you to monitor and control your households hot water, even when you are away from home. It will allow you to switch your geyser on and off, schedule it to switch on/off at certain times, measure temperature of the geyser, set maximum save temperatures etc. It is made for high pressure electrical geysers with a single element. It can easily be modified for other geyser configurations like low pressure, dual element etc. My geyser is also installed vertically.
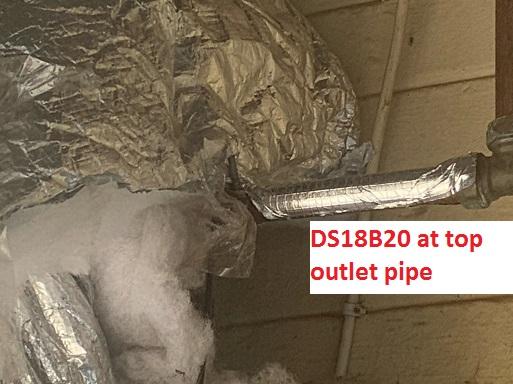
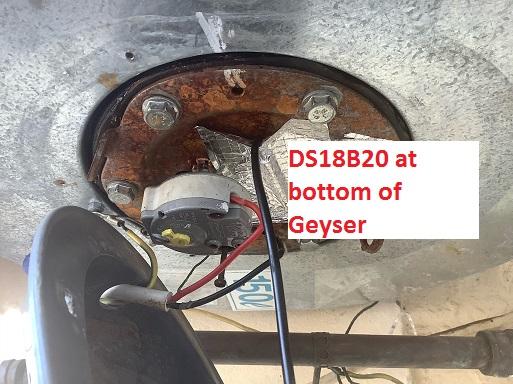
For safety, I kept my mechanical thermostat in its tube. I measure the water temperature with two DS18B20 temp sensors, one attached to the bottom of my geyser, below the element, the other attached to the hot water outlet. You should never remove your mechanical thermostat for safety reasons. Replacing the mechanical thermostat with a electronic sensor can be dangerous, since the sensor or the micro controller (hardware or software may malfunction) and lead to steam explosions which may kill people.
This project involves the connection of a Solid State Relay in serious with your geyser element. You may need an qualified electrician to do it (By Law). Do not work on your AC (Mains) if you are unsure about it.
Your ESP32 will publish data to a service called Cayenne IoT Cloud via MQTT. You will be able to use the Cayenne dashboard to monitor and control your geyser and schedule heating up times.
Supplies
- ESP32 Wemos lolin or any other ESP32. The ESP8266 will also work but the touch pin functionality will not work. An Arduino with WiFi should also do
- Solid State relay (SSR), rated 30 amp or more
- Heatsink for the SSR
- 3 (2 may do) Dalas semiconductor temperature sensors, DS18B20.
- Casing
- Some jumper cables
- Electrical cables suitable for the current of your geyser
- Terminal blocks
- USB power supply for the ESP32
- Lithium battery to power the ESP32 if mains is of.
Skills Required
ESP32 Programing in Arduino IDE, installing libraries
Basic electronics
Knowledge of mains (Normally AC 110 - 240 volt)
Some knowledge of cayenne.mydevices.com
Thermo Profile of Geysers and Sensor Placement
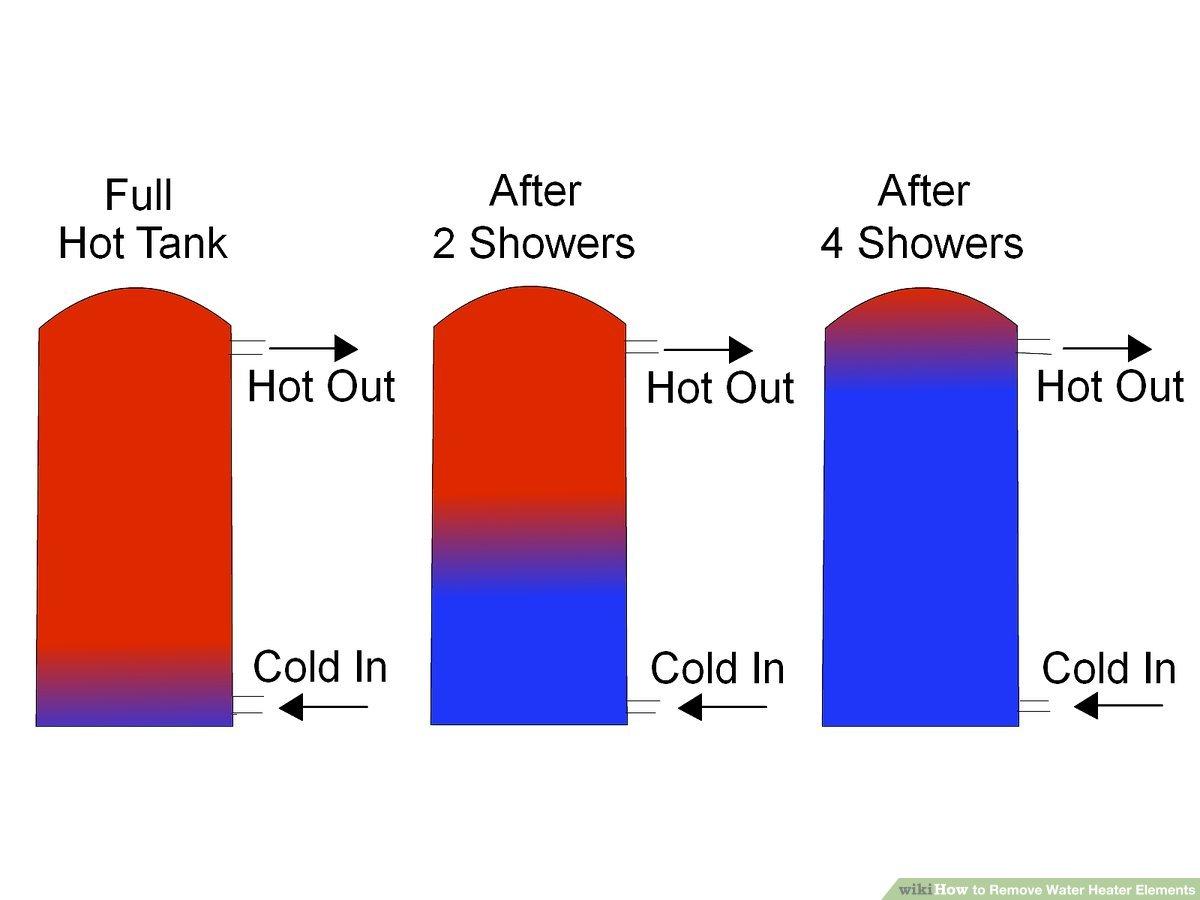

Hot water have a lower density than cold water. Therefore the water at the top of the tank will be hotter than the water at the bottom of the tank since the hot water will rise. The geyser outlet is also normally at the top and the inlet at the bottom which further contribute to the heat profile.
In my project, I used three temperature sensors. One at the bottom, one at the top and an ambient temperature sensor. Based on a few experiments, I decided to use the bottom temperature sensor as my indicator that the tank is hot. The problem with the top sensor is that it will rise with a few degrees the moment a hot tab is opened for a few seconds and there may just be a little hot water left at the top of the tank. You may decide to use some average between the two sensors.
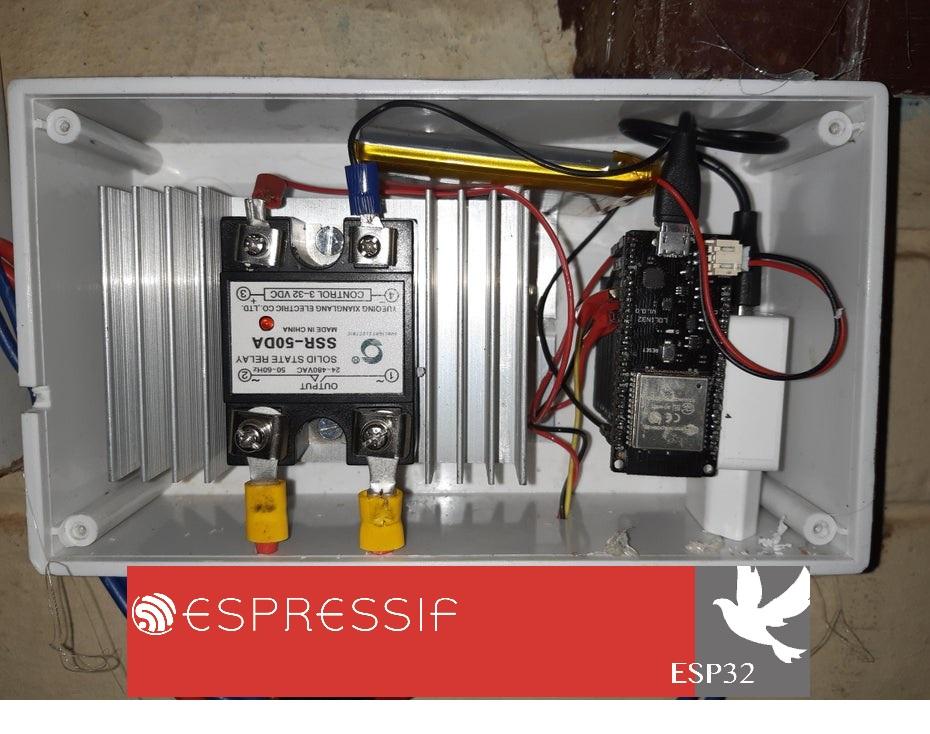
Build Your Hardware
Connect the SSR to PIN 15 and GND
Connect all 3 DS18B20 sensor: Yellow to PIN 16, Black to GND, Red to 3.3volt. Use a 4.7KOhms pull up resister between PIN 16 and 3.3volt. (Remember, DS18B20 are one wire devices, and multiple one wire devices is allowed on one bus or pin).
Connect your restart touch wire to TO and Reset wire to T2
Do not yet connect your build to mains (AC). Do not yet attach the sensors to your Geyser. You first need to figure which sensor must go to which position.
Register As a Cayenne User
This is not a cayenne.mydevices.com tutorial. Cayenne is the zero price version of mydevices.com
If you are not familiar with cayenne, more info is available at https://community.mydevices.com/?_ga=2.205257232.1695603717.1605354764-1503512272.1599609745
You first need to register at cayenne.mydevices.com and receive a login and password.
More info about cayenne is available at https://developers.mydevices.com/cayenne/docs/intro/
It is also important to read through
https://developers.mydevices.com/cayenne/docs/cayenne-mqtt-api/#cayenne-mqtt-api-using-arduino-mqtt to add the cayenne library to the Arduino ID
Install the Required Libraries in the Arduino IDE
WiFiManager
ArduinoJson version 6.9.0
CayenneMQTT
OneWire
DallasTemperature
ArduinoOTA
Load the ESP32 Sketch
The ESP32 Sketch contains lots of code. It includes code for
- https://github.com/tzapu/WiFiManager. WiFi manager is used to let your ESP32 know what your WiFi access points login credentials is. It is further used to capture the CayenneMQTT details, temperature limits for the geyser and to link the 3 Temperature sensors to its location (Top, bottom or ambient)
- Code for The cayenne API
- OTA (Over the air updates). You will be able to update firmware via WiFi. You need to be on your local WiFi, using the same computer that you used to upload your original sketch.
-
DS18B20 temperature reading.
The ArduinoIDE Sketch is available at: https://github.com/JJSlabbert/IoT-Geyser
Add Your ESP32 to Cayenne

You can now add a new device.
Log in to cayenne.mydevices.com. On your left you will see a dropdown menu Add New...... Select Device/Widget. A page will open were you need to select bring your own thing. A new page will open with your MQTT details. Write down your MQTT USERNAME, MQTT PASSWORD, CLIENT ID. You will need this to communicate with the Cayenne MQTT Broker (Server). Your MQTT USERNAME and MQTT PASSWORD will always be the same, but the CLIENT ID will be different for each new device like another ESP32, Arduino or Raspberry PI.
You can also give your device a name on this form.
Run Your Sketch
Restart the ESP32
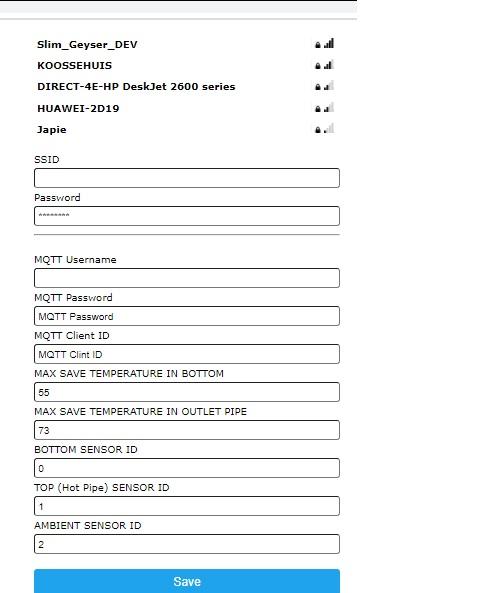
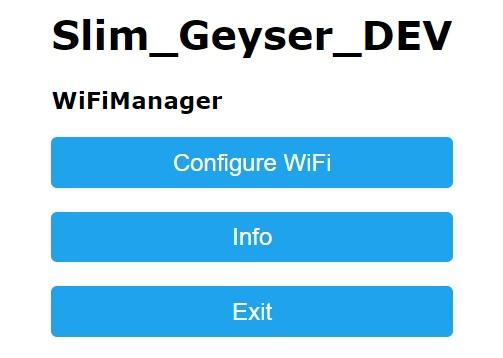
You should now see a new WiFi access point called "Slim_Geyser_DEV". (The ESP 32 will be in access point mode/ Ad-hoc or hotspot mode) using your computers WiFi search/scan.
Log in to this new access point. The password/Security Key is password.
Your browser should go to the landing page "192.168.4.1", if not, do it manual.
Go to Configure WiFi
The configuration page should now open. It should have automatically scanned for your internet access point, select it, type in the password, Cayenne MQTT details. Leave the rest the same. All temp values is metric (Deg Celcius).
Press save. The ESP32 will now try to connect to your wifi and the Cayenne server.
Disconnect from "Slim_Geyser_DEV" and connect your computer to your home access point.
Building Your Cayenne Dashboard
Now you should log in to cayenne.mydevices.com using your cayenne credentials.
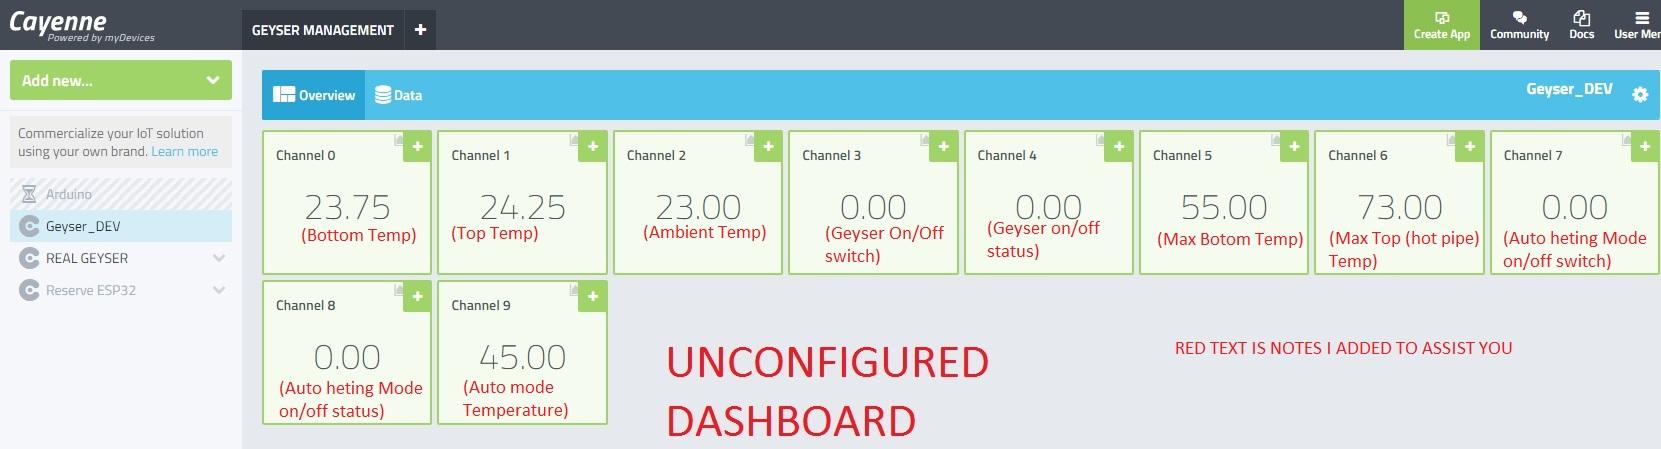
Your device should be listed on the left menu bar (Mine is Geyser_DEV).
You can now add all your sensors and the relay (or channels) to your dashboard by clicking the add signs.
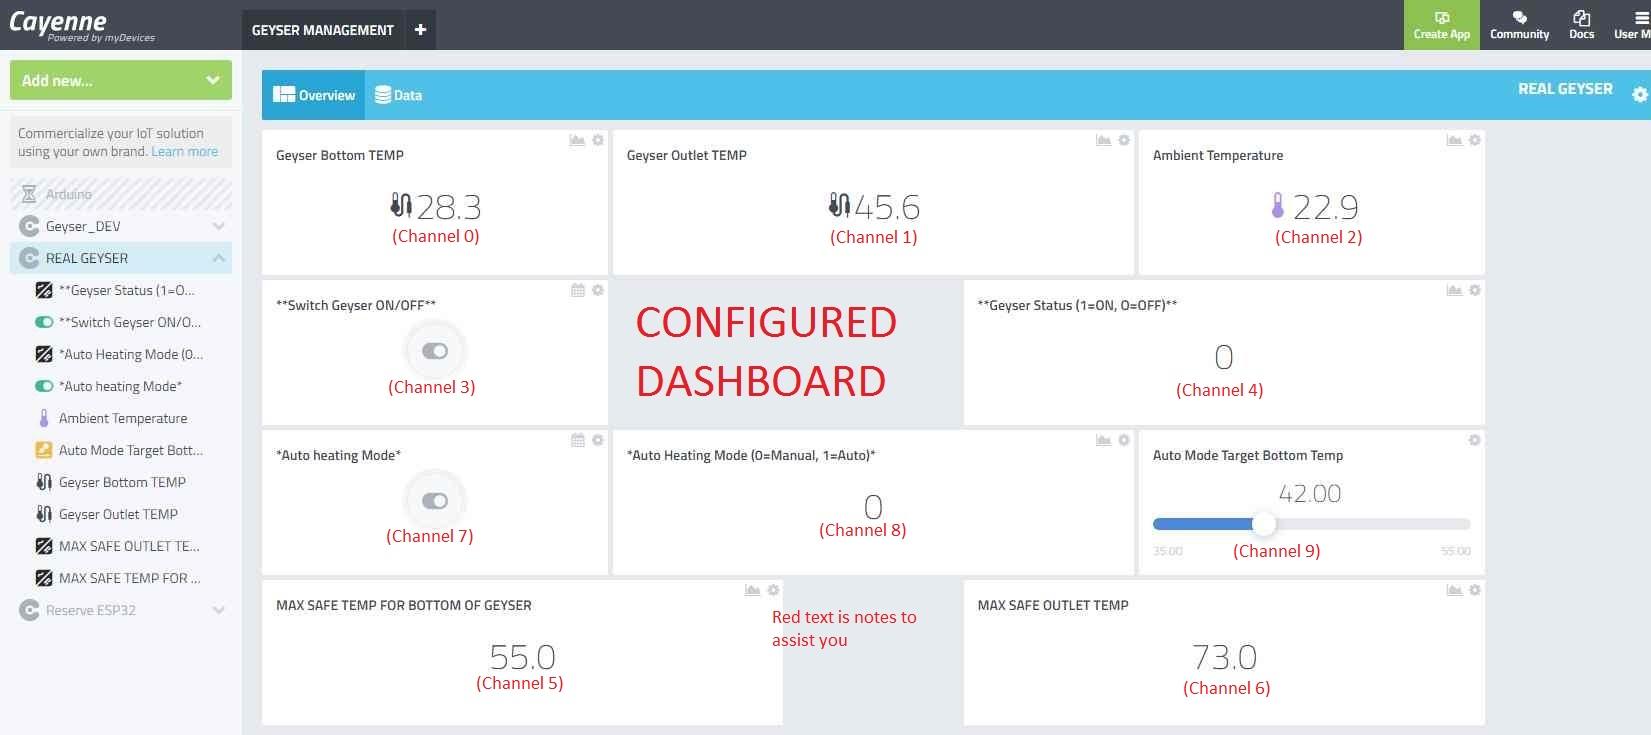
On the channel 0 Icon, click settings and cvhange the name to "Geyser Bottom TEMP". Chose a suitable Icon (Temperature Probe) and select the number of decimals as 1. Do the same for channel 1, 2, 5,6
For Channel 4 and 8, change the number of decimals to 0 and name them "**Geyser Status (1=ON, O=OFF)**"
and "*Auto Heating Mode (0=Manual, 1=Auto)*" respectively.
Channel 3 and 7 should be buttons
Go to Add New menu item on the left menu bar, go to Device/Widget> Custom Widgets>Button
Name the Button "Switch Geyser on/off", Select the Device name (Geyser_DEV), DATA=Digital actuator, Channel 3, Unit=Digital I/O, Icon =toggle switch. Click add Widget.
Do the same for Channel 7
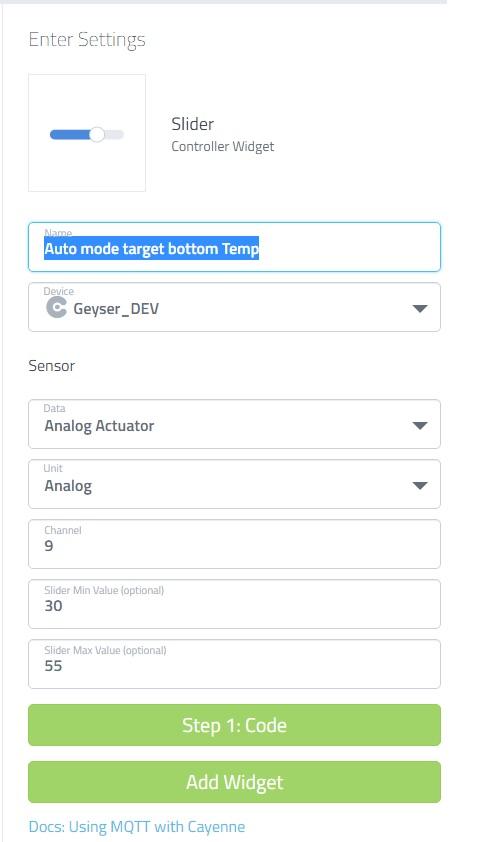
Channel 9 should be converted to a slider
Go to Add New menu item on the left menu bar, go to Device/Widget> Custom Widgets>Slider and select the appropriate values as in the image.
You can now move your widgets around.
Figuring Out the Positions of the Sensors
Since the three Temp sensors is connected to the same pin (One Wire Bus), you should figure out what sensor should go where.
Check your Cayenne dashboard and note the three temperatures. They should be more or less the same. Heat one up with warm water or your hand. Note the sensor that heats up on the dashboard. Label your sensor accordingly. Do this for the other 2 sensors.
Playing Around (Testing) Your Dashboard

Play around with the controls on the dashboard. Toggle the on/off switch and see if the SSR led is lighting up. Also switch on the Auto heating mode, heat the bottom sensor and see if the SSR switch of when the desired temperature is reached.
You can now connect the 2 Sensors to the geyser and the ambient temp sensor to a suitable position. You can also connect the SSR to your mains.
Scheduling Your Geyser
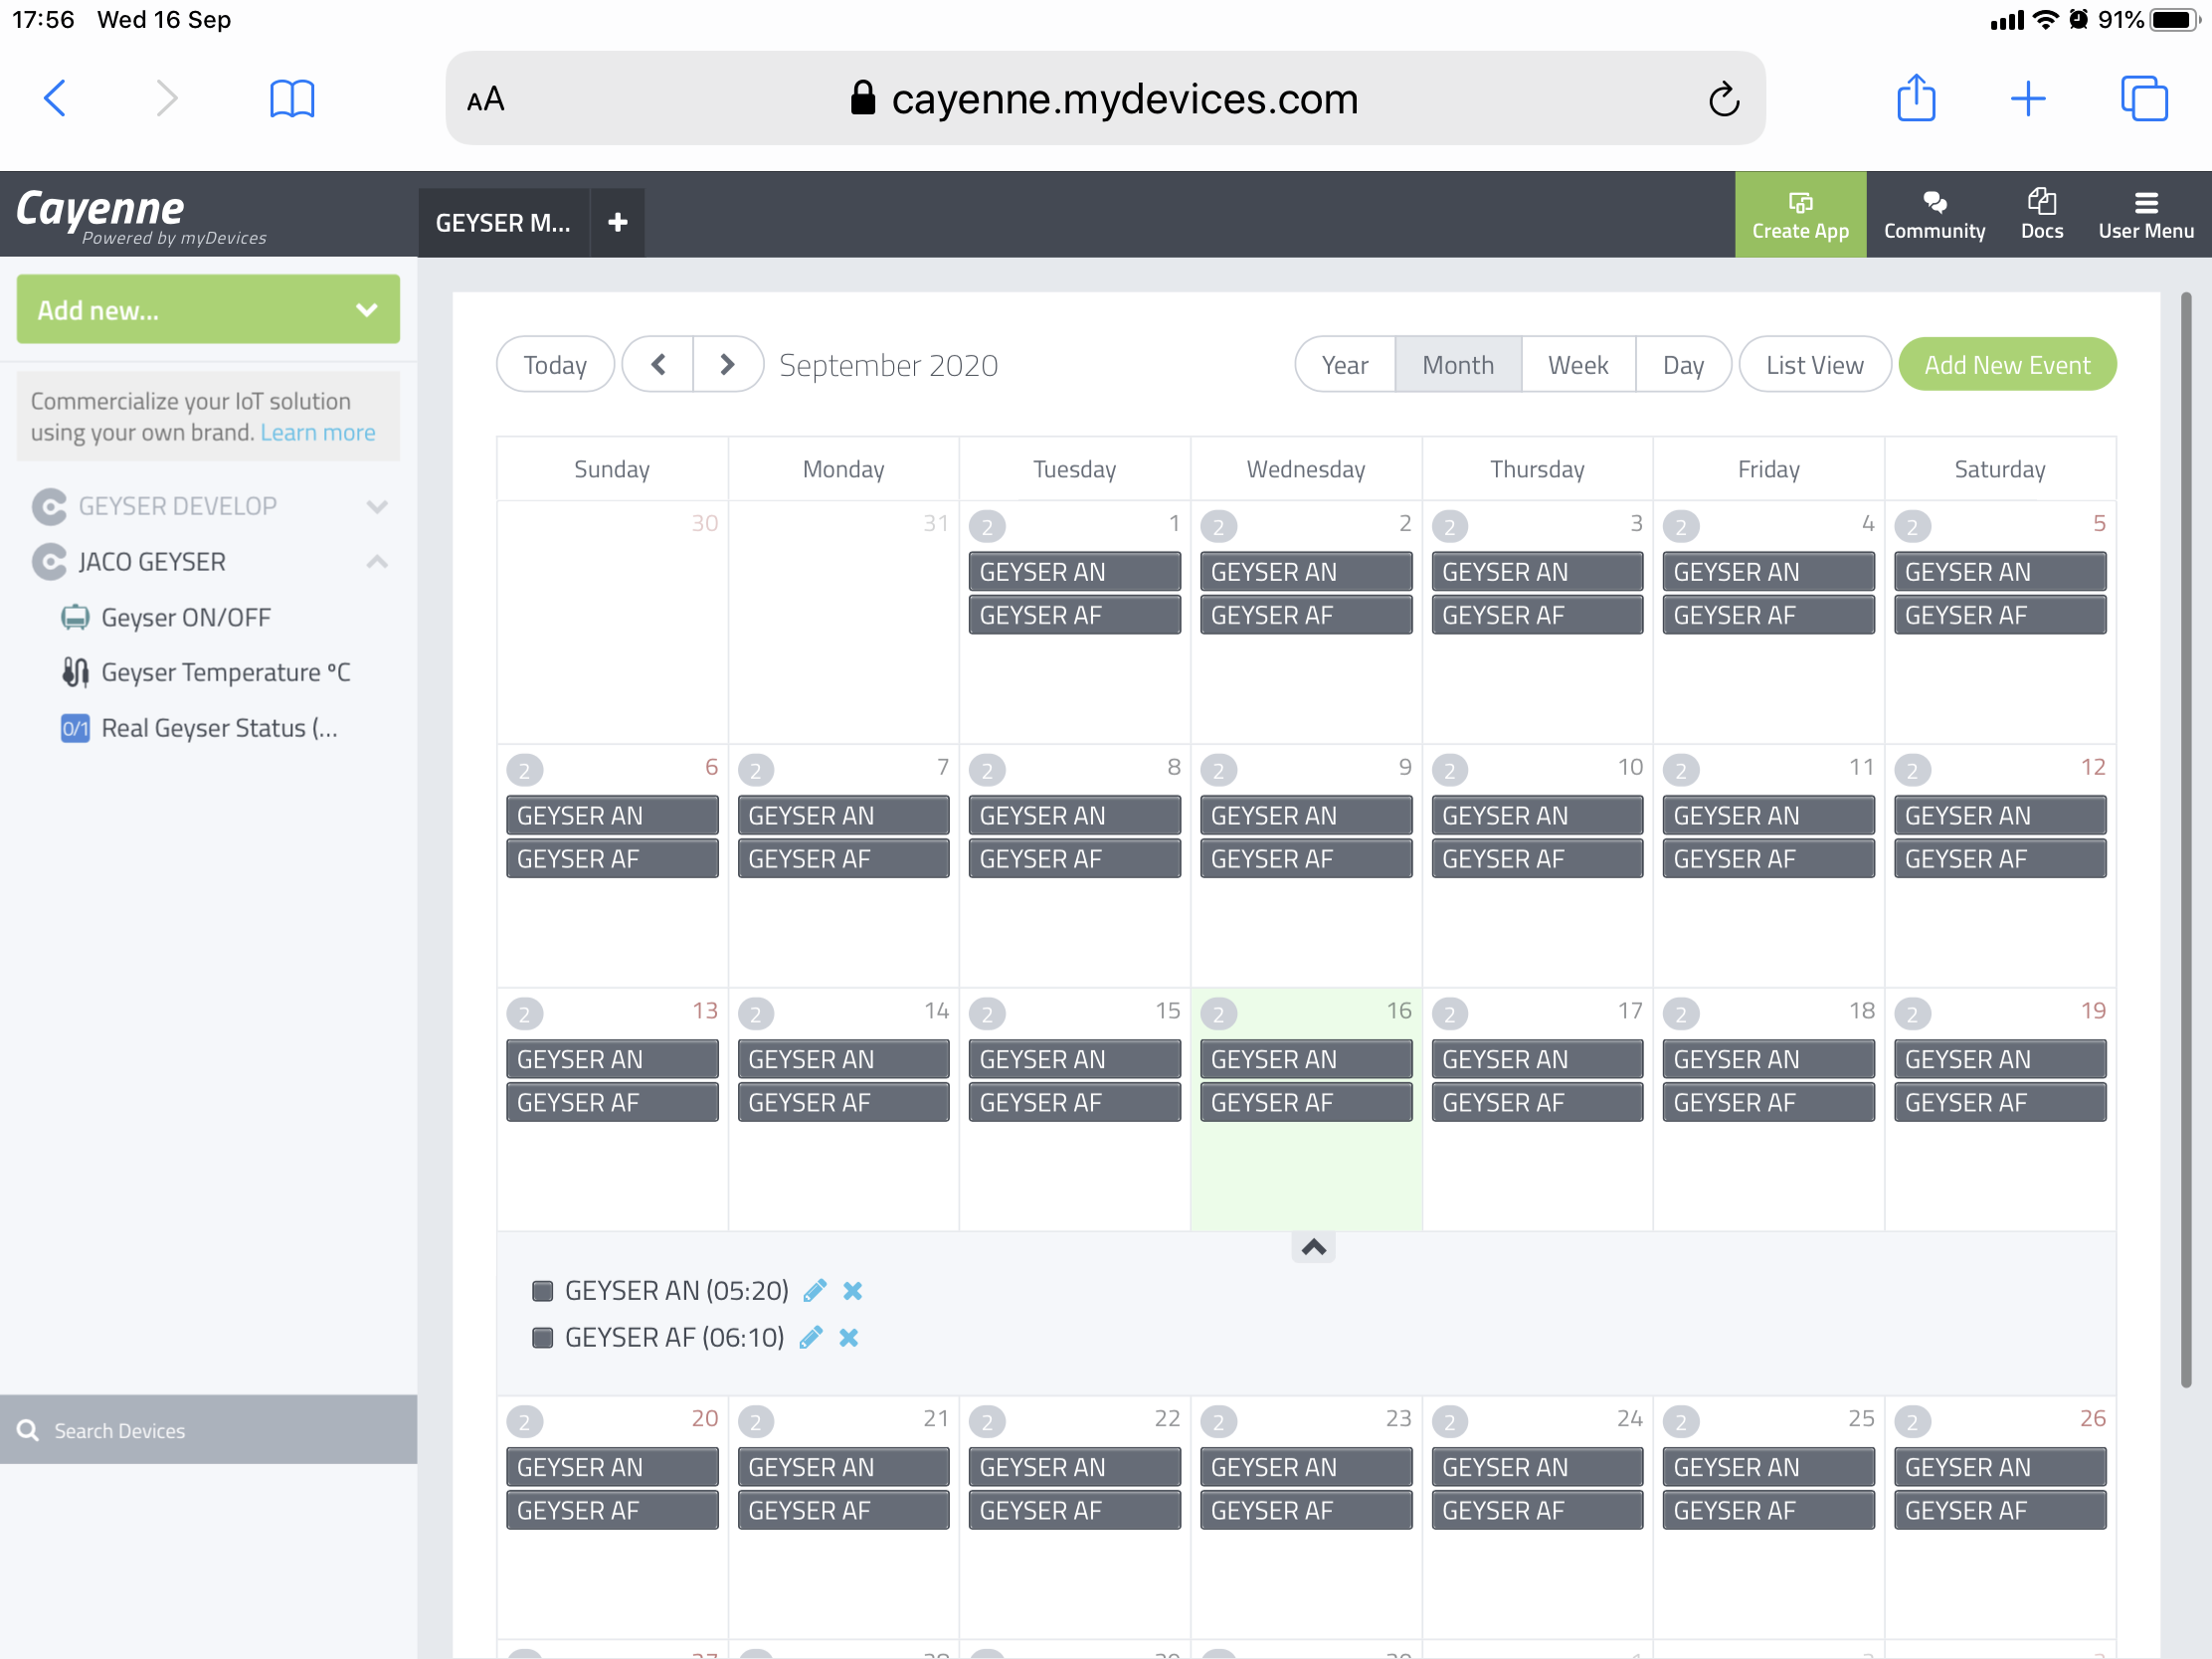
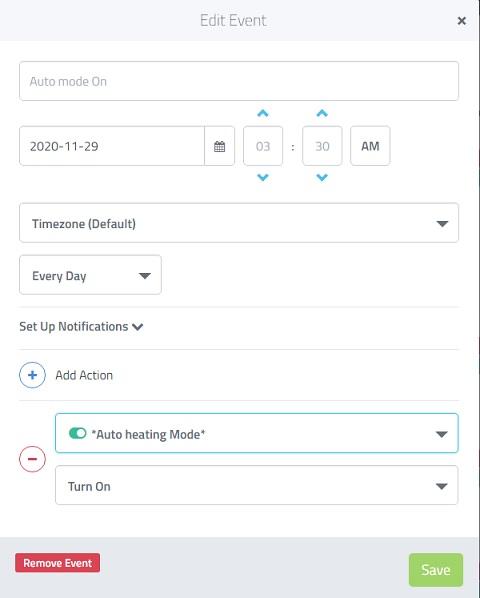
You can now schedule on/ off events with your Geyser
On the Dashboard, select Add New>Event