Cat´s Tom House
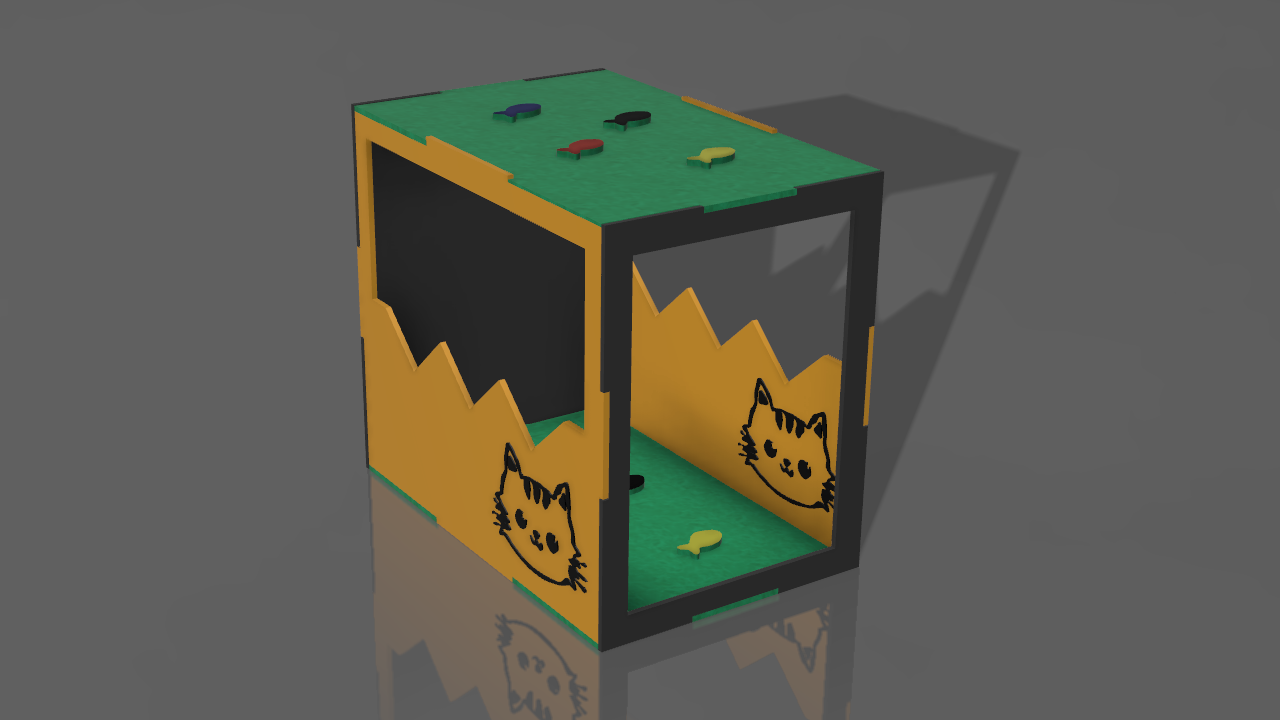
Hey guys!
Welcome back, I am Lucia, today I will teach you how to create a house for cats based on the program Fushon 360 , in this case for my little cat Tom.
Supplies
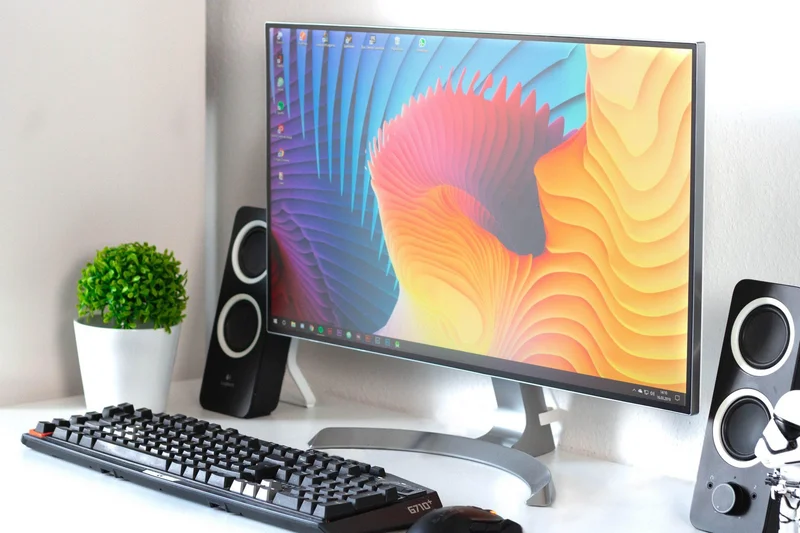


-Computer or laptop
-Autodesk Fusion 360 program
-Internet
Face 1
.png)
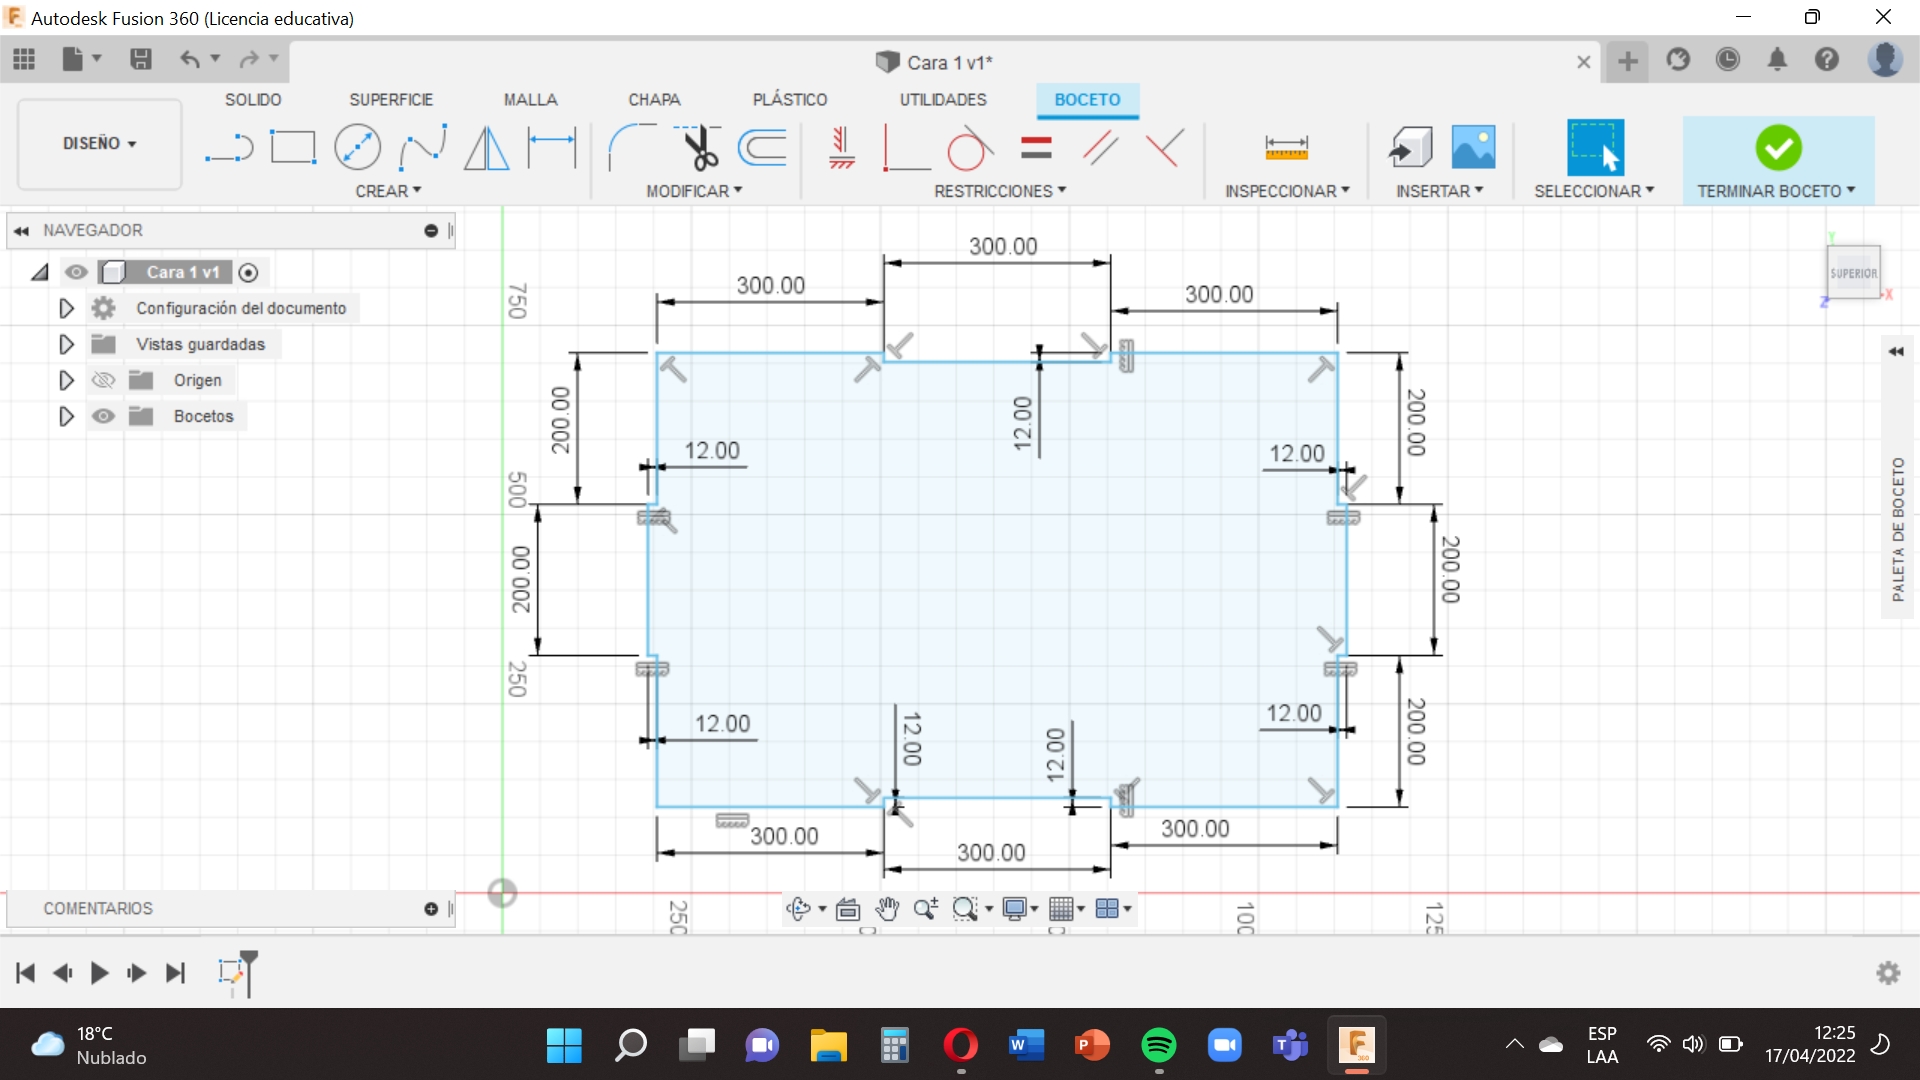
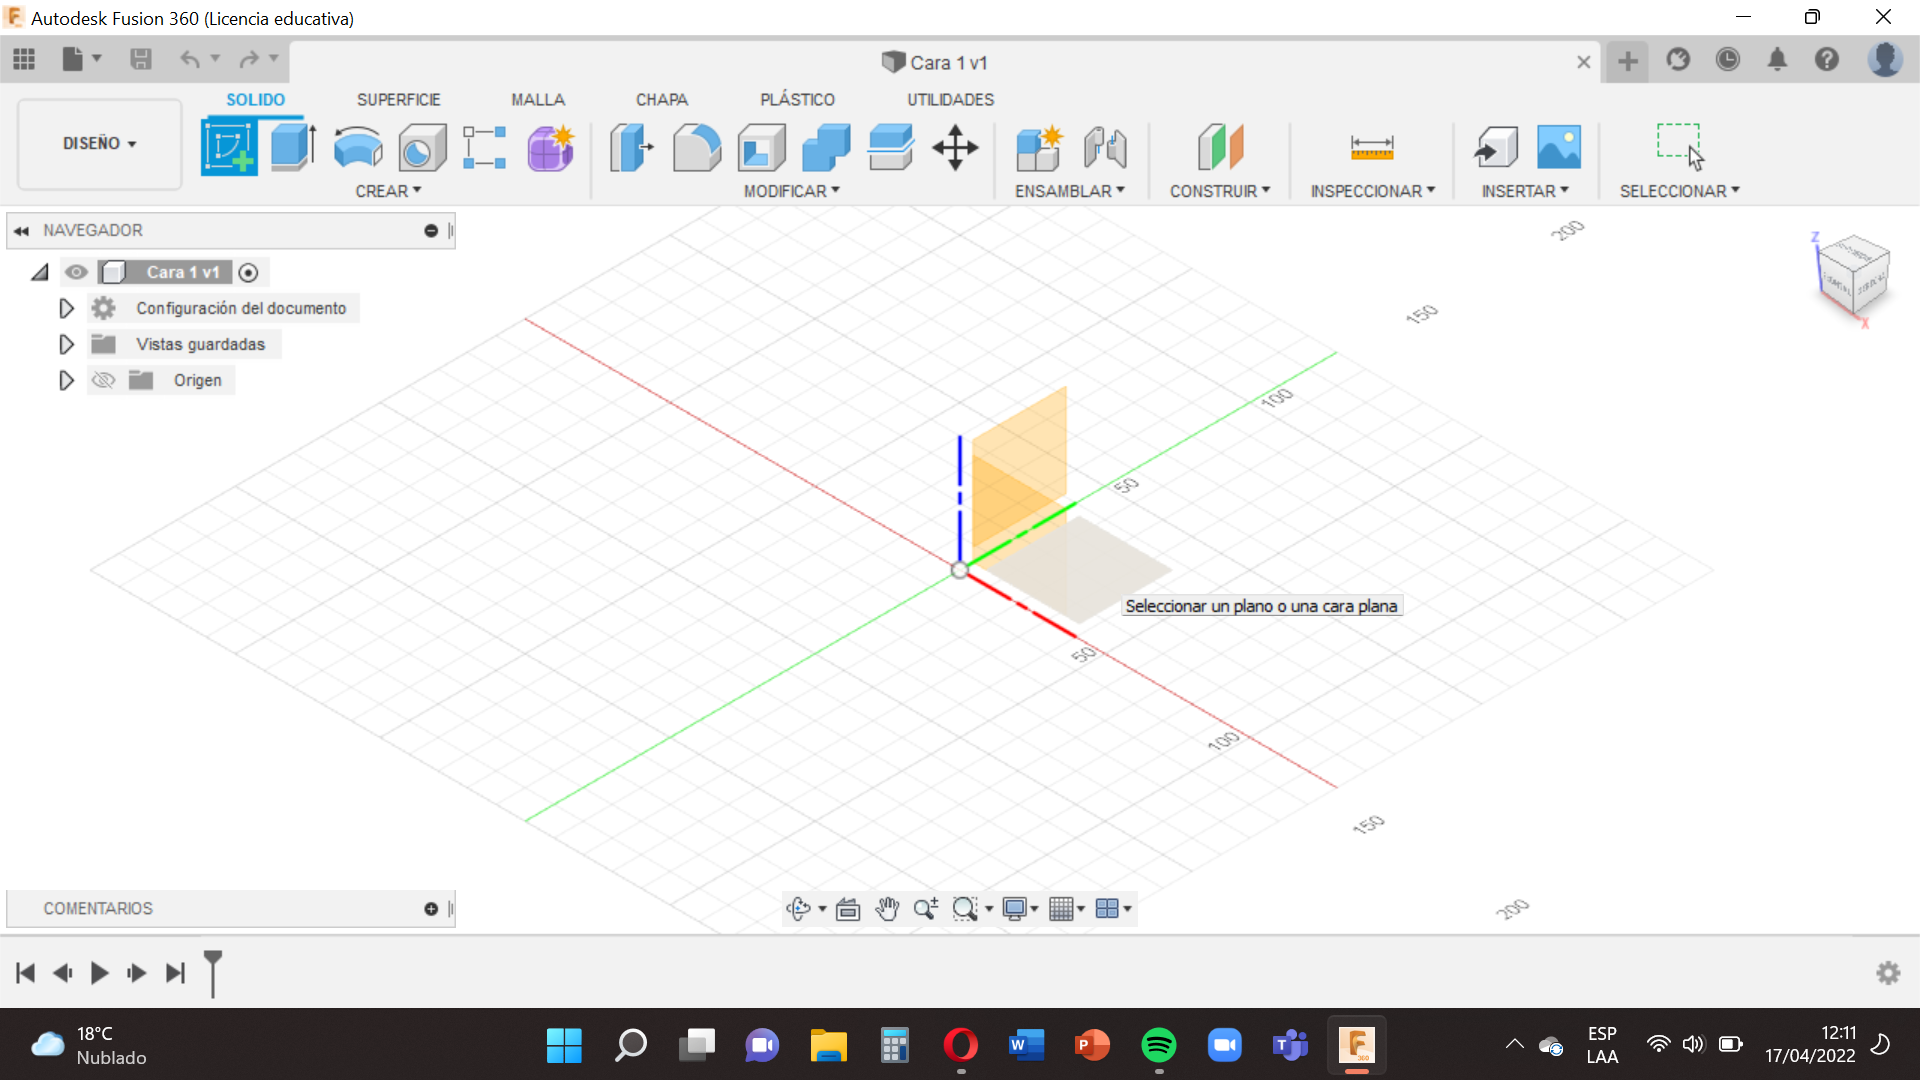
Let’s start with the position of our base.
Remember that it is very important because each face has a different position.
Now we select the square between X and Y (red and green ), this will help us to connect each part of our face ,quickly.
Then you will go to the option ´´Create´´ , use the tool ´´Line´´ , this is easy , you have to make a line based on the measurements of our face 1 , remember to finish the shape of our face at the same point where it started.
For the following we have to select ´´Finish sketch´´ .
Face 2
.png)
.png)
.png)
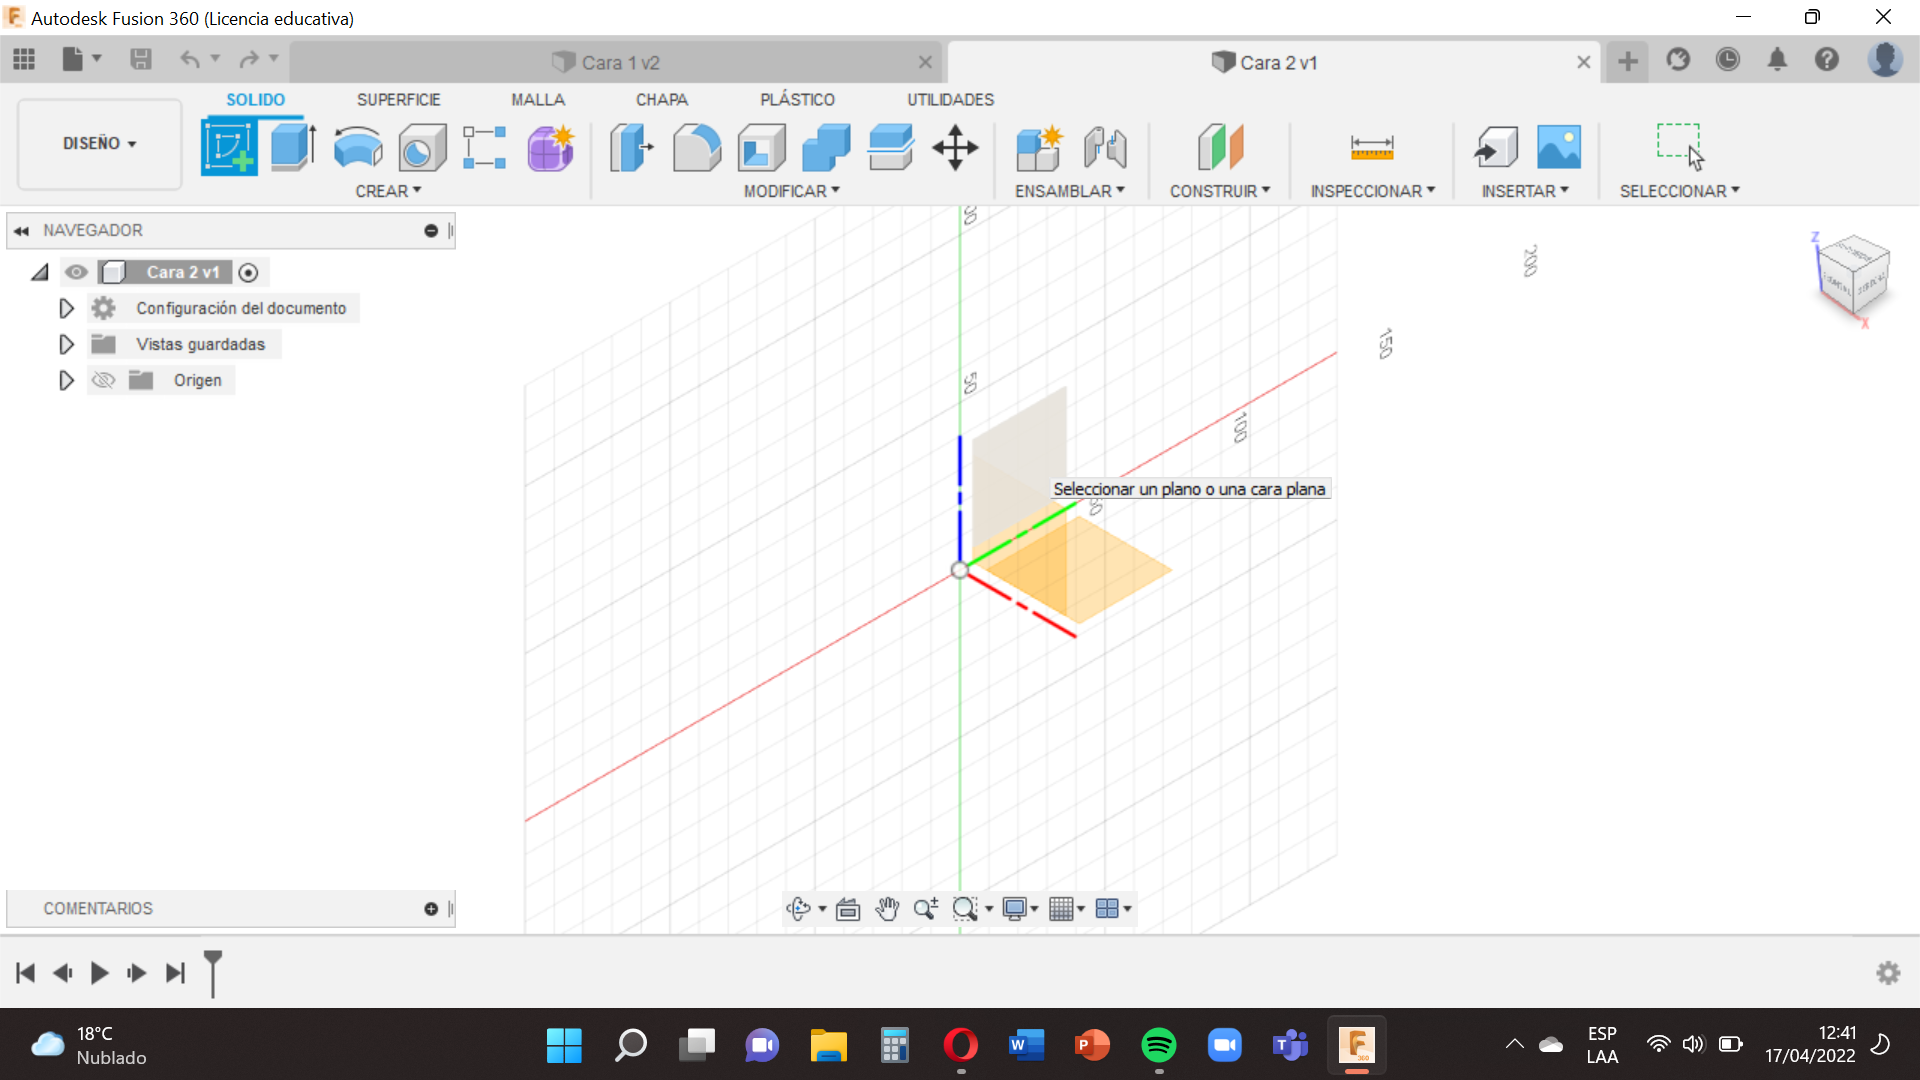
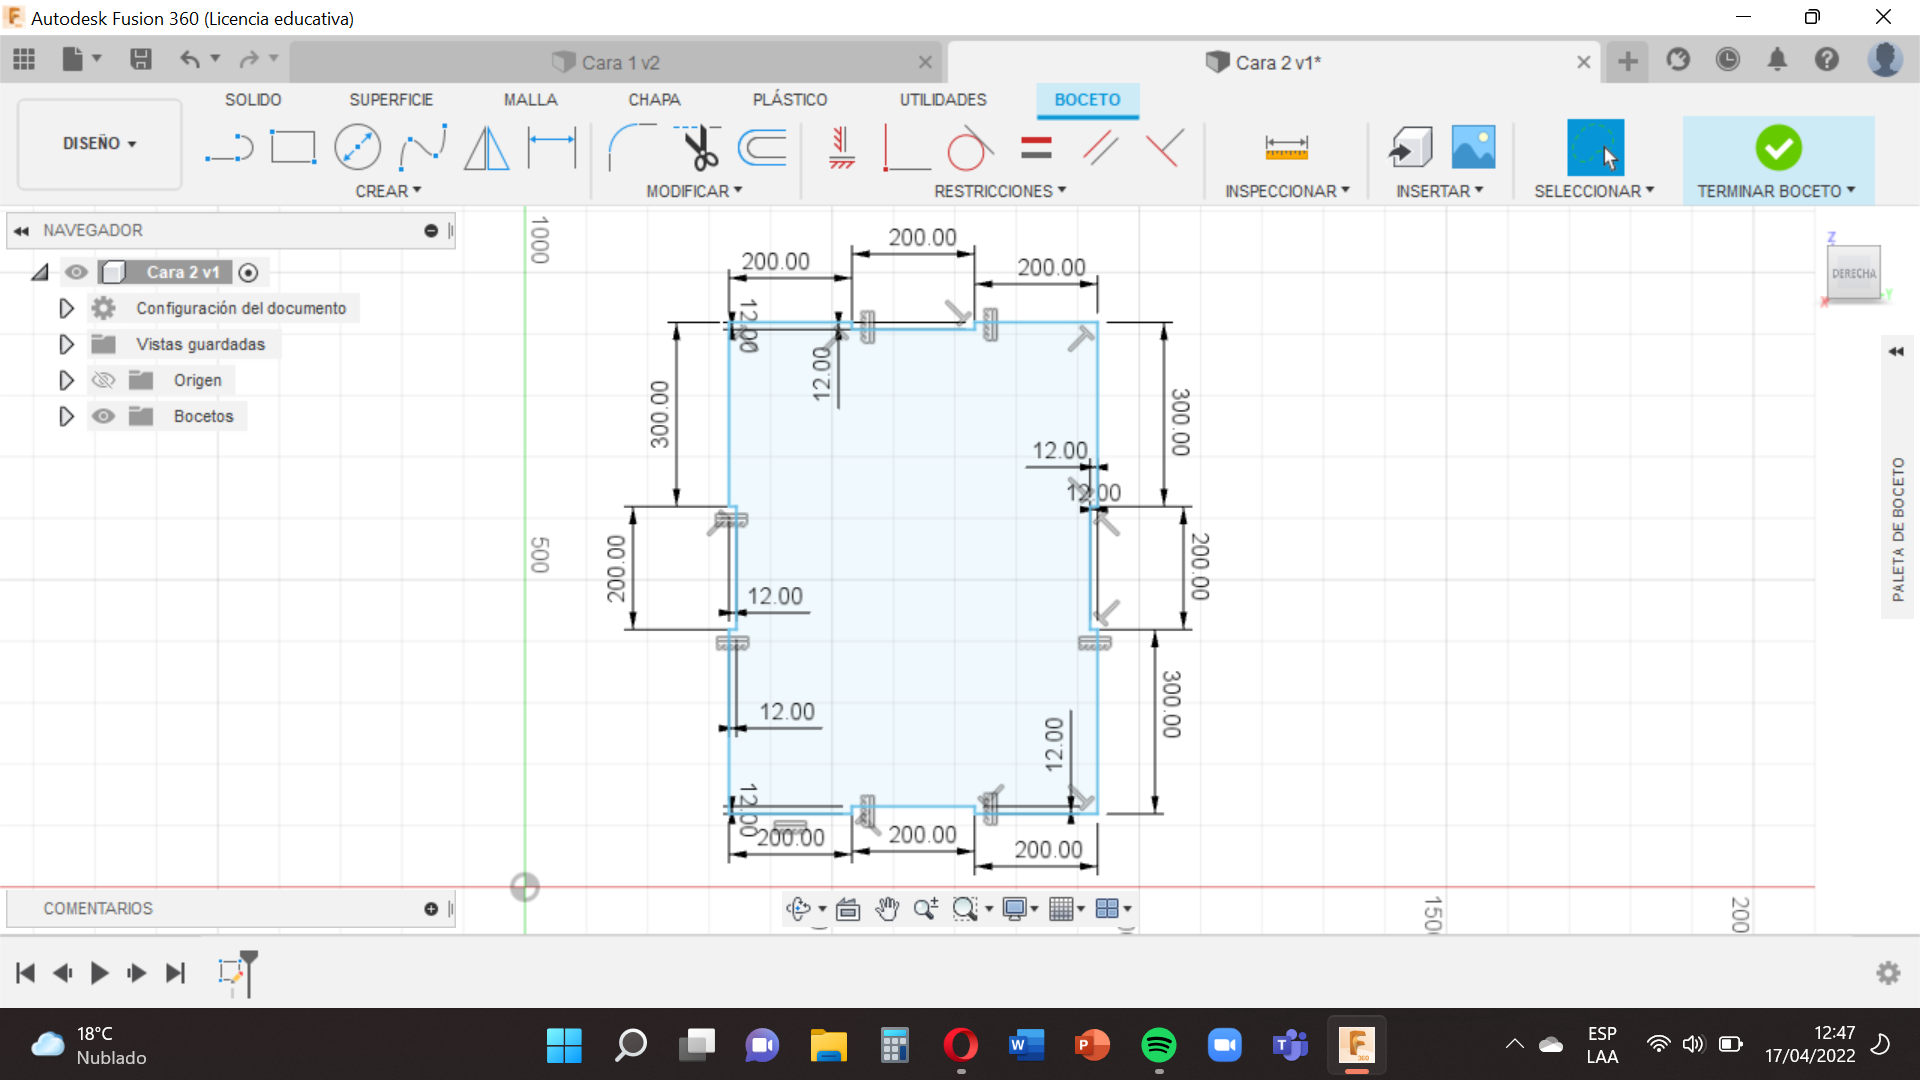
The second step will start in the same way as the first step, but now choose the small square between the lines Z and Y (blue and green) and then follow this guide.
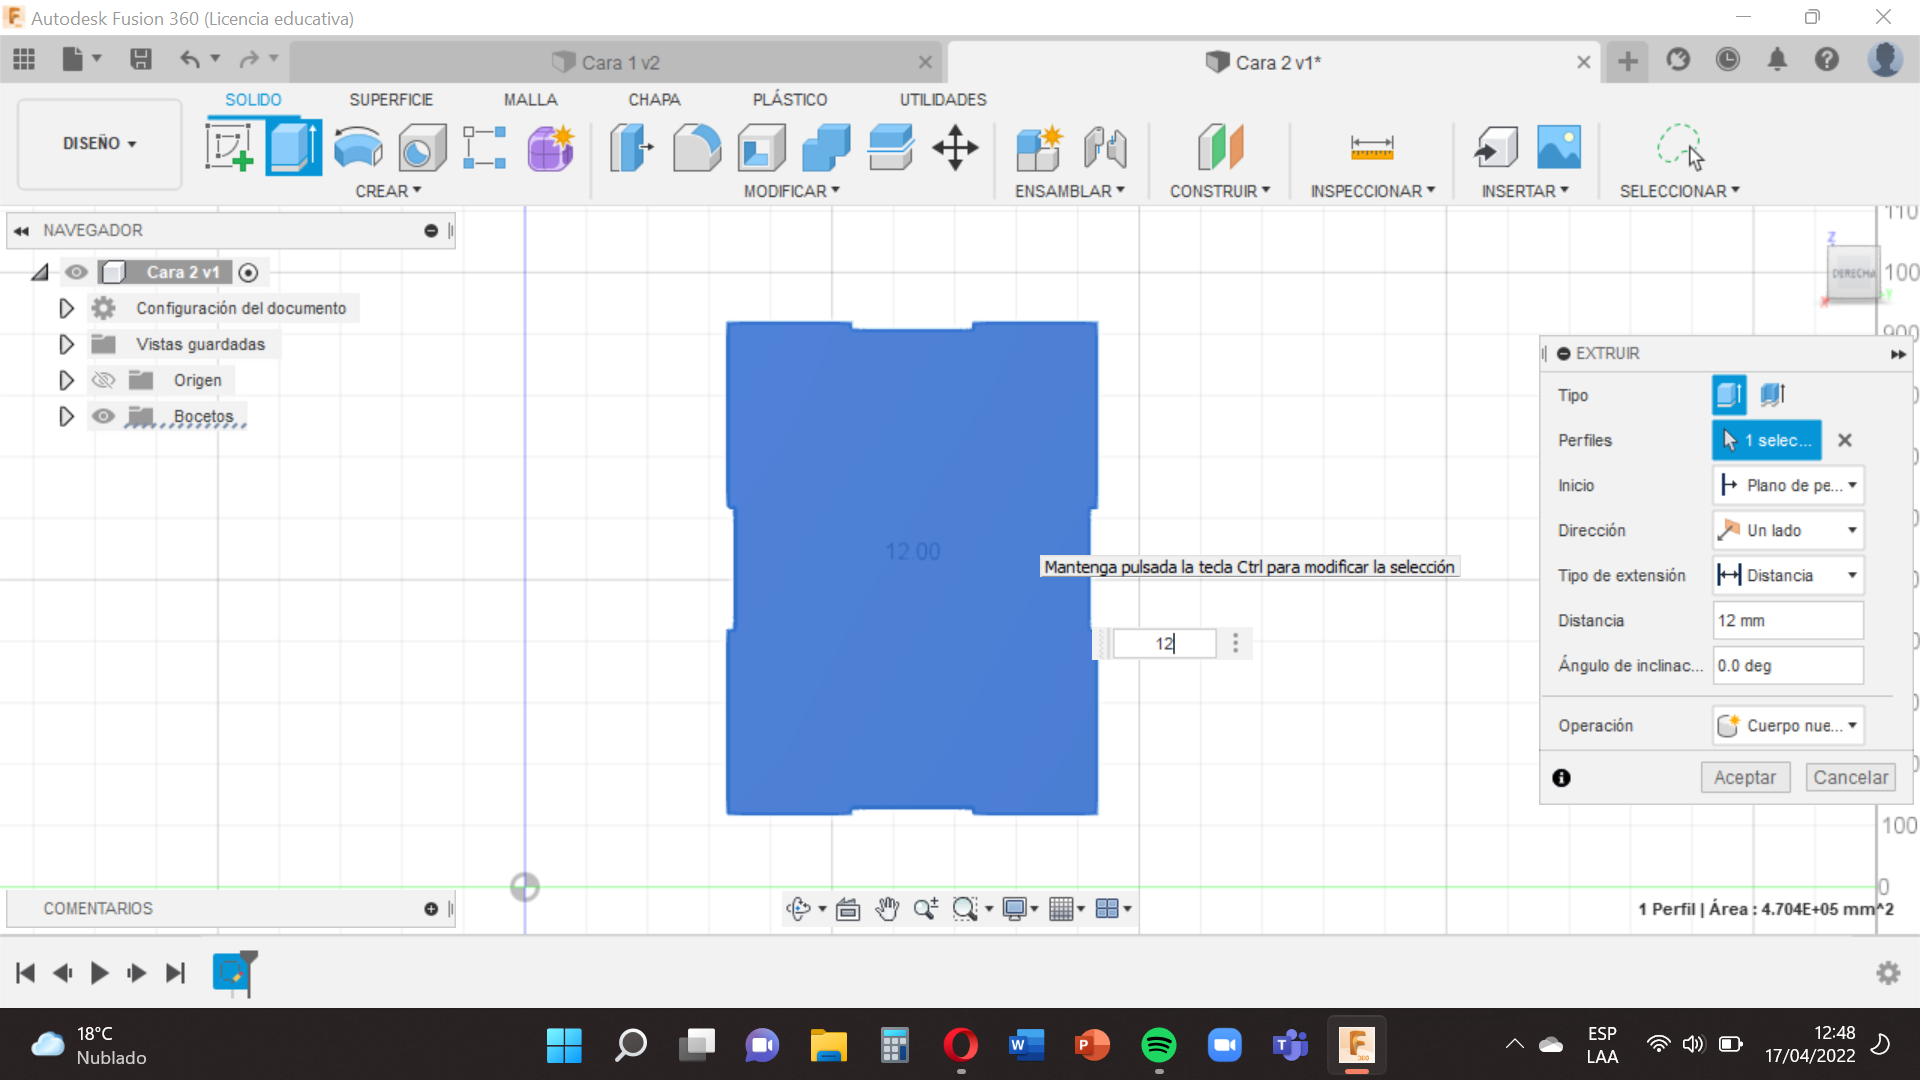
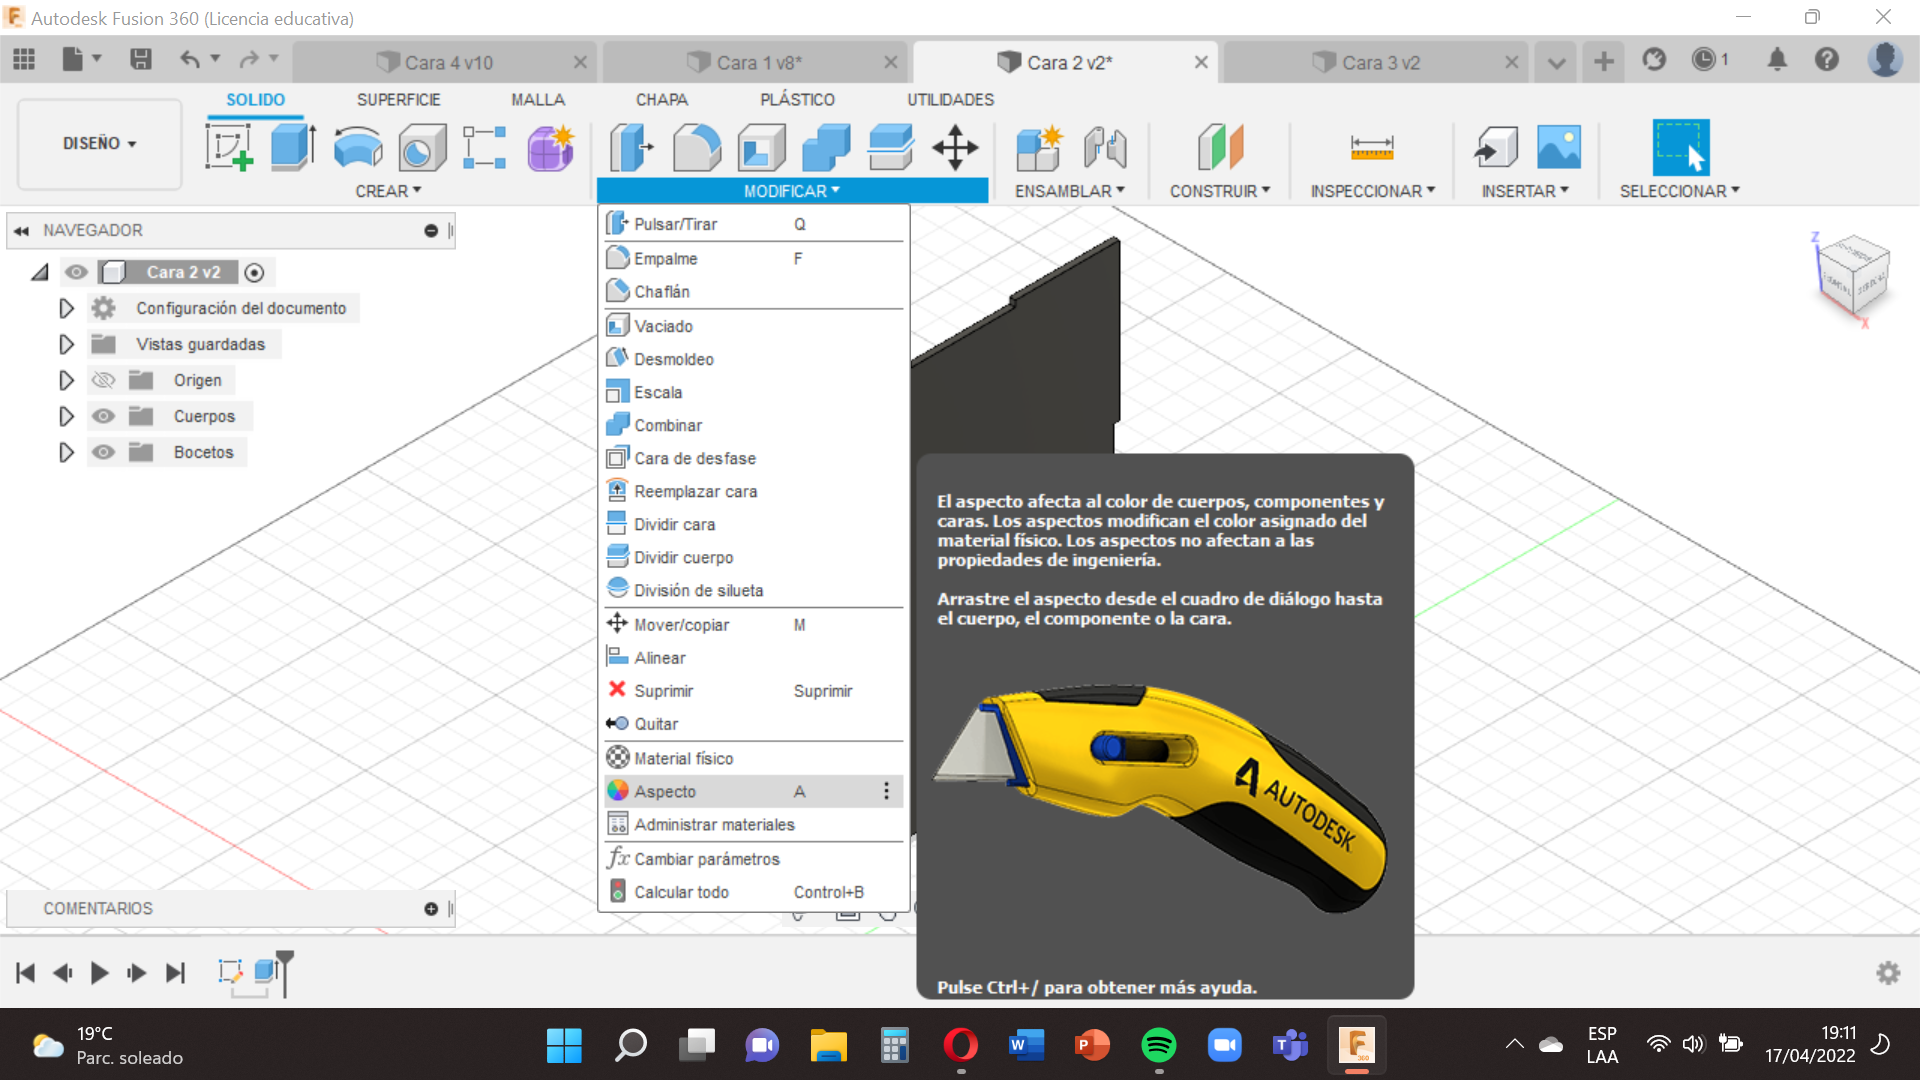
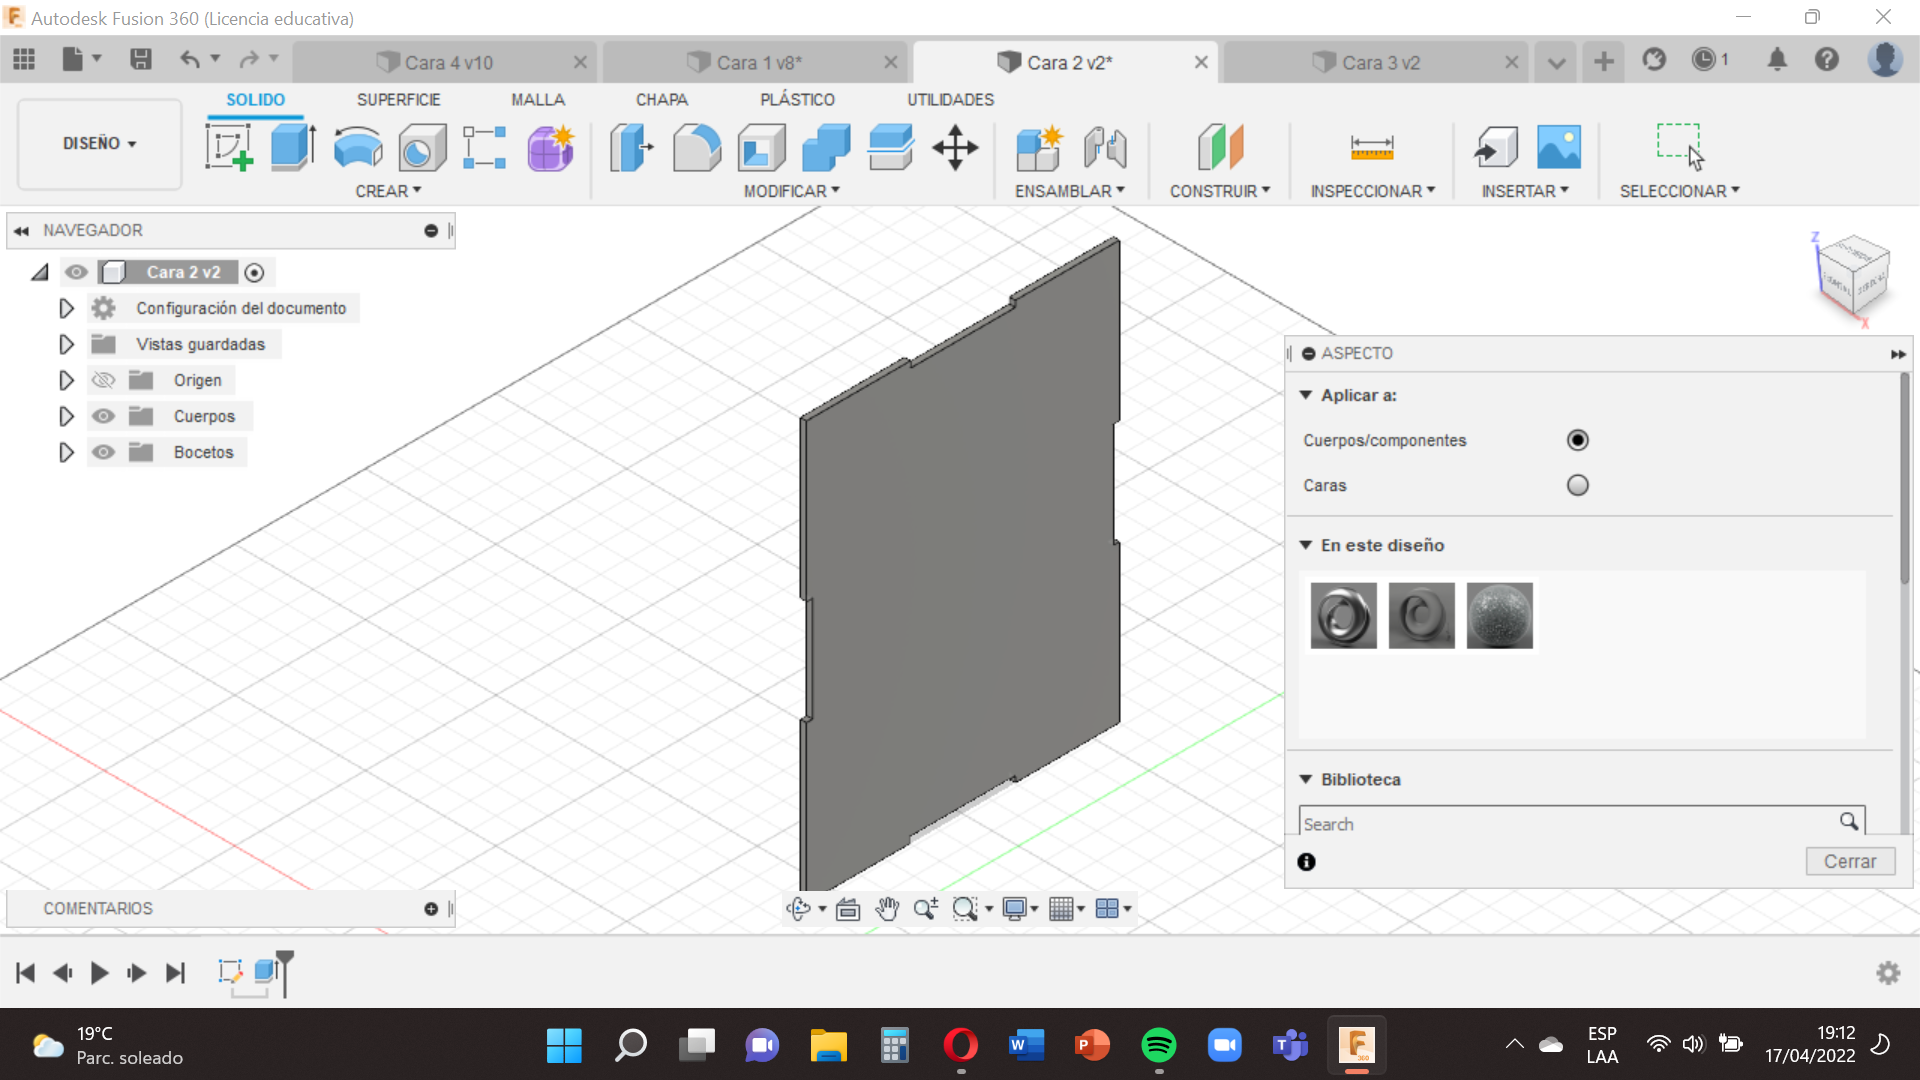
Then you will go to the option ´´Create´´ , select ´´Extrude´´ (This tool will give you our face volume, something like 3D) and choose the 12 mm volume.
Next you will go to the option ´´Modify´´ select ´´Appearance´´ we will choose the one we like best , so that our face has texture and we drag it to our base face.
When you have finished pressing Finish Sketch and save it with the name in this case Face 2 .
Face 3
.png)
.png)
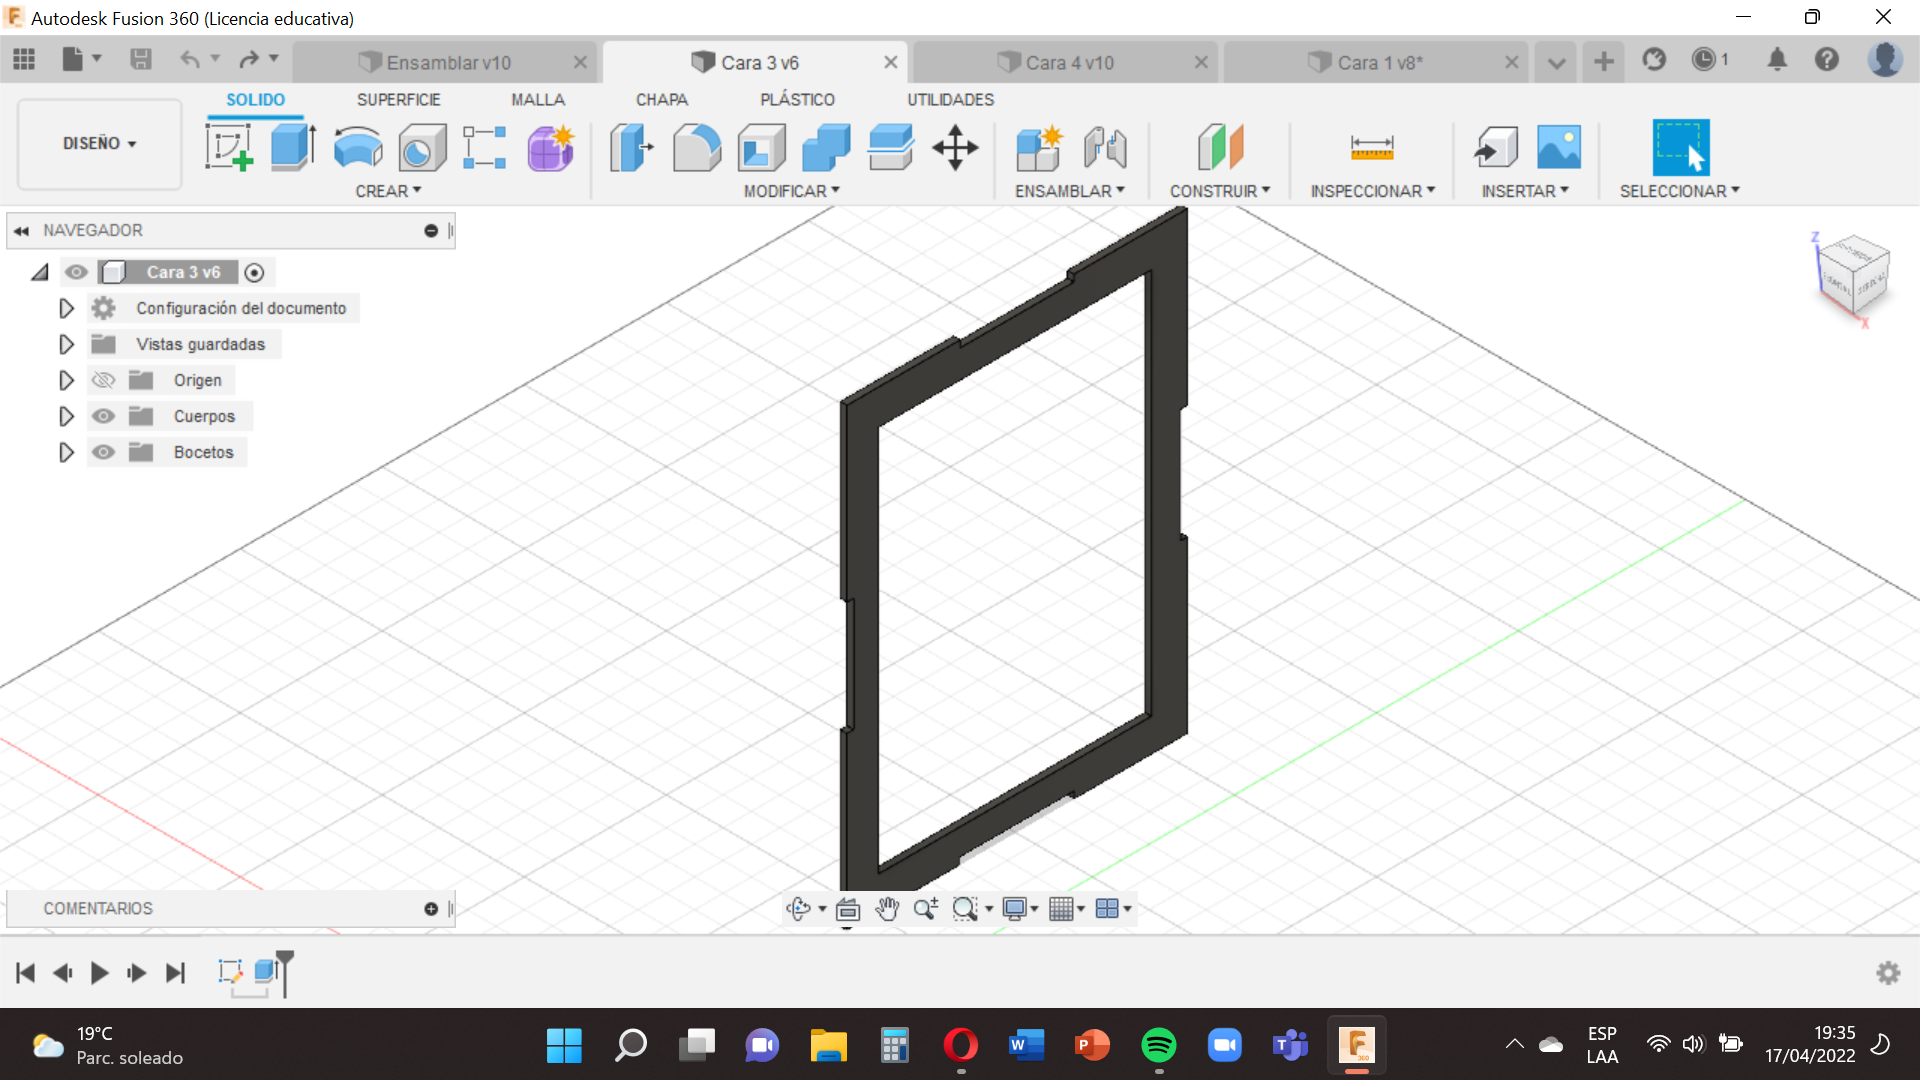
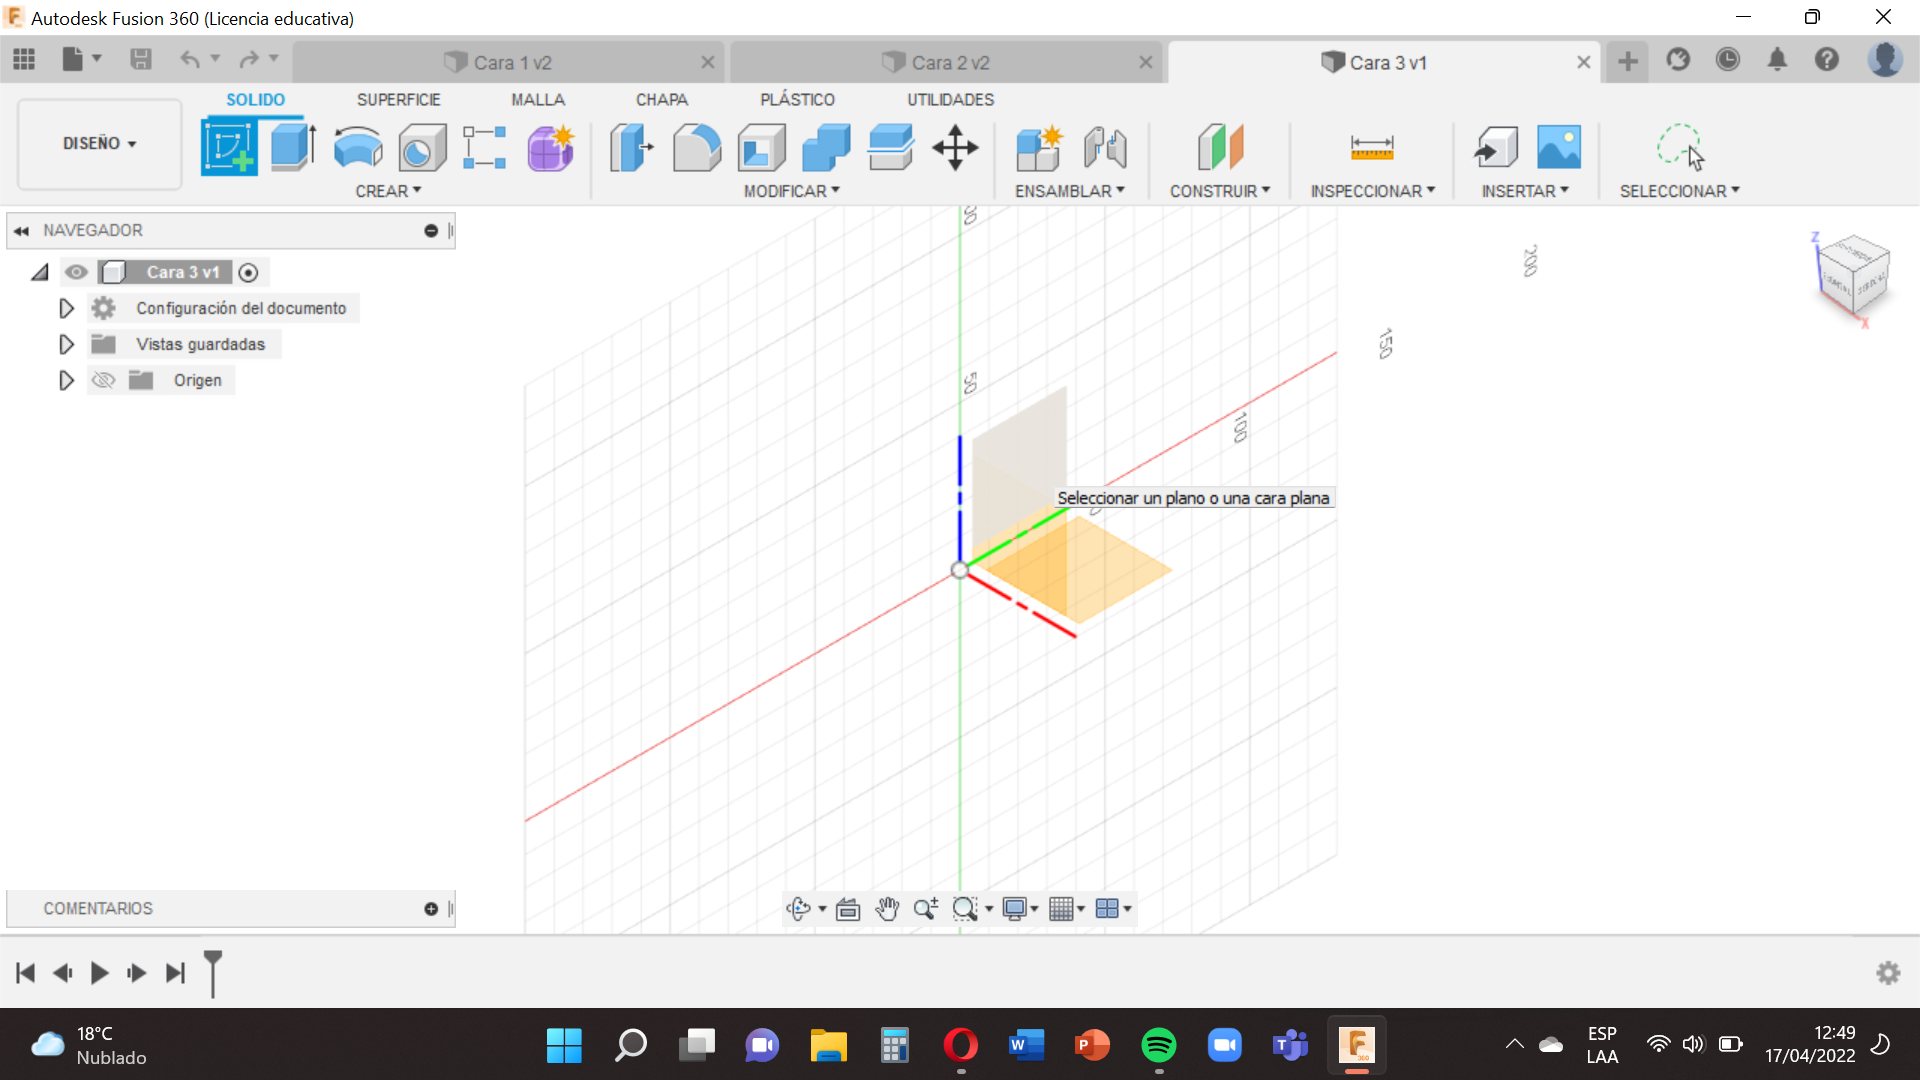
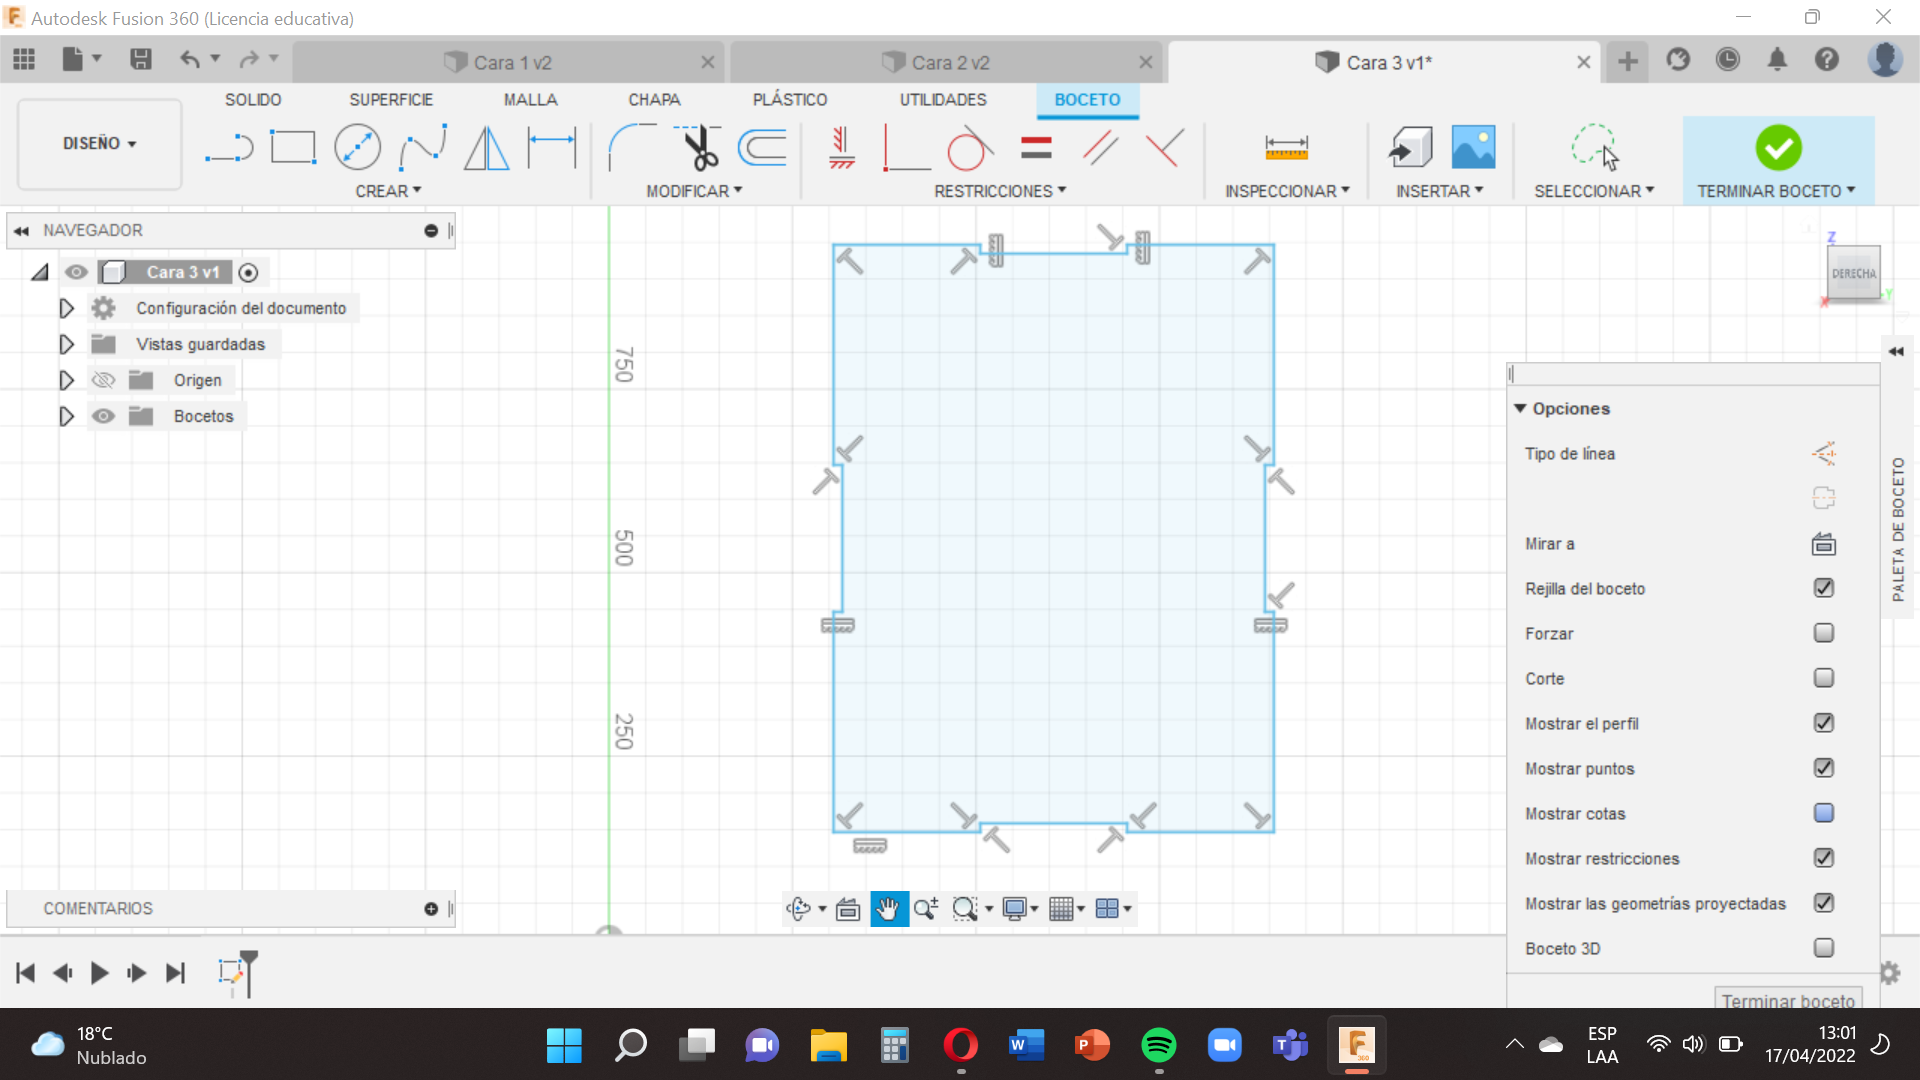
Now we select the square between Z and Y (blue and green), this will help us to connect each part of our poster ,quickly.
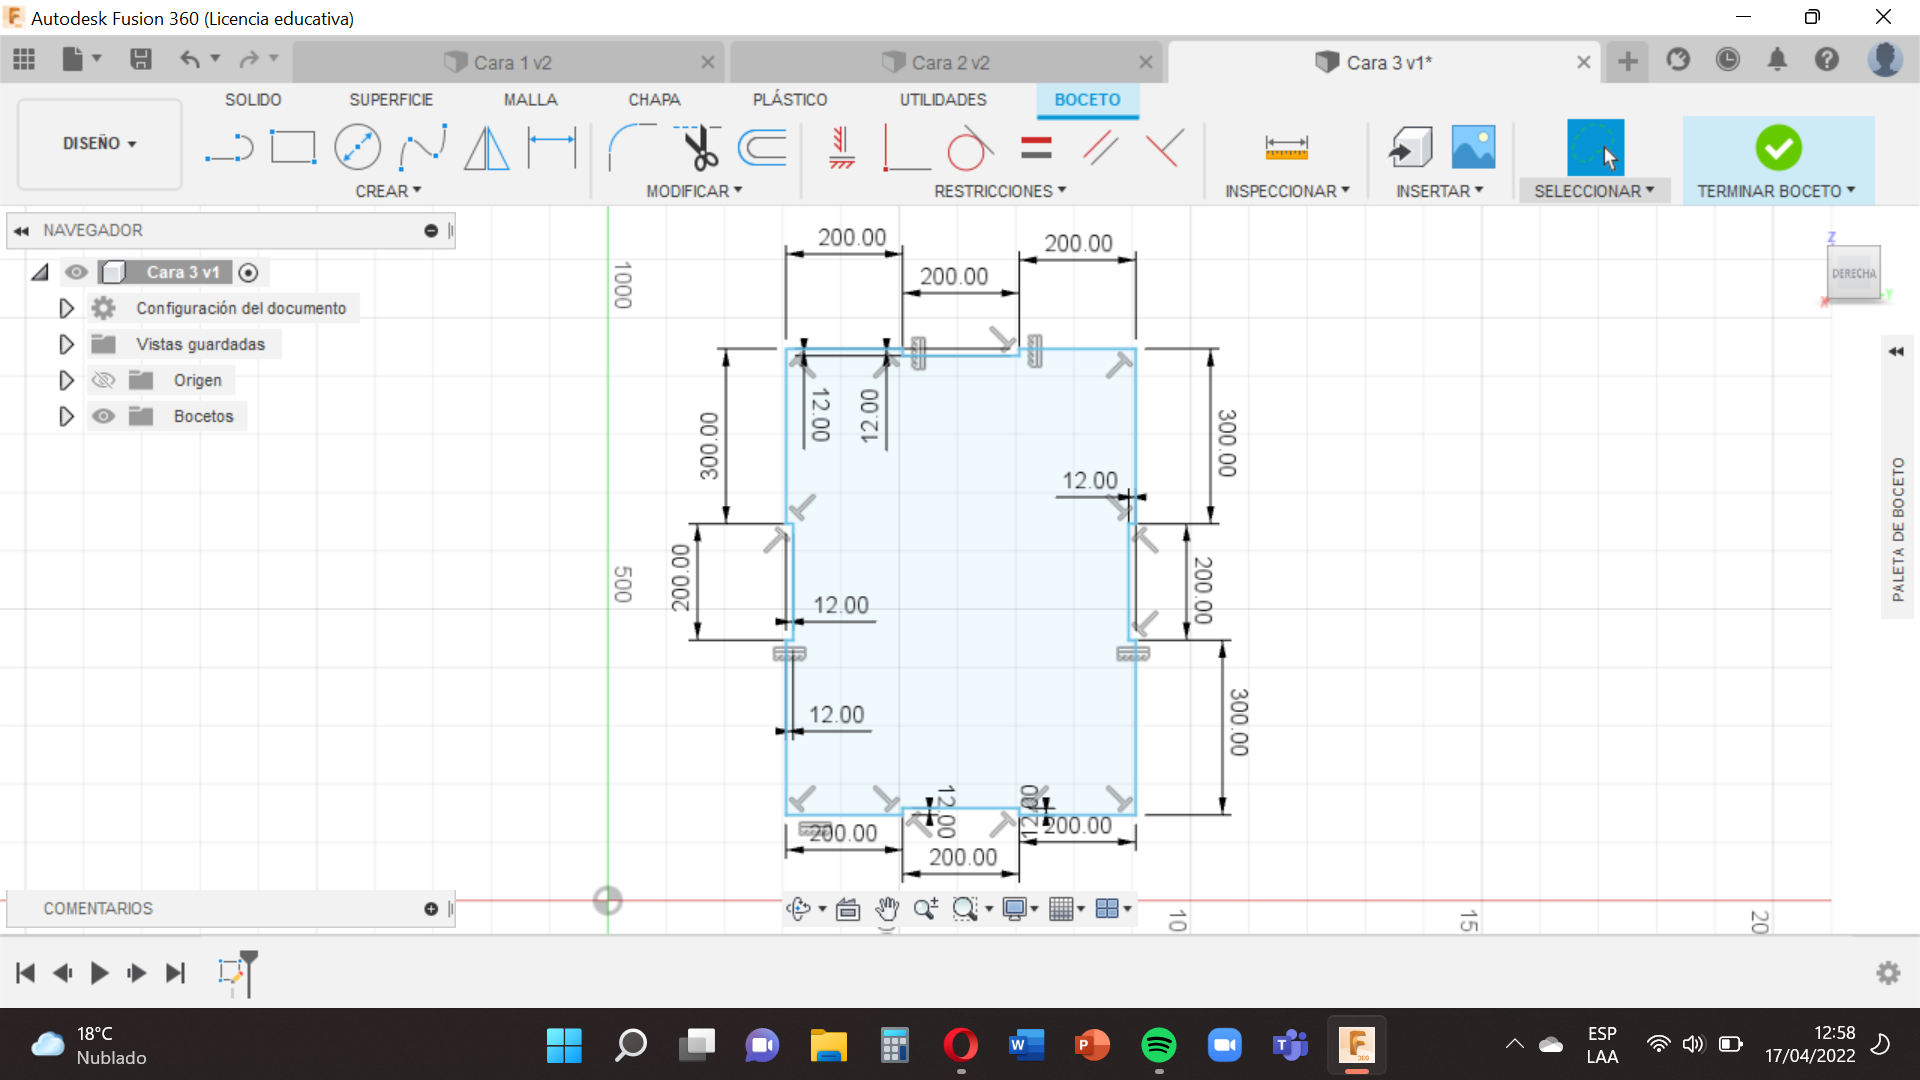
Then you will go to the option ´´Create´´ , use the tool ´´Line´´, you have to make a line based on the measurements of our face 3 , remember to finish the shape of our face at the same point where it started.
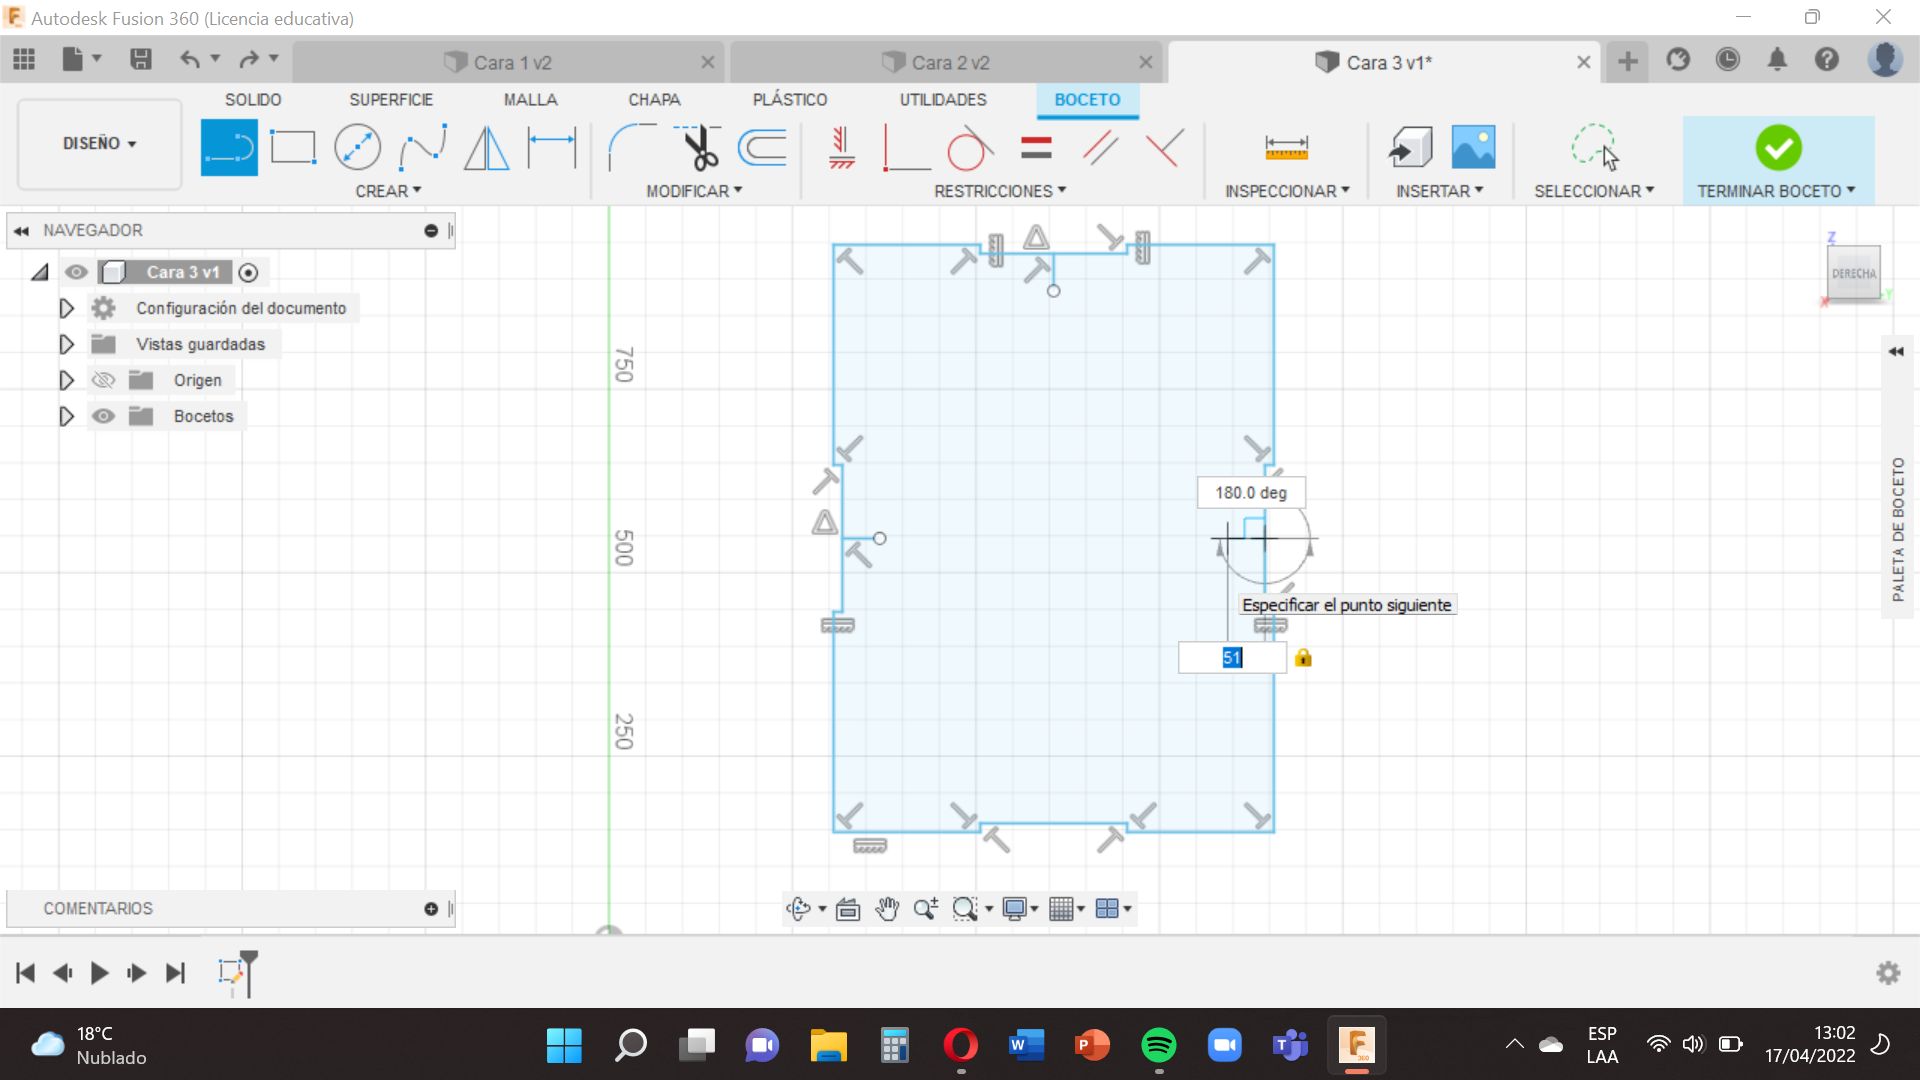
Having the complete face, we use the tool "Line", we stand in the center of the lines of the faces and draw lines within 51mm, these lines will serve as support.
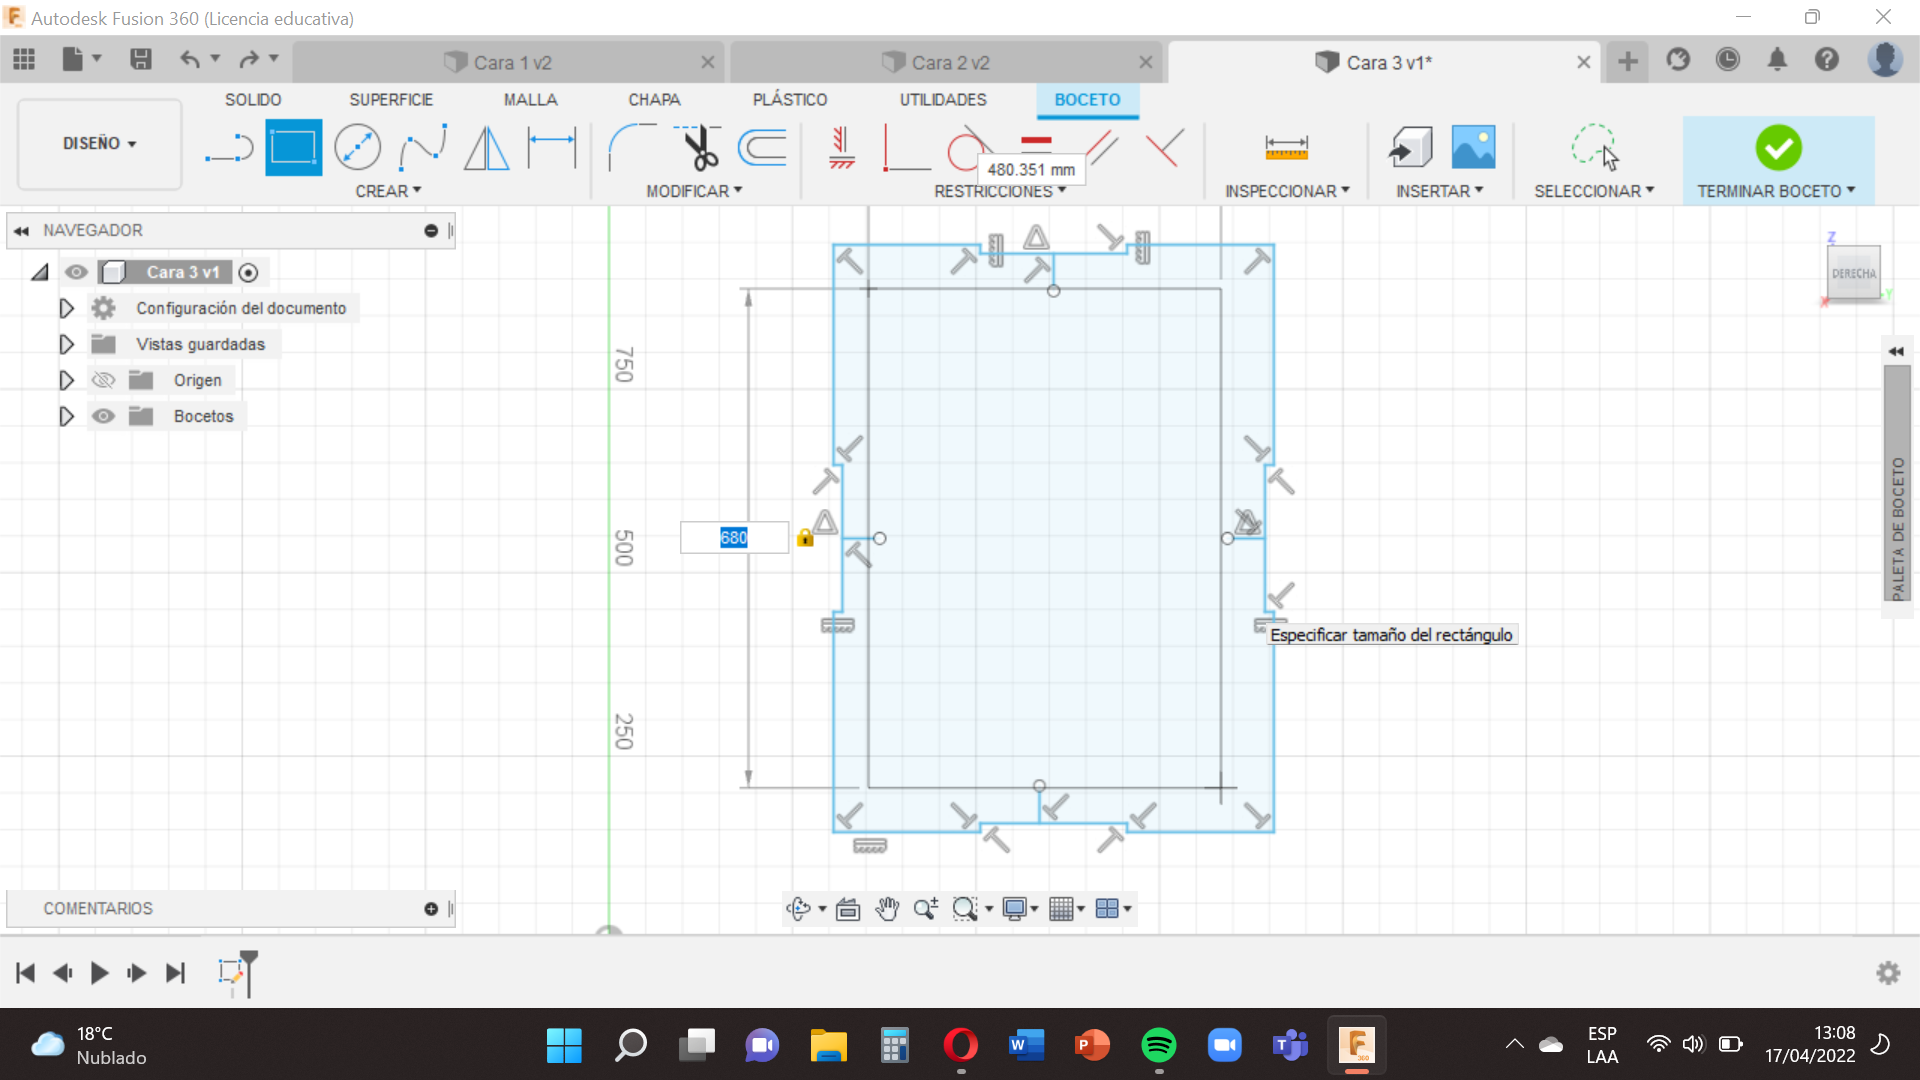
Then you will go to the option ´´Create´´ , use the tool "Rectangle", place in the corner and write the values of 680mm and 480mm.
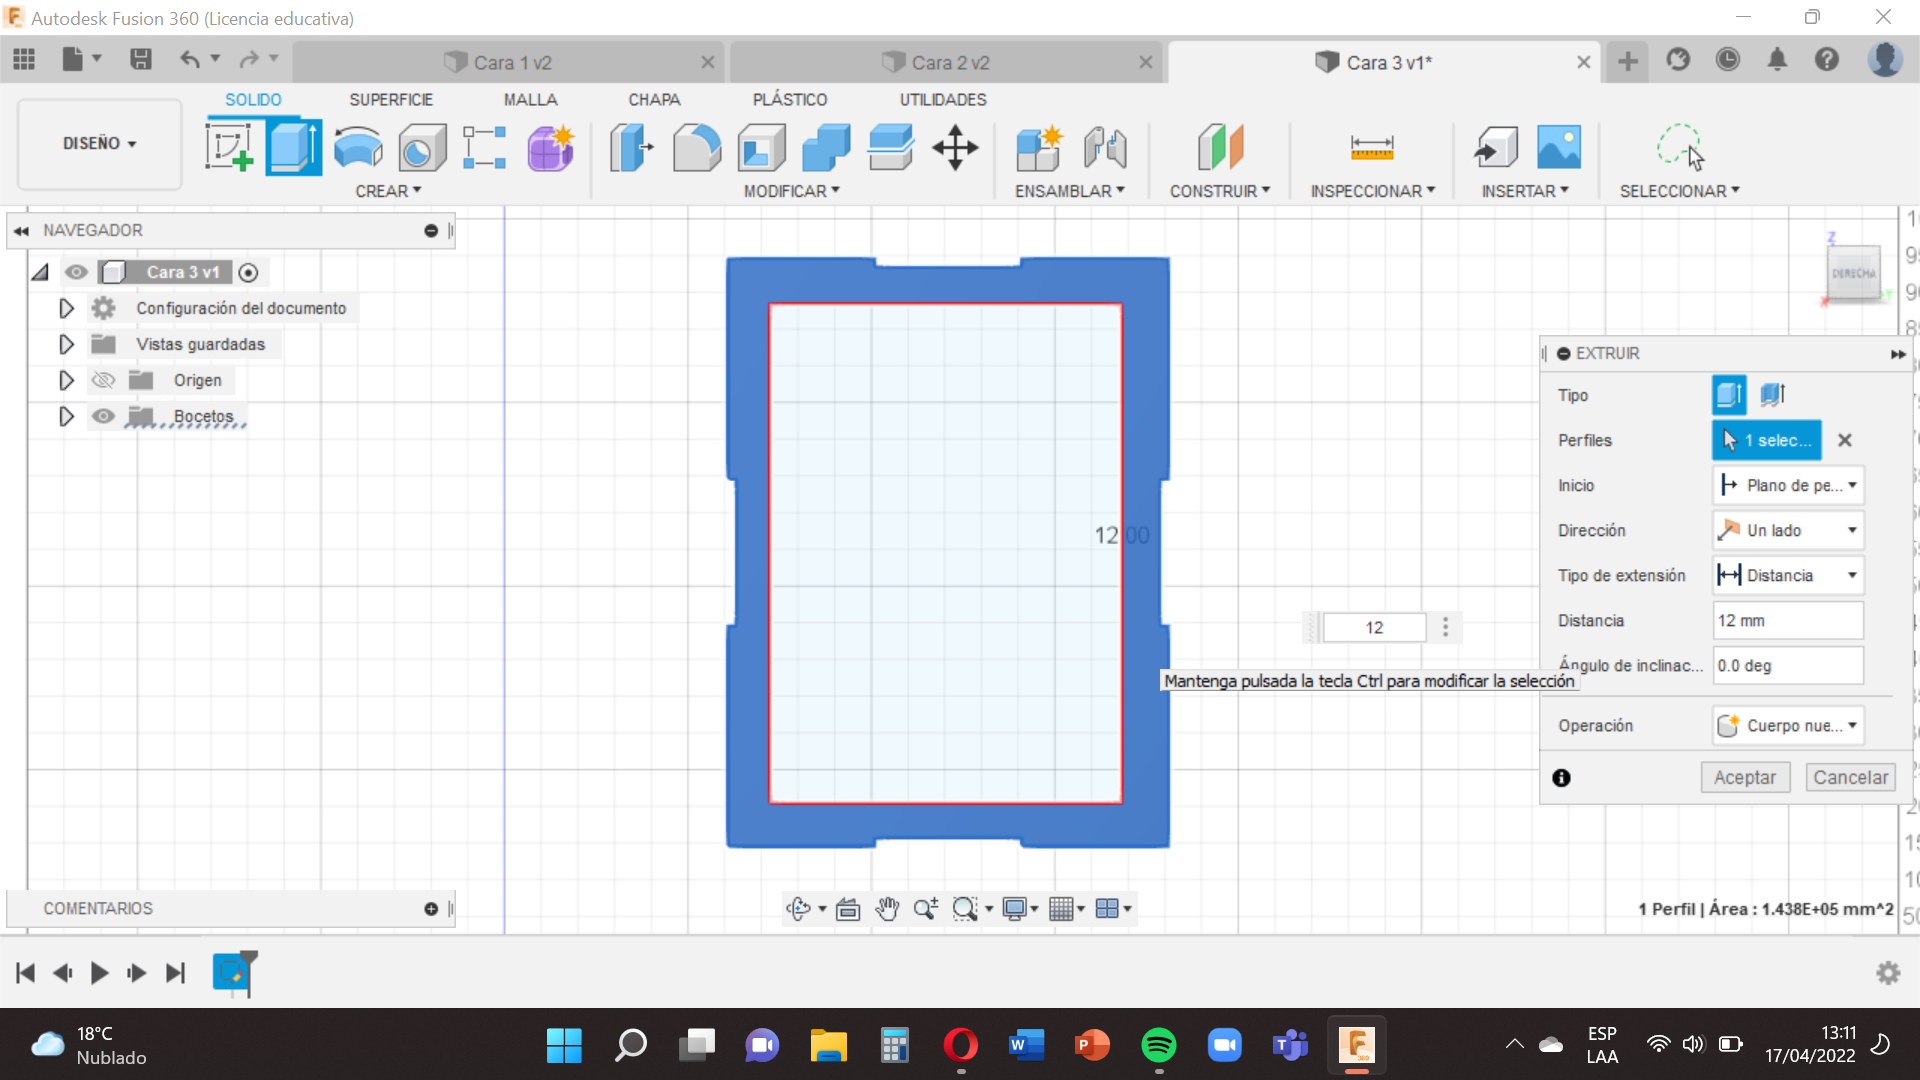
We will select and with the ´´Extrusion´´ tool write 12 mm and click on "enter".
Next you will go to the option ´´Modify´´ select appearance , and choose the one that pleases us so our face will have that ´´texture and drag it to our base.
When you have finished pressing ´´Finish Sketch´´ and save it with the name in this case Face 3 .
Face 4
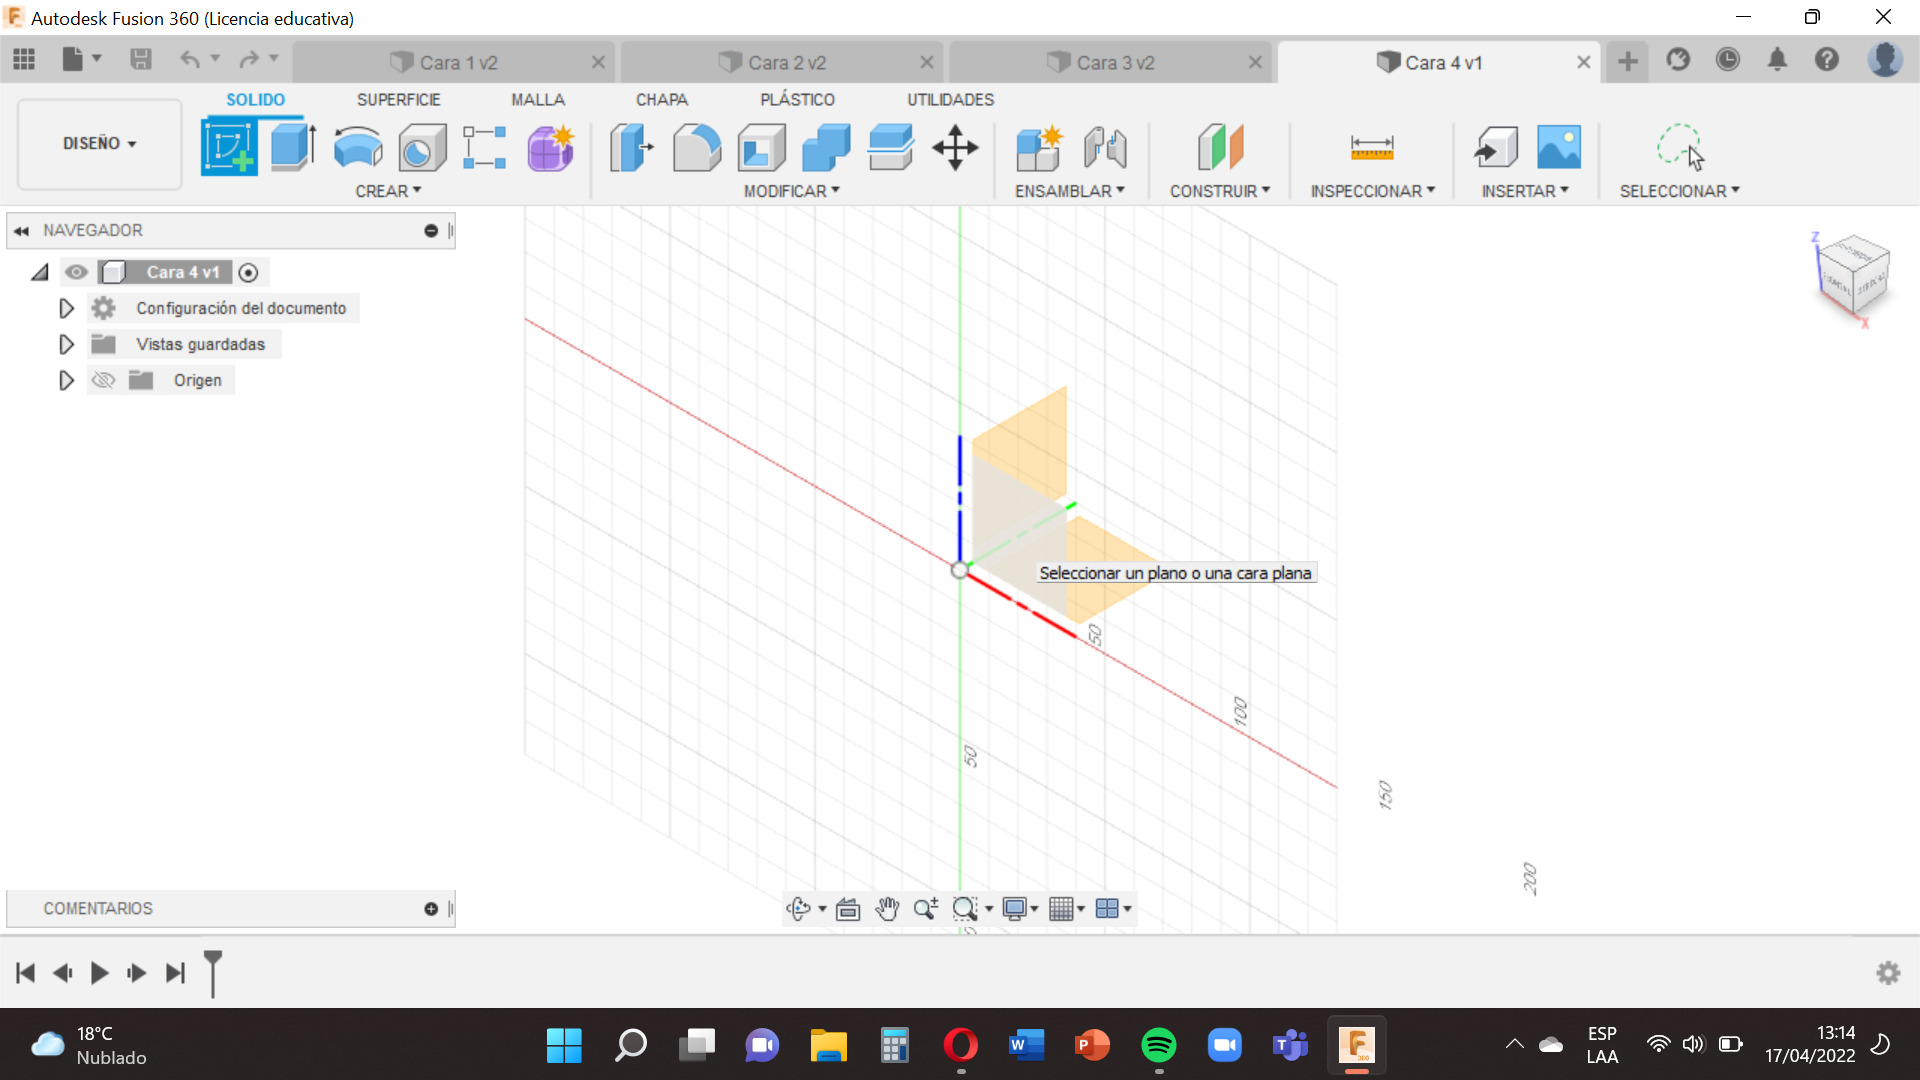
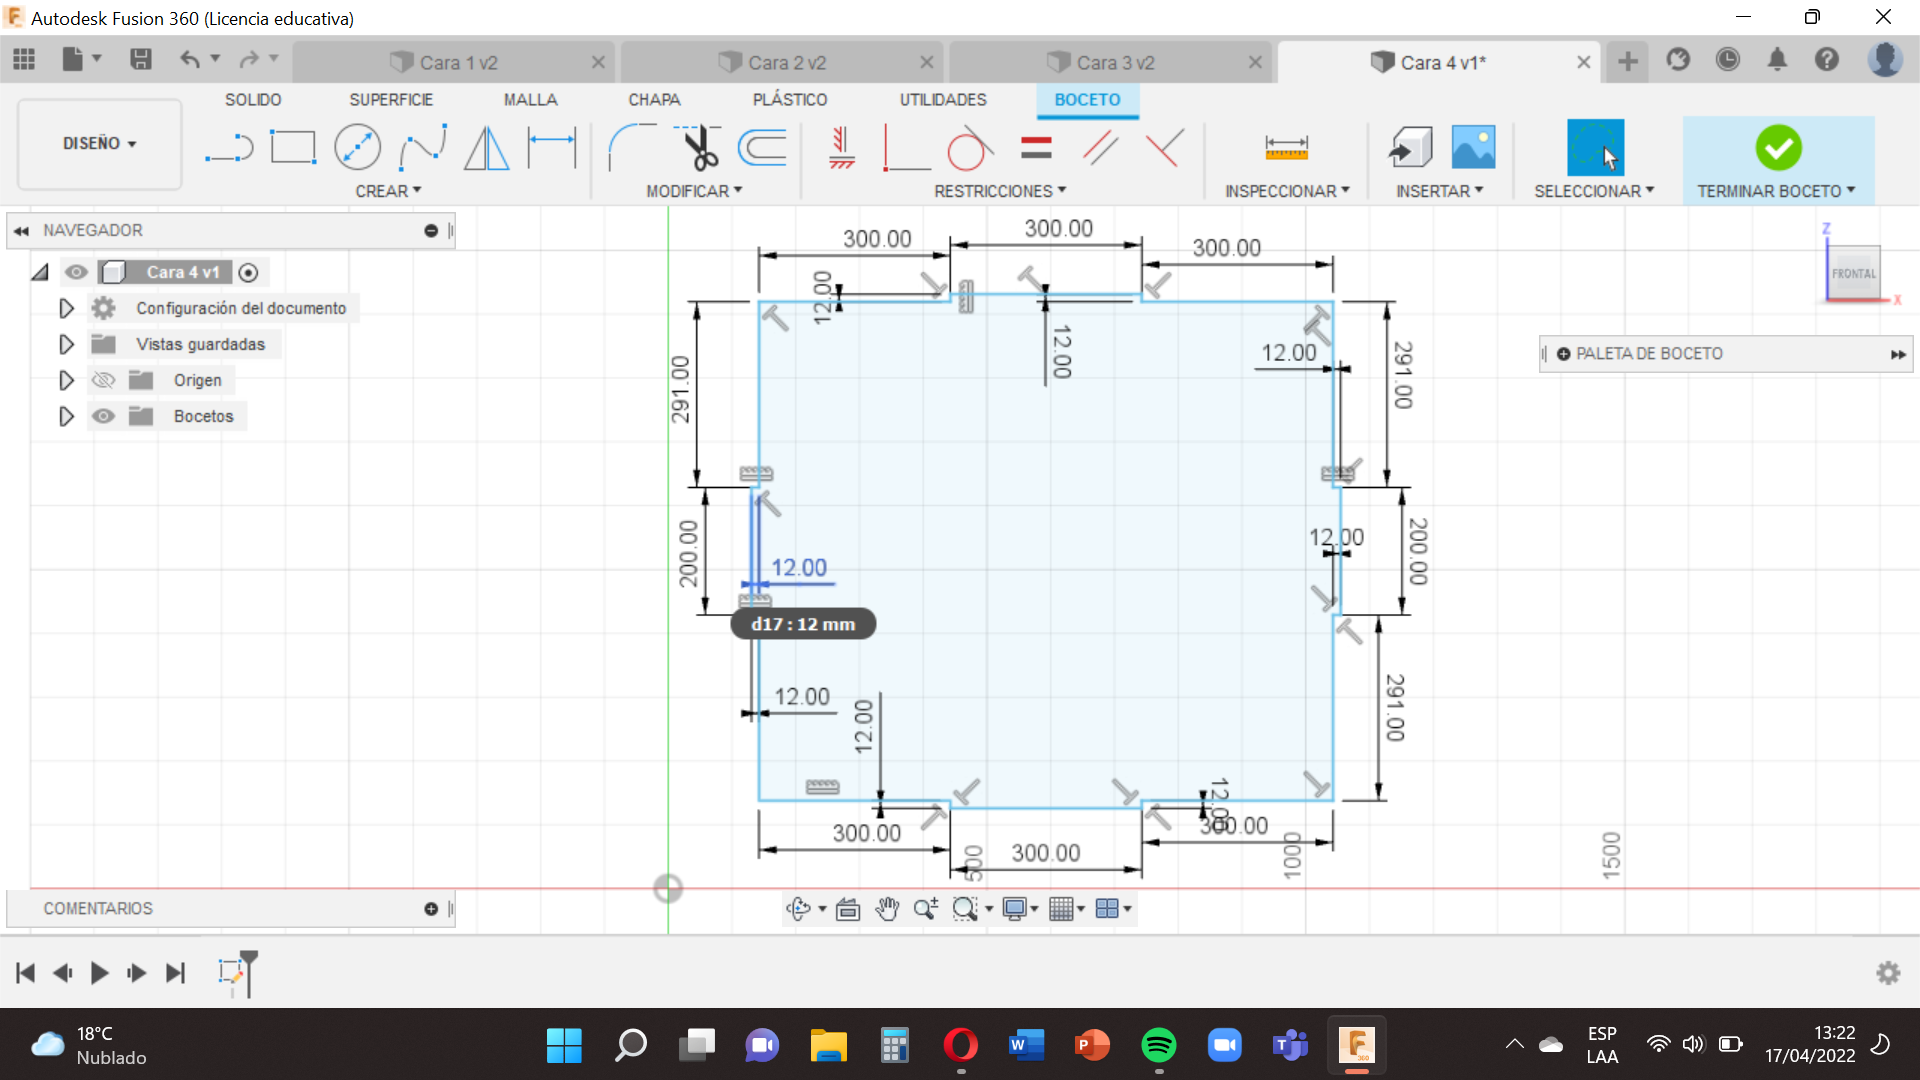
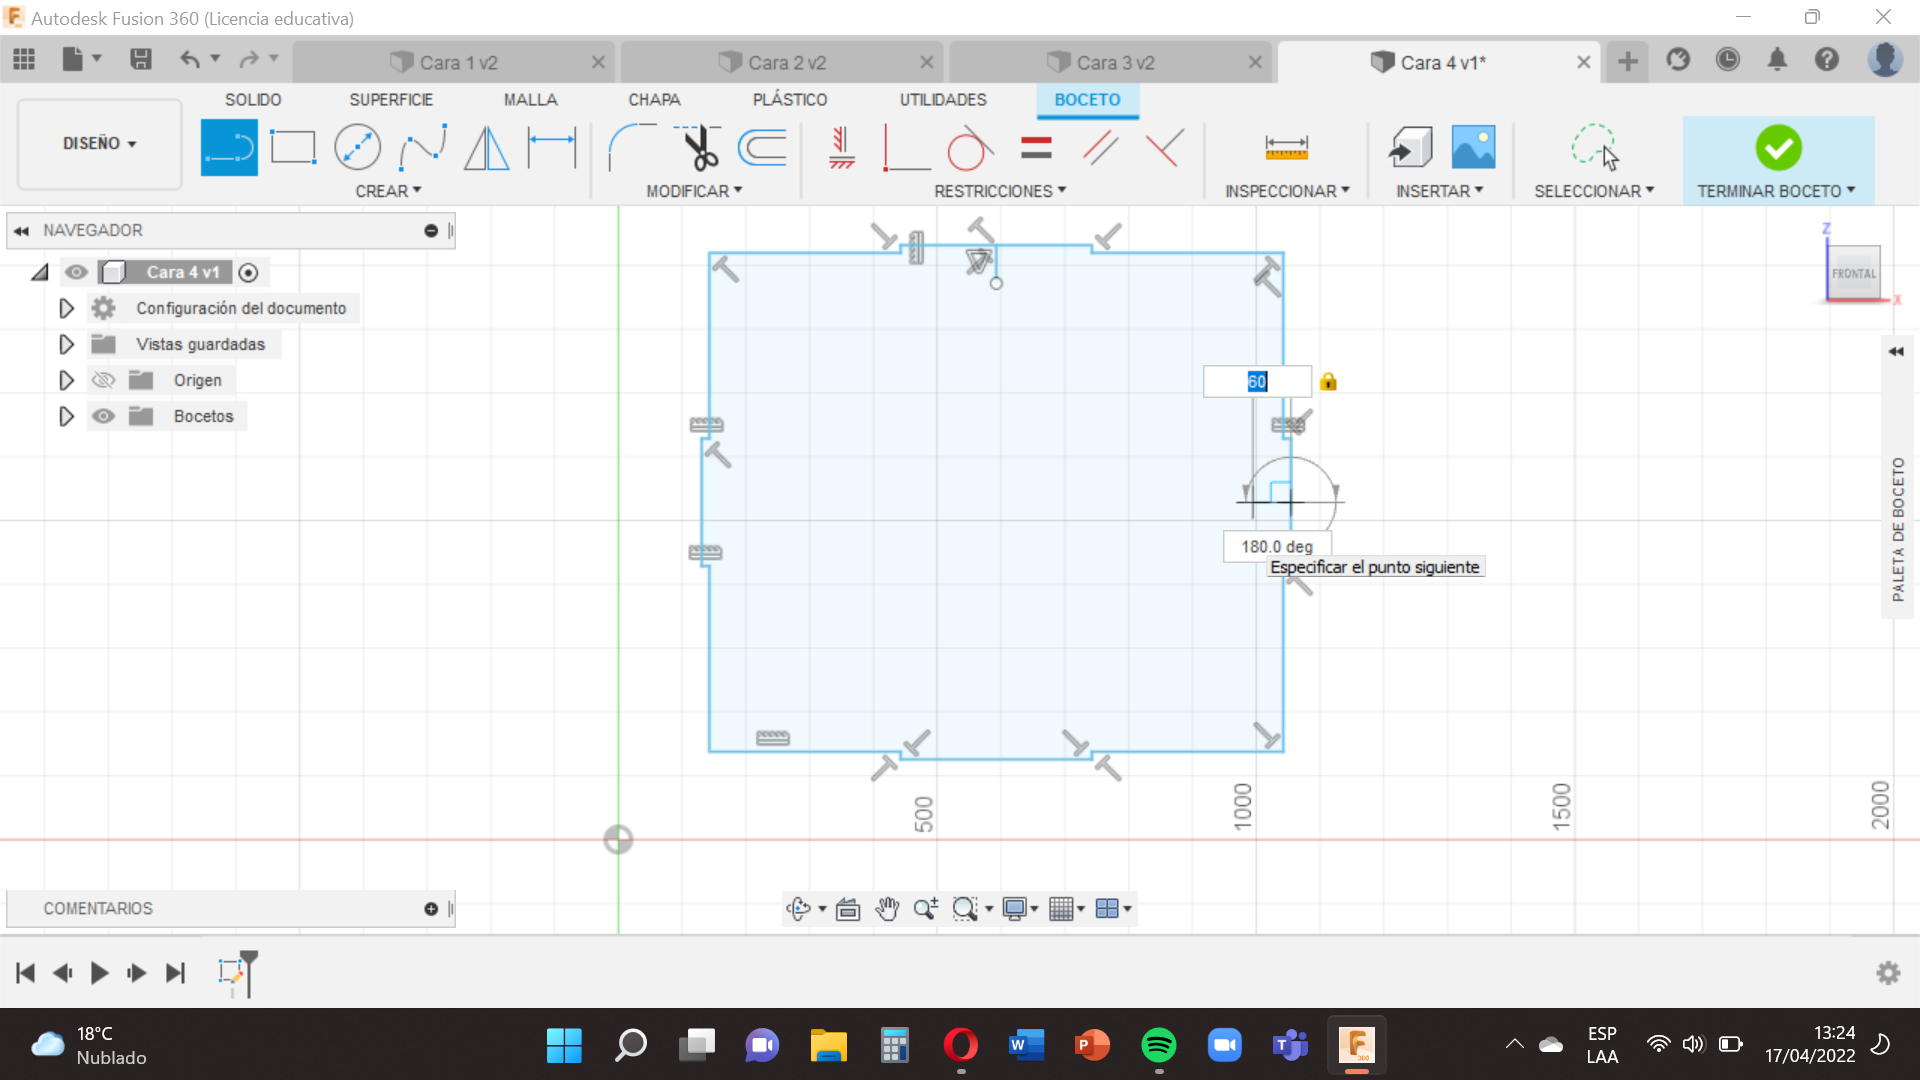
You will choose the small square between the lines Y and X (green and red) and then do exactly the same and follow this guide with the same three steps above.
You will go to the option Create , use the tool Line , you have to make a line based on the measurements of our face 4 , remember to finish the shape of our face at the same point where it started.
For the following we have to select Finish sketch .
Having the full face, we will make lines of support.
We move to the centers of each line of the face and draw lines in with a measure of 60mm, these lines will support.
Window of Face 4
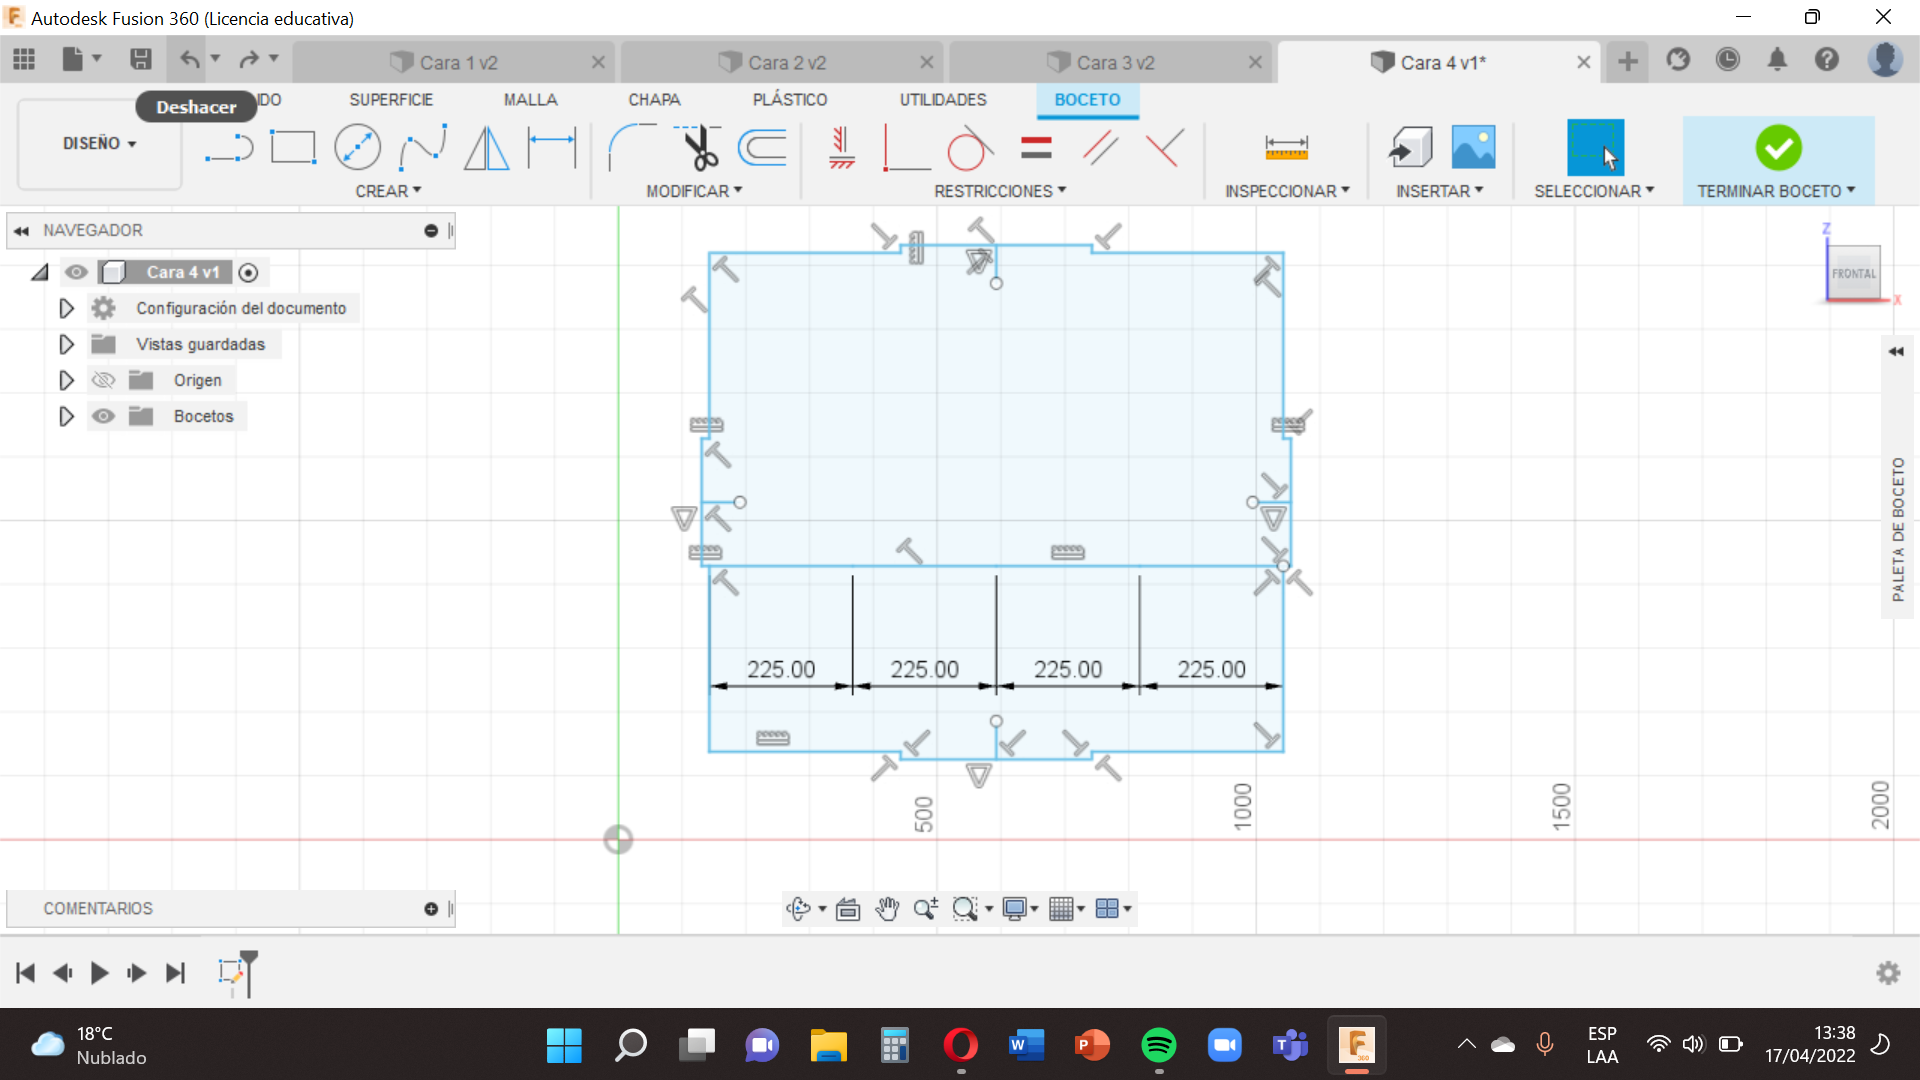
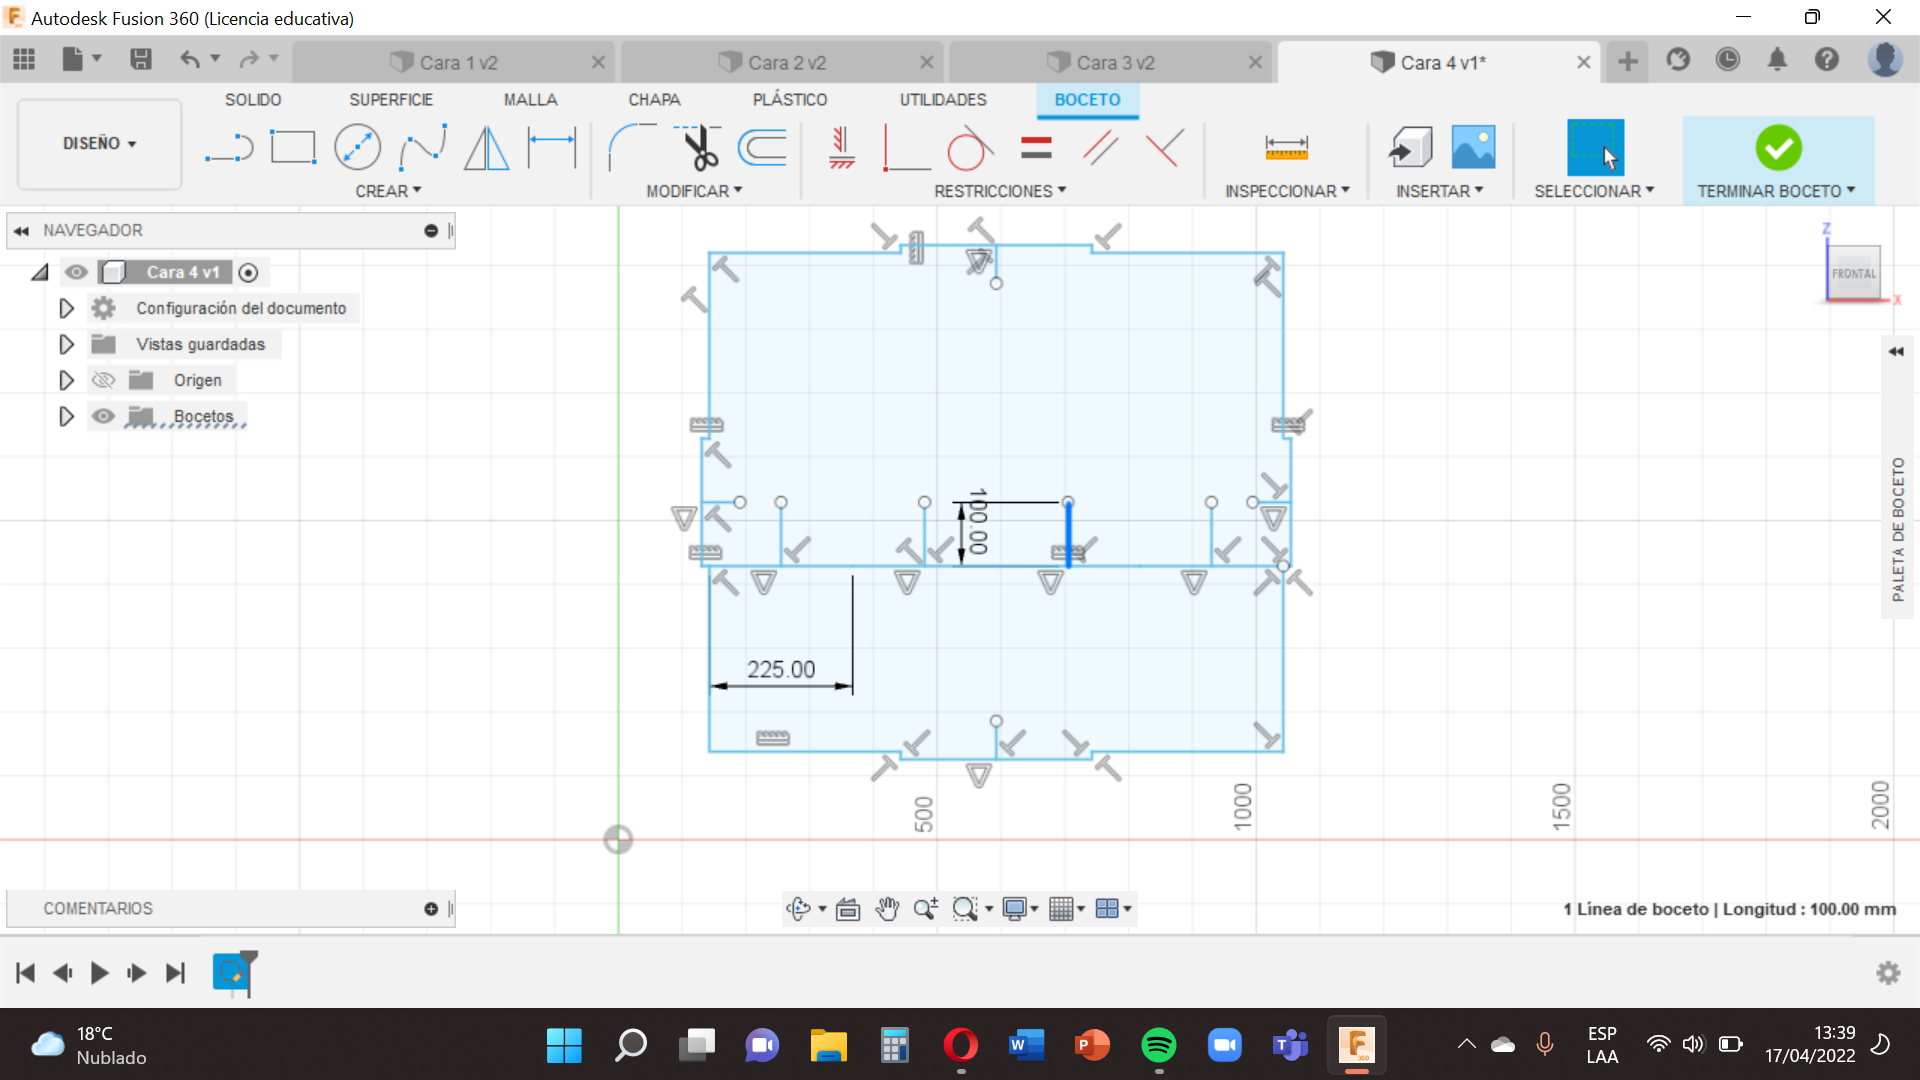
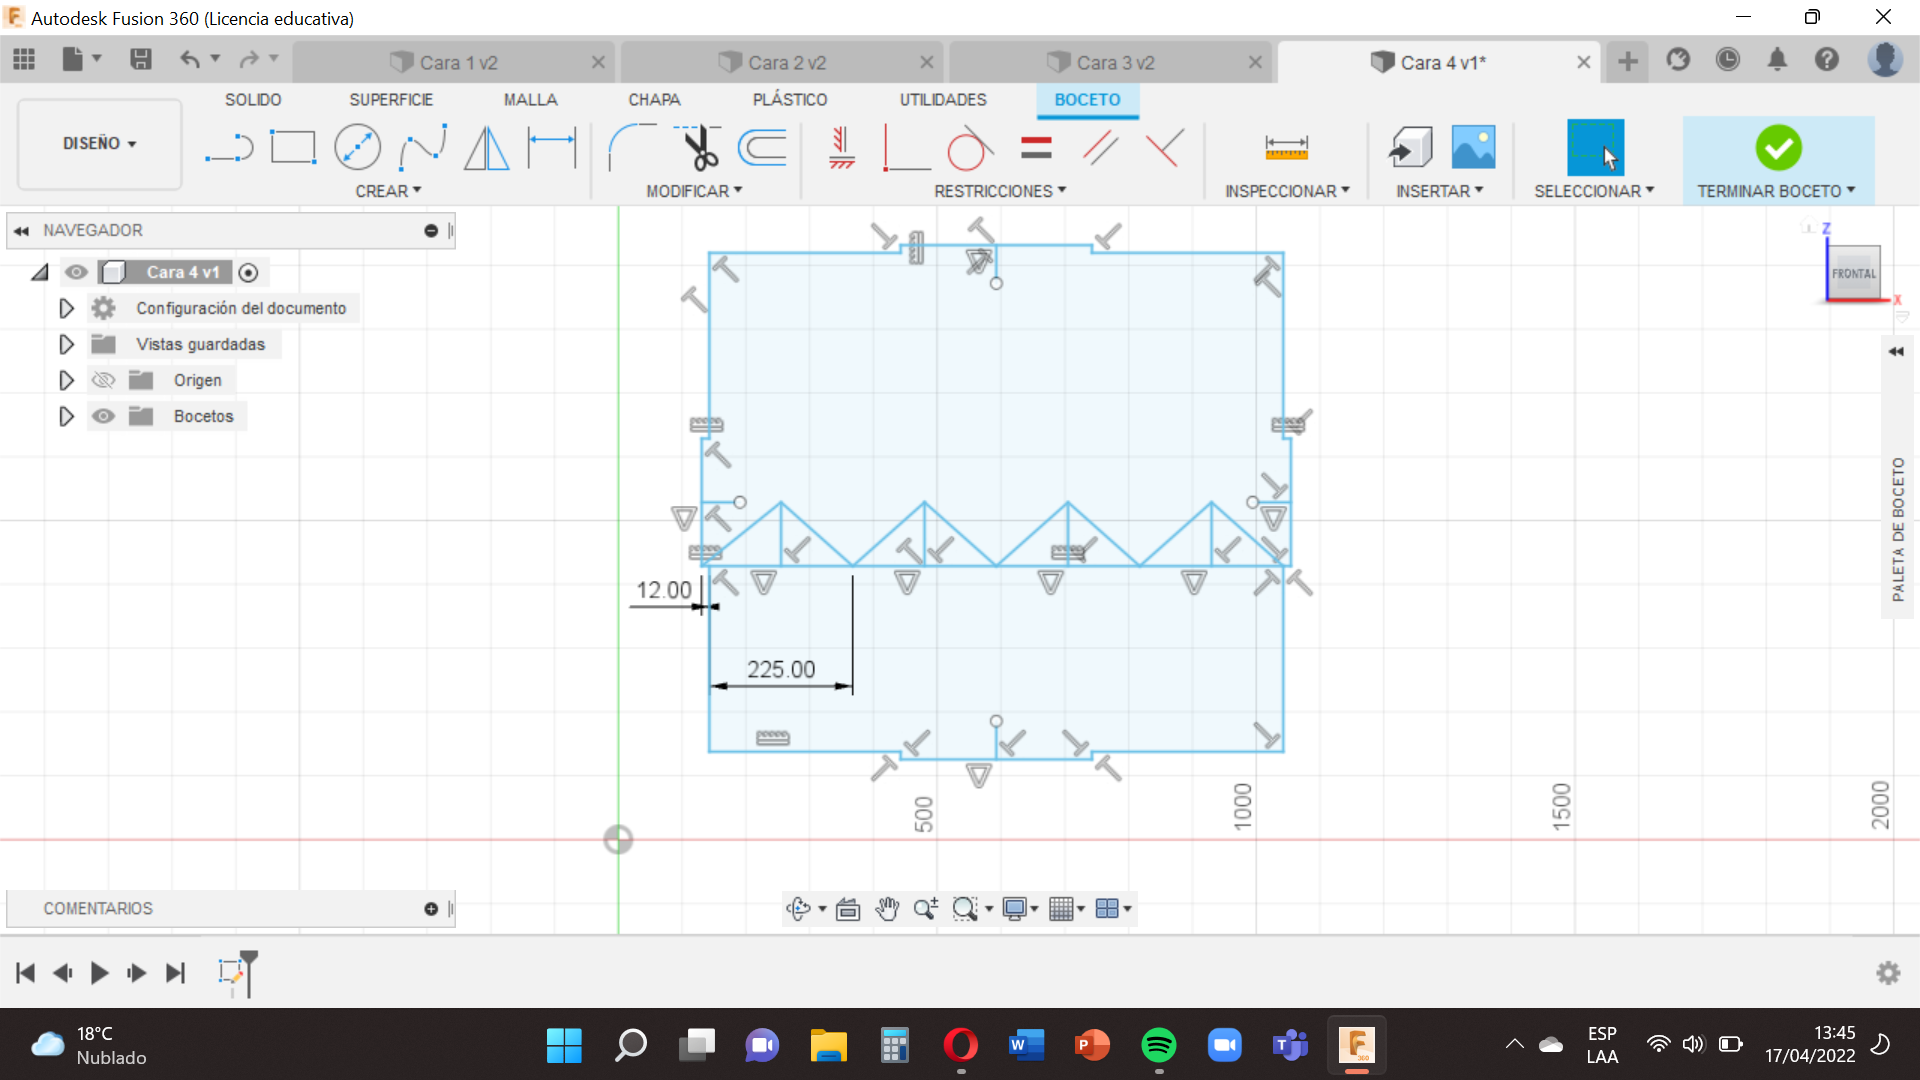
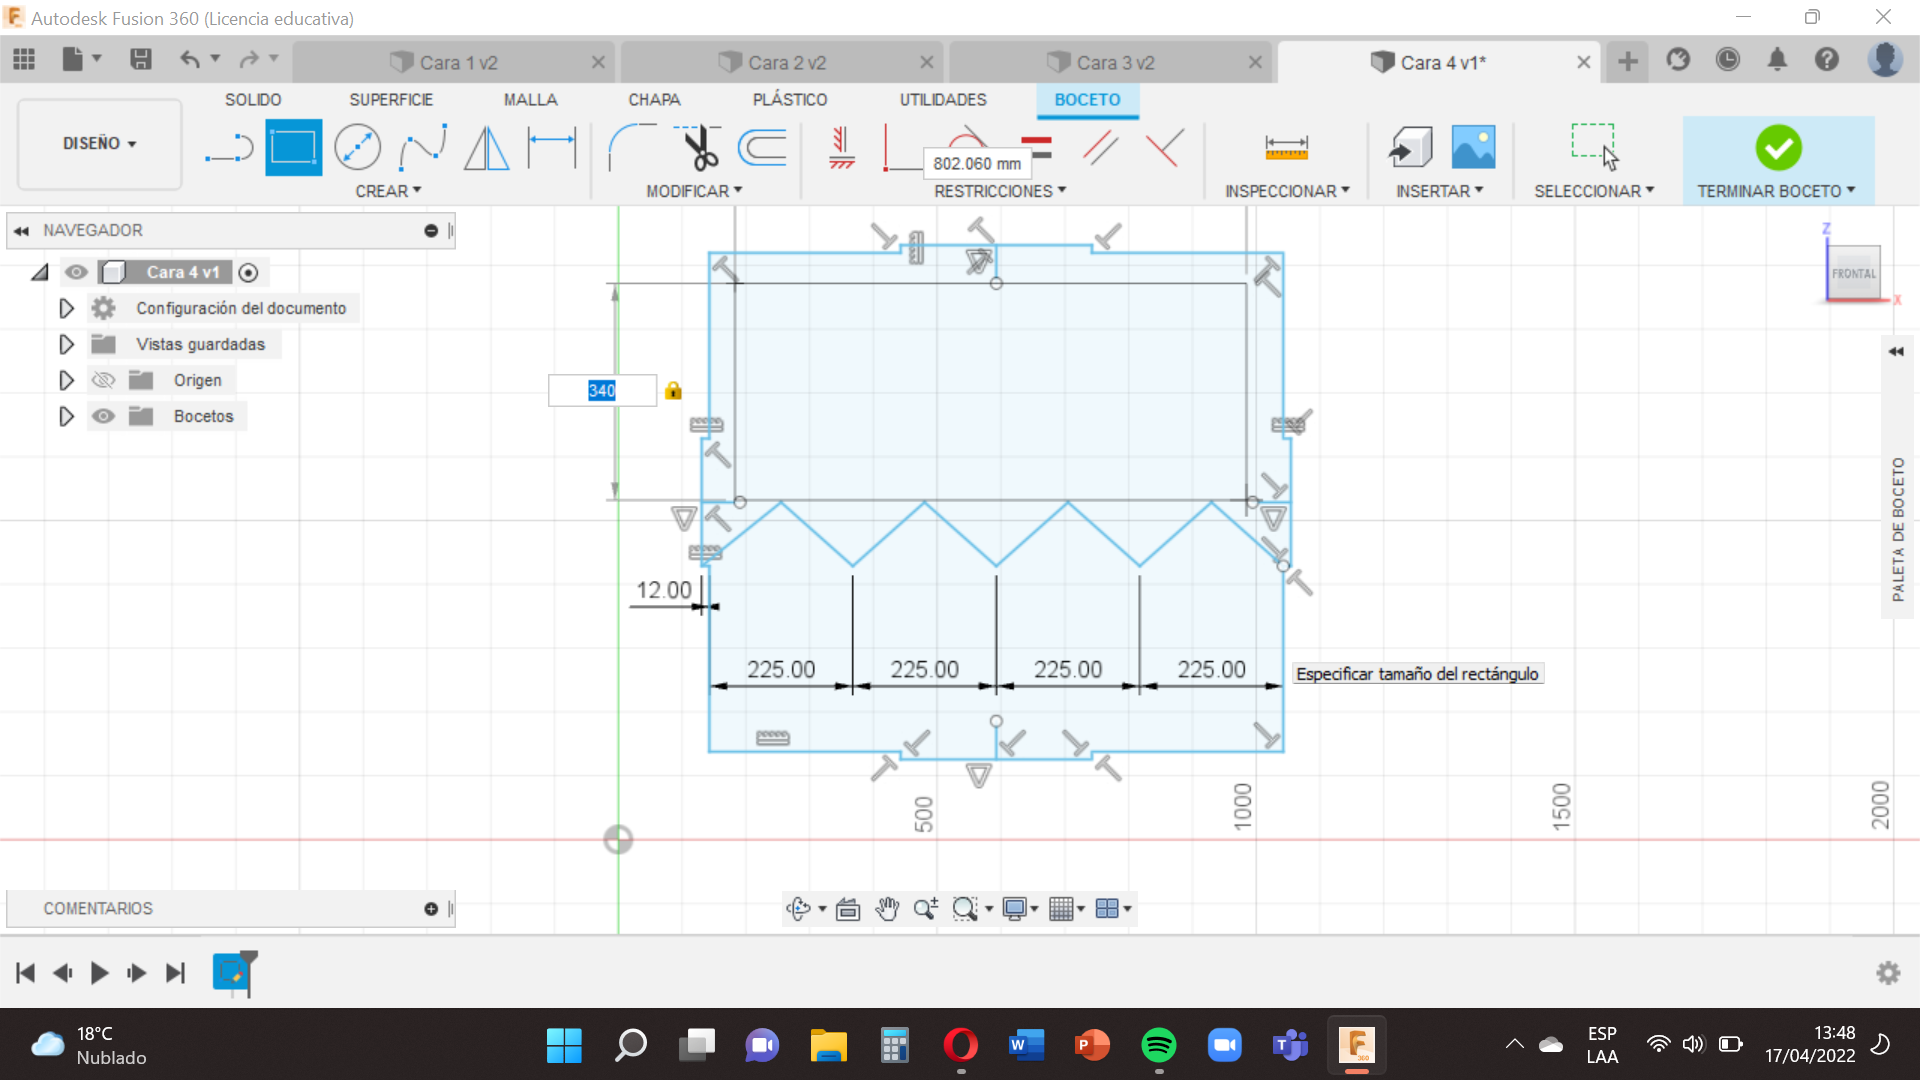.png)
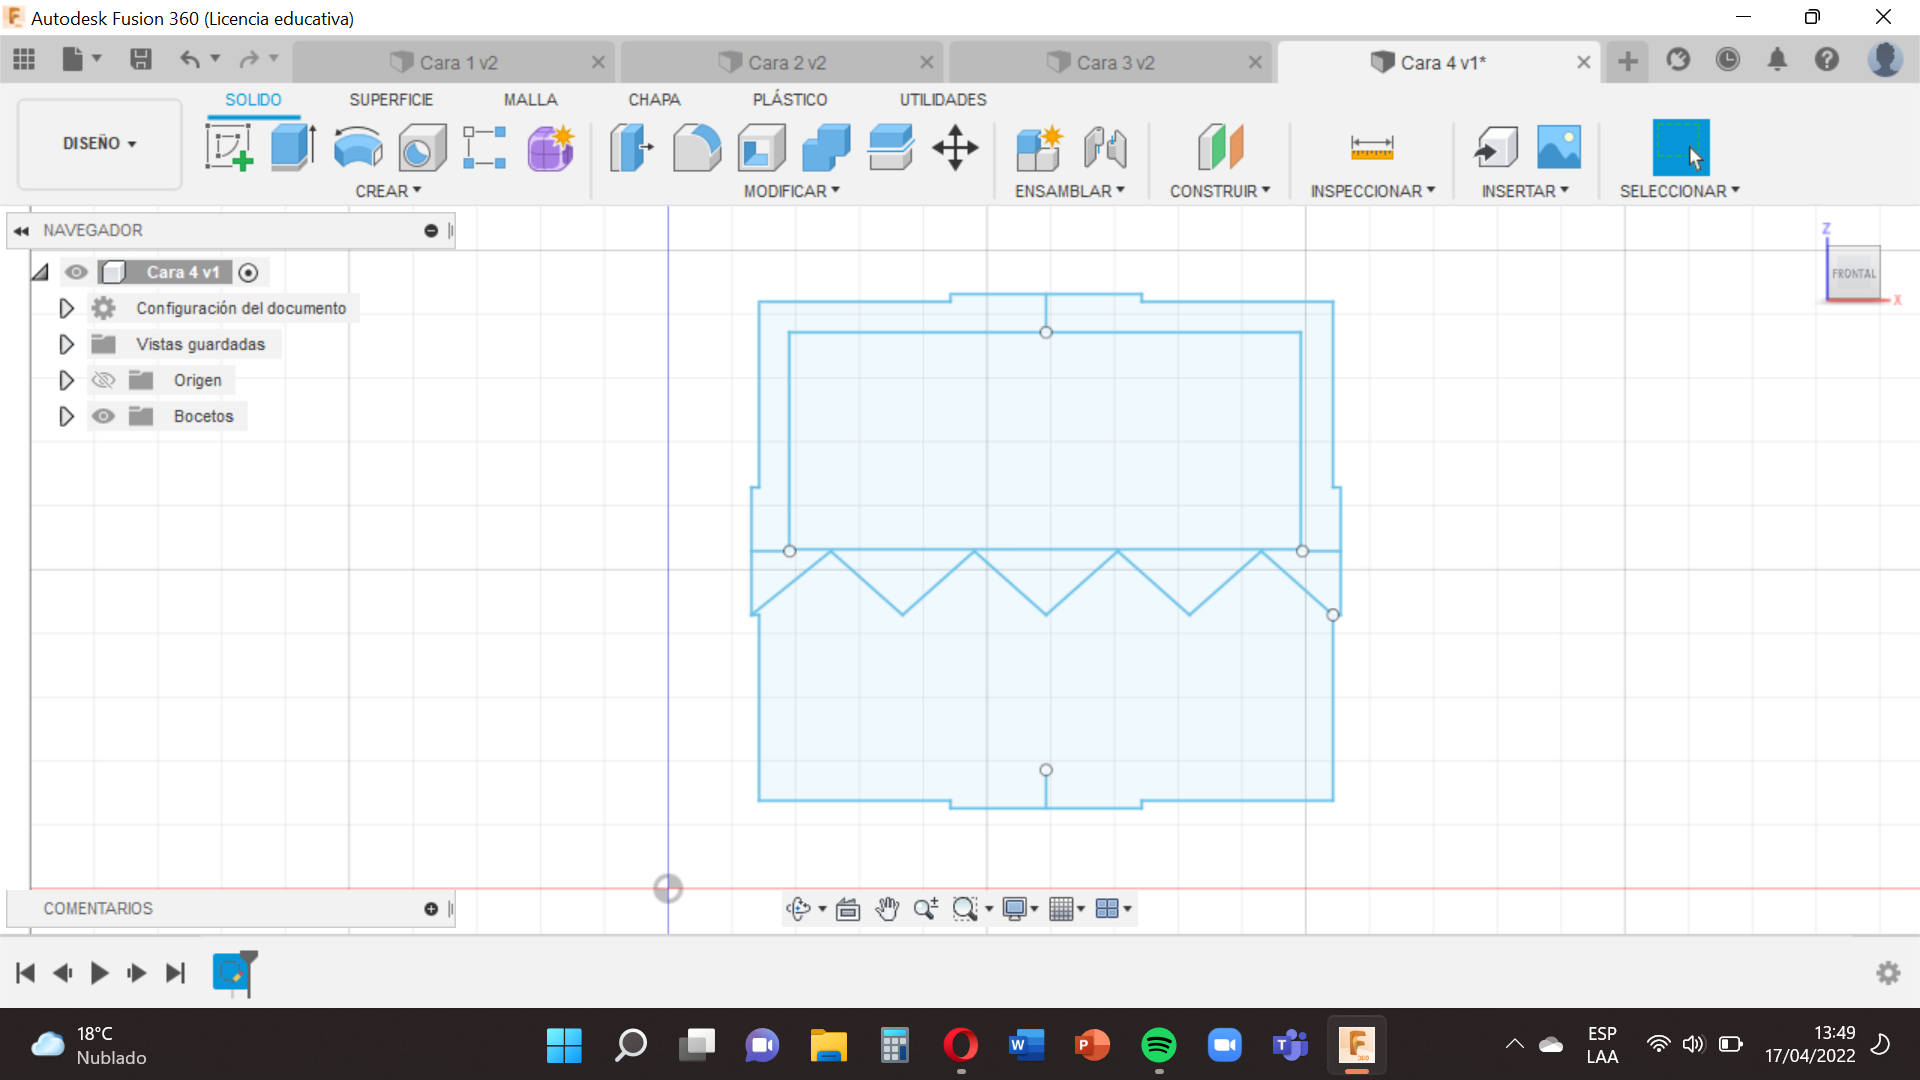
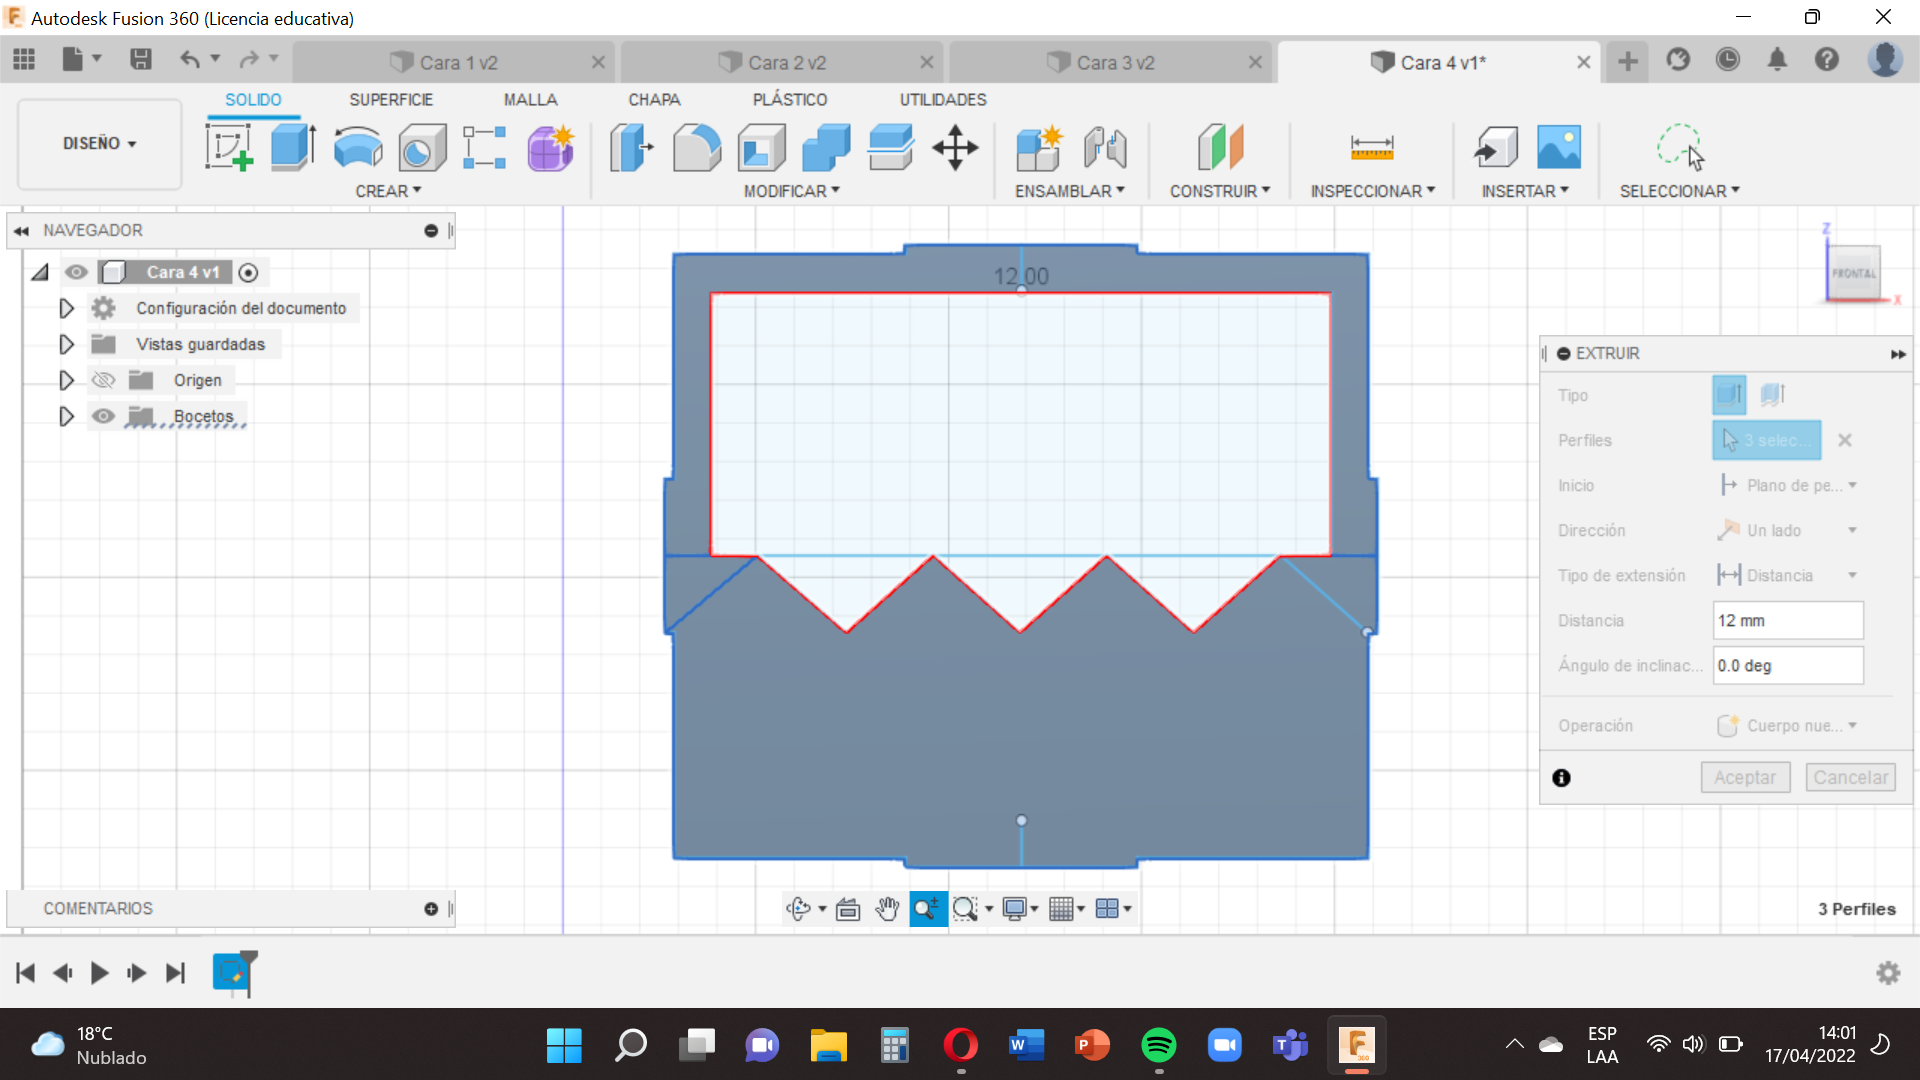
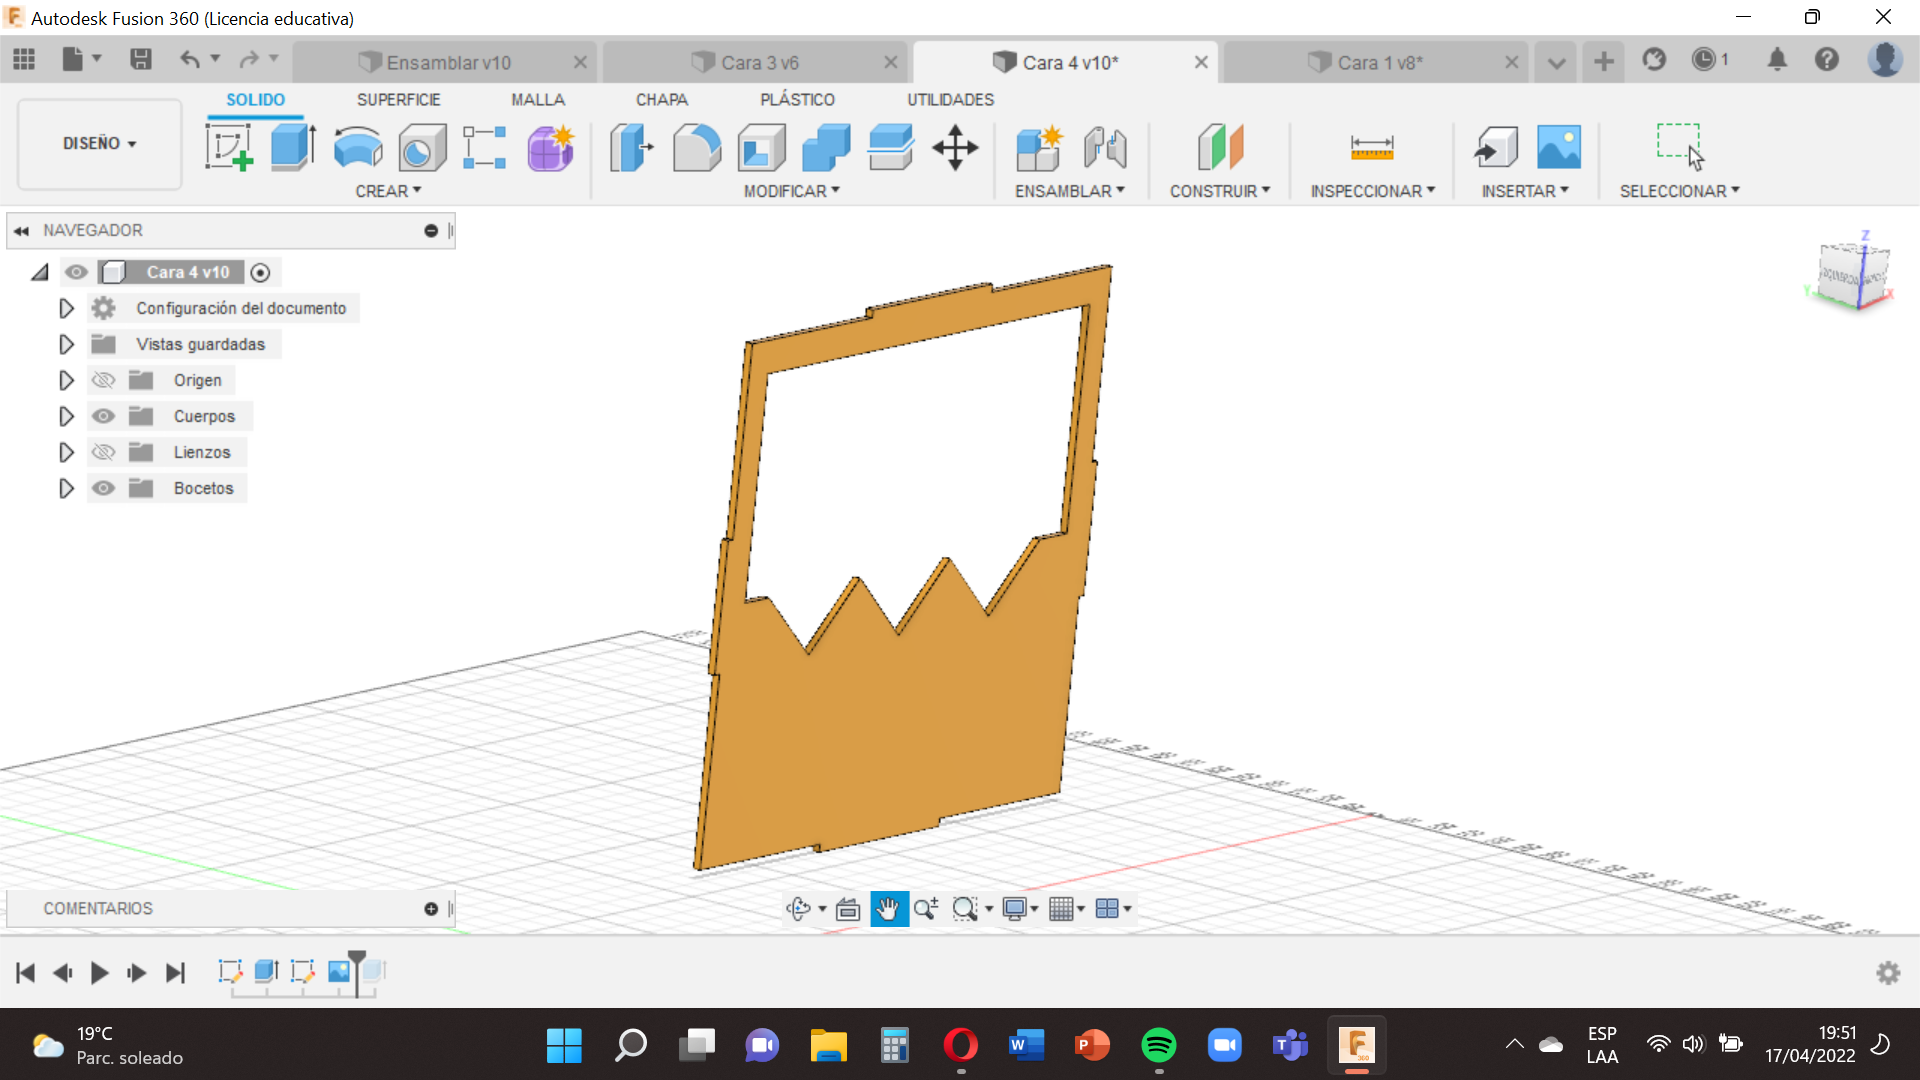
Having our support lines, we are located at 291 mm from the beginning of the face, that is to say at the beginning of the teeth , with the tool "Line" we draw 4 continuous lines of a distance of 225mm until we reach the end of the face.
Then we will place in the centers of each line and with the tool "Line" we will draw a vertical line of up to 100mm.
Now with the tool "Line" we are going to join the ends of the horizontal lines with the vertical ones, that is, as if we were forming triangles.
We erase horizontal and vertical lines of 225mm and 100mm.
Now we will use the tool "Rectangle", we place in the corner and write the values of a length of 800 mm and a width of 340mm.
Having all this we will select and with extrusion tool type 12mm and click on "enter".
Next you will go to the option Modify select appearance , and choose the one that we like so that our face has that texture and drag it to our base.
When you have finished pressing Finish Sketch and save it in this case with the name Face 4
Design of the Face 1
.png)
.png)
.png)
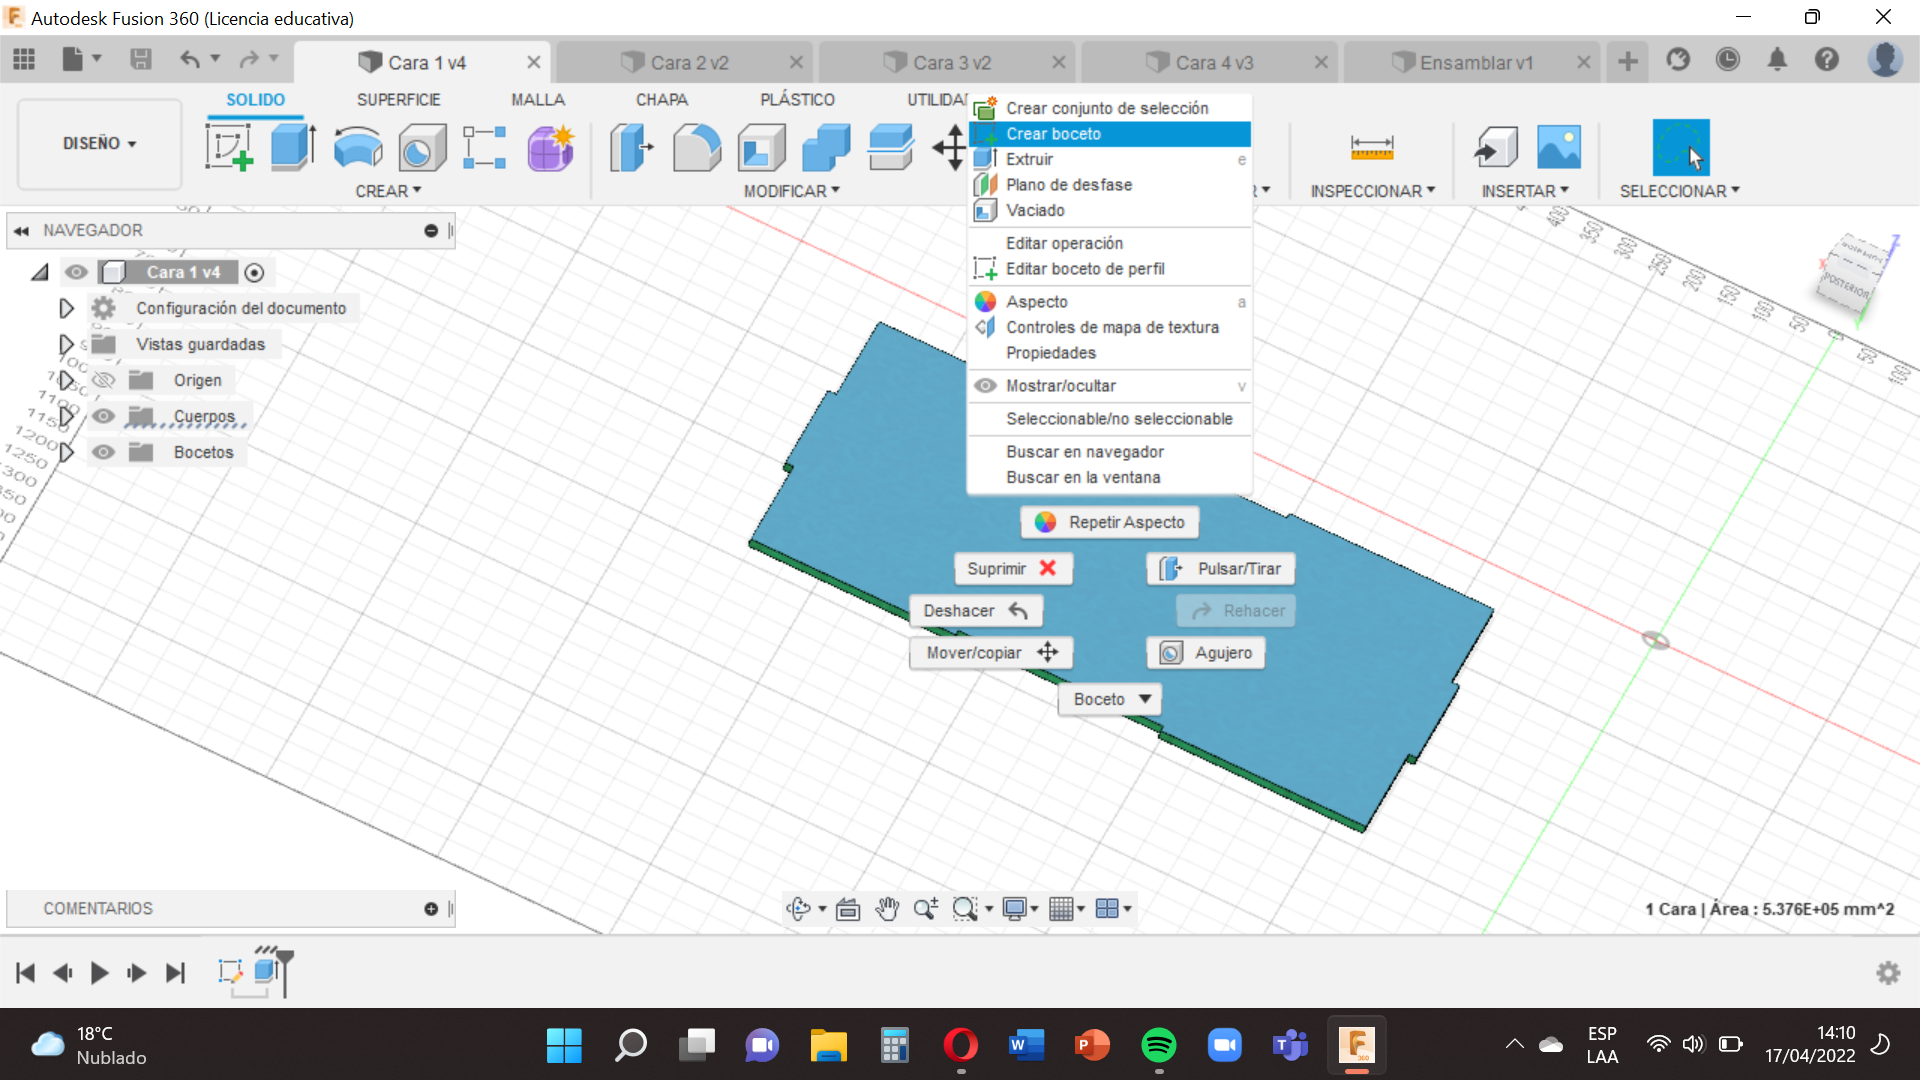
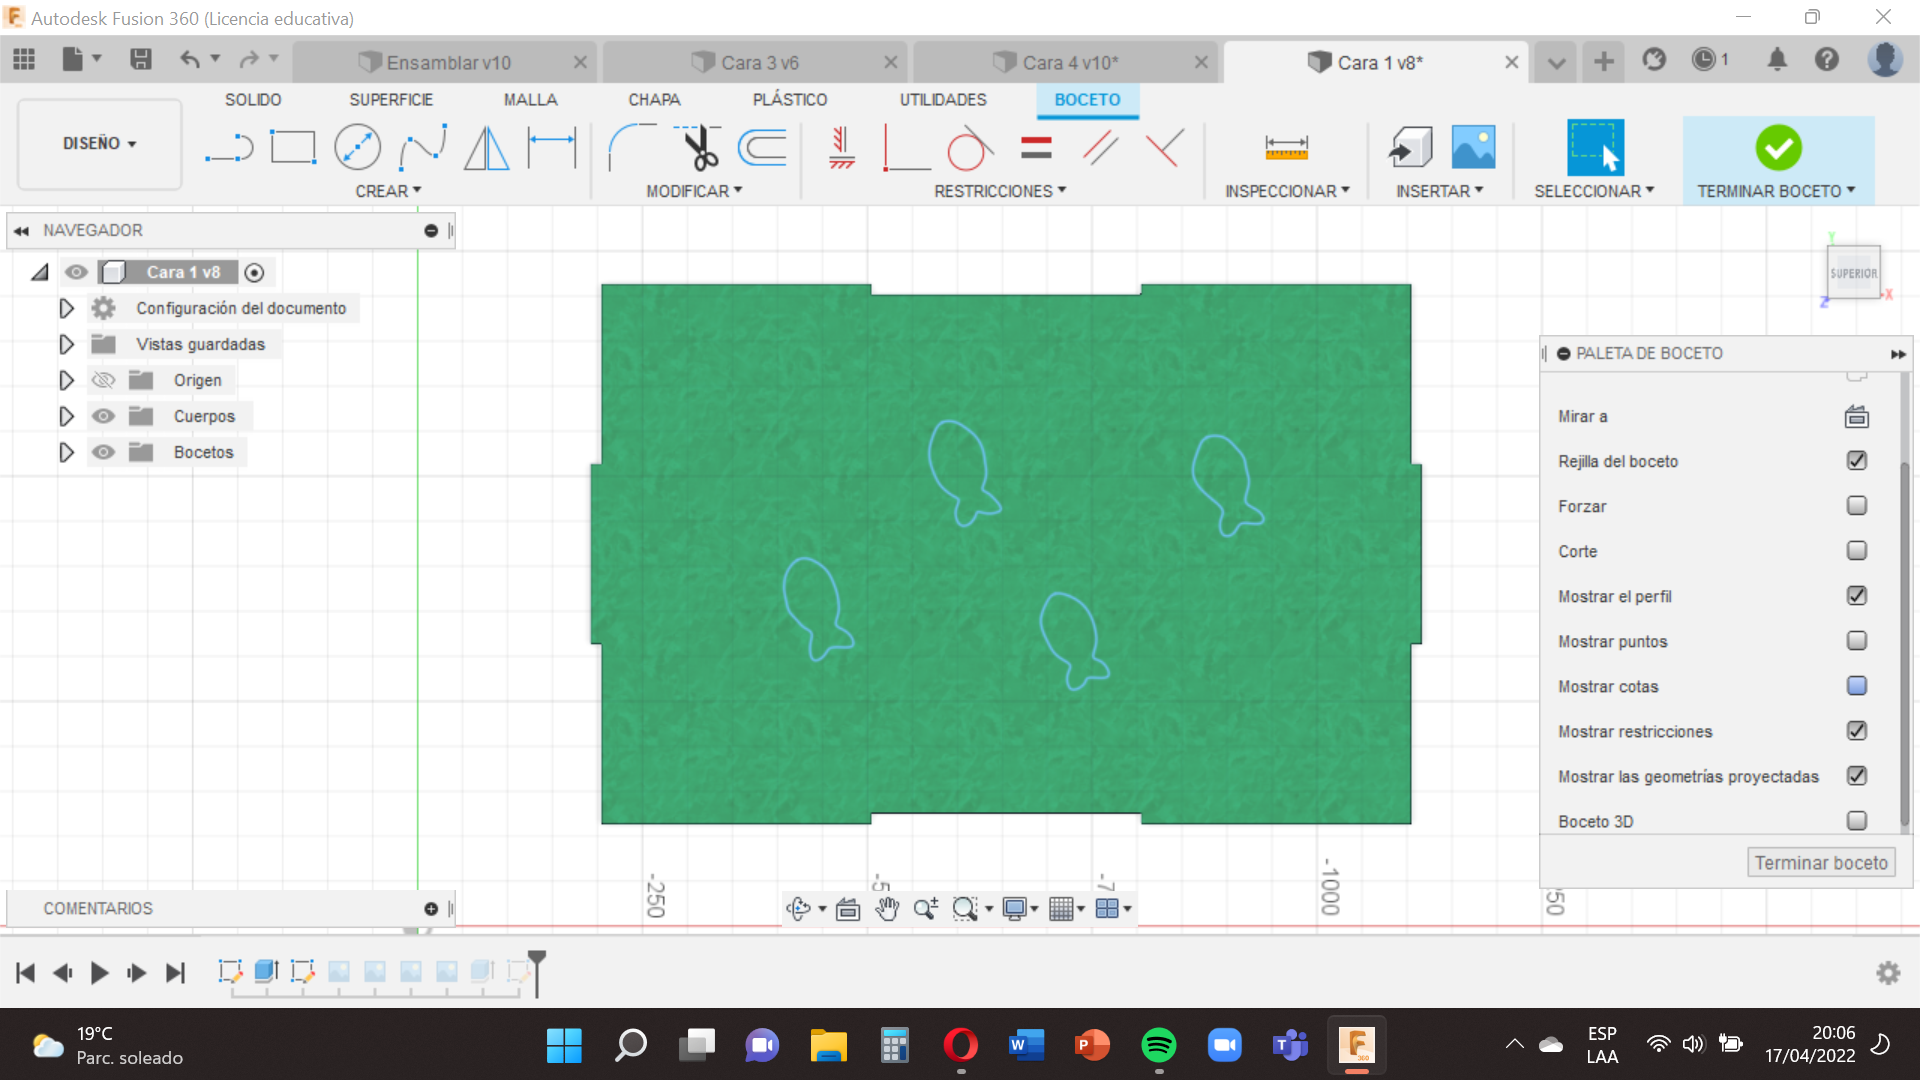
What we are going to do is design cat croquettes in the form of fish on our face 1, let’s get started.
When you’re in Face 1, right-click and choose the "Create Sketch" option.
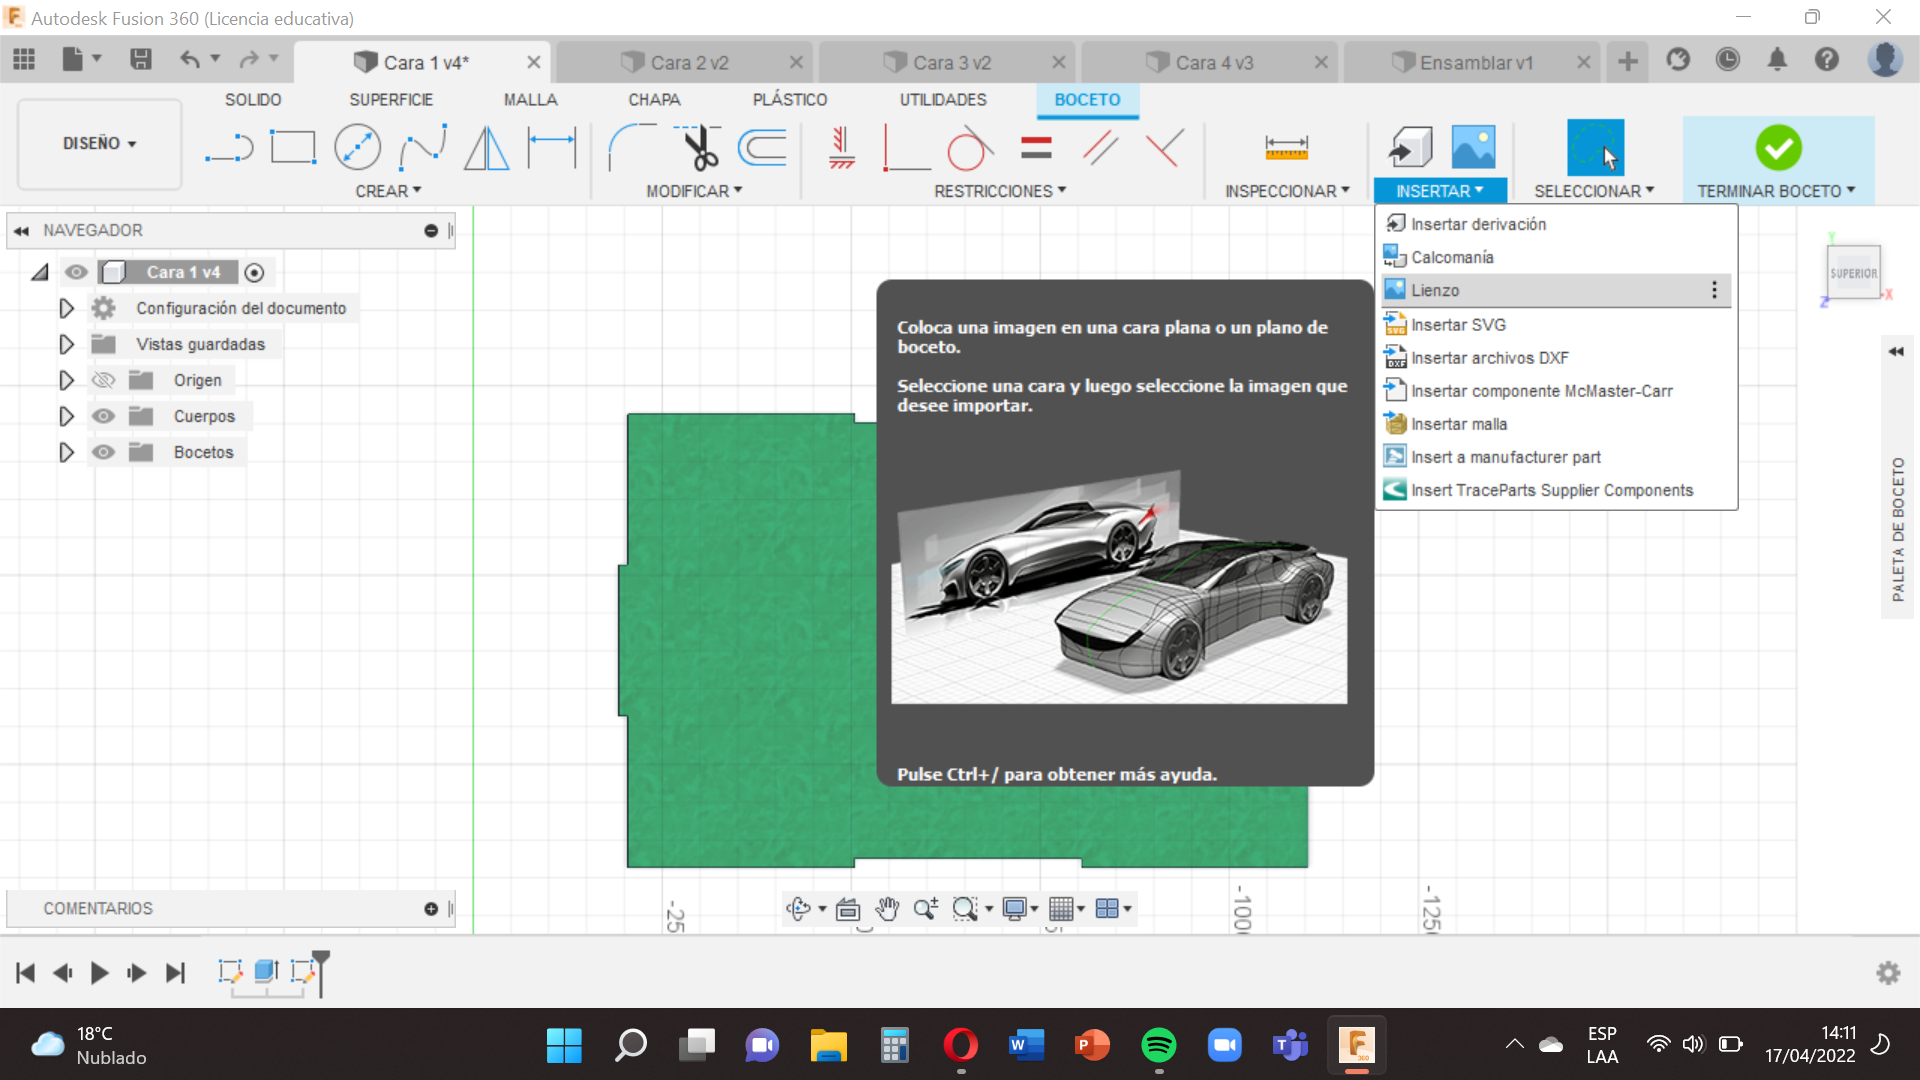
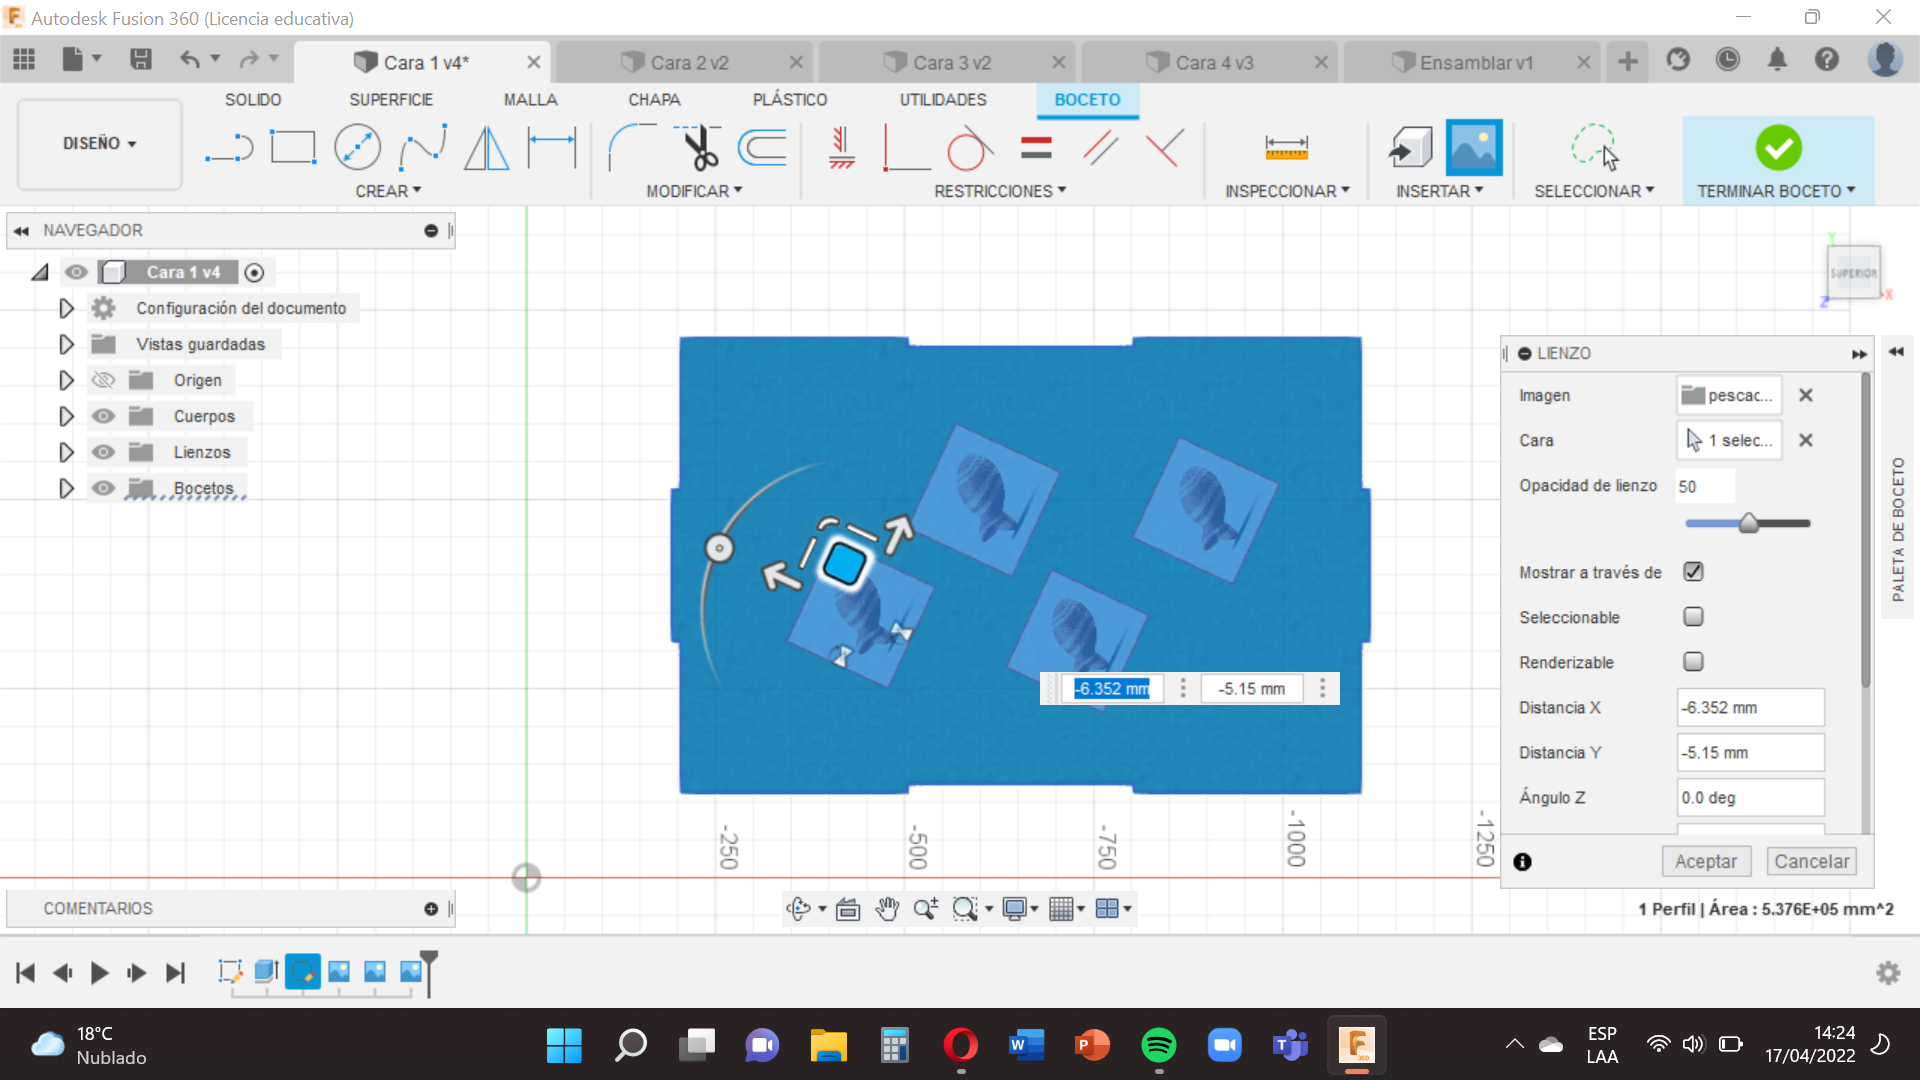
We go to the option of "Canvas" (it is the tool that allows us to put the image), from our computer , we insert the image in our case croquettes in the form of fish.
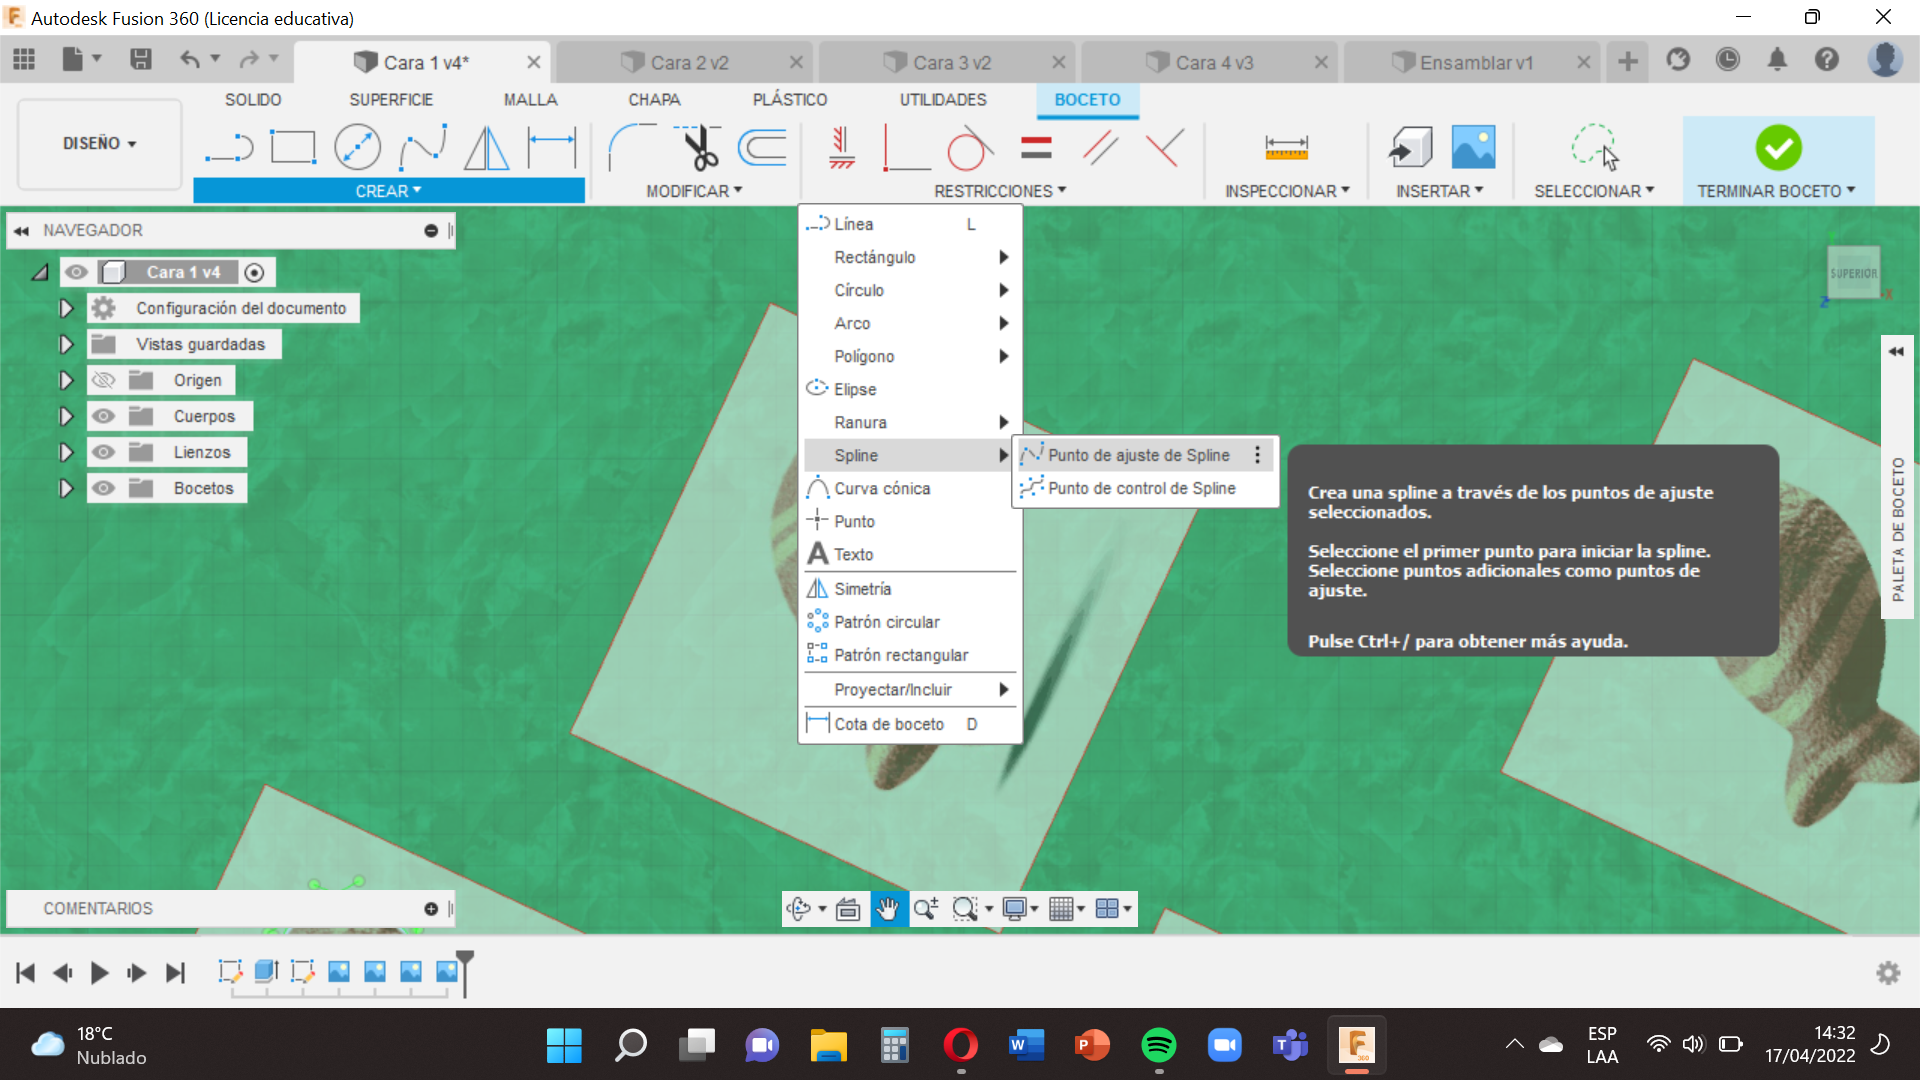
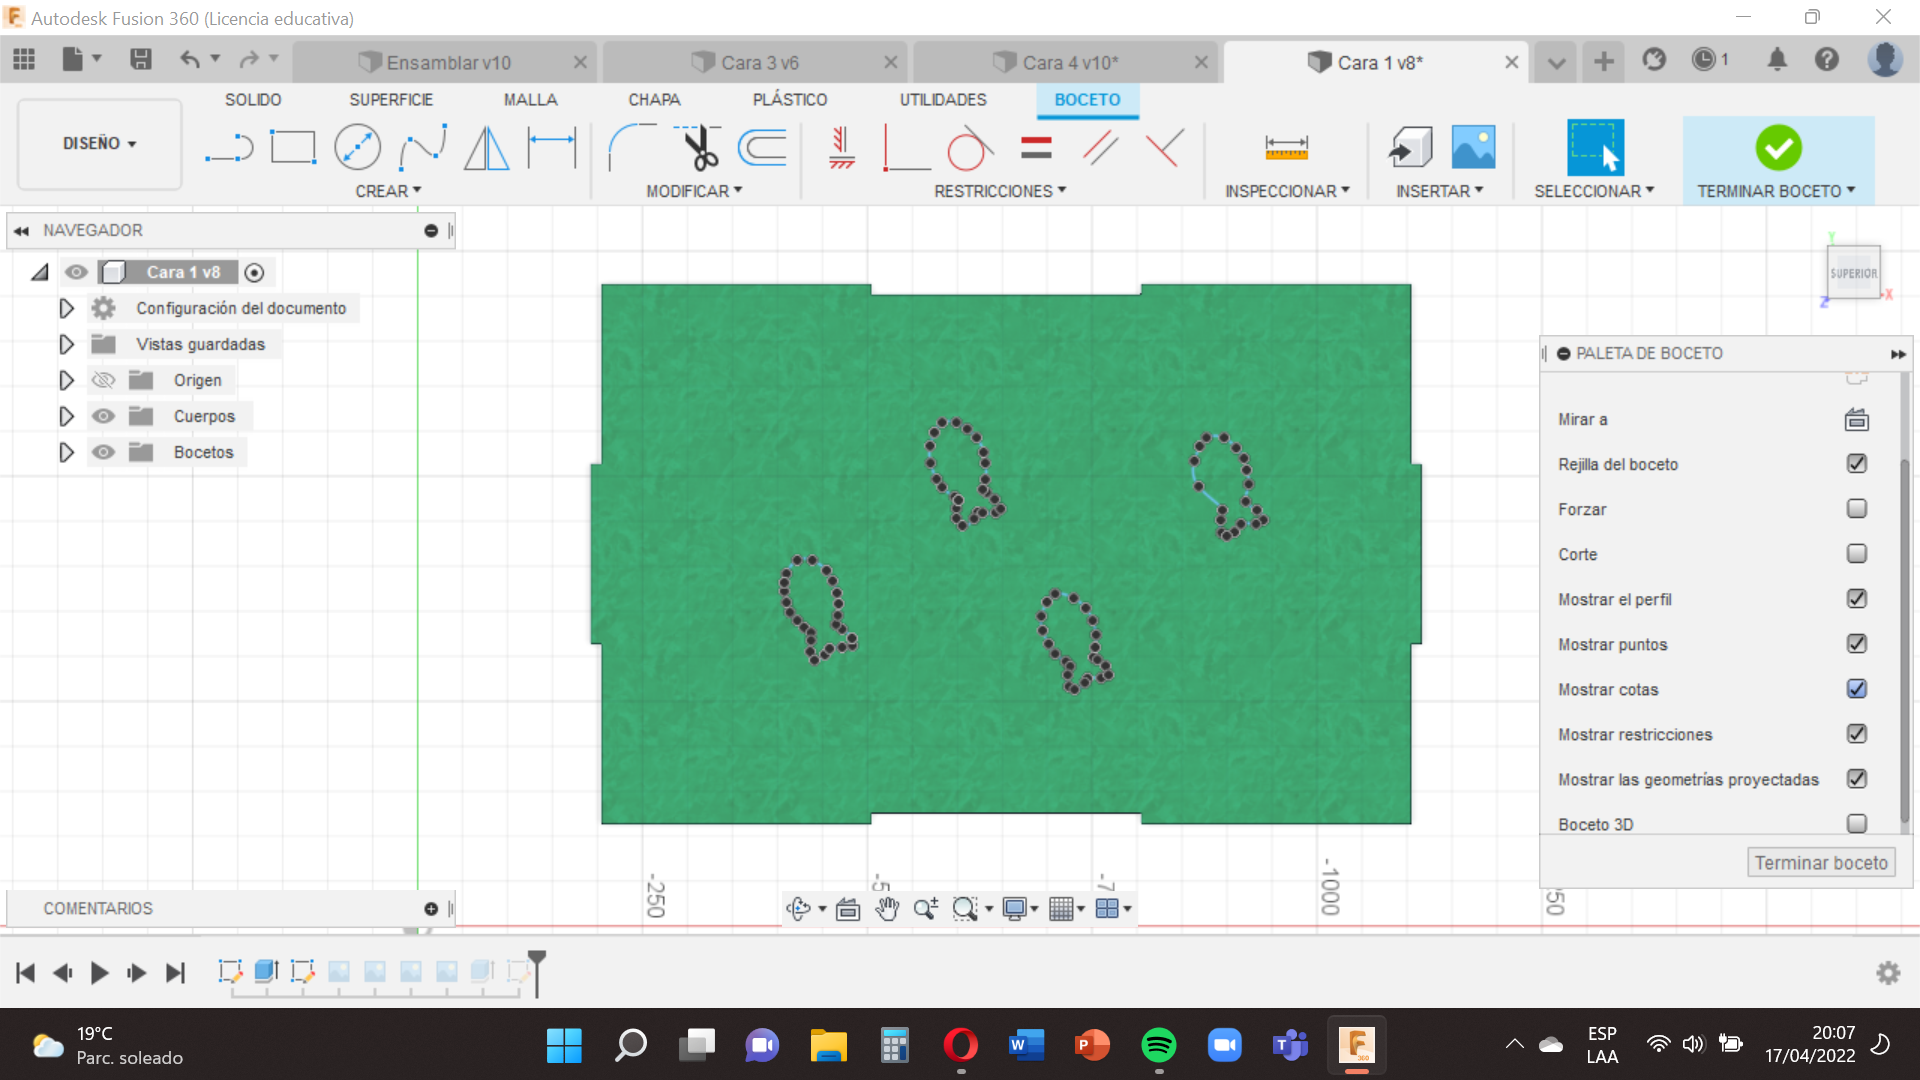
then we go to the option ´´Create´´ , select ´´Spline´´ , ´´Spline´´ setting point , it is similar to the first step only this time we will outline the image of fish croquettes with lines .
At the end of this step we will remove the Remove Dots option that appear on the right side and we will also remove the Canvas option that appears on the left side, so we will finish our design.
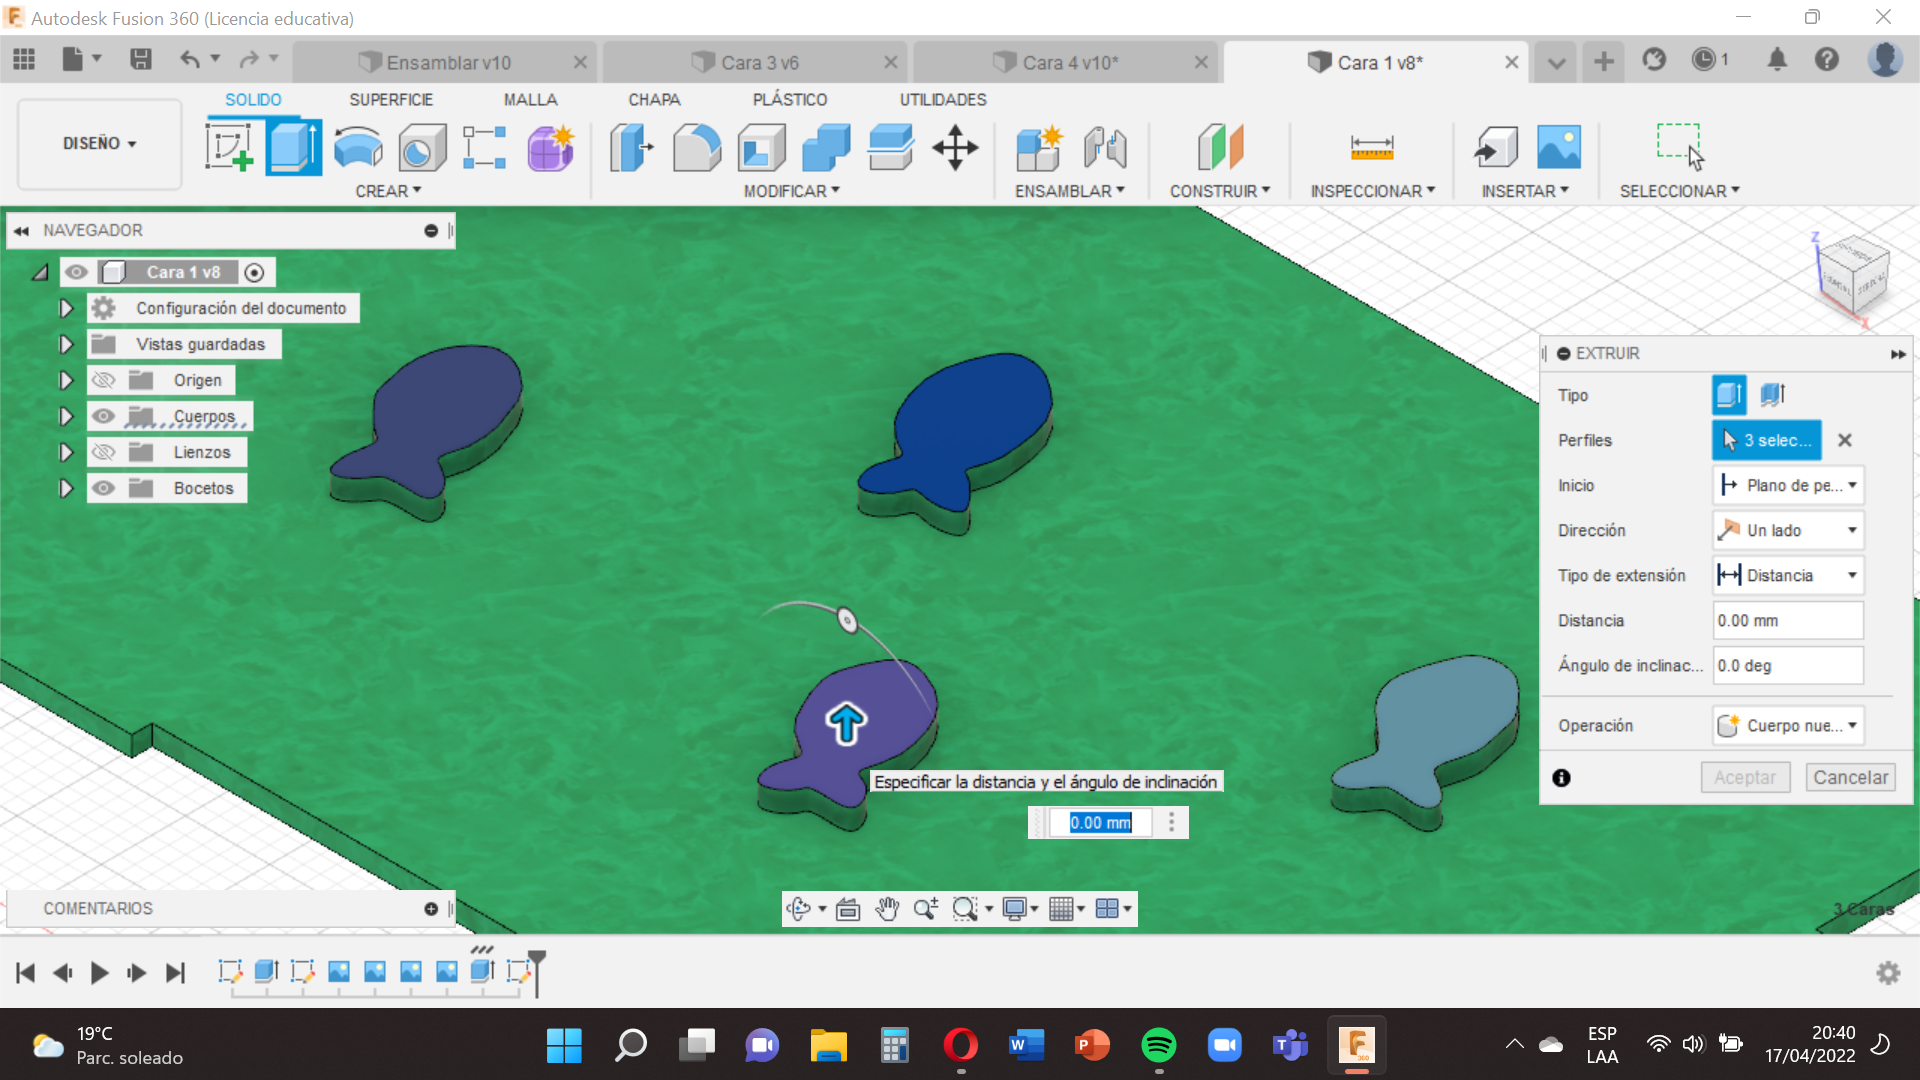
Now we will give you volume and texture and do the same as the first two steps :
- We select and with the ´´extrusion´´ tool type 9mm and click "enter".
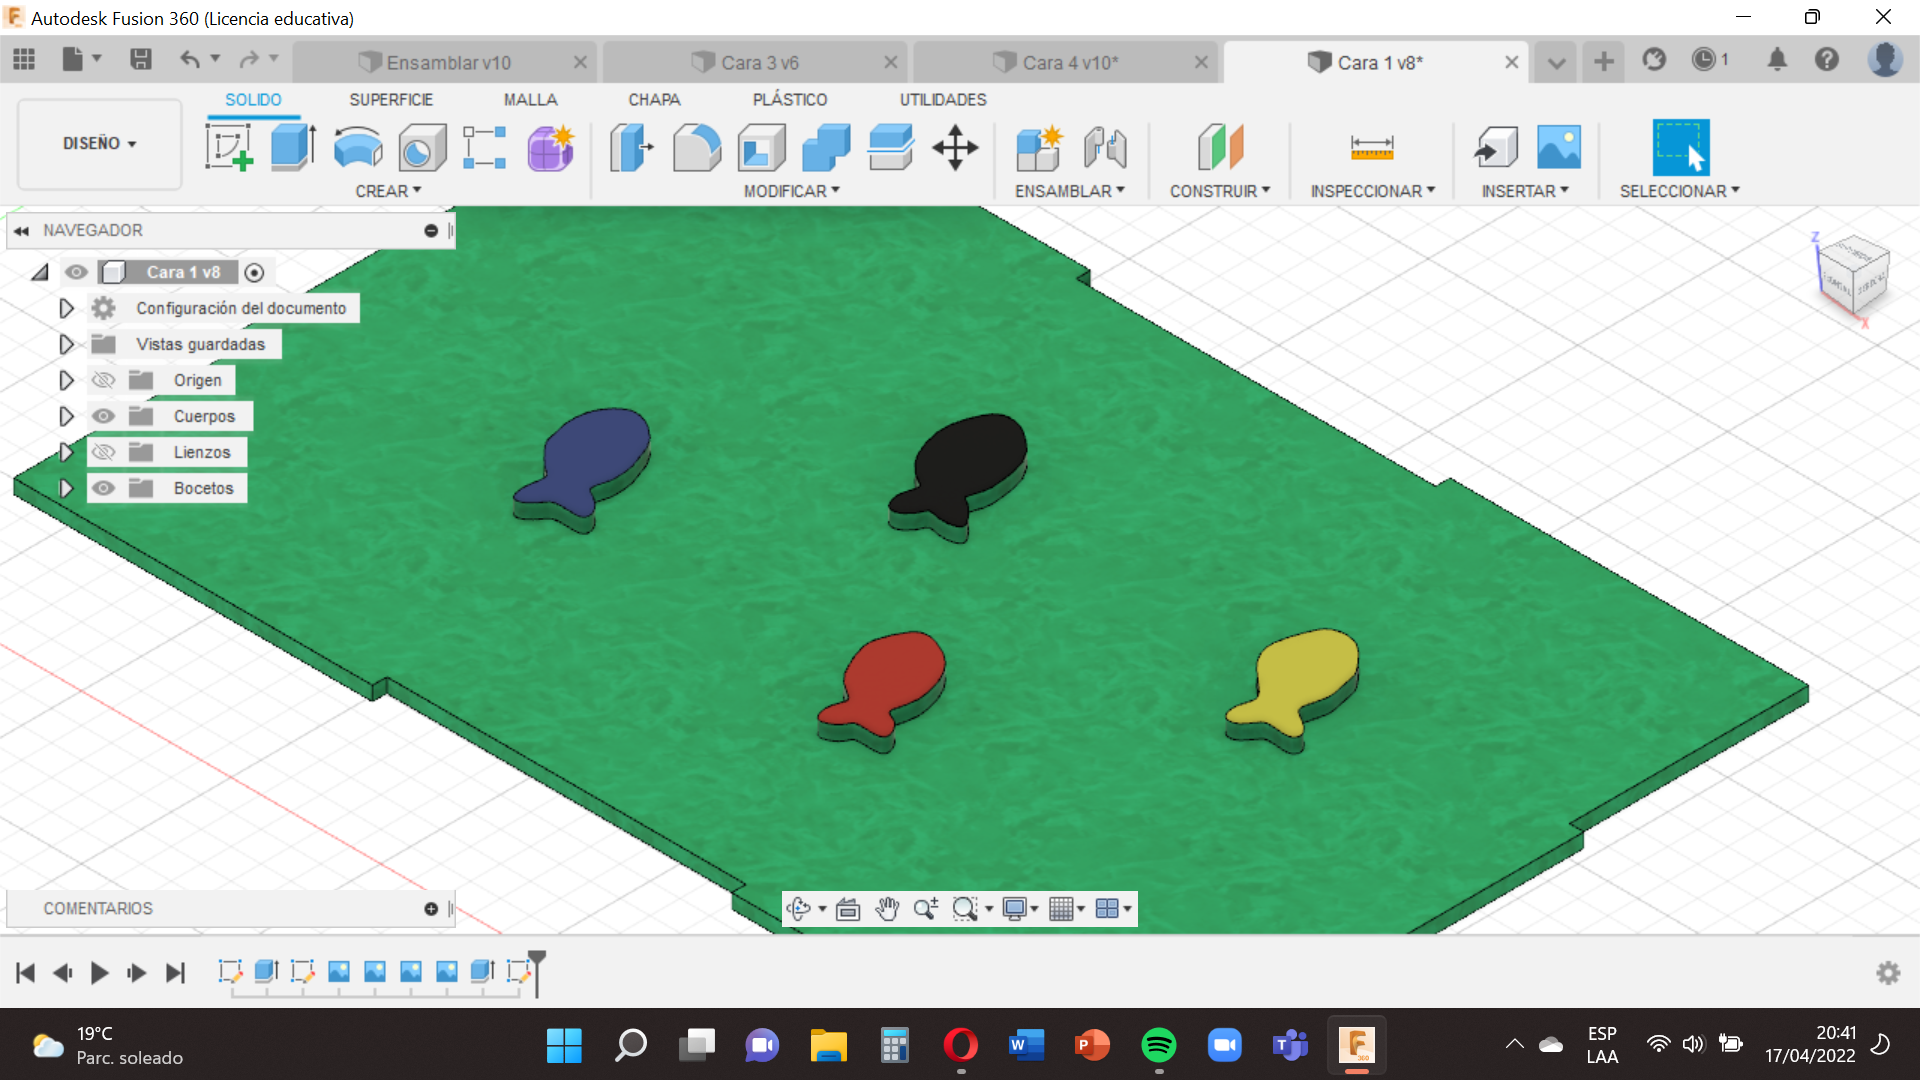
- Then you will go to the option ´´Modify´´ select ´´appearance´´ , and choose the one that we like so that our croquettes have that texture/color and drag it to these , in this case use many colors to make it flashy.
You can do it too.
When you have finished pressing ´´Finish sketch´´ and save it with the name in this case Face 1
Design of the Face 4
.png)
.png)
.png)
.png)
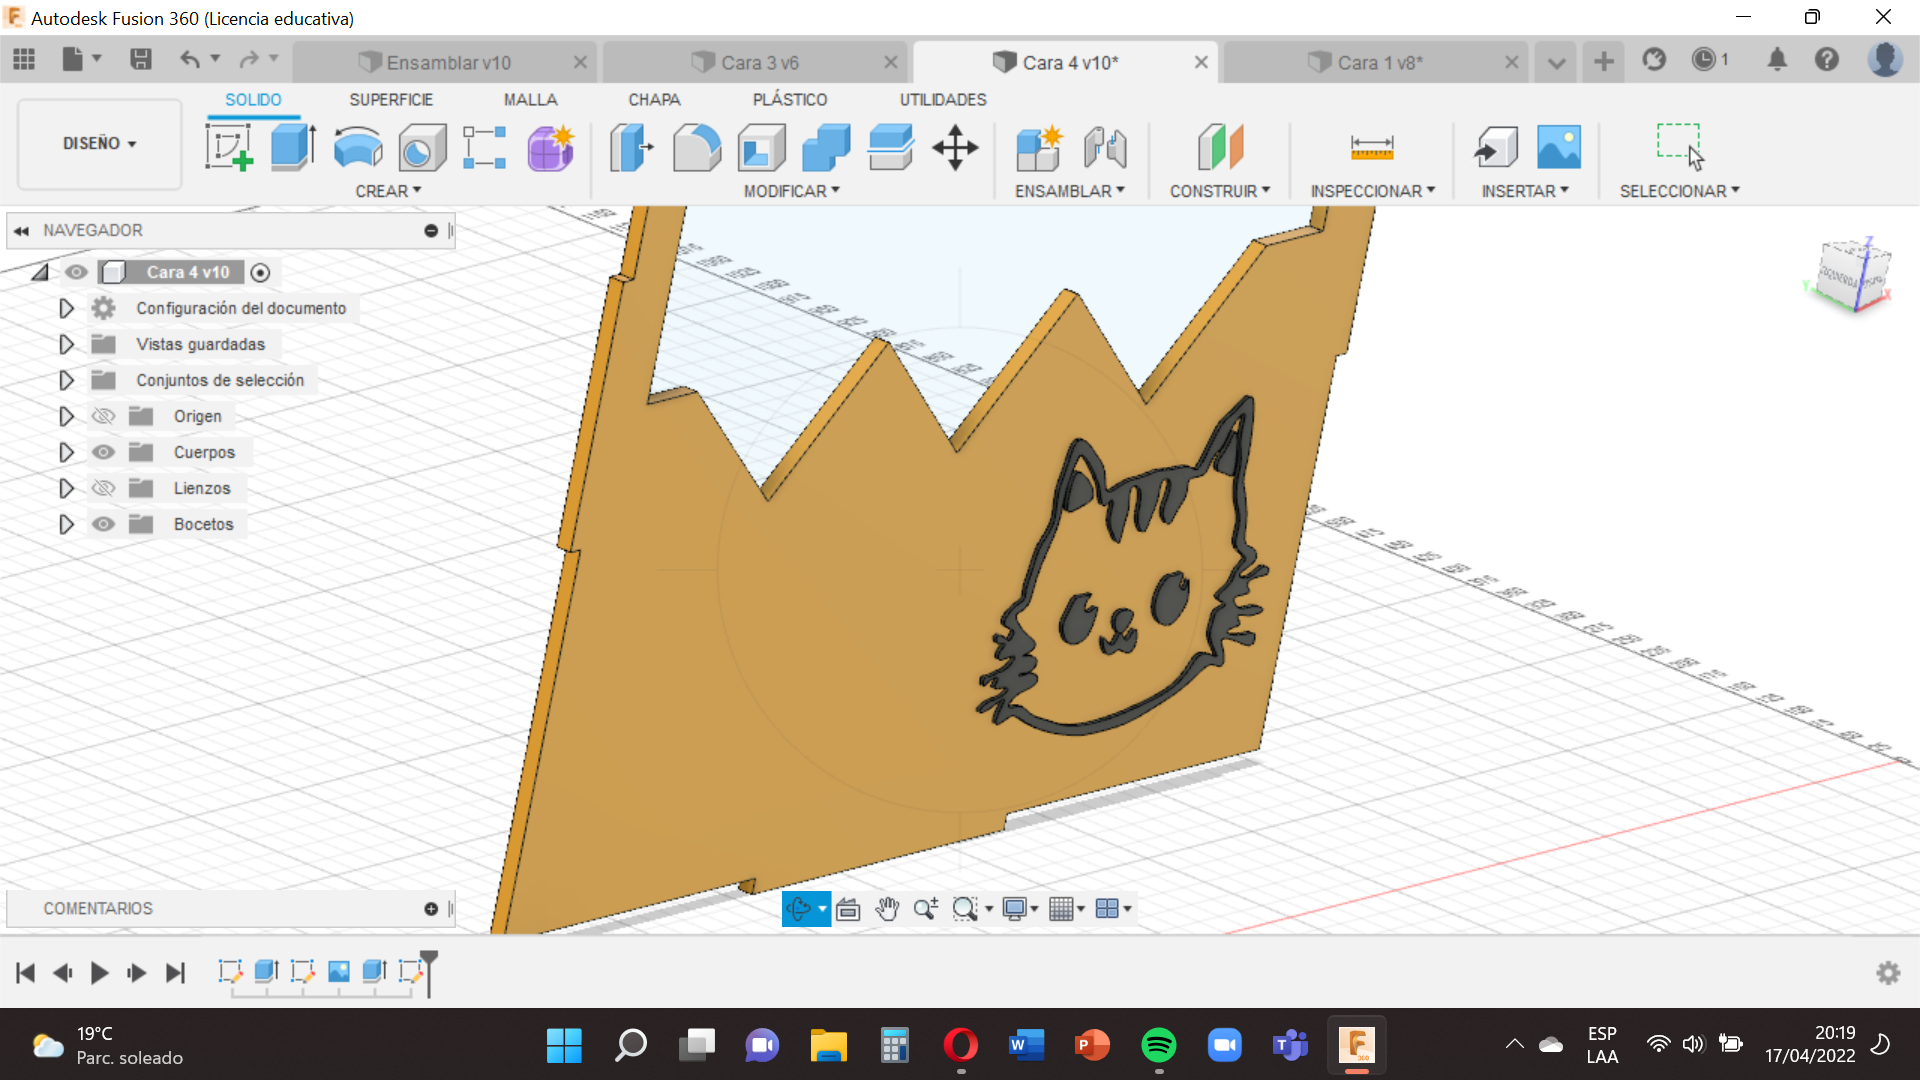
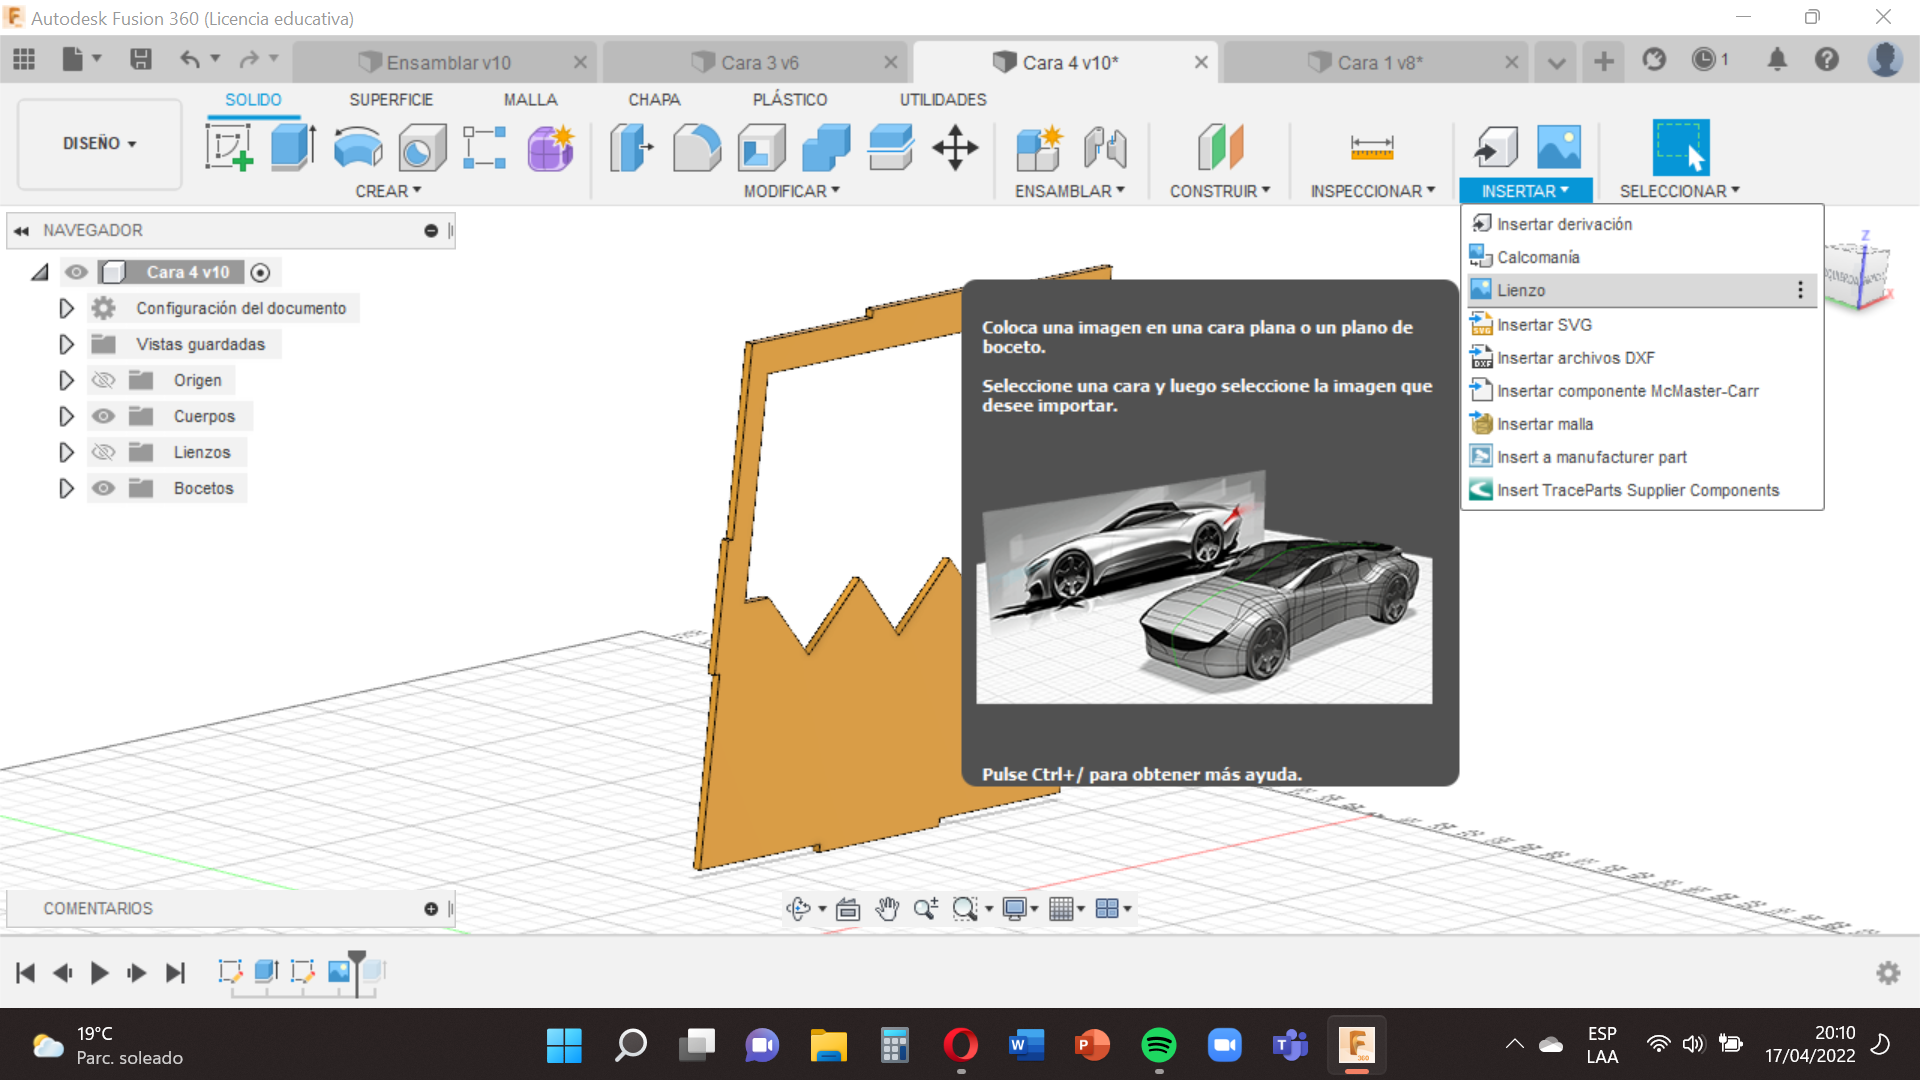
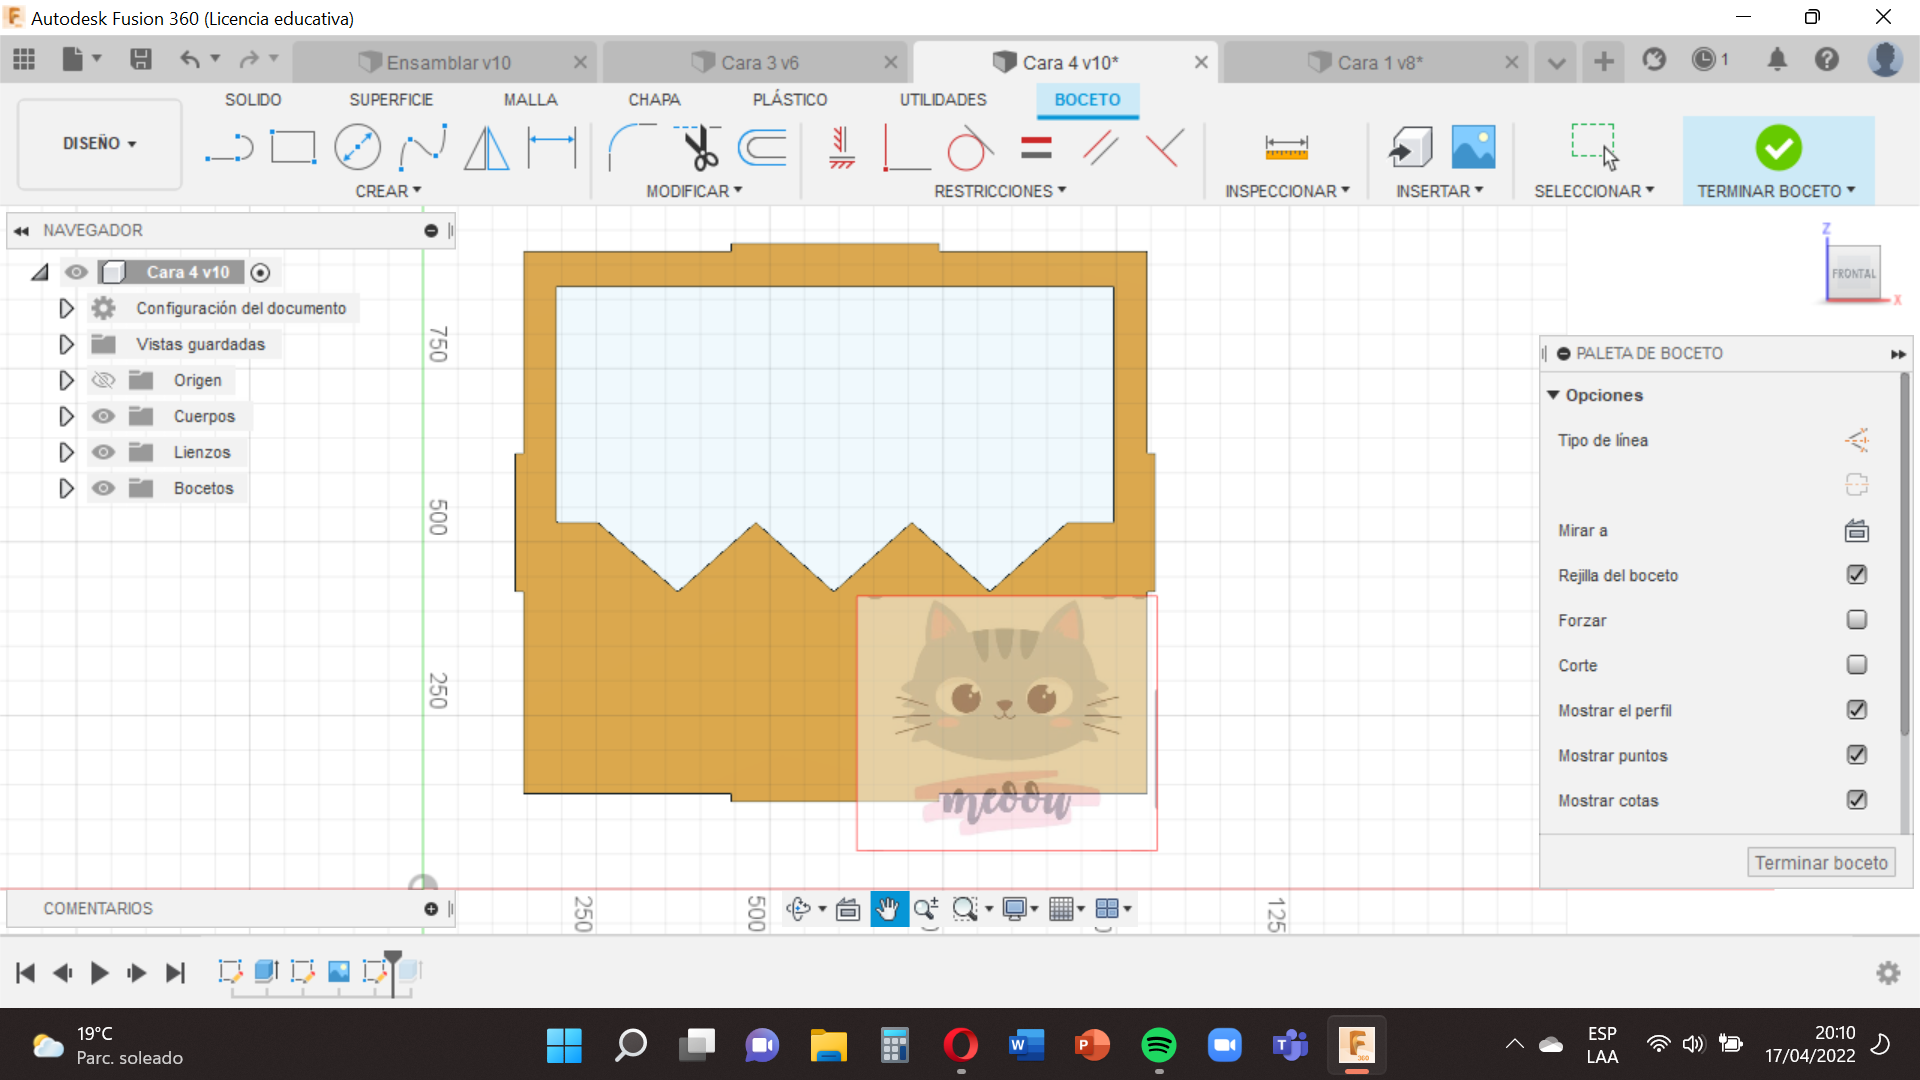
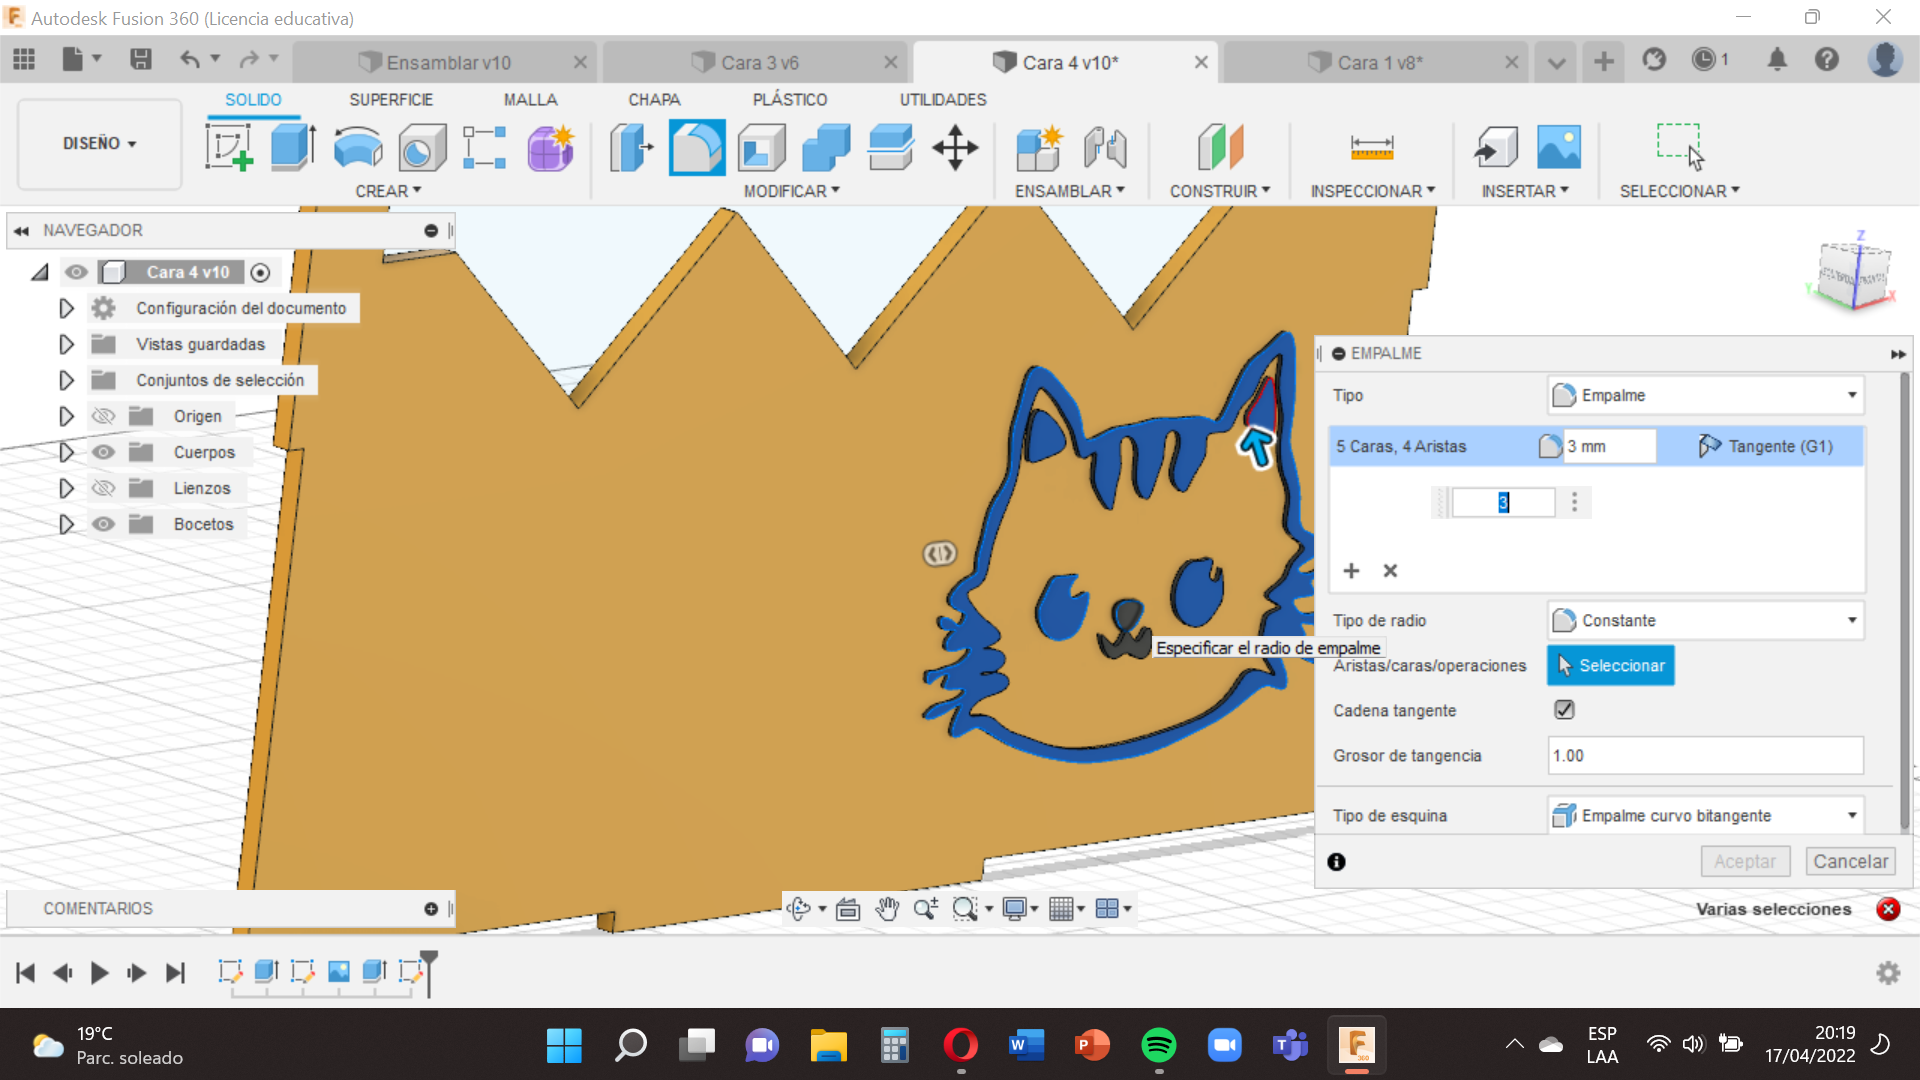
Here we will do the same as in the previous step , but this time it will be with a cat image on our face 4 , let’s start.
When you’re in Face 4, right-click and choose the "Create Sketch" option.
We go to the option of "Canvas" (it is the tool that allows us to put the image), from our computer , we insert the image in our case a cat.
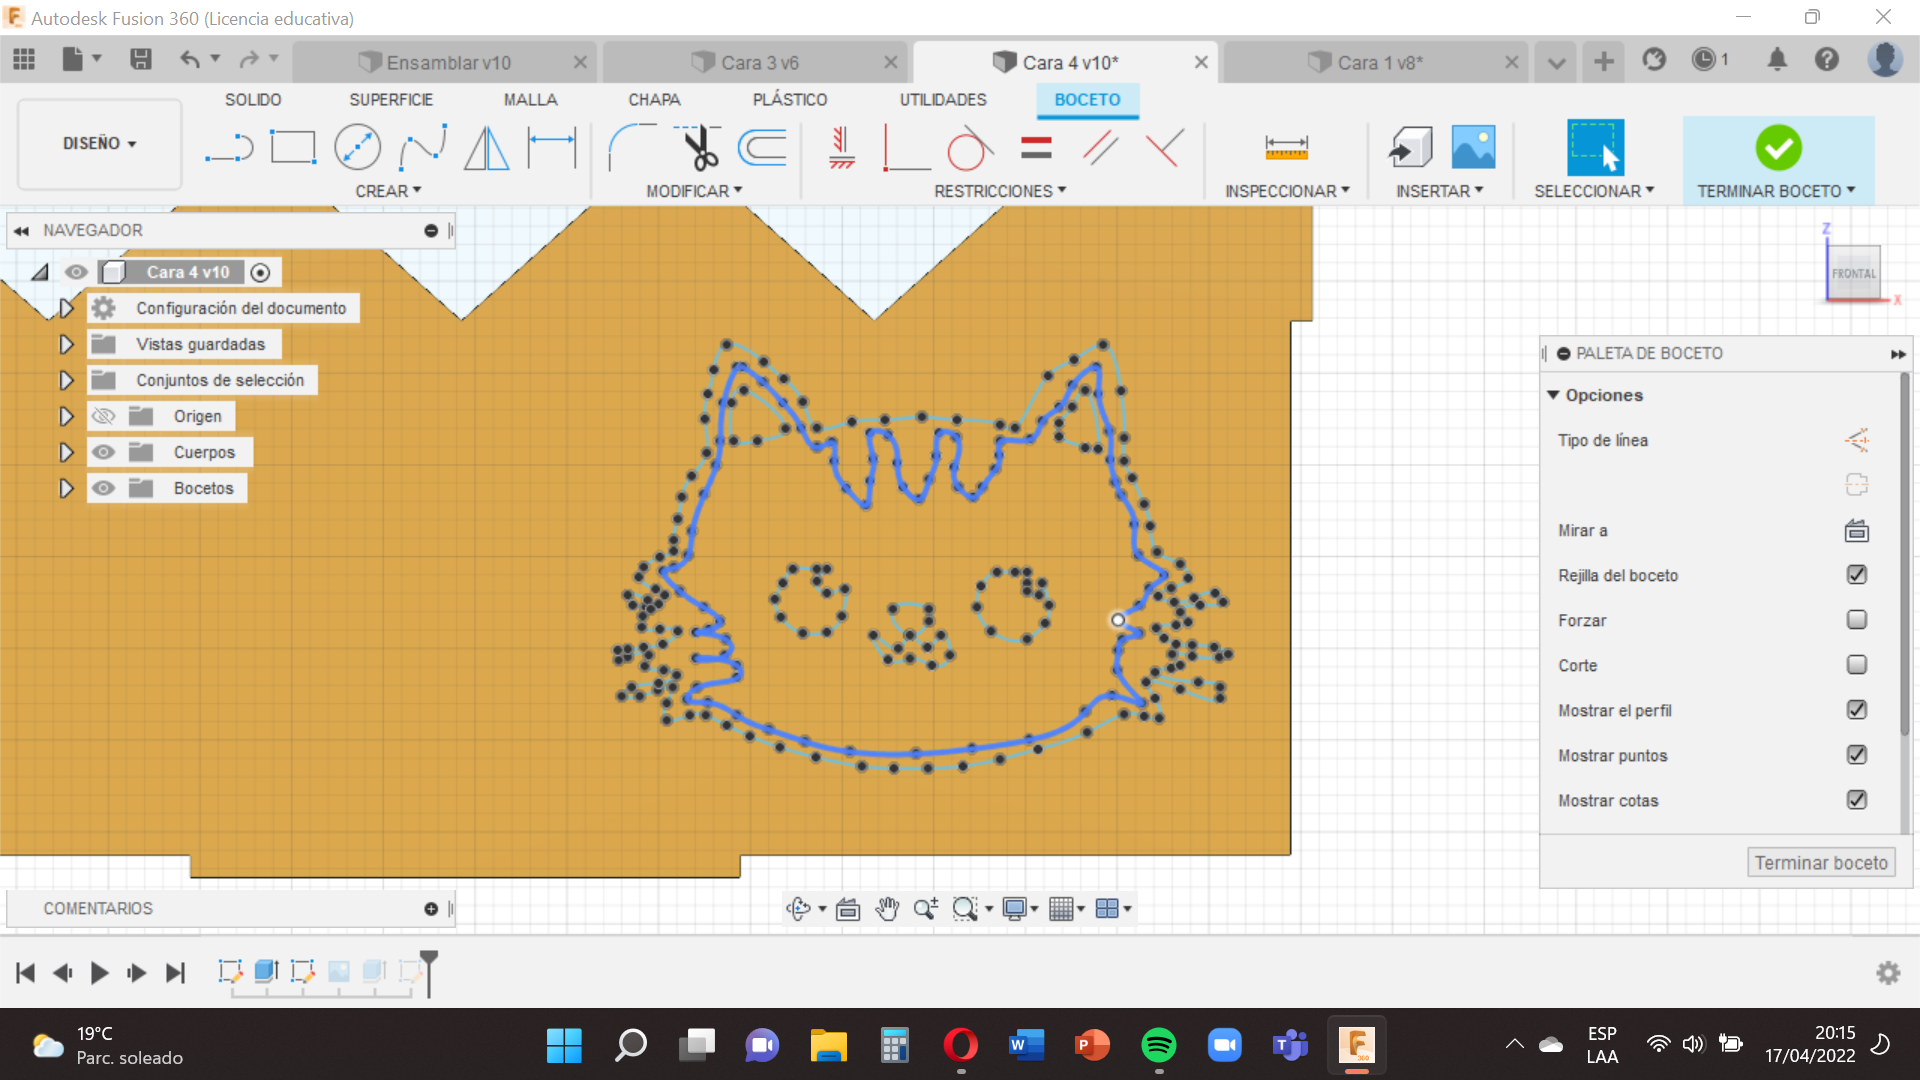
This step more carefully because the face of the cat has many details , but you can do it.
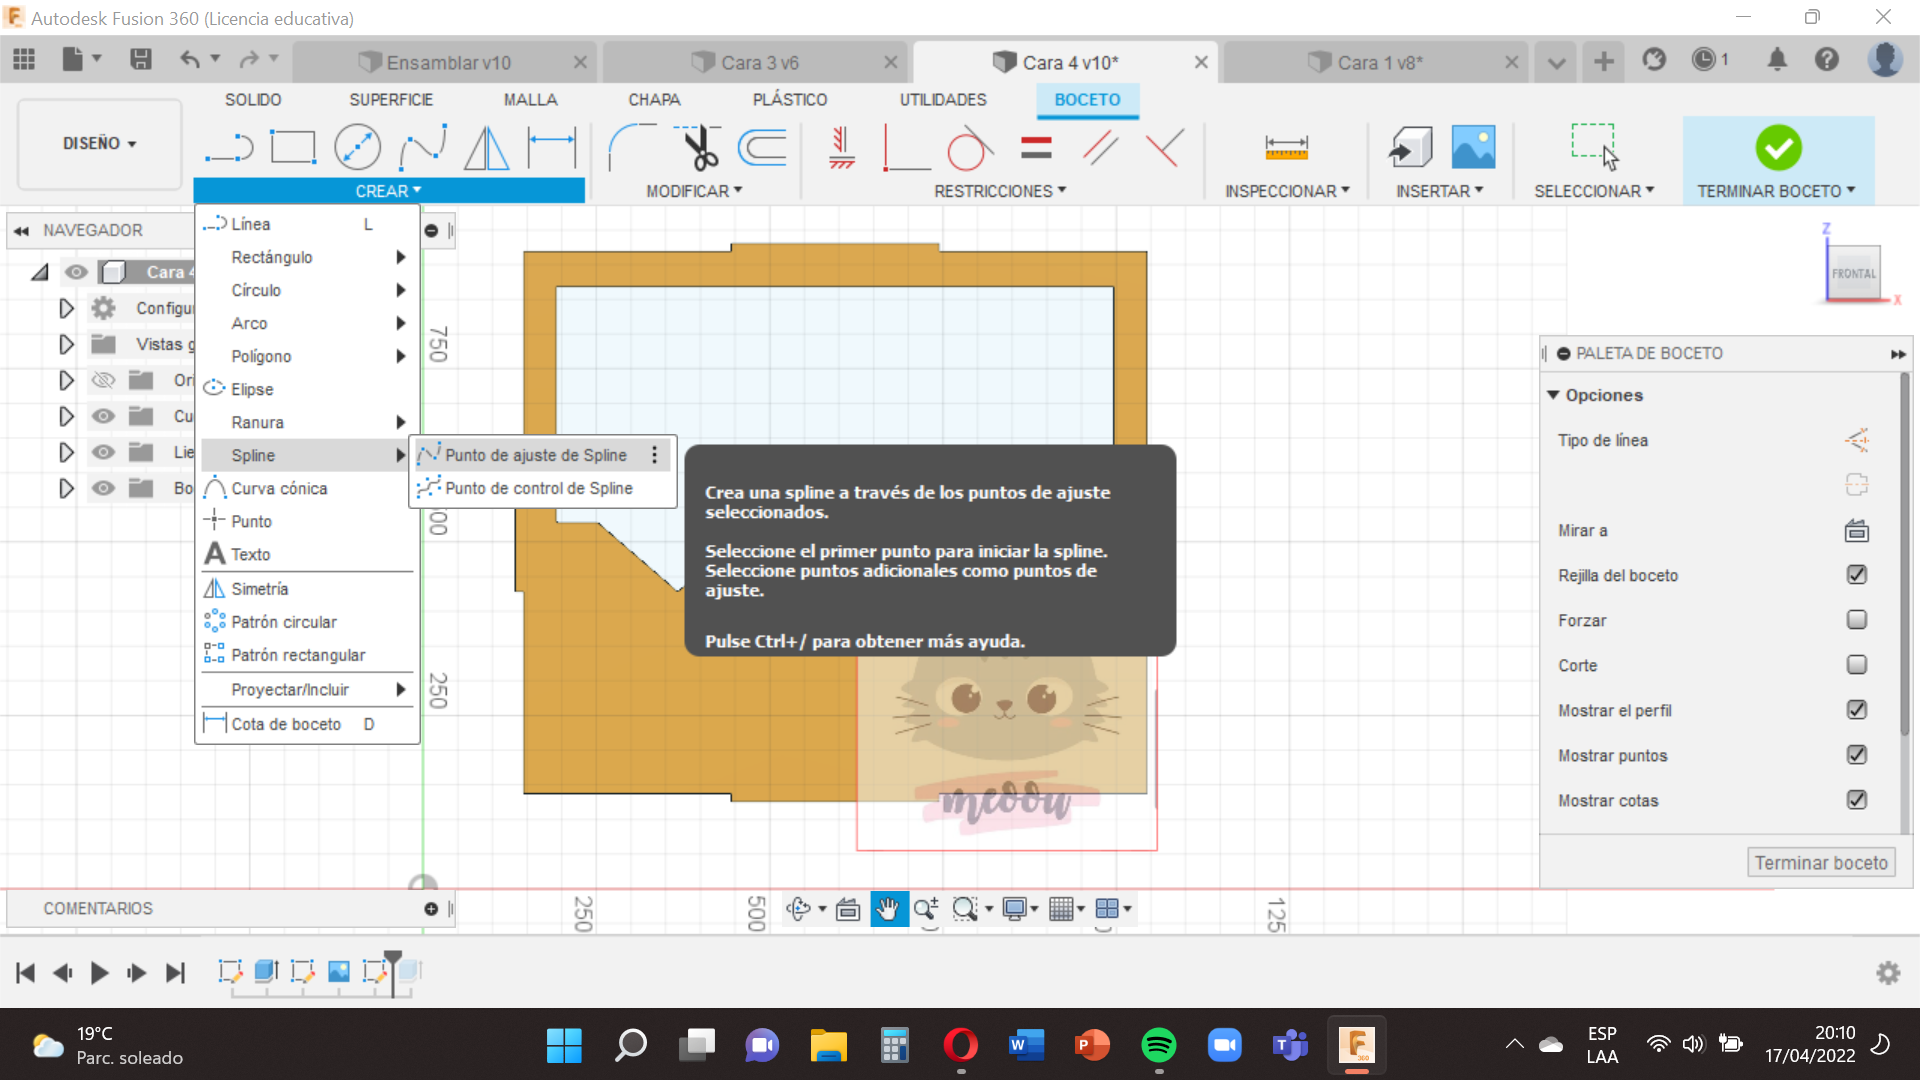
Let’s go to the option ´´Create´´ , select ´´Spline´´ , ´´Spline setting point ´´ , it is similar to the first step only this time we will outline the cat image with lines .
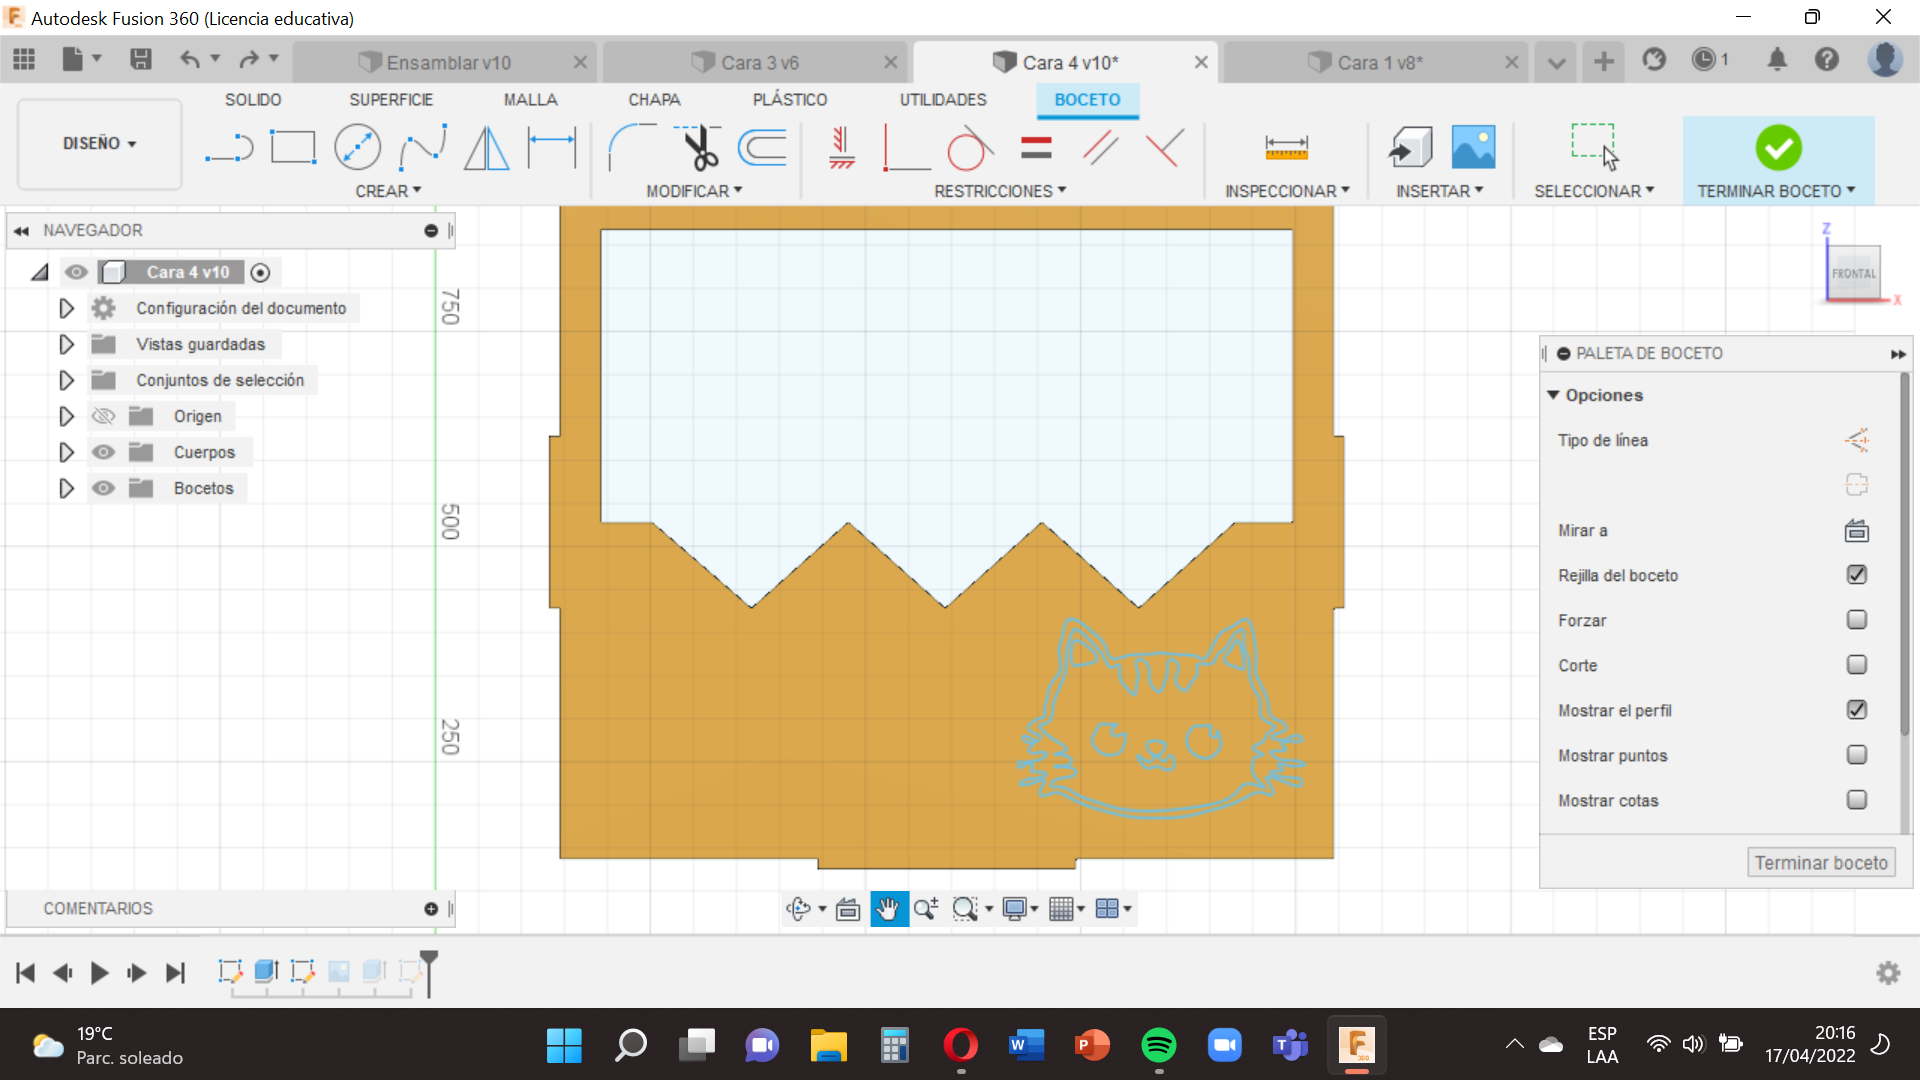
At the end of this step we will remove the Remove Dots option that appear on the right side and we will also remove the ´´Canvas´´ option that appears on the left side, so we will finish our design.
Now we will give you volume and texture and do the same as the first two steps :
- We select and with the ´´extrusion´´ tool type 3mm and click "enter".
- Then you will go to the option ´´Modify´´ select ´´appearance´´ , and choose the one that we like so that our cat has that texture/color and drag it to these , in this case use a neutral color , to give you a distinctive.
When you have finished pressing ´´Finish sketch´´ and save it with the name in this case Face 4.
Join
.png)
.png)
.png)
.png)
We’re almost done here!
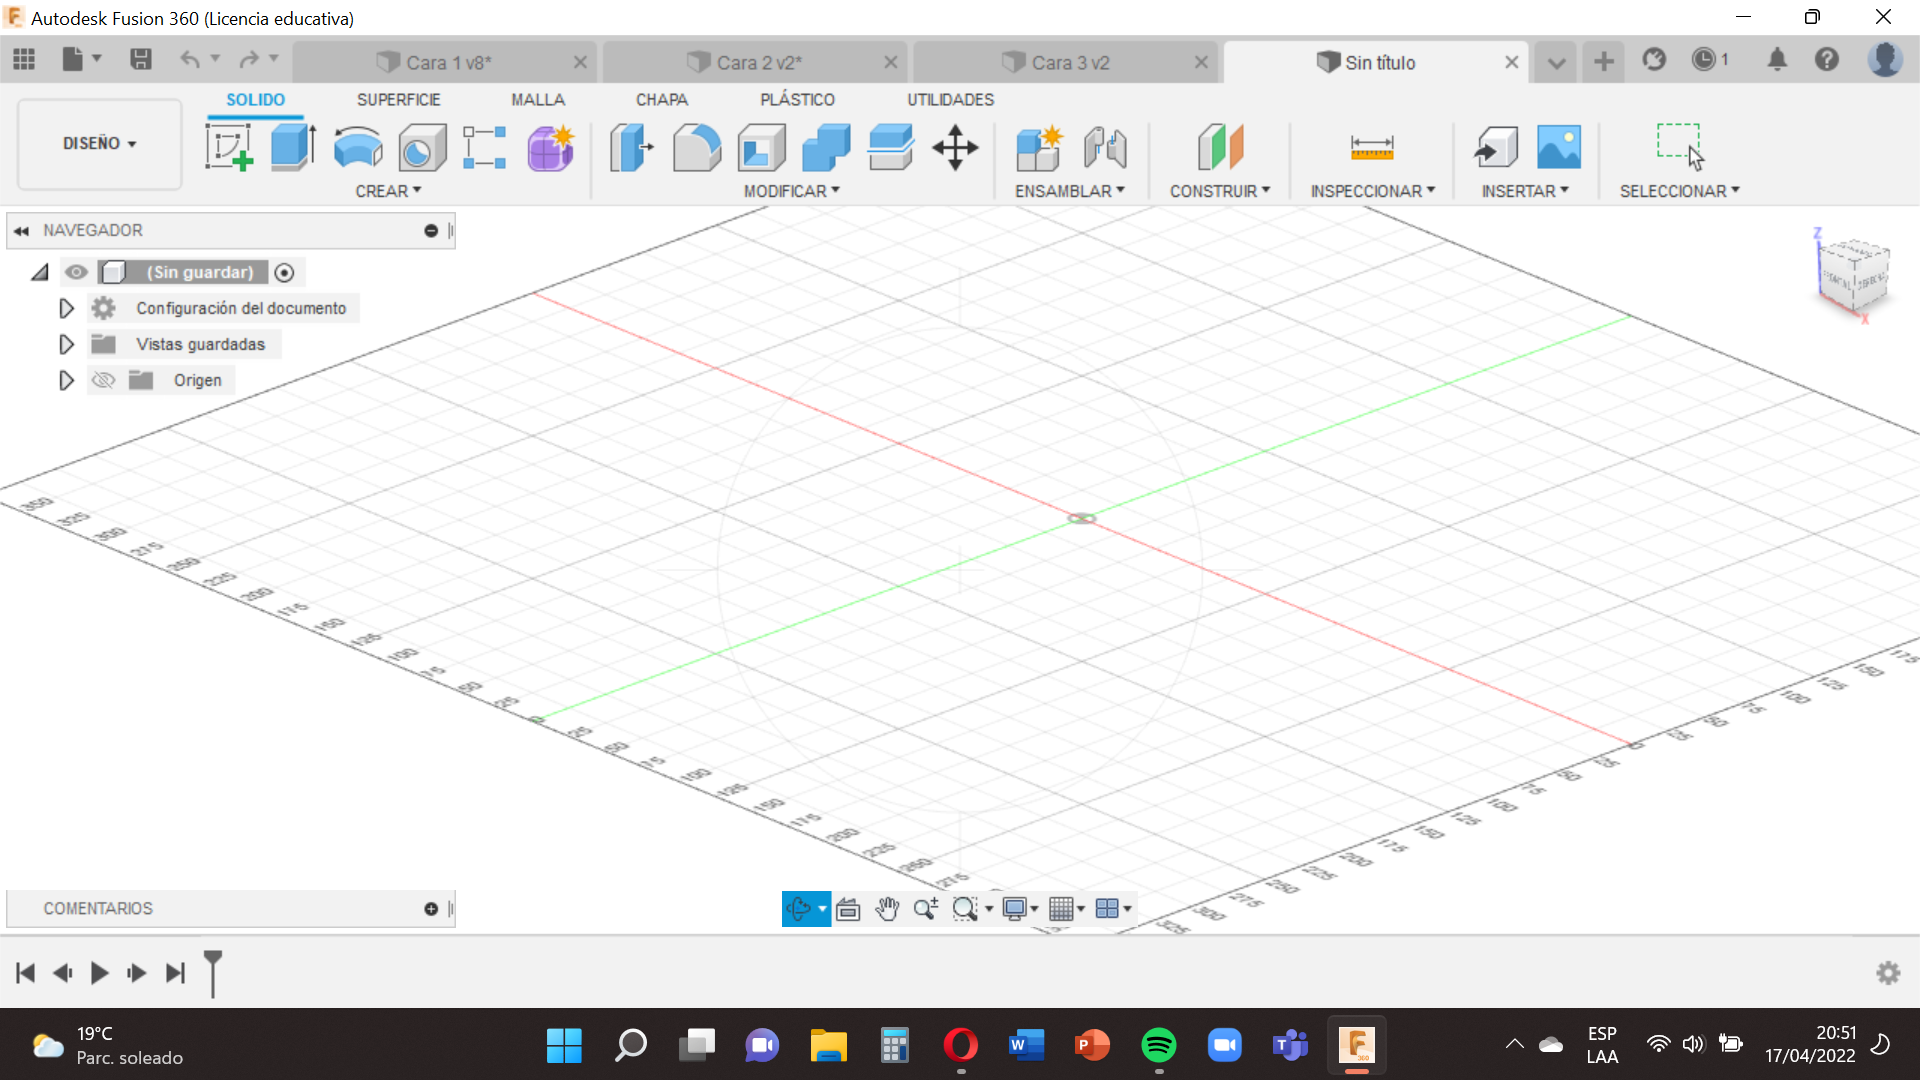
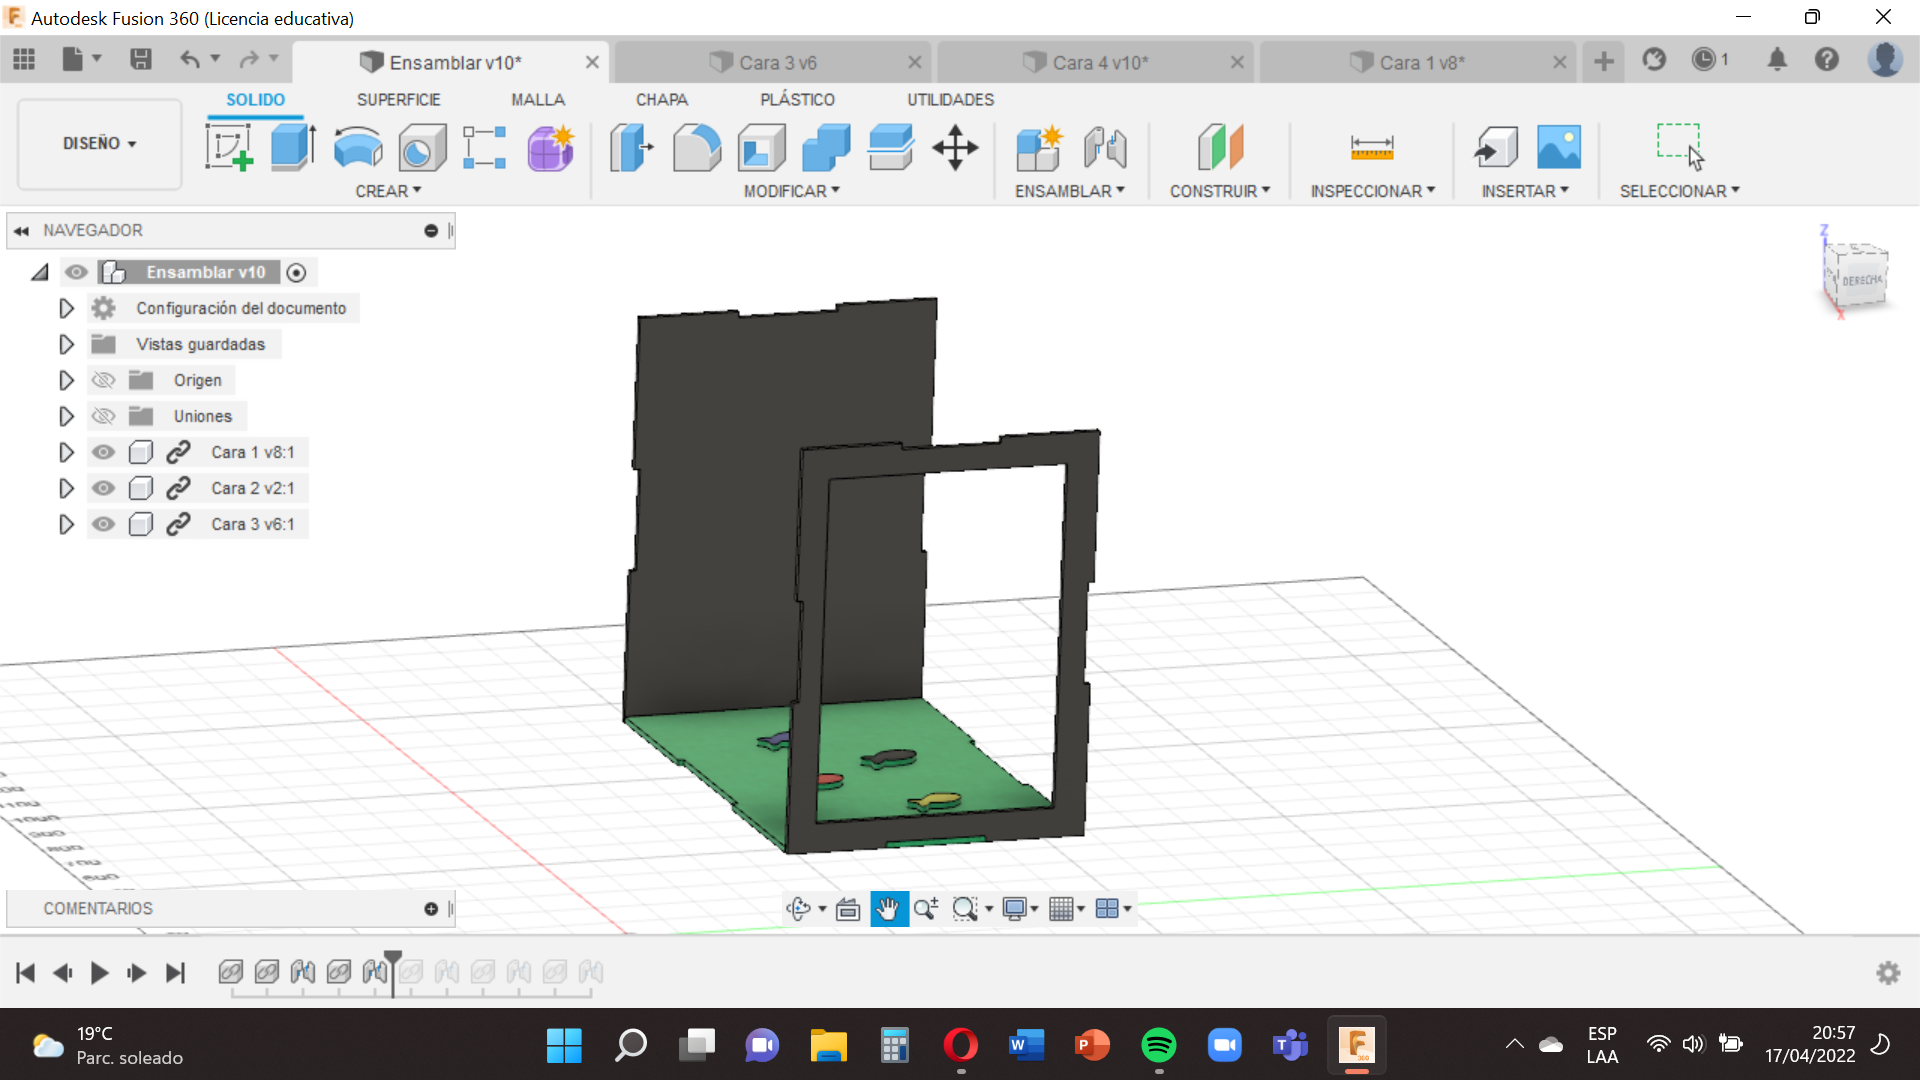
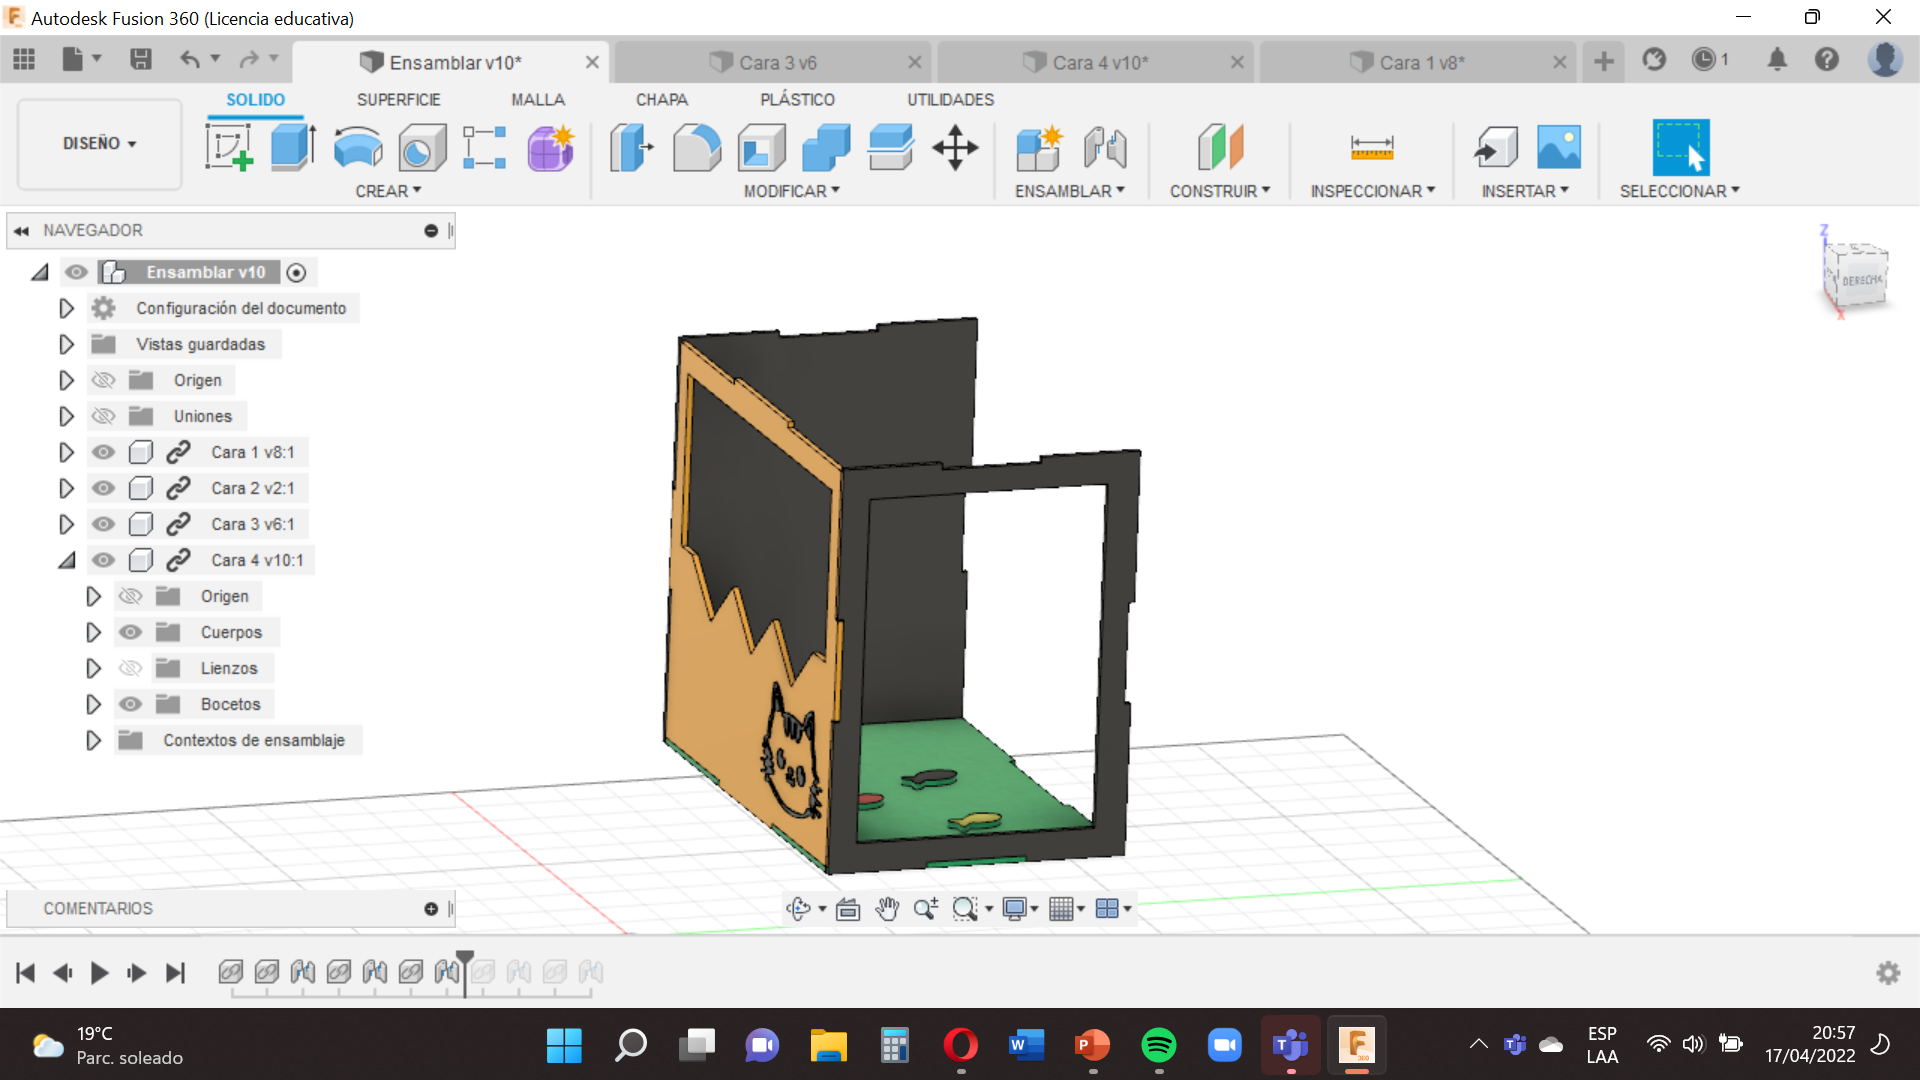
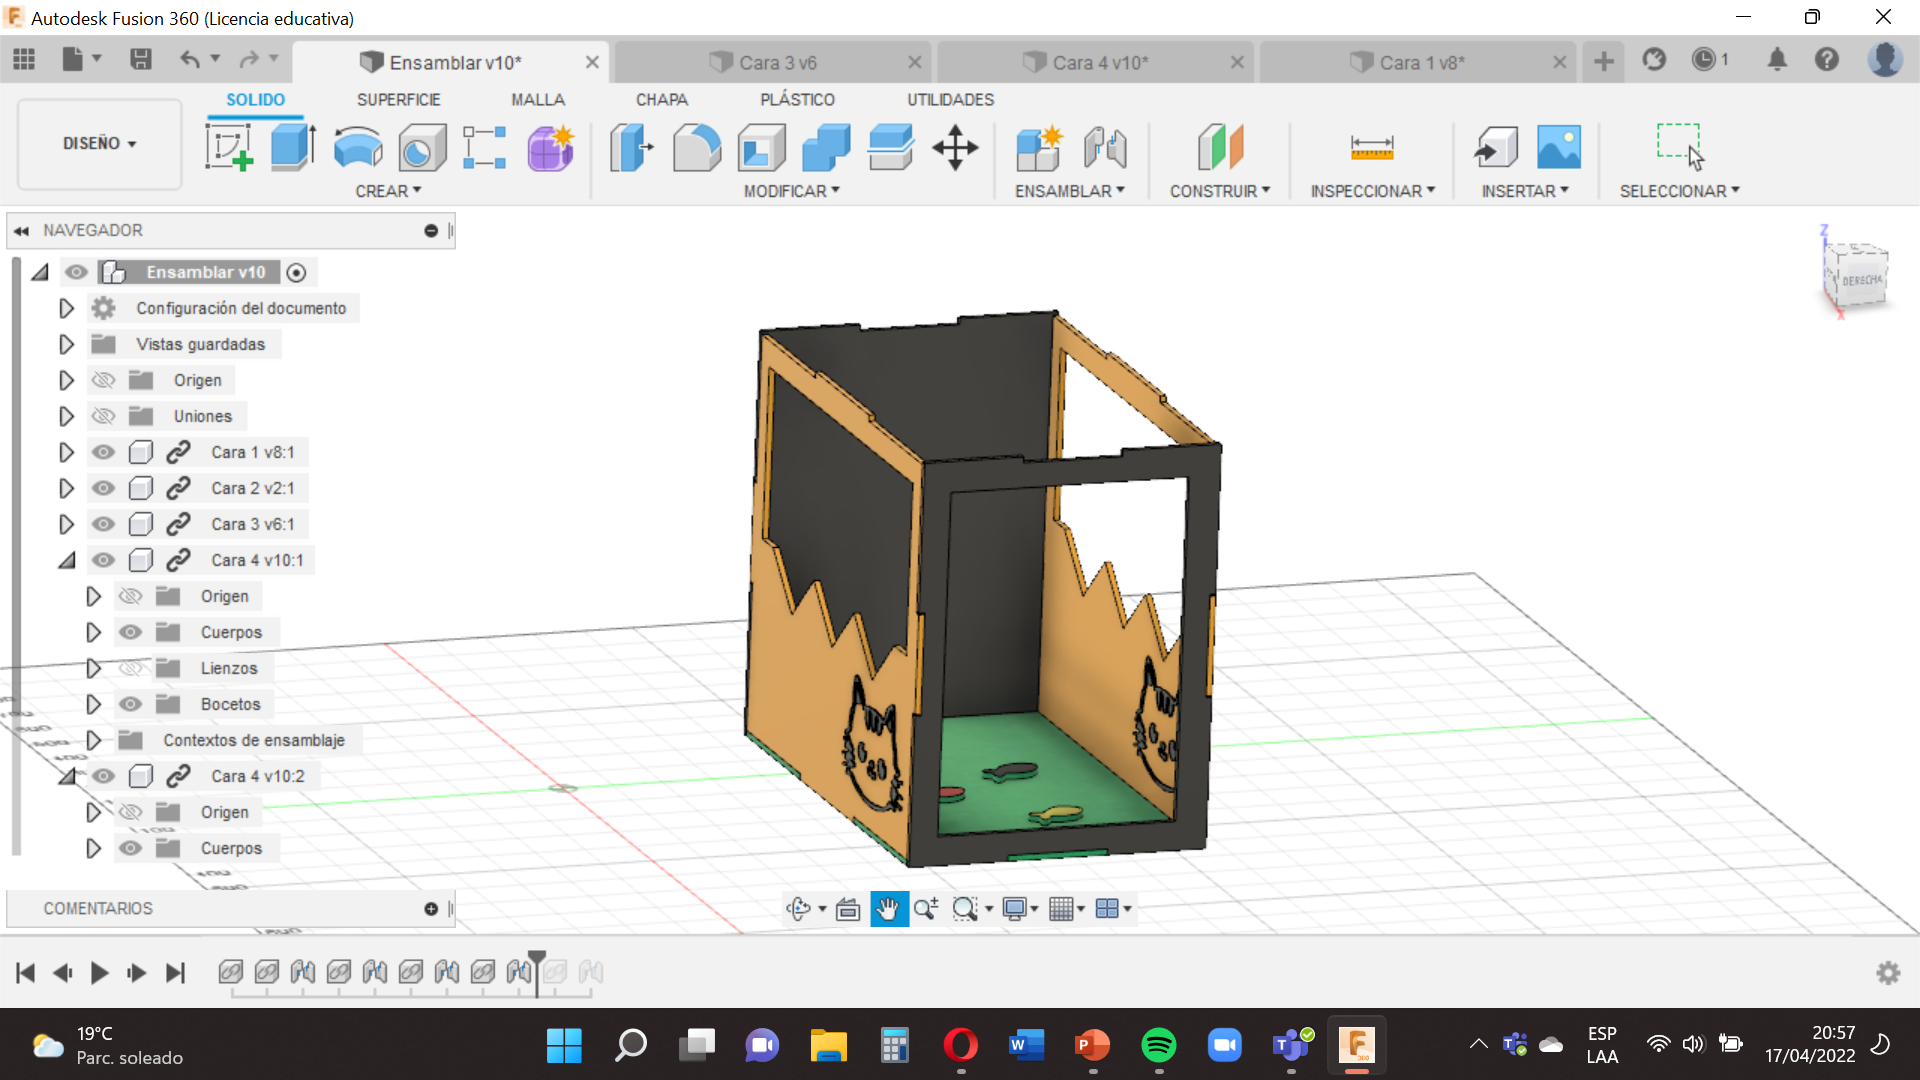
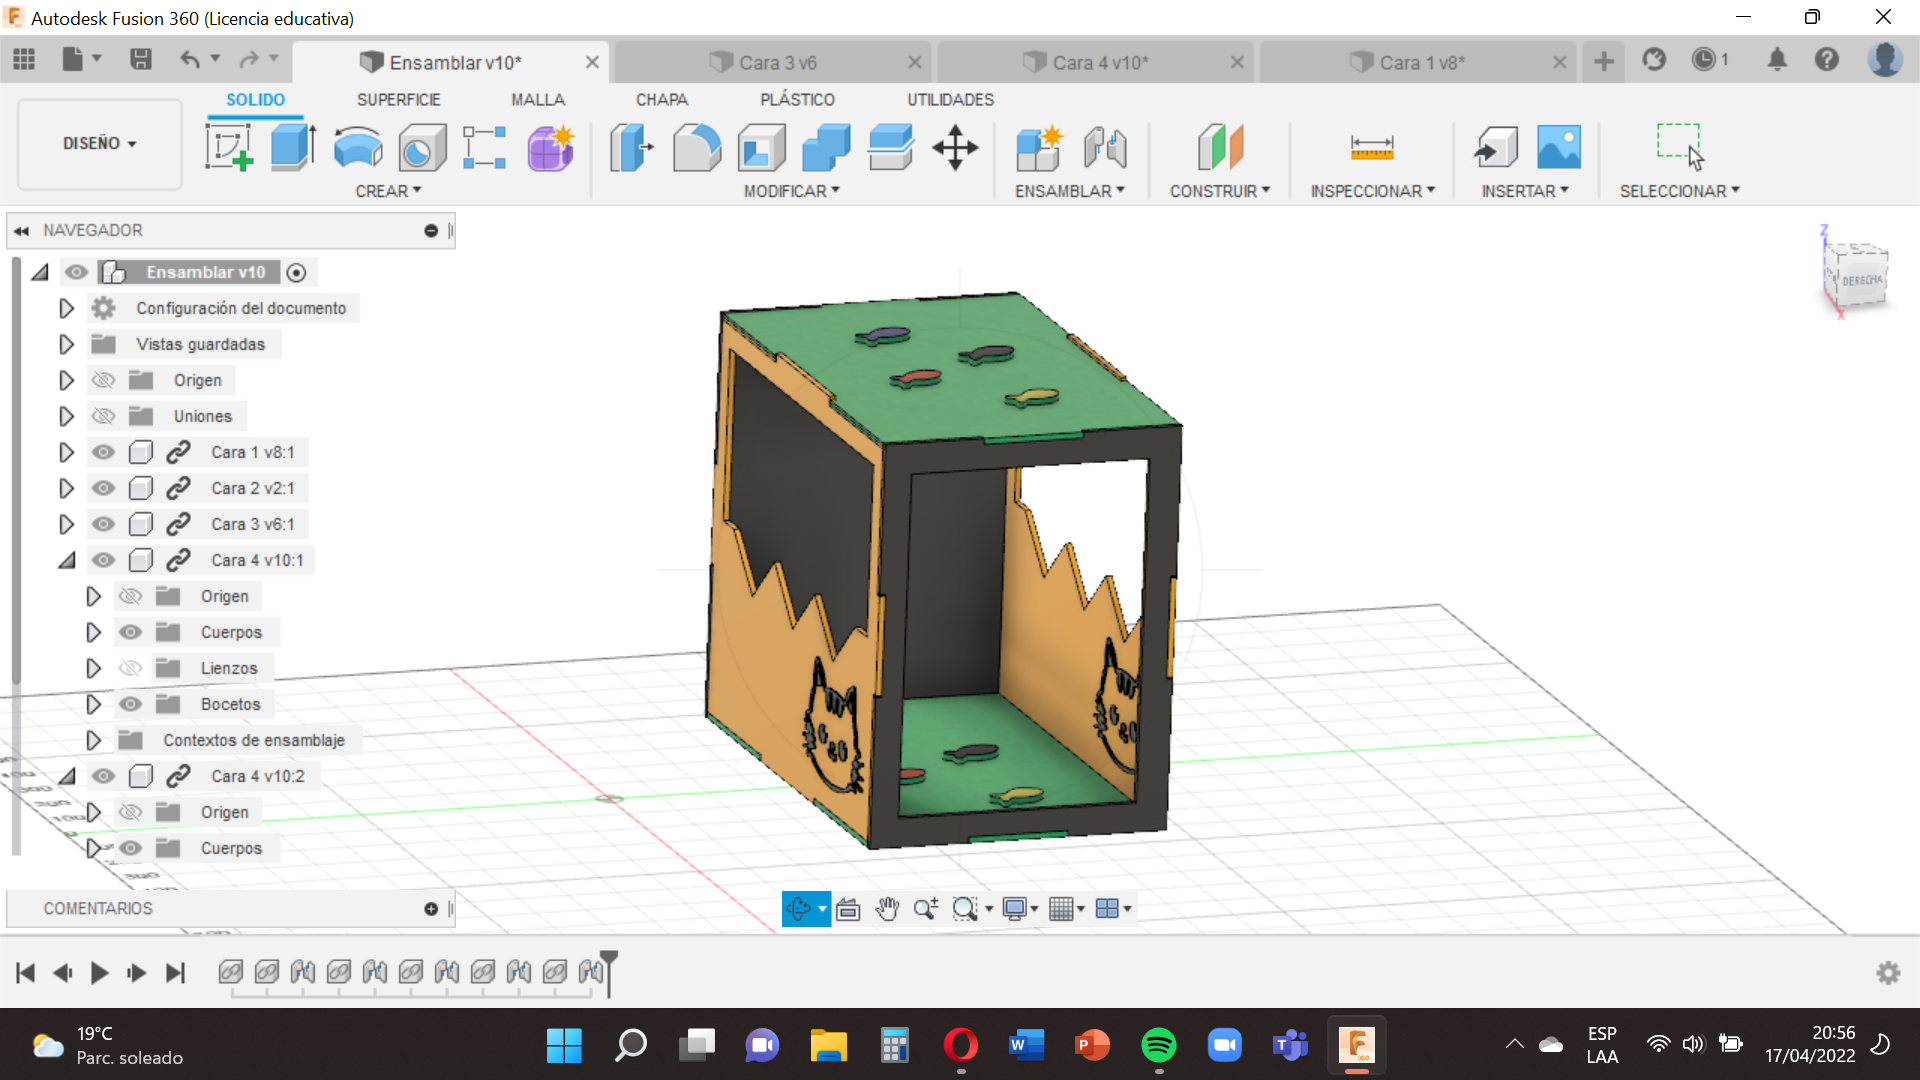
We just have to put our faces together.
This time we will not need axles , because it is only esnamblar , having this in clear , we continue
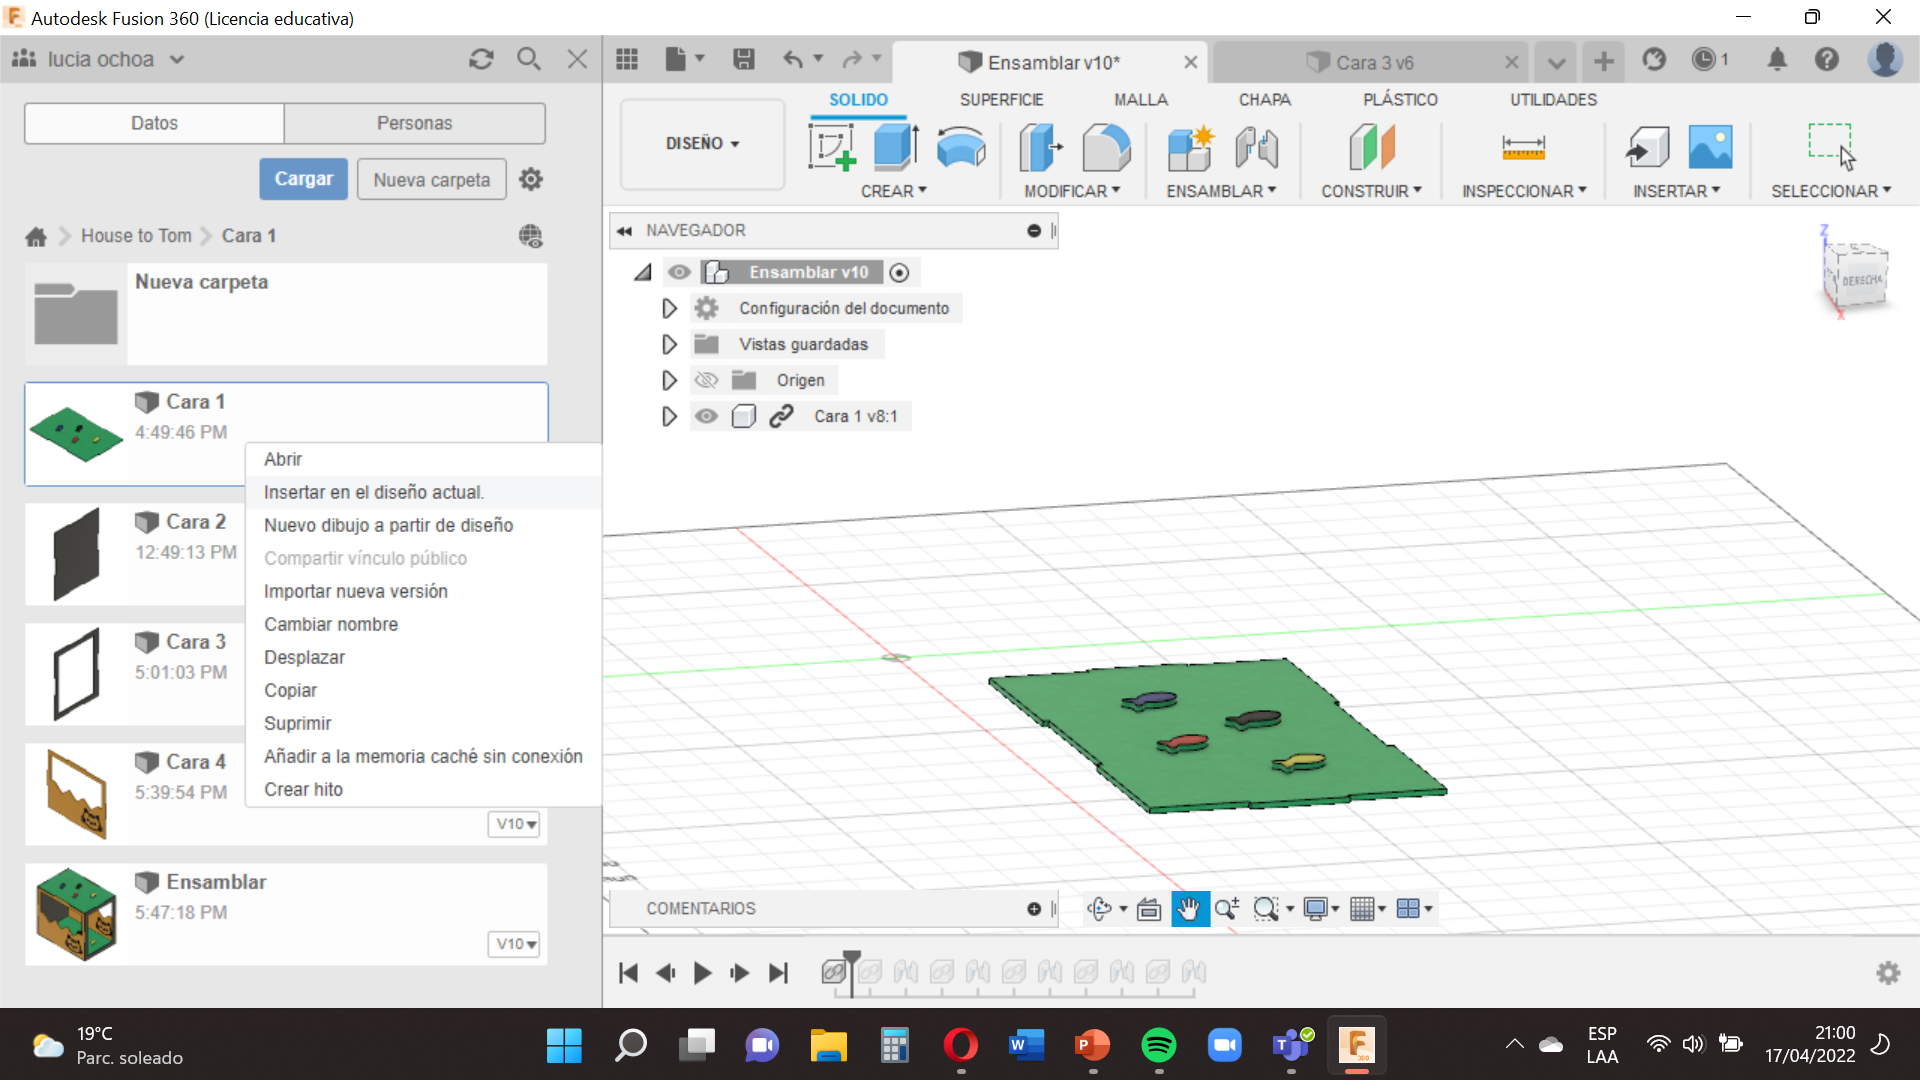
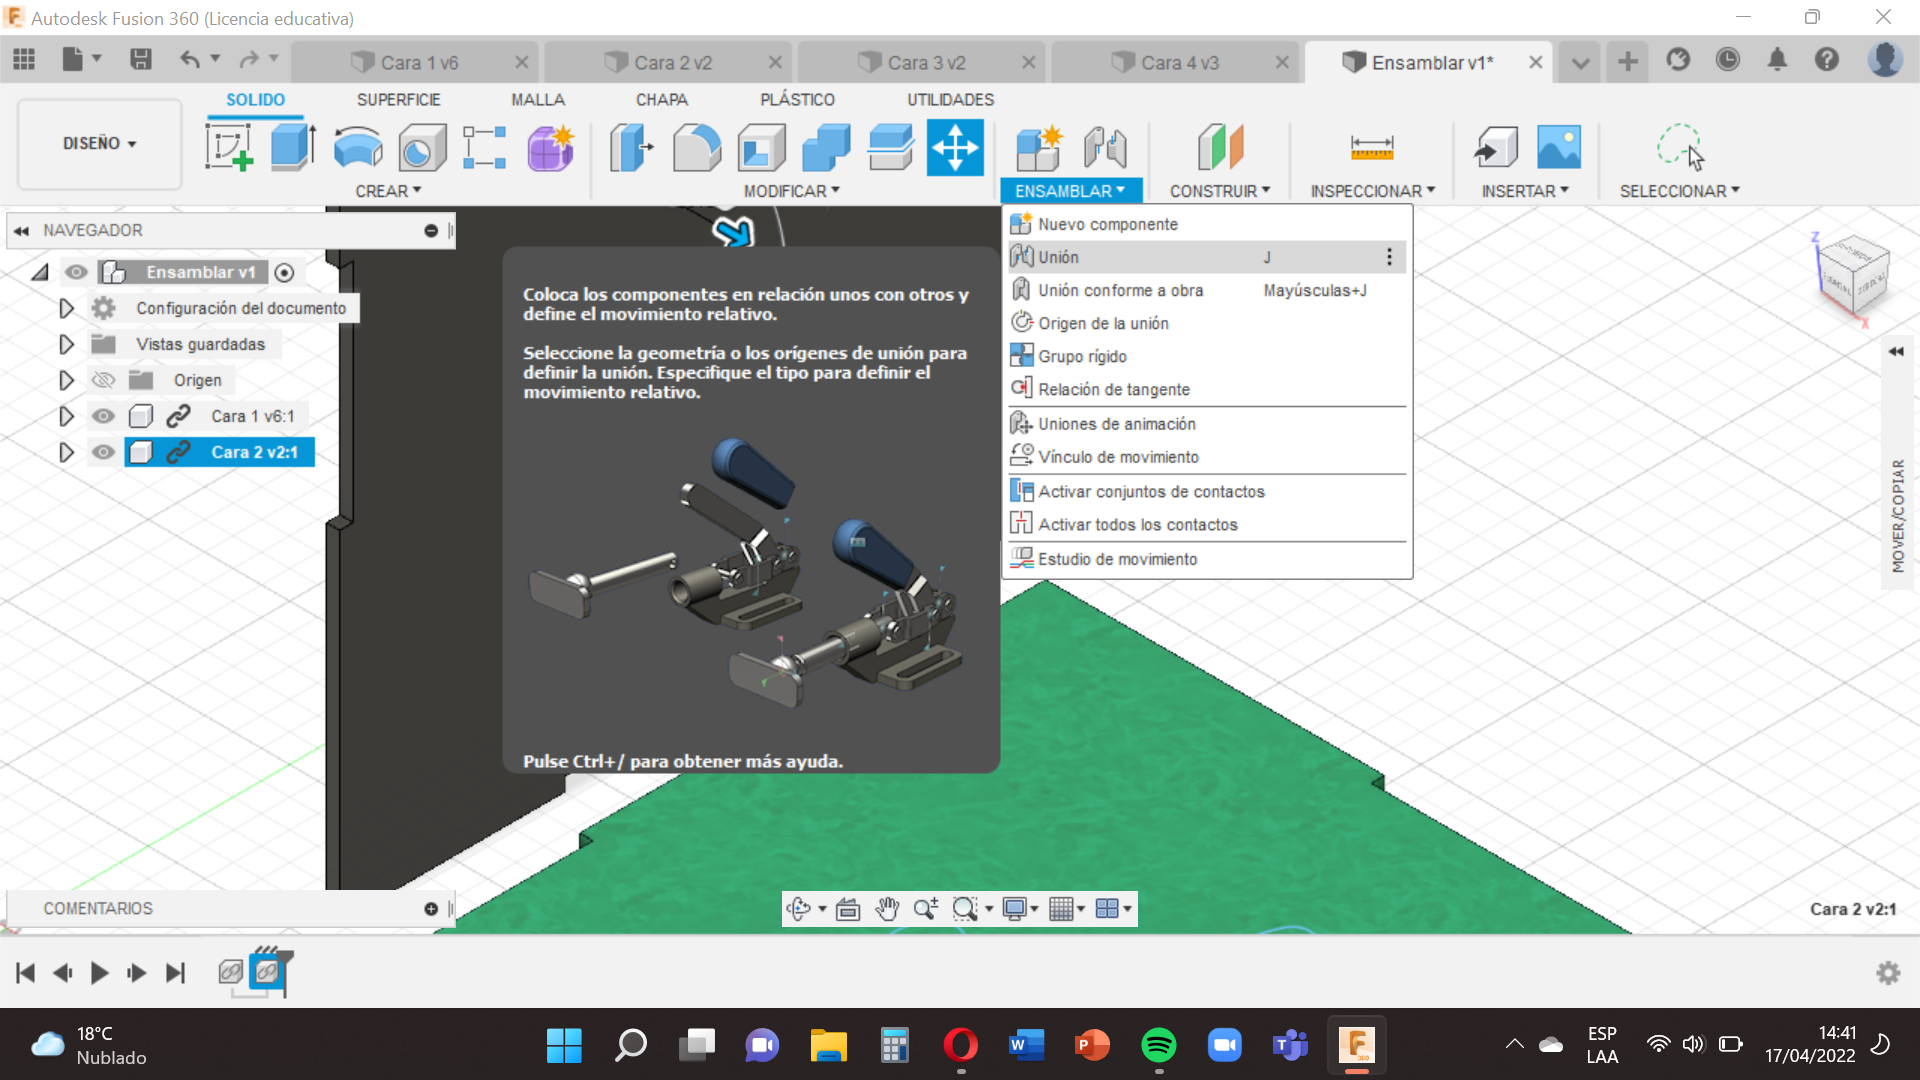
Now you will put the right mouse button on the base face and select Insert in the current design , then do the same with the 2 face and both images will appear.
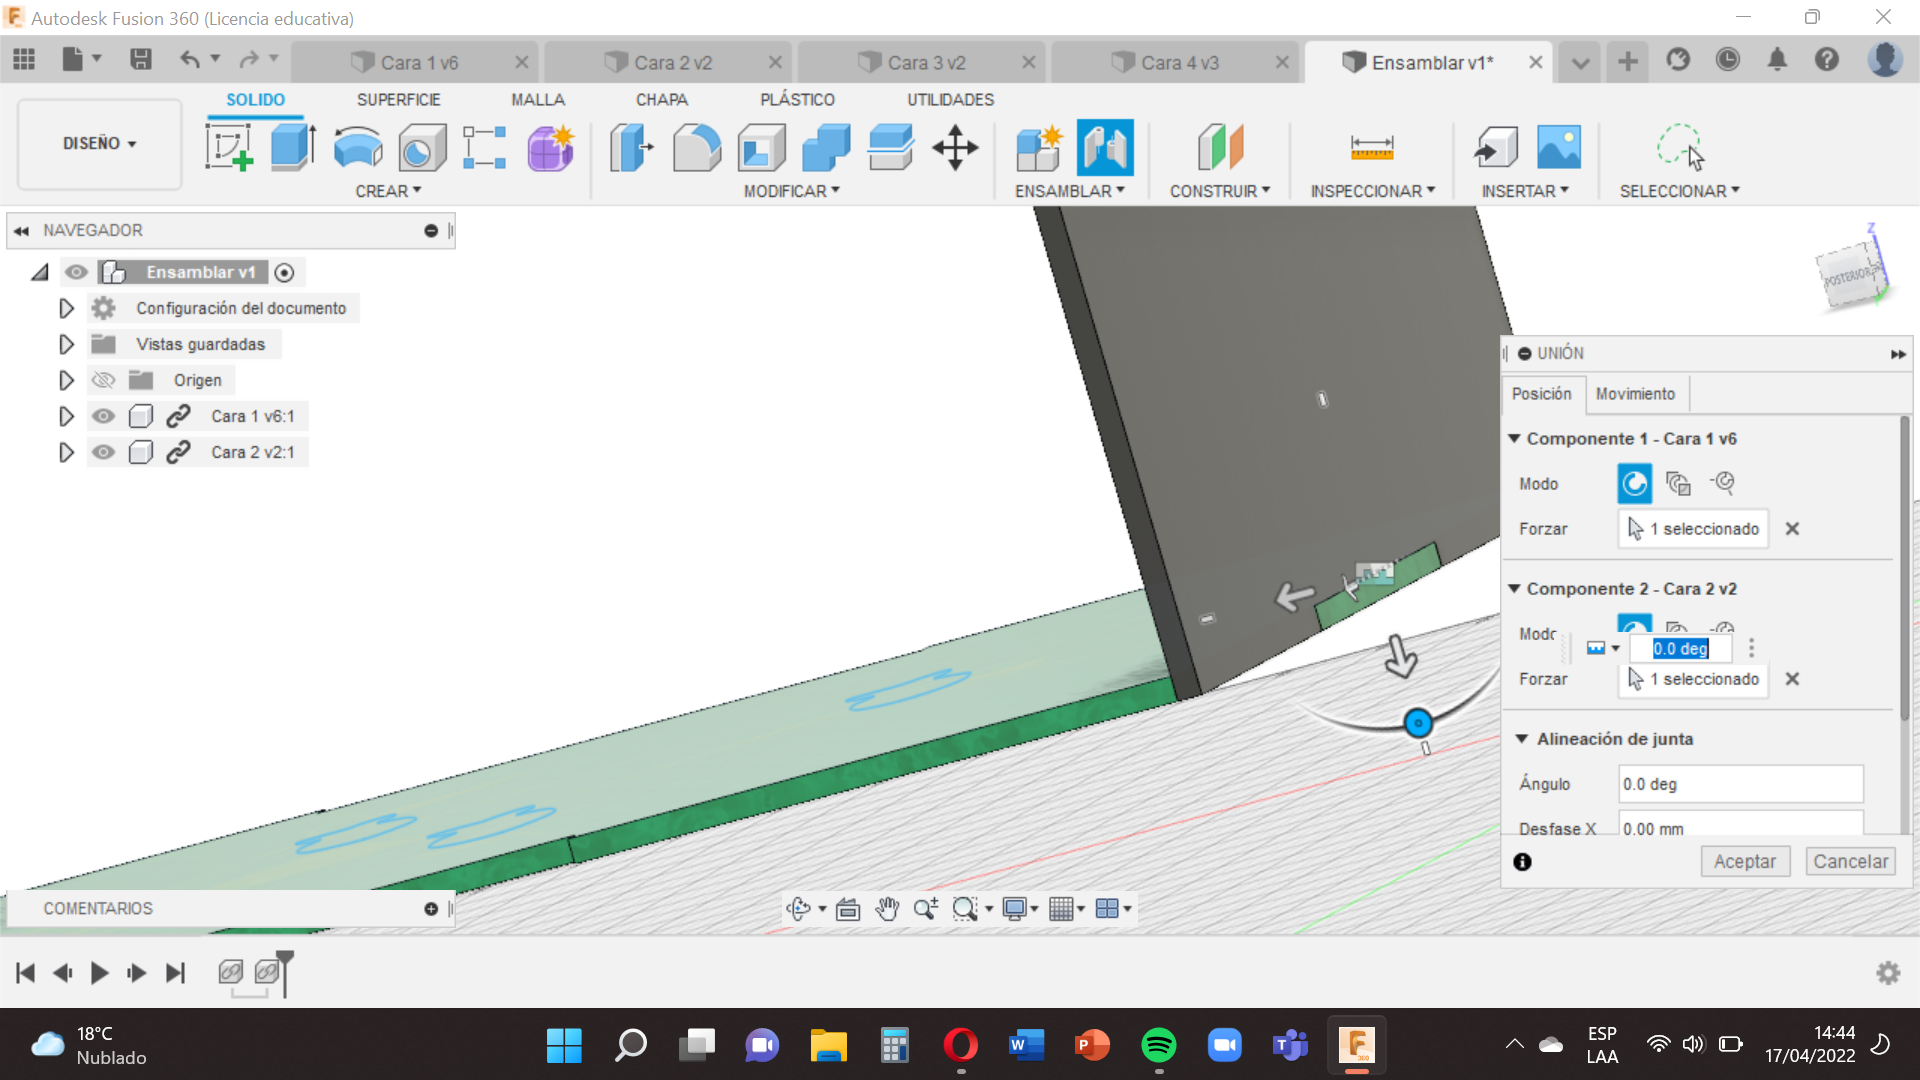
Try to put them close and let’s go to the Join option to select Union , let’s work with the edges so that you select the right edges to mount and so on with all the faces , sometimes they will not assemble well , so be careful with the edges , all calmly will come out.
.png)
.png)
.png)
.png)
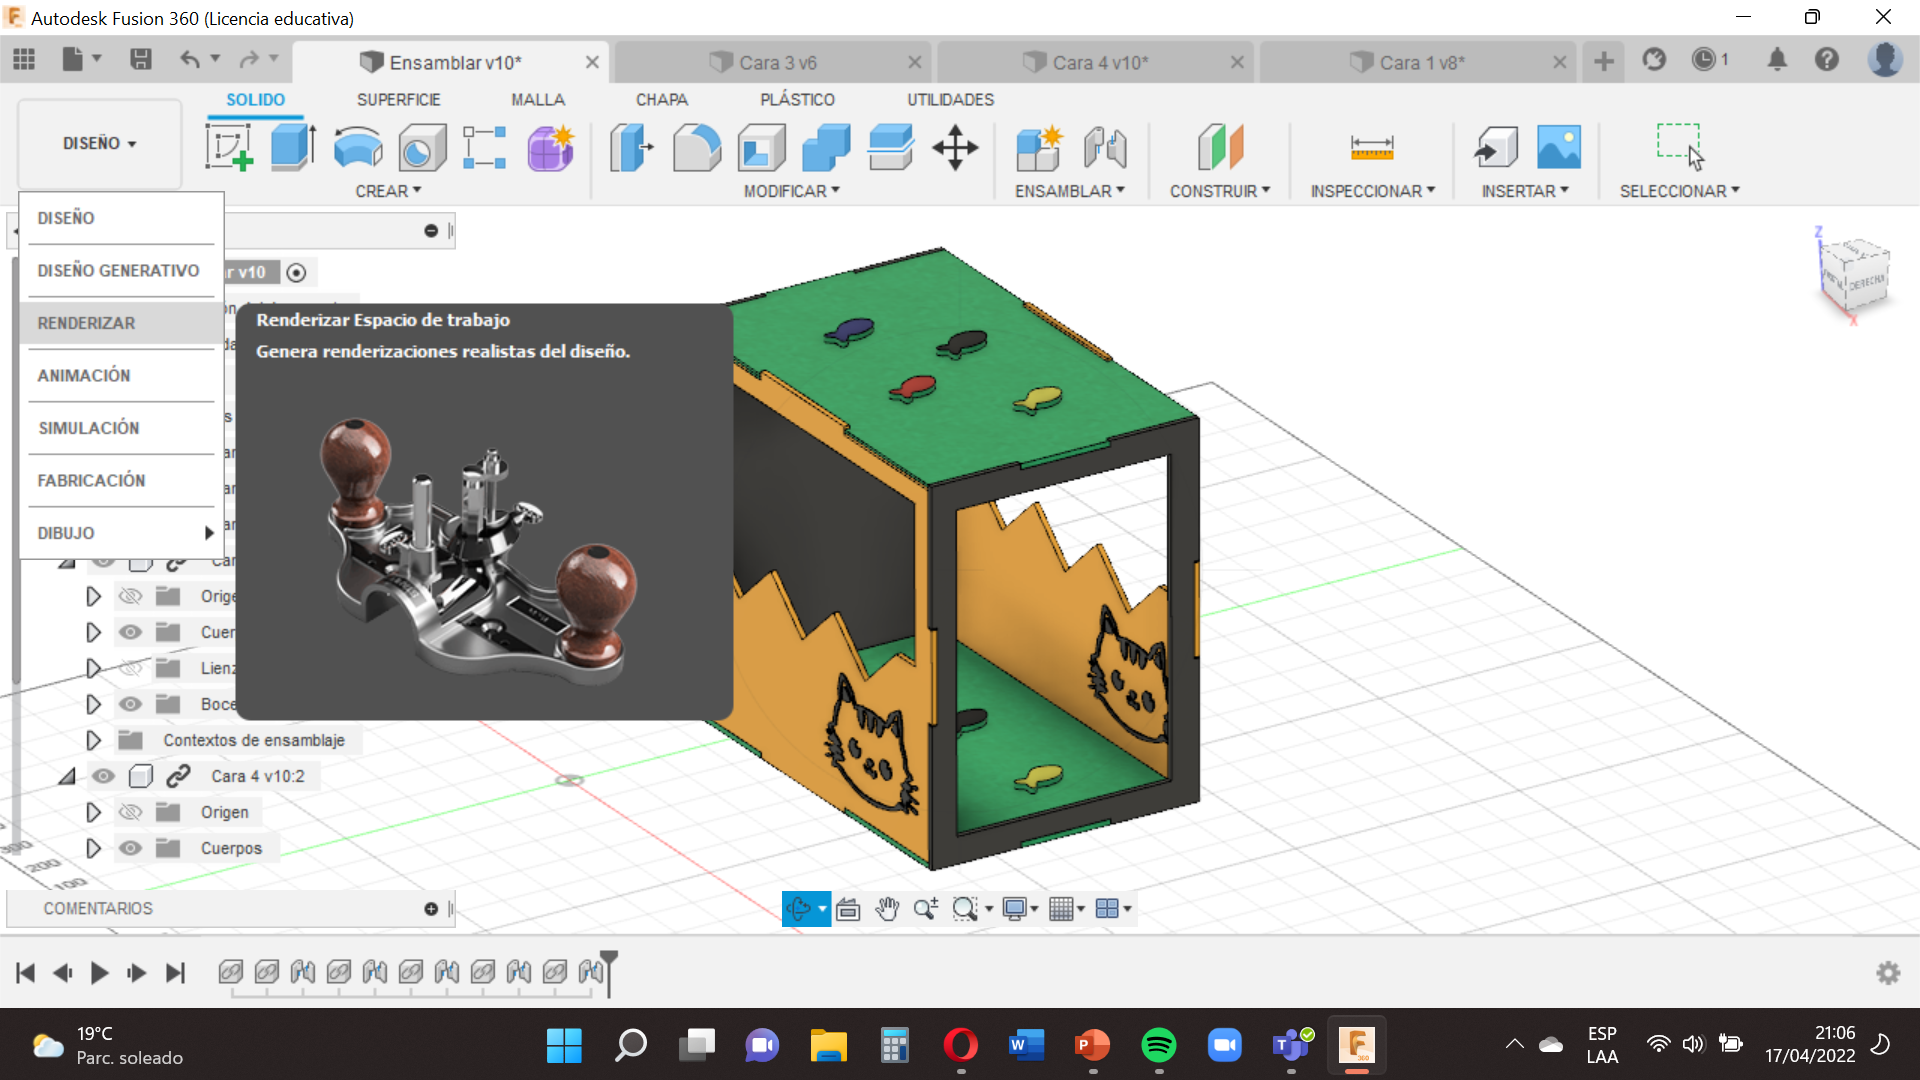
We’ll finally make our little cat house look better.
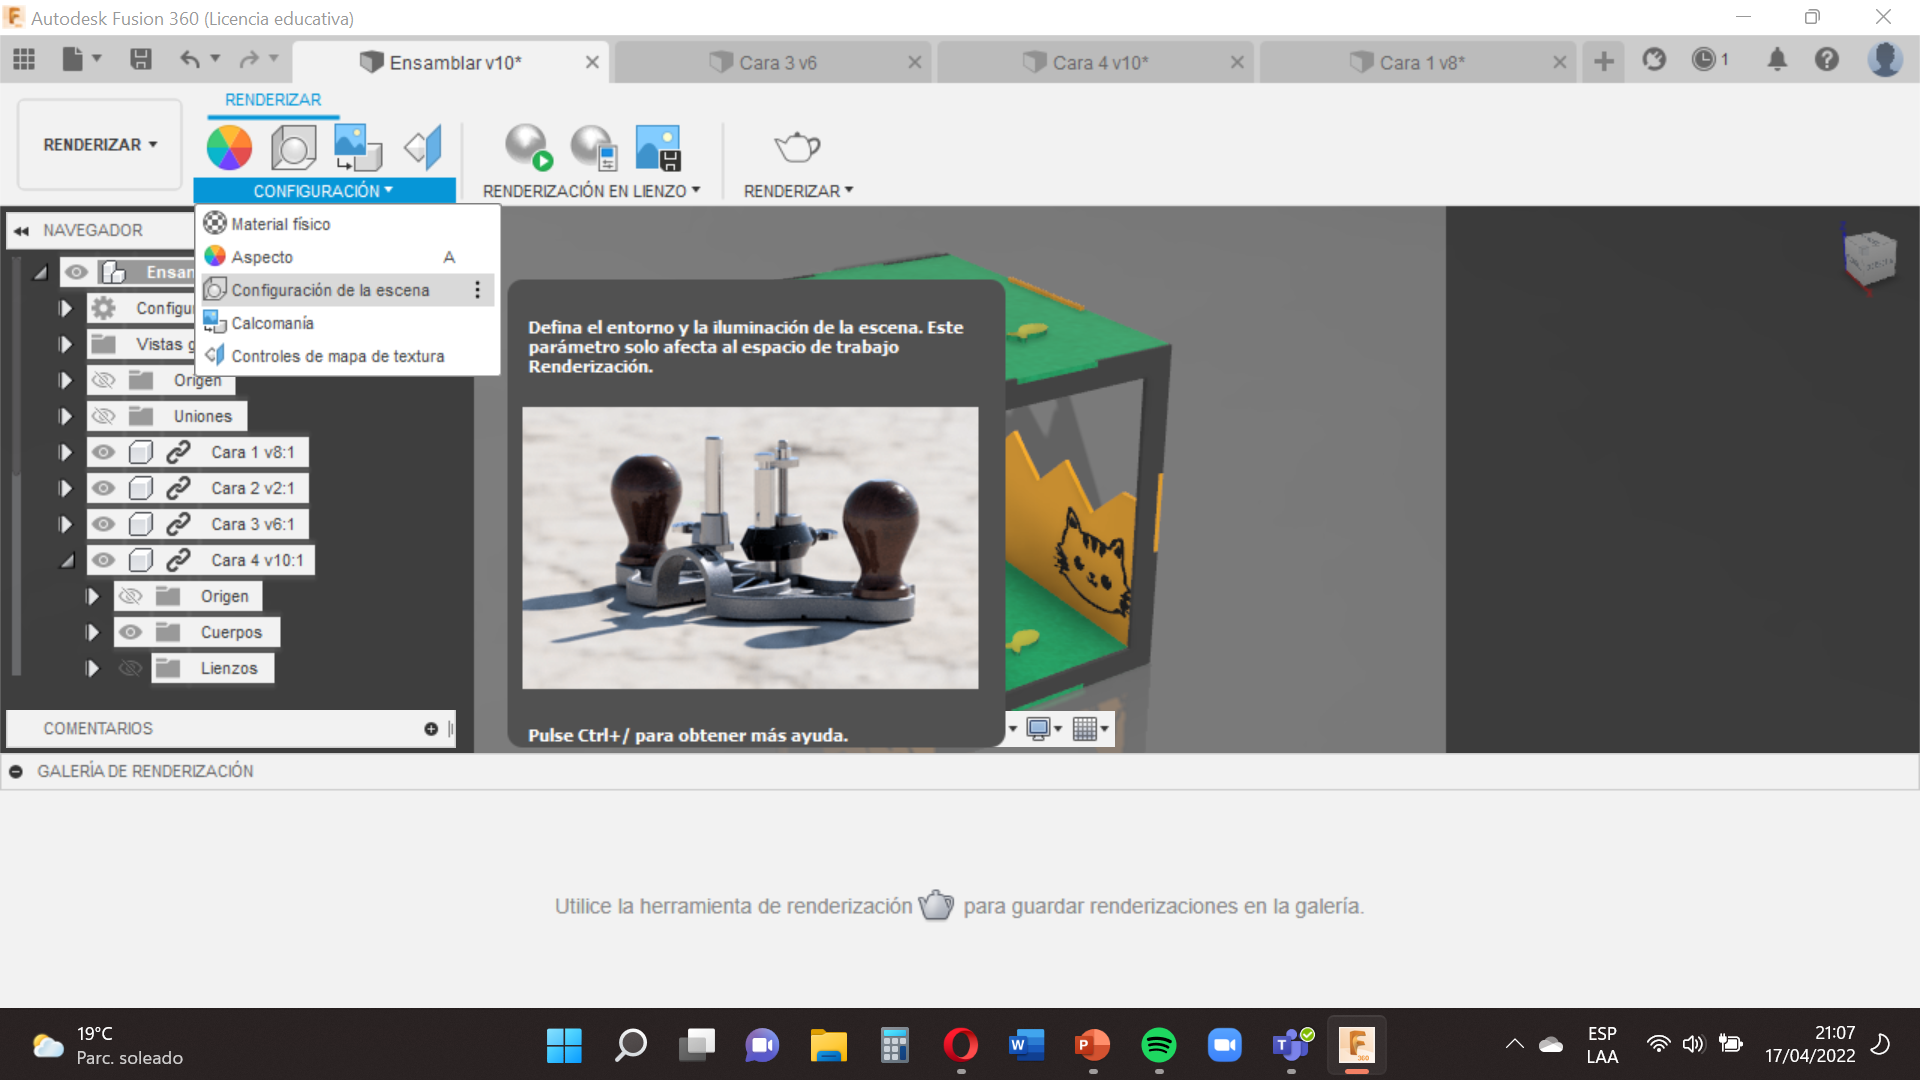
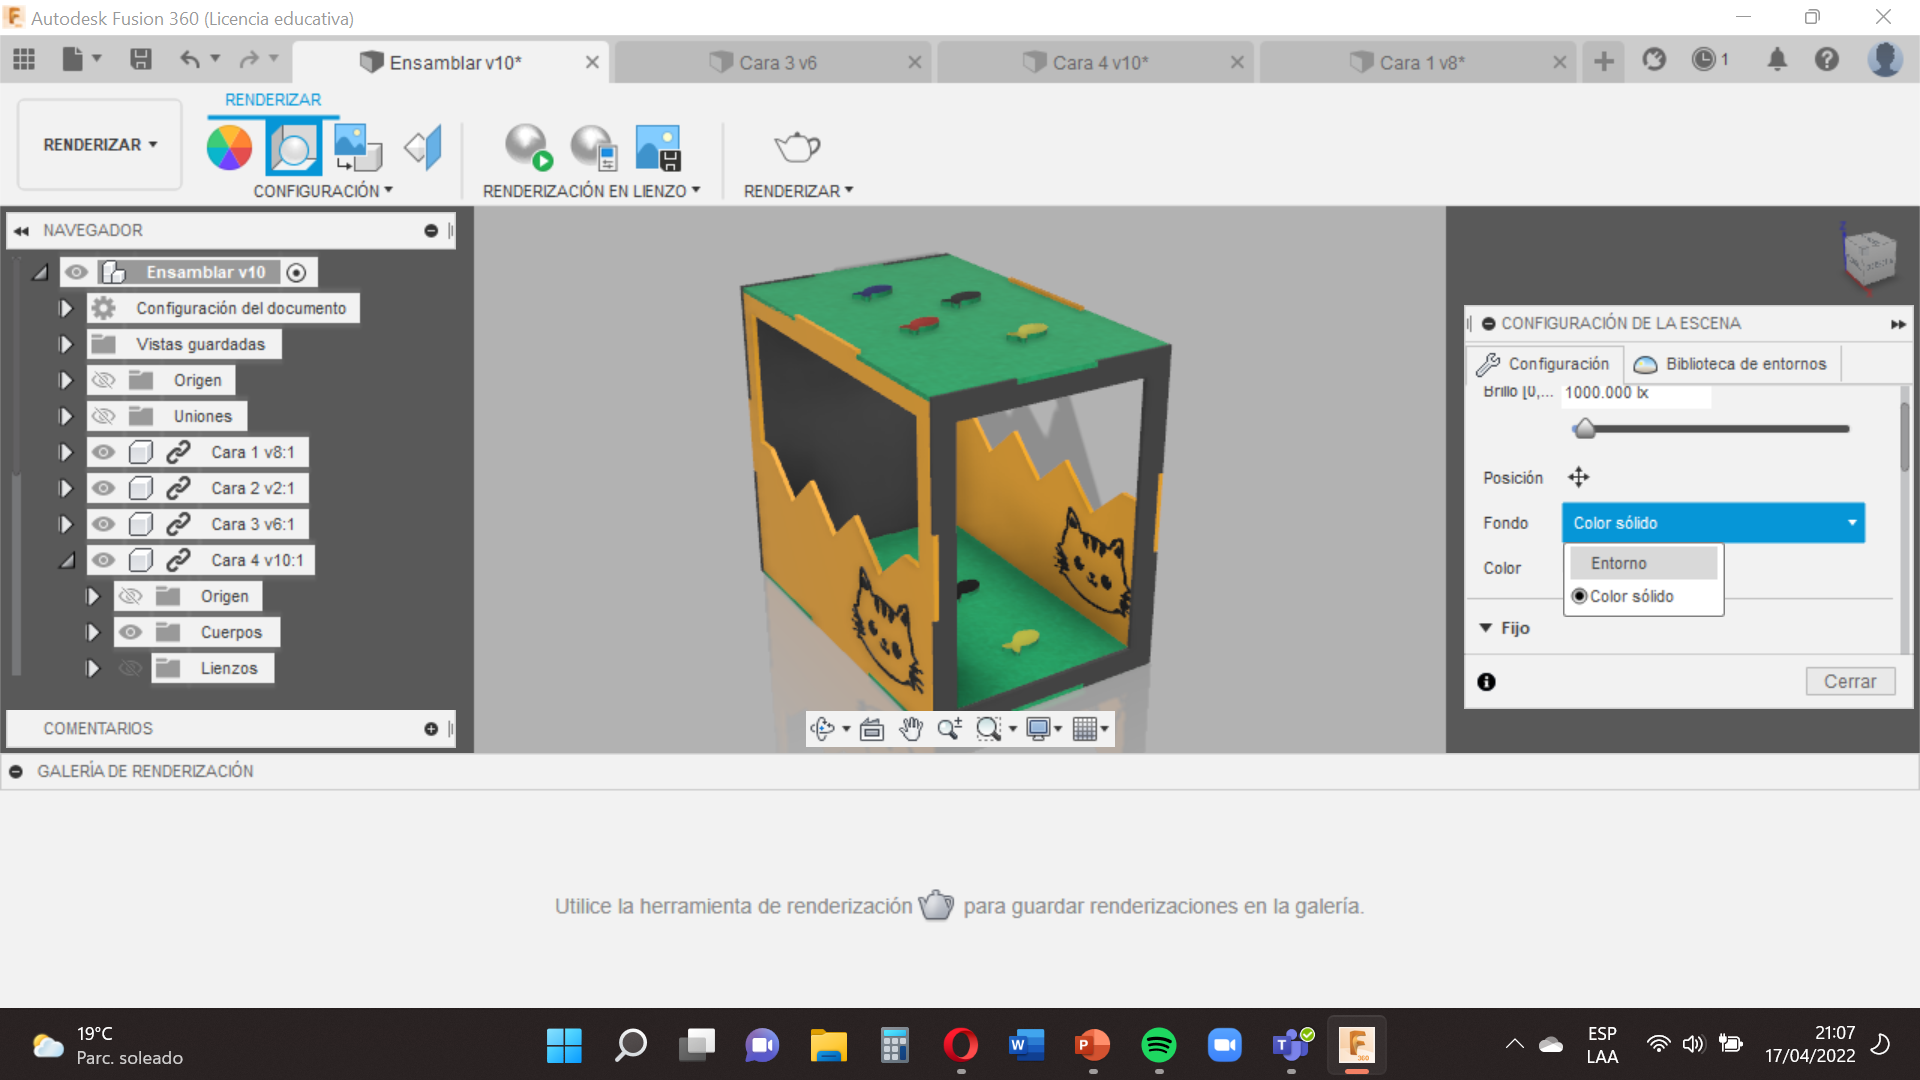
We go to the option ´´Design´´ , we select ´´Render´´ (this option will allow us to see a scenario of how our cat house will look).
Then we go to the option ´´Settings´´ , we select ´´Scene Settings´´ (here we can point the theme of brightness , environment , perspectives , lengths , exposure ).
Now we are going to Set up a Scenario so that we go to the option of ´´Environmental Library´´ and choose the scenario that we like ,so that we have the scenario we drag the option towards the environment of our house.
soon!
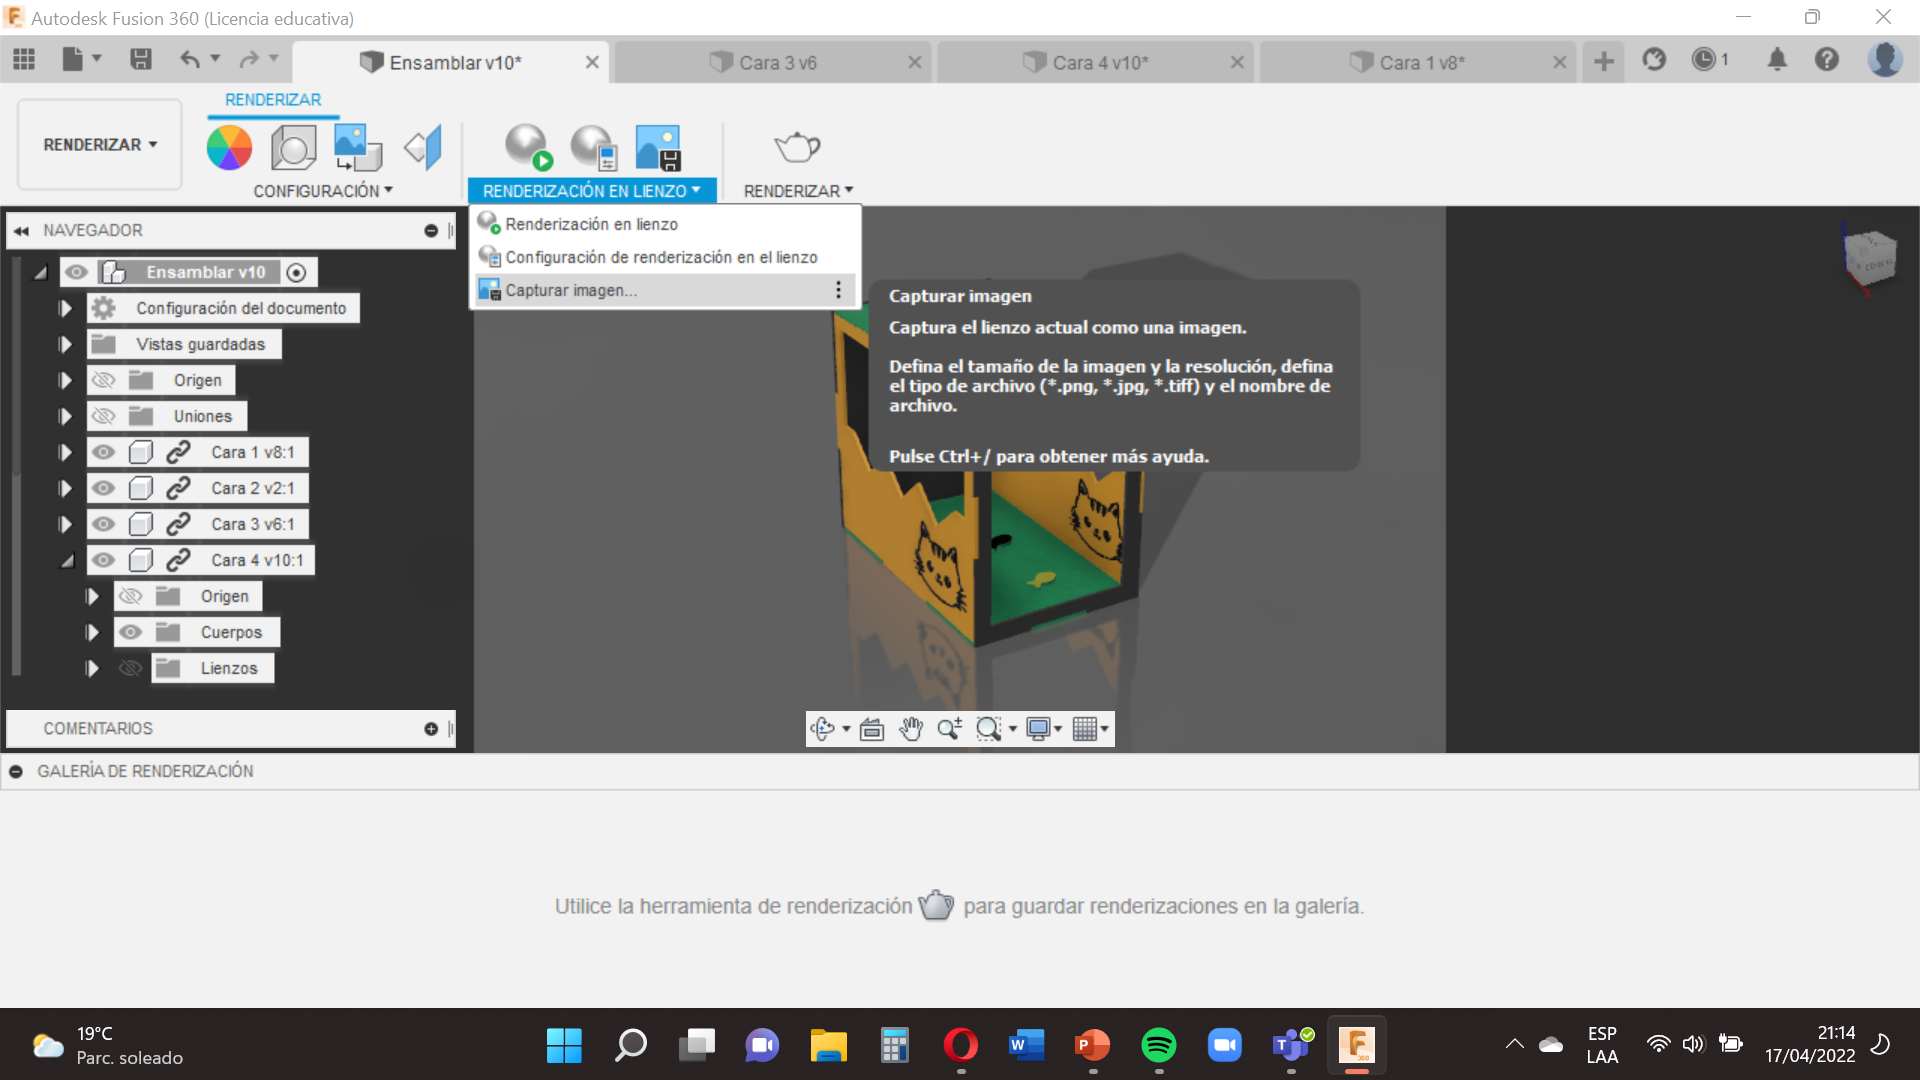
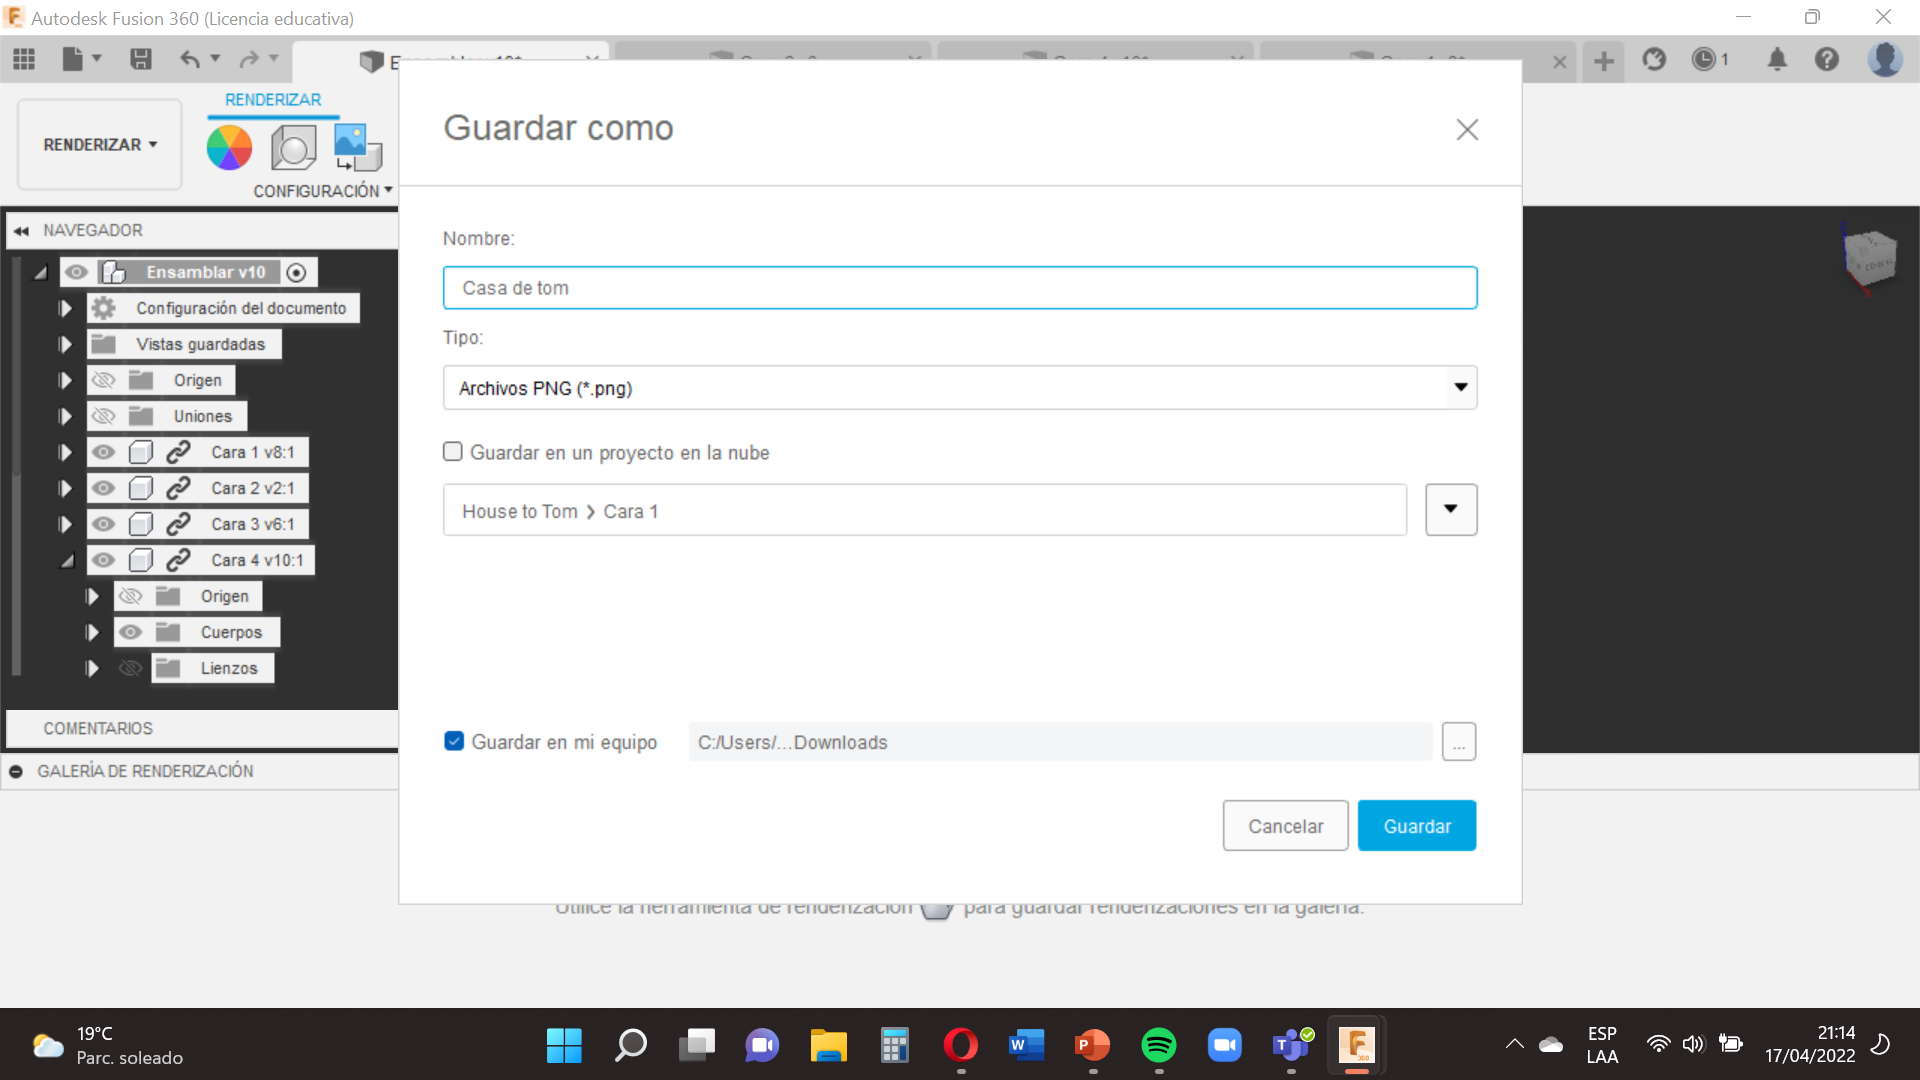
We position ourselves in the way we like the bright sign , and we go to the option of capturing the image , the measures of preference (16:9) and we accept , finally we save it as House Tom and Accept .
What Next
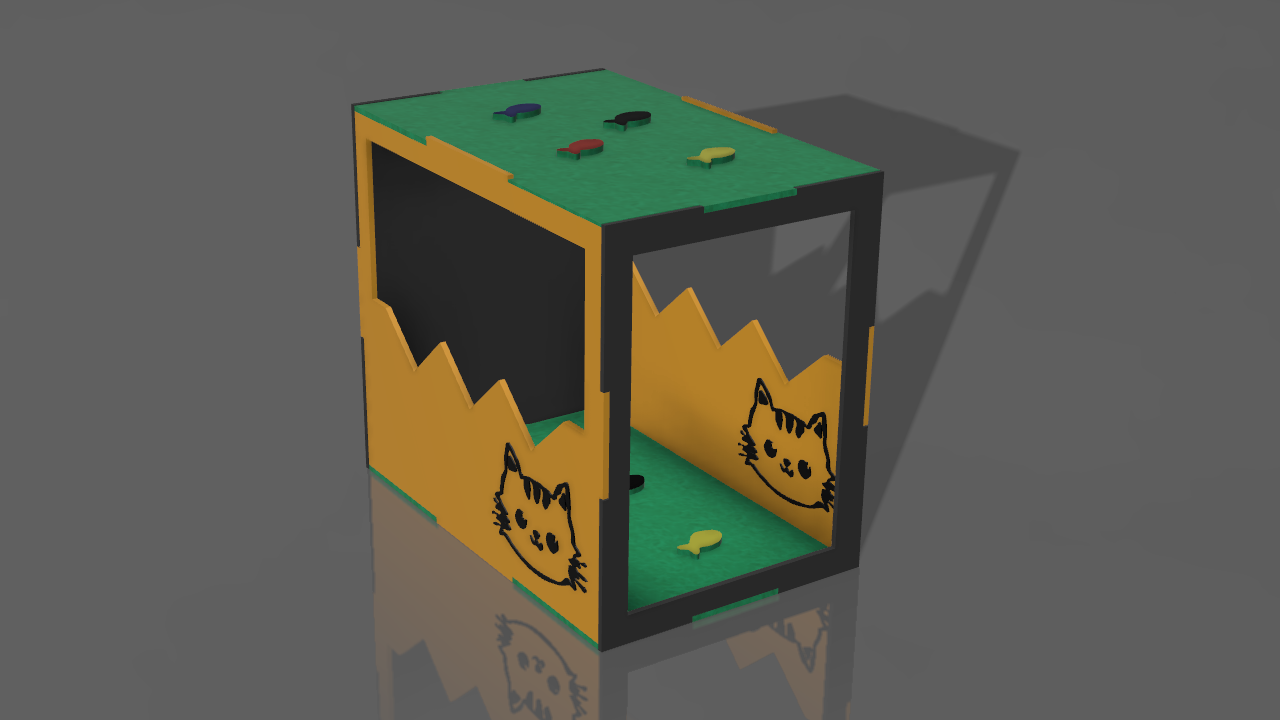
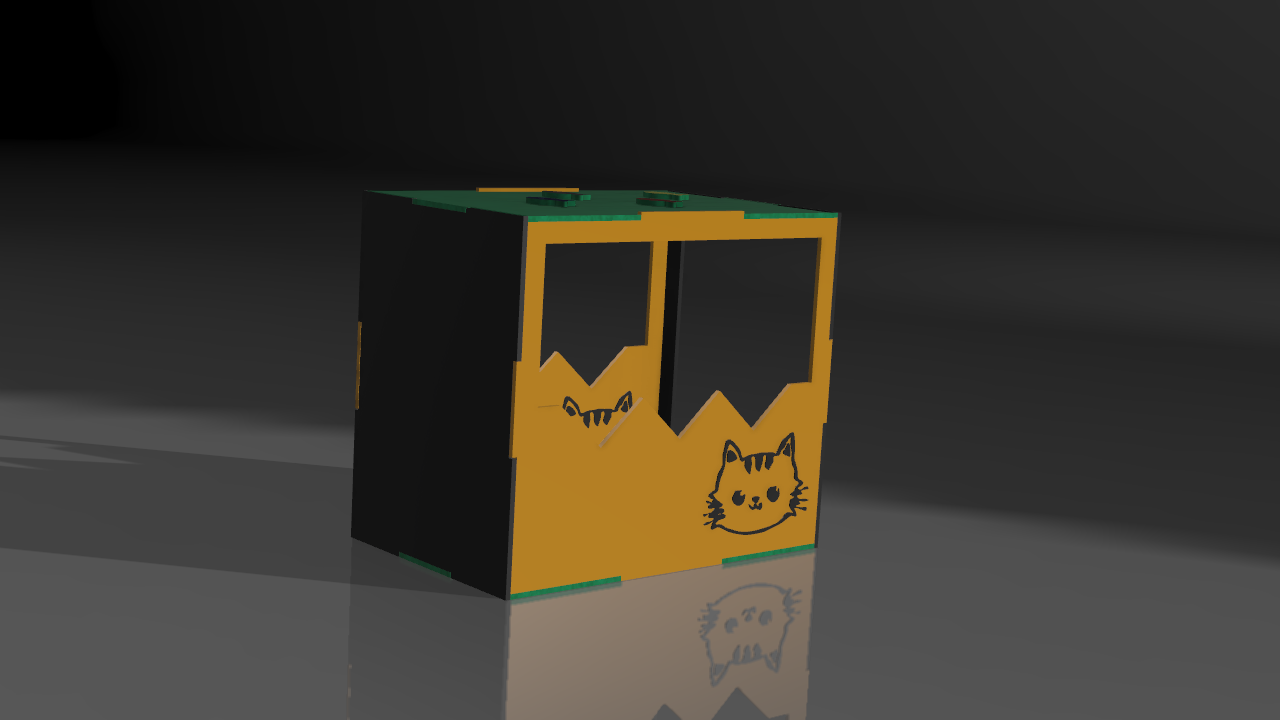
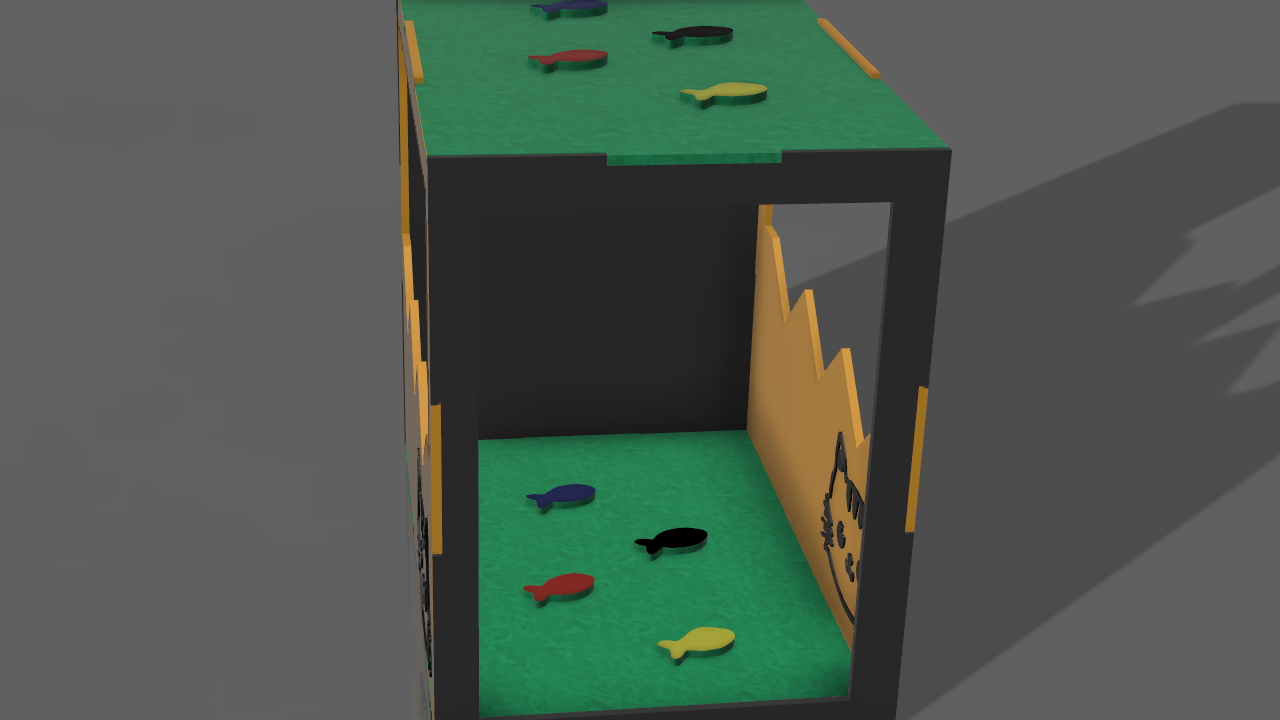
All this would be saved on your computer and we are done with our cat house!!. Good job.
¡You’ve built a house for cat ! Now that you have learned how Fusion 360 works, try to design your own model so that you do it with the design that you like. I made this house for my kitten Tom because he needed one , use your favorite colors and all that remind me of him , and of course nothing better than to share it,
I hope to see you again! If you have any questions and need clarification, please feel free to contact us in the comments here or in my DM.
Until next time! Ciao!!