Catapult With Arduino and a Servo
by Kim Hoogebom in Living > LEGO & K'NEX
533 Views, 1 Favorites, 0 Comments
Catapult With Arduino and a Servo
Hello there! In this tutorial I am going to show you how to make a tutorial on how to make a catapult.
Step 1: Get the Appropriate Components
For this catapult you need various things:
1. a servo
2. Ardiuno
3. A motherboard
4. Cables
5. Buttons
3. Lots of legos and mechano.
4. Being a bit crazy
Step 2: Putting the Motherboard and Servo Together
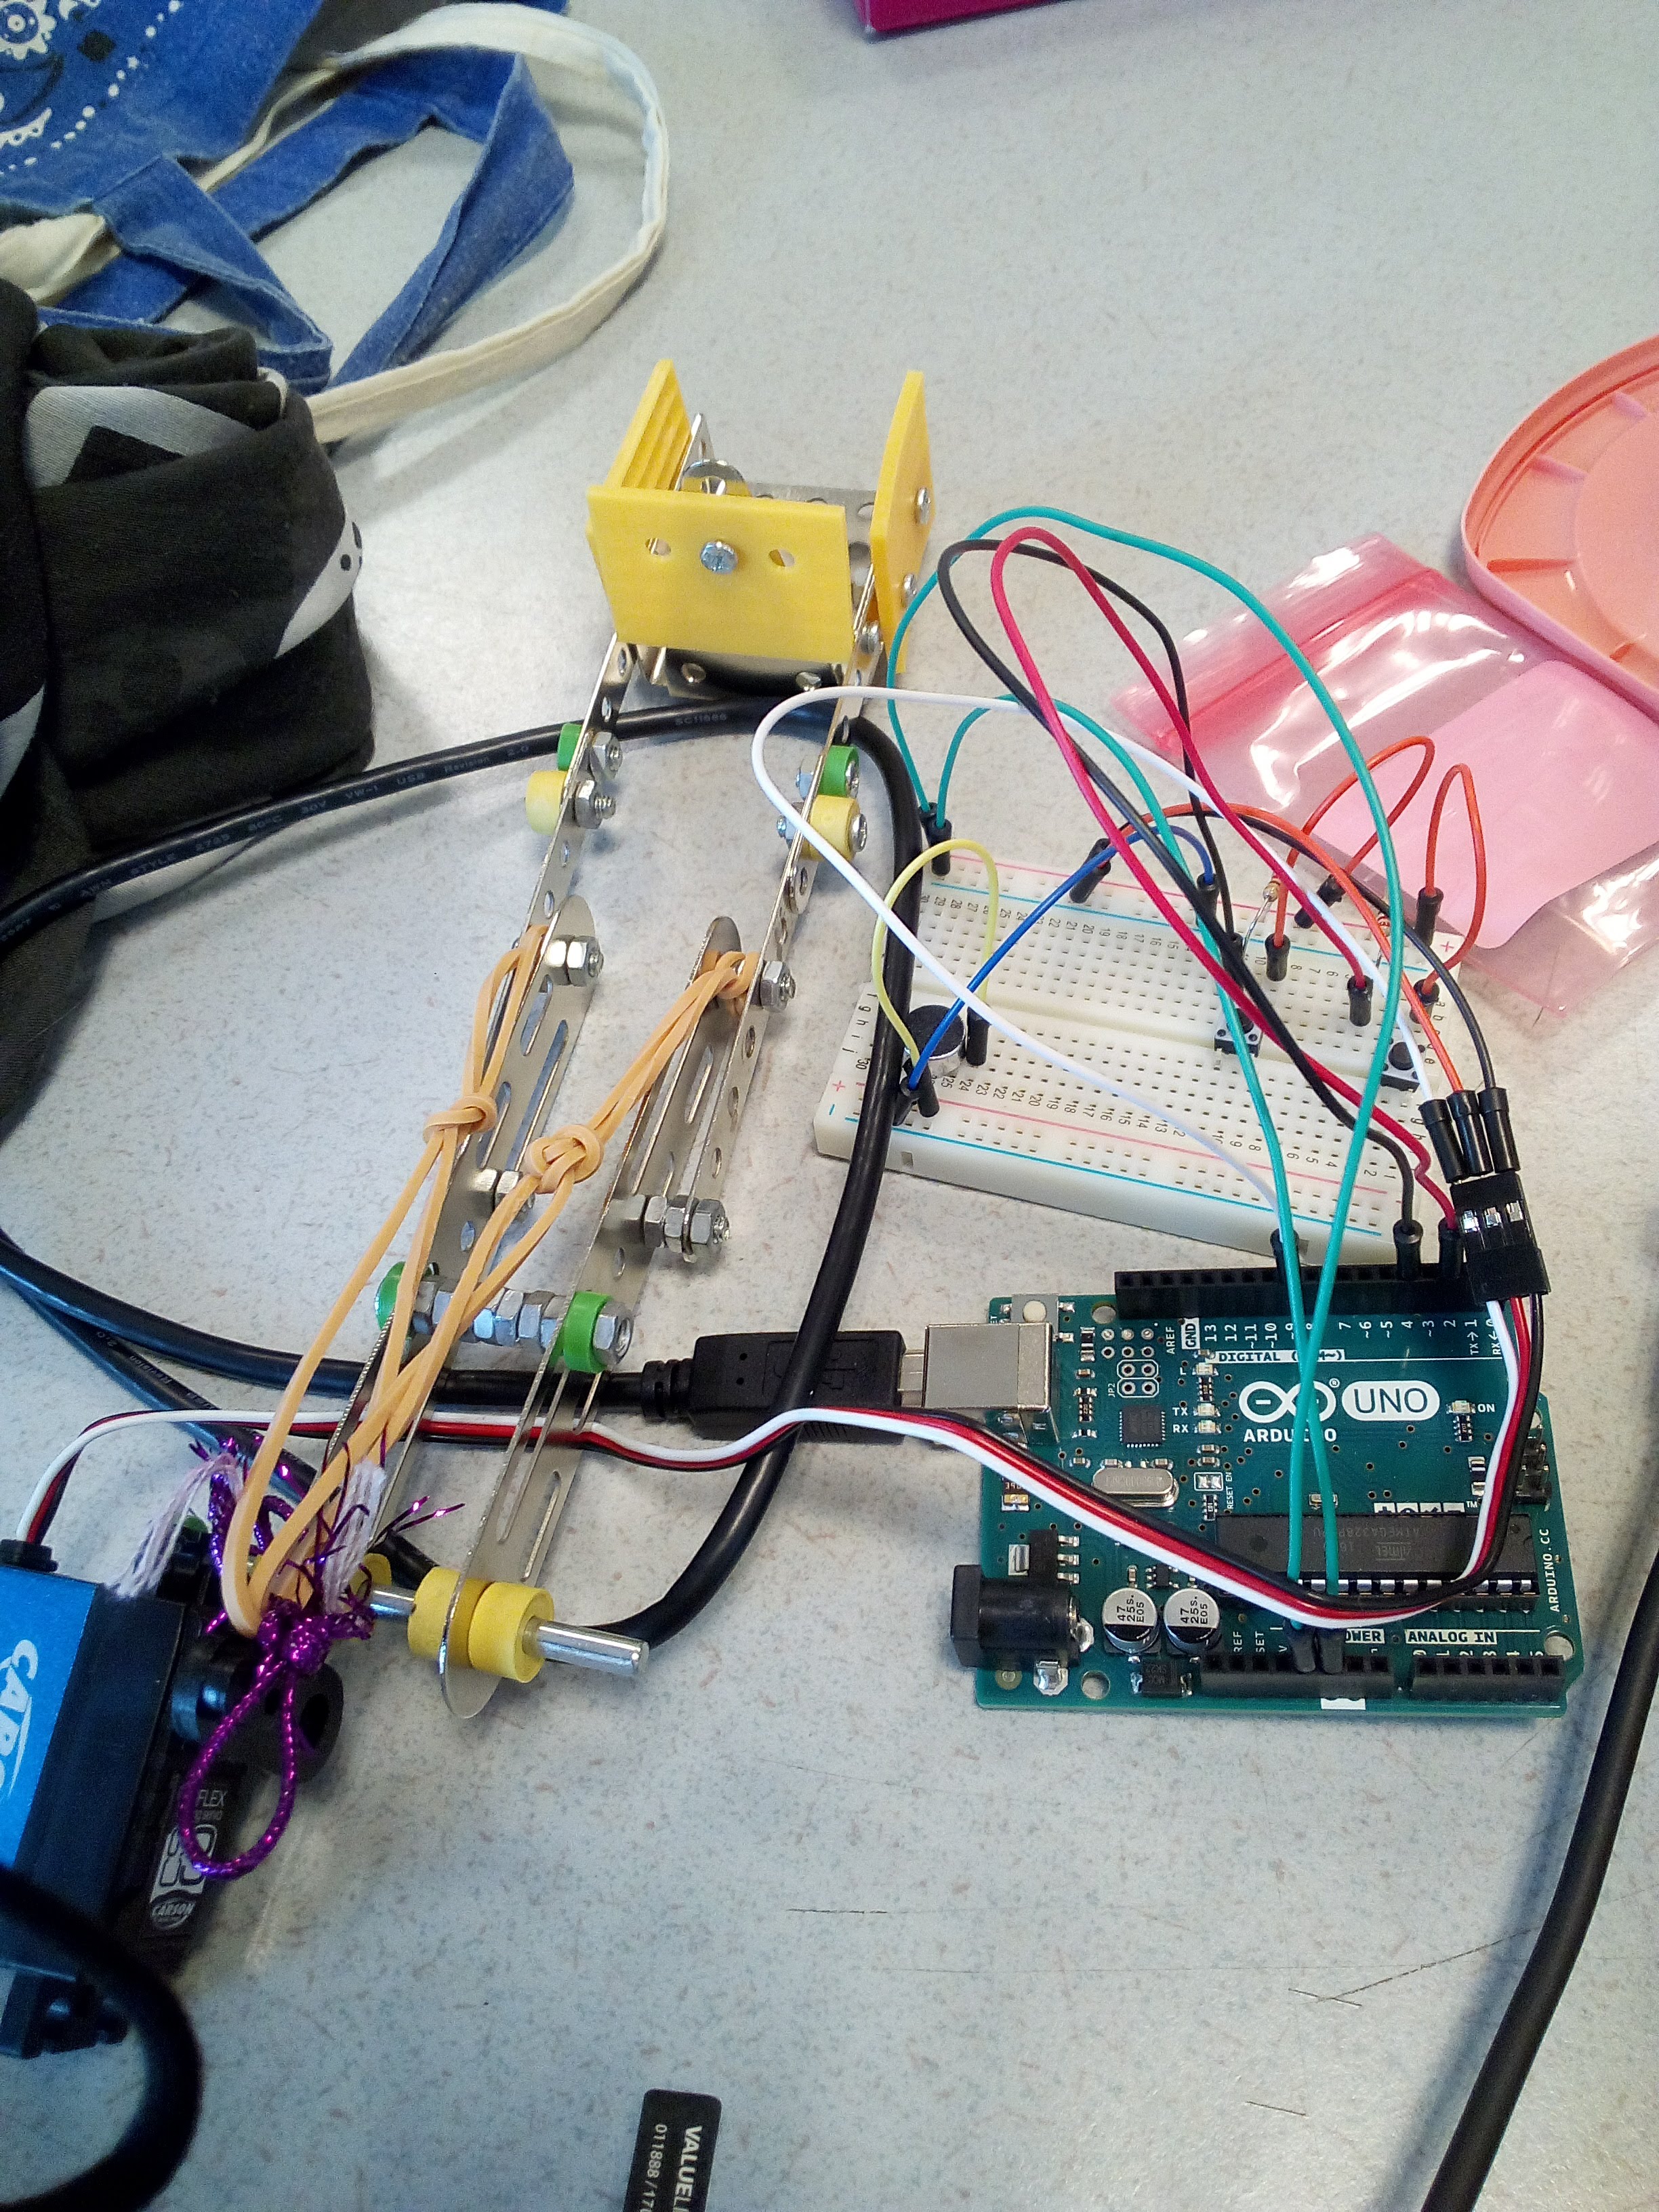
Put your motherboard and servo together like on this picture
Step 3: the Code
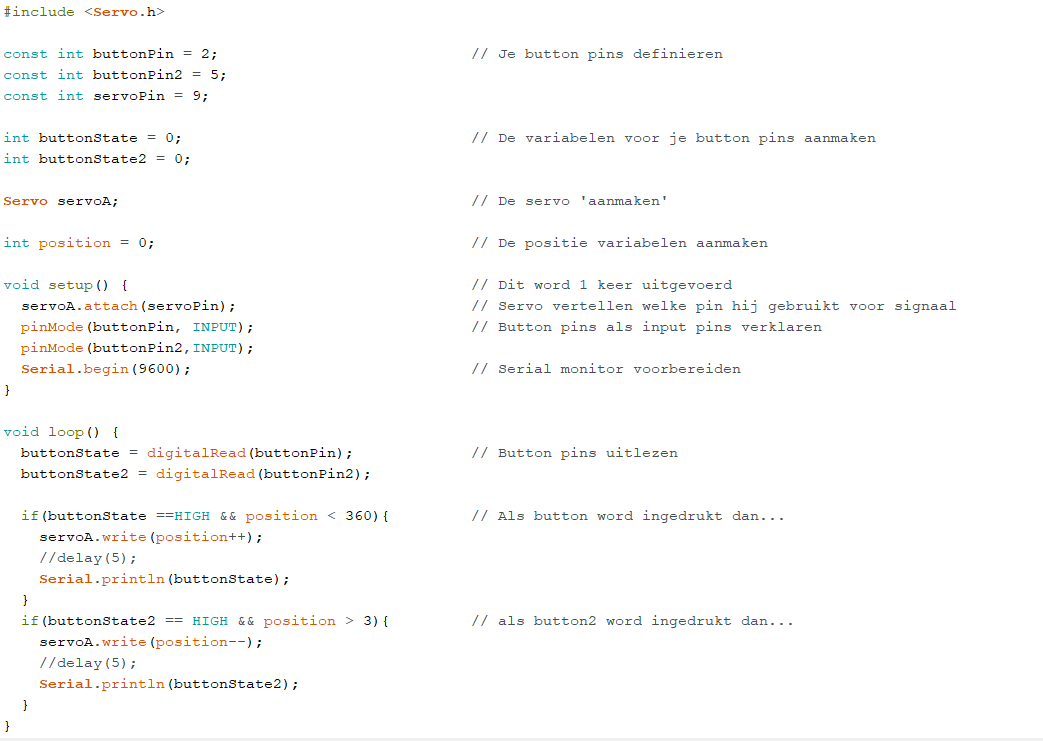
Use this code for the arduino
#include
const int buttonPin = 2;
int buttonState = 0;
Servo servoA;
int position = 0;
void setup() {
servoA.attach(servoPin);
pinMode(buttonPin, INPUT);
pinMode(buttonPin2,INPUT); Serial.begin(9600);
void loop() { buttonState = digitalRead(buttonPin);
buttonState2 = digitalRead(buttonPin2);
if(buttonState ==HIGH && position < 360){ servoA.write(position++);
Serial.println(buttonState); } if(buttonState2 == HIGH && position > 3){ // als button2 word ingedrukt dan... servoA.write(position--); //delay(5); Serial.println(buttonState2); } }
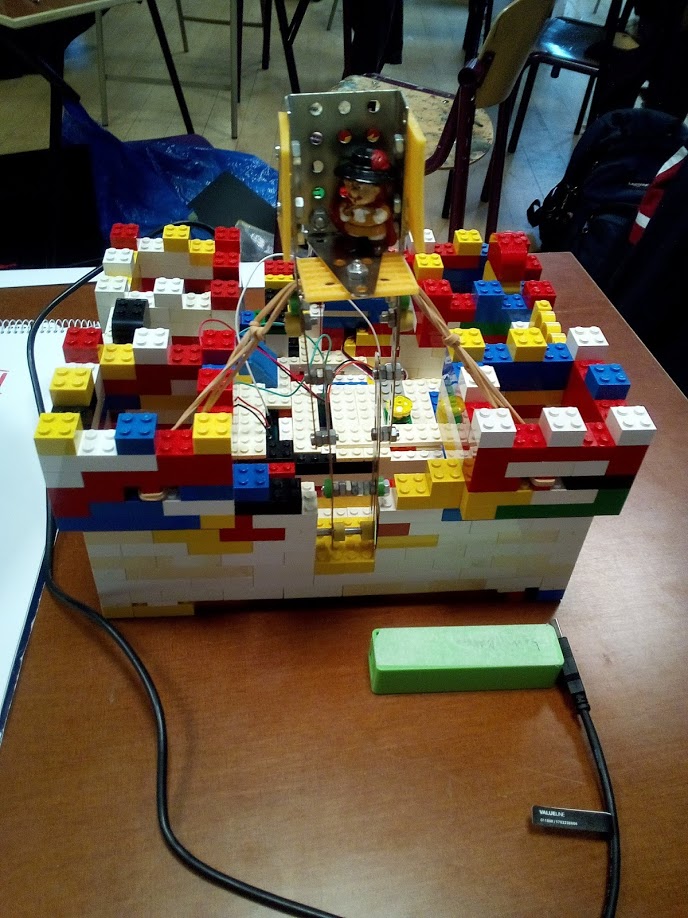
Step 4: Build the Castle and Catapult
Now you got everything set the only thing you need to do is building the actual catapult part