Carved Lake Map

This Instructable describes how to make a decorative carved lake map using lake depth, or bathymetric, data.
The materials list is short:
- Board of most any wood species
- Stain
- Epoxy and tint (optional)
- Finish such as polyuethane
Get Bathymetric Data
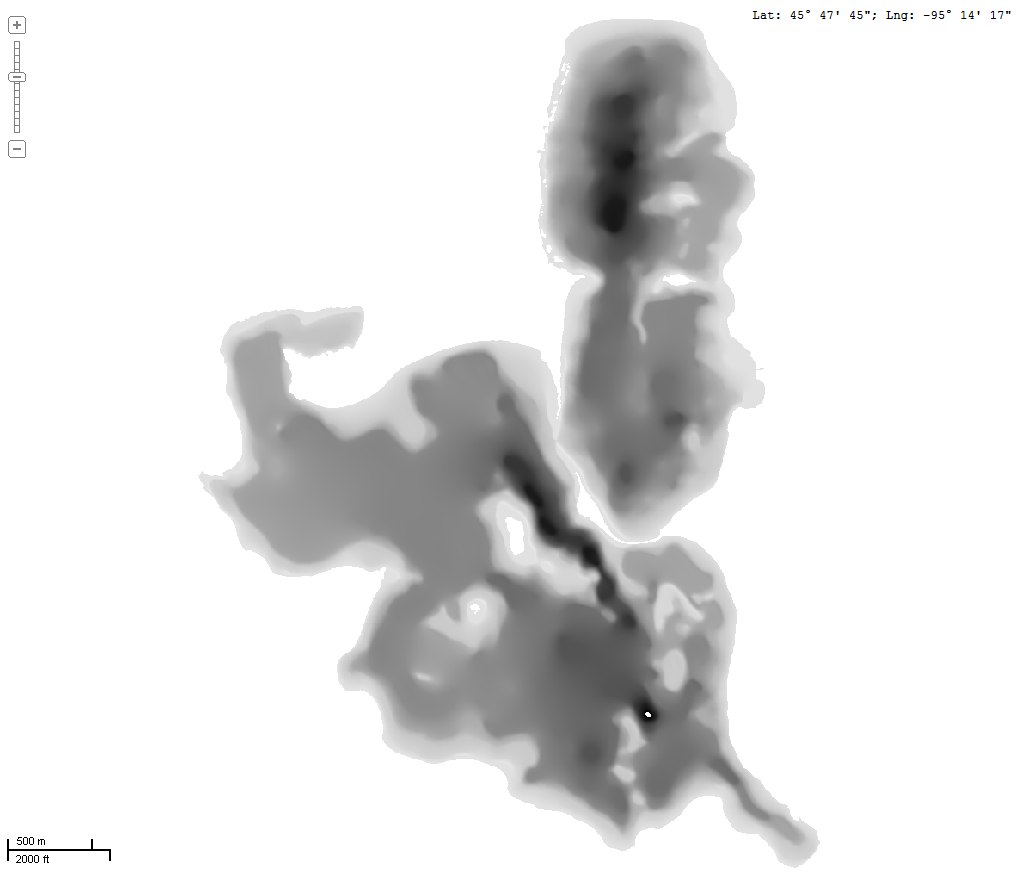
It may be possible to find bathymetric data online for your lake of interest. Do a search - for example, "Minnesota bathymetric". Minnesota does in fact have an extensive lake bathymetric database that can be downloaded at no cost. I used MapWindowGIS to import the data for this Minnesota lake. The data is presented as a grayscale heightmap. A heightmap is a grayscale image where the intensity of gray corresponds to the height, or in our case depth, of an object.
Convert a Contour Map to a Grayscale Heightmap
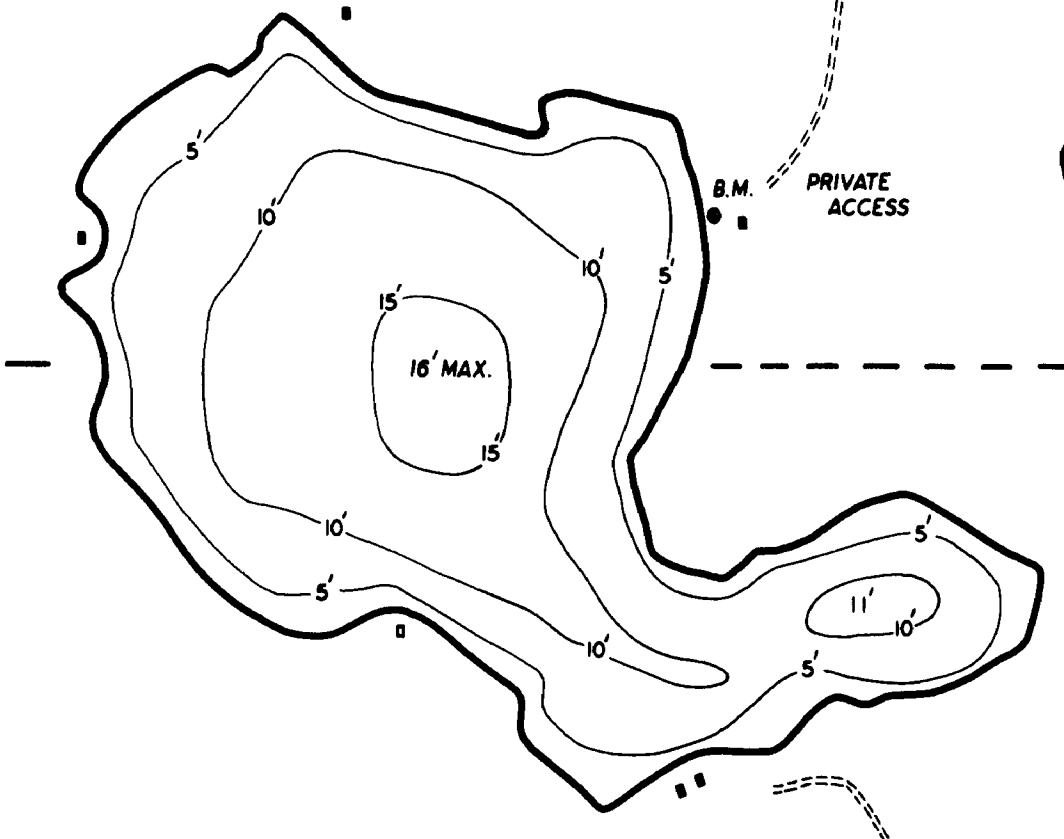
If you can't find bathymetric data for your lake, you can use a depth contour map to create a heightmap. Many lake contour maps can be found online, or you can scan a paper copy. Load it into a drawing program - I like to use paint.net. If your map is in color, convert it to black and white.
Close Open Contour Lines

The first step is to ensure that the contours are closed. Often they are not, as a gap has been left to insert the depth number. Use one of the drawing tools to close the contours. You can draw right through the numbers. You can remove the numbers if you like, but in most cases it is not necessary.
Color Alternating Contour Areas
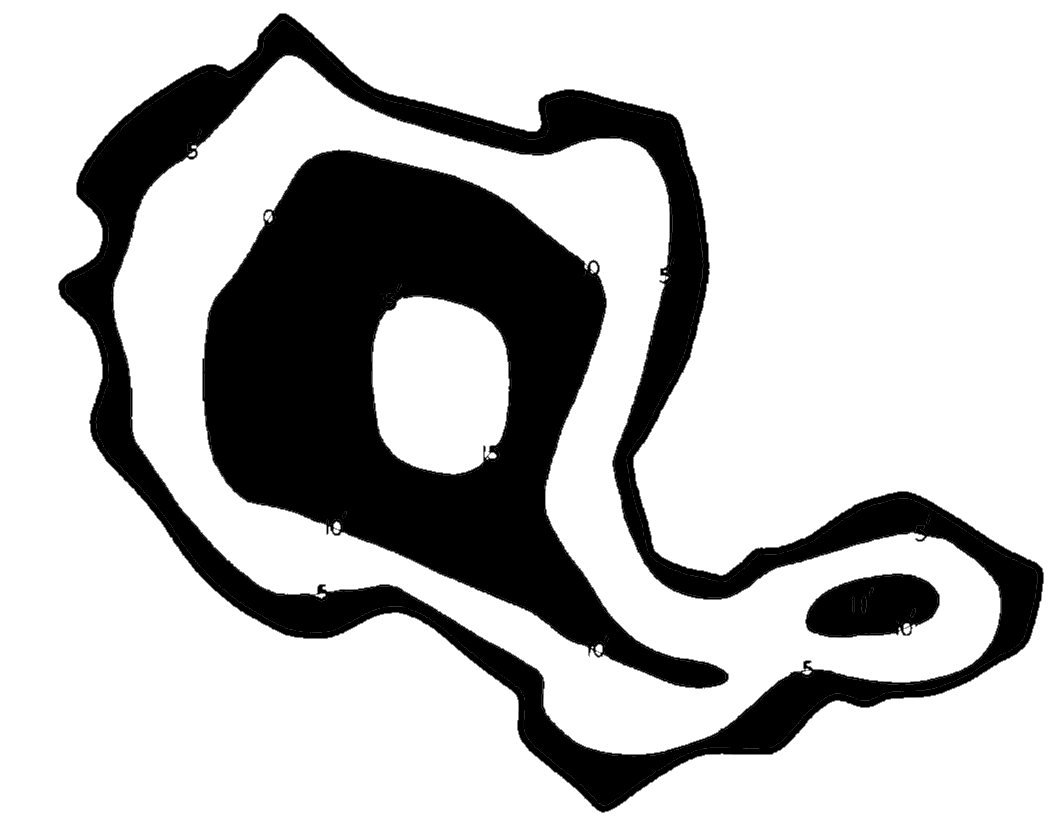
Next, use the paint bucket tool to color the contour areas alternating black and white. This absorbs the contour lines. Delete any details outside the lake.
Paint in Gray

Again using the paint tool, start with the outermost depth area and color that area a light gray. paint.net displays the hugh, saturation, and value numbers for colors, so I select white and then adjust the value - in this case I started with value = 10, a light gray. Color the next ring slightly darker - value = 20. Continue with value = 30 etc. For a map with a lot of contour lines, you'll need to use a smaller increment as you change the value.
Smooth the Contours
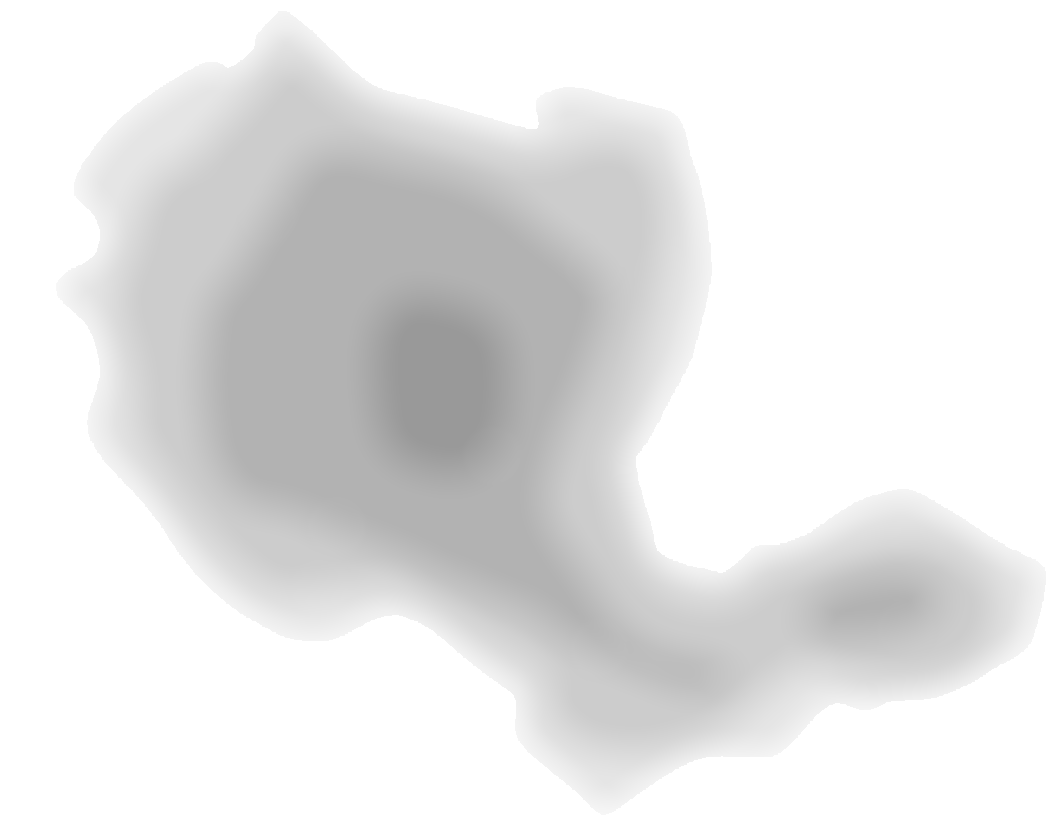
Finally, selecting only the lake, smooth the contours using a smoothing tool or a blur tool. A little judgement is needed here. Too little smoothing and the end result will look like stair steps; too much and the detail will be lost. Notice that the smoothing operation hides the depth numbers, so no real need to having removed them.
If you like the stair step effect, you can of course skip the smoothing.
Import the Heightmap

If your CNC software supports heightmap imports, go ahead and do that.
If not, there are several online and downloadable tools to convert a heightmap to STL, a format that is commonly used for 3D objects.
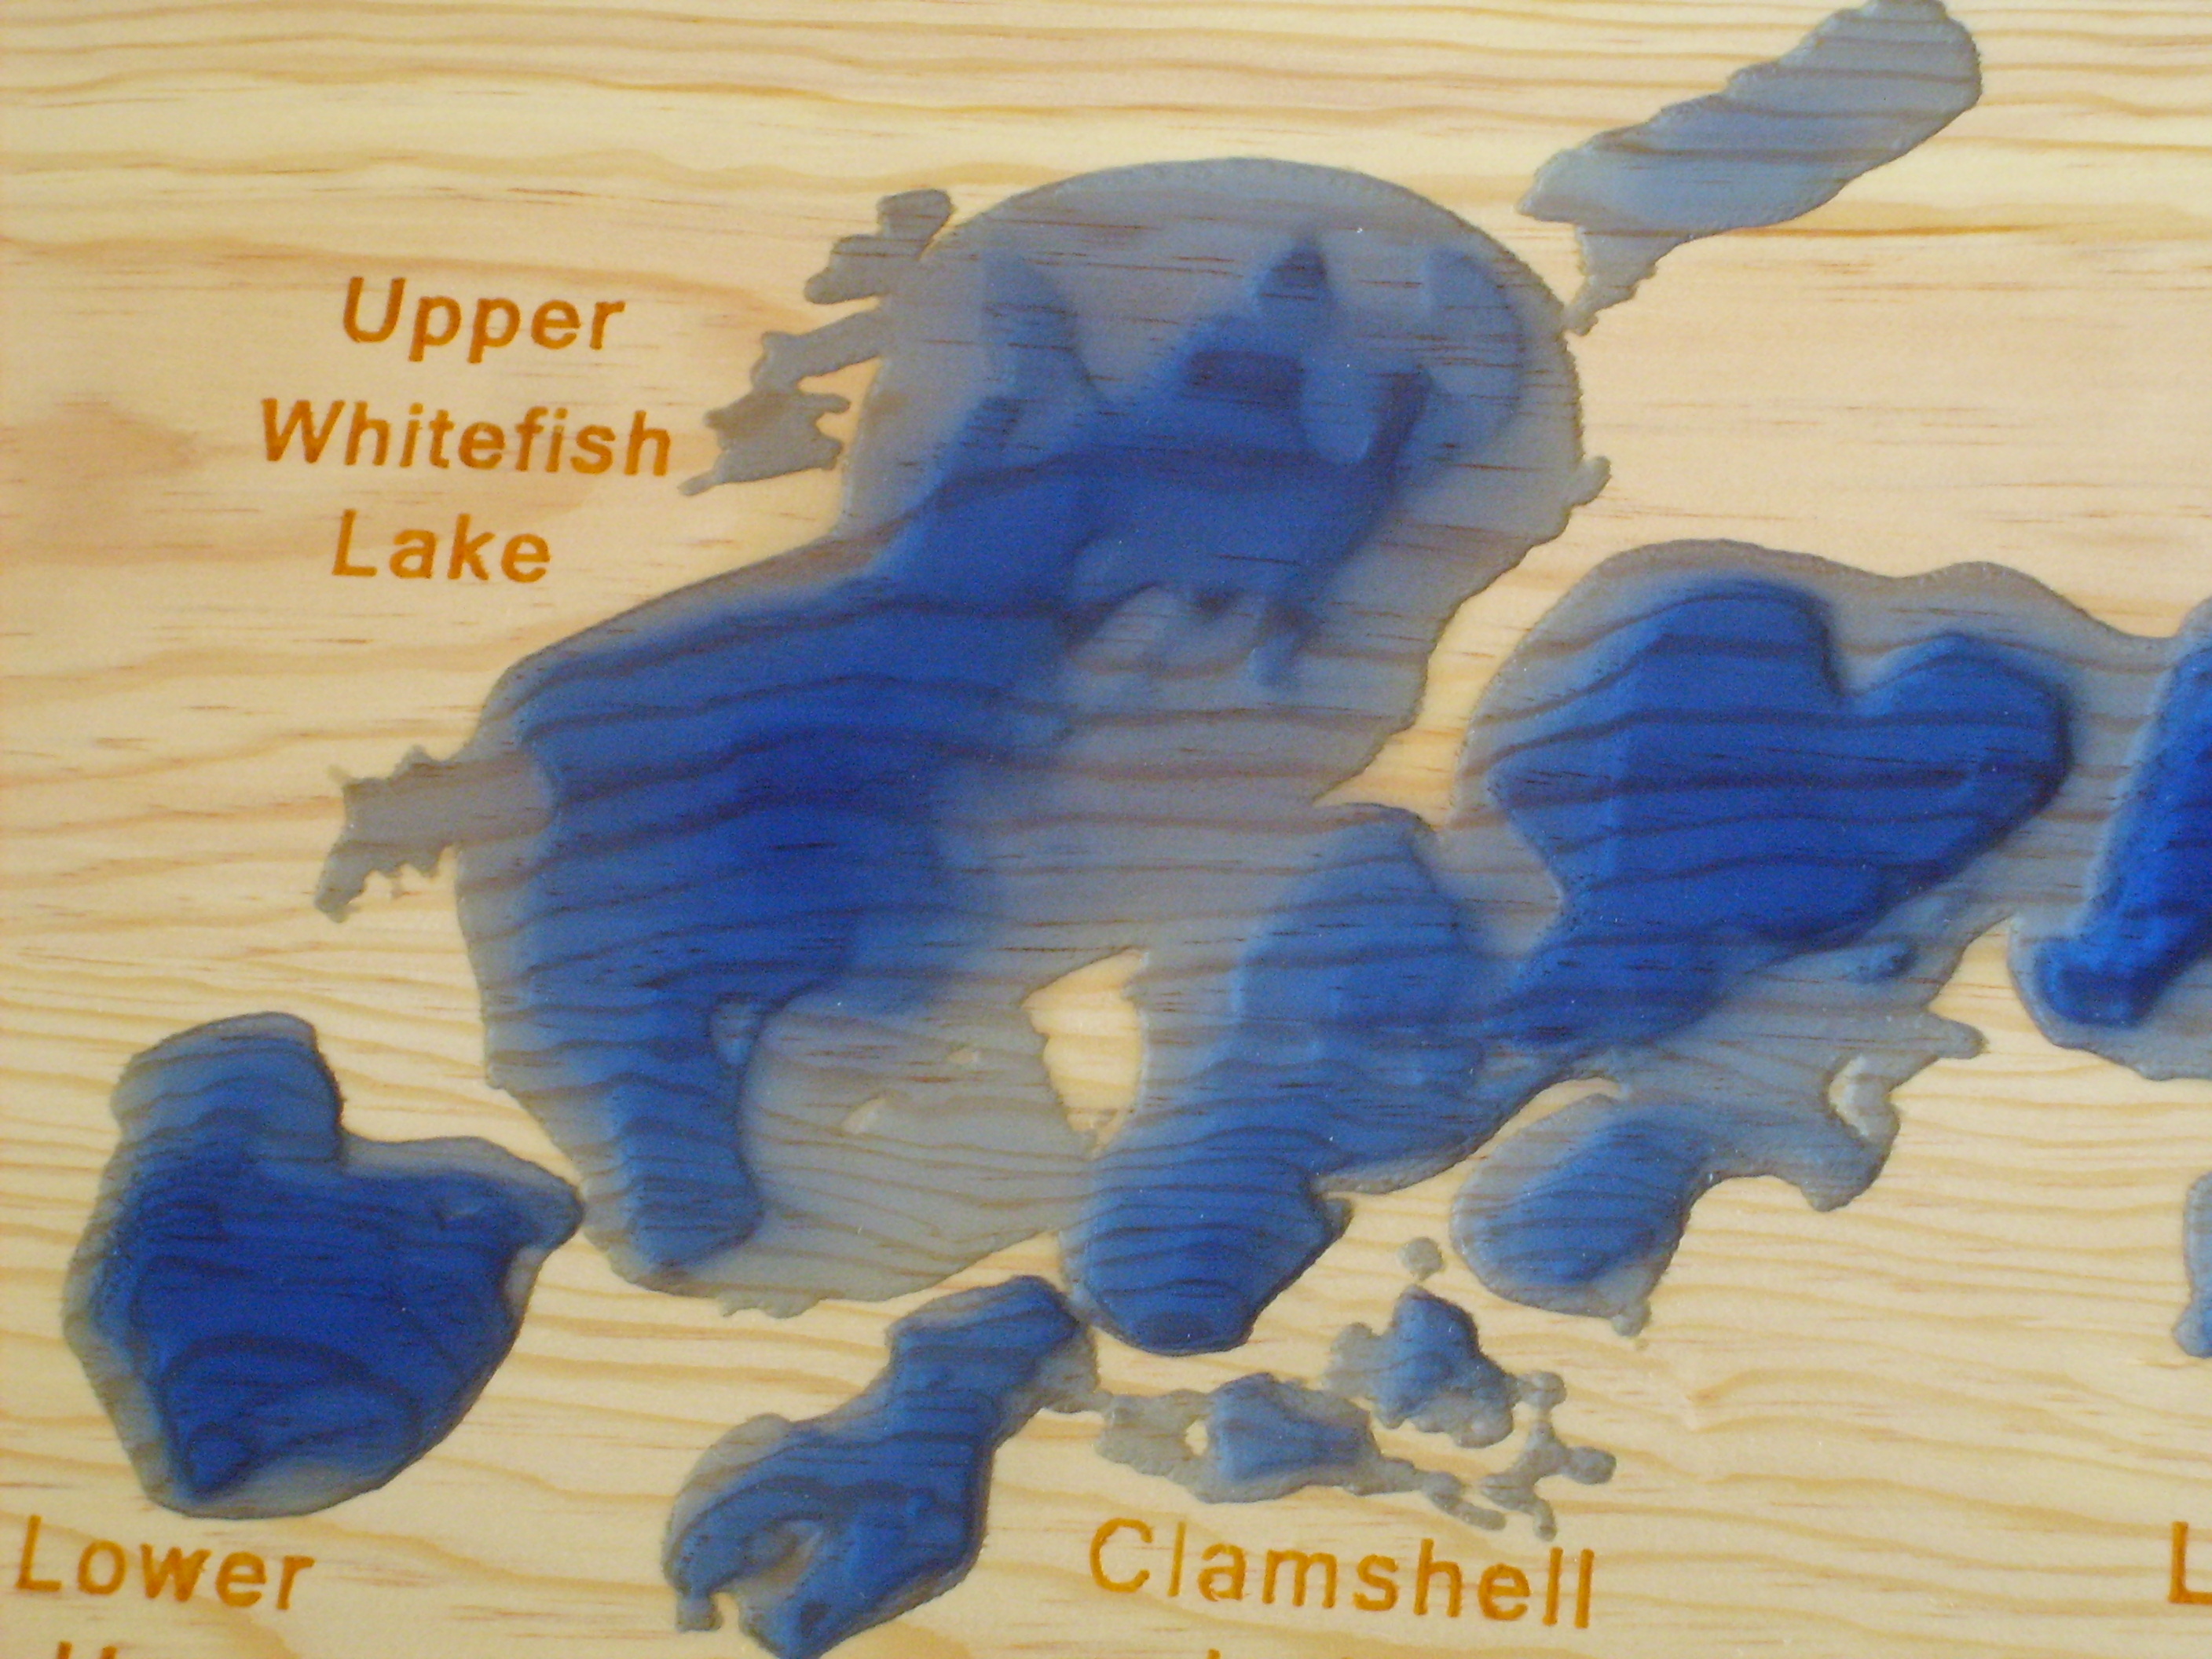
I've imported the height map into my CNC design software and placed the pattern on a board. I've added some text using a 90-degree v bit.
Carve the Project
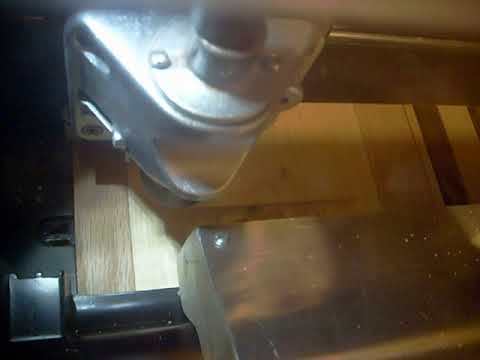
Carve the project. I use a 1/16" ballnose bit for the lake and as mentioned v bit for text.
Finish
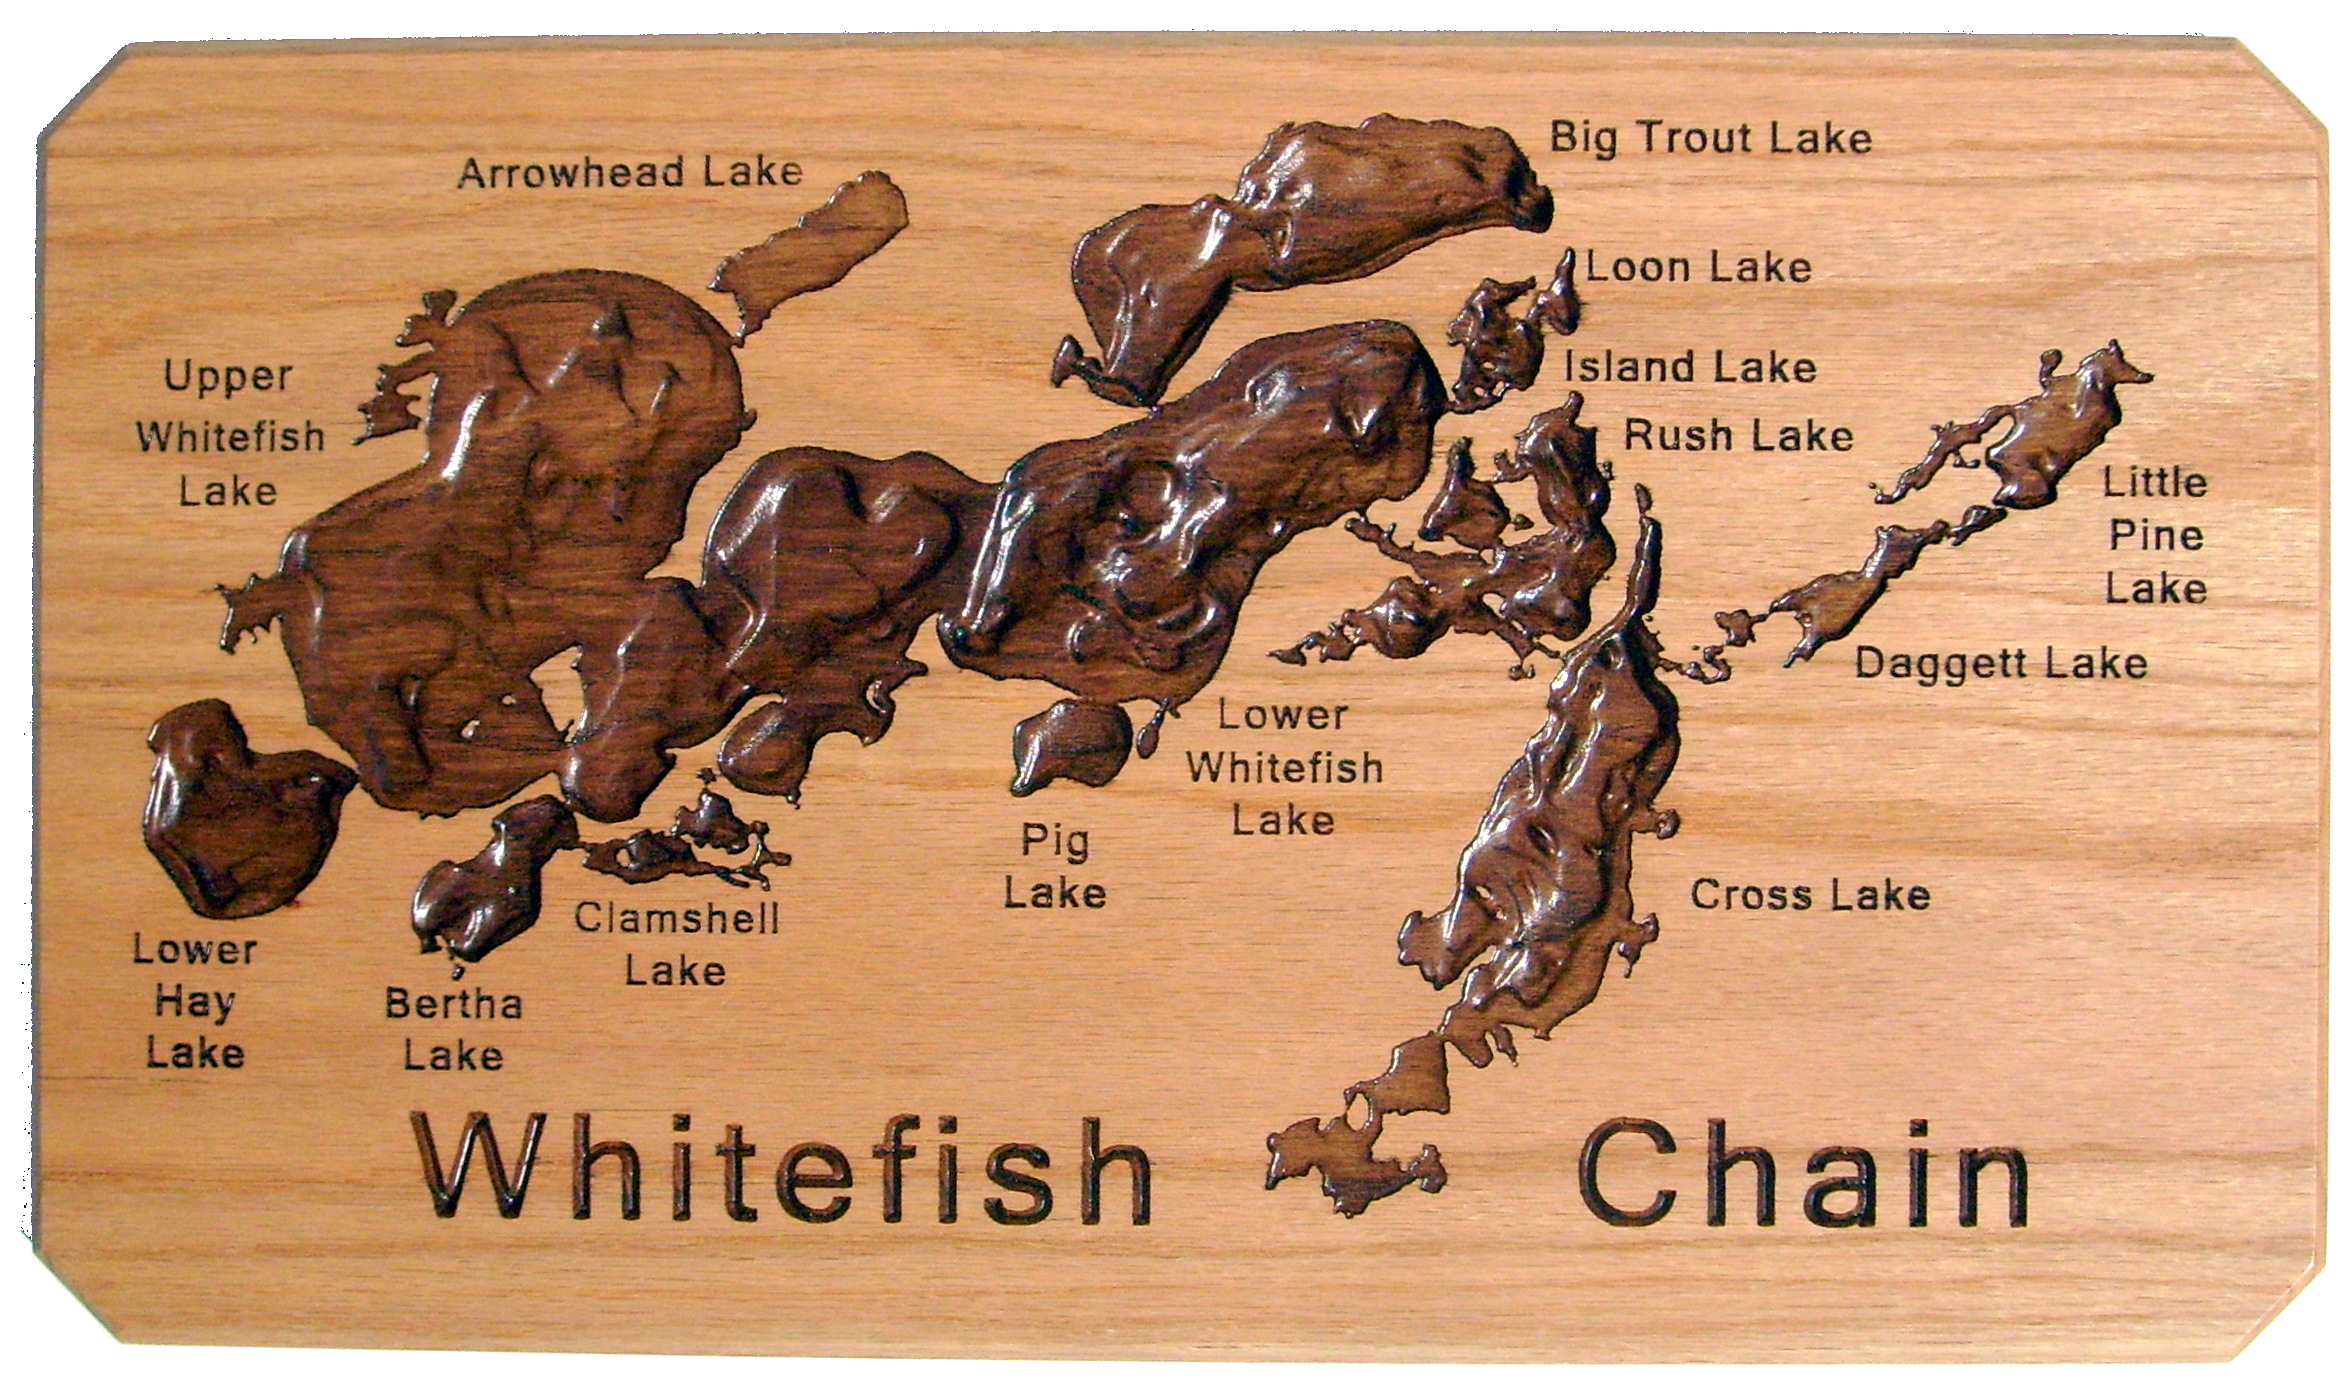
To clean up the lake contours, I use a combination of hand sanding, mini sanding discs in a Dremel tool, and radial bristle discs in a Dremel tool.
I like to finish my lake maps with a darker stain in the lake areas and the text. I use Minwax PolyShades, a combined stain and polyurethane, for this. A thin stain tends to bleed into surrounding areas, whereas Polyshades does not. You can be a little sloppy and allow stain to be applied outside the lake area. Once dried, you sand the surface only of the board to both smooth it and remove the excess stain. Then apply top coats of clear polyurethane.
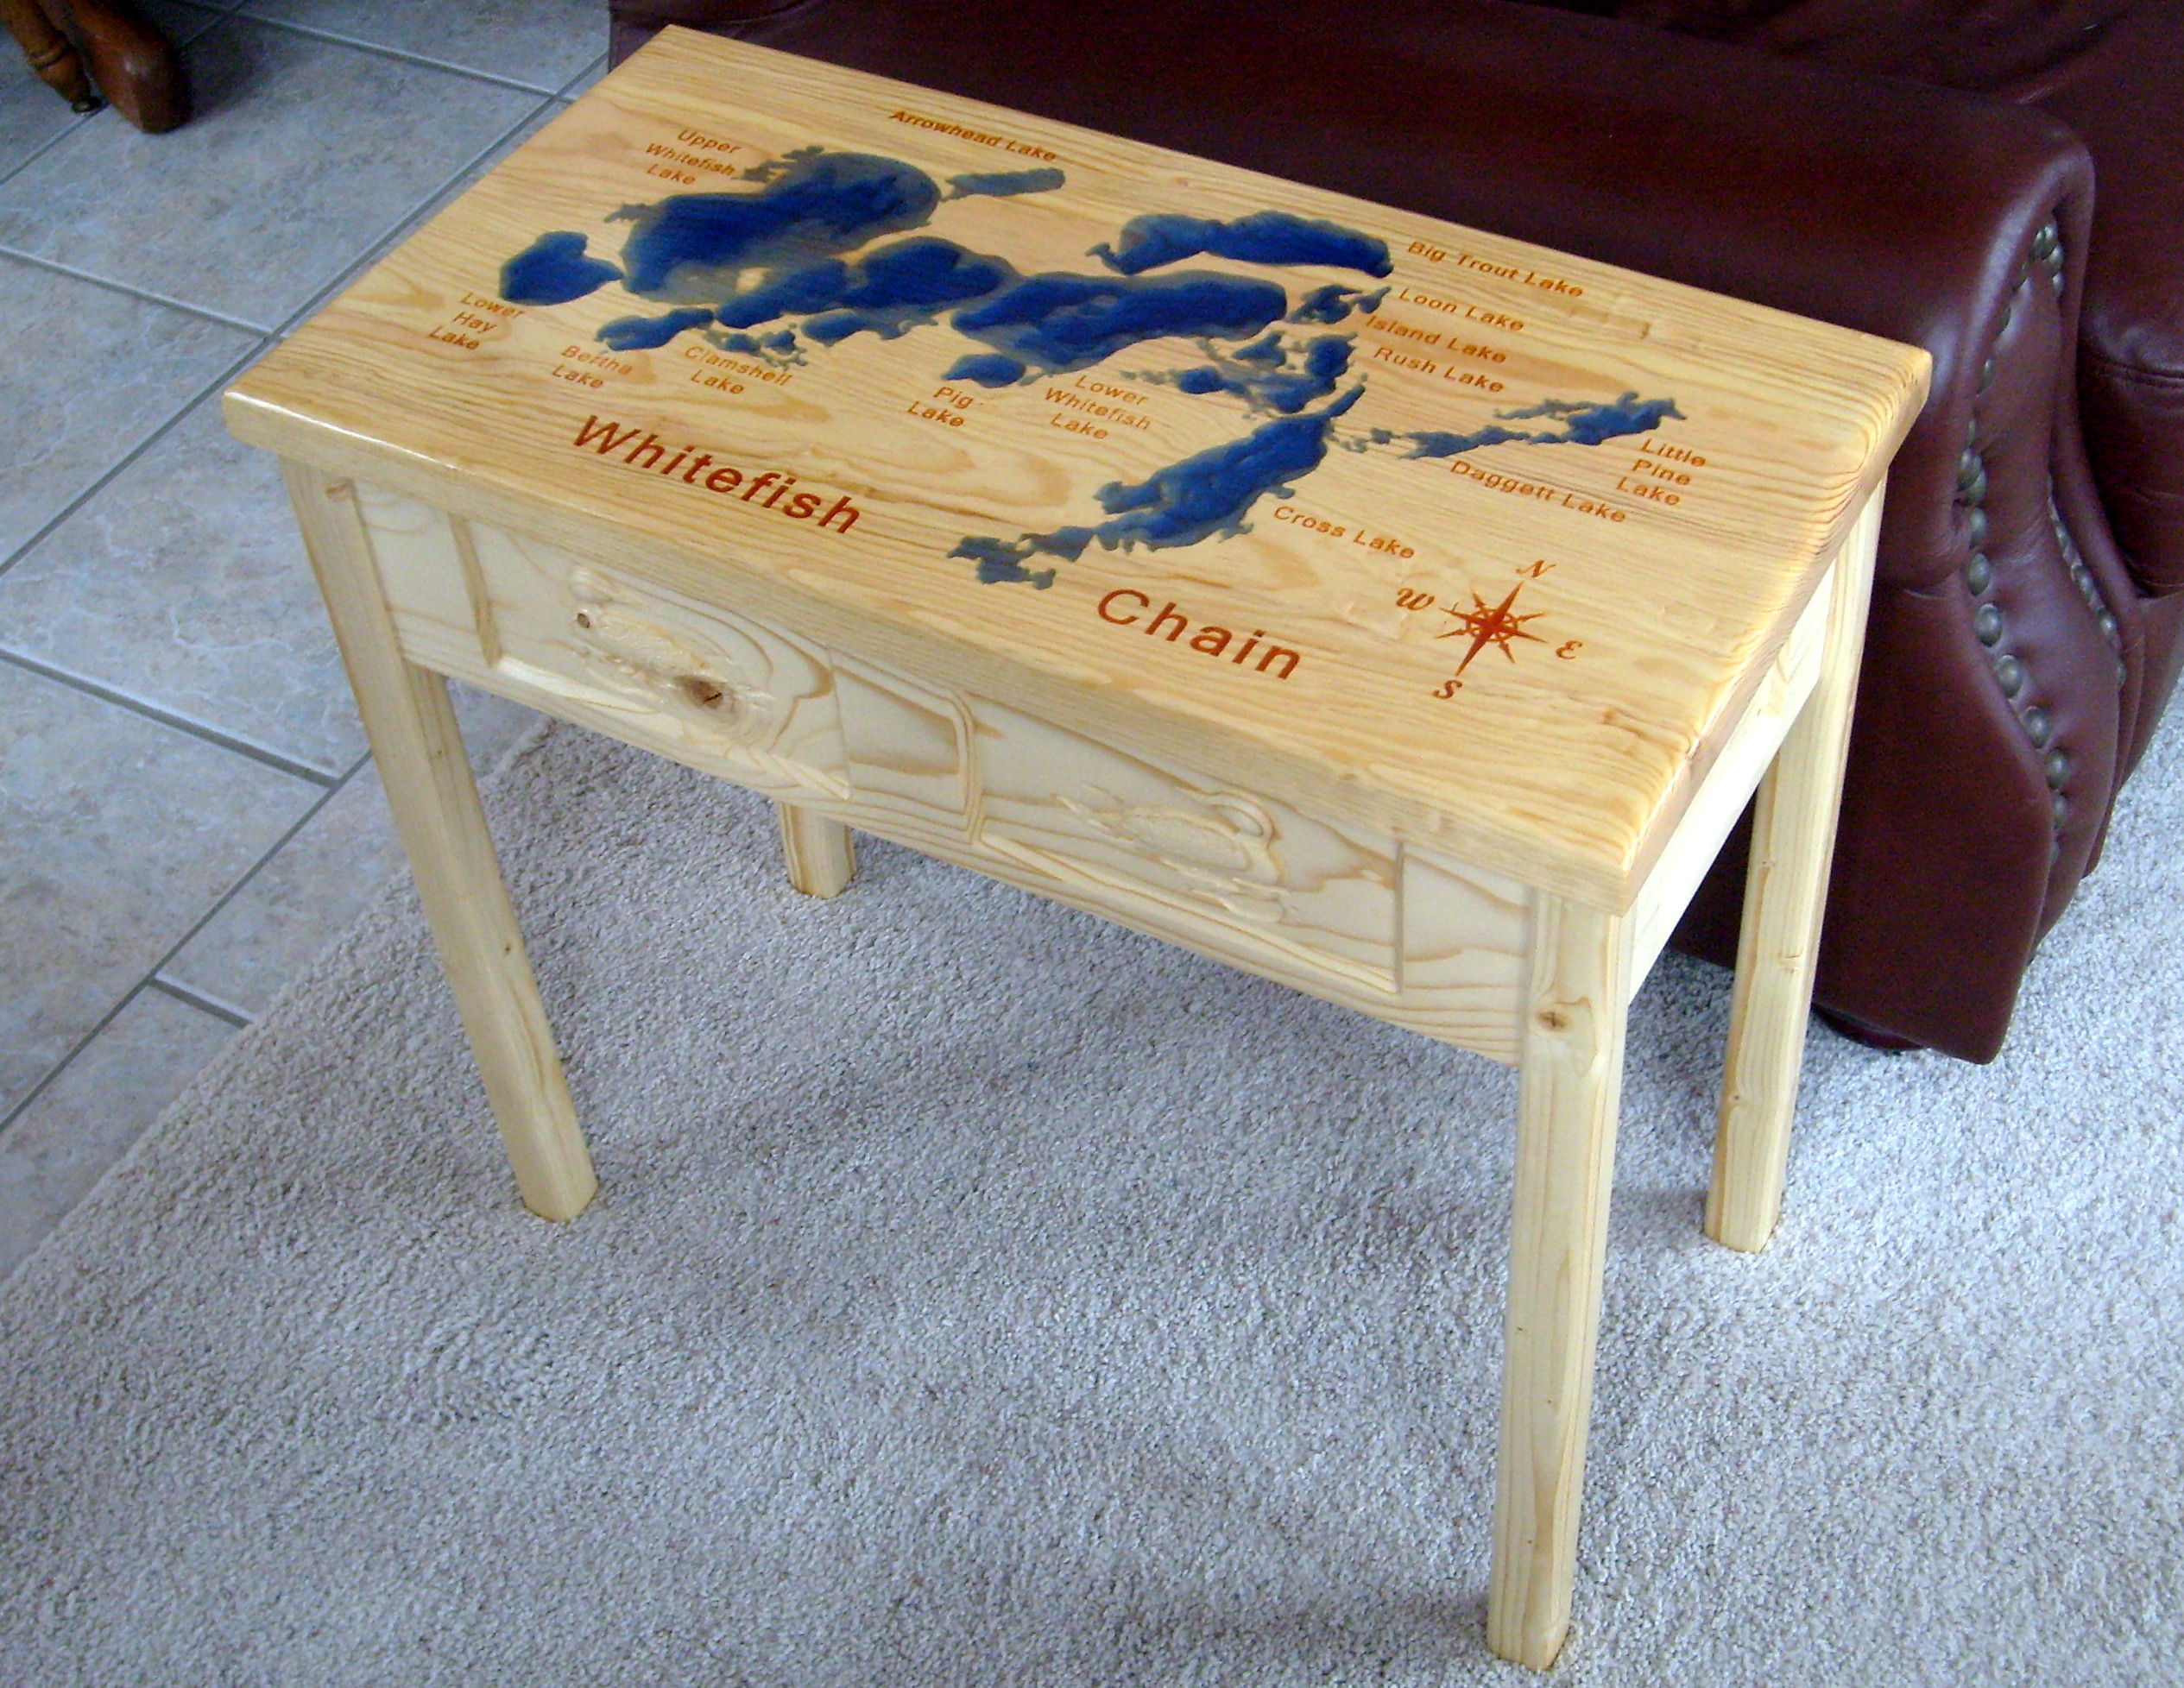
Another technique that I have used for table tops is to tint some pourable epoxy and fill the lake areas with it. This makes for an interesting effect.