CartoonFace
.jpg)
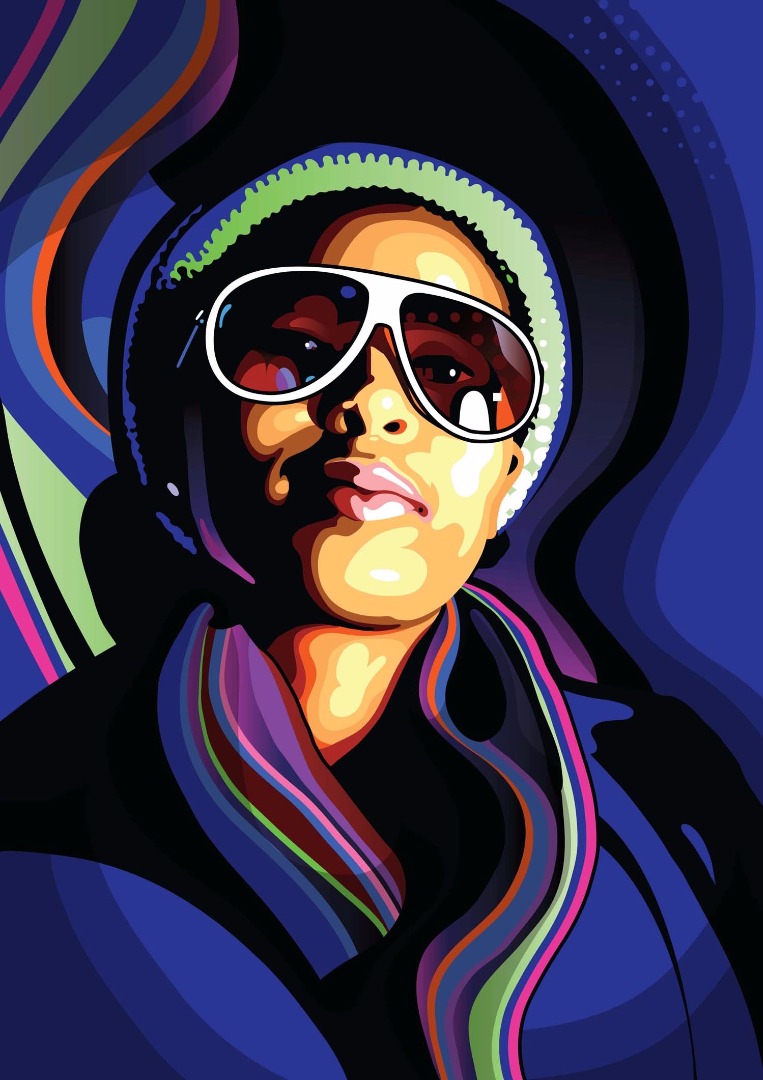
In this tutorial, Eelco van den Berg lets you behind the curtain to see how he creates his incredible vector portraits by turning a photo into a ‘poppy’ vector illustration.
You will learn quick and easy Photoshop adjustments that prepare artwork for translation into vector shapes. He shows you how to trace the basic shapes using the main tools in Illustrator, and how to use layers to organise the photos and your new vector artwork. You will discover how to create the feeling of light and shadow, build a simple brush to work with and use the Pen tool for more geometrical shapes. You’ll also discover the possibilities of the Pathfinder tool, and how to draw with the brush to create a looser feel. We’ll also show you how to play around with elements of the portrait to build up the background and how to use a simple raster to give it some texture.
Time to complete 3-4 hours
Software Adobe Photoshop CS3 or higher, Adobe Illustrator CS3 or higher
Step: 1
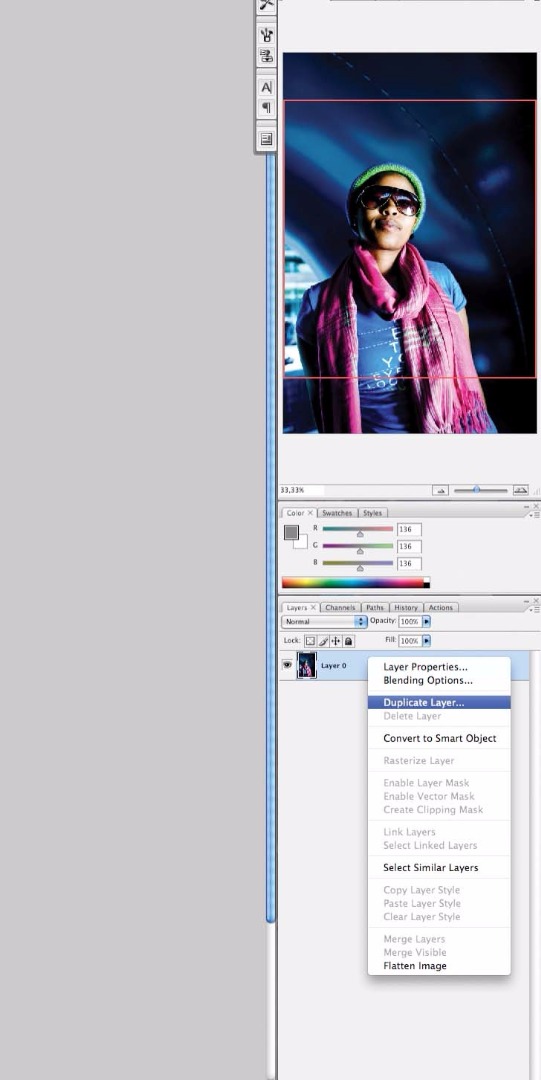
In Photoshop, open photo.jpg from the project files and select Duplicate Layer from the menu in the Layers panel. Use Cmd/Ctrl + L to bring up the Levels dialog, then use the middle slider to make the new layer a bit lighter, so the subject stands out better from the background.
Step: 2
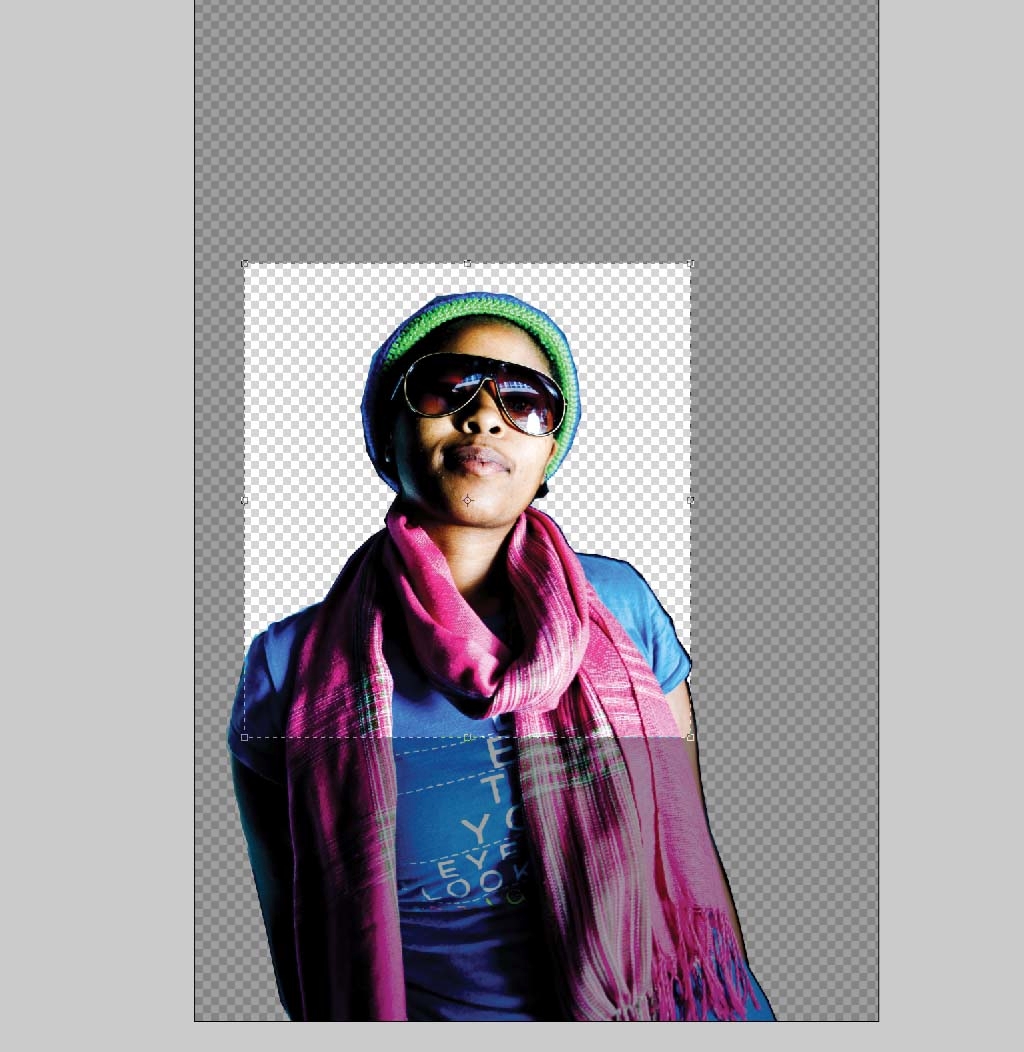
Now choose the Crop tool (C) and select just the subject’s face and a bit of her chest. Set the Crop Guide Overlay to None in the Options bar to help you see what you’re doing. For now, we’ll keep the image’s resolution unchanged.
Step: 3
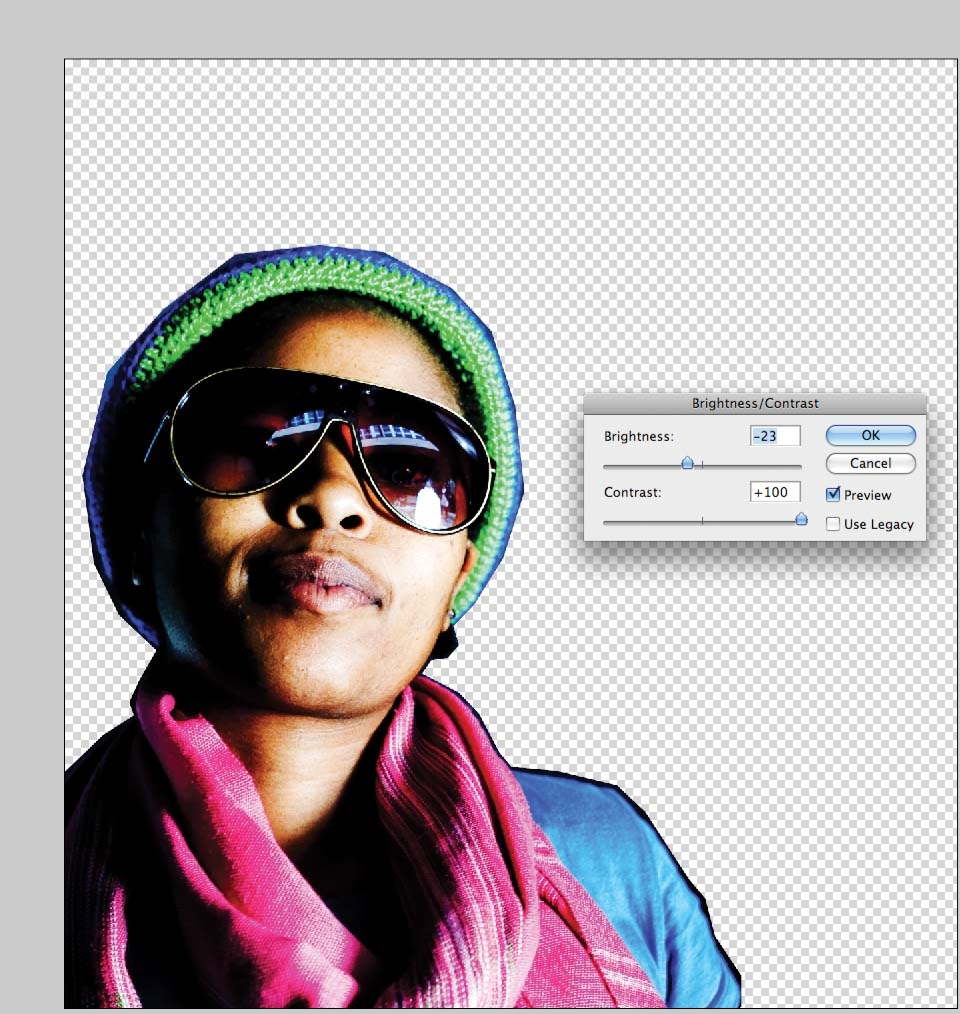
Duplicate the layer, name it ‘Contrast’, then increase the contrast on this layer. Duplicate this layer and select Image > Adjustments > Posterize with a Level of 4. Now rename this layer ‘Posterize’.
Step: 4
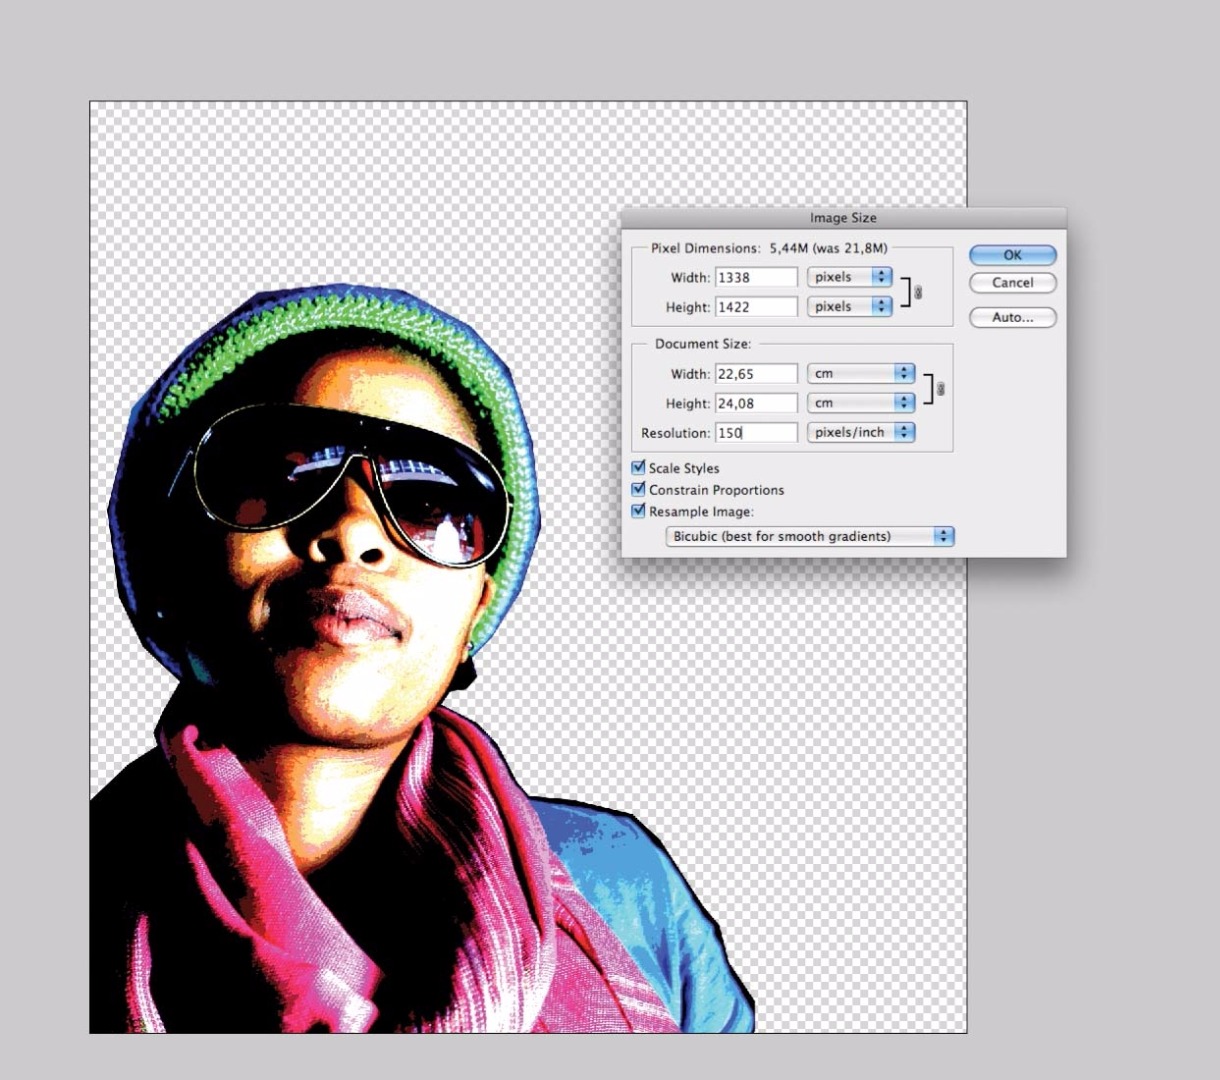
Now change the image resolution to 150dpi and the height to a maximum of 25cm; this will make the subsequent Illustrator file smaller. Save it as a PSD.
Step: 5
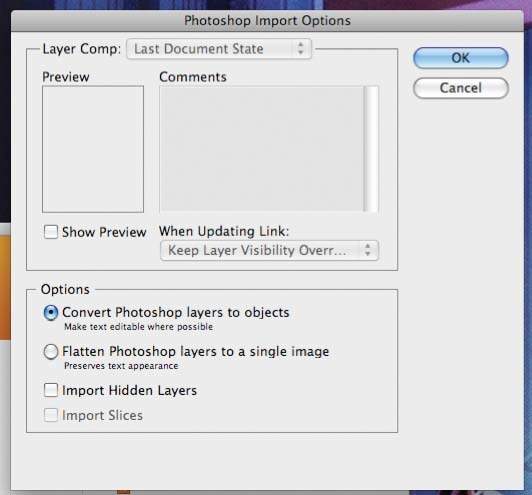
Open the PSD file in Illustrator and use the ‘Convert Photoshop layers to objects’ option. Now all your layers are in Illustrator’s Layers panel.
Step: 6
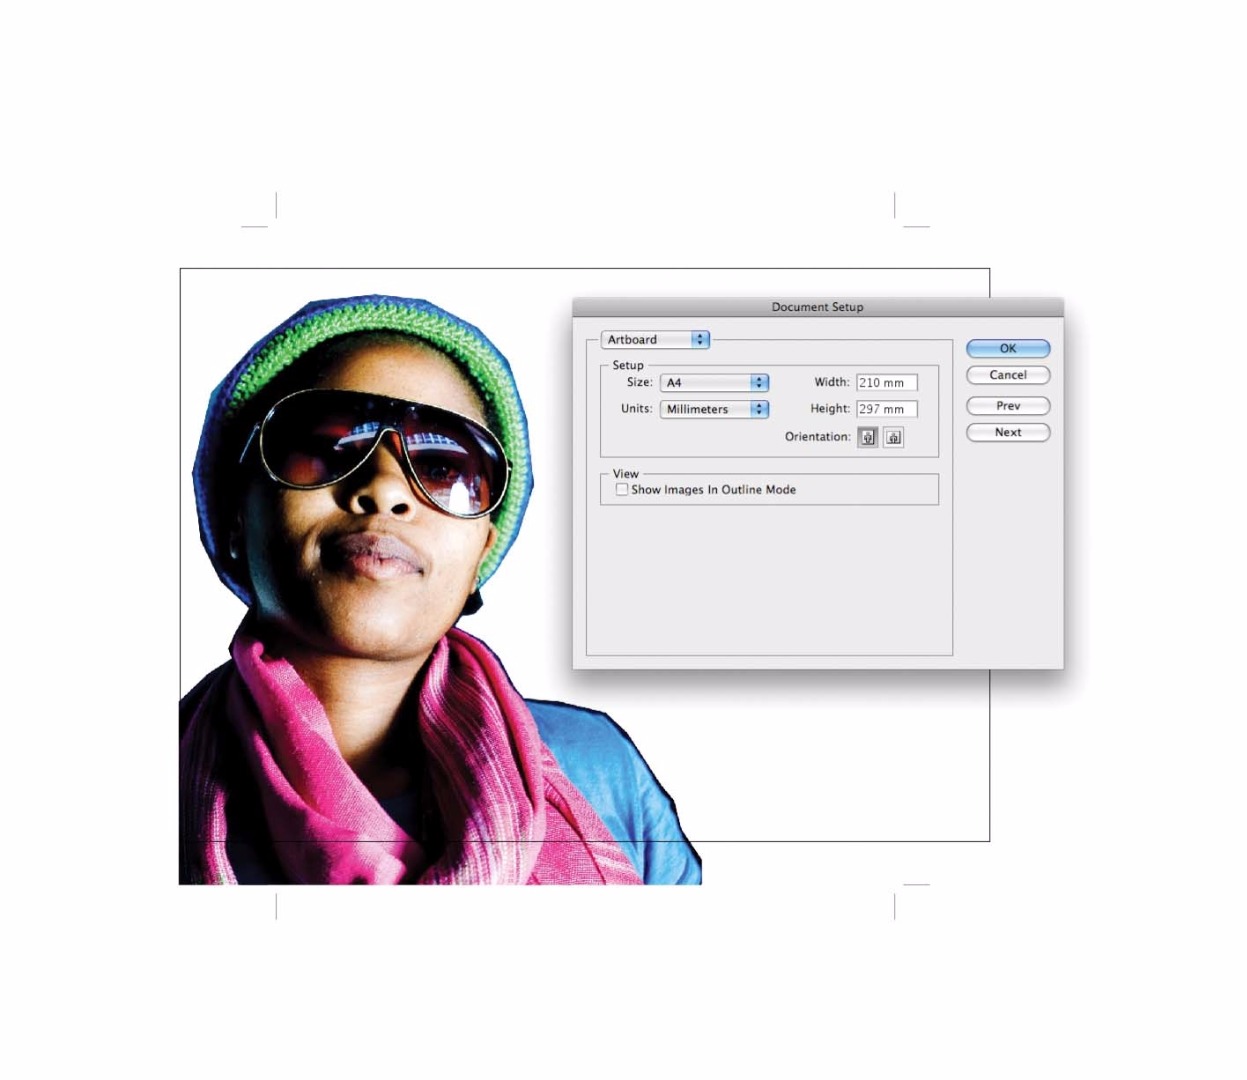
Set the document up as a portrait A4 page, then save it as an Illustrator document. You can save it as a PDF instead to reduce the file size and stop your hard disk from overflowing.
Step: 7
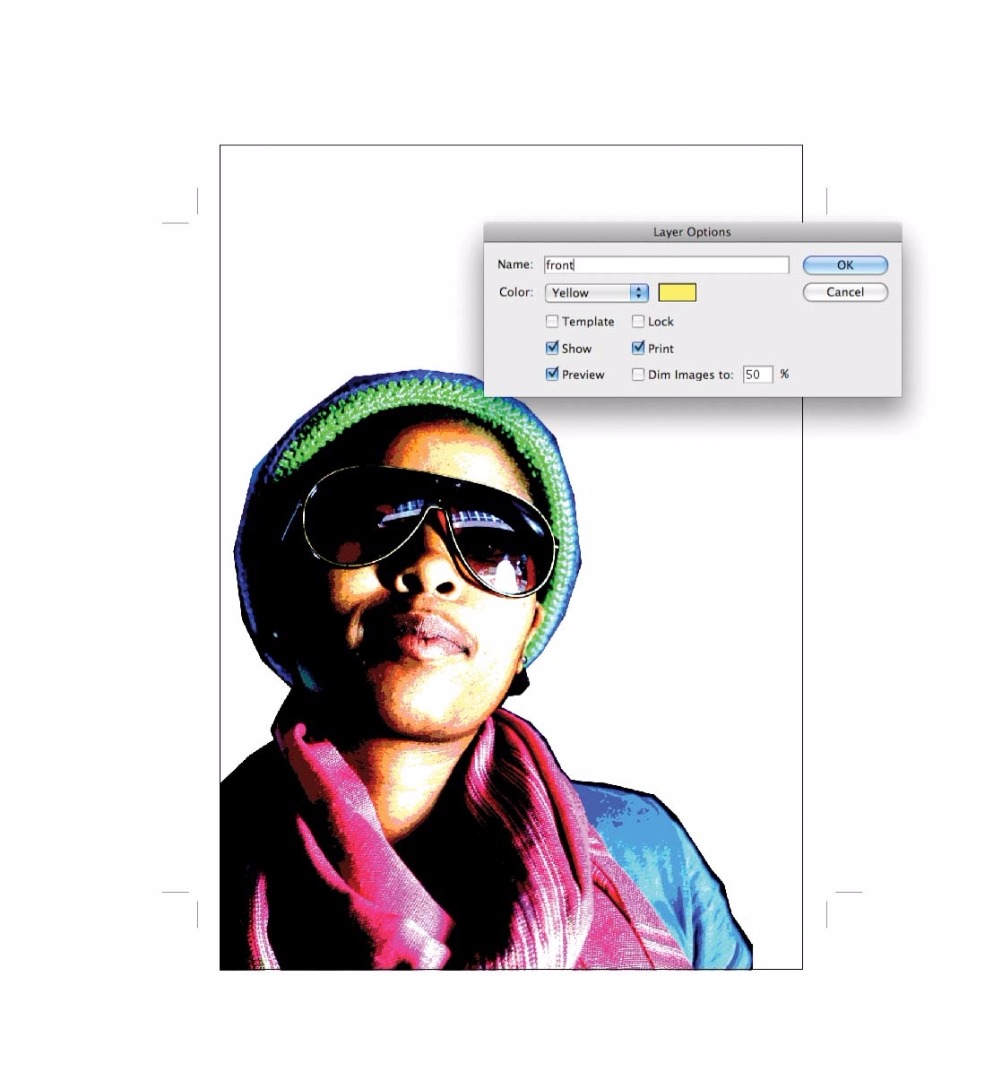
Make a new layer and call it ‘Front’. This is the layer we are going to work in. Put this layer on top of your other layers. Lock the other layers.
Step: 8
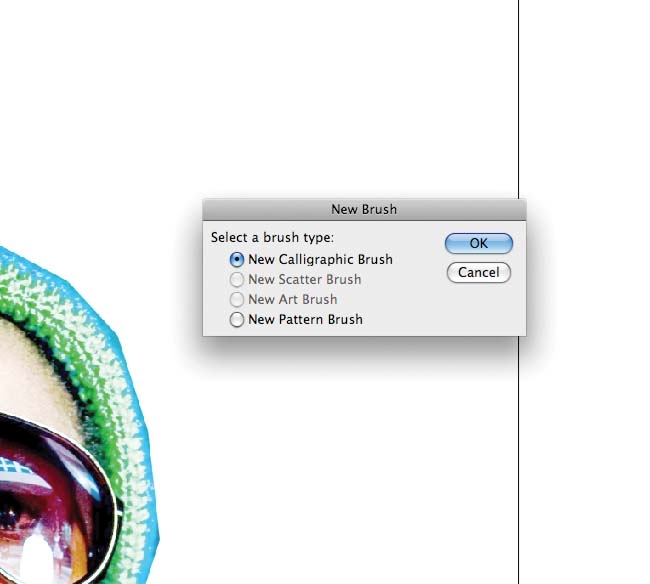
In the Brushes panel, select New Brush. Select New Calligraphic Brush and click OK. Rename it Basic Brush and set the Diameter to 1 and the angle to 0°. Choose Cmd/Ctrl + B to activate the brush, using black for the stroke colour and no fill.
Step: 9
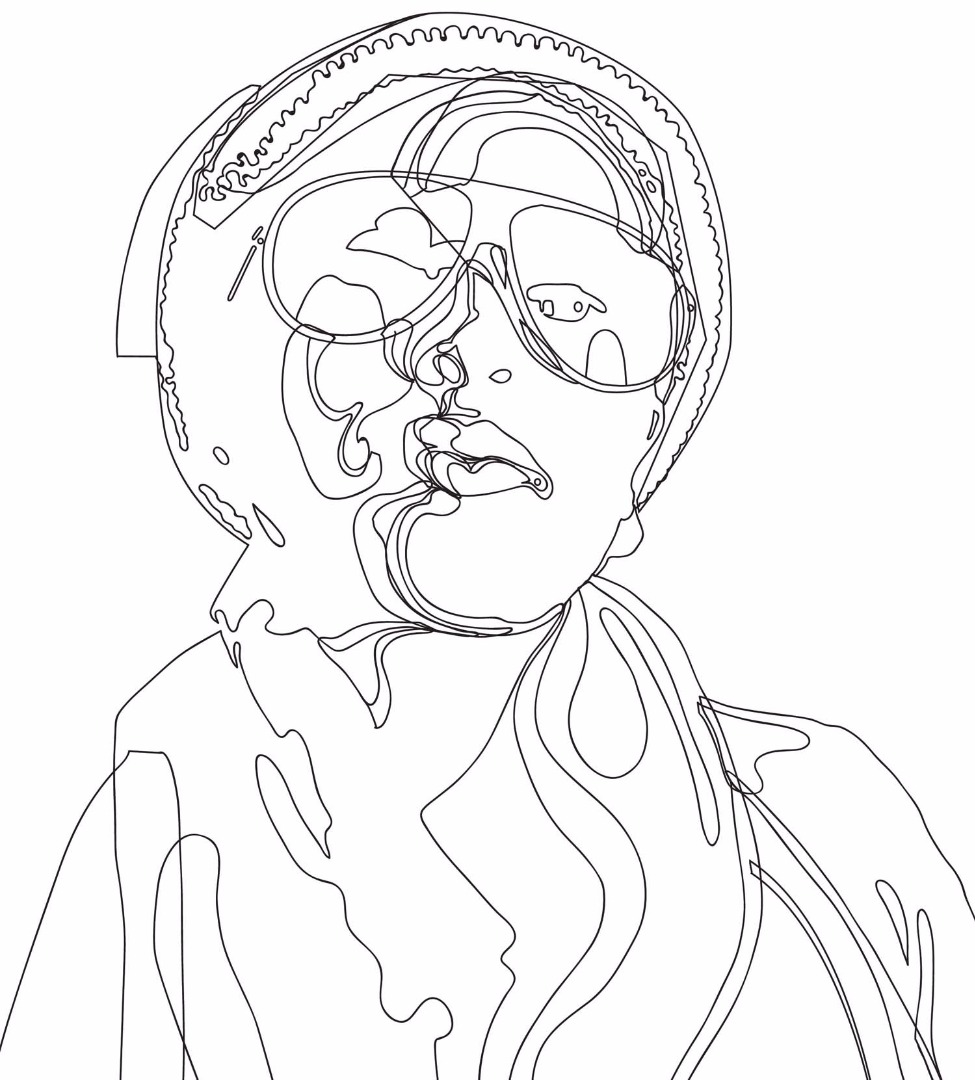
Now it’s time to start tracing the photo. In general, use the brush for irregular shapes and the Pen tool for more geometrical shapes. Start off by mapping out the basic shapes. It will look a bit messy once you’re finished, but trust me, that’s fine for now. I start off by tracing from the ‘Posterize’ layer and turn to the other layers later if I want to add more detail.
Step: 10
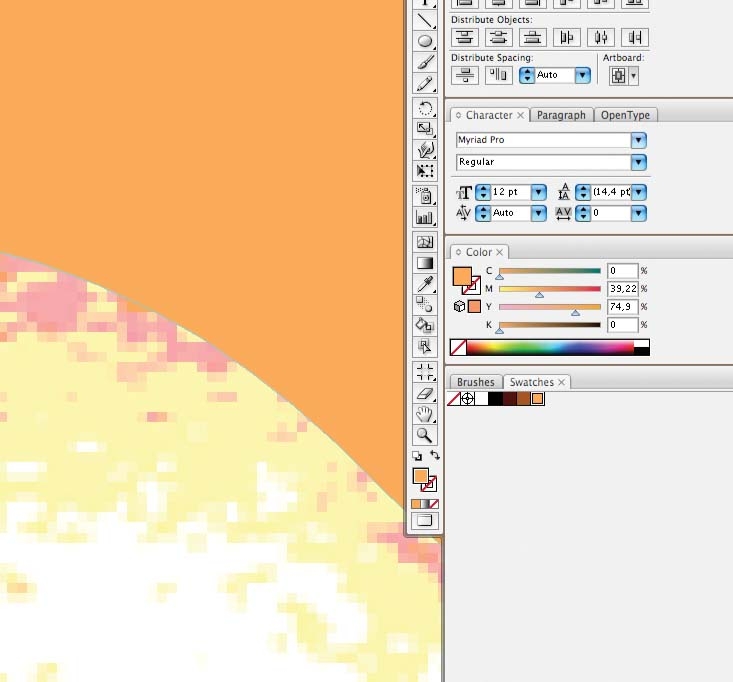
Make sure the shapes are joined (using Cmd/Ctrl + J). Now you can start filling them, using the Eyedropper tool to pick colours from the ‘Posterize’ layer (you may also want to store them in the Swatches panel). If some shapes overlap, copy and select the shapes that need to be divided, then go to the Pathfinder panel (Cmd/Ctrl + Shift + F9) and hit the Divide button. Ungroup them (Cmd/Ctrl + Shift + G) and delete the parts you don’t need. Remember to Group them again afterwards (Cmd/Ctrl + G).
Step: 11
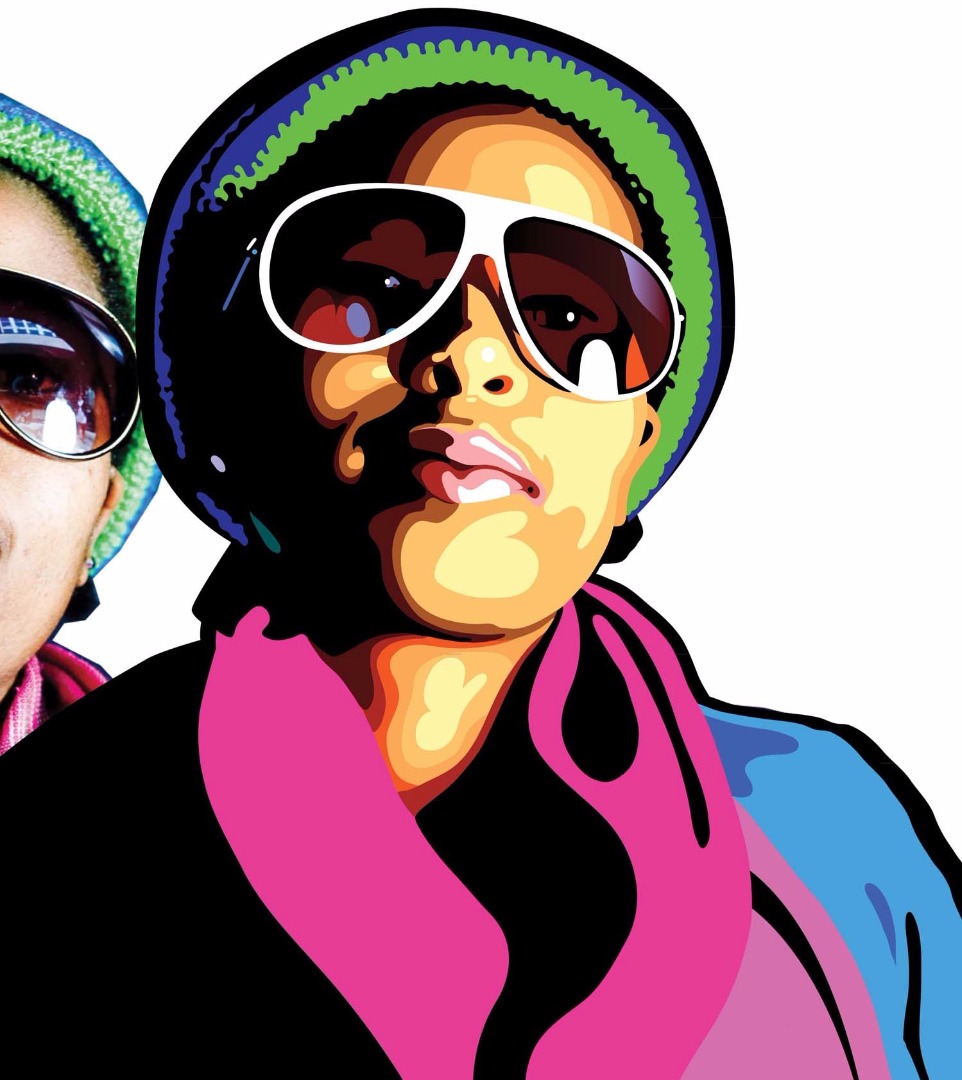
Now return to the ‘Contrast’ layer (and the ‘Levels’ layer too, if you created this) – to pick out more details. After this, try playing around with the colours. Using gradients makes the results subtler and gives a pleasing painterly effect.
Step: 12
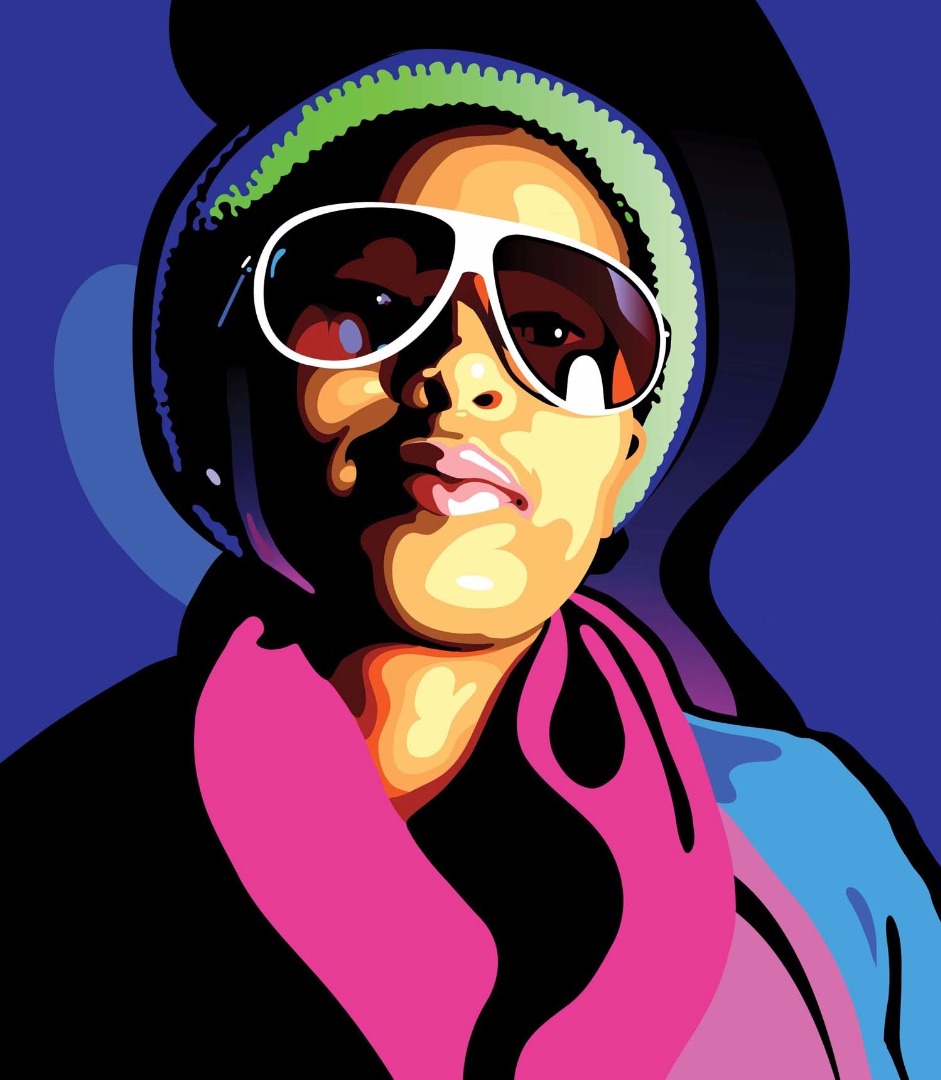
Create a new layer called ‘Background’ and draw a rectangle the size of the document; I’ve made mine dark blue to make the face stand out more. Also draw some simple liquid shapes with the Basic Brush to make the composition more dynamic. Open the raster.eps file and place the object over the green cap. Select both cap and raster element, duplicate them and drag the result beyond the document edge. Bring it to the front (Cmd/Ctrl + Shift + }) with the raster over the cap. Hit the Crop button in the Pathfinder panel. Align the result over the first raster element (use Smart Guides to help you), then delete the first element. Now you have a rasterised fill giving the cap more texture.
Step: 13
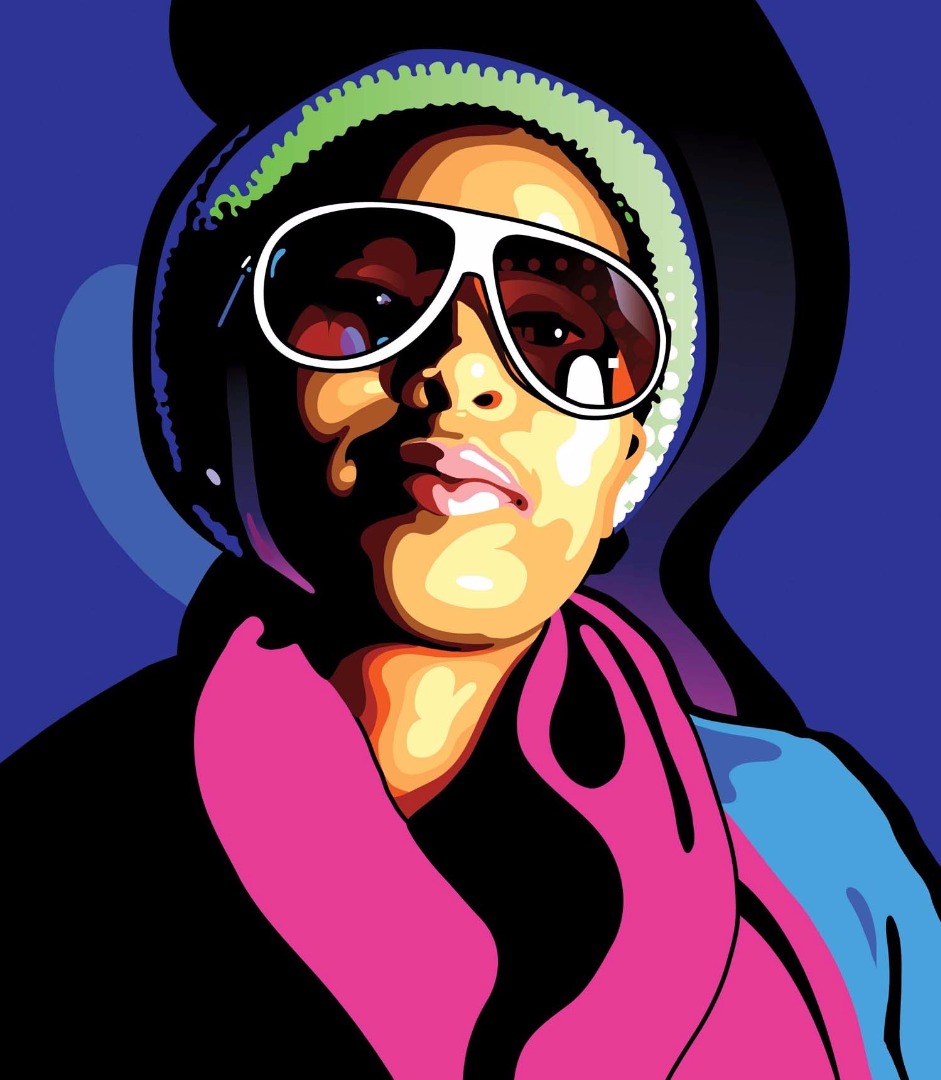
To assess your work, create a new layer called ‘Mask’ to use as a sort of picture frame. With the Rectangle tool, drag a selection over the artboard. Drag another rectangle bigger than your artboard. Select both and right click > Compound Path. Make this white and lock the layer. Select Object > Path > Offset Path to accentuate the sunglasses – a value of 1mm should do. Choose Preview to see what works. To add an extra line inside, create another with an offset of -1mm. Note that it’s not an outline, but an extra shape. Do the same for the scarf.
Step: 14
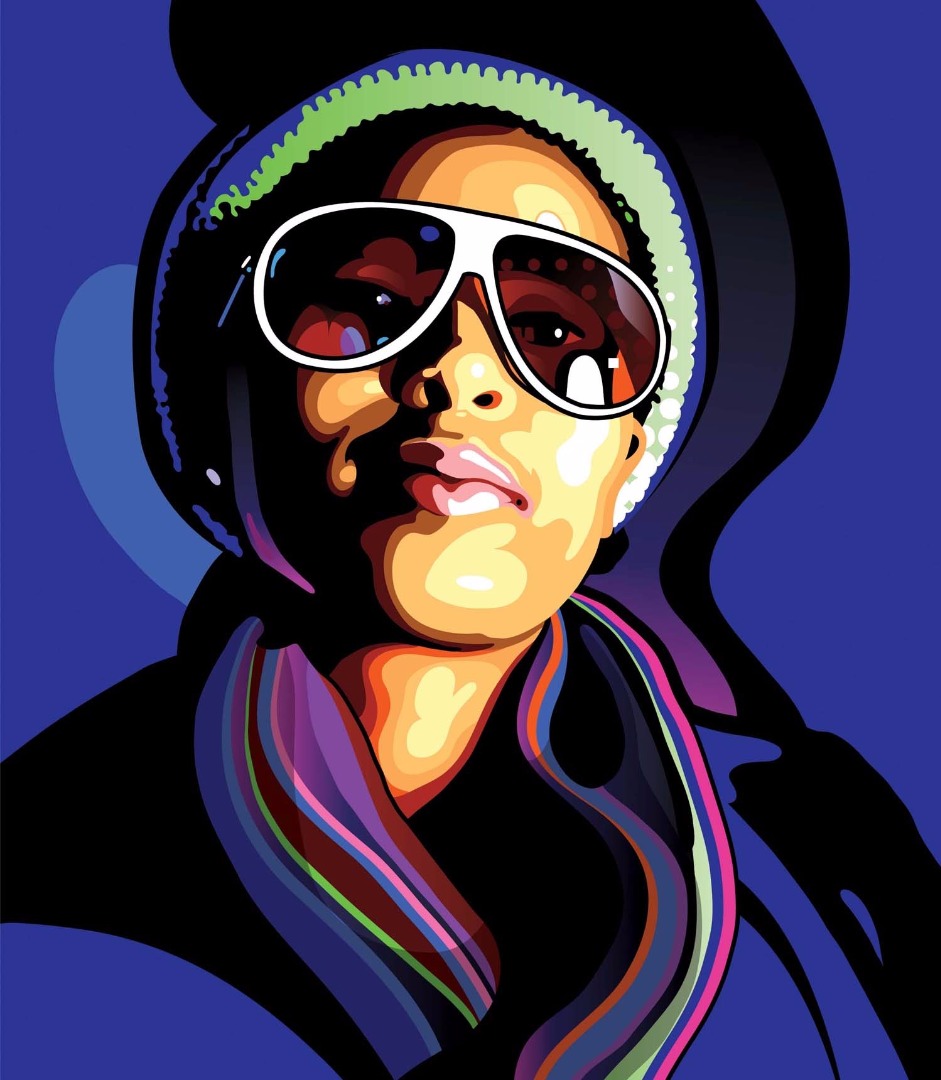
I want to add more detail to the scarf, which should make the rest more abstract. First, reduce the scarf area to just blue and black by deleting some things you’ve drawn. Now use the Basic Brush to create a stripe pattern using colours from the Swatches panel, then use the Pathfinder panel’s Divide tool to fit the shape in the scarf. Next, draw a shape with your brush to suggest shadow. Open the Transparency panel (Cmd/Ctrl + Shift + F10) and select a Multiply blending mode with an opacity of 30%. Do the same for the background and clothing.
Step: 15
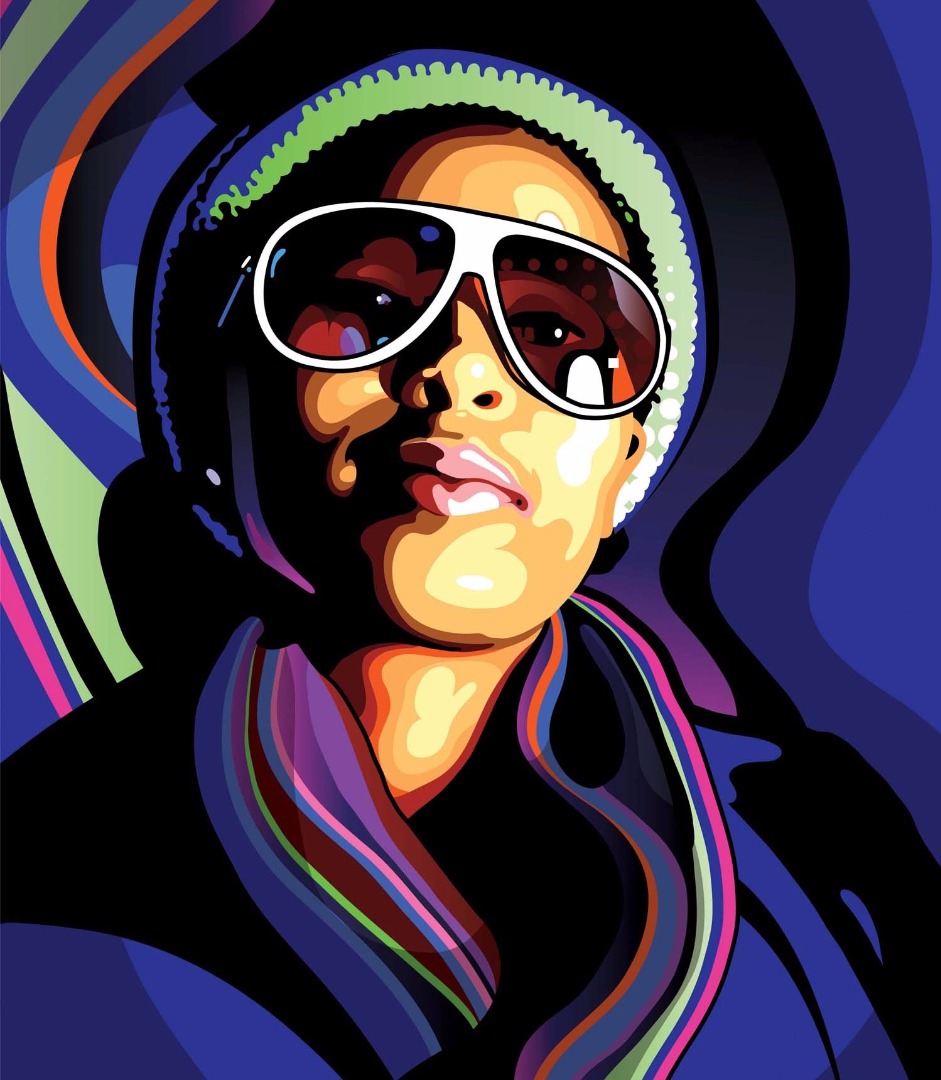
Copy the layer with the Multiply blending mode and paste it a number of times. Place them under the clothing to give it more depth. Copy one part of the scarf pattern, group the elements (Cmd/Ctrl + G), scale them up slightly and place them in the background. Again use copy-and-paste versions of the layers with Multiply blending modes to add more depth to the composition.
Step: 16
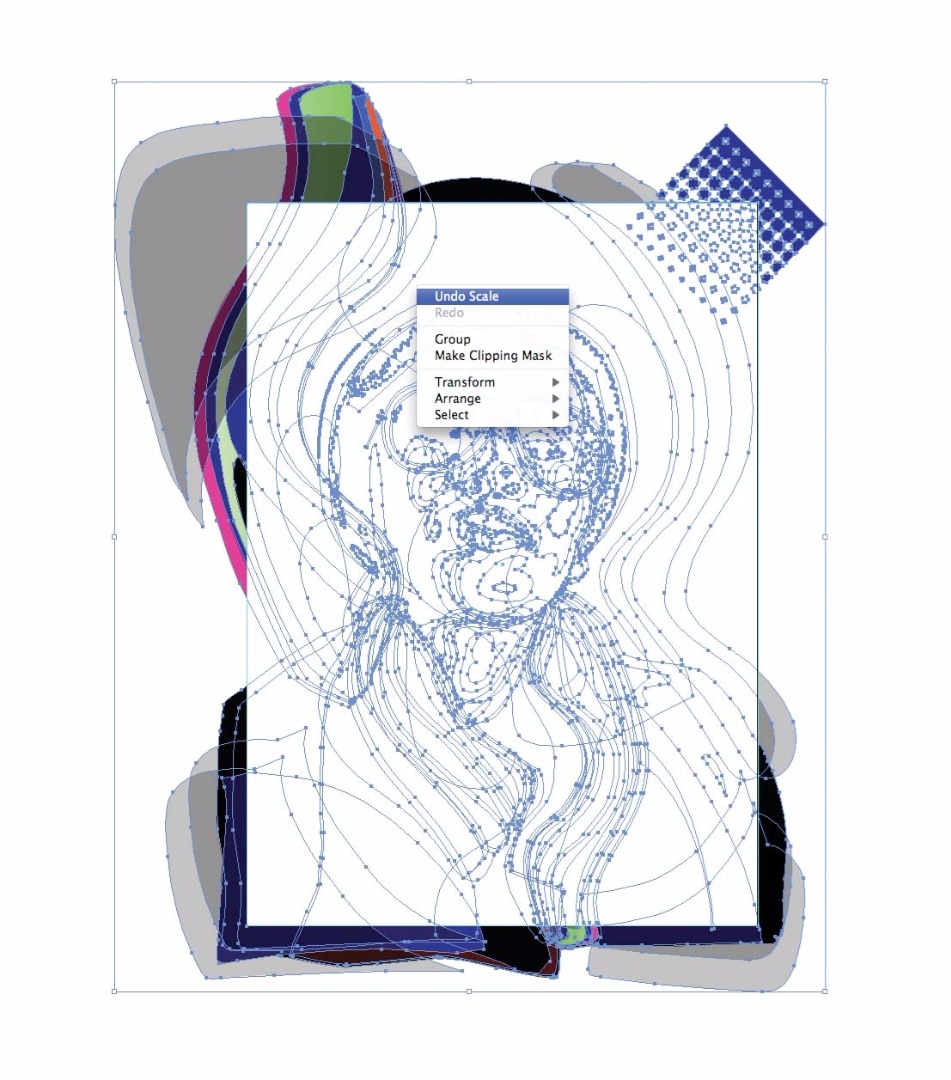
Delete the ‘Mask’ layer and the layers you brought in from Photoshop. In the Layers panel menu, select Flatten Artwork. Select all your elements (Cmd/Ctrl + A) and group them (Cmd/Ctrl + G). Drag a rectangle precisely over your artboard and make sure it is on top of your grouped artwork. Select all again (Cmd/Ctrl + A) and hitCmd/Ctrl + 7. Now you’ve made a clipping mask of your work, showing only what is within the artboard. Your vector portrait is now complete.
.jpg)