Car Robot Controlled by Voice Commands and Alexa
by Ayamola in Workshop > Electric Vehicles
724 Views, 5 Favorites, 0 Comments
Car Robot Controlled by Voice Commands and Alexa
With this robot car, students can explore the endless possibilities and benefits of IoT in the real world. The car responds to voice commands, allowing for hands-free control and making it an excellent tool for educational purposes. Using Alexa, the car can be connected to various smart home devices, providing a seamless integration and enhancing the user experience. The robot car is equipped with sensors, allowing for accurate and precise movements, making it perfect for exploration, experimentation, and learning.
Supplies
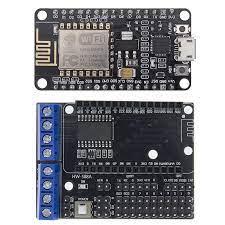
1x Esp8266 ESP-12E Module
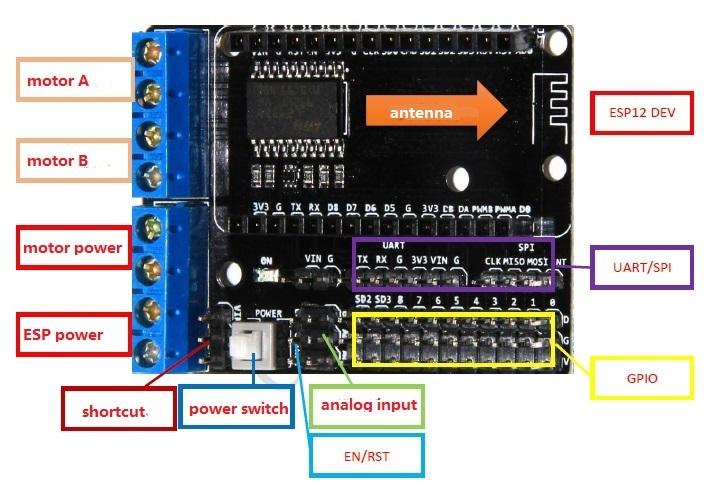
1x Motor Shield NodeMCU L293D
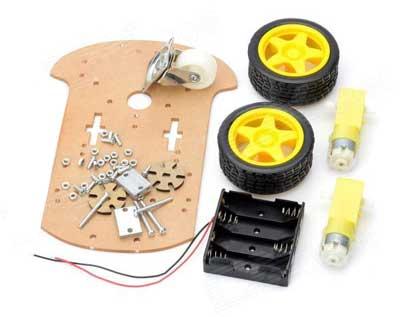
1x Kit Chasis 2WD Robot Smart Car
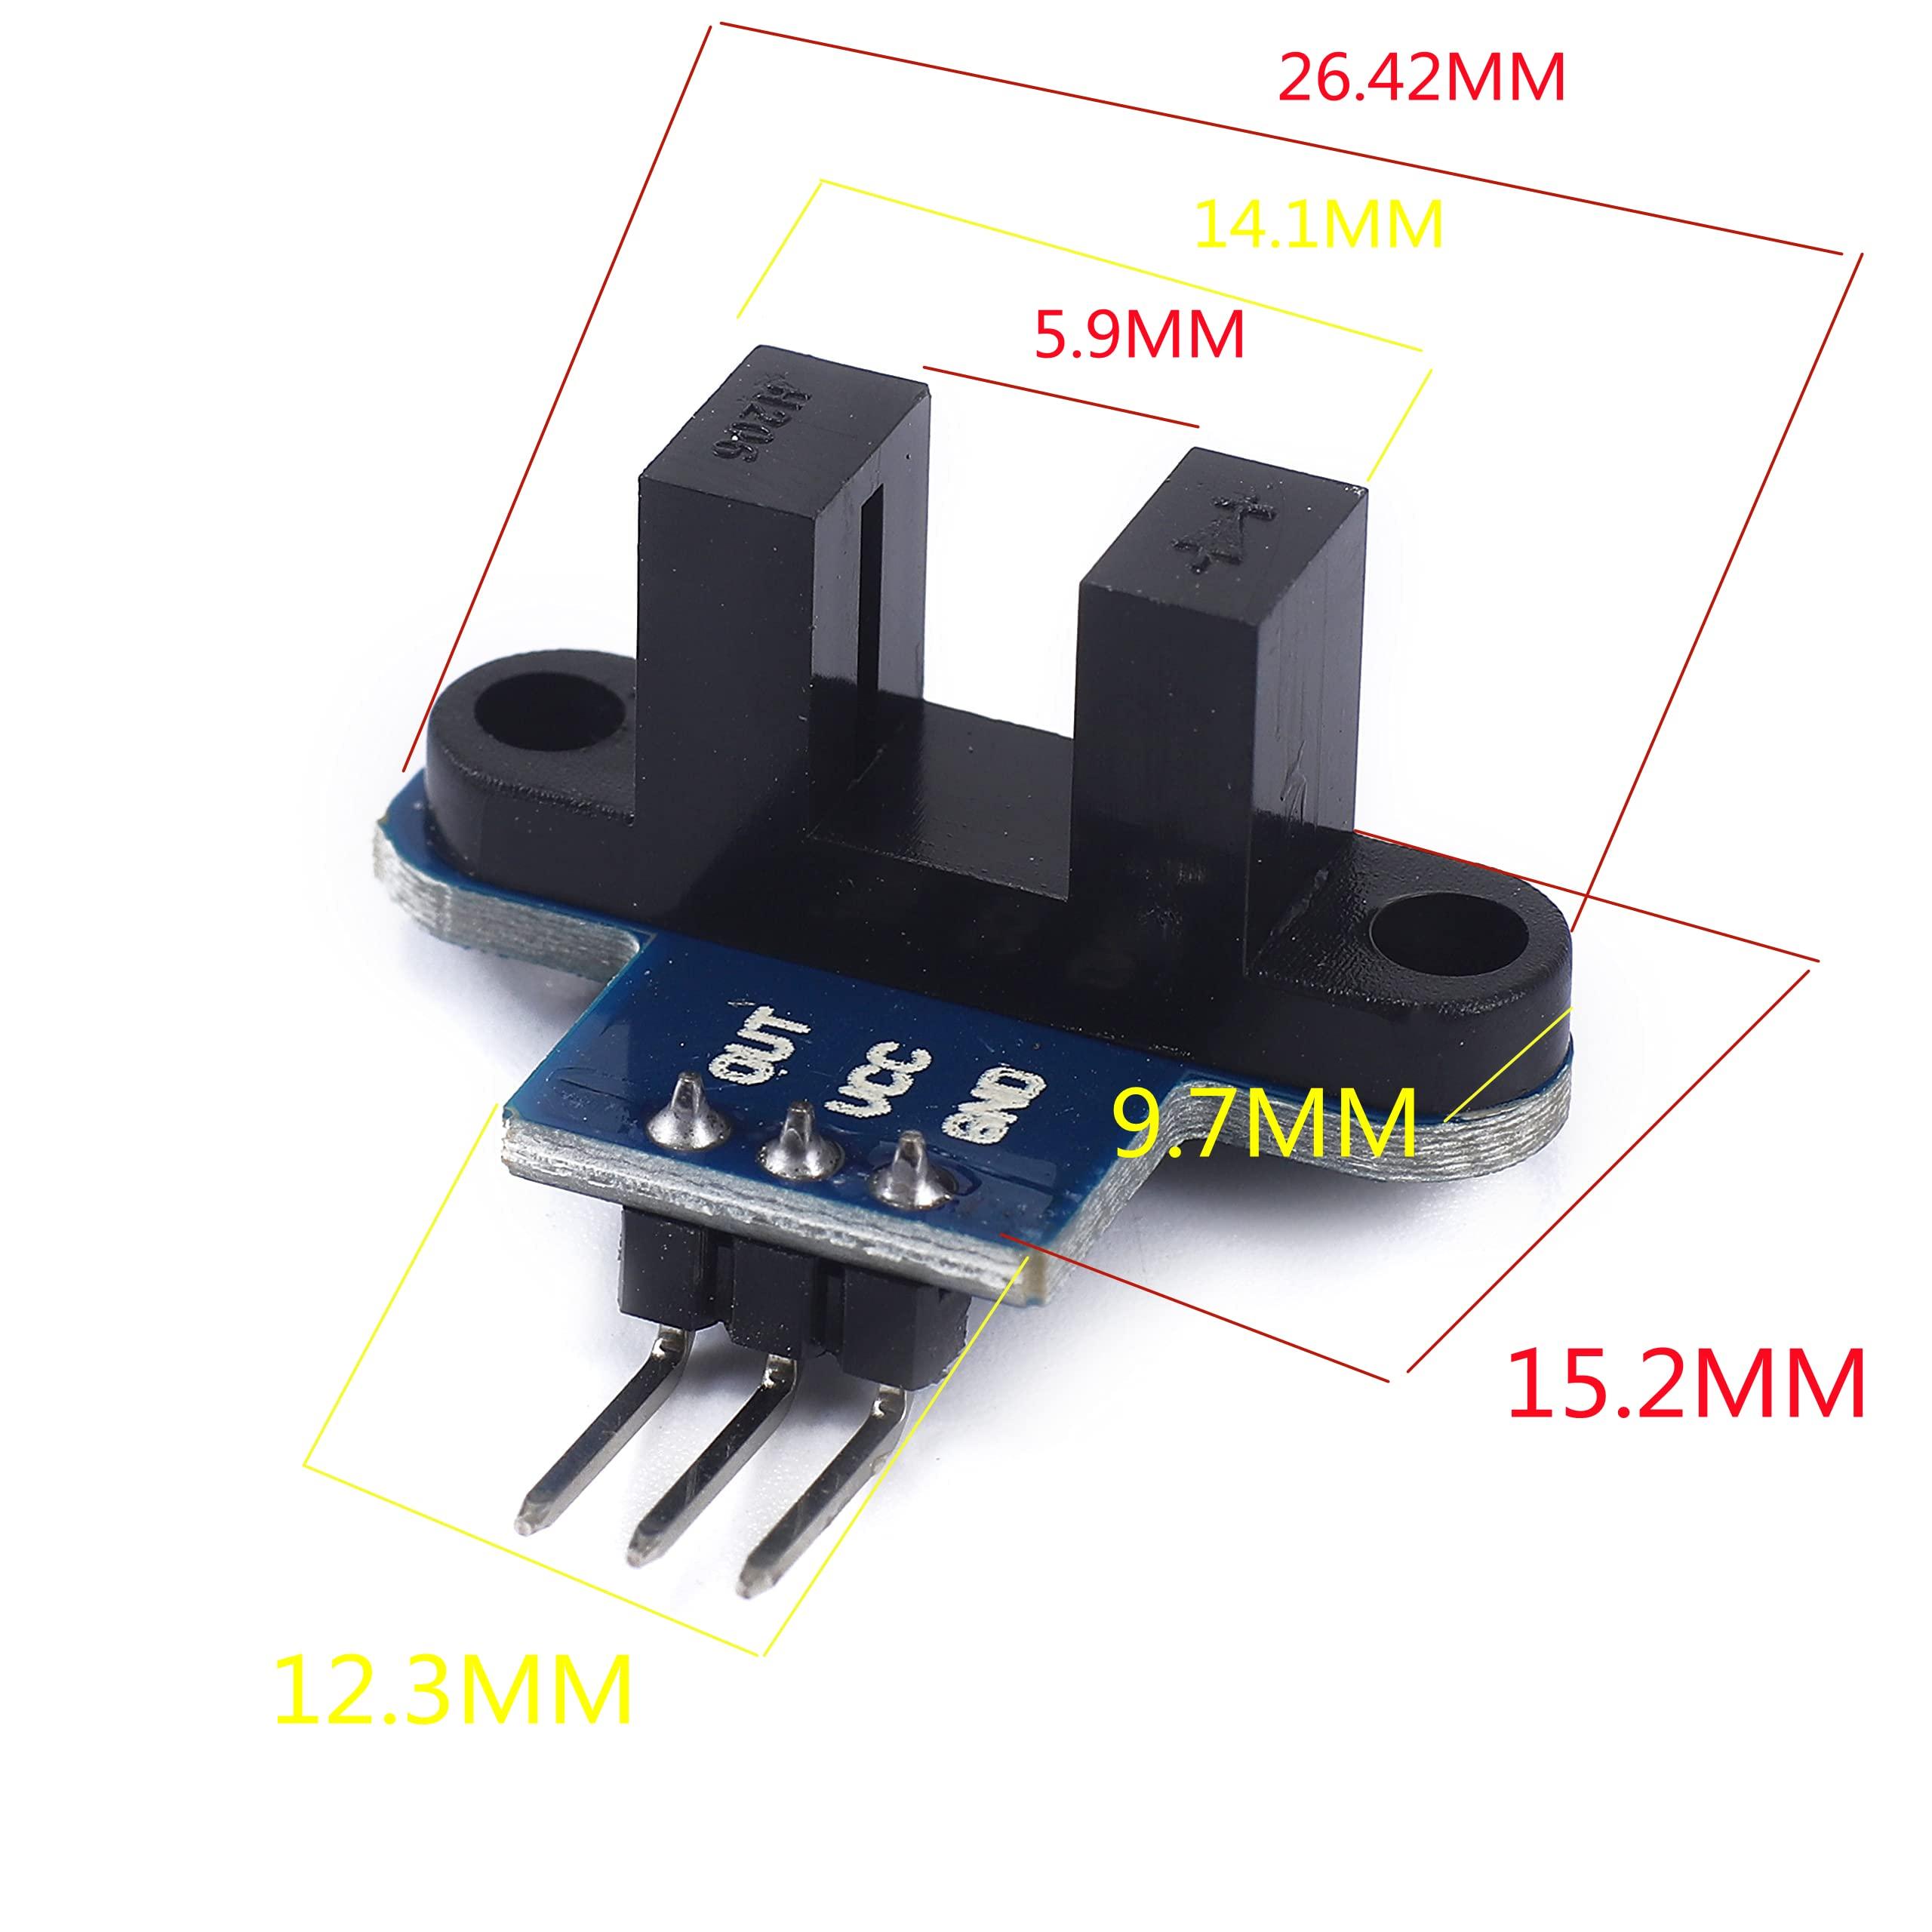
2x IR Infrared Slotted Optical Optocoupler Module Encoder
4x AA Batteries
Dupont jumper wires
Screwdriver (typically Phillips head)
CODE : https://github.com/Ayamola/Robot-internet-of-tricks.git
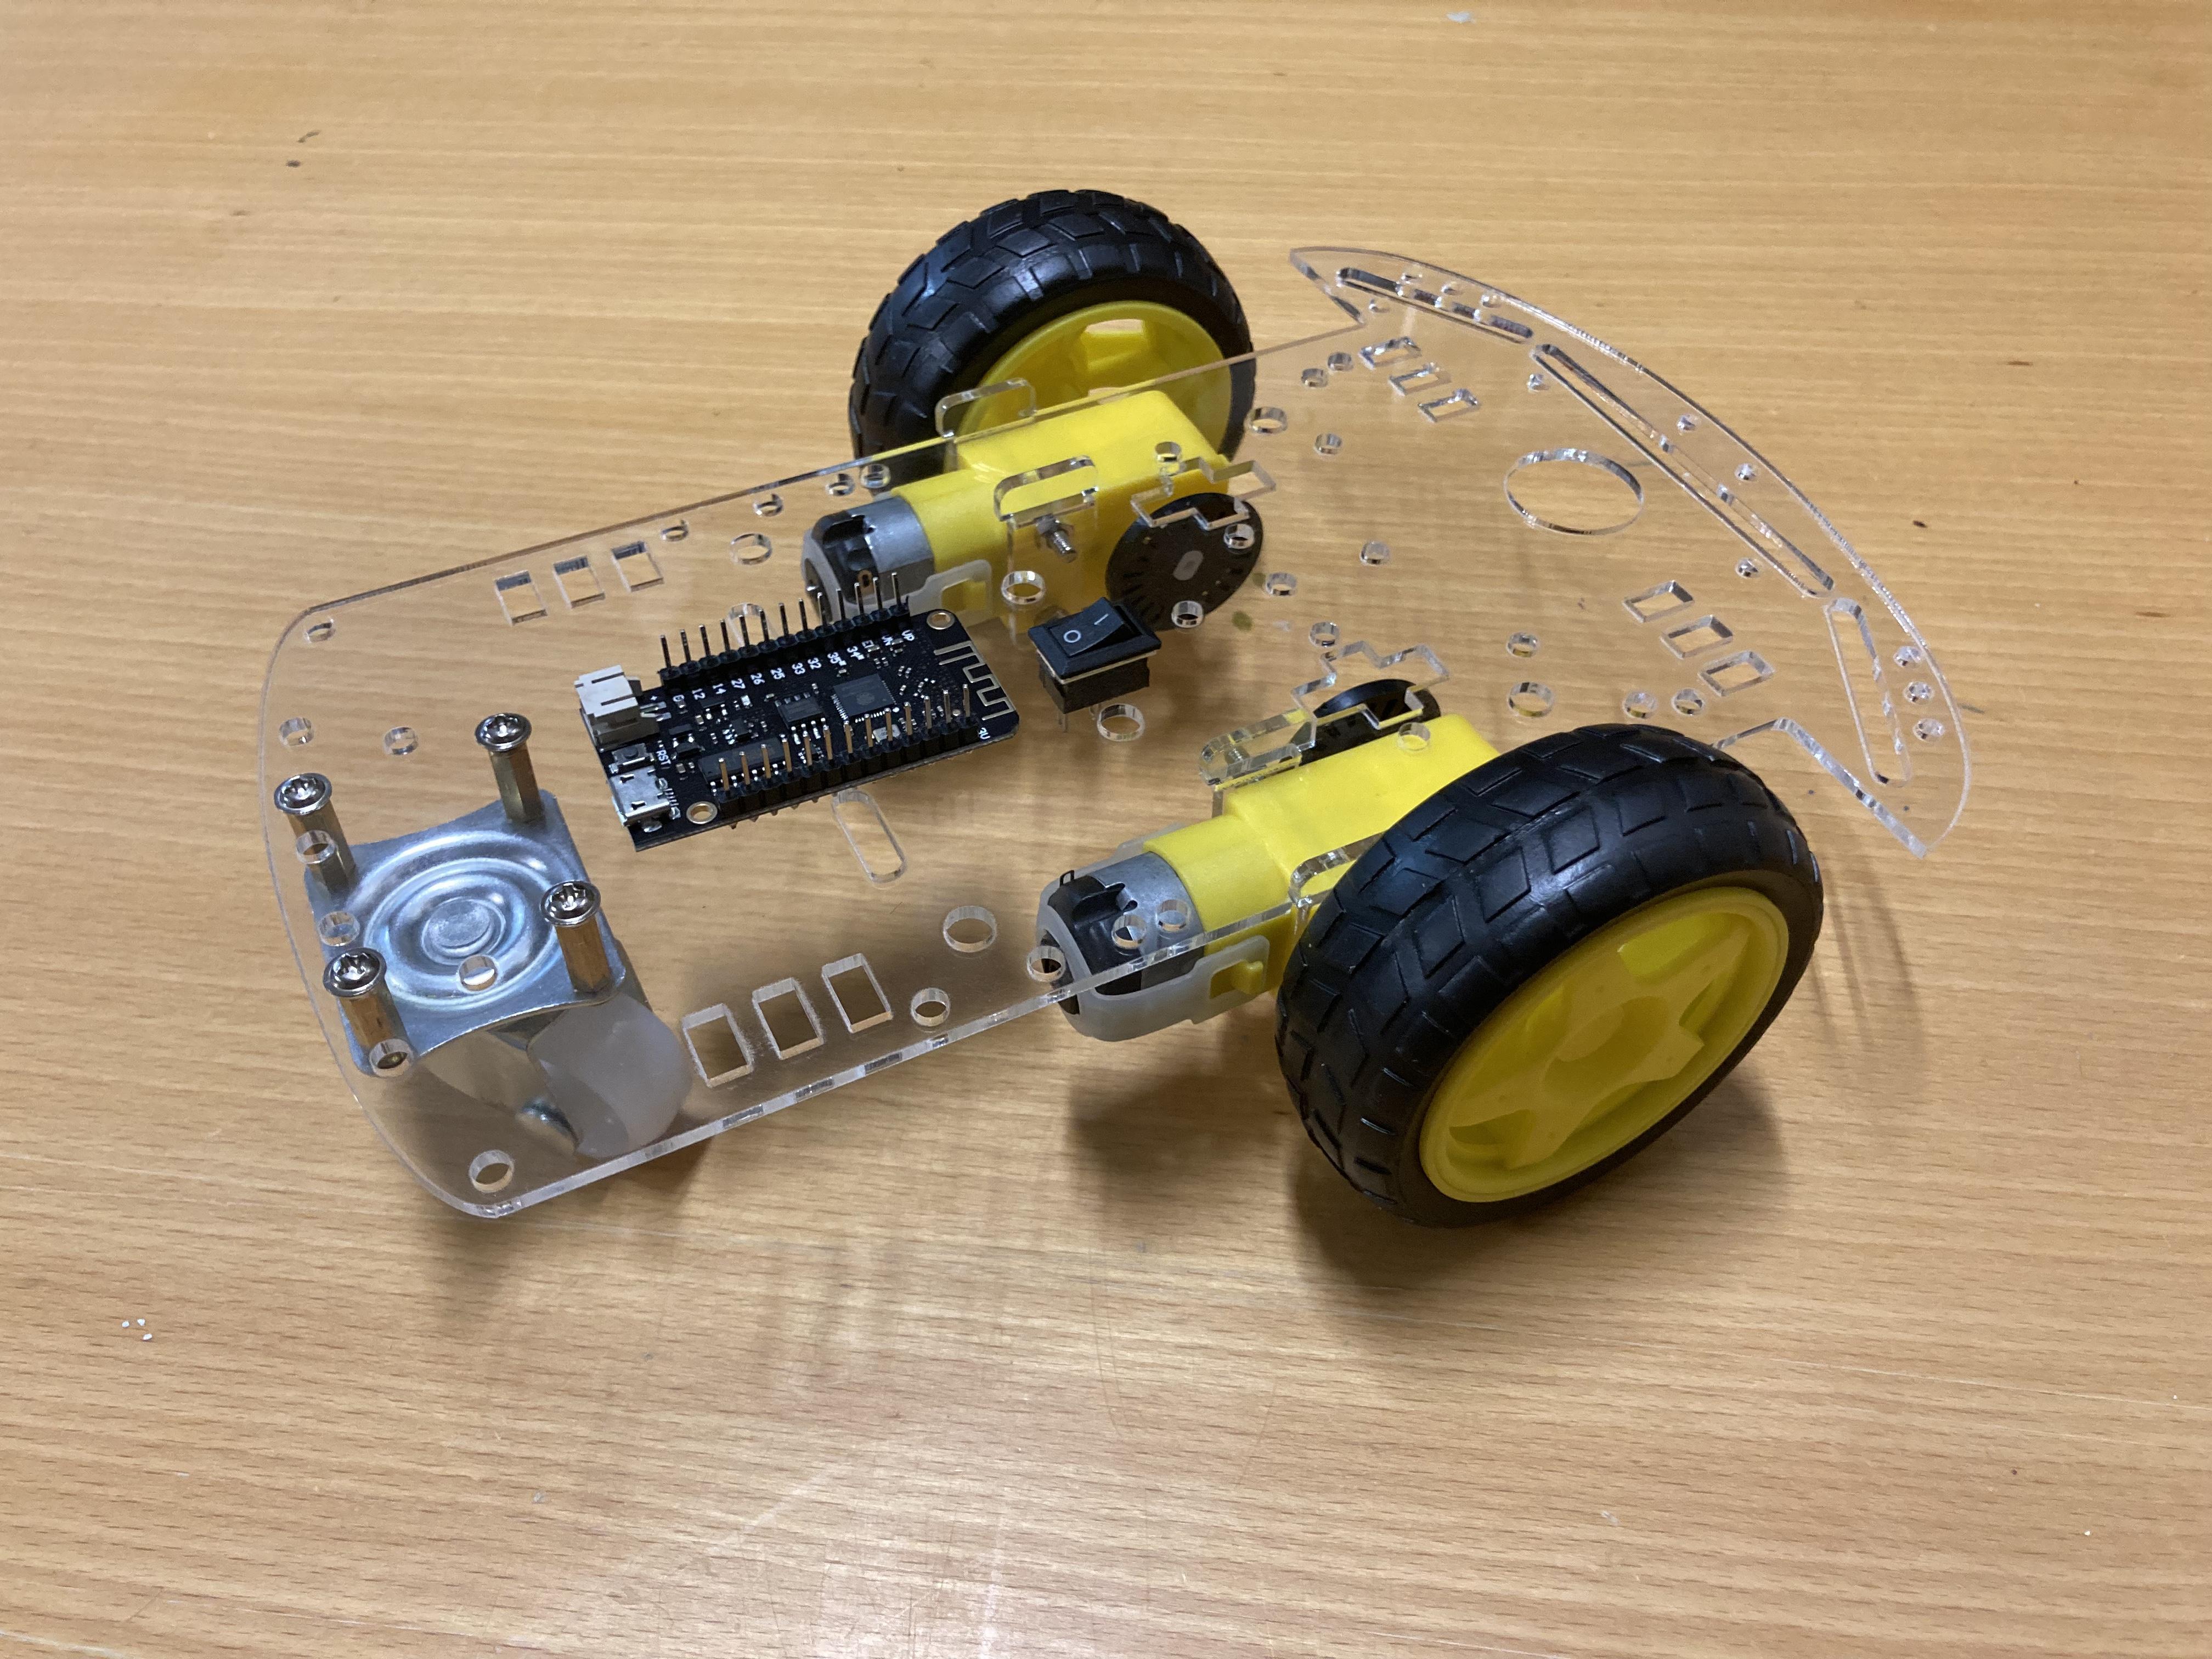
Assembly of Chasis

- Lay out all the parts from the kit and identify the main body of the plastic platform.
- Locate the two motor mounts on the body and attach the motors to them using the nuts and bolts provided.
- Connect the motor wires to the motor controller or driver board, following the instructions provided with the board.
- Secure the controller board onto the body using the screws provided.
- Connect the power source to the controller board, following the instructions provided with the board.
- Test the motors and wheels to ensure everything is working properly before adding any additional components or programming the robot.
Connect Wires
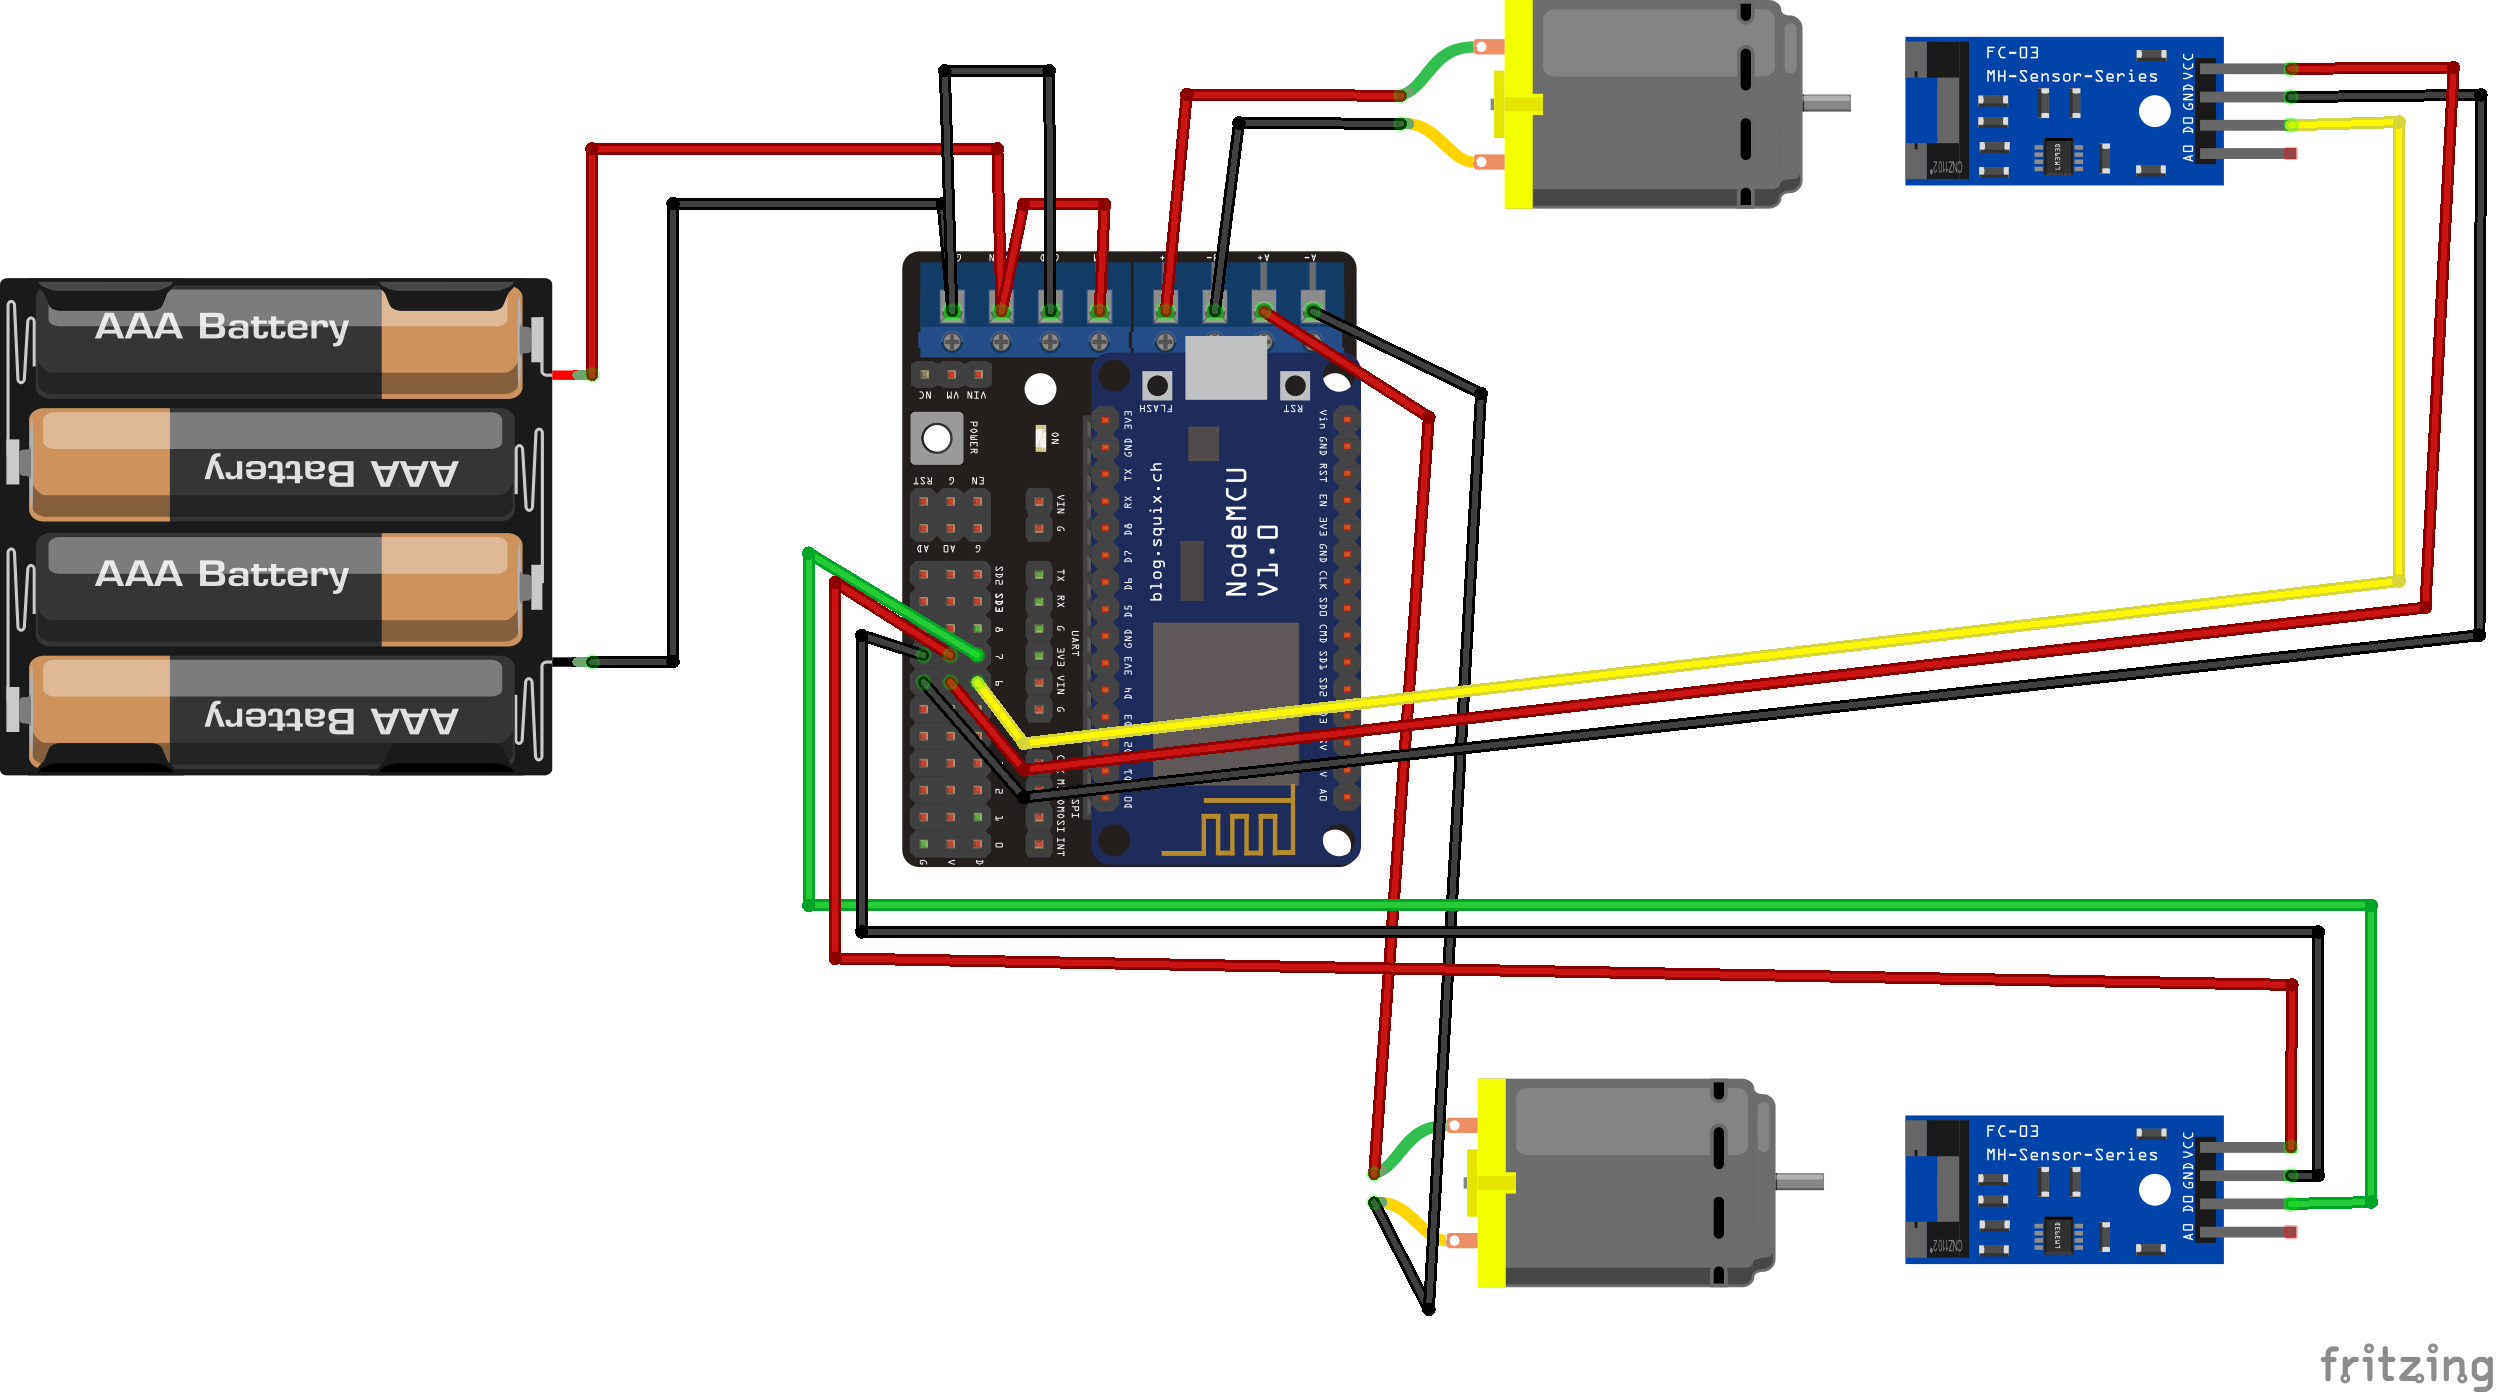
Connect the wires as shown in the diagram.
Left Optocoupler -> GPIO13 (D7)
Right Optocoupler -> GPIO12 (D6)
Install the ESP8266 Board


- Open the Arduino IDE on your computer.
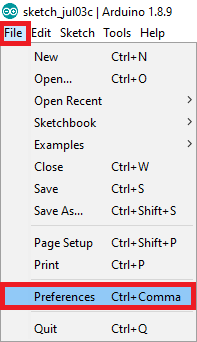
- Go to the File menu and select Preferences.
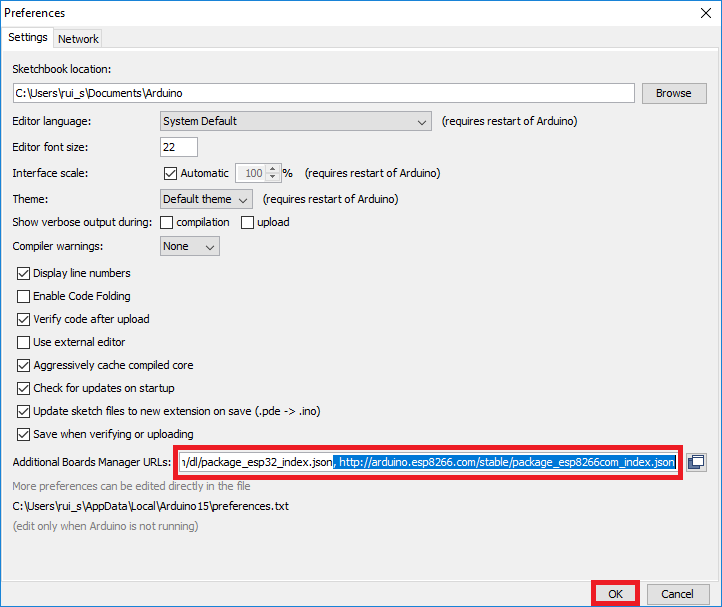
- In the Preferences window, find the "Additional Boards Manager URLs" field and paste the following URL:
- http://arduino.esp8266.com/stable/package_esp8266com_index.json
- Note: If you already have a URL in this field, simply separate it from the new URL with a comma.
- Click OK to close the Preferences window.
- Next, go to the Tools menu and select Board > Boards Manager.
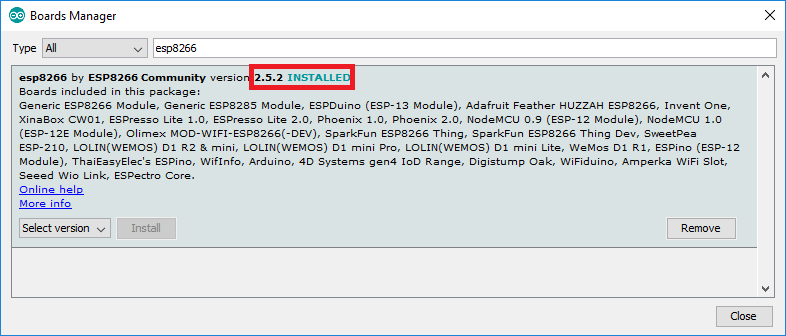
- In the Boards Manager, search for "esp8266" using the search bar.
- Click on "esp8266 by ESP8266 Community" and then click the Install button.
- Wait for the installation to complete. This may take a few minutes, depending on your internet speed.
- Once the installation is complete, close the Boards Manager and go back to the Tools menu.
- Under the Boards submenu, you should now see a list of ESP8266 boards. Select the one you are using.
- Now you are ready to program your ESP8266 board with the Arduino IDE!
Install Libraries
- Open the Arduino IDE (Integrated Development Environment) on your computer.
- Go to the Sketch menu and select Include Library > Manage Libraries.
- In the Library Manager, search for the libraries you want to install by typing their names into the search bar. For example, search for "FS" and select "FS by Ivan Grokhotkov."
- Click on the library you want to install and then click the Install button. The IDE will download the library and install it for you.
- Repeat this process for each of the libraries you want to install: Arduino, Wire, ESP8266WiFi, DNSServer, ESP8266WebServer, WiFiManager, ArduinoJson, and PubSubClient.
#include <ESP8266WiFi.h> https://github.com/esp8266/Arduino
#include <WiFiManager.h> https://github.com/tzapu/WiFiManager
#include <ArduinoJson.h> https://github.com/bblanchon/ArduinoJson (only works with version 5.x)
Upload the Code
- Select the board NodeMCU 1.0 (ESP-12E Module)
- Select your port
- Compile and upload the code
Now we are ready to receive commands through the mqtt broker
Downloads
Create an Account in the Mqtt Broker
- Go to the maqiatto.com website at https://www.maqiatto.com/.
- Click on the "Create Account" button at the top right corner of the homepage.
- Fill out the registration form with your personal information, including your name, email address, and password.
- Choose your preferred language and time zone.
- Check the box to agree to the terms and conditions of the website.
- Click on the "Register" button to complete the registration process.
- Once you have created your account, you can log in using the email address and password you provided during registration.
Creating a Topic:
- After logging in to your maqiatto.com account, click on the "MQTT Websocket" button on the top menu bar.
- Click on the "New Topic" button to create a new topic.
- In the "New Topic" dialog box, enter "robot" as the topic name.
- Click on the "Create" button to create the new topic.
- You have now created a new topic with the name "robot" on maqiatto.com.
Create Amazon AWS Account
- Go to the Amazon AWS website at https://aws.amazon.com/ and click on the "Create an AWS Account" button.
- On the "Create an AWS Account" page, enter your email address and select "I am a new user." Click the "Sign in using our secure server" button.
- On the next page, enter your name and create a new password for your AWS account. You will also need to enter your credit card information to verify your identity, but AWS offers a free tier with limited services that will not be charged if you stay within the free tier limits.
- Next, you will be prompted to enter your phone number. Amazon will send you an automated message with a verification code. Enter the code to complete the phone verification process.
- After verifying your phone number, you will be prompted to select a support plan. You can choose the free basic plan, which provides access to AWS documentation, whitepapers, and support forums.
- On the next page, you will need to provide additional information, including your company name, job title, and address. You can also choose to receive promotional emails from AWS.
- Finally, review the AWS Customer Agreement and click the "Create Account and Continue" button to complete the account creation process.
Install Node.js
For Windows:
- Go to the Node.js website at https://nodejs.org/ and click on the "Download" button.
- Select the Windows Installer option based on your system architecture (32-bit or 64-bit).
- Run the downloaded installer file and follow the prompts in the installer.
- Accept the license agreement, choose the installation location, and click "Next" to continue.
- Select the components you want to install, and click "Next".
- Choose the "Custom" installation type, and click "Next".
- Choose the features you want to install, and click "Next".
- Choose the "npm package manager" option, and click "Next".
- Click "Install" to begin the installation process.
- Wait for the installation to complete, and click "Finish" to exit the installer.
- To verify the installation, open the command prompt and type "node -v". This should display the version of Node.js installed on your system.
Install and Configure Ask-cli
- Install Ask CLI on your system by following the instructions on the official documentation at https://developer.amazon.com/en-US/docs/alexa/smapi/quick-start-alexa-skills-kit-command-line-interface.html.
- Open your terminal or command prompt and run the command "ask configure". This will start the configuration process for Ask CLI.
- Follow the prompts to enter your Amazon Developer account credentials, including your email address and password.
- If you have two-factor authentication enabled on your account, you will be prompted to enter the verification code sent to your device.
- Once you have successfully logged in, you will be prompted to create a new profile or use an existing one. Choose the "Create a new profile" option.
- Enter a name for your profile, such as "Robot ioTricks", and choose a default region.
- You will now be prompted to create an IAM user in your AWS account. Follow the prompts to create a new user and assign it the necessary permissions.
- Once the IAM user is created, you will be prompted to enter the access key ID and secret access key for the user. Enter the values and choose the default output format.
- Your profile is now configured and ready to use with Ask CLI. You can start building Alexa skills and managing your account using the CLI commands.
Create an Skill With Ask-cli
- Go to your working folder location and run the command --> ask new
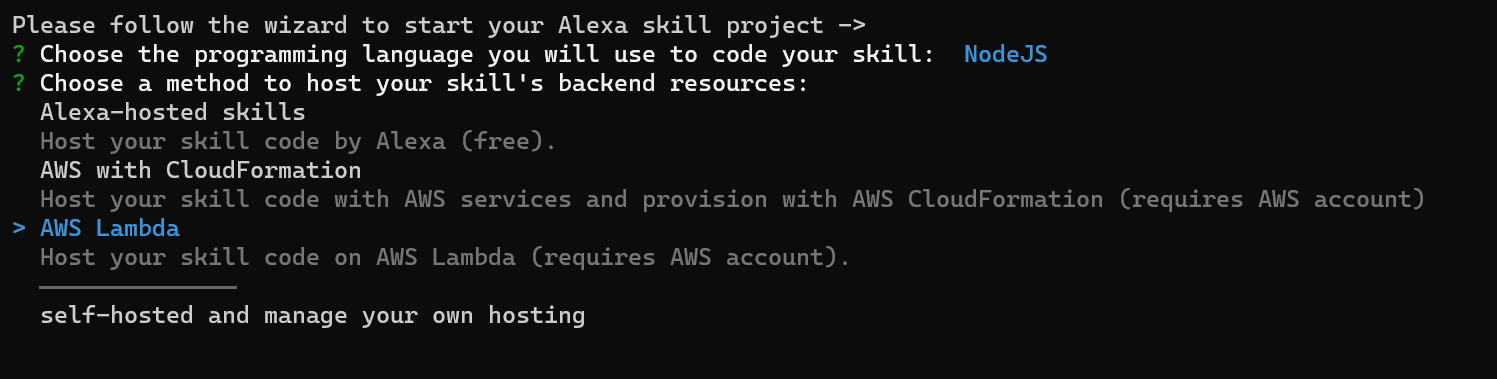
- Choose nodejs
- Move down with your keyboard until AWS Lambda
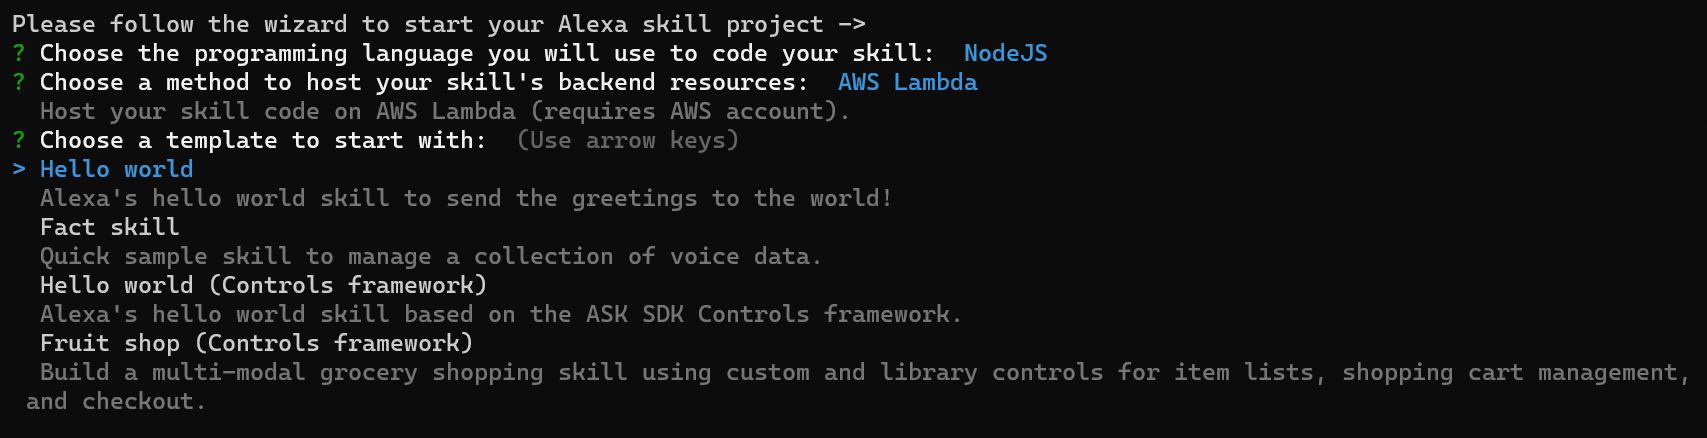
- Choose the template Hello World
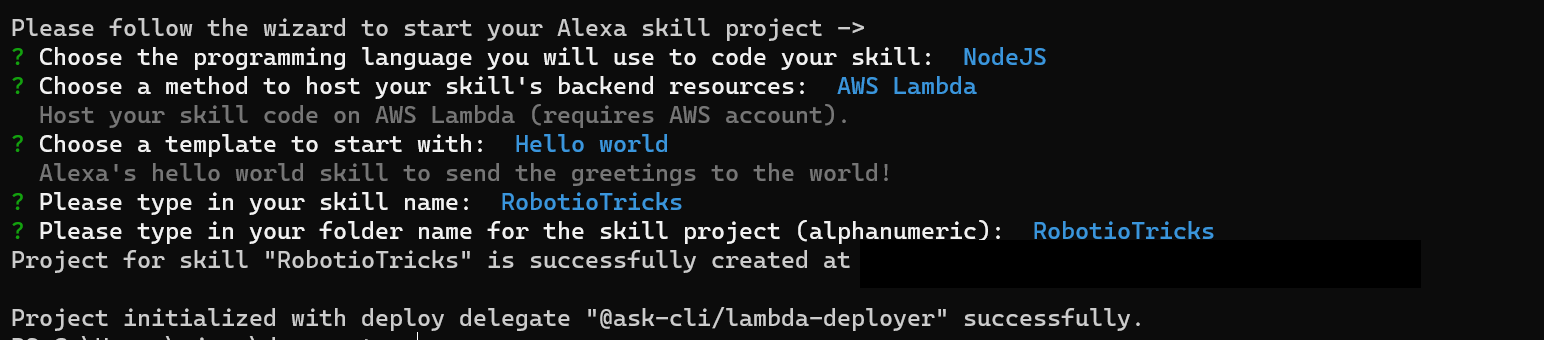
- Write a skill name (Robot ioTricks)
- Write a folder name (Robot ioTricks)
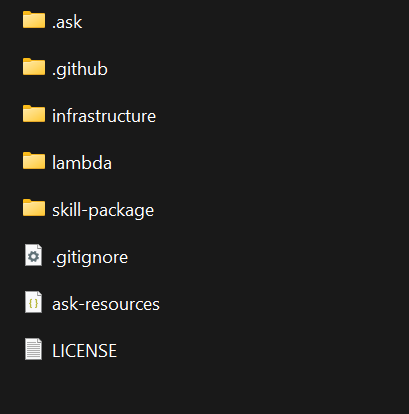
- If everything run successfuly move to the created folder (Robot ioTricks)
- you will se several created folders like infraestucture, lambda, skill-package....
- Go to \RobotioTricks\skill-package\interactionModels
- You will find a json file with your lenguage (like en-US) replace the content with the file US-en Robotiotricks.json
- Remember to change the line 4 with your invocation name
- Copy from here the file mqttHelper.js inside lambda folder and edit your mqtt credentials (lines 3,4 and 17)
- Replace the content of index.js in lambda folder with the file index_robotiotricks.js here
- open terminal and go to the root of the ask-cli (Robot ioTricks) step 8
- run the command -> ask deploy
- now you will have a new skill in your amazon account
Downloads
How to Operate the Robot
- Push the power button of the shield
- If you don't change your credentials od WIFI and mqtt broker on the code you can connect to the WIFI network of the ESP8266 should be "Robot Configuration"
- Edit your credentials and save
- Open your alexa app and invoke "Open robot i o Tricks"
- Alexa should response and now you can interact with the robot
- Remember the command should be like: please move forward 20 centimeters...
Enjoy your new voice command robot!!