Candy Defense Bucket

by TeamGammaGamma in Circuits > Raspberry Pi

270 Views, 3 Favorites, 0 Comments

Candy Defense Bucket
20241031_142347.jpg

In recent years, Halloween has experienced a decline in popularity. Fewer children are ringing doorbells around the nation, as most houses have stopped offering candy after the COVID-19 pandemic and children are no longer interested in the holiday. To make Halloween safer and exciting again, our design eliminates physical contact between homeowners and trick-or-treaters, ensuring the safety of the candy, and dispenses candy in a new and interactive way. Incidentally, the design is perfect for introverts, as the Candy Defense Bucket only needs to be plugged into a power outlet to begin operating and dispensing candy to the masses!

The Candy Defense Bucket uses an ultrasonic sensor to determine when a trick-or-treater is approaching the bucket and a temperature sensor to determine if the trick-or-treater has a fever or not. If the child approaching the bucket has a fever, then the bucket will not open, which maintains the integrity of the candy inside. However, if the child is within a healthy temperature range, the bucket opens, revealing a treasure trove of candy inside. Although the Candy Defense Bucket is able to operate independently, the homeowner using the bucket can choose to open the bucket at the press of a button (literally) through the corresponding app.


Supplies

Materials:

Bucket (About five inches in height and six inches in diameter) x 1

3D Printer x 1

Spool of PLA Filament x 1

Raspberry Pi 3 x 1

VEX 393 Motor x 1

L298N H-Bridge x 1

MLX90614 Long-Range Infrared Thermometer x 1

HC-SR04 Ultrasonic Sensor x 1

Male to Female Jumper Wires x 6

Female to Female Jumper Wires x 7

Male to Male Jumper Wires x 2

5V 2.5A Power Adapter x 1

Gold Screw ½ inch x 2

3” Steel Square Rod x 1

Acrylic Paints (Colors can be varied)

Googly Eyes (Number of eyes can be varied)

Paintbrush x 1

Files/Sandpaper x 1

Hot Glue Gun x 1

Hot Glue Sticks x 2

E6000 x 1


Software:

Fusion 360 (The hobbyist version is free for three years)

Cura

Android Studios

Raspberry Pi OS

3D-Printing

Modify Motor, Bucket Lid, and Raspberry Pi Attachment (Optional). If you are using a bucket with different dimensions, then you can modify the parameters of the Motor, Bucket Lid, and Raspberry Pi Attachments to be sure that the parts correctly fit your bucket.

To change the parts, we will be using Fusion 360, which is free for hobbyists for three years. If you already have Fusion 360 installed on your computer, you can skip this step. However, if you do not have Fusion 360 installed, then navigate to Autodesk Account and create your account, being sure to specify that you are a hobbyist and intend to use Autodesk applications for personal use. Then, navigate to Fusion 360 and install it. Once Fusion 360 is installed, you can download the attached .f3d Motor and Raspberry Pi Attachment files.  

Once you have downloaded both of these files, double-click on the Motor Attachment file to open it. Then, navigate to the modify menu, and select the Change Parameters option.

Afterward, measure the rim and base diameter of your bucket. Then input these measurements into the appropriate variables. Repeat this process for the Bucket Lid and Raspberry Pi Attachment.

This should automatically update the model to best fit your bucket!

Slicing the files. If you do not need to edit the dimensions of the Motor, Bucket Lid, and Raspberry Pi Attachments, then you can skip to this step. Download all the attached files and open Cura or a similar slicing program. Place the Motor, Bucket Lid, Raspberry Pi, and Sensor Attachment files on the print bed and set the infill density to 15% and the wall thickness to 1.5mm, and turn support structures on. Pre-heat your 3D printer and print the model.

For the optional fangs and horns, download the corresponding file and place them on the print bed. Then, create as many copies of the model as you want, varying the scale of the model to create different-sized fangs and horns, customizing your own bucket!

Post-processing the parts. The parts may require light sanding using a file or some sandpaper to make it easier to apply paint or glue to the surfaces.


Wiring

Wiring the sensors and motors. Follow the wiring diagram pictured below. Please make sure that the Raspberry Pi is disconnected from the power source when wiring together the parts. Additionally, we suggest running a program to test each component individually to catch any errors in the wiring early on. If errors persist, try using a logic probe or multimeter to ensure each wire is connected correctly and all components are receiving power and ground.


Flask Server
1.jpg
4.jpg

The Raspberry Pi is responsible for handling the temperature and distance sensor inputs. We will use this data in our code to trigger the automatic lid-lifting mechanism.


Download an IDE that supports Python. Once you have booted up and imaged your Raspberry Pi, click the Raspberry Pi icon at the top left of the screen. Click on the Programming section and check if there is an IDE (integrated development environment) such as Geany, Thonny, or Mu. If an IDE exists, proceed to step 2. If none exist on the Pi, click on the Internet icon. In a new browser tab, download one of the IDE software listed above and follow the installation instructions.


Create a new Python file. Open the IDE of your choice and create a new file. This may be a button labeled “New” or a choice under the File dropdown menu. Make sure to select Python 3 as the language. Save it to your desktop as “server.py”


Install Python libraries. To use some Python libraries, we must install their packages onto the Pi. Open a new Raspberry Pi terminal window. Copy the following commands into the terminal one line at a time, pressing Enter after each command.

sudo pip3 install flask
sudo pip3 install gpiozero
sudo pip3 install --upgrade adafruit
sudo pip3 install adafruit-blinka
sudo pip3 install adafruit-circuitpython-adafruitio


Import Python libraries. In the Python file, import the following libraries. These libraries are essential to ensure that we can properly access and communicate with our app and the bucket’s sensors.

### Imports ###
# Flask server imports
from flask import Flask, jsonify
import datetime


# Sensor imports
from gpiozero import Motor
from gpiozero import DistanceSensor
from time import sleep
import board
import busio as io
import adafruit_mlx90614


Initialize the sensors in the code. To access the sensor data, we must first initialize them to their locations on the Raspberry Pi. In the same Python file, add the following code. The numbers in the Motor and Distance setup are the pin numbers that correspond to the Pi. These should be changed if their physical location on the Pi is different.

### Sensor stuff ###
# Temperature Sensor Set-up
i2c = io.I2C(board.SCL, board.SDA, frequency=100000)
mlx = adafruit_mlx90614.MLX90614(i2c)


# Motor Set-up
# Pin numbers correspond to the Pi, change as necessary
motor = Motor(forward = 20, backward = 21)


#Distance Sensor Set-up
# Pin numbers correspond to the Pi, change as necessary
distSensor = DistanceSensor(echo = 23, trigger = 24)


Initialize the Flask app. The Flask app allows the Raspberry Pi and Android app to communicate with each other using an HTTP protocol. Add the following code in the same Python file. This allows us to do things like toggle between detecting temperatures to automatically open the bucket or manually open the bucket at the press of a button.

# creates Flask app to establish HTTP protocol
app = Flask(__name__)
print("Created Flask app")


Create a “landing” page. While this isn’t an essential part of the project, a landing page with a simple return statement allows us to easily see whether or not the Flask server was successfully created. If the landing page fails to load, we can easily debug knowing that there was a connection error. Continue the Python code with the following lines.

@app.route('/')
def home():
return "Hello, this is your Raspberry Pi!"


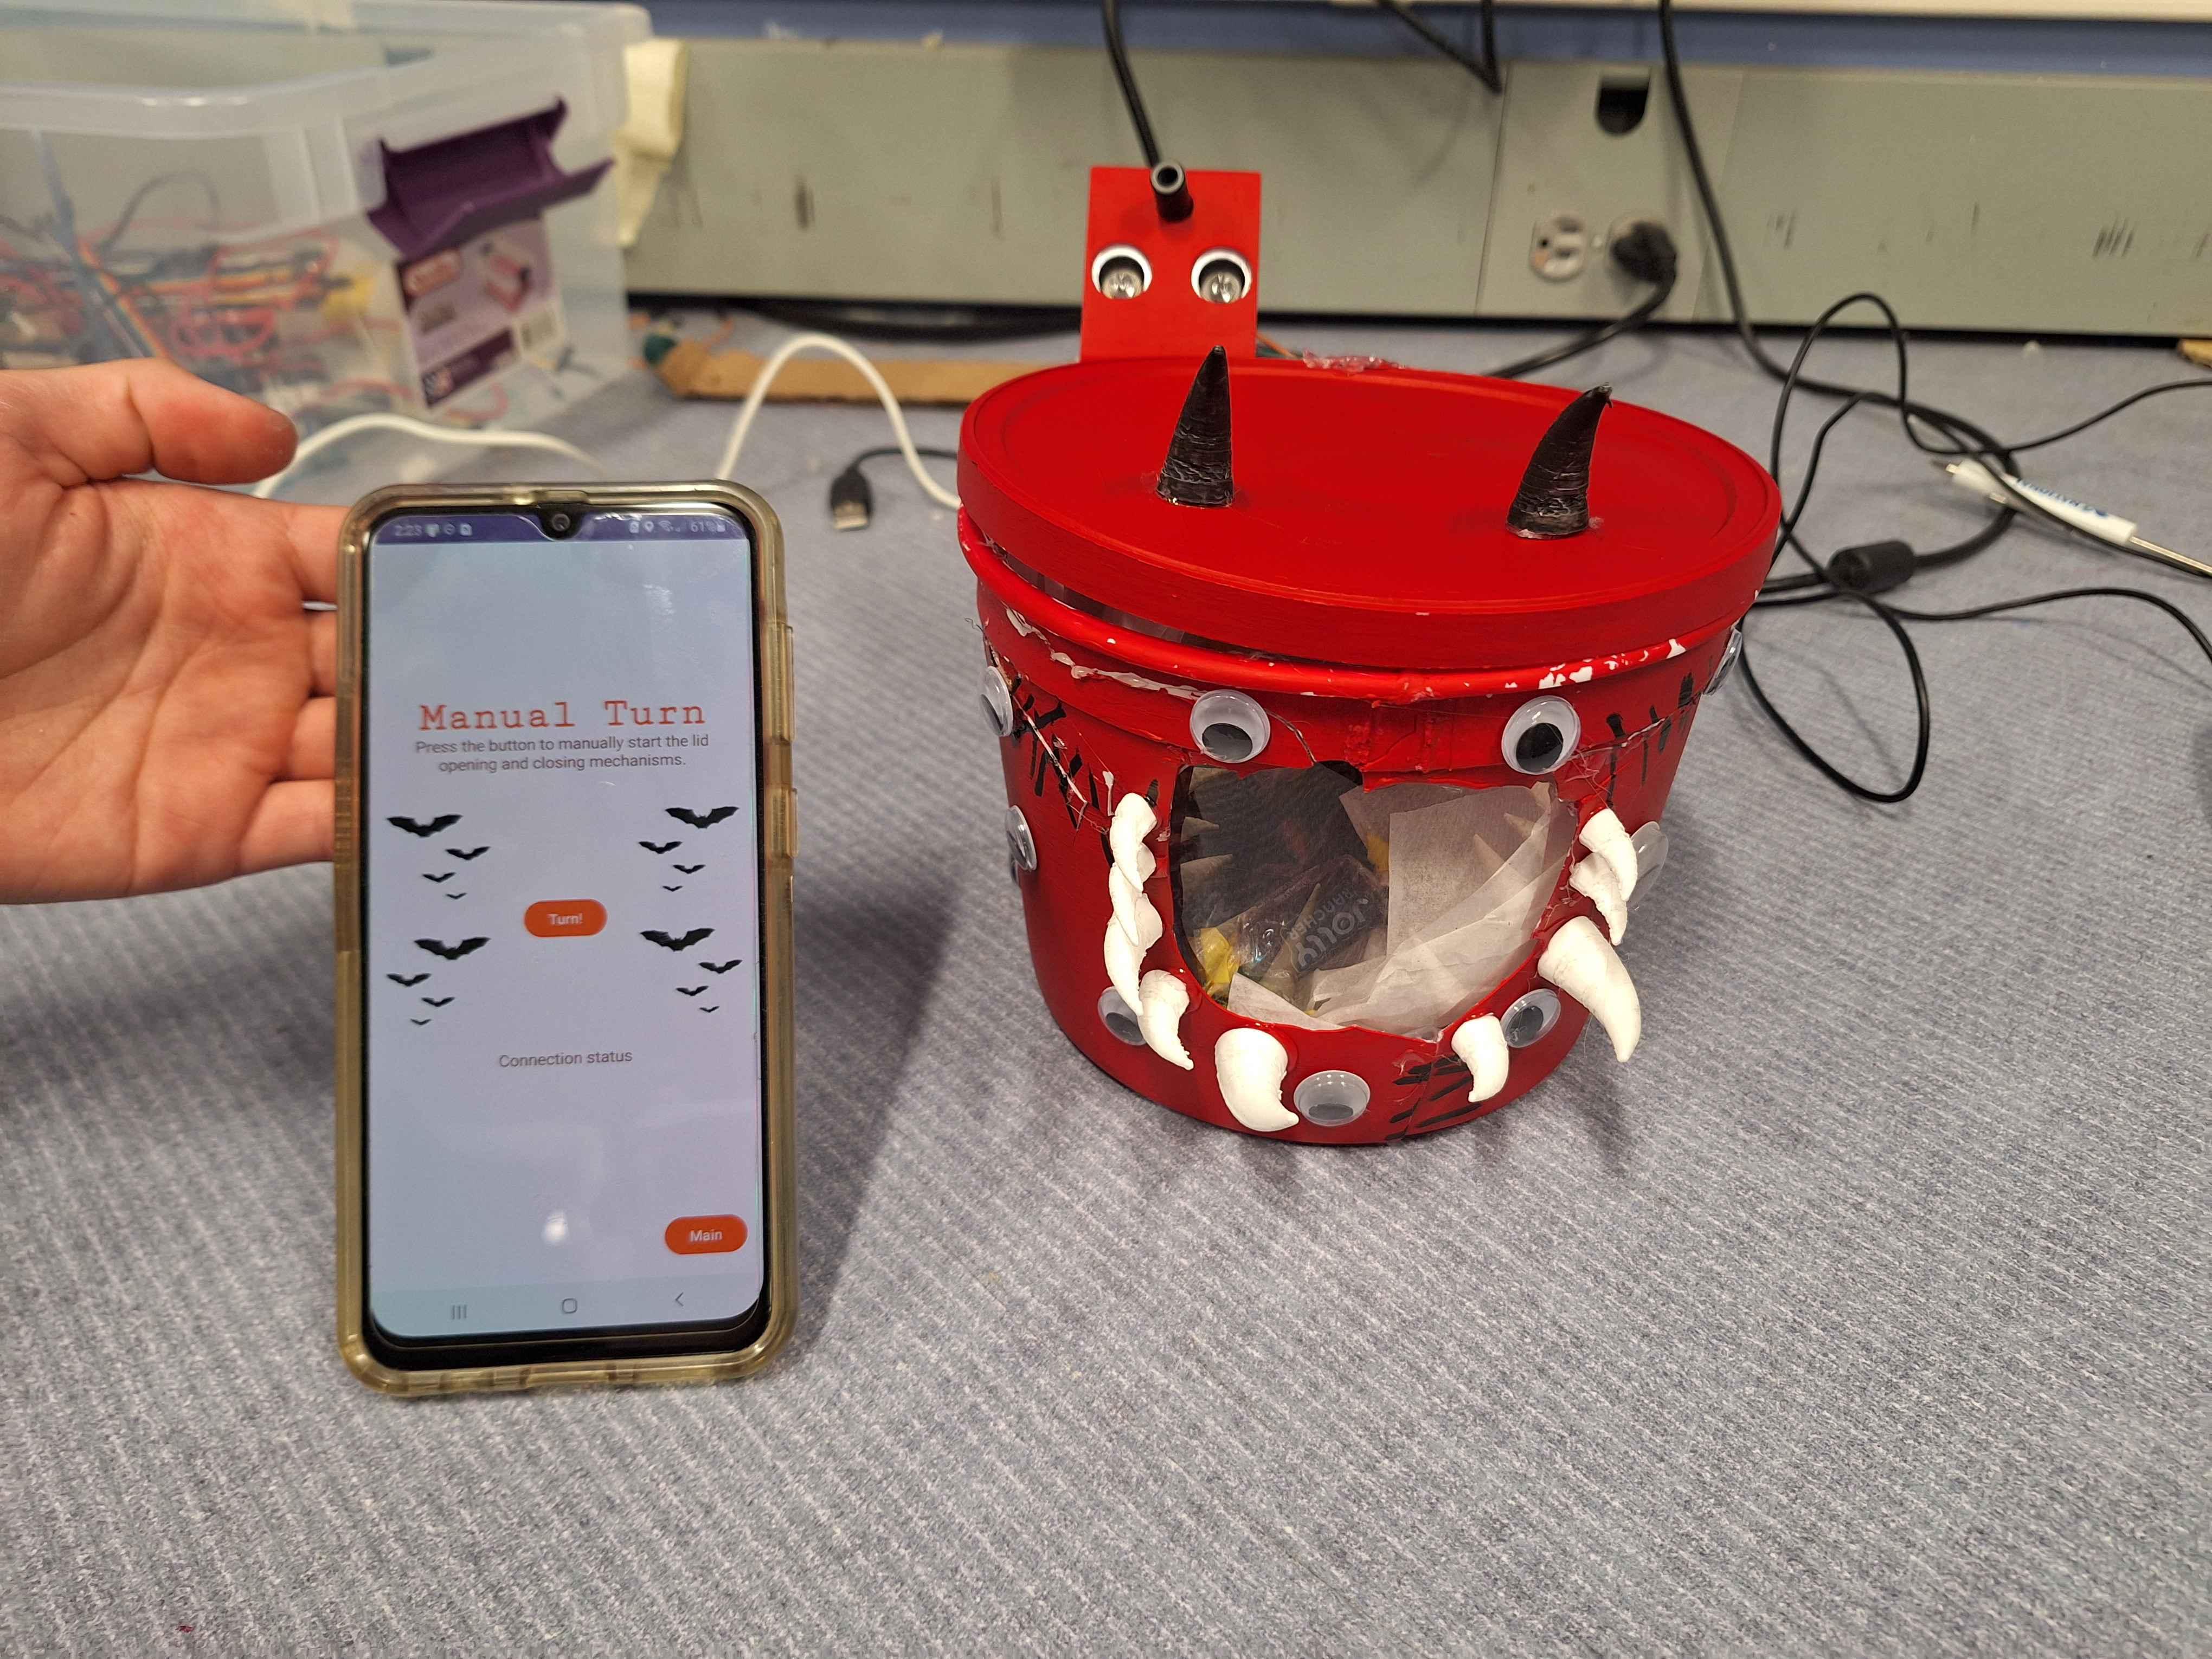
Create a “manual turn” page. When a device connects to this route on the Flask server, it will cause the bucket lid to open and close without needing a sensor input. Add the following function to the Python code.

@app.route('/turn', methods=['GET'])
def manual_turn():
motor.forward()
sleep(0.75)
motor.stop()
sleep(10)
motor.backward()
sleep(1)
motor.stop()
response = "finished turn"
print(response)
return jsonify(response)


Create a “sensor” page. When a device connects to this route on the Flask server, it will have the bucket’s attached distance sensor first check to see if the sensed target is close by. Then, its temperature sensor will check to see if a target’s temperature falls within a permissible range of temperatures considered to be healthy for a human. Copy the following code into the same Python file. To avoid the Pi running an infinite while loop, the sensors will stop after about 50 seconds, but the number of iterations can be adjusted for your desired time frame.

@app.route('/sensor', methods=['GET'])
def sensor():
sensor_data = {}


i = True
count = 0
acount = 0


while i:
# Lid-lifting mechanism


# Keep updating
targetTemp = "{:.2f}".format(mlx.object_temperature)
targetDistance = distSensor.distance


# Detects when trick-or-treater is in range
if targetDistance < 0.5:
# Determines if trick-or-treater is within temperature range
if float(targetTemp) < 35.0 and float(targetTemp) > 28.0:
# Opens and closes the lid
motor.forward()
sleep(0.75)
motor.stop()
sleep(10)
motor.backward()
sleep(1)
motor.stop()


print(f"{datetime.datetime.now()} : {str(targetTemp)}")
sensor_data[f"{datetime.datetime.now()}"] = " | " + str(targetTemp) # key-value pairs of timestamp and temperature


sleep(0.5)
count += 1


if count == 100: # Adjust for desired time frame
acount += 1
count = 0
if acount == 1:
acount = 0
i = False


return jsonify(sensor_data) # convert sensor data into JSON format which is returned as HTTP response


Declare the host and port number. When testing the different pages, they can be loaded on the Pi’s Internet browser (e.g., Chromium) using the address http://0.0.0.0:5000. Add the following code.

# runs app only if script is executed directly (not imported as module);
if __name__ == '__main__':
app.run(host='0.0.0.0', port=5000)


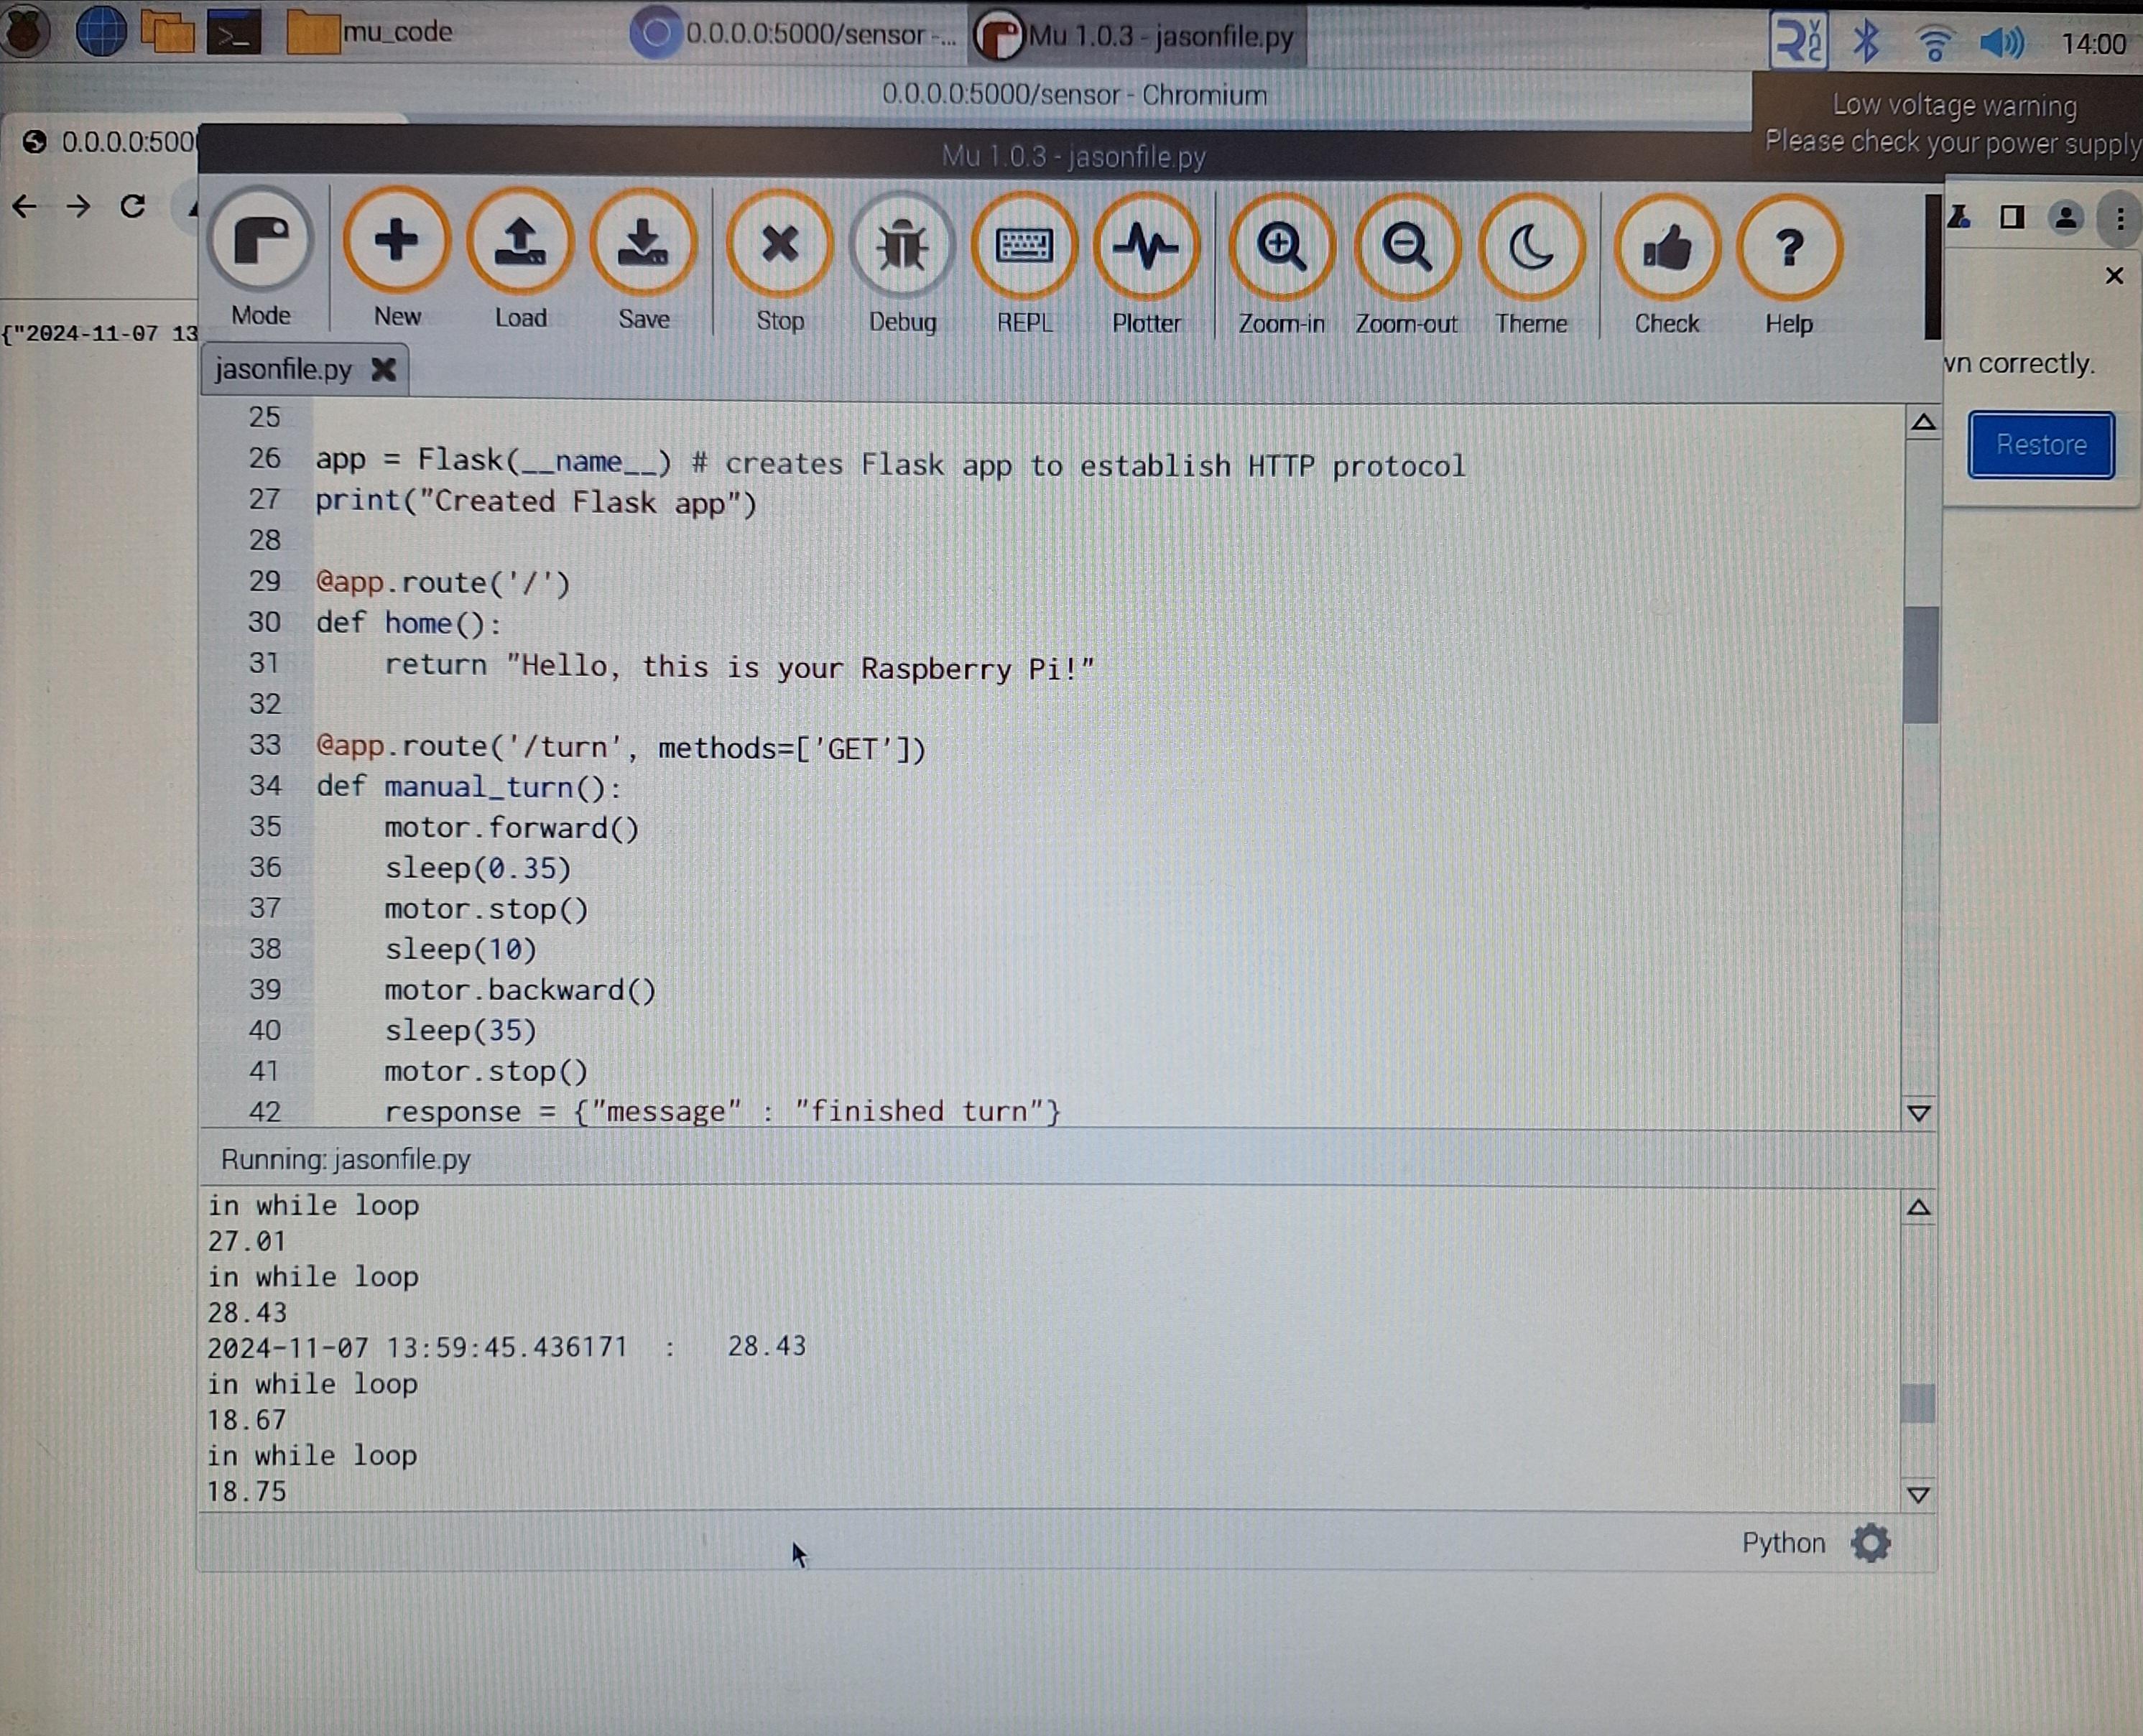
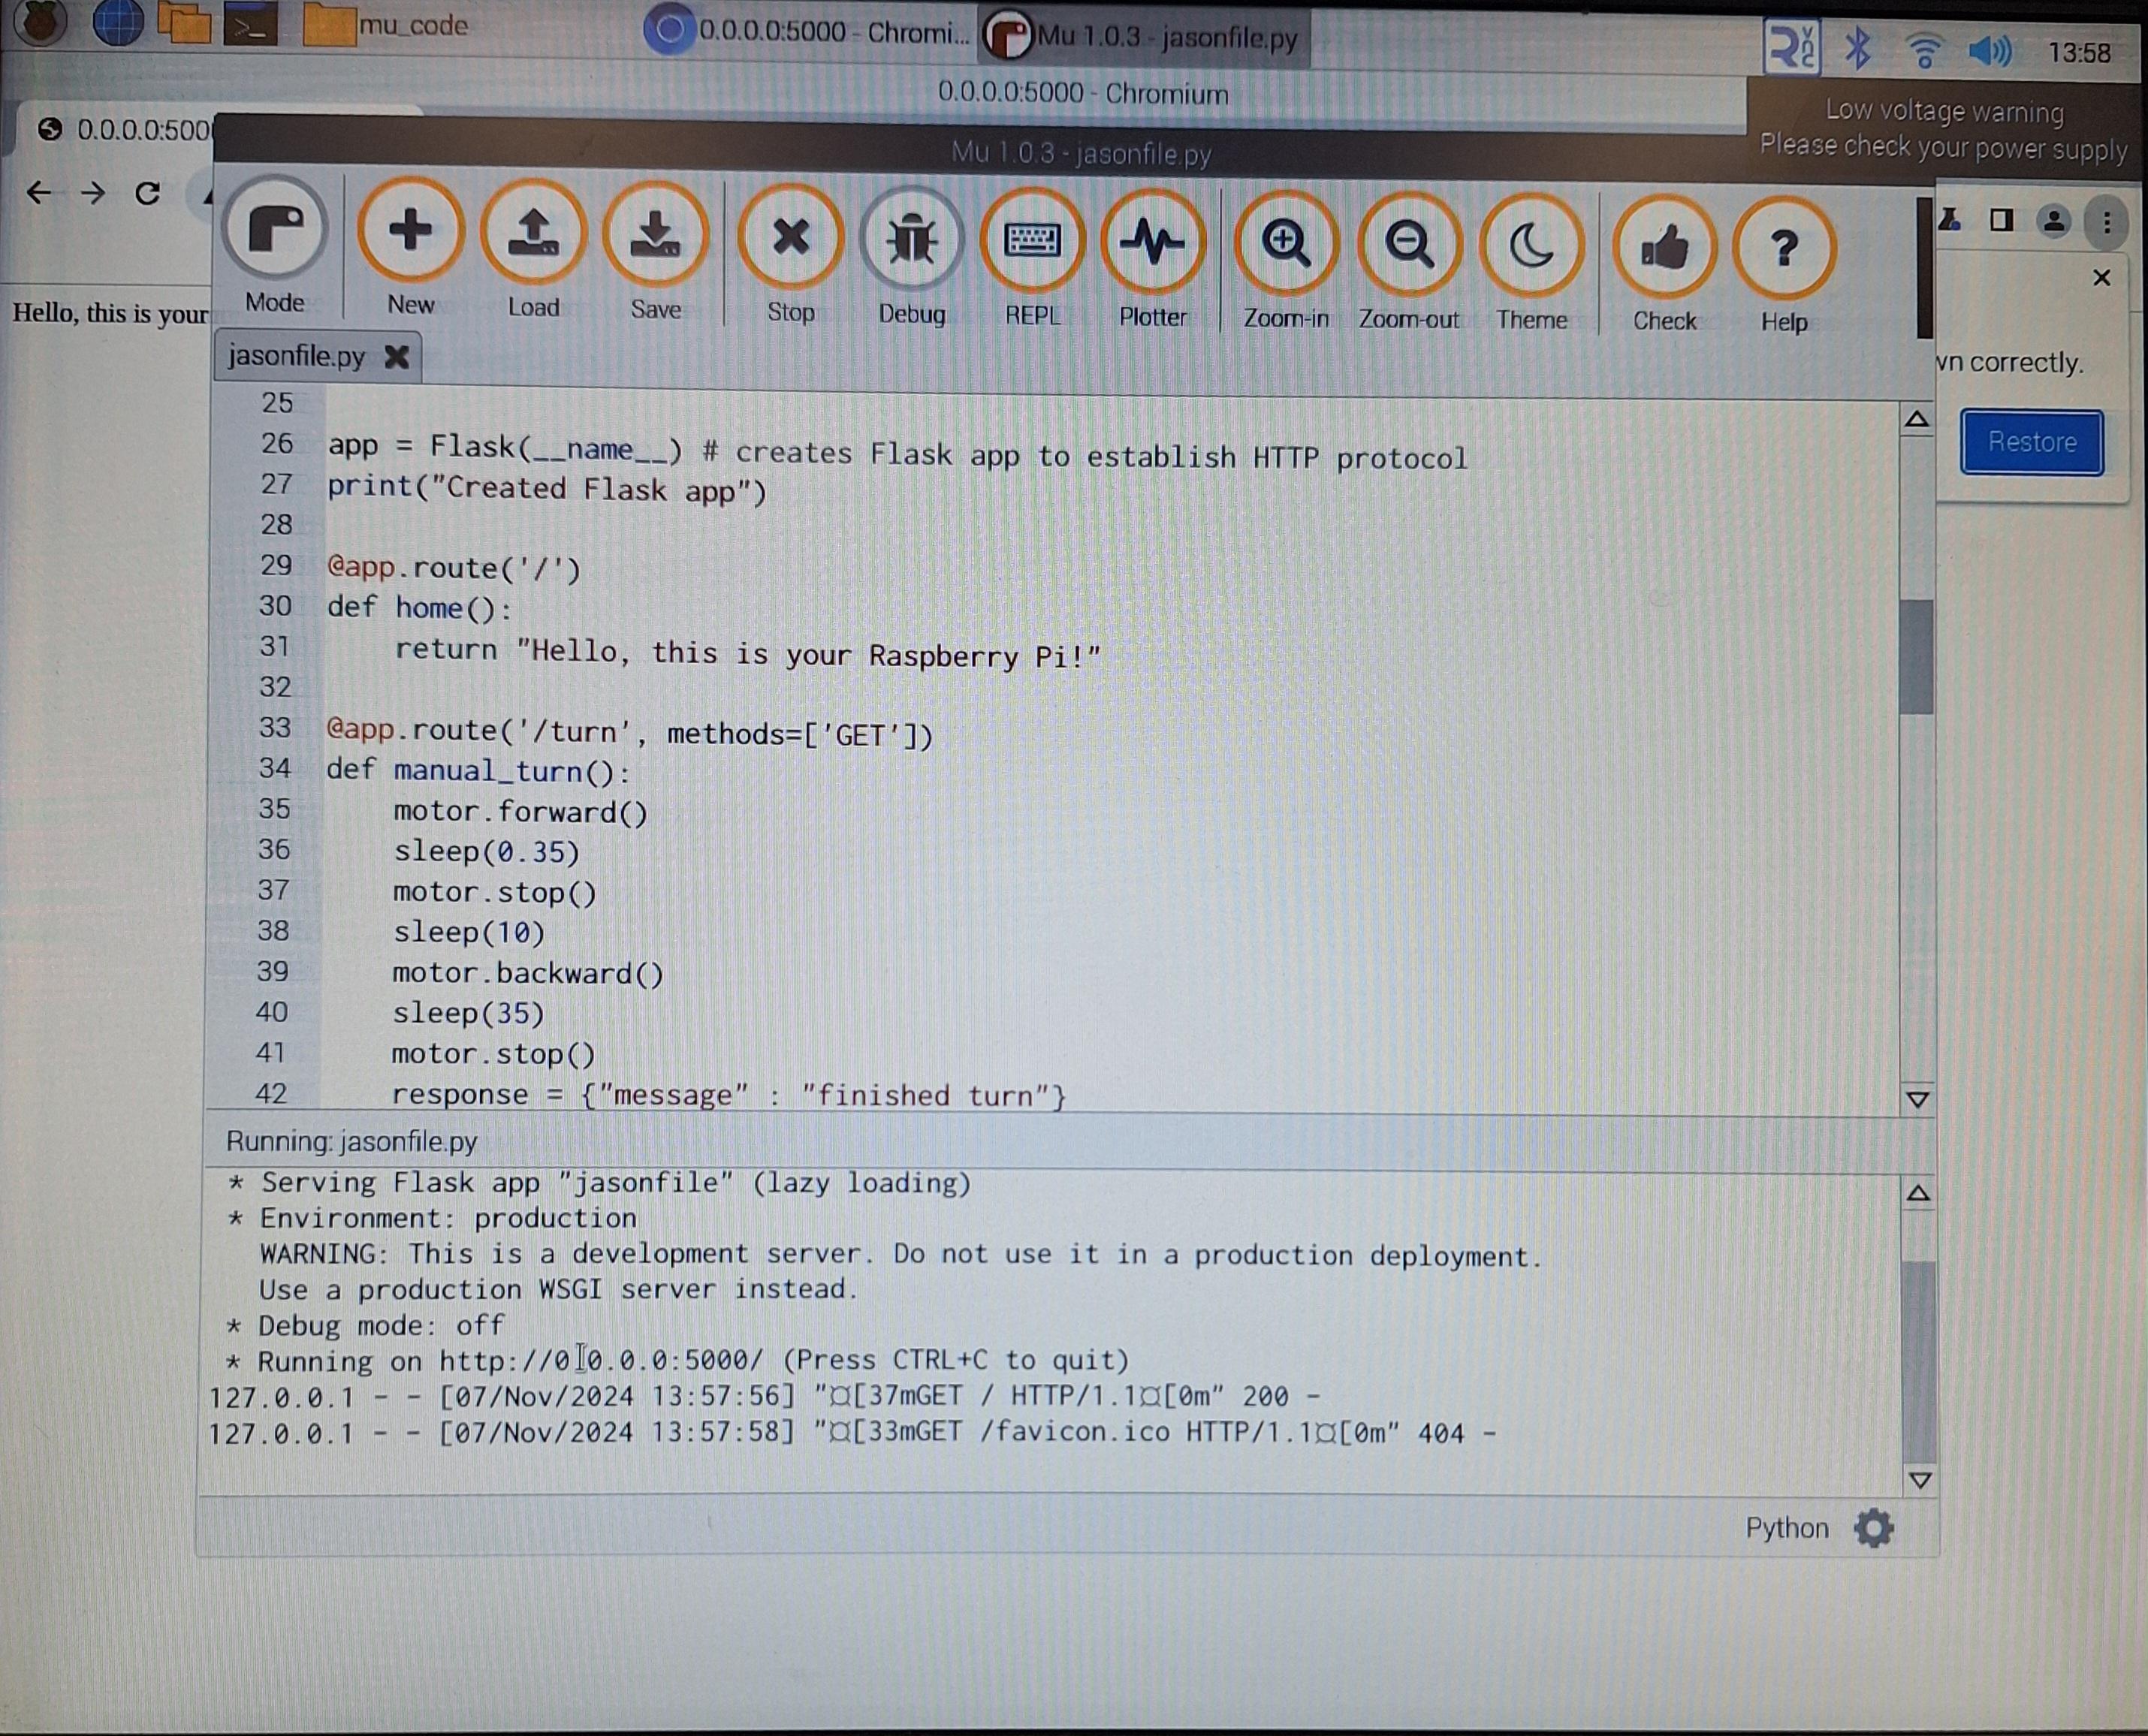
Test! Run the Python script. On a new tab on your Pi’s browser, enter the address http://0.0.0.0:5000. This should take you to the landing page. Test the other pages by adding the route name to the end of the address (e.g., test the manual turn page with http://0.0.0.0:5000/turn). On other devices, use the Raspberry Pi’s IP address in place of 0.0.0.0 in the address. You can obtain the Raspberry Pi’s address by clicking on the RealVNC icon on the top right corner of the screen. If the RealVNC icon does not exist, open a new terminal window and enter the ifconfig command. The inet parameter on the second line displays the IP address of the board.

Android App

Android Studios is the main IDE that was used for the development of the app. 


  1. Step 1: Go to https://developer.android.com/studio 
  2. Download a suitable version of Android Studios (This app was developed with LadyBug, the current version of Android Studios when this was written.)
  3. Step 3: Go through the setup process (Make sure to download both Studios and Emulator)
  4. Step 4:
  5. When creating the project, there will be several options to select from. 
  6. Make sure to choose Empty Views Activity, not Empty Activity, because Empty Views Activity gives the option to choose languages while Empty Activity does not.
  7. Make sure Java is selected as the language and Kotlin DSL is selected as the build
  8. The Minimum SDK is based on preference but the lower the build number, the more likely an android device will support it. This is because each generation of android has a new SDK, so the older the chosen SDK, the more phones that will support it, e.g, 5.1 is supported by 99.7% while 10.0 is supported by 81.2% of phones. Regardless, Android Studios will say what percentage of phones are supported right below the selection box for the SDK. 
  9. Step 5: Find all the files that match with the names below and copy paste the code
  10. Step 6: Test the app with an actual android device; See below document for how to connect an android device
  11. https://developer.android.com/studio/run/device


libs.versions.toml:

The libs.versons.toml needs to have the okhttp library added to it’s [libraries] section for the entire app to sync and download the library

[versions]
agp = "8.7.1"
junit = "4.13.2"
junitVersion = "1.2.1"
espressoCore = "3.6.1"
appcompat = "1.7.0"
material = "1.12.0"
activity = "1.9.3"
constraintlayout = "2.1.4"
okhttp = "4.9.1" # Specify the version here

[libraries]#all the important libraries needed for the application
junit = { group = "junit", name = "junit", version.ref = "junit" }
ext-junit = { group = "androidx.test.ext", name = "junit", version.ref = "junitVersion" }
espresso-core = { group = "androidx.test.espresso", name = "espresso-core", version.ref = "espressoCore" }
appcompat = { group = "androidx.appcompat", name = "appcompat", version.ref = "appcompat" }
material = { group = "com.google.android.material", name = "material", version.ref = "material" }
activity = { group = "androidx.activity", name = "activity", version.ref = "activity" }
constraintlayout = { group = "androidx.constraintlayout", name = "constraintlayout", version.ref = "constraintlayout" }
okhttp = { group = "com.squareup.okhttp3", name = "okhttp", version.ref = "okhttp" } //okhttp is the main library that allows for the http connection to be poassible

[plugins] 
android-application = { id = "com.android.application", version.ref = "agp" }

Build.gradle.kts (app)
The okhttp library needs to be implemented under the dependencies section of the Build.gradle.kts file for the app to download and validate the okhttp library. 
plugins {
   alias(libs.plugins.android.application)
}

android { 
   namespace = "com.example.myapplication"
   compileSdk = 34

   defaultConfig {
       applicationId = "com.example.myapplication"
       minSdk = 24
       targetSdk = 34
       versionCode = 1
       versionName = "1.0"

       testInstrumentationRunner = "androidx.test.runner.AndroidJUnitRunner"
   }

   buildTypes {
       release {
           isMinifyEnabled = false
           proguardFiles(
               getDefaultProguardFile("proguard-android-optimize.txt"),
               "proguard-rules.pro"
           )
       }
   }
   compileOptions {
       sourceCompatibility = JavaVersion.VERSION_11
       targetCompatibility = JavaVersion.VERSION_11
   }
}

dependencies { //importing and downloading the libraries
   implementation(libs.appcompat)
   implementation(libs.okhttp) //okhttp
   implementation(libs.material)
   implementation(libs.activity)
   implementation(libs.constraintlayout)
   testImplementation(libs.junit)
   androidTestImplementation(libs.ext.junit)
   androidTestImplementation(libs.espresso.core)
}


AndroidManifest.xml:

The line “<uses-permission android:name="android.permission.INTERNET" />” needs to be added to the AndroidManifest.xml to give permission and allow the app to use the internet. 

<?xml version="1.0" encoding="utf-8"?>
<manifest xmlns:android="http://schemas.android.com/apk/res/android"
   xmlns:tools="http://schemas.android.com/tools">

   <uses-permission android:name="android.permission.INTERNET" /> 

   <application
       android:allowBackup="true"
       android:dataExtractionRules="@xml/data_extraction_rules"
       android:fullBackupContent="@xml/backup_rules"
       android:icon="@mipmap/ic_launcher"
       android:label="@string/app_name"
       android:roundIcon="@mipmap/ic_launcher_round"
       android:supportsRtl="true"
       android:theme="@style/Theme.MyApplication"
       android:usesCleartextTraffic="true"
       tools:targetApi="31">
       <activity
           android:name=".ManualTurn"
           android:exported="false" />
       <activity
           android:name=".Data"
           android:exported="false" />
       <activity
           android:name=".MainActivity"
           android:exported="true">
           <intent-filter>
               <action android:name="android.intent.action.MAIN" />

               <category android:name="android.intent.category.LAUNCHER" />
           </intent-filter>
       </activity>
   </application>

</manifest>


MainActivity.java


The main activity section is for the app and where everything that is related to the app is coded and designed. 

package com.example.myapplication;


import android.content.Intent;
import android.os.Bundle;
import android.util.Log;
import android.view.View;
import android.widget.Button;
import android.widget.TextView;

import androidx.appcompat.app.AppCompatActivity;
//Imported all of the okhttp classes
import okhttp3.Call;
import okhttp3.Callback;
import okhttp3.OkHttpClient;
import okhttp3.Request;
import okhttp3.Response;

import java.io.IOException;

public class MainActivity extends AppCompatActivity {

   public TextView lblConnected;
   public TextView lblTitle;
   public Button btnData;
   public Button btnManualTurn;
   private String url;

   @Override
   protected void onCreate(Bundle savedInstanceState) {
       super.onCreate(savedInstanceState);
       setContentView(R.layout.activity_main);

       // Initializing elements
       lblConnected = findViewById(R.id.lbl_connected_main);
       lblTitle = findViewById(R.id.lbl_title_main);
       btnData = findViewById(R.id.btn_to_data_main);
       btnManualTurn = findViewById(R.id.btn_to_manual_turn_main);

       // URL of the Flask server
       url = "http://10.199.218.124:5000"; // Pi IP and port

       // Perform network request
       fetchDataFromFlaskServer(url);

       // Switch to Data Activity
       btnData.setOnClickListener(new View.OnClickListener() {
           @Override
           public void onClick(View view) {
               System.out.println("Set data activity");
               Intent MainToData = new Intent(MainActivity.this, Data.class);
               startActivity(MainToData);
           }
       }); //end of switch to data activity

       // Switch to Manual Turn Activity
       btnManualTurn.setOnClickListener(new View.OnClickListener() {
           @Override
           public void onClick(View view) {
               System.out.println("Set manual turn activity");
               Intent MainToManualTurn = new Intent(MainActivity.this, ManualTurn.class);
               startActivity(MainToManualTurn);
           }
       }); //end of switch to manual turn activity

   } //end of onCreate

   // Function to perform the network request to the Flask server
   private void fetchDataFromFlaskServer(String url) {
       OkHttpClient client = new OkHttpClient();

       Request request = new Request.Builder()
               .url(url)
               .build();

       client.newCall(request).enqueue(new Callback() {
           @Override
           public void onFailure(Call call, IOException e) {
               Log.e("MainActivity", "Failed to fetch data: " + e.getMessage());
               runOnUiThread(() -> lblConnected.setText("Failed to connect"));
           }

           @Override
           public void onResponse(Call call, Response response) throws IOException {
               if (response.isSuccessful()) {
                   final String responseData = response.body().string();
                   runOnUiThread(() -> lblConnected.setText(responseData));
               } else {
                   Log.e("MainActivity", "Error: " + response.message());
                   runOnUiThread(() -> lblConnected.setText("Error: " + response.message()));
               }
           }
       }); //end of Flask server

   }
}


activity_main.xml / activity_manual_turn.xml / activity_data.xml

The app itself and all of the ui and gui designs are all in this file. There is both a code and an actual preview section for the activity xml file. 

<?xml version="1.0" encoding="utf-8"?>
<androidx.constraintlayout.widget.ConstraintLayout xmlns:android="http://schemas.android.com/apk/res/android"
   xmlns:app="http://schemas.android.com/apk/res-auto"
   xmlns:tools="http://schemas.android.com/tools"
   android:id="@+id/main"
   android:layout_width="match_parent"
   android:layout_height="match_parent"
   tools:context=".MainActivity">

   <TextView
       android:id="@+id/lbl_title_main"
       android:layout_width="wrap_content"
       android:layout_height="wrap_content"
       android:fontFamily="serif-monospace"
       android:text="Candy Defense Corp. LLC"
       android:textAlignment="center"
       android:textColor="#F55F20"
       android:textSize="42sp"
       android:textStyle="bold"
       app:layout_constraintBottom_toBottomOf="parent"
       app:layout_constraintEnd_toEndOf="parent"
       app:layout_constraintHorizontal_bias="0.0"
       app:layout_constraintStart_toStartOf="parent"
       app:layout_constraintTop_toTopOf="parent"
       app:layout_constraintVertical_bias="0.196" />

   <TextView
       android:id="@+id/lbl_connected_main"
       android:layout_width="wrap_content"
       android:layout_height="wrap_content"
       android:text="Connection status"
       android:textColor="#8B4000"
       android:textSize="18sp"
       app:layout_constraintBottom_toBottomOf="parent"
       app:layout_constraintEnd_toEndOf="parent"
       app:layout_constraintStart_toStartOf="parent"
       app:layout_constraintTop_toTopOf="parent"
       app:layout_constraintVertical_bias="0.878" />

   <Button
       android:id="@+id/btn_to_data_main"
       android:layout_width="wrap_content"
       android:layout_height="wrap_content"
       android:backgroundTint="#F55F20"
       android:text="Data"
       app:layout_constraintBottom_toBottomOf="parent"
       app:layout_constraintEnd_toEndOf="parent"
       app:layout_constraintHorizontal_bias="0.498"
       app:layout_constraintStart_toStartOf="parent"
       app:layout_constraintTop_toTopOf="parent"
       app:layout_constraintVertical_bias="0.448" />

   <Button
       android:id="@+id/btn_to_manual_turn_main"
       android:layout_width="wrap_content"
       android:layout_height="wrap_content"
       android:backgroundTint="#F55F20"
       android:text="Manual Turn"
       app:layout_constraintBottom_toBottomOf="parent"
       app:layout_constraintEnd_toEndOf="parent"
       app:layout_constraintStart_toStartOf="parent"
       app:layout_constraintTop_toTopOf="parent"
       app:layout_constraintVertical_bias="0.604" />


   <ImageView
       android:id="@+id/img_bats_left_main"
       android:layout_width="113dp"
       android:layout_height="157dp"
       app:layout_constraintBottom_toBottomOf="parent"
       app:layout_constraintEnd_toEndOf="parent"
       app:layout_constraintHorizontal_bias="0.053"
       app:layout_constraintStart_toStartOf="parent"
       app:layout_constraintTop_toTopOf="parent"
       app:layout_constraintVertical_bias="0.404"
       app:srcCompat="@drawable/bats_col2" />

   <ImageView
       android:id="@+id/img_bats_left_main5"
       android:layout_width="113dp"
       android:layout_height="157dp"
       app:layout_constraintBottom_toBottomOf="parent"
       app:layout_constraintEnd_toEndOf="parent"
       app:layout_constraintHorizontal_bias="0.946"
       app:layout_constraintStart_toStartOf="parent"
       app:layout_constraintTop_toTopOf="parent"
       app:layout_constraintVertical_bias="0.404"
       app:srcCompat="@drawable/bats_col2_rev" />

   <ImageView
       android:id="@+id/img_bats_left_main3"
       android:layout_width="113dp"
       android:layout_height="157dp"
       app:layout_constraintBottom_toBottomOf="parent"
       app:layout_constraintEnd_toEndOf="parent"
       app:layout_constraintHorizontal_bias="0.053"
       app:layout_constraintStart_toStartOf="parent"
       app:layout_constraintTop_toTopOf="parent"
       app:layout_constraintVertical_bias="0.604"
       app:srcCompat="@drawable/bats_col2_rev" />

   <ImageView
       android:id="@+id/img_bats_left_main6"
       android:layout_width="113dp"
       android:layout_height="157dp"
       app:layout_constraintBottom_toBottomOf="parent"
       app:layout_constraintEnd_toEndOf="parent"
       app:layout_constraintHorizontal_bias="0.946"
       app:layout_constraintStart_toStartOf="parent"
       app:layout_constraintTop_toTopOf="parent"
       app:layout_constraintVertical_bias="0.604"
       app:srcCompat="@drawable/bats_col2" />

   <ImageView
       android:id="@+id/img_bats_left_main4"
       android:layout_width="113dp"
       android:layout_height="157dp"
       app:layout_constraintBottom_toBottomOf="parent"
       app:layout_constraintEnd_toEndOf="parent"
       app:layout_constraintHorizontal_bias="0.053"
       app:layout_constraintStart_toStartOf="parent"
       app:layout_constraintTop_toTopOf="parent"
       app:layout_constraintVertical_bias="0.79"
       app:srcCompat="@drawable/bats_col2" />

   <ImageView
       android:id="@+id/img_bats_left_main7"
       android:layout_width="113dp"
       android:layout_height="157dp"
       app:layout_constraintBottom_toBottomOf="parent"
       app:layout_constraintEnd_toEndOf="parent"
       app:layout_constraintHorizontal_bias="0.946"
       app:layout_constraintStart_toStartOf="parent"
       app:layout_constraintTop_toTopOf="parent"
       app:layout_constraintVertical_bias="0.803"
       app:srcCompat="@drawable/bats_col2_rev" />

</androidx.constraintlayout.widget.ConstraintLayout>


activity_manual_turn.xml

<?xml version="1.0" encoding="utf-8"?>
<androidx.constraintlayout.widget.ConstraintLayout xmlns:android="http://schemas.android.com/apk/res/android"
   xmlns:app="http://schemas.android.com/apk/res-auto"
   xmlns:tools="http://schemas.android.com/tools"
   android:id="@+id/main"
   android:layout_width="match_parent"
   android:layout_height="match_parent"
   tools:context=".ManualTurn">

   <Button
       android:id="@+id/btn_to_main_manual_turn"
       android:layout_width="wrap_content"
       android:layout_height="wrap_content"
       android:backgroundTint="#F55F20"
       android:text="Main"
       app:layout_constraintBottom_toBottomOf="parent"
       app:layout_constraintEnd_toEndOf="parent"
       app:layout_constraintHorizontal_bias="0.95"
       app:layout_constraintStart_toStartOf="parent"
       app:layout_constraintTop_toTopOf="parent"
       app:layout_constraintVertical_bias="0.976" />

   <TextView
       android:id="@+id/lbl_info_manual_turn"
       android:layout_width="318dp"
       android:layout_height="49dp"
       android:text="Press the button to manually start the lid opening and closing mechanisms."
       android:textAlignment="center"
       android:textColor="#8B4000"
       android:textSize="16sp"
       app:layout_constraintBottom_toBottomOf="parent"
       app:layout_constraintEnd_toEndOf="parent"
       app:layout_constraintHorizontal_bias="0.494"
       app:layout_constraintStart_toStartOf="parent"
       app:layout_constraintTop_toTopOf="parent"
       app:layout_constraintVertical_bias="0.282" />

   <TextView
       android:id="@+id/lbl_connected_manual_turn"
       android:layout_width="242dp"
       android:layout_height="27dp"
       android:text="Connection status"
       android:textAlignment="center"
       android:textColor="#8B4000"
       android:textSize="16sp"
       app:layout_constraintBottom_toBottomOf="parent"
       app:layout_constraintEnd_toEndOf="parent"
       app:layout_constraintHorizontal_bias="0.497"
       app:layout_constraintStart_toStartOf="parent"
       app:layout_constraintTop_toTopOf="parent"
       app:layout_constraintVertical_bias="0.714" />

   <Button
       android:id="@+id/btn_turn_manual_turn"
       android:layout_width="wrap_content"
       android:layout_height="wrap_content"
       android:backgroundTint="#F55F20"
       android:text="Turn!"
       app:layout_constraintBottom_toBottomOf="parent"
       app:layout_constraintEnd_toEndOf="parent"
       app:layout_constraintStart_toStartOf="parent"
       app:layout_constraintTop_toTopOf="parent"
       app:layout_constraintVertical_bias="0.519" />

   <ImageView
       android:id="@+id/img_bats_col_manual_turn2"
       android:layout_width="wrap_content"
       android:layout_height="wrap_content"
       app:layout_constraintBottom_toBottomOf="parent"
       app:layout_constraintEnd_toEndOf="parent"
       app:layout_constraintHorizontal_bias="0.053"
       app:layout_constraintStart_toStartOf="parent"
       app:layout_constraintTop_toTopOf="parent"
       app:layout_constraintVertical_bias="0.42"
       app:srcCompat="@drawable/bats_col2" />

   <ImageView
       android:id="@+id/img_bats_col_manual_turn"
       android:layout_width="wrap_content"
       android:layout_height="wrap_content"
       app:layout_constraintBottom_toBottomOf="parent"
       app:layout_constraintEnd_toEndOf="parent"
       app:layout_constraintHorizontal_bias="0.053"
       app:layout_constraintStart_toStartOf="parent"
       app:layout_constraintTop_toTopOf="parent"
       app:layout_constraintVertical_bias="0.609"
       app:srcCompat="@drawable/bats_col2_rev" />

   <ImageView
       android:id="@+id/img_bats_col_manual_turn5"
       android:layout_width="wrap_content"
       android:layout_height="wrap_content"
       app:layout_constraintBottom_toBottomOf="parent"
       app:layout_constraintEnd_toEndOf="parent"
       app:layout_constraintHorizontal_bias="0.946"
       app:layout_constraintStart_toStartOf="parent"
       app:layout_constraintTop_toTopOf="parent"
       app:layout_constraintVertical_bias="0.42"
       app:srcCompat="@drawable/bats_col2_rev" />

   <ImageView
       android:id="@+id/img_bats_col_manual_turn6"
       android:layout_width="wrap_content"
       android:layout_height="wrap_content"
       app:layout_constraintBottom_toBottomOf="parent"
       app:layout_constraintEnd_toEndOf="parent"
       app:layout_constraintHorizontal_bias="0.946"
       app:layout_constraintStart_toStartOf="parent"
       app:layout_constraintTop_toTopOf="parent"
       app:layout_constraintVertical_bias="0.609"
       app:srcCompat="@drawable/bats_col2" />

   <TextView
       android:id="@+id/lbl_title_manual_turn"
       android:layout_width="wrap_content"
       android:layout_height="wrap_content"
       android:fontFamily="serif-monospace"
       android:text="Manual Turn"
       android:textAlignment="center"
       android:textColor="#F55F20"
       android:textSize="42sp"
       android:textStyle="bold"
       app:layout_constraintBottom_toBottomOf="parent"
       app:layout_constraintEnd_toEndOf="parent"
       app:layout_constraintStart_toStartOf="parent"
       app:layout_constraintTop_toTopOf="parent"
       app:layout_constraintVertical_bias="0.213" />

</androidx.constraintlayout.widget.ConstraintLayout>

activity_data.xml

<?xml version="1.0" encoding="utf-8"?>
<androidx.constraintlayout.widget.ConstraintLayout xmlns:android="http://schemas.android.com/apk/res/android"
   xmlns:app="http://schemas.android.com/apk/res-auto"
   xmlns:tools="http://schemas.android.com/tools"
   android:id="@+id/main"
   android:layout_width="match_parent"
   android:layout_height="match_parent"
   tools:context=".Data"
   tools:layout_editor_absoluteX="-133dp"
   tools:layout_editor_absoluteY="0dp">

   <ImageView
       android:id="@+id/img_bats_col_manual_turn7"
       android:layout_width="wrap_content"
       android:layout_height="wrap_content"
       app:layout_constraintBottom_toBottomOf="parent"
       app:layout_constraintEnd_toEndOf="parent"
       app:layout_constraintHorizontal_bias="0.087"
       app:layout_constraintStart_toStartOf="parent"
       app:layout_constraintTop_toTopOf="parent"
       app:layout_constraintVertical_bias="0.758"
       app:srcCompat="@drawable/bats_col2" />

   <ImageView
       android:id="@+id/img_bats_col_manual_turn10"
       android:layout_width="wrap_content"
       android:layout_height="wrap_content"
       app:layout_constraintBottom_toBottomOf="parent"
       app:layout_constraintEnd_toEndOf="parent"
       app:layout_constraintHorizontal_bias="0.946"
       app:layout_constraintStart_toStartOf="parent"
       app:layout_constraintTop_toTopOf="parent"
       app:layout_constraintVertical_bias="0.758"
       app:srcCompat="@drawable/bats_col2" />

   <ImageView
       android:id="@+id/img_bats_col_manual_turn9"
       android:layout_width="wrap_content"
       android:layout_height="wrap_content"
       app:layout_constraintBottom_toBottomOf="parent"
       app:layout_constraintEnd_toEndOf="parent"
       app:layout_constraintHorizontal_bias="0.52"
       app:layout_constraintStart_toStartOf="parent"
       app:layout_constraintTop_toTopOf="parent"
       app:layout_constraintVertical_bias="0.758"
       app:srcCompat="@drawable/bats_col2" />

   <Button
       android:id="@+id/btn_to_main_data"
       android:layout_width="wrap_content"
       android:layout_height="wrap_content"
       android:backgroundTint="#F55F20"
       android:text="Main"
       app:layout_constraintBottom_toBottomOf="parent"
       app:layout_constraintEnd_toEndOf="parent"
       app:layout_constraintHorizontal_bias="0.95"
       app:layout_constraintStart_toStartOf="parent"
       app:layout_constraintTop_toTopOf="parent"
       app:layout_constraintVertical_bias="0.913" />

   <TextView
       android:id="@+id/lbl_title_data"
       android:layout_width="wrap_content"
       android:layout_height="wrap_content"
       android:fontFamily="serif-monospace"
       android:text="Data"
       android:textAlignment="center"
       android:textColor="#F55F20"
       android:textSize="42sp"
       android:textStyle="bold"
       app:layout_constraintBottom_toBottomOf="parent"
       app:layout_constraintEnd_toEndOf="parent"
       app:layout_constraintStart_toStartOf="parent"
       app:layout_constraintTop_toTopOf="parent"
       app:layout_constraintVertical_bias="0.194" />

   <TextView
       android:id="@+id/lbl_connected_data"
       android:layout_width="247dp"
       android:layout_height="212dp"
       android:text="Data will appear here."
       android:textAlignment="center"
       android:textColor="#8B4000"
       android:textSize="16sp"
       app:layout_constraintBottom_toBottomOf="parent"
       app:layout_constraintEnd_toEndOf="parent"
       app:layout_constraintStart_toStartOf="parent"
       app:layout_constraintTop_toTopOf="parent"
       app:layout_constraintVertical_bias="0.377" />
</androidx.constraintlayout.widget.ConstraintLayout>


Decoration (Optional)

Although this step is optional, we highly recommend painting the bucket, as it provides an additional flair to the project and makes the experience of interacting with the Candy Defense Bucket more enjoyable for trick-or-treaters. The method we provide below is just one way to customize your bucket, so feel free to make your own ghoulish creation!

Creating the viewing window.  The first step is to create a hole in the bucket to create the viewing window, allowing prospective trick-or-treaters to preview the plethora of positively pleasant treats inside. There are a number of ways to create this hole, depending on the strength of the walls of your bucket. The method we used was to carefully punch out a hole in the front of the bucket, roughly 2.5 inches in diameter, as the walls of our bucket were relatively thin. Although it is difficult to control the shape of the hole, carefully fracturing parts of the bucket using pressure from one’s hands creates a jagged, natural look. If the walls of your bucket are thicker, consider drilling a hole using a hole saw with your desired diameter for the viewing window. It is crucial to drill in a slow and careful manner, as rapid oscillations in the plastic can cause fractures. If you would like to replicate the uneven edge to give the viewing window a more natural look, use files and sandpaper to remove excess material.  

Painting the components. Next, paint the Motor, Bucket Lid, Raspberry Pi, and Sensor Attachment and Bucket in a color of your choosing using acrylic paint. For this step, we used red acrylic paint and used multiple layers to ensure that the outside of the bucket was properly covered with an even coat of paint. Additionally, you can paint the fangs and horns any color; however, we chose to leave the fangs white and paint the horns black.

Adding the final touches. Using a hot glue gun, attach the fangs and horns at the desired locations on the bucket and bucket lid. Then, peel off the backing of several googly eyes and place them as desired. If the sticky googly eye base is not strong enough, consider using additional hot glue to fortify the connection (as we can’t add nerves and connective tissue to the bucket). To add the clear screen to the viewing window, cut out a square sheet of clear plastic film to roughly the dimensions of the hole and adhere it to the inside of the bucket using hot glue.


Assembly

Completing the main assembly. To assemble the bucket, we will be using hot glue for most of the assembly process. The only exception to this is the Bucket Lid Attachment, which requires E6000 or a similar superglue to secure it to the edge of the bucket lid. Make sure to allow enough time for the super glue to cure. First, glue the Raspberry Pi Attachment to the opposite side of the viewing window on the bottom edge of the bucket. Then, use the two gold screws to attach the VEX 393 motor to the Motor Attachment with the wires facing toward the bottom of the bucket. Afterward, glue the Motor Attachment directly above the Raspberry Pi Attachment on the rim of the bucket. The Senor Attachment does not require glue, and instead, should be able to slide onto the top of the motor and stay firmly attached through a friction fit. To attach the wired Raspberry Pi, secure the Raspberry Pi to the Raspberry Pi Attachment with the ports on the open faces (you can use a non-permanent method of attaching the Raspberry Pi if you intend to repurpose it for a future project). The sensors can simply be slotted into their respective holes in the Sensor Attachment. Lastly, insert the 3” Steel Square Rod into the hole of the motor and slide the Bucket Lid Attachment on. The connection should be relatively tight but may require additional glue depending on the level of accuracy your 3D printer can achieve.

Finalizing the project. Add wrapping paper to the inside of the bucket, which adds some contrast to the inside of the bucket, and pour in a bag of candy. Plug your abominable creation into a power outlet, and you are ready to safely dispense buckets of candy to your neighborhood!