Hack Analog Clock to Show DATE Not Time
by Josh EJ in Circuits > Microcontrollers
1002 Views, 2 Favorites, 0 Comments
Hack Analog Clock to Show DATE Not Time

The idea for this project is to repurpose an analog wall clock to display the date instead of the time. The hour hand will display the month (1 to 12) and the minute hand will correspond to the day.
This hack involves slowing down the clock mechanism so that the minute hand only moves once a day and it takes the hour hand a whole month to move by an hour.
The Calendar Clock visually indicates how much of the year has passed by and can potentially incentivize people to plan their days and use time more effectively.
Supplies


1) Arduino Pro Mini
2) Another Arduino to be used as a programmer
3) DS1307 RTC module (Newer models like the DS3231 are more efficient and can improve battery life)
4) AA Battery.
5) Quartz wall clock
6) Wires ( Flexible Silicon wires around 20 AWG easy to work with)
7) Screwdriver set
8) Soldering Iron
9) FTDI Serial Adapter
Slow Down the Arduino to 1Mhz


The quartz clock mechanism runs on a single AA battery (around 1.5V), thus to control the clock mechanism we need to send a 1.5V signal from the Arduino Pro mini. The digital pins can send a 1.5V signal only when the Arduino pro mini supply voltage (VCC) is close to 1.5V. But by default the Atmega 328p microcontroller in the Arduino pro mini needs around 5V as its clock frequency is 16Mhz, we can make the Arduino pro mini work at 1.5V by reducing the clock frequency to 1Mhz. This also drastically reduces power consumption.
For this, we need to flash the Arduino Pro mini with a 1Mhz bootloader. This can be done by using a USB ASP programmer or by turning another Arduino into a programmer by uploading the ArduinoISP sketch.
Wire the Programmer Arduino to the Arduino Pro mini as per the image at the top.
Excerpt of 1Mhz bootloader tutorial from: https://forum.mysensors.org/topic/3018/tutorial-how-to-burn-1mhz-8mhz-bootloader-using-arduino-ide-1-6-5-r5/2
- I use this precompiled bootloader from here. It's an Optiboot with 1MHz internal clock and 9600 baud serial communication. Fuse changed to BOD disable.
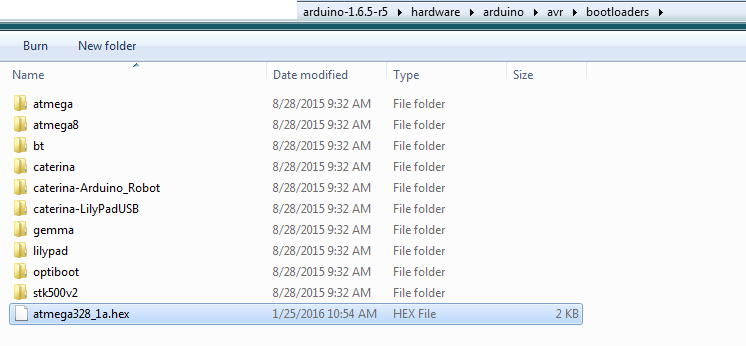
- Rename your .hex to atmega328_1a.hex
- Move it to "ARDUINO_PATH" > hardware > arduino > avr > bootloaders
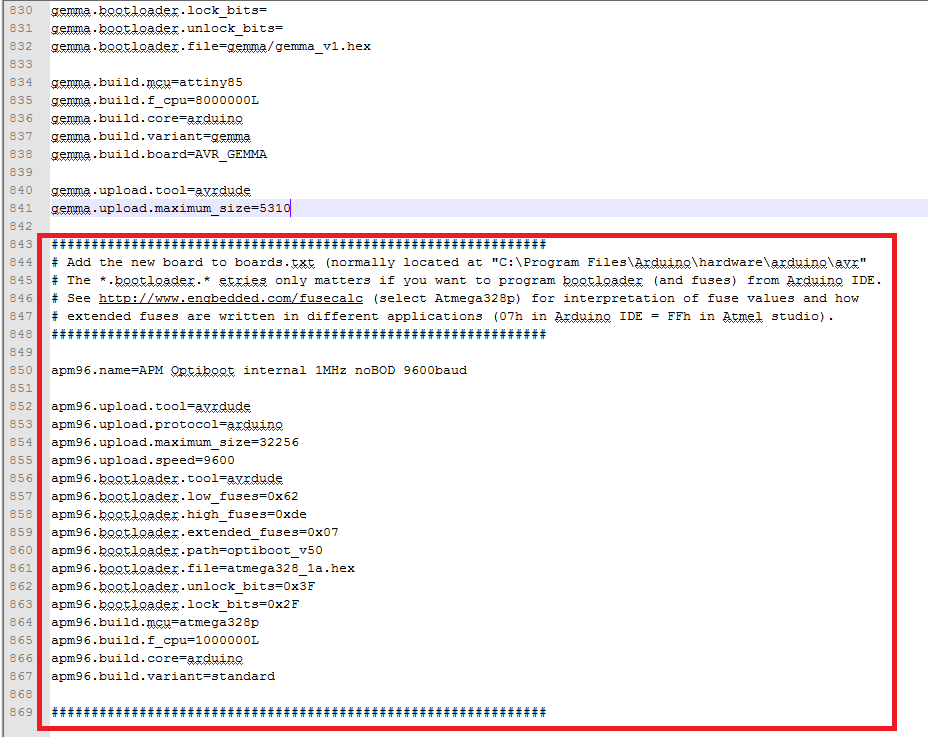
- We need to add the new board to the boards.txt file located at "ARDUINO_PATH" > hardware > arduino > avr
- Open boards.txt
- Go to this link.
- Copy the content of the link and paste it at the end of boards.txt
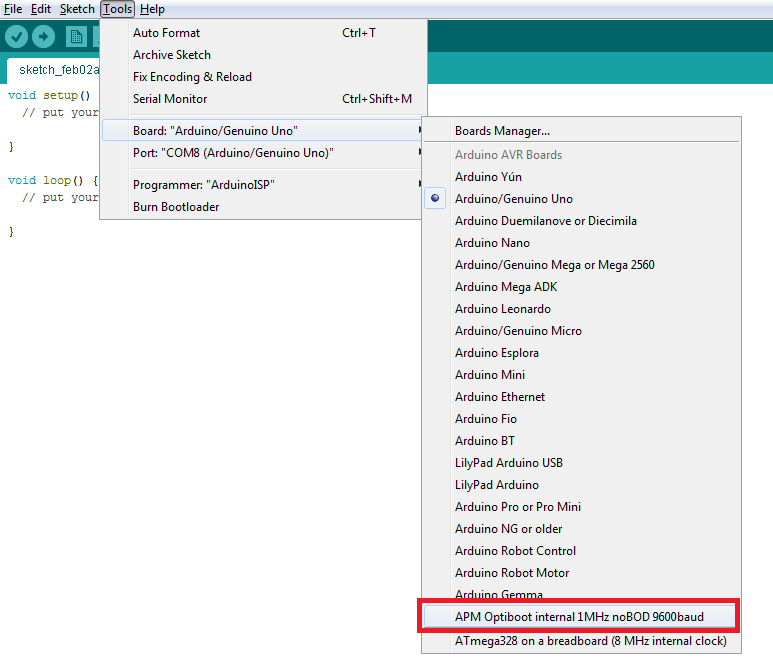
- Restart you Arduino IDE.
- You should see "APM Optiboot internal 1Mhz noBOD 9600baud" in the Tools > Board menu.
- Set the programmer to ArduinoISP.
- Once you've done this, you can burn the bootloader and upload programs onto your ATmega328p. To burn the bootloader go to Tools > Burn bootloader
For any errors while updating the bootloader: https://forum.mysensors.org/topic/3018/tutorial-how-to-burn-1mhz-8mhz-bootloader-using-arduino-ide-1-6-5-r5/2
Saving Power

Since we are running the Arduino pro mini off a single 1.5V AA battery, we need to reduce power consumption by removing components such as the voltage regulator and SMD LEDs. These can be desoldered using a soldering iron or a screwdriver can be used to break these from the board.
Wiring Things Up


Wire the Arduino Pro Mini & DS1307 RTC with the clock mechanism as per the above diagram. Note that if you still want to use the battery holder on the clock mechanism you would have to open up the mechanism and disconnect the wires from the battery holder to the PCB.
Slow Down the Clock Mechanism

The Code along with comments are attached, please download the RTClib by Adafruit from the library manager. I used Kevin Darrah's tutorial to set the Arduino to deep sleep mode. The Calendar clock should last a year and a couple of months before a AA battery needs to be changed.
In simple terms, we read the date from RTC ds1307 and if there is a change in the day then move the minute hand by setting the digital pin HIGH for a particular duration, the duration might drastically differ from the end of the month to the next month transitions.
Downloads
Customizing the Clock Face


I have added dates from 1 to 28 to the location of every even minute. 29 to 31 are placed close to each other. The Arduino code moves the needle accordingly based on the date. For example, from 28th Feb to 1st March the minute hand is programmed to move extra steps compared to the transition from 1st March to 2nd March. I also added the text for months to make things a bit more readable, for the month of February the hour hand is between hour 2 and 3. The year starts at hour 1.