CNC Machine
In this project we will scavenge parts from old PC CD-Rom(s) and build a fully working CNC machine using (basically any type of) Arduino which would run on G-Code.
For more info and Arduino and Raspberry Pi related projects go to my website https://www.neuralnetworks26.com/
You can also visit our official neural networks page at: https://www.facebook.com/Neural.Networks26/
Parts Needed
- Arduino Nano x1
- Easydrivers by Sparkfun x 3
- CD-Rom drives x 3
- Jumper Wires x 20
- Spacers and Washers
- Dc Jack Male x 1
- (5v ; 2.1 A) Power Adapter x 1
Software Needed
- XLoader
- Universal G-Code Sender
- Inkscape
- Maker CAM
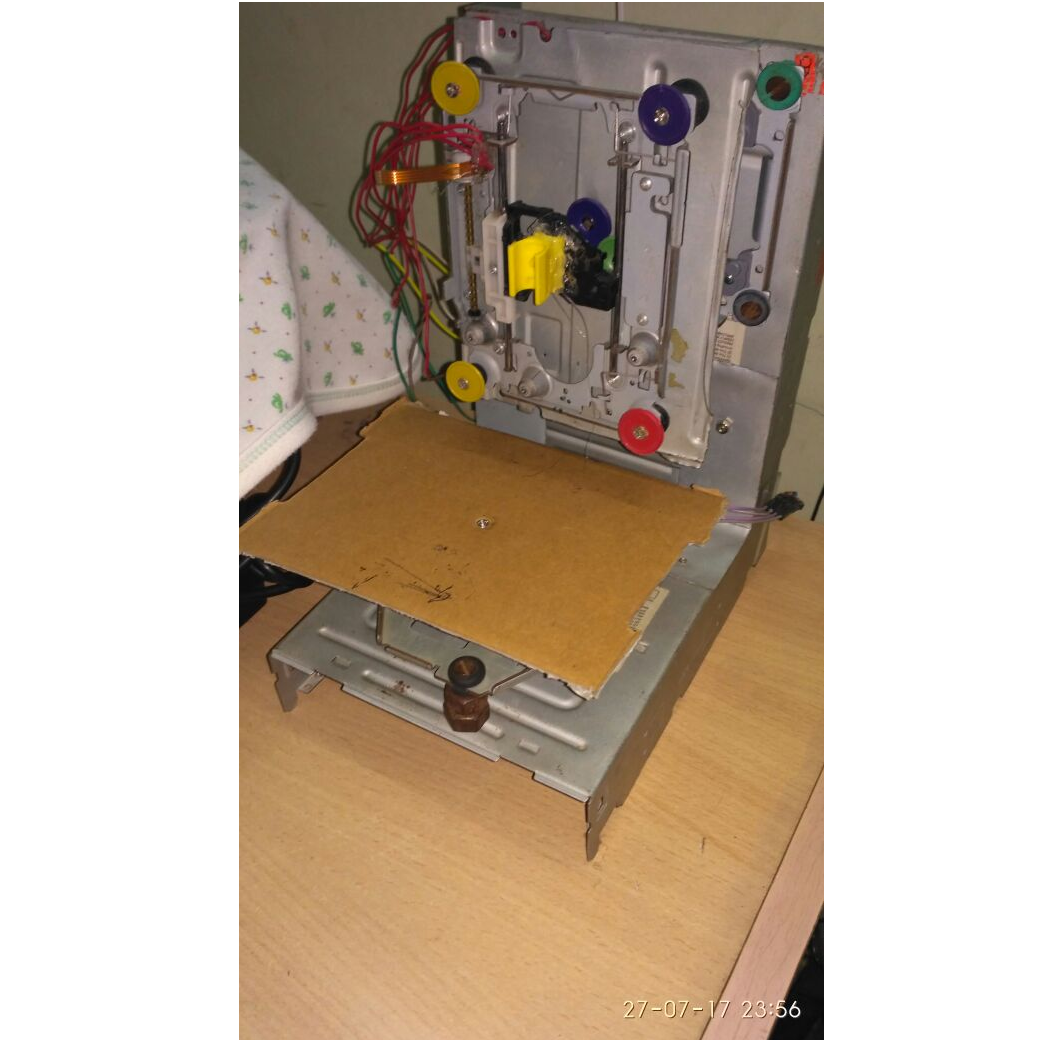
Creating the Axis
First of all you have to assemble your CD-Rom(s) so they are mutually perpendicular to each other and thus form 3 axis namely X, Y and Z.
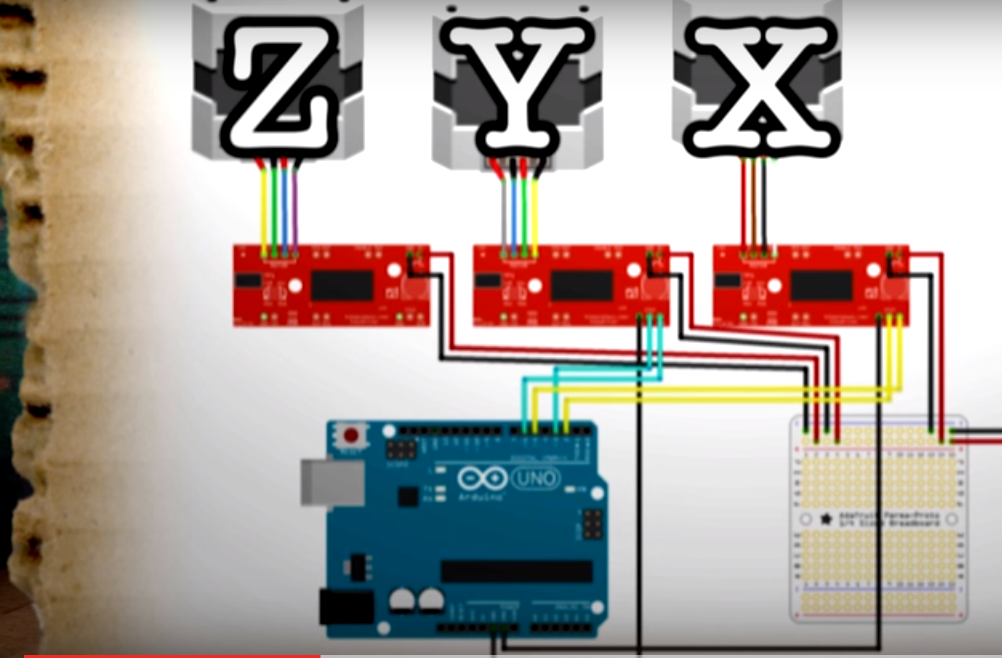
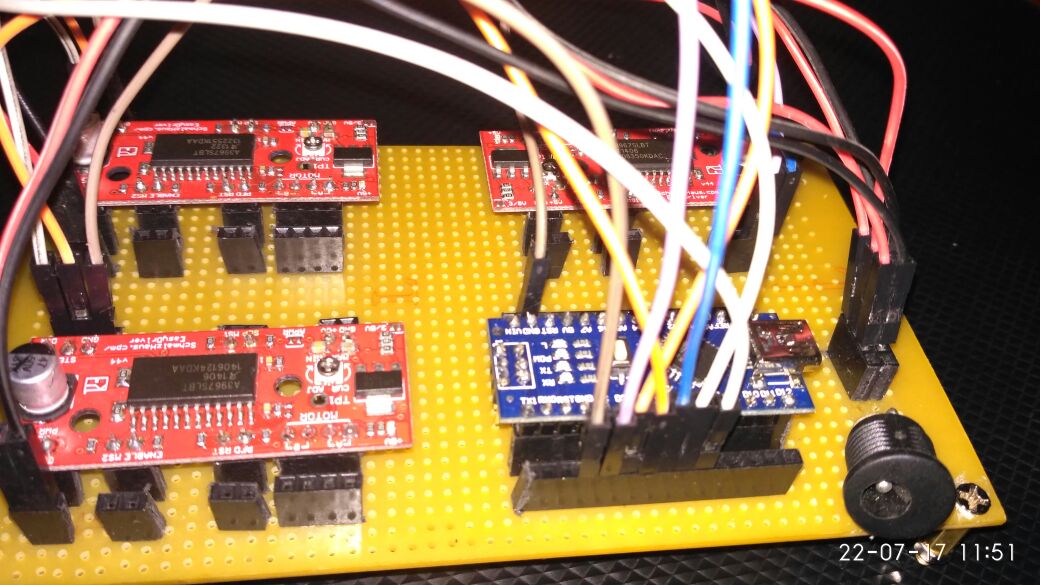
Connecting All the Components
.png)
.jpeg)
Now just follow the following circuit diagram to connect your Easydrivers, Motors and Arduino.
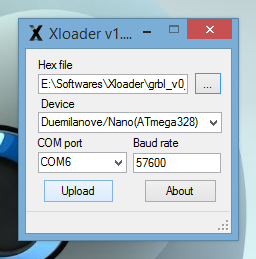
Uploading the Hex File
.png)
Next upload the given HEX file onto your Arduino using XLoader
Arduino - Universal G-code Sender
Now open Universal G-code Sender and connect your Arduino.
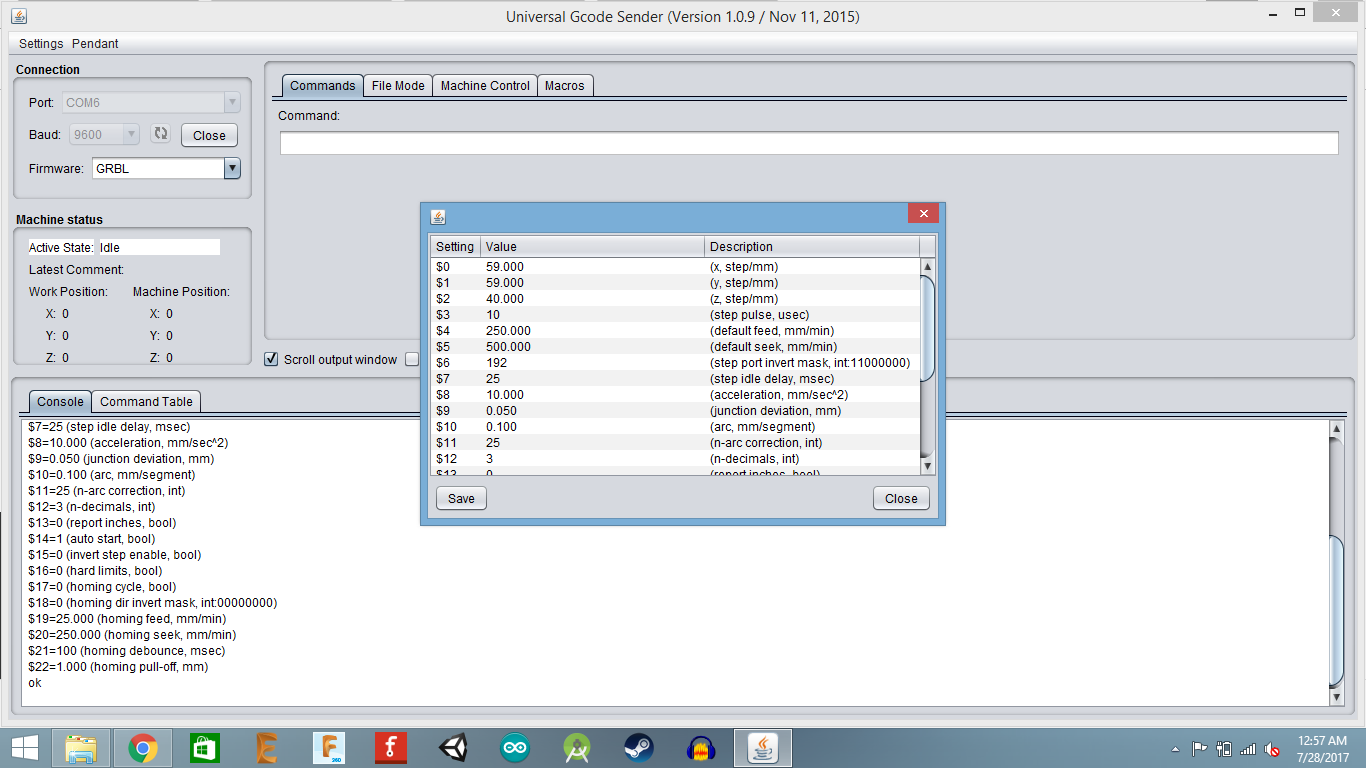
Setting the Correct X, Y, Z Step Dimensions
.png)
Now go to Settings > Firmware Settings > GRBL.
These are the X, Y and Z Step Dimensions for my machine (yours may vary).
Generating and Sending the G-Code
Now you can browse for the G-Code (I have used InkScape to generate G-Code) file and send it to the Arduino
And It's Done
Your CNC Machine should now start printing.
For a final complicated test print go to: