CD Case Mural

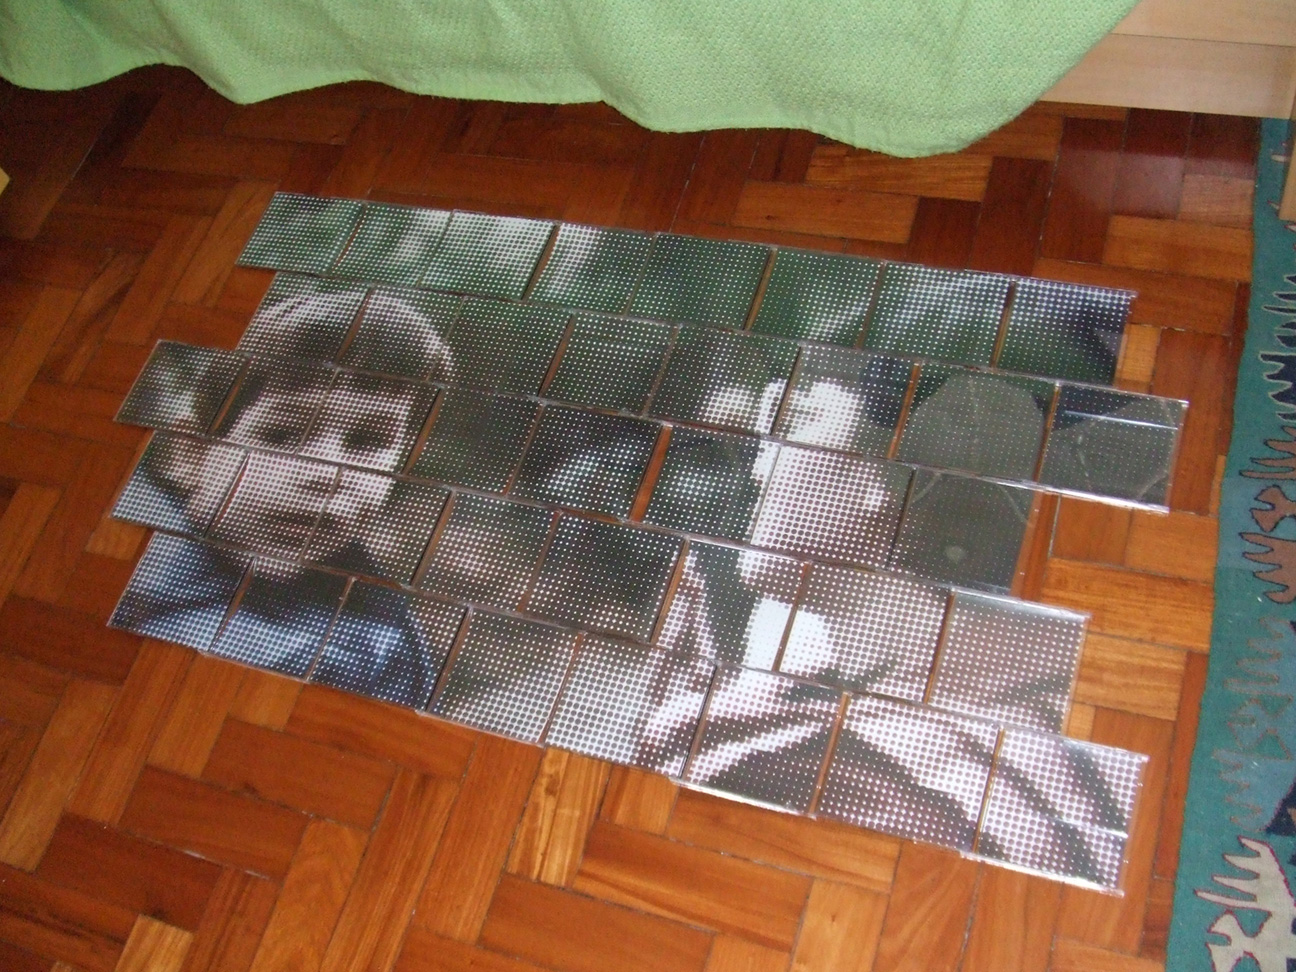
Here's a little project to decorate your wall using some of those spare jewel cases you have hanging around. It's not too expensive and looks quite interesting. It's also very versatile, you can change the image whenever it gets old for you. All you need is a little time and patience to cut everything and get all the pieces up. But I guess that's what it's all about...
Ingredients ...

Here's what you need:
- Rulers (metal works best for cutting, and if you have a long one it really helps too)
- Olfa cutter (or any x-acto cutting knife you're used to)
- Scotch tape
- Adhesive velcro
- Jewel cases (the amount depends on how big your image is)
- Image of your choice (this is what's going up on the wall)
- Rulers (metal works best for cutting, and if you have a long one it really helps too)
- Olfa cutter (or any x-acto cutting knife you're used to)
- Scotch tape
- Adhesive velcro
- Jewel cases (the amount depends on how big your image is)
- Image of your choice (this is what's going up on the wall)
Rasterbate and Print


This is actually optional. I did it to give a special reticular effect to my image, and to easily tile it across many pages.
OPTION 1 - AUTOMATIC, PC ONLY
- Visit http://arje.net/rasterbator and install the Rasterbator software. Only for PC :(
- Run your image through the program and set up how many pages you want your poster to be. It will spit out a PDF with your rasterbated image tiled across many pages.
OPTION 2 - MANUAL, MAC & PC
Another way to get the Rasterbator effect to the image is to use Adobe Illustrator and Scriptographer. This isn't as automatic as using the Rasterbator, but it can be done on a Mac.
- Download Scriptographer from http://scriptographer.org, and install
- Download the Object Raster Color script from http://scriptographer.org/scripts/raster-scripts/object-raster-color/, and copy it into your Scriptographer scripts folder
- Create a lower resolution version of your image, imagining that each pixel will become a dot
- In Illustrator, draw a 1x1px circle on the canvas, import your low-res image, select both objects and run the Object Raster Color script (Grid Size: 1, Object Scale: 100%)
- See the magic happen, delete your original image and the circle you drew and scale up the result to the size you wish.
- Create additional artboards and arrange them to cover the whole artwork, and save the file as a PDF.
--------------------------
Print out all the pages or send them to a digital bureau to get a good quality laser print.
IMPORTANT: Be sure to check the "fit to page" option when printing, to get the whole image out.
Cut & Join


- Chop off the white edges left by the print.
- Spread out the pages and join each one with scotch tape on the back.
This takes a while and requires some care and patience to line everything up.
- Spread out the pages and join each one with scotch tape on the back.
This takes a while and requires some care and patience to line everything up.
Organize the Cases


- Turn over your super poster and lay the open CD cases over it to decide how they're going to look. It doesn't have to be a traditional rectangular mural. In fact that's the beauty in this. The arrangement of the CD cases can easily match the concept of the image it's displaying, so be creative about it !
- Turn the poster over again and start marking the case panels.
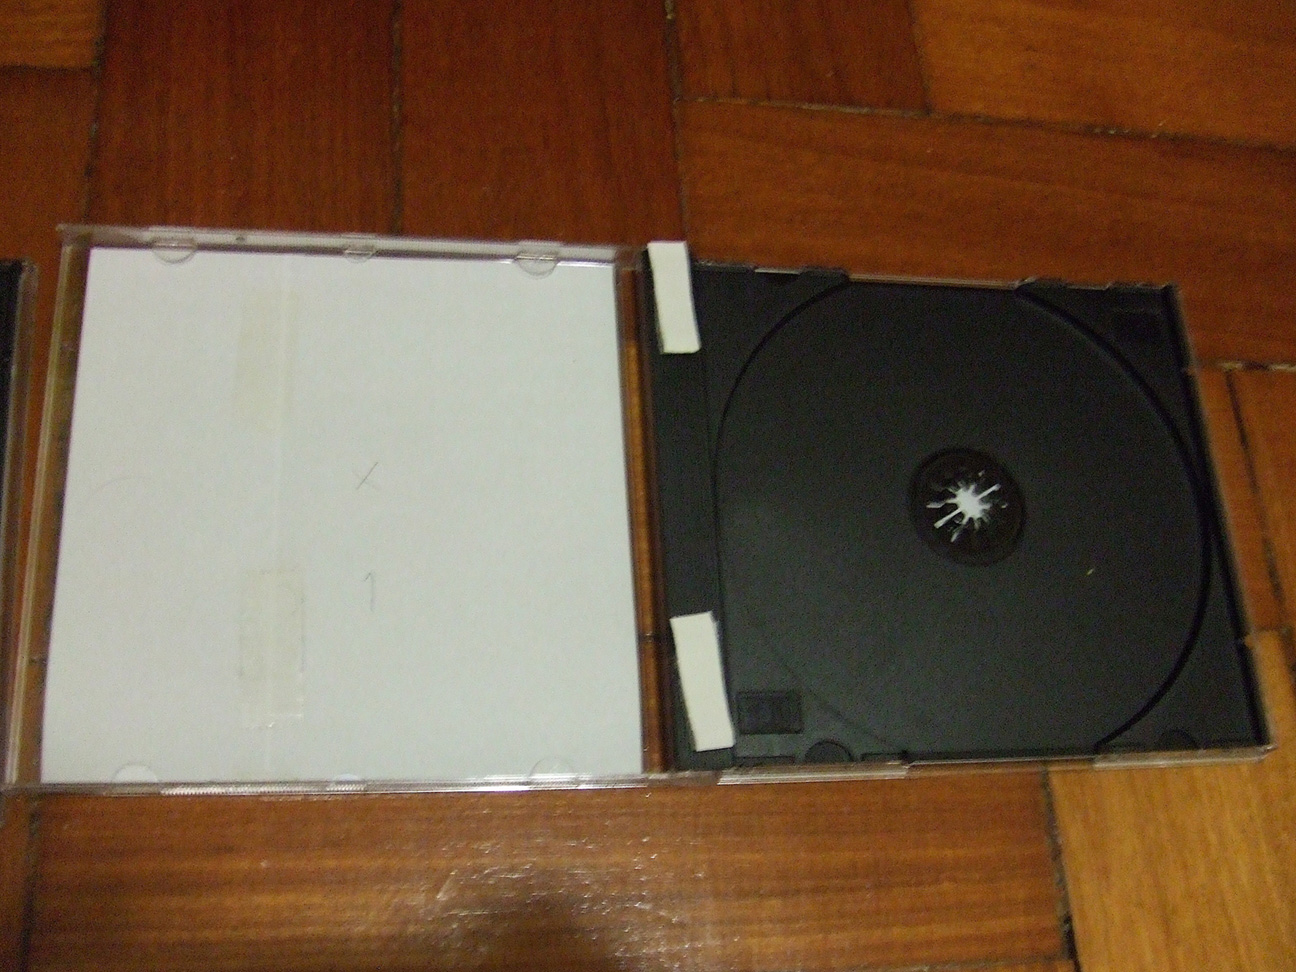
Keep it organized. The CD cover panel is slightly smaller in width than the back panel. So start drawing the horizontal strips of 4 5/8" tall and then divide them with alternating front / back sections.
The front panel is 4 7/8" wide.
The back panel is 5 3/8" wide.
To keep track of everything, I marked the front panels with an "X" and the back panels with a "Y", and then numbered them from 1 - 40 (I used 20 cases).
Chop Chop Dress


- Start by cutting the horizontal strips, then the individual panels.
- You may have to shorten the back panels a bit, to fit into the case.
- Dress up the cases with the panels. If you want, spread them on the floor to see how it's coming out.
- You may have to shorten the back panels a bit, to fit into the case.
- Dress up the cases with the panels. If you want, spread them on the floor to see how it's coming out.
On With the Velcro


- Cut off short pieces of the velcro.
- Open the cases and stick a couple of pieces to the CD spine.
- Peel off the backing from the velcro and start sticking the cases to the wall.
- Stand back and appreciate your cheap, recycled jewel case mural !
I find it easier to start with the bottom line and work my way up, using it as a base and using the paper joints as reference to line the cases up vertically.
This was my first instructable so please comment if I've left something out. My estimate for the cost of this project is about $20, but I live in Brazil, so that's how much it cost me to get the materials and the prints over here.