Butt Light

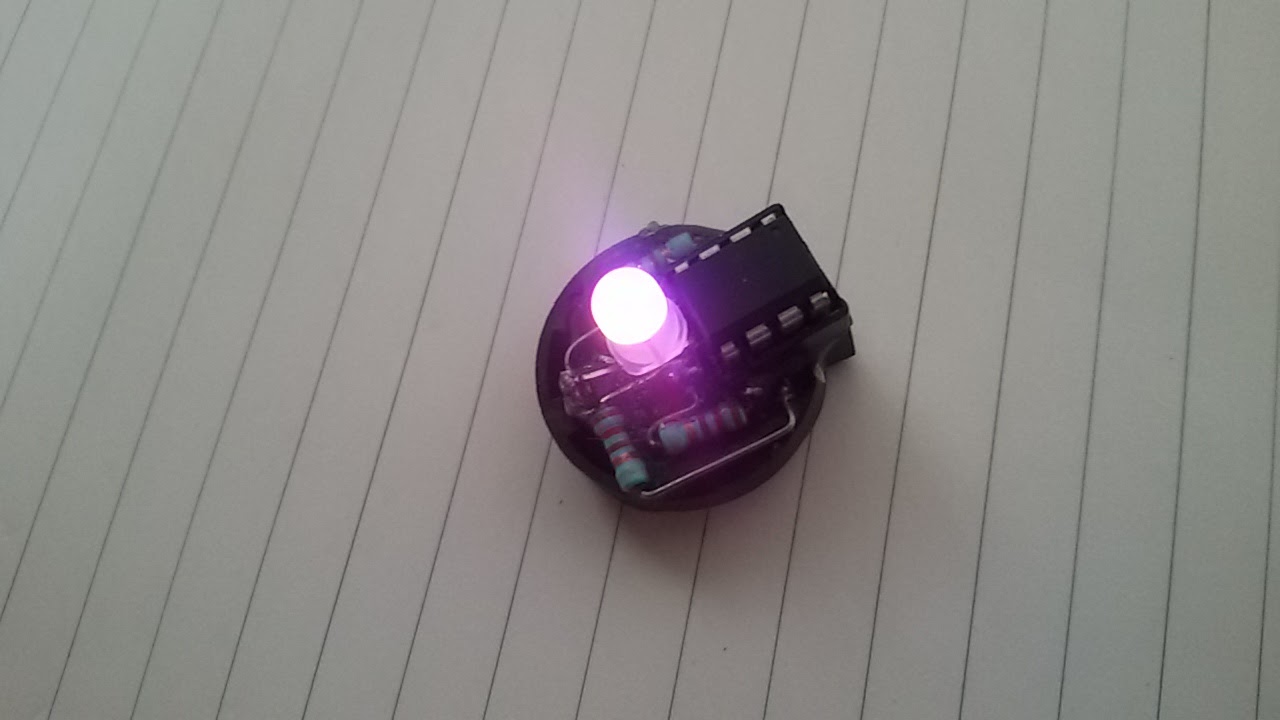
The Butt Light (yeah I know, corny), is about the most elementary piece of hardware to introduce yourself, your kids and everyone else to the wonderful world of micro-controllers. The entire project has no input and only one output: an RGB LED. The few parts are all glued on a button cell clip. You can make surprisingly creative little gems with this ultra-simple device. Flashing, fading, dices, memory games. You can slowly move from extremely simple scripts to more complex firmware.
The goal is to learn a few elementary aspects of programming these little gems.
Overview
- We're using my favourite chip, the Atmel ATtiny85. It is compatible with the Arduino
- For programming, we will use Codebender
- You need some sort of programmer, there are many instructables on how to build one (links to be added)
You need
- A button cell holder for a CR2032
- A CR2032 button cell
- An 8 pin DIL socket
- An ATtiny85 microcontroller
- An RGB LED
- 3 resistors, 330 ohms
Tools required
- A soldering iron and solder
- A hot glue gun
- An ISP for the ATtiny85
The Hardware

The hardware is extremely simple. The ones I build are completely free from, see the picture in the previous step. Hot glue is allowed! But if you want to build one with discrete LED's, or on a PCB, or in a plastic ladybug, feel free. There is really only one rule: the chip needs to sit in a socket, because you are going to remove it very often to reprogram it.
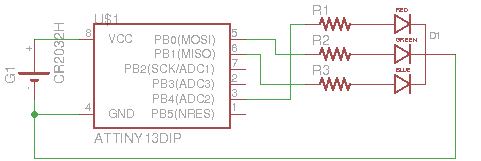
If it is better for your layout to use different pins for the LED, again, feel free, you only need to adjust your sketches a little bit. Just don't use pins 1, 4 and 8: 4 and 8 are used for the battery, and pin 1 should be left open, it is the reset line.
Just follow the simple schematic shown here.
As you can see the project is continuously powered from a single 3V lithium button cell. I like the clips shown in the picture as they make popping the cell, or using a loose cell as combined power source and switch very easy.
As there is no power switch, simply remove the battery when done. In the more complex scripts you will find examples that will put the Butt Light in an extremely deep sleep thus saving the battery, but that's more advanced stuff. Let's move on.
Programmer
You need some sort of device to put your programs (or sketches as they are called in Arduino parlance) into the chip's flash memory. Such devices are called ISP's. This instructable is not about how to build yourself an ISP, there are many available, i.e.
https://www.instructables.com/id/ATtiny-Programming...
https://www.instructables.com/id/Arduino-Attiny85-p...
In fact, you don't need a dedicated ISP. A regular Arduino such as a 4 Euro Nano will do if you happen to have an bread board laying around, see this example:
https://www.instructables.com/id/ATtiny-programming...
The ISP is the bridge between your development chain (your PC and codebender) and the actual chip. It might look a bit daunting at first but once set up, it is truly simple: Connect the chip to the ISP, connect the ISP through USB to your computer and hit the "Run on Arduino" button: your script will be compiled into something the chip can understand, transferred there and saved. Once done, remove the chip and put it into your Butt Light.
Codebender
We are going to build our sketch in codebender, which in essence is an online version of the Arduino development software. You only need a browser and a small add-on. Just head over to codebender, create an account and follow the steps to install the add-on. The add-on is needed to enable your browser to communicate with the ISP over USB.
Codebender does all the heavy lifting for you: Editing, Compiling, Programming your chip through your ISP, etcetera. By default all your sketches are shared to all other users, so finding interesting sketches should be easy. My sketches can be found here. Remember though, they are not all for the Butt Light.
Your First Sketch


There are dozens of tutorials on how to write Arduino scripts. For this tutorial, we will just make a simple traffic light: 5 seconds red, 1 second amber, 4 seconds green and repeat.
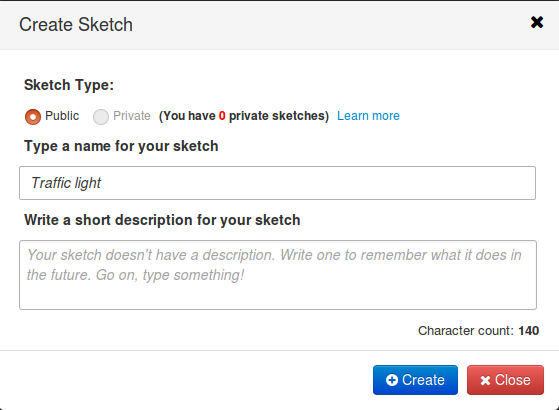
In codebender, log in and start with clicking on the big blue button "Create Sketch". A popup will appear asking you to name your project and add a description. Just name it "Traffic Light" and click "Create".
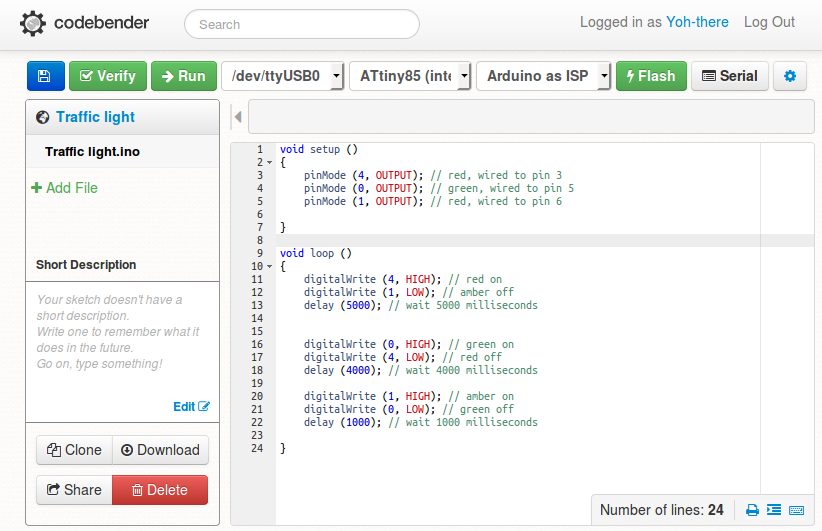
And editor will be opened. Before continuing, let's tell codebender we use an ATtiny85 and an Arduino as ISP. Connect your programmer, click on the cam-wheel, so you will see three pull down boxes above the editor. Leave the first one alone (it should state the port that is connected to your ISP). For the second one, choose "ATtiny85 (internal 1 MHz clock) D. A. Mellis core". In the third pull down, choose "Arduino as ISP".
Now let's move on to the code. Already there are a few lines of code there. Notice a part called setup, and a part called loop. The part between the curly brackets under setup will be run once at startup. The only thing we need to do here is to define the three pins that are connected to the LED as output.
void setup ()
{
pinMode (4, OUTPUT); // red, wired to pin 3
pinMode (0, OUTPUT); // green, wired to pin 5
pinMode (1, OUTPUT); // red, wired to pin 6
}
Everyting after the double slashes is comment and doesn't need to be there, but it is easier to later understand your script.
The part called loop is run over and over again until you disconnect the battery. Replace it with this.
void loop ()
{
digitalWrite (4, HIGH); // red on
digitalWrite (1, LOW); // amber off
delay (5000); // wait 5000 milliseconds
digitalWrite (0, HIGH); // green on
digitalWrite (4, LOW); // red off
delay (4000); // wait 4000 milliseconds
digitalWrite (1, HIGH); // amber on
digitalWrite (0, LOW); // green off
delay (1000); // wait 1000 milliseconds
}
Click on Save and there it is, your first script, a functioning traffic light. Now put your ATtiny85 in the ISP and hit the green "Run on Arduino" button. Your ISP should do some flashing and when it is done, remove the chip, press it in your Butt Light and press the button cell in the holder. Success!
Done!
That's it, You have build and completed your first Butt Light!
You can do surprisingly complex with this simple device, learning more and more about the processor as you go. Here are a few ideas:
- a traffic light
- a dragster christmas tree
- a dice using color and/or flashes
- color faders
- a color pattern memory game
Along the way you can learn about random sequences, PMW output, timers, sleep modes, using the EEPROM, etc etc. Scripts for these examples can be found in my codebender repository and feel free to load them in your Butt Light, clone them, improve them.
Have fun!