Burned Wood Wall Art
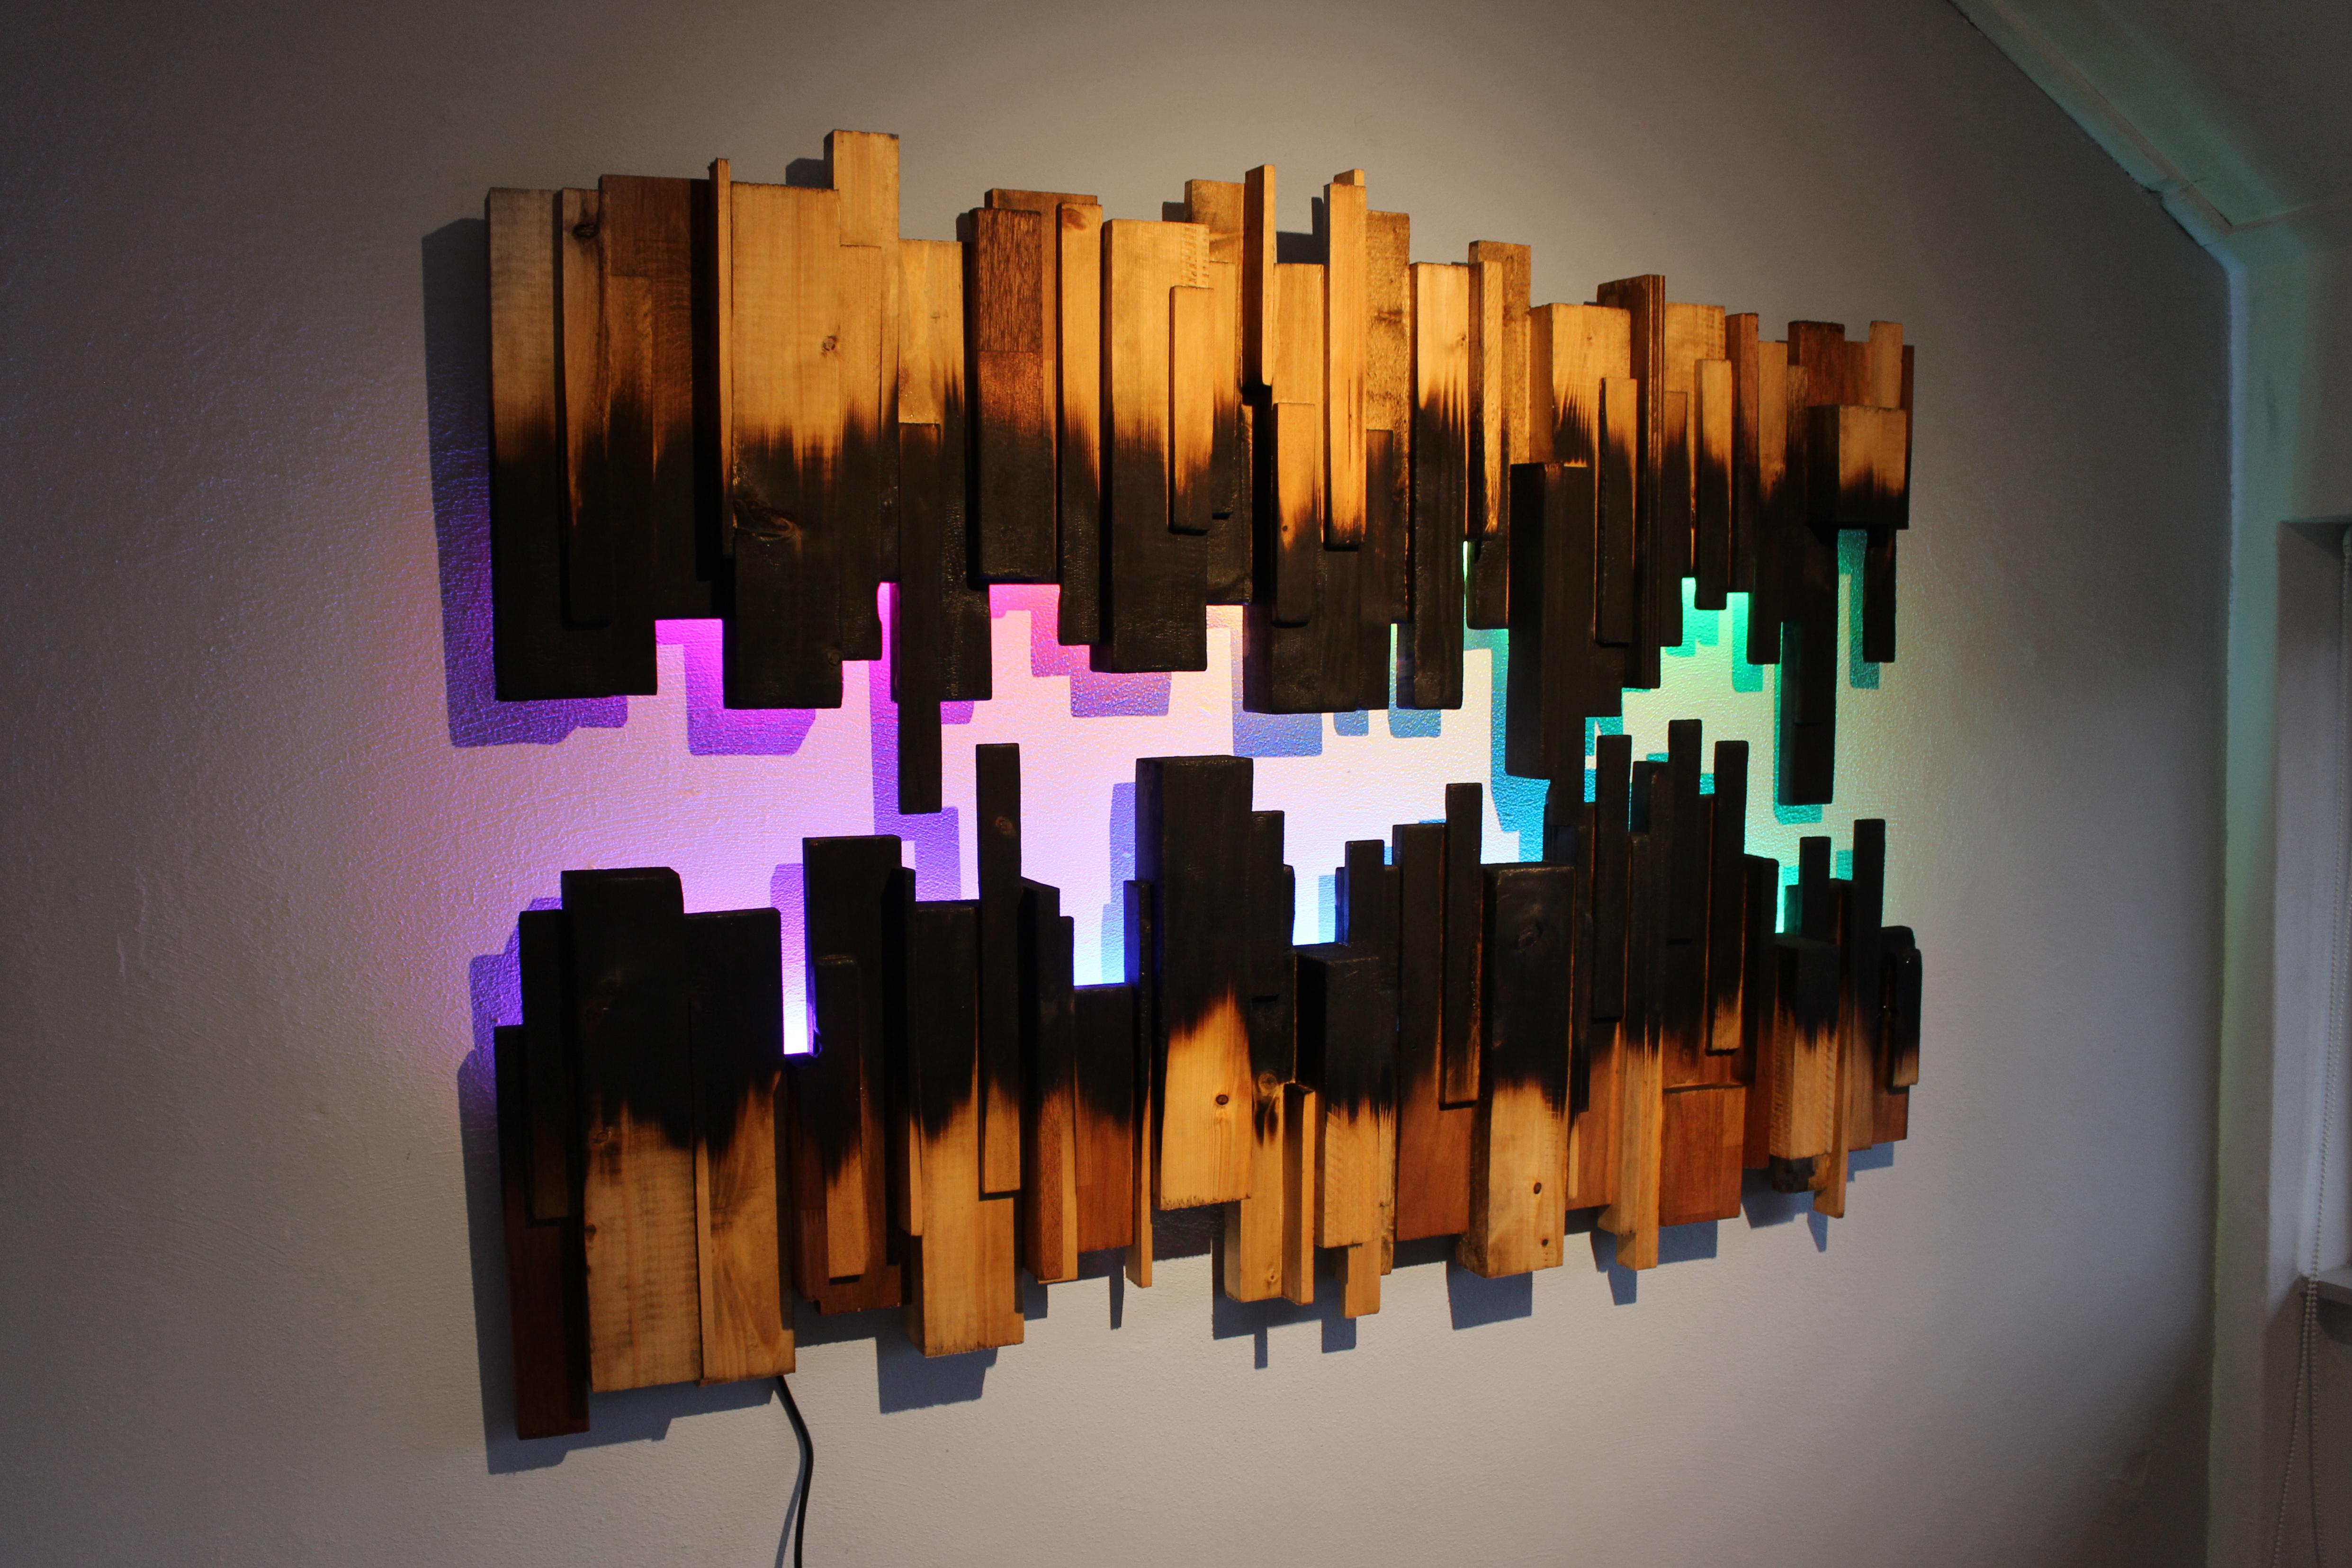


In this Instructables I will explain how to make this Burned Wood Wall Art.
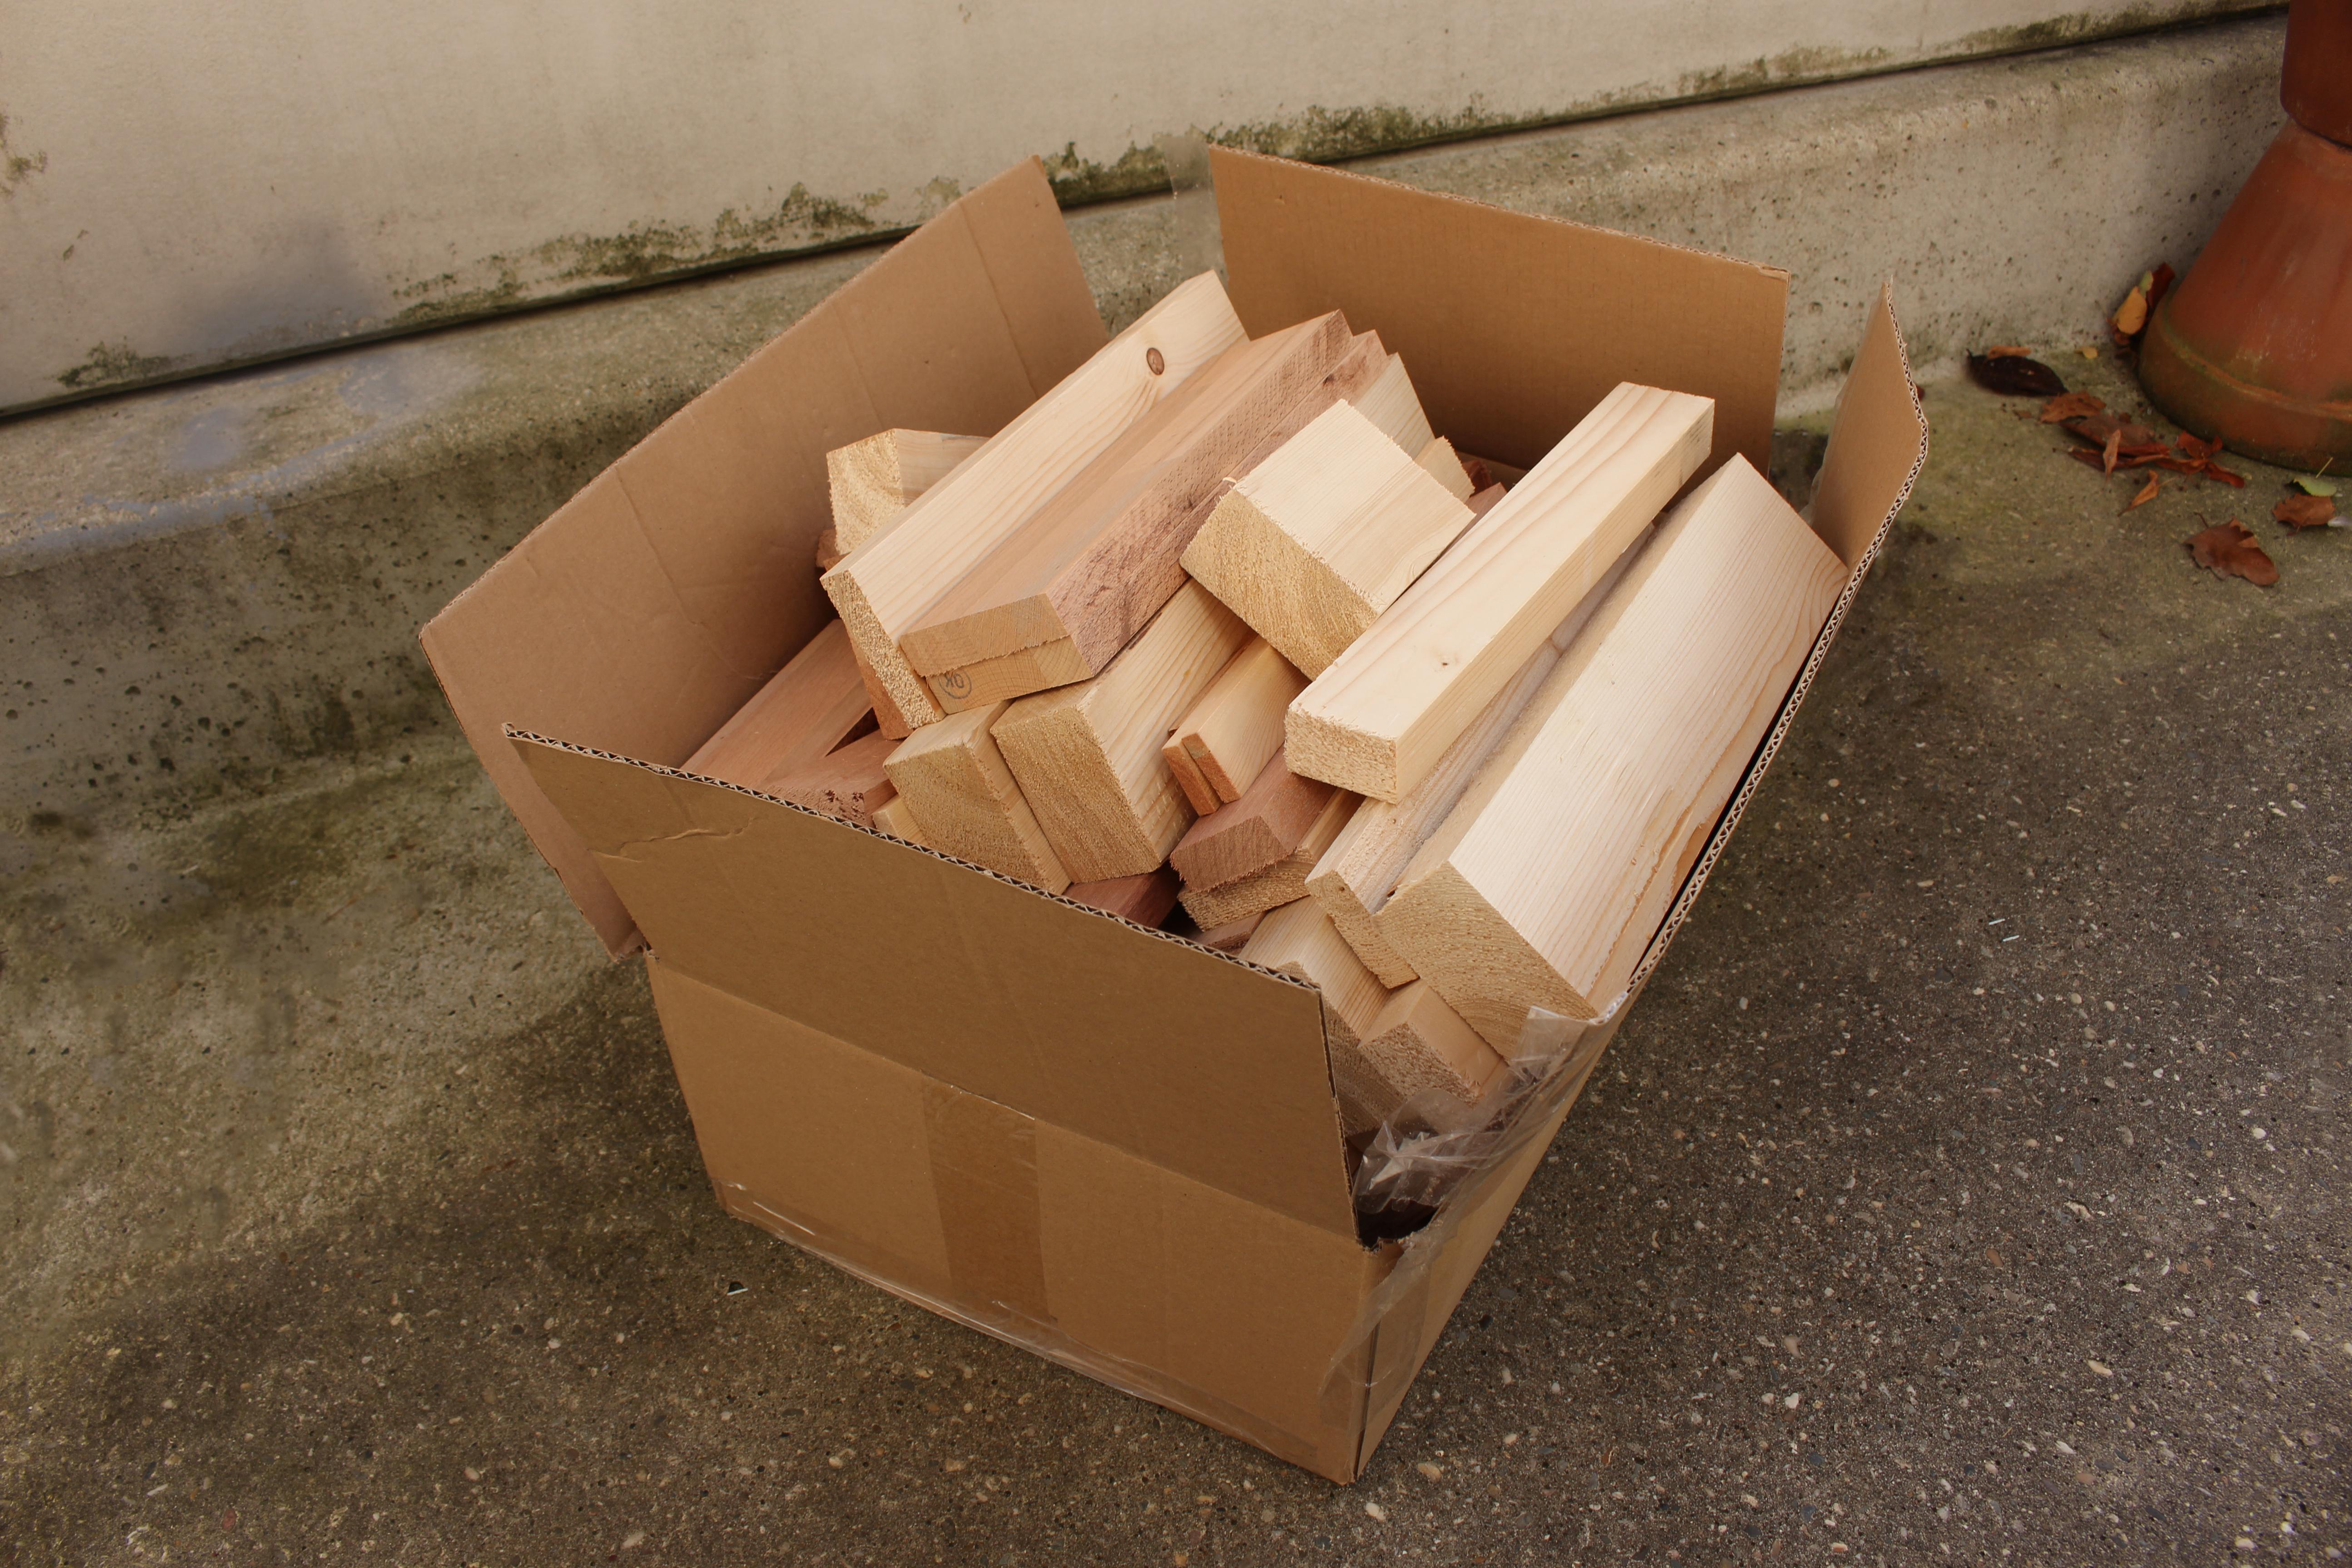
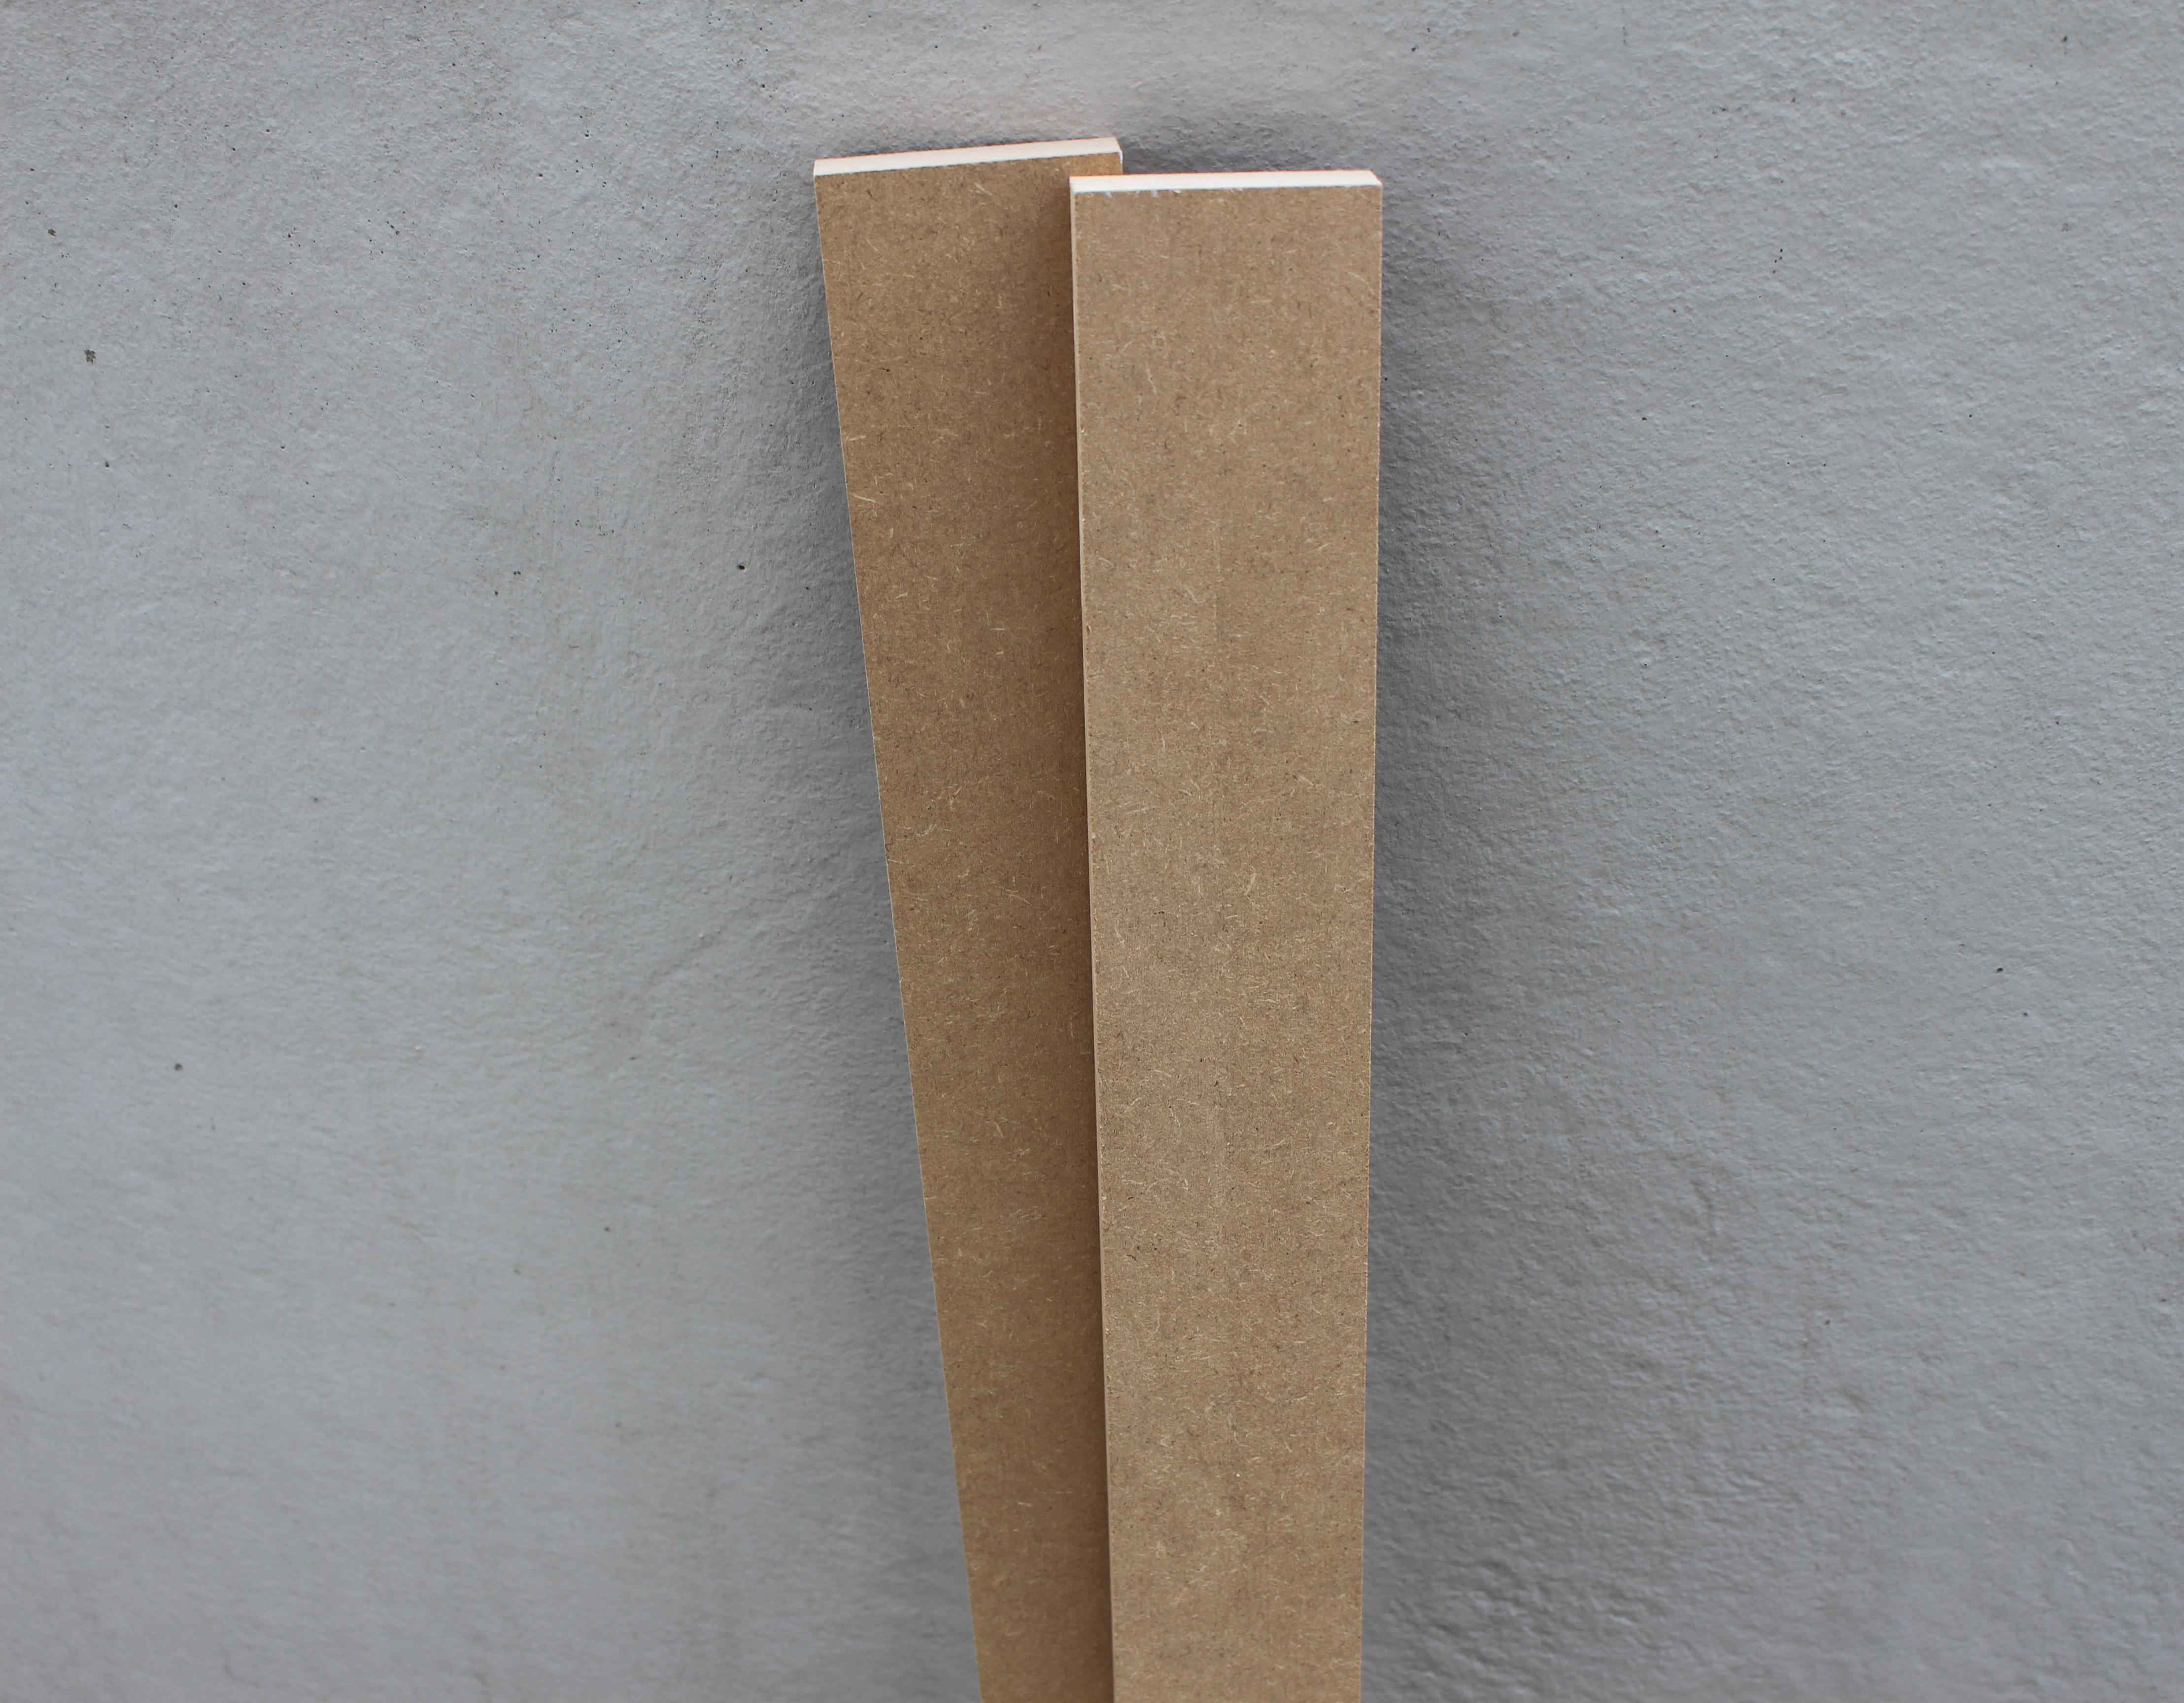
Materials
- Scrap Wood
- Wooden Panel x2
- Nails
- Screws
- Keyhole Bracket
- Solder
- Wood Oil
- Wood Glue
Electronics
- NodeMCU V2 WIFI Board
- WS2812B Ledstrip 60Led/m 2M
- 5V 8A Power Supply
- Logic Level Converter
- 1000uF Capacitor
- DC Power Connector
- Power Cable
- Perfboard
Tools
- Soldering Iron
- Cordless Drill
- Blowtorch
- Hot Glue Gun
- Hammer
- Brush
Place the Wood
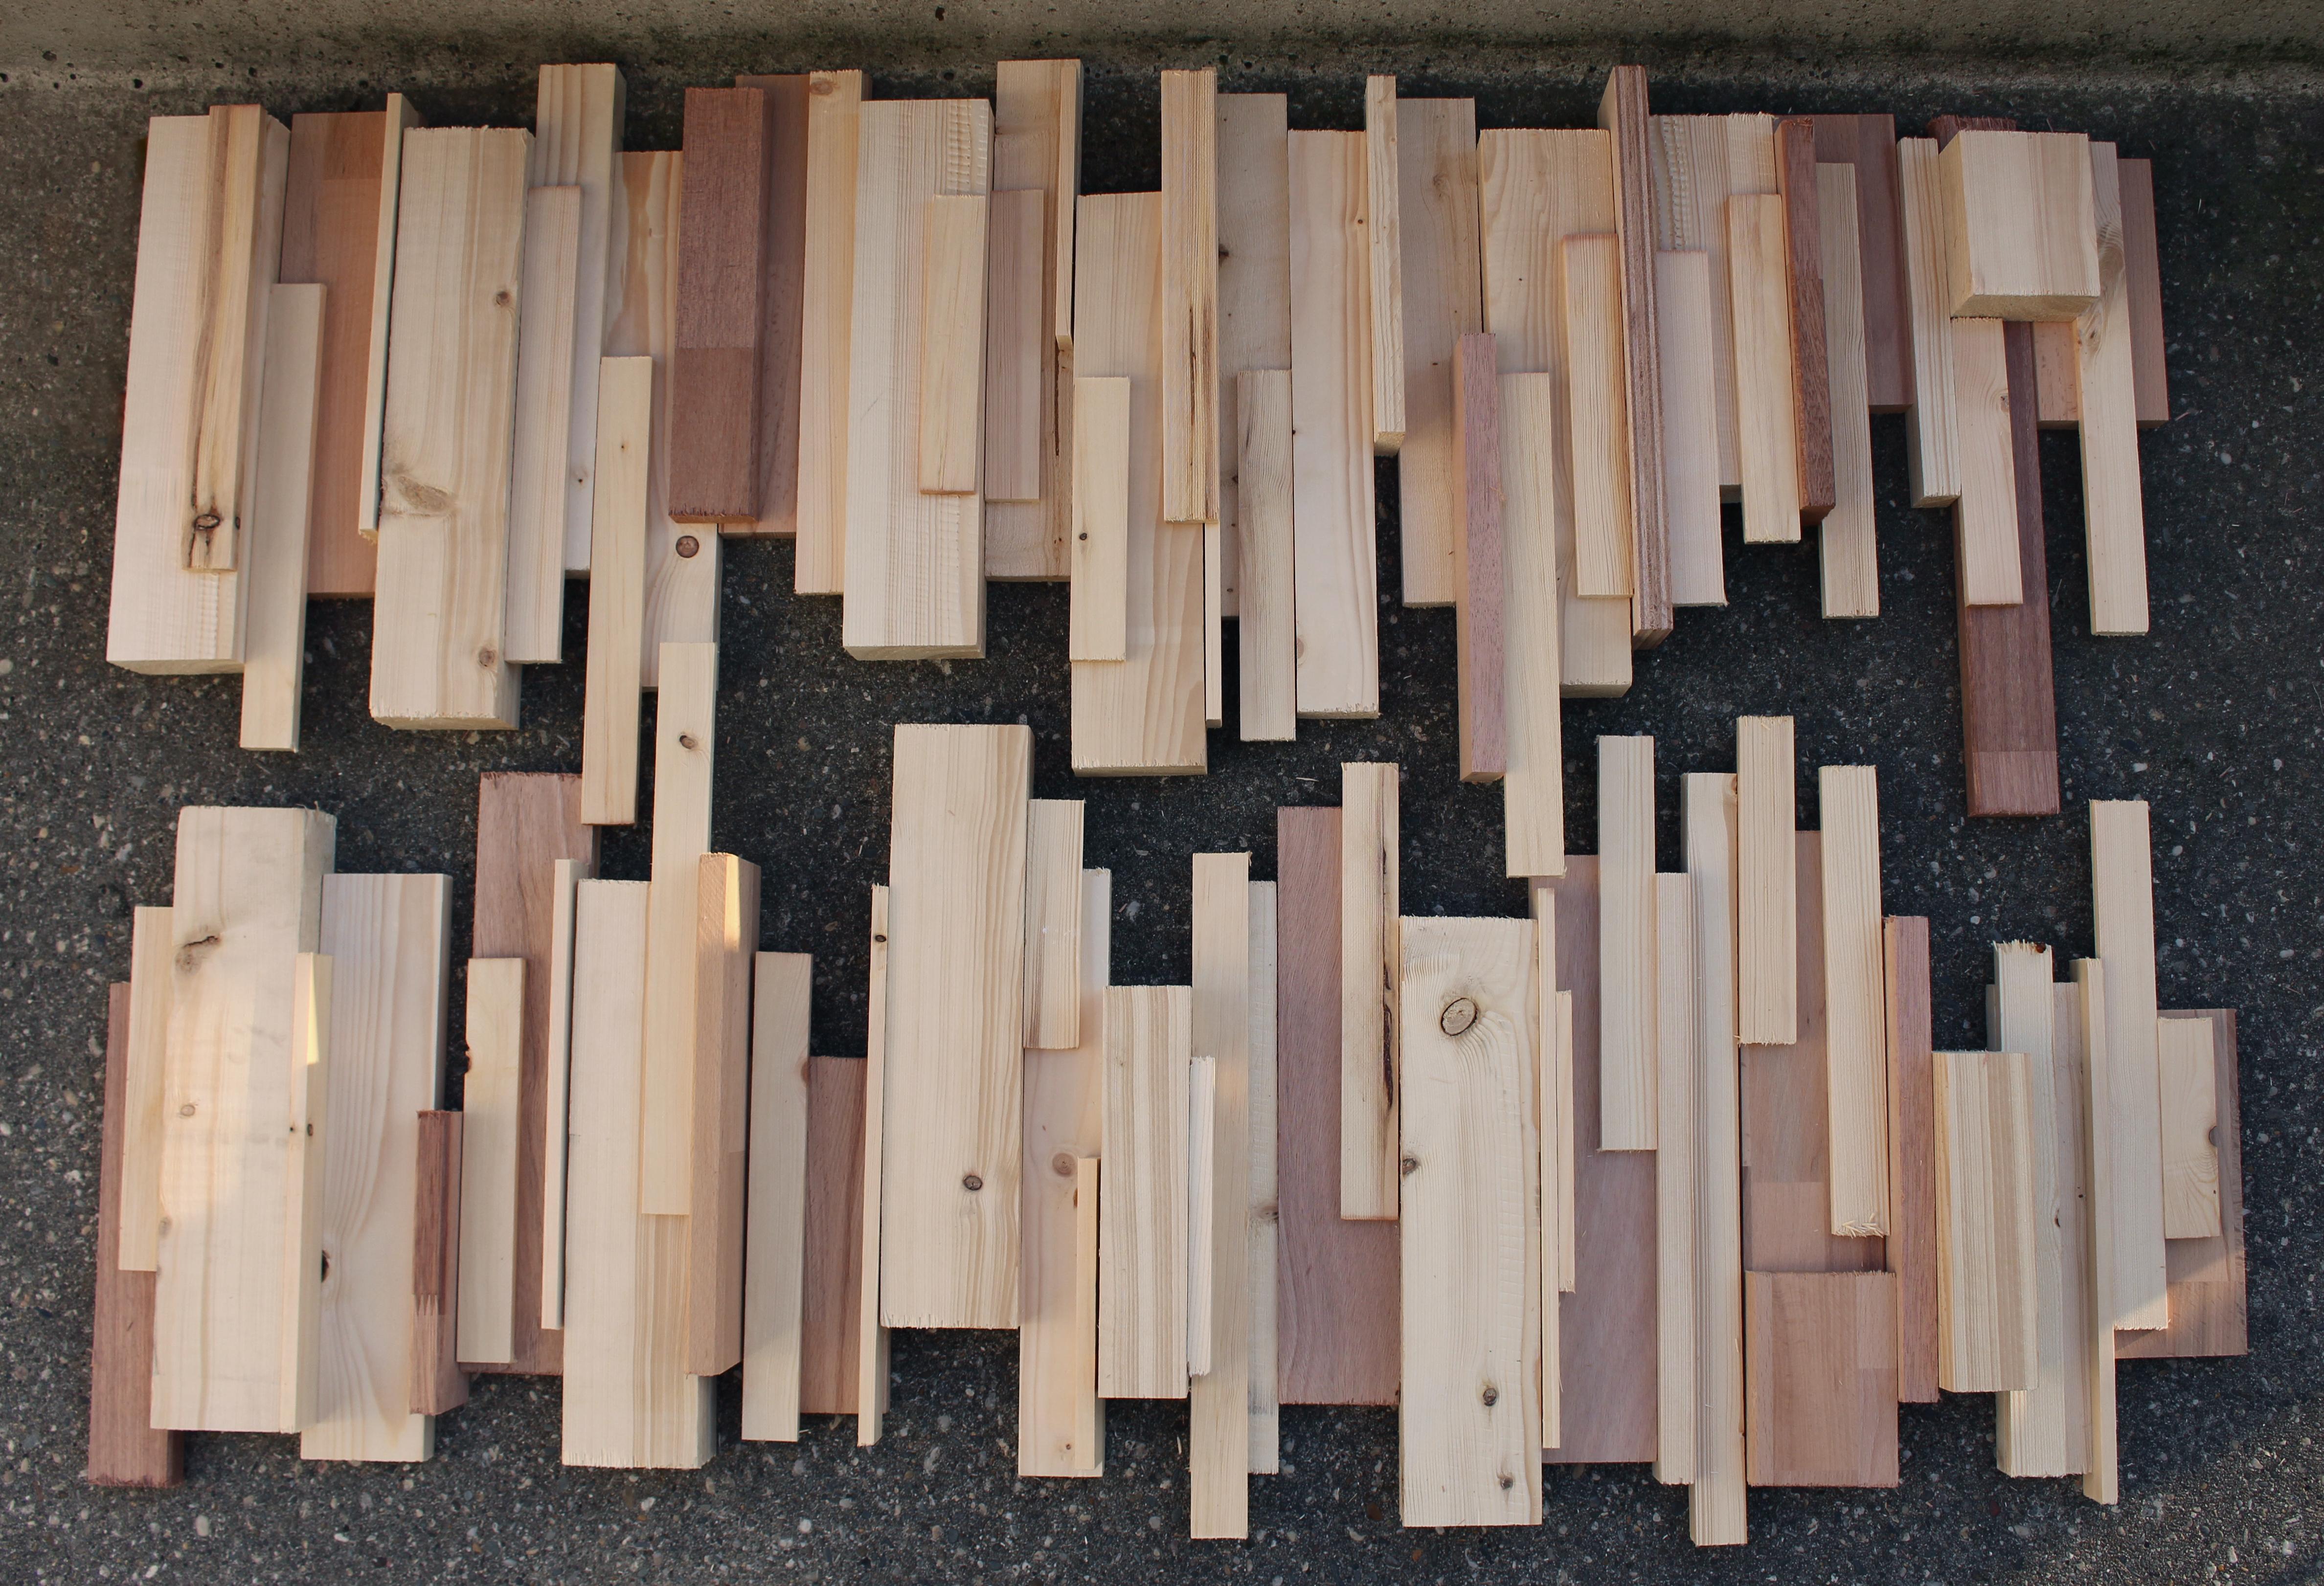
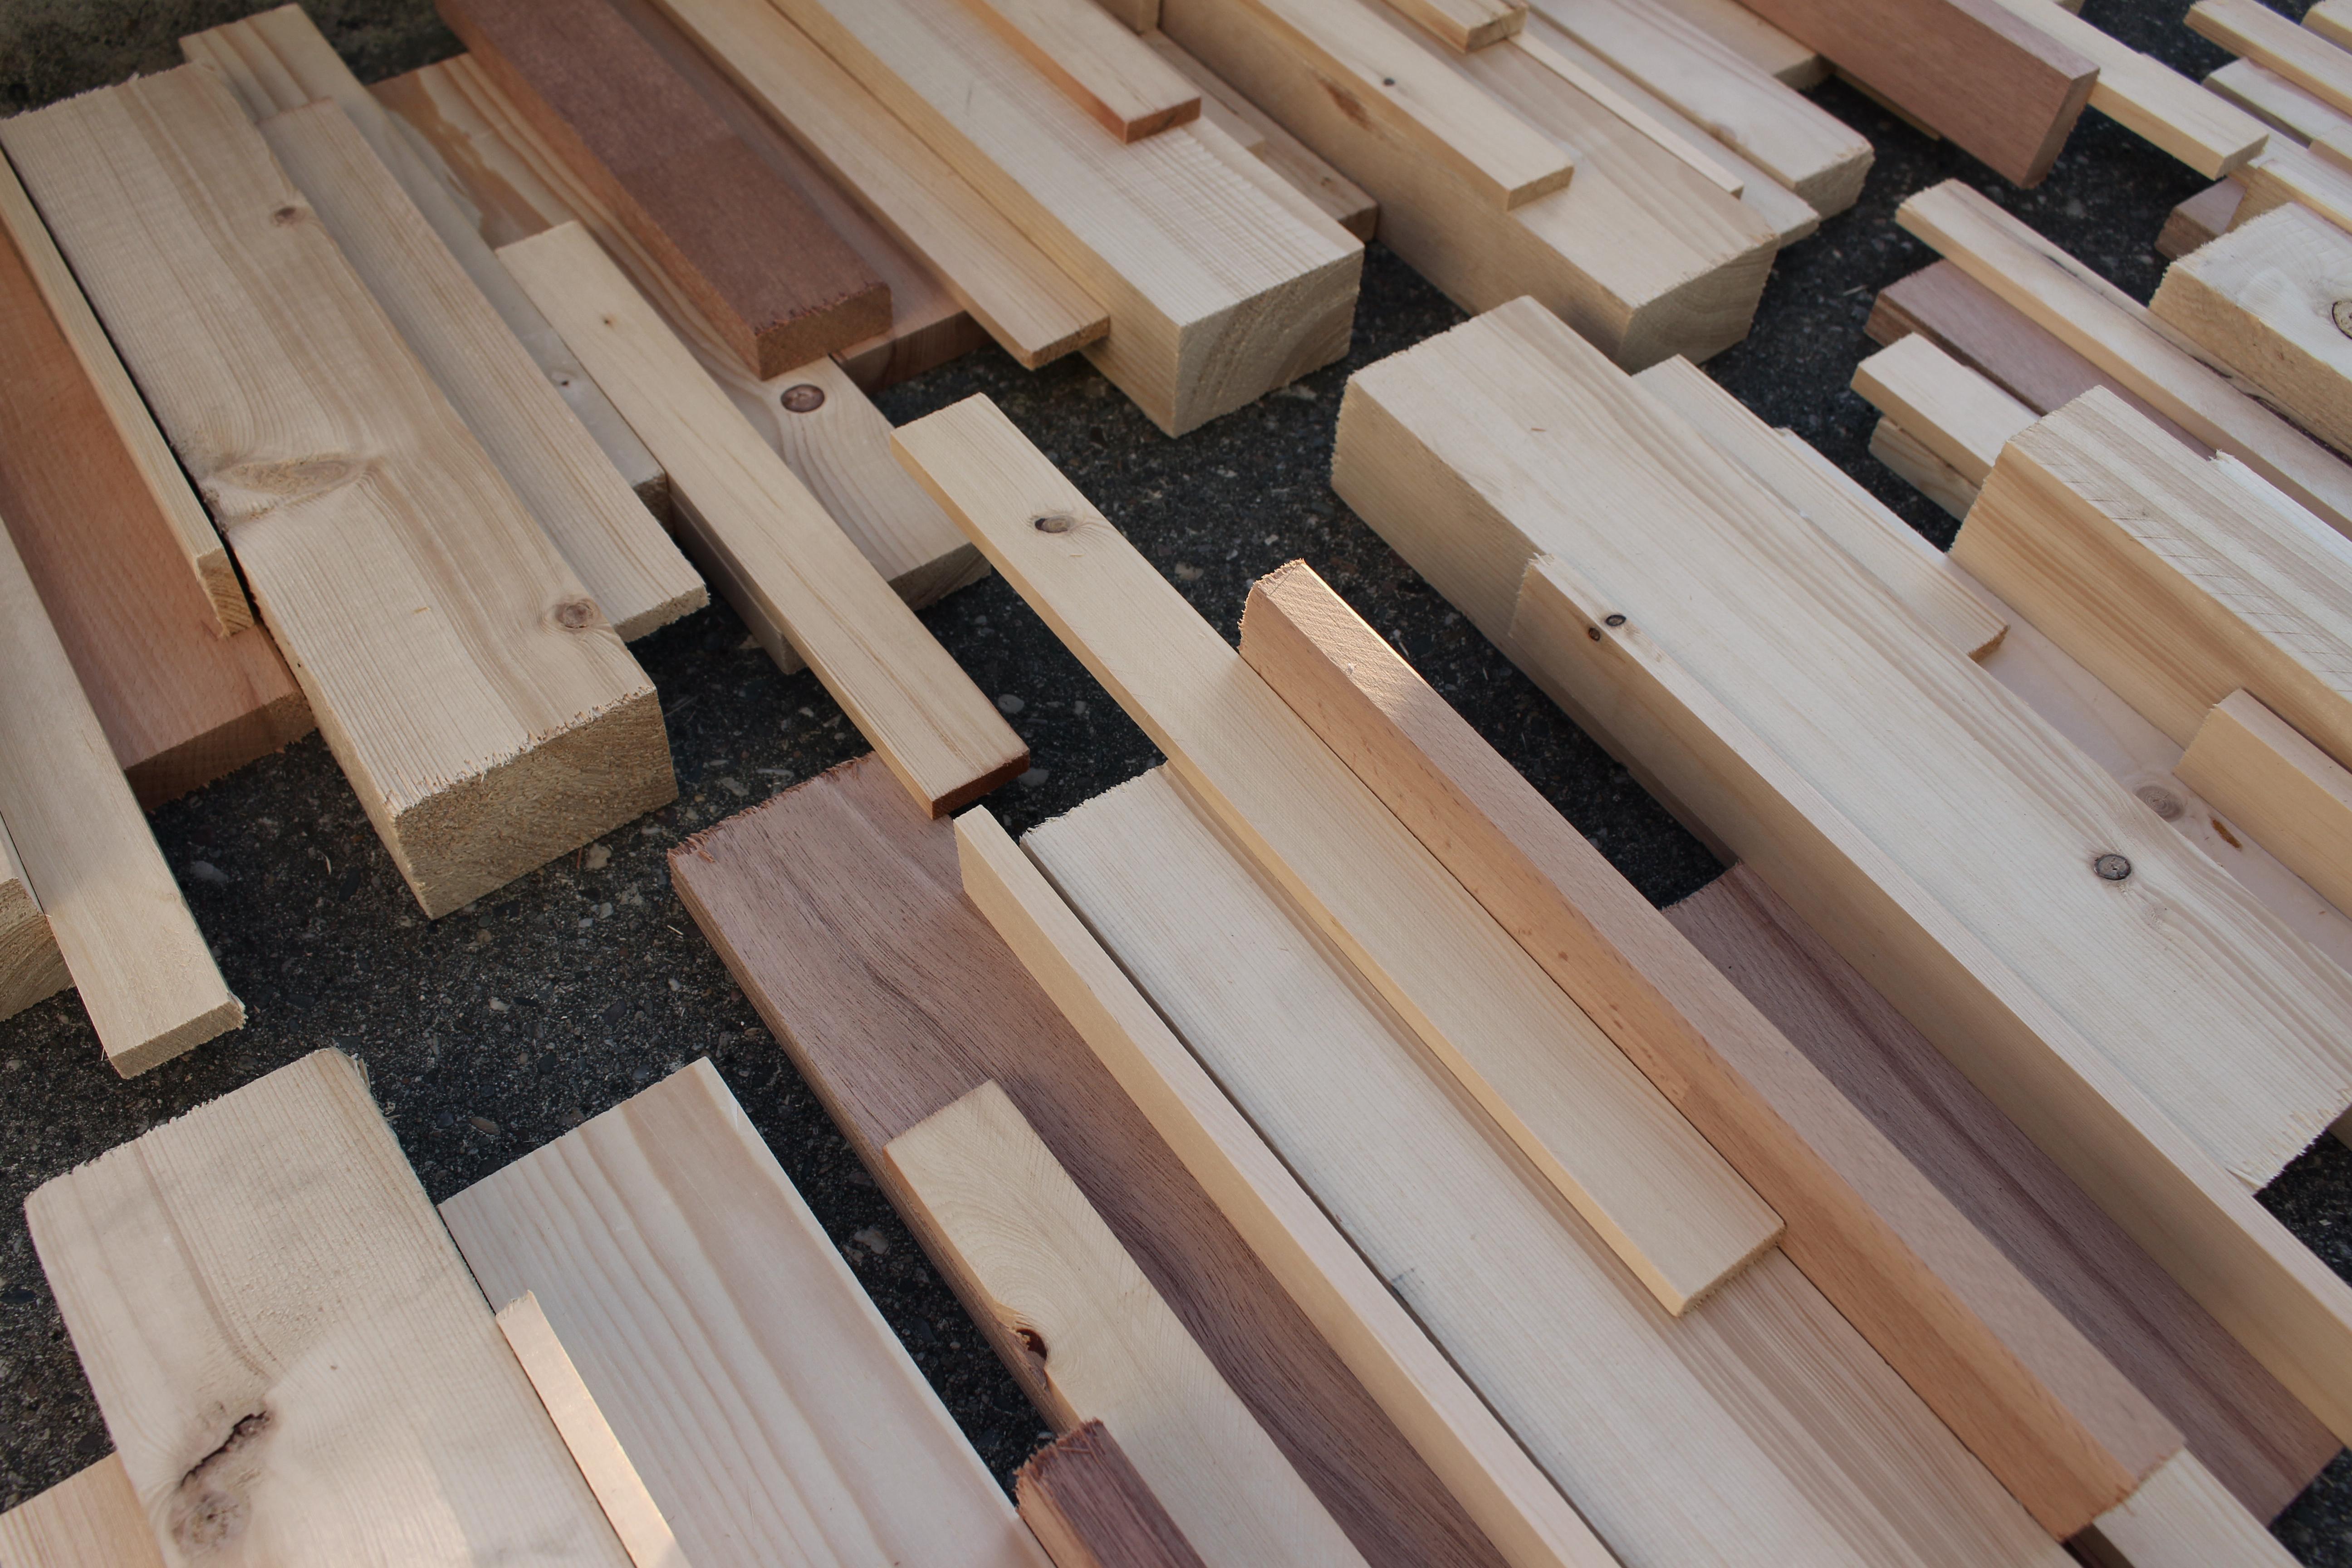
Arrange the wood the way you would like it to be. I went for two wider panels so I could put a ledstrip in between.
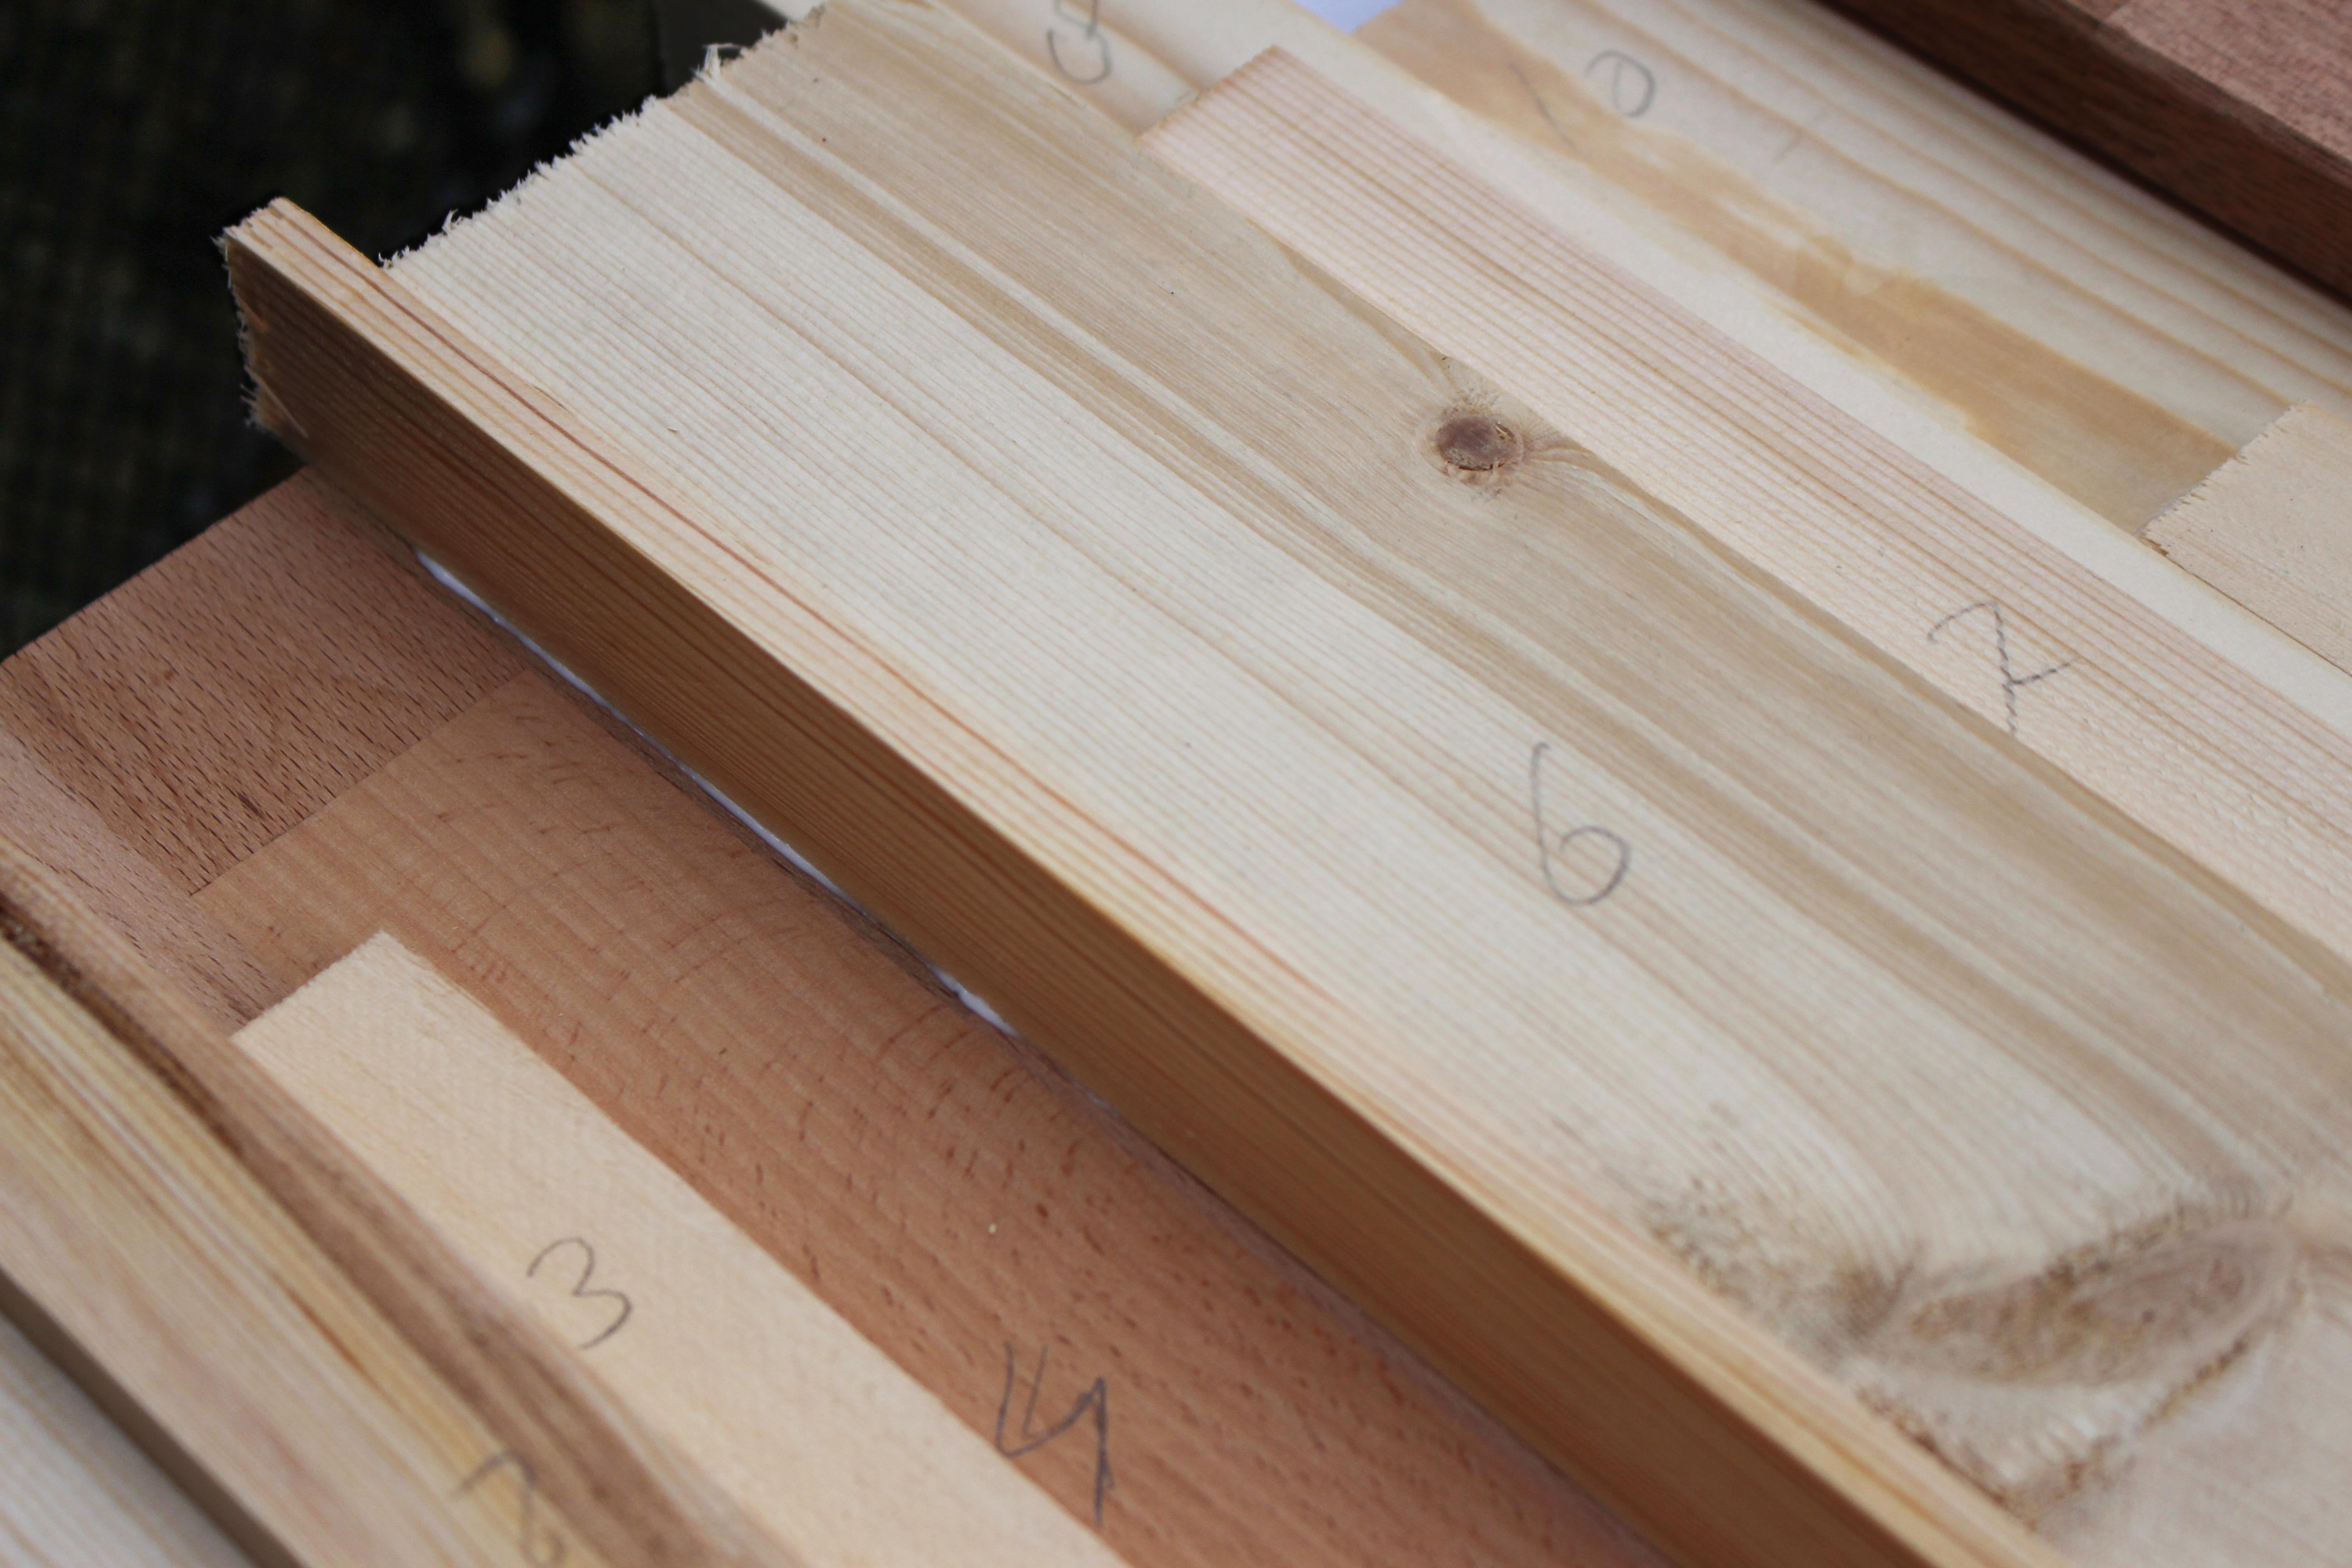
After arranging the wood I numbered all the wood pieces so I know how to arrange them correctly again after moving it.
Glue the Wood

After you placed the wooden pieces you can start putting it together with wood glue. When you are done with gluing wait atleast 24 hours until the next step.
Add the Mounting
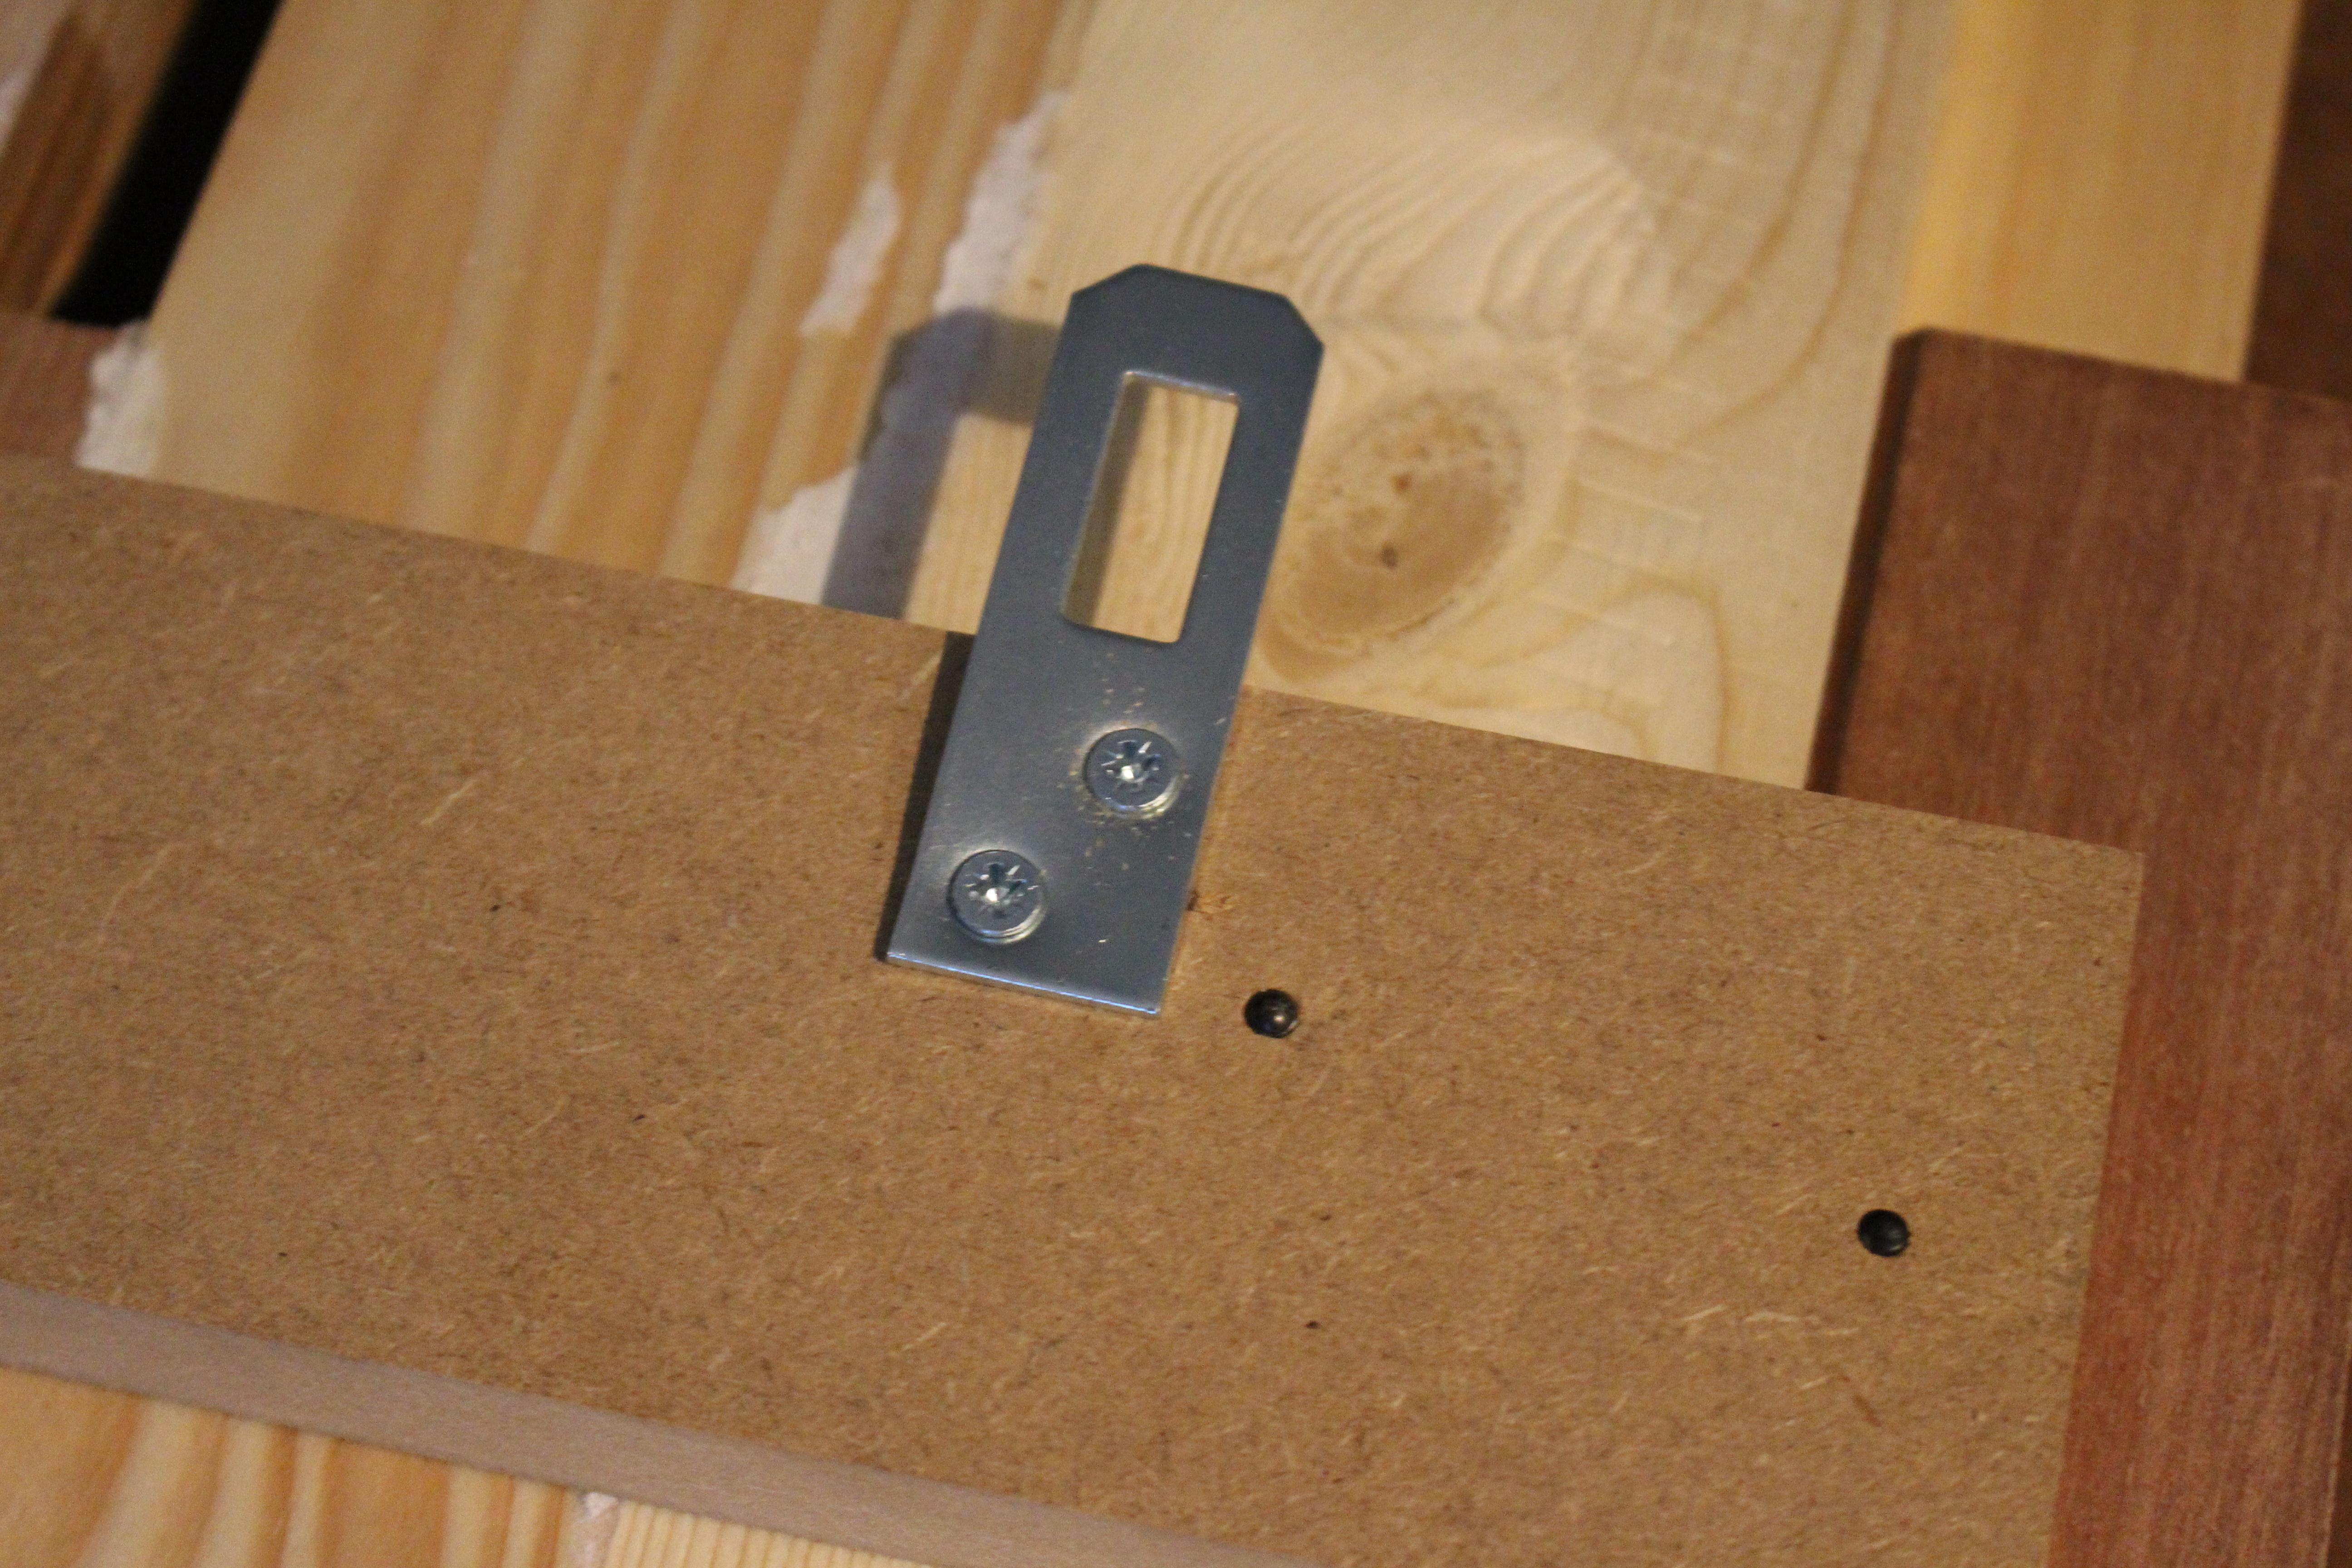
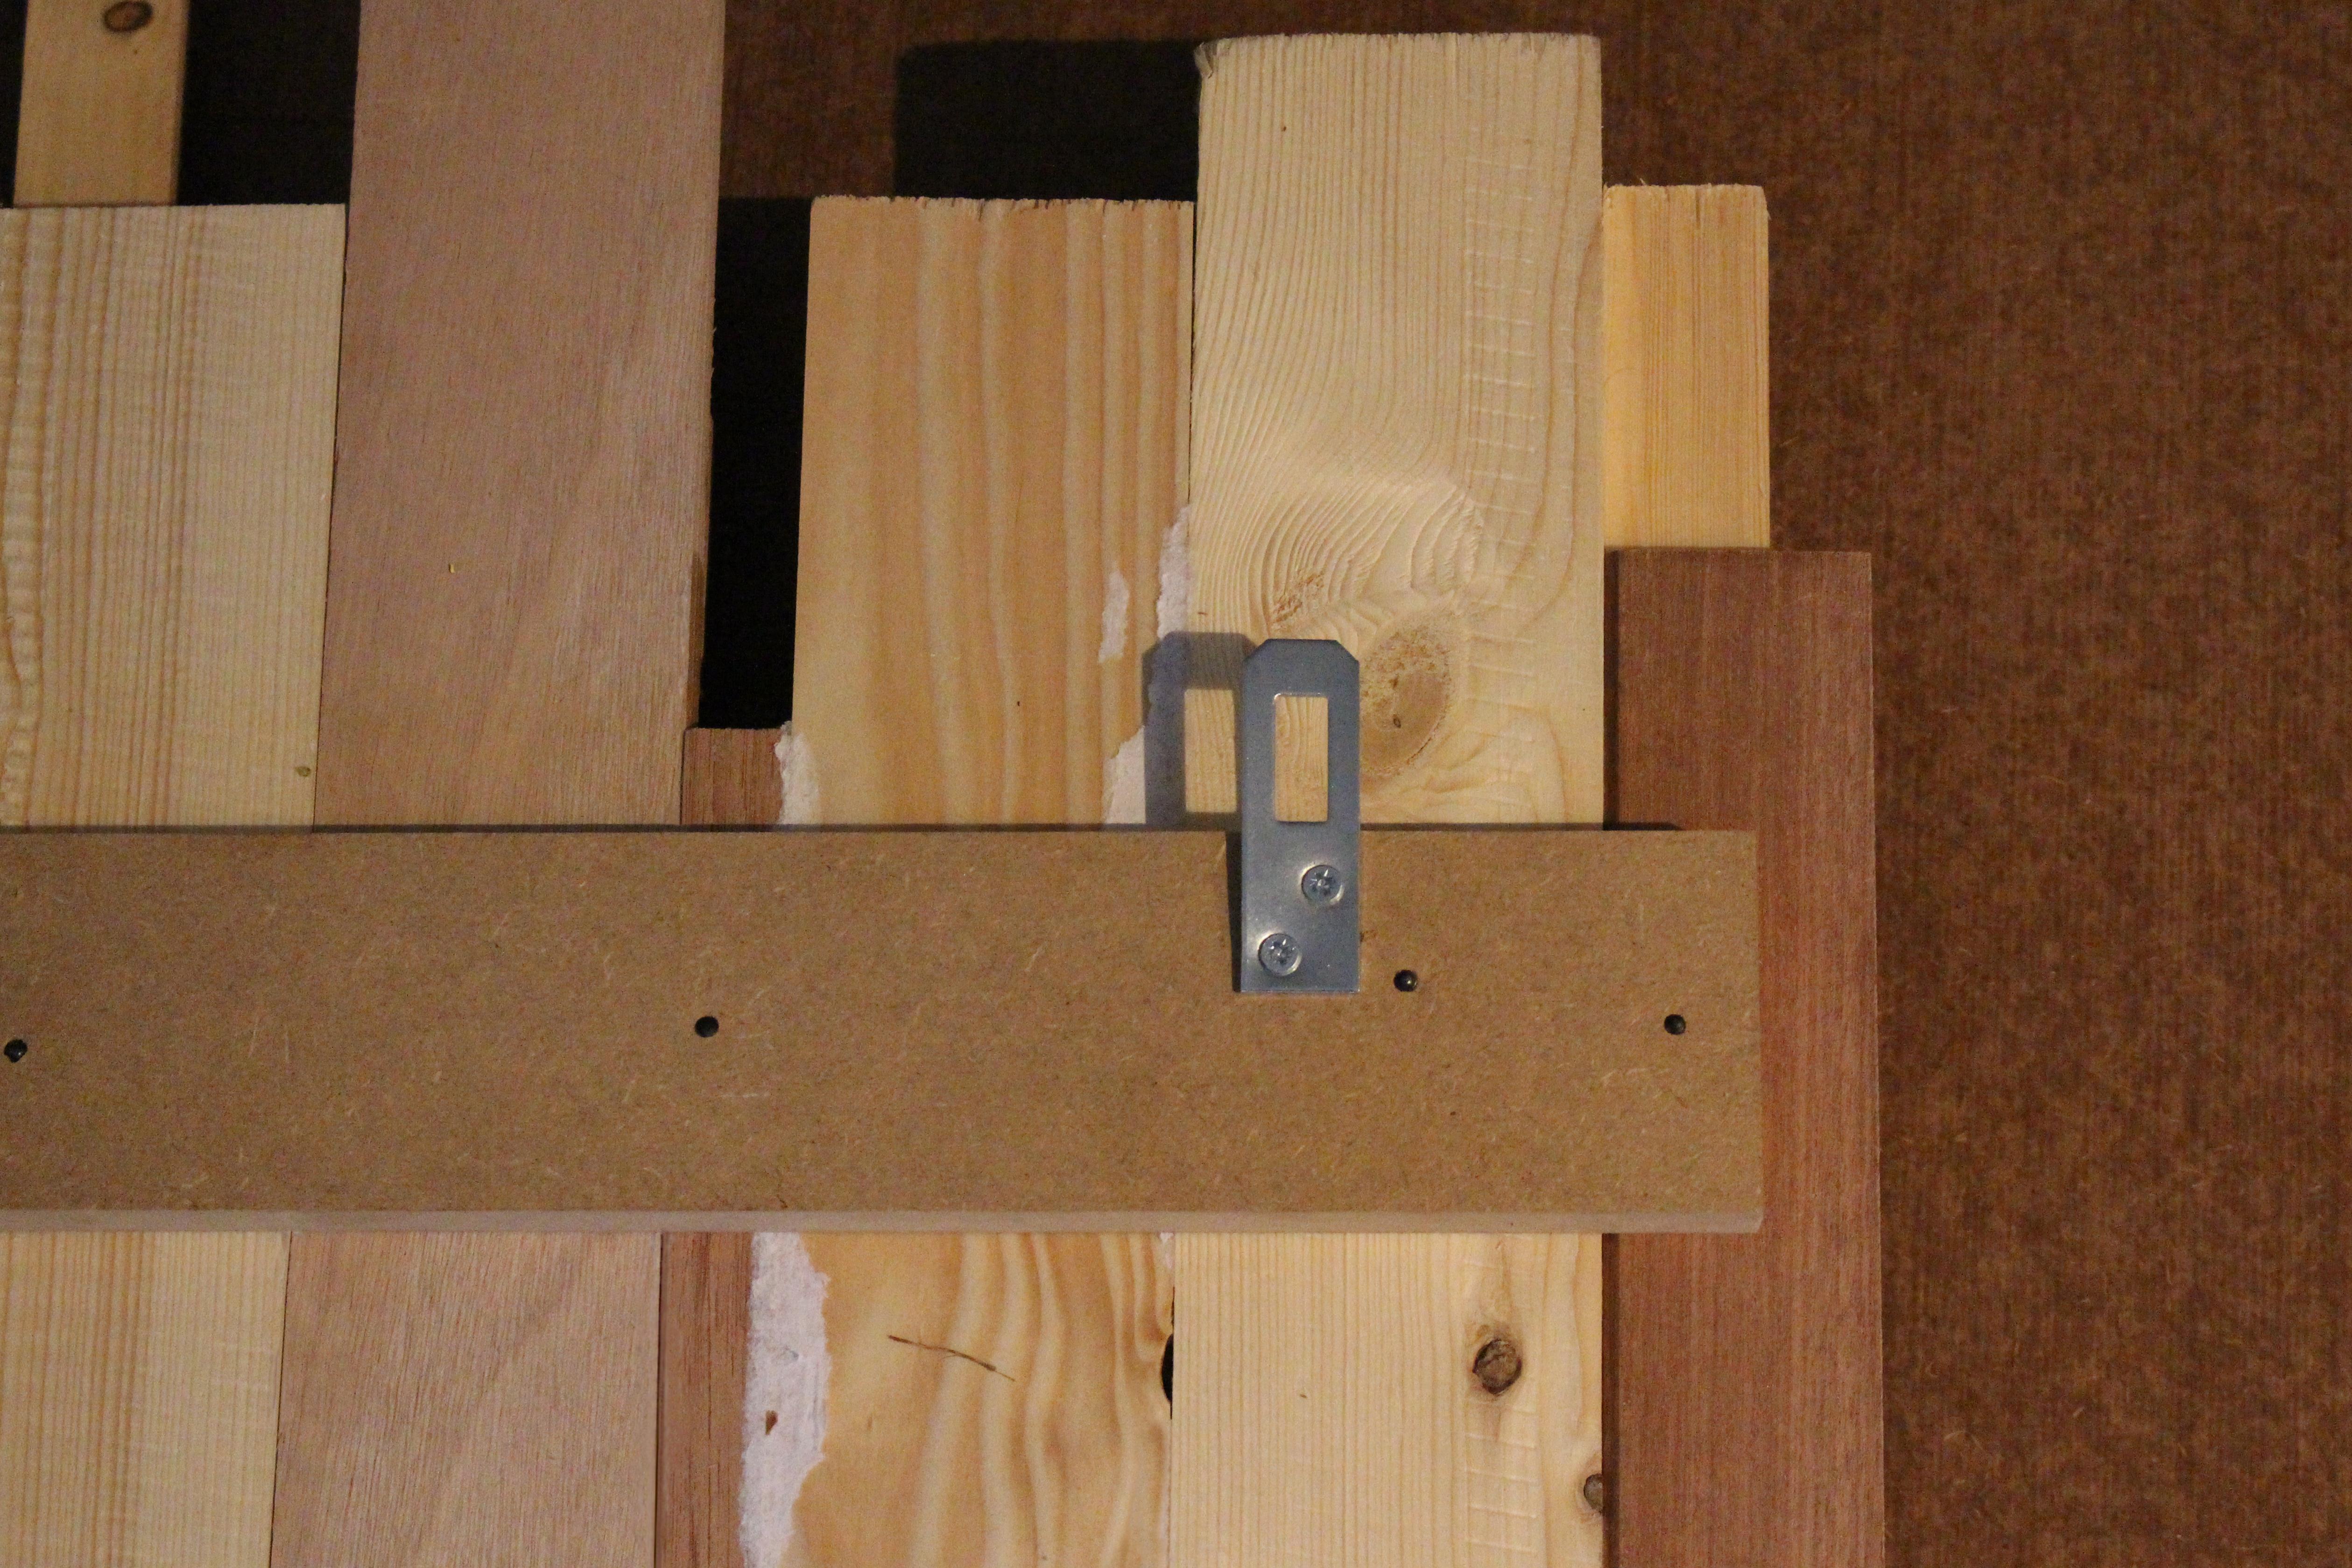

To add the mounting for the panels you need to put a wooden panel that is just a bit smaller than the minimum size off the front panel on the back. Also make sure the panel is thick enough so there will be room to put the circuitboard and ledstrips between (1,5 - 2cm).
To attach the mounting panel I used nails that are just short enough to not go all the way through the front panel. I also screwed two big metal keyhole brackets on the corners off the mounting panel so it will be easy to hang the panels.
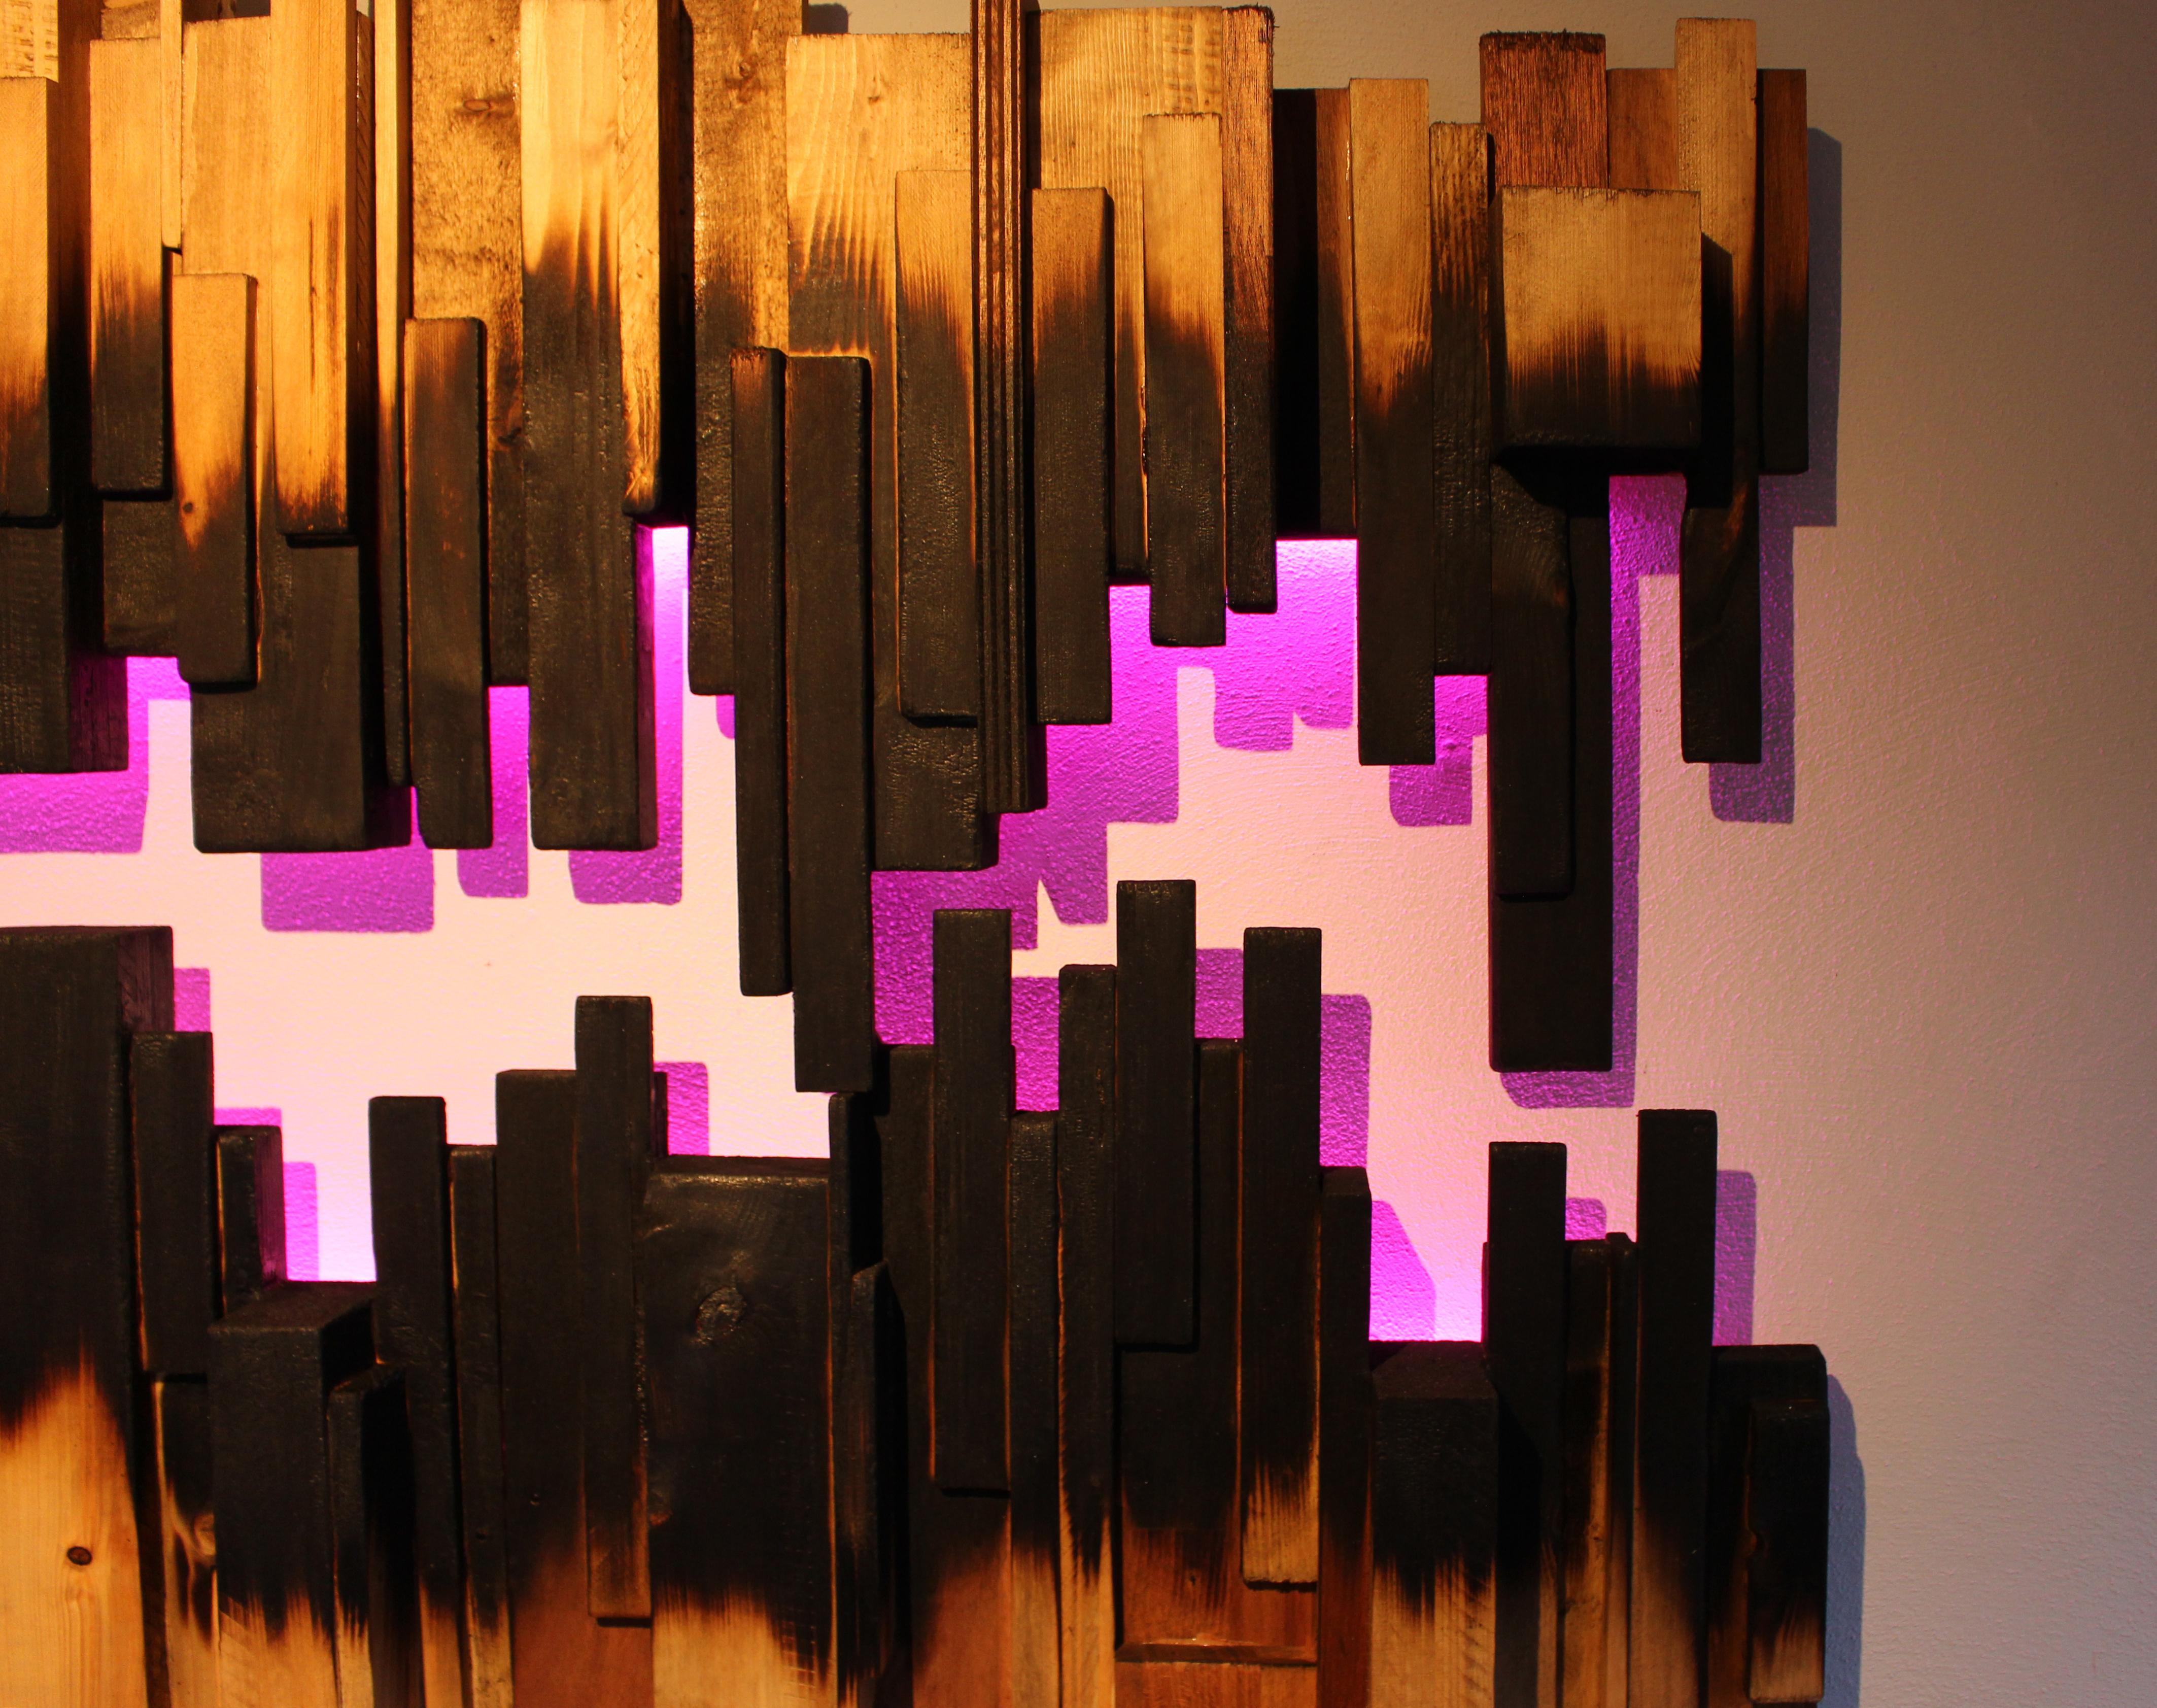
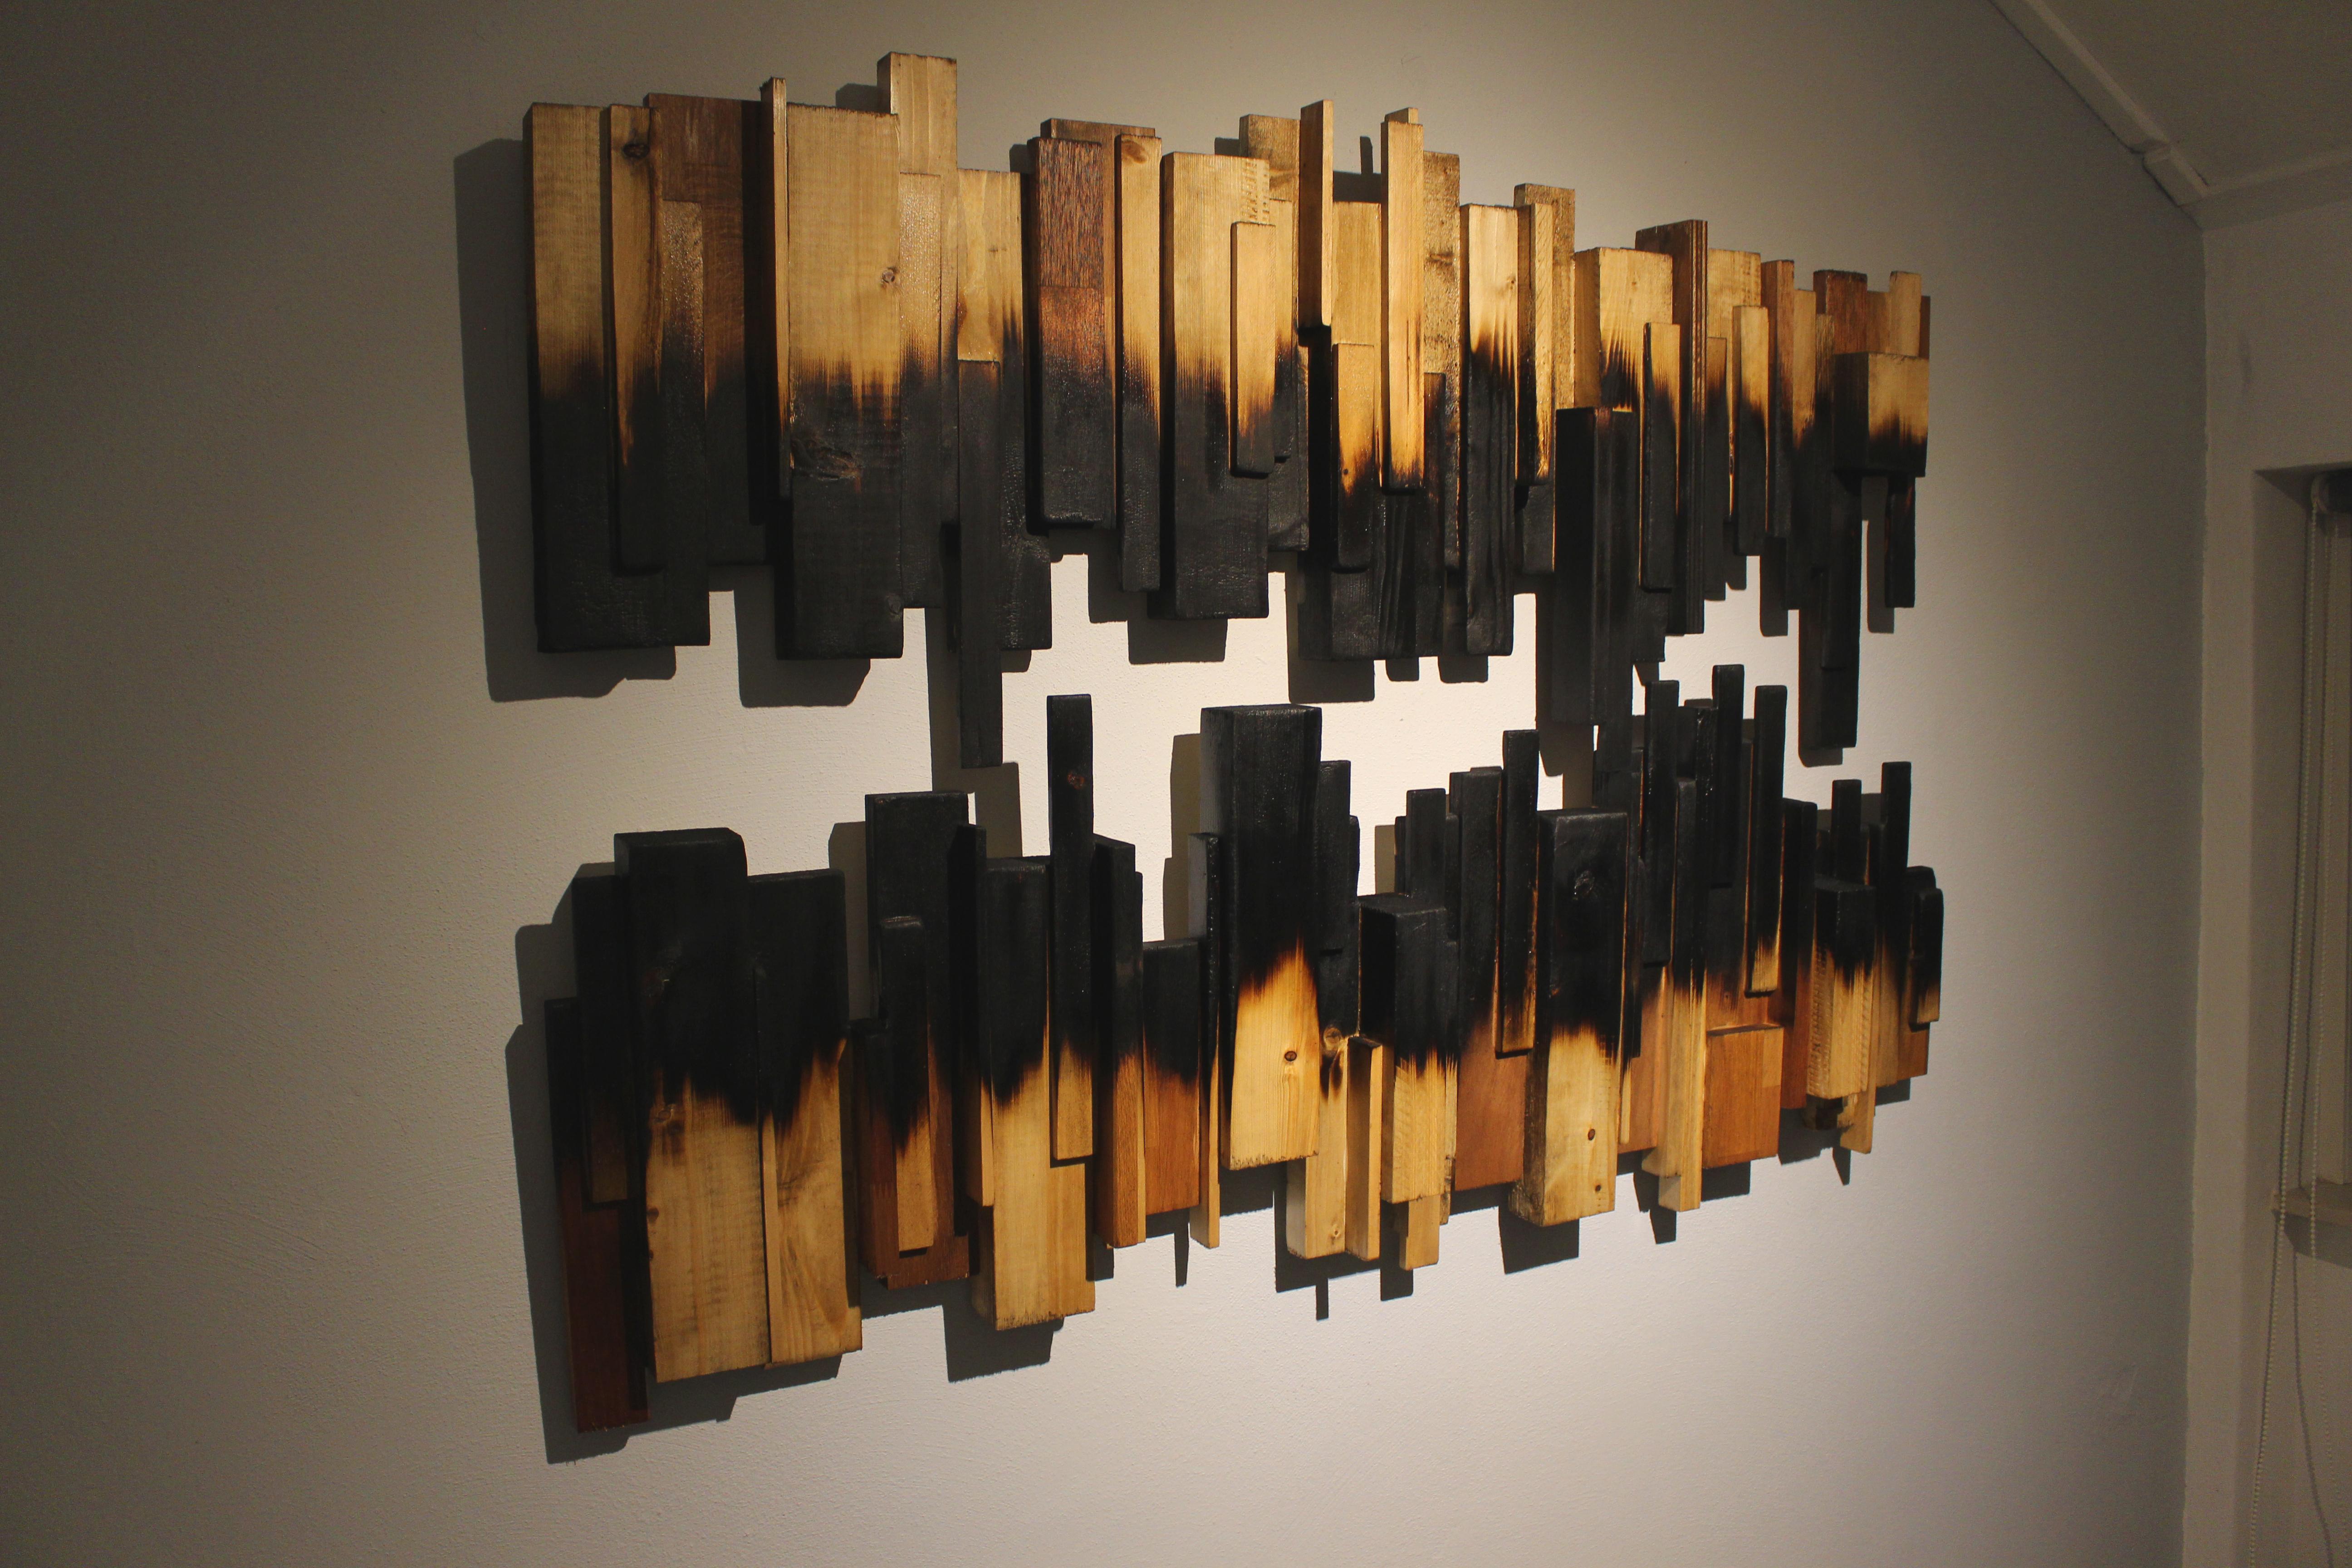
Burn the Panels
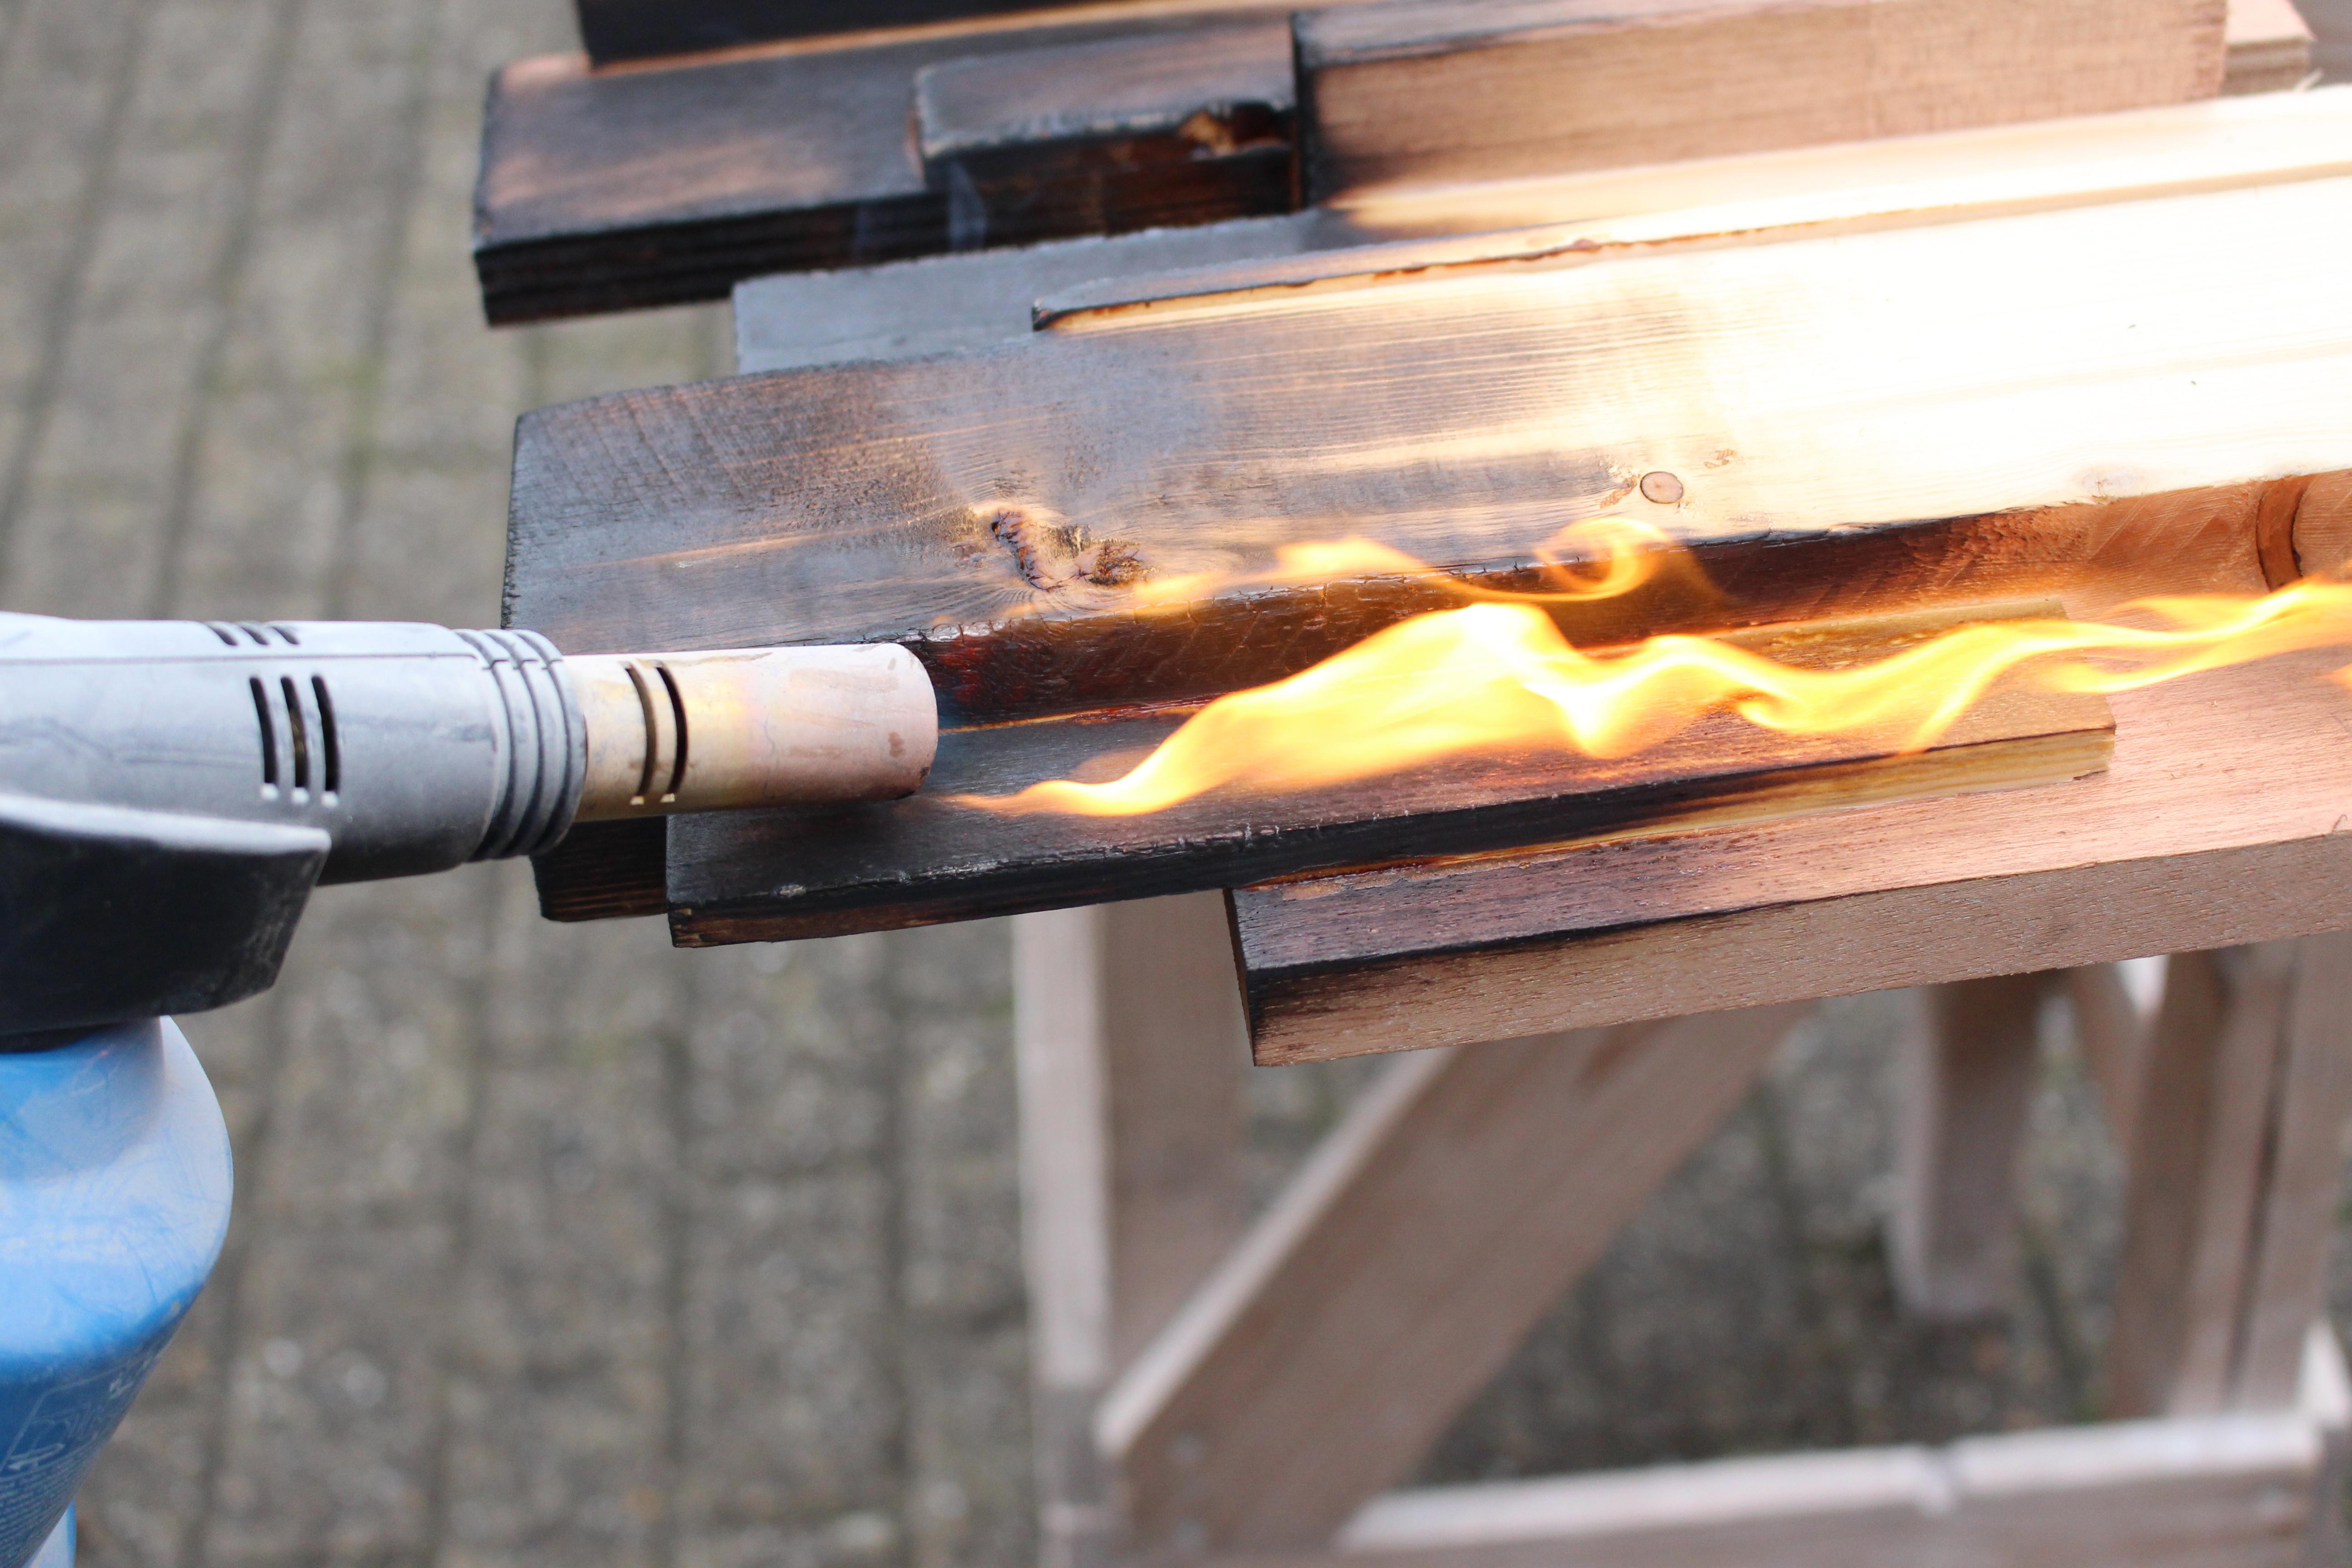
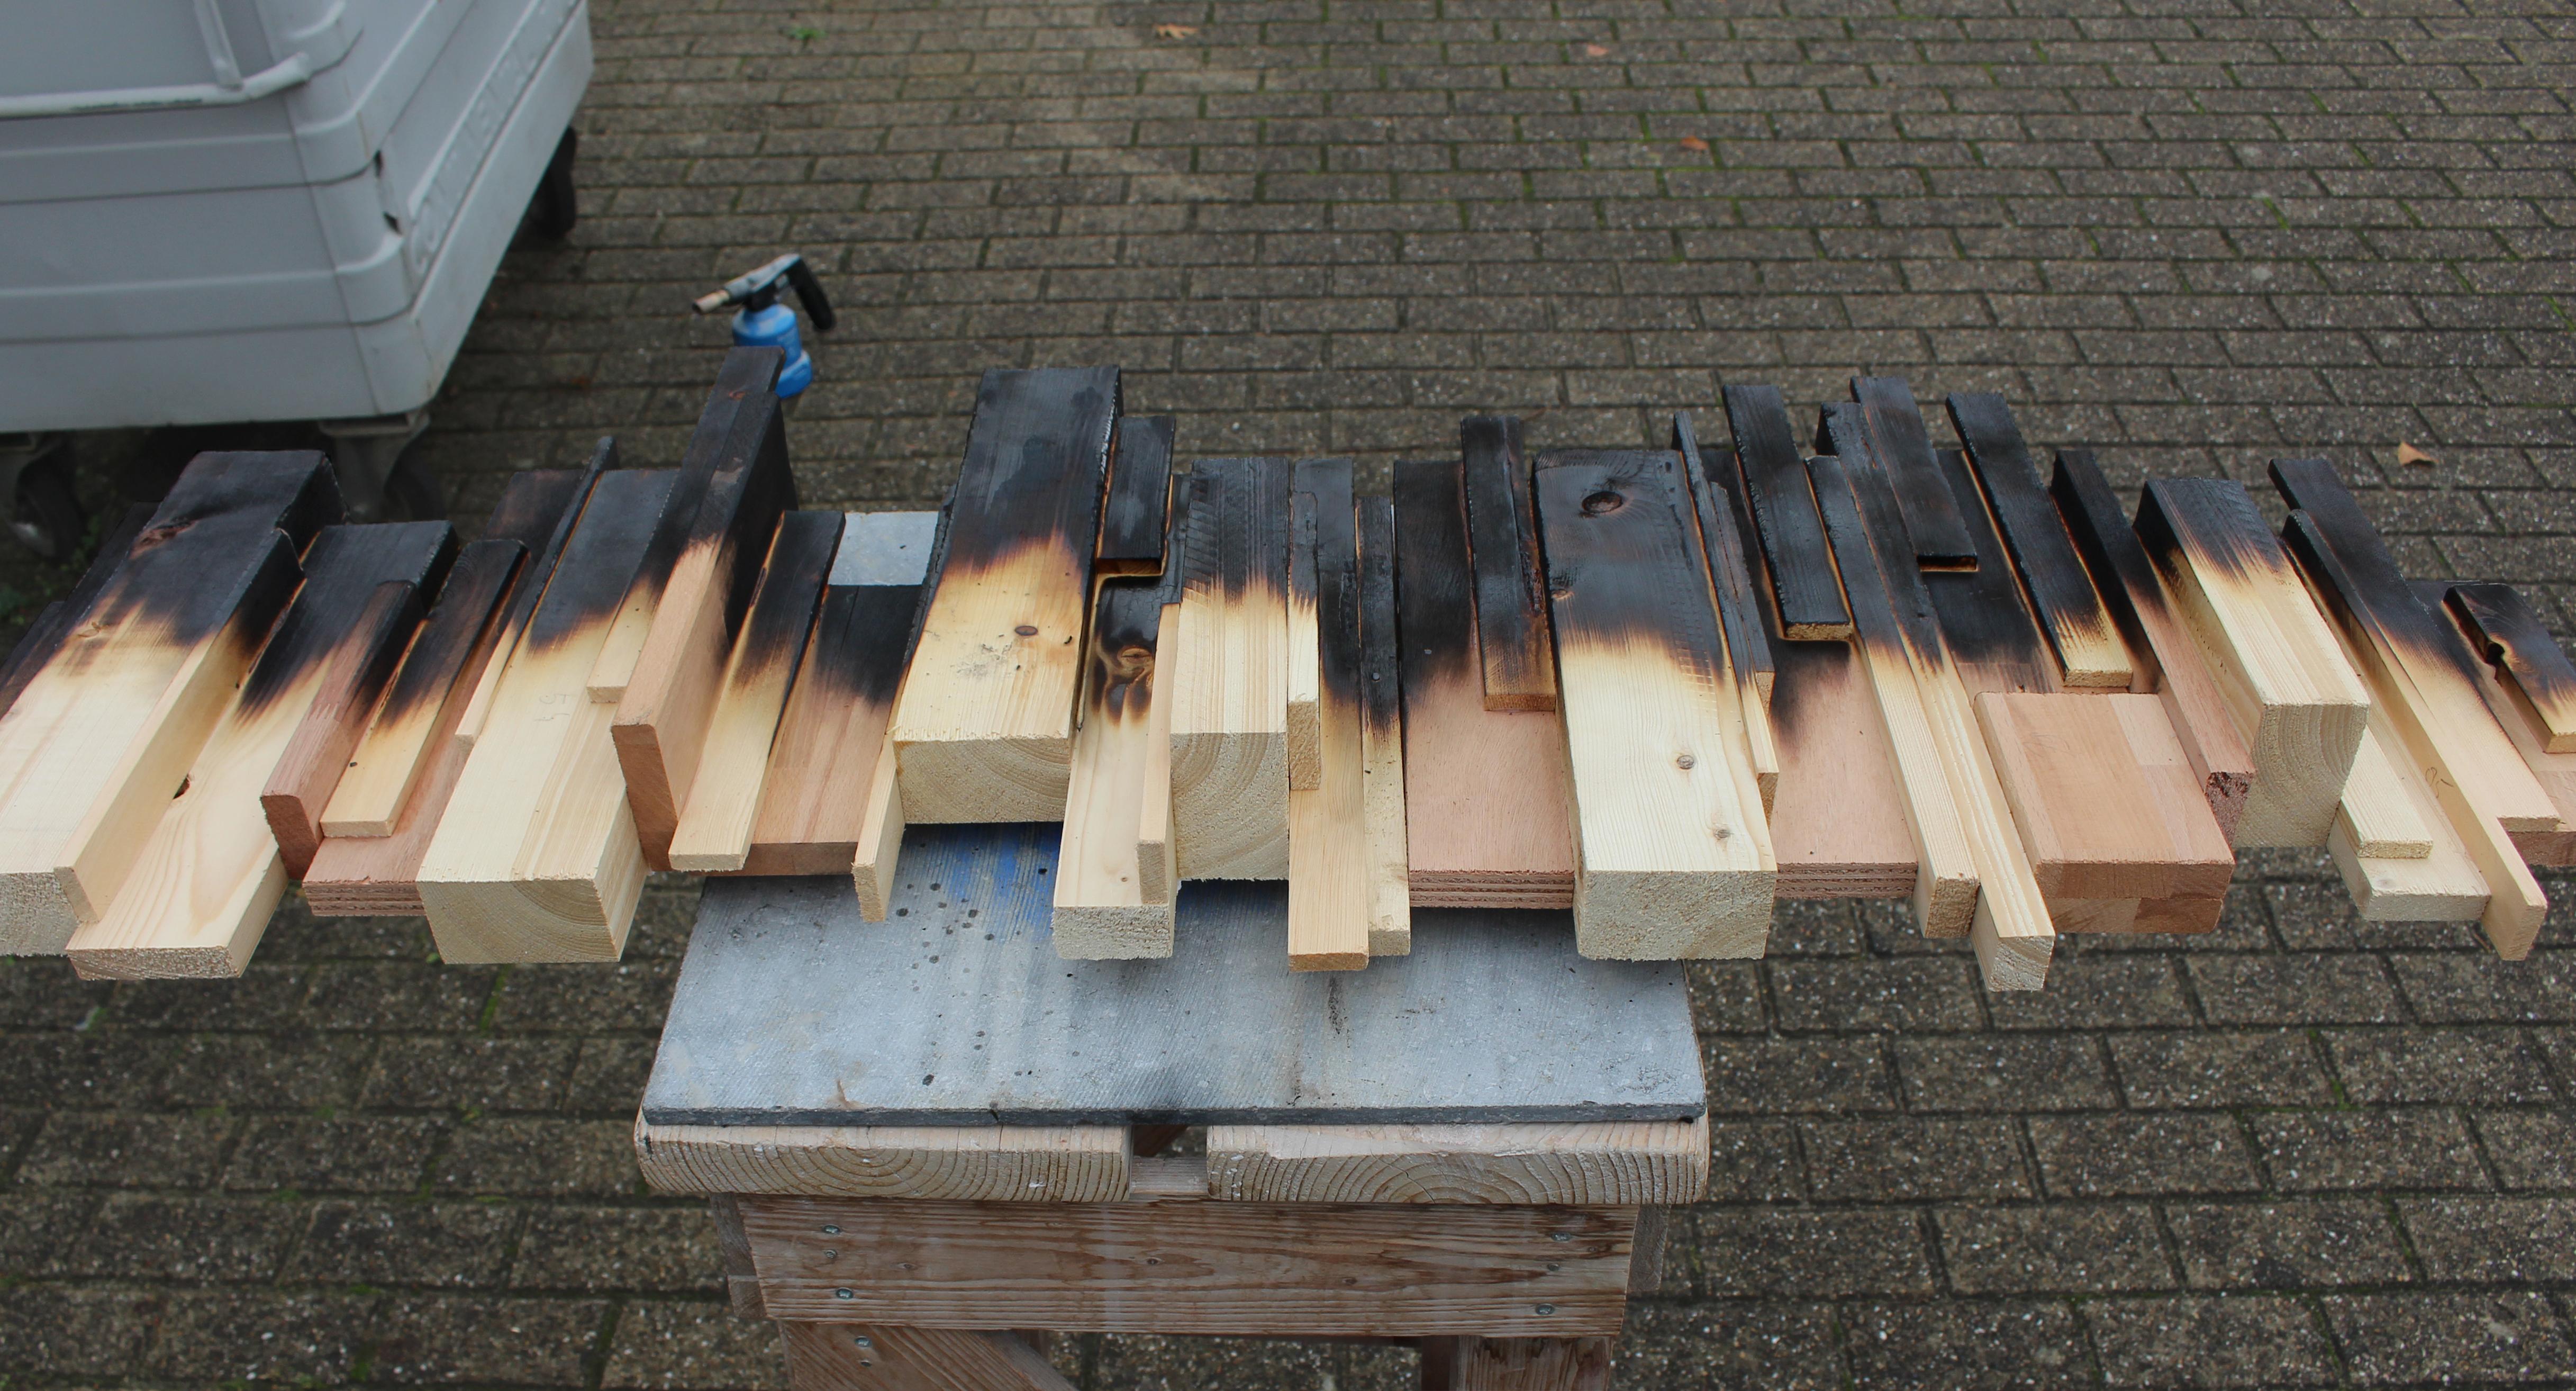
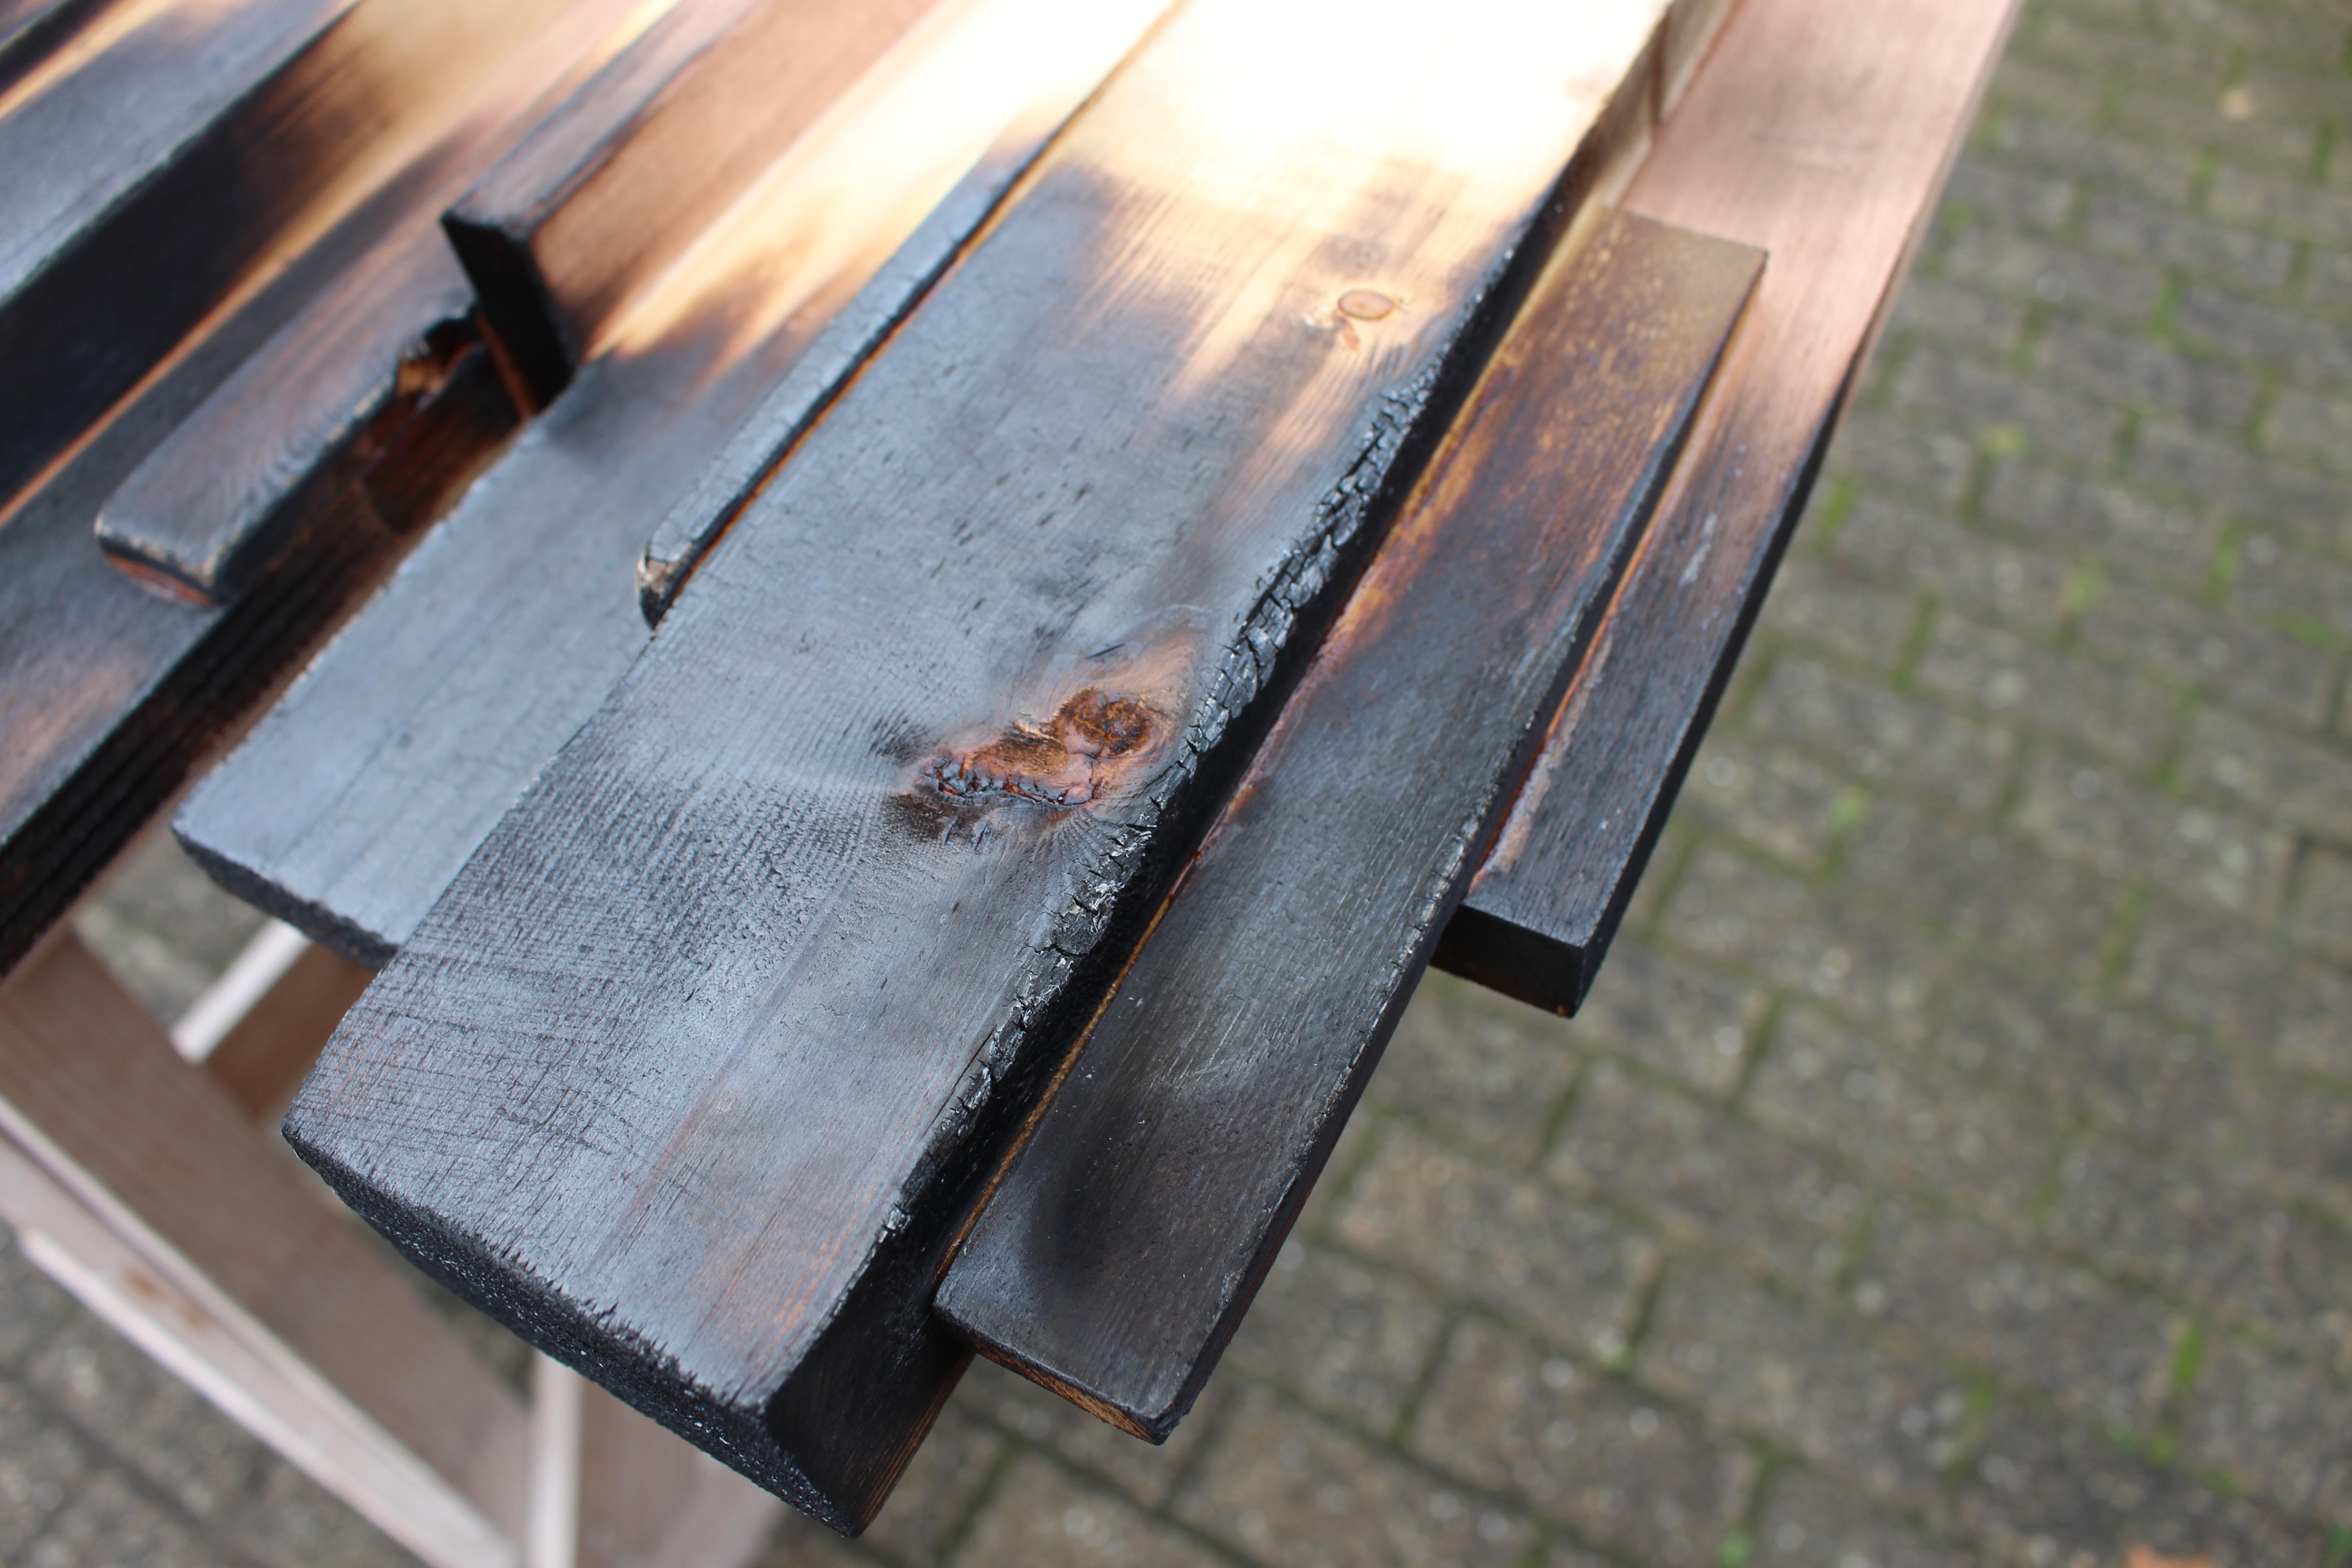
When you are done with making your panels you can start to burn them. I chose to only burn it halfway. I used a blowtorch and burned it until the front turned black and edges got a bit of a coal texture. Ofcourse you can burn it and until you like the texture and color.
Oil the Panel
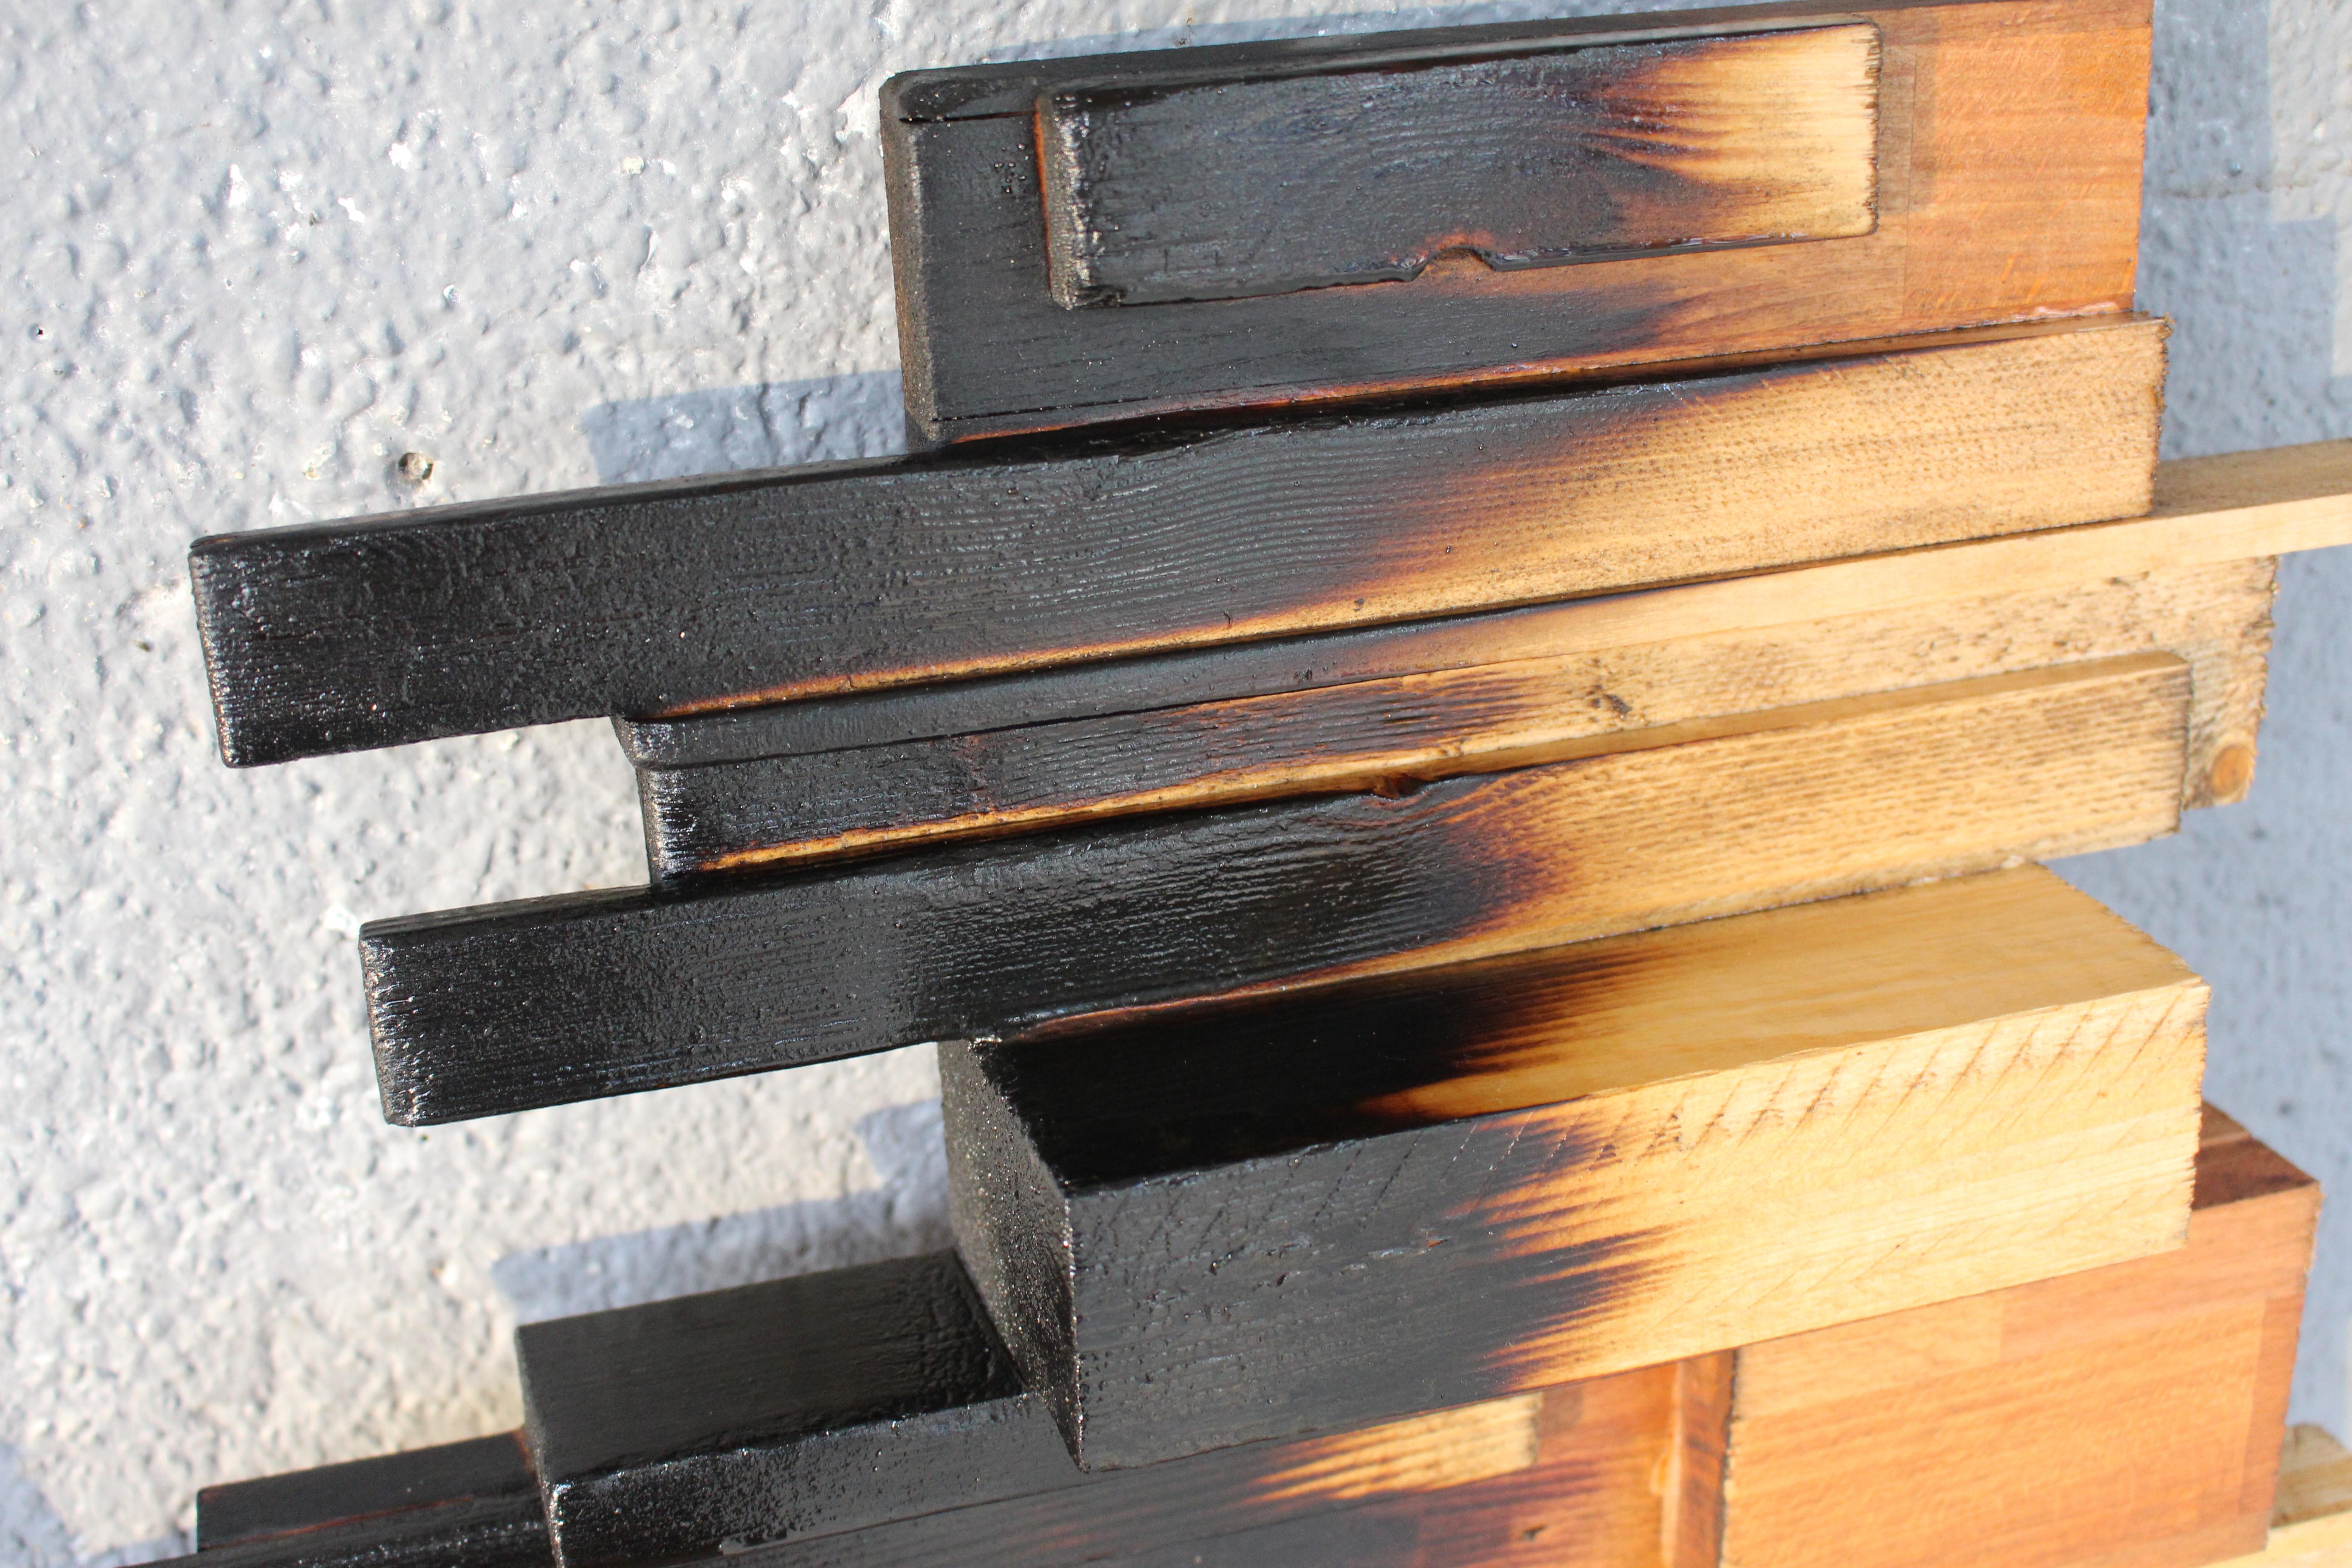
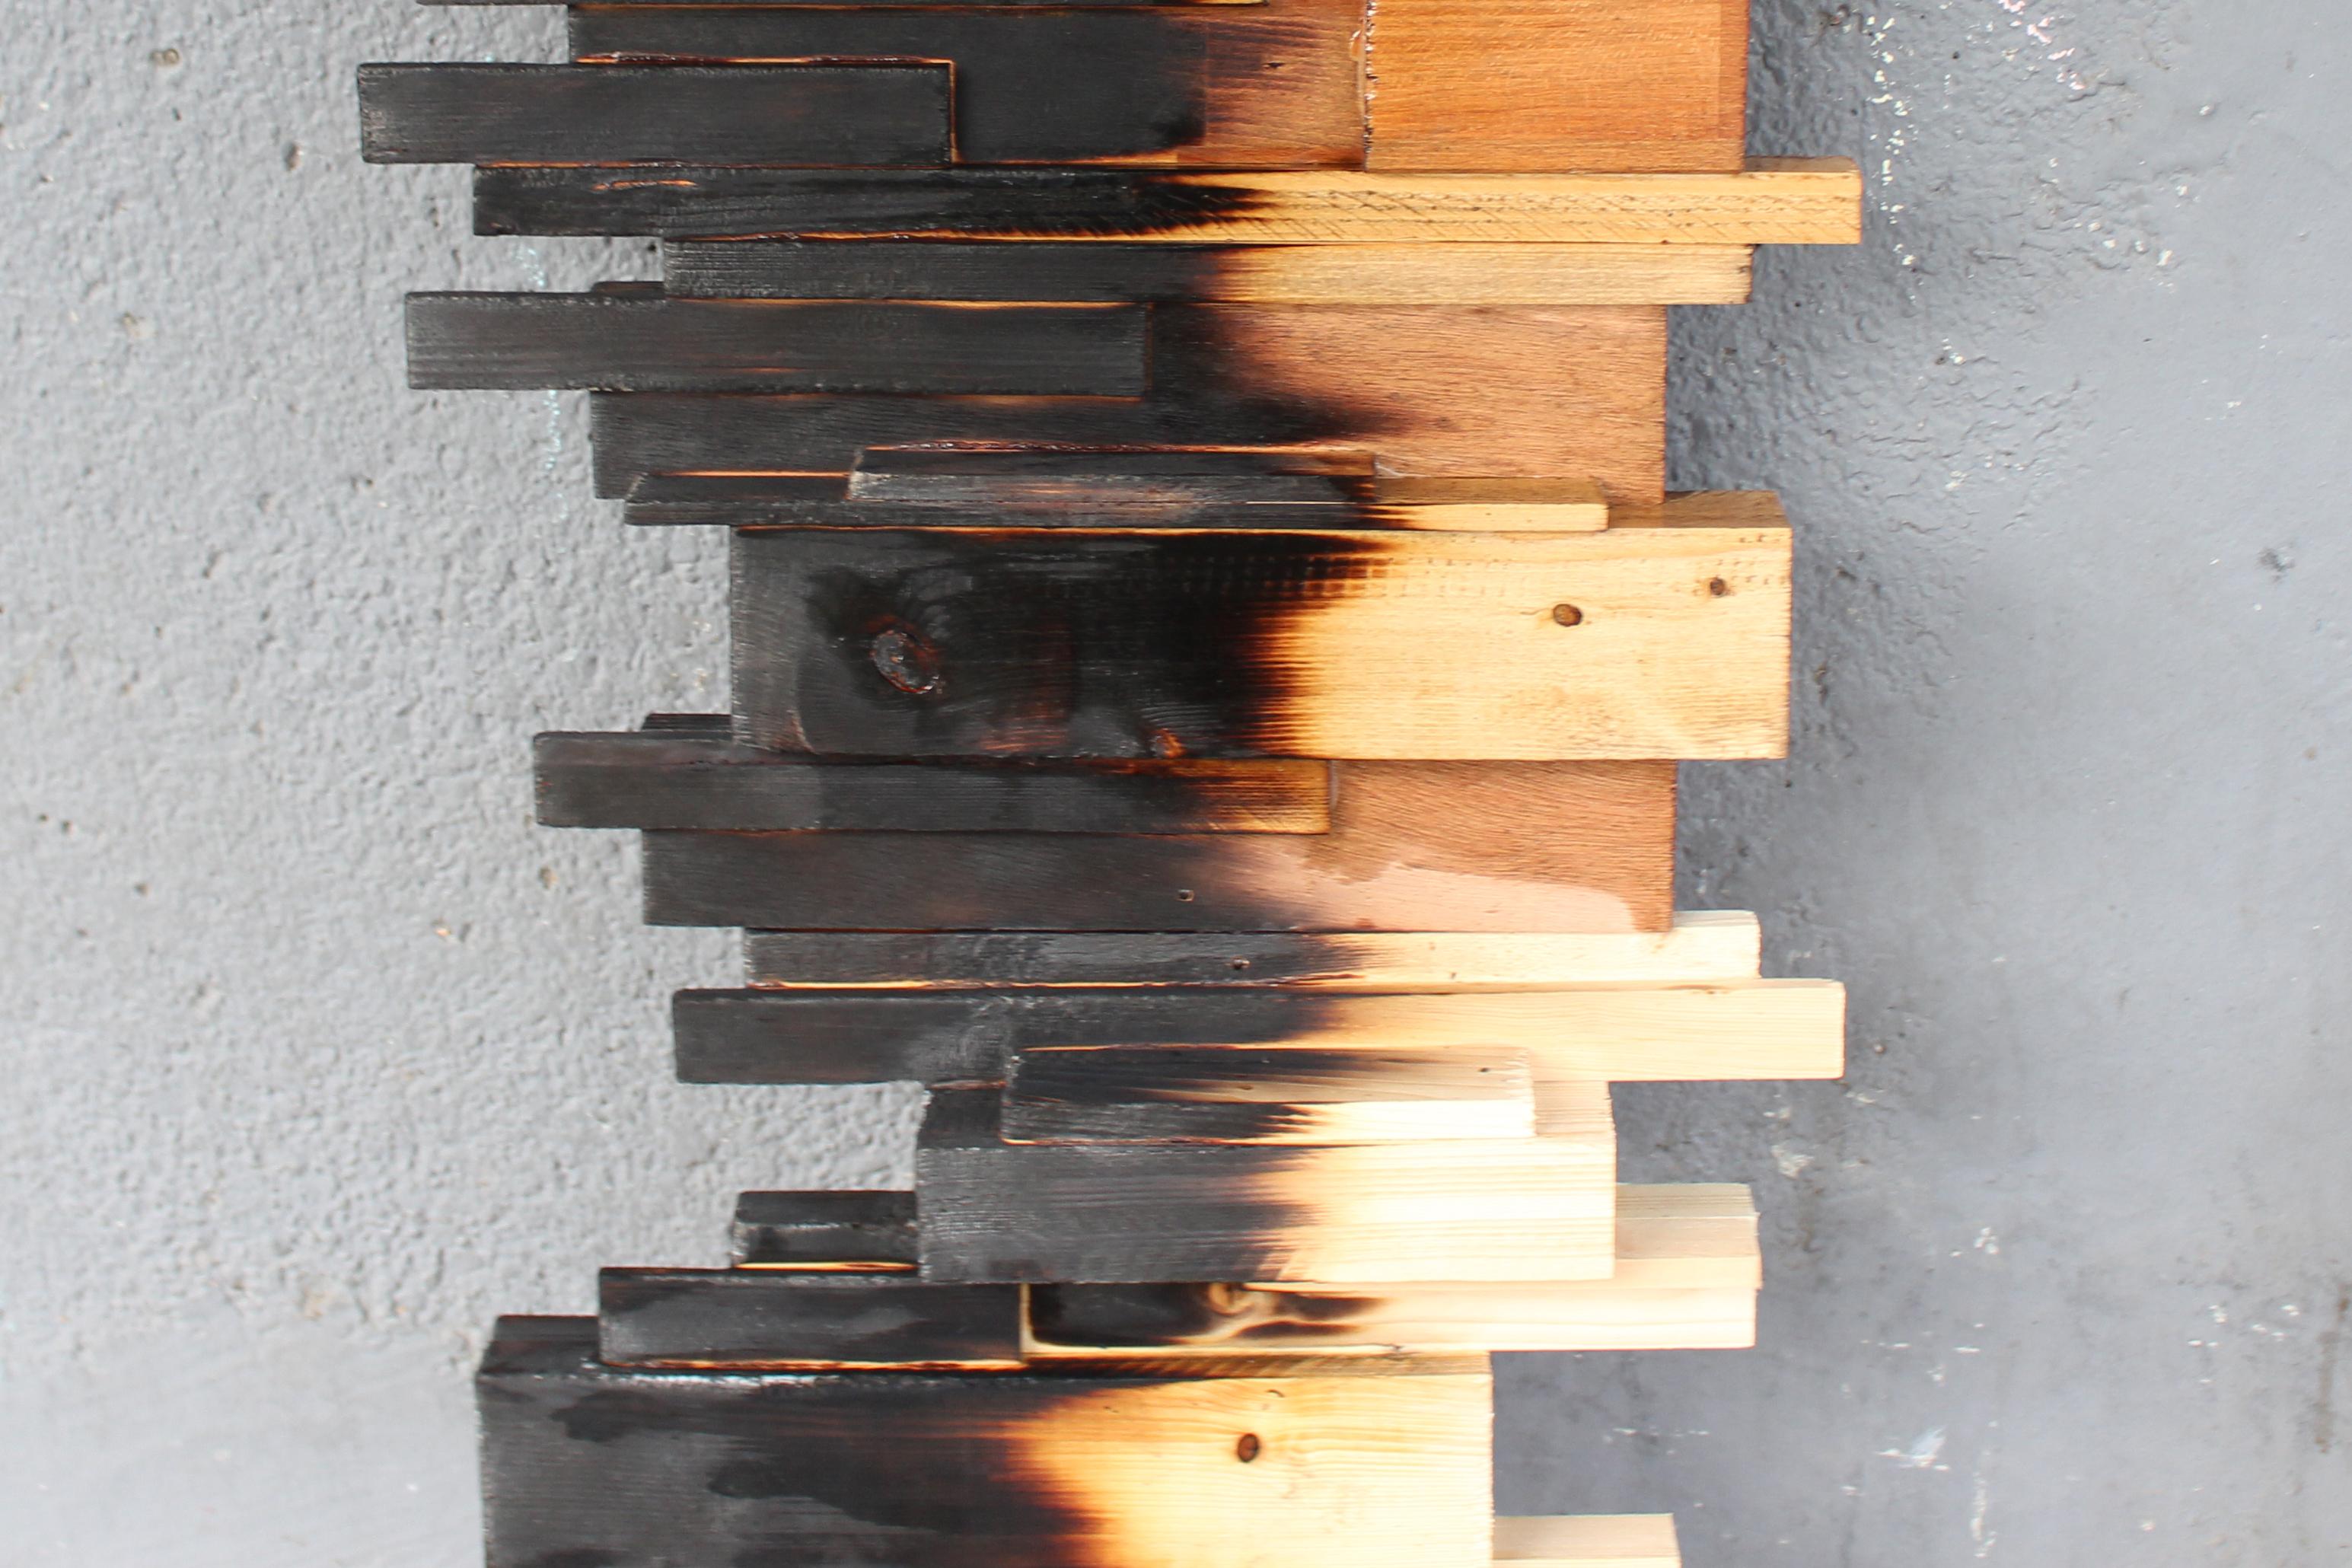

After I burnt the panels I mixed oil with some brown oil paint (of course you can just use normal wood oil). Next I gave the panels a coat of the oil with a brush to make the wood a bit darker. But before I oiled them I erased the numbers using a eraser.
Upload the Code
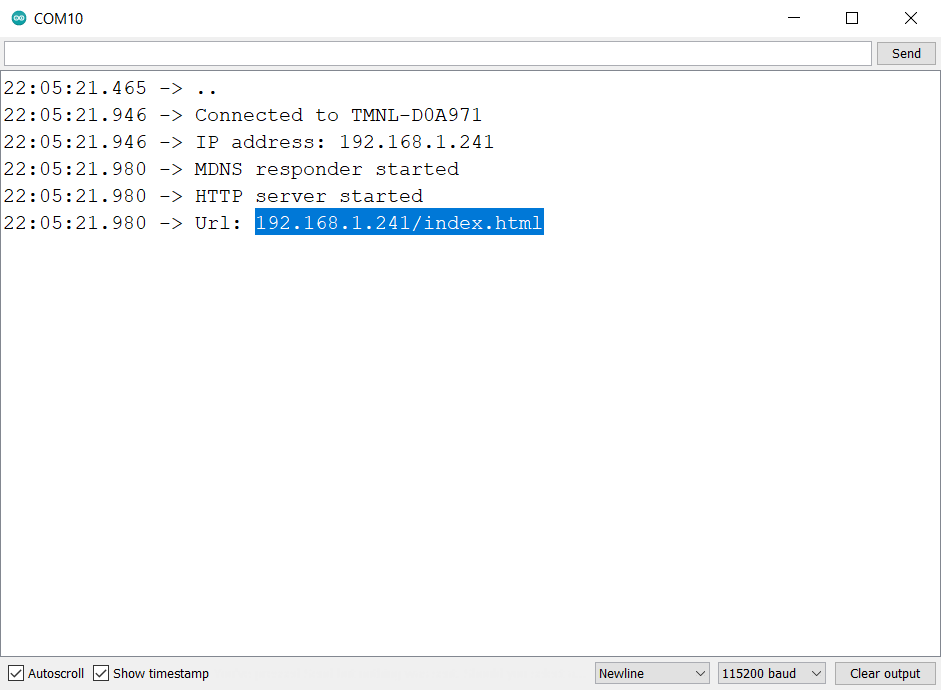
Plug your NodeMCU into your pc and install the ESP8266 Board Package a great instruction can be found here. After following the instruction open the attached arduino code and change the ssid and password to the ones of your router (You must use a 2.4GHz wireless network). Finally you can upload the arduino code.
Once you have uploaded the code to the NodeMCU you need to open the Serial Port. The Serial Port will print out the url you need to control the ledstrip with.
Downloads
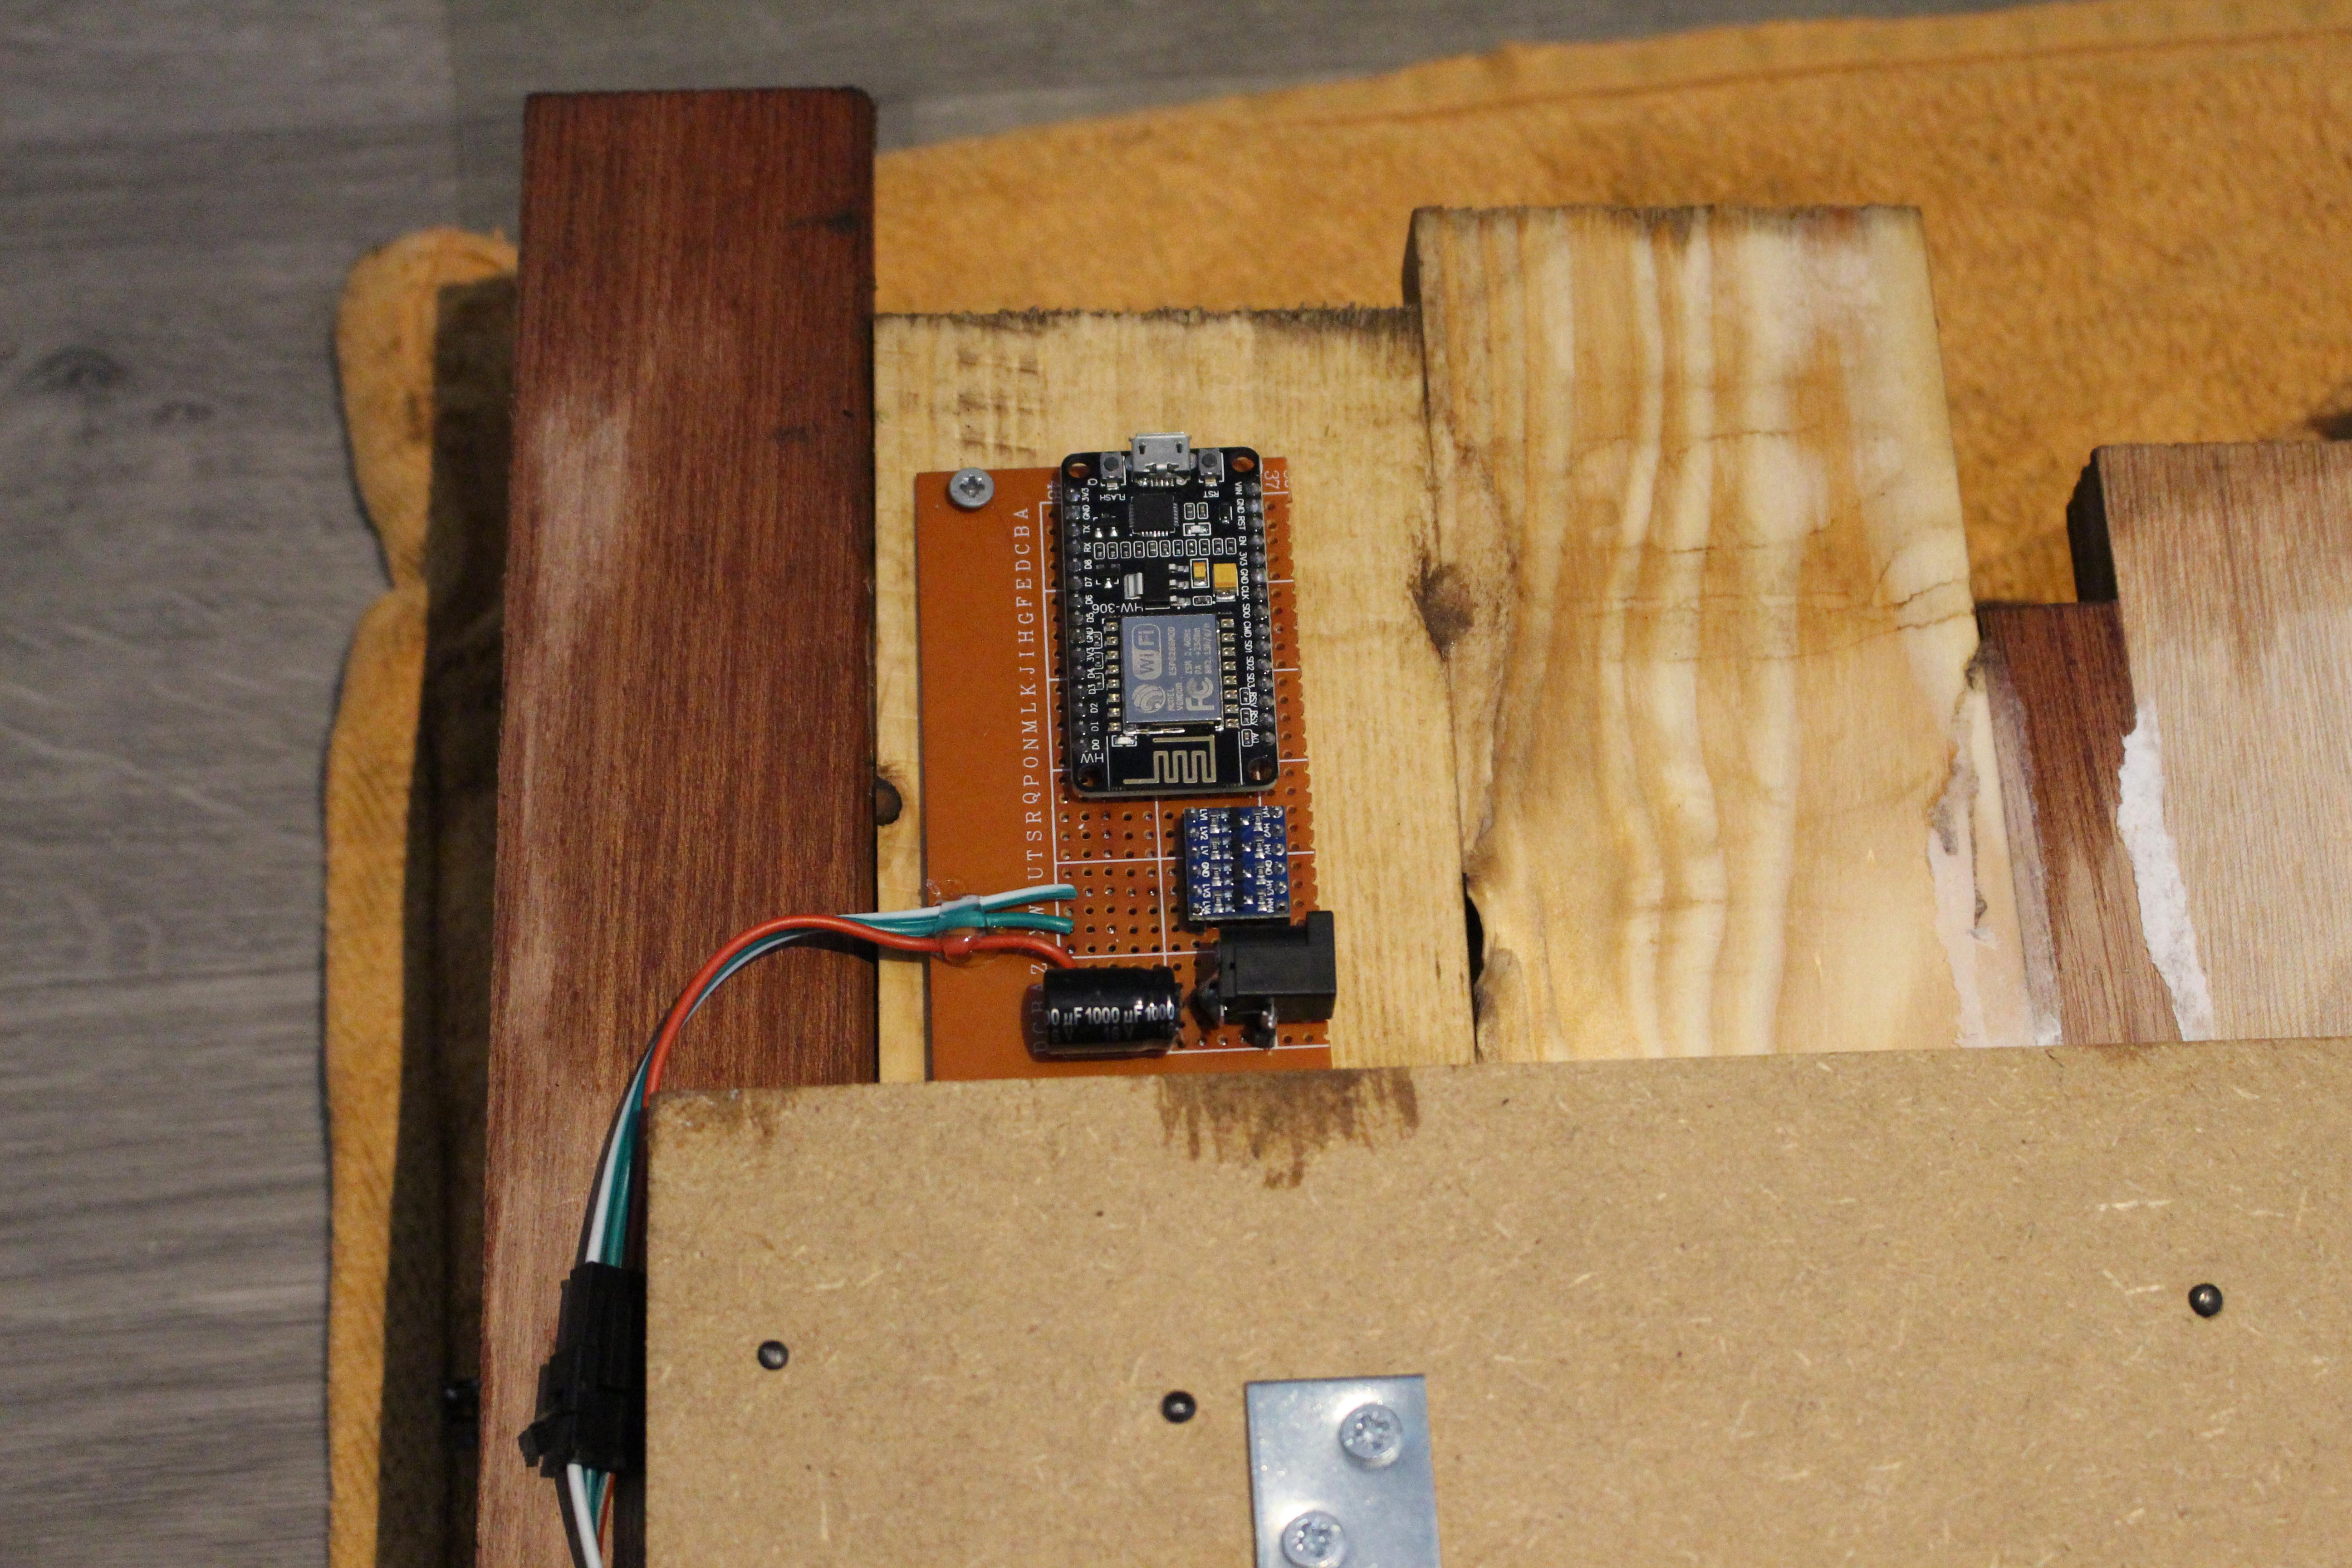
Solder the Circuitboard
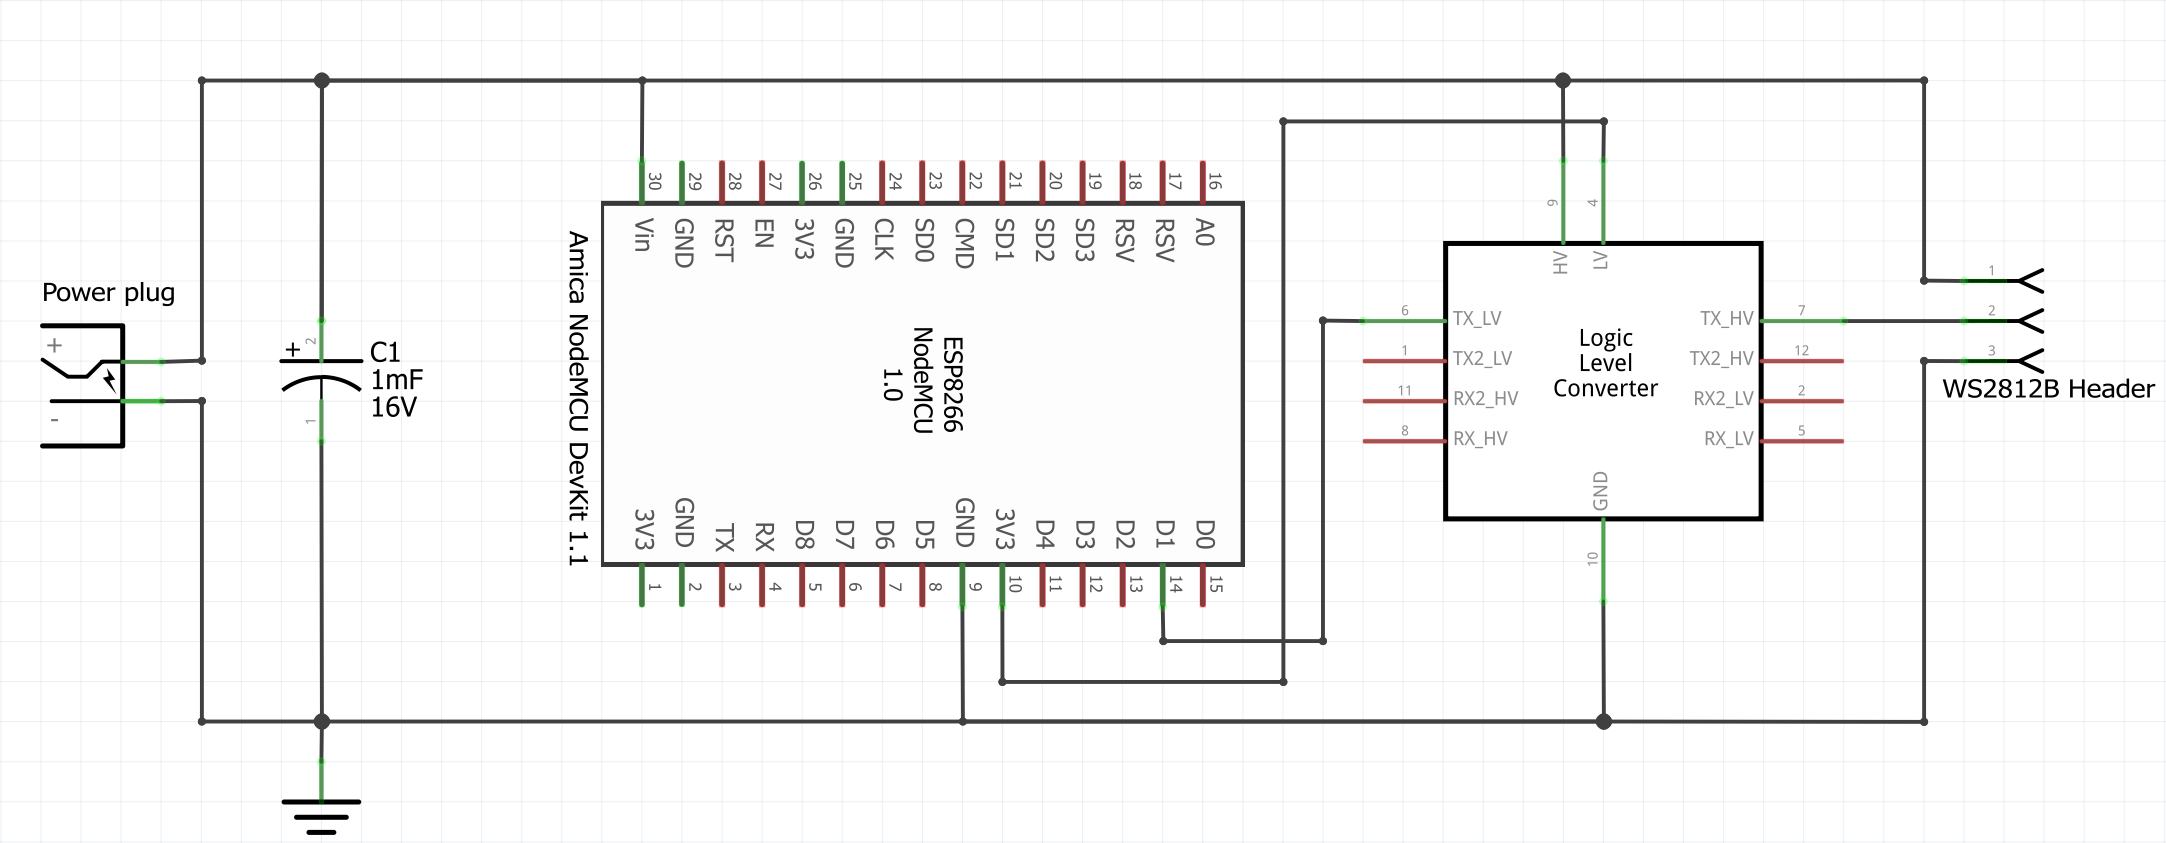
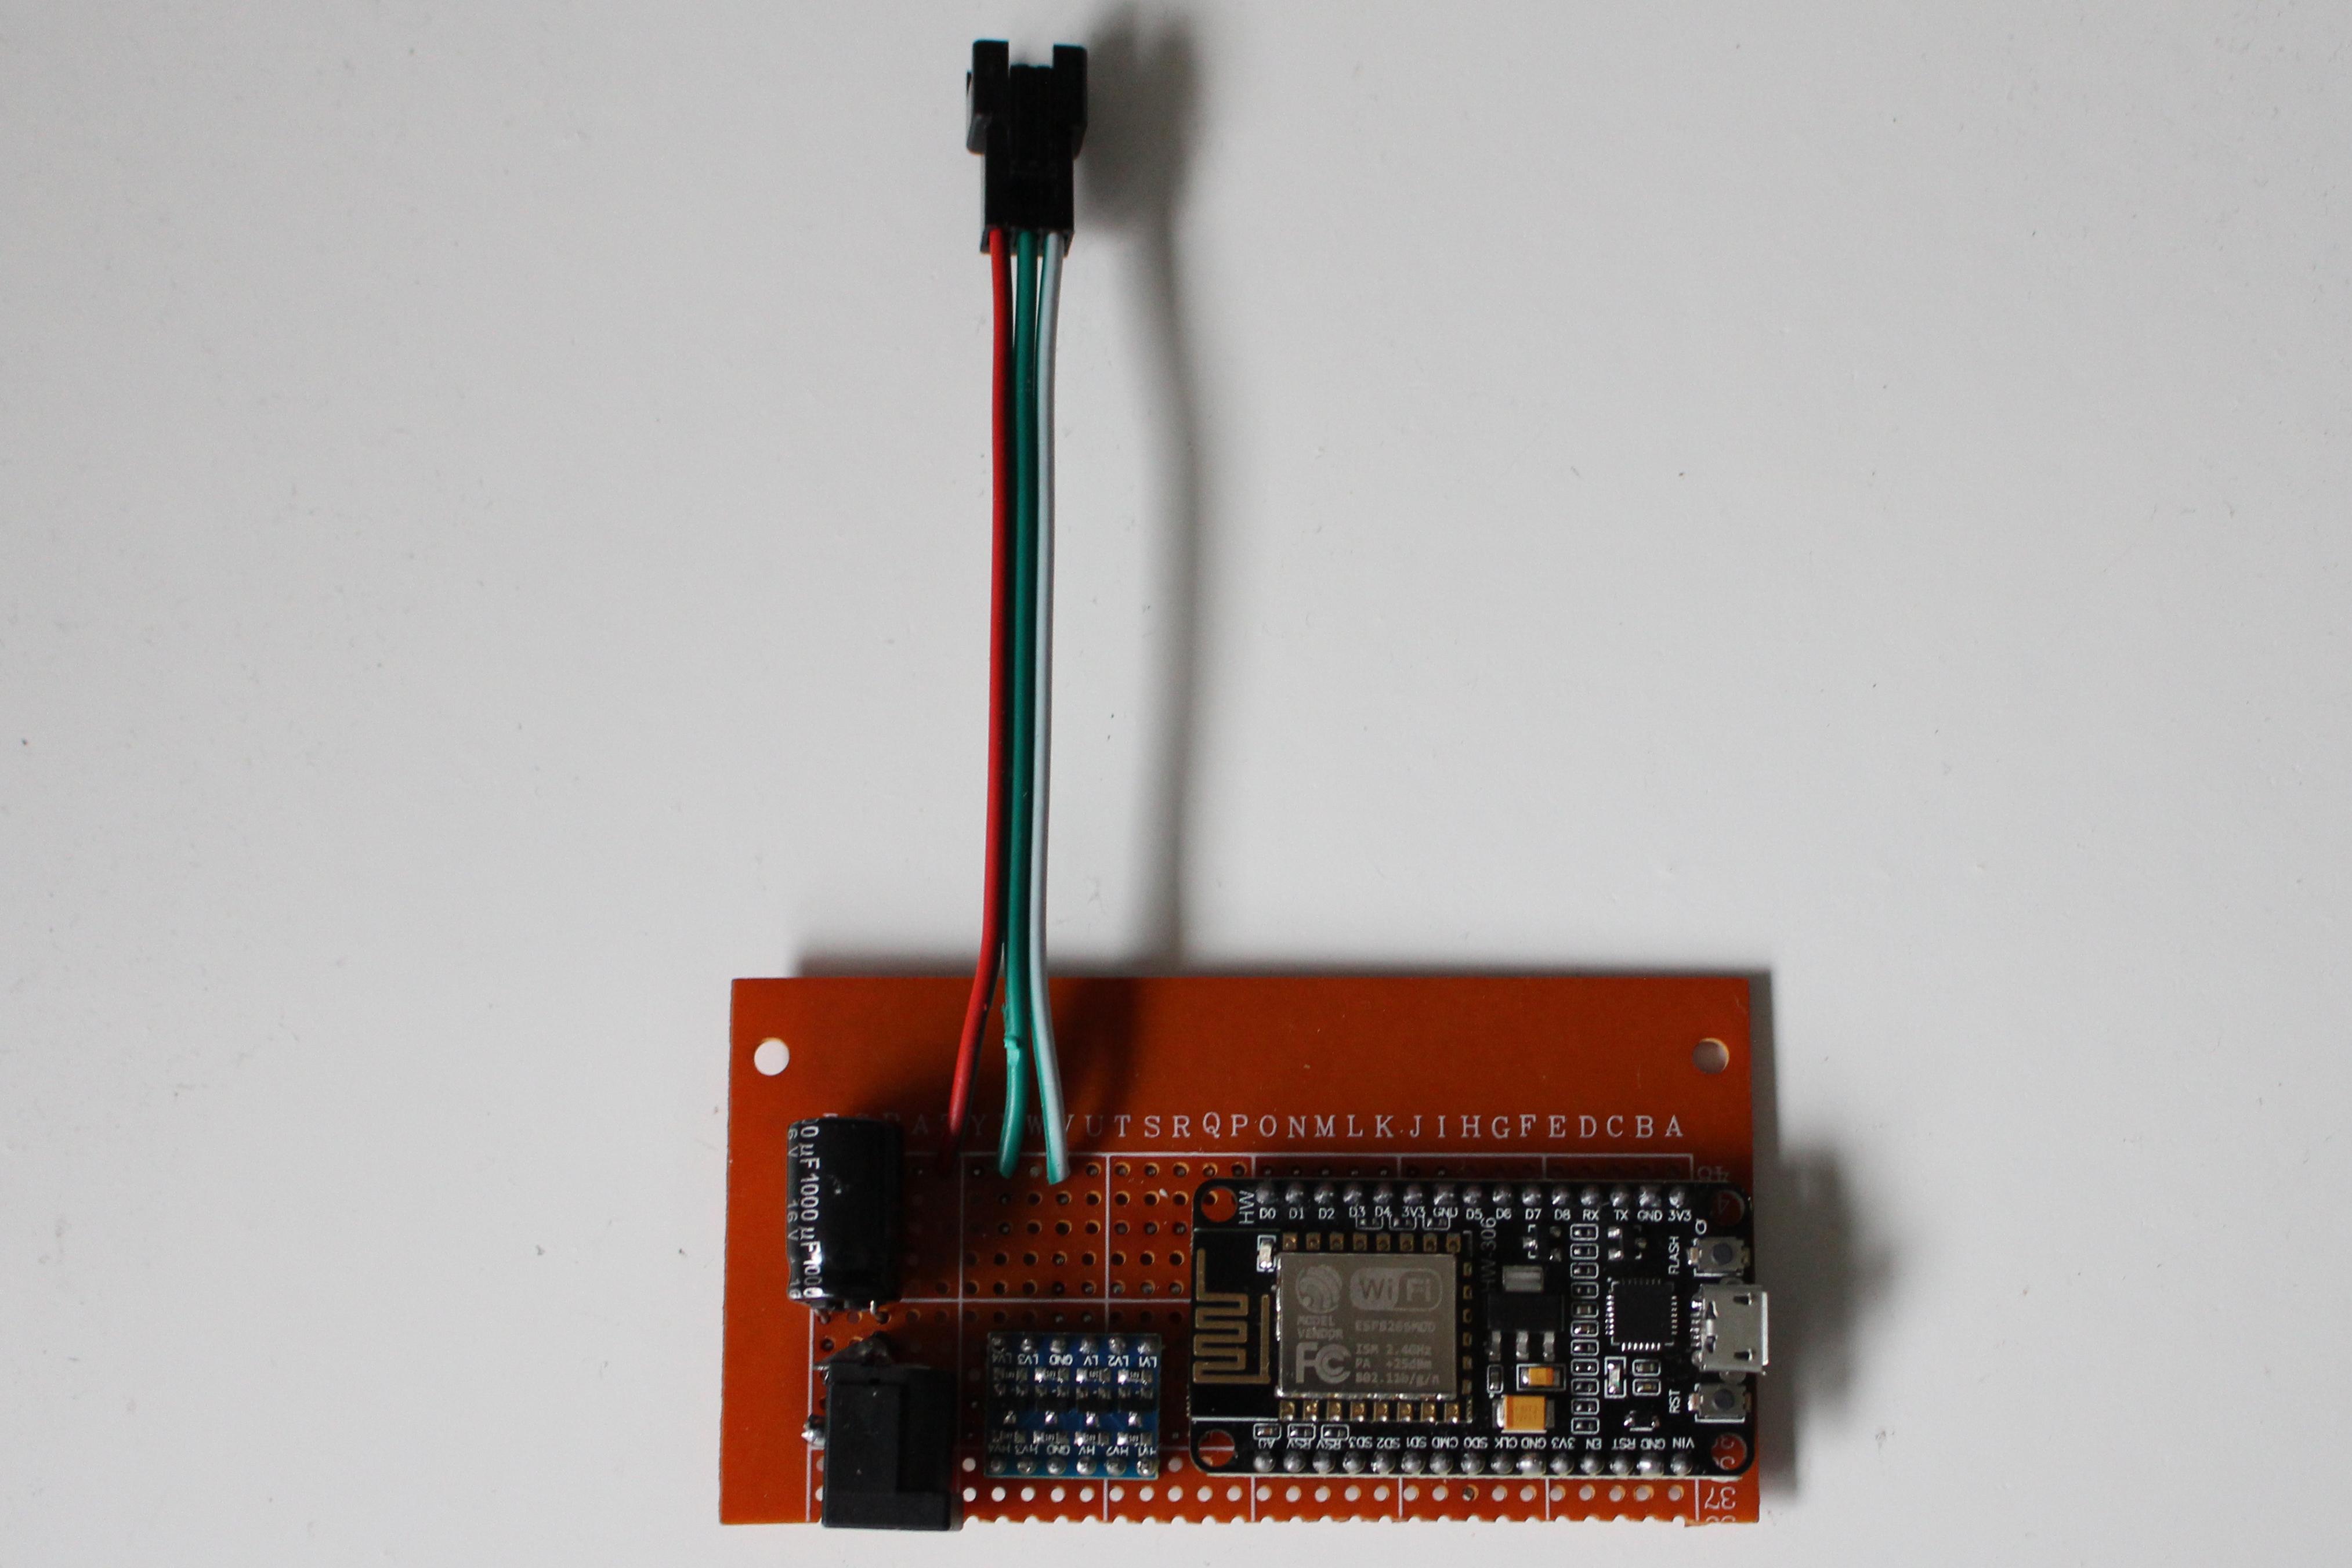
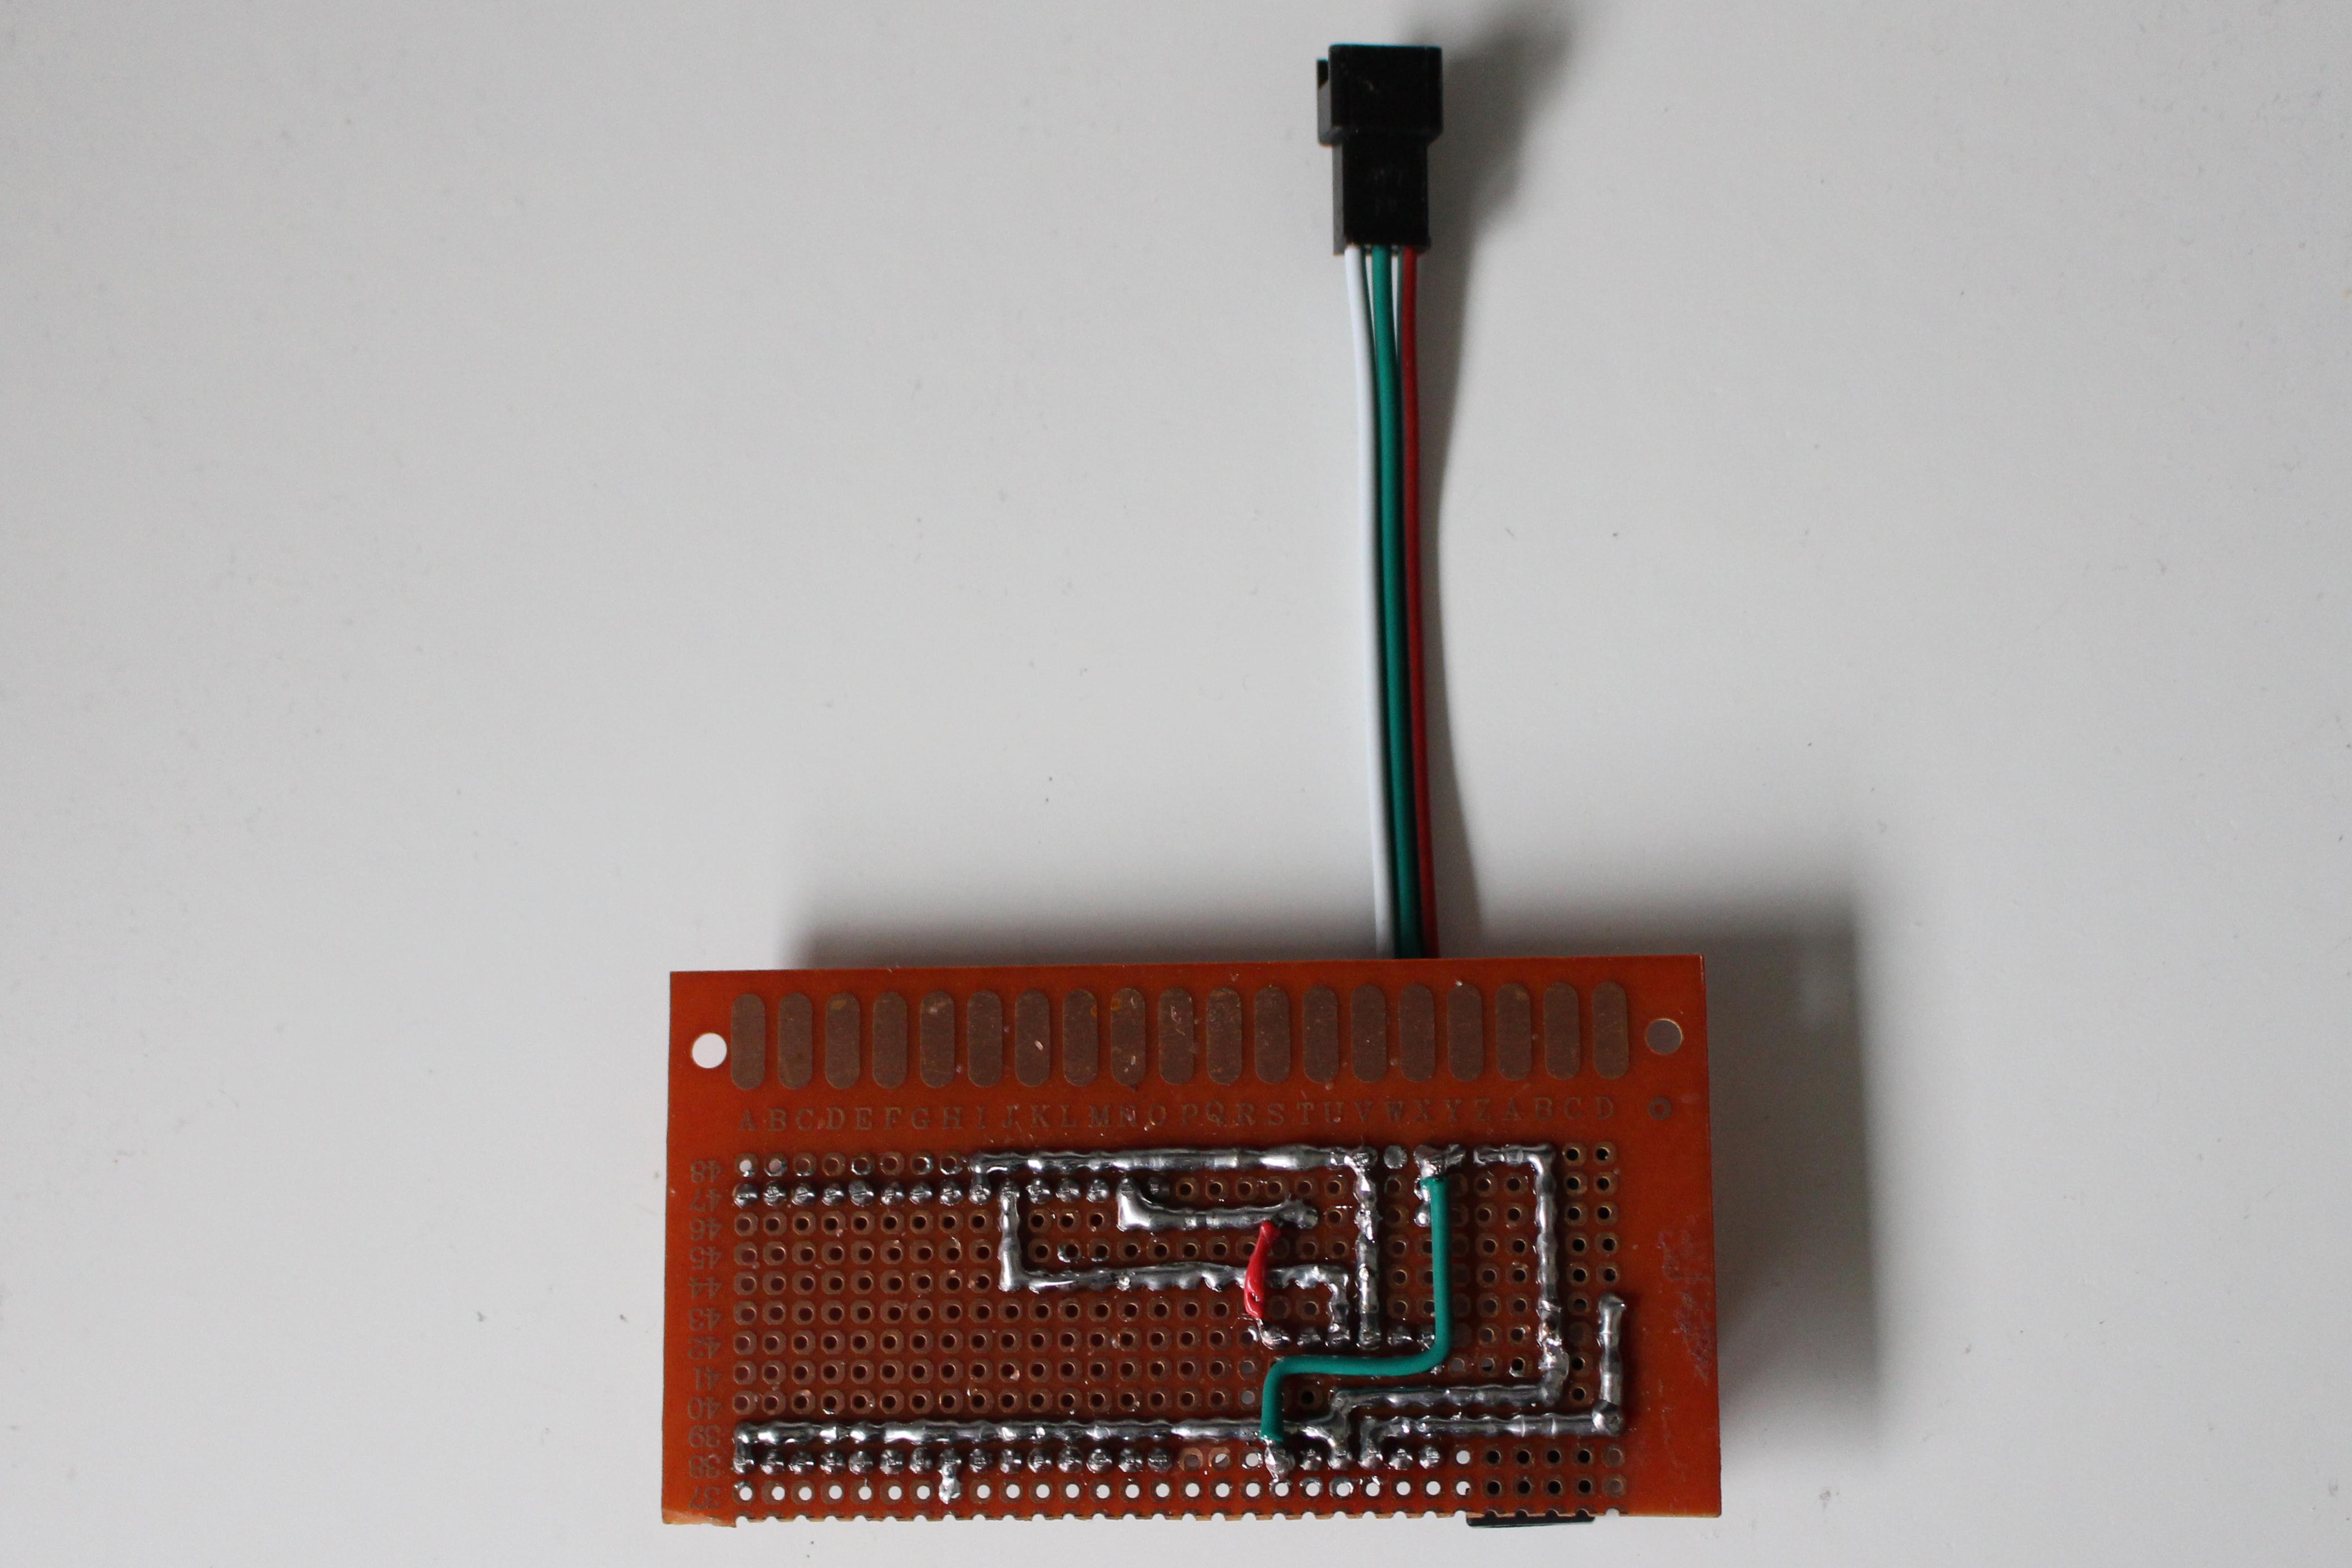
Solder the circuit as shown in the image above. Make sure the thickness off the circuitboard isn't thicker than the mounting panel.
For powering the NodeMCU v2 and the ledstrips you need to use an external powersupply. Since the ledstrips require 60mA/led and we have 120 leds you can calculate how big the external powersupply needs to be.
120 * 60 / 1000 = 7,2A so for the powersupply I will use a 5v 8A powersupply.
Attach the Ledstrips
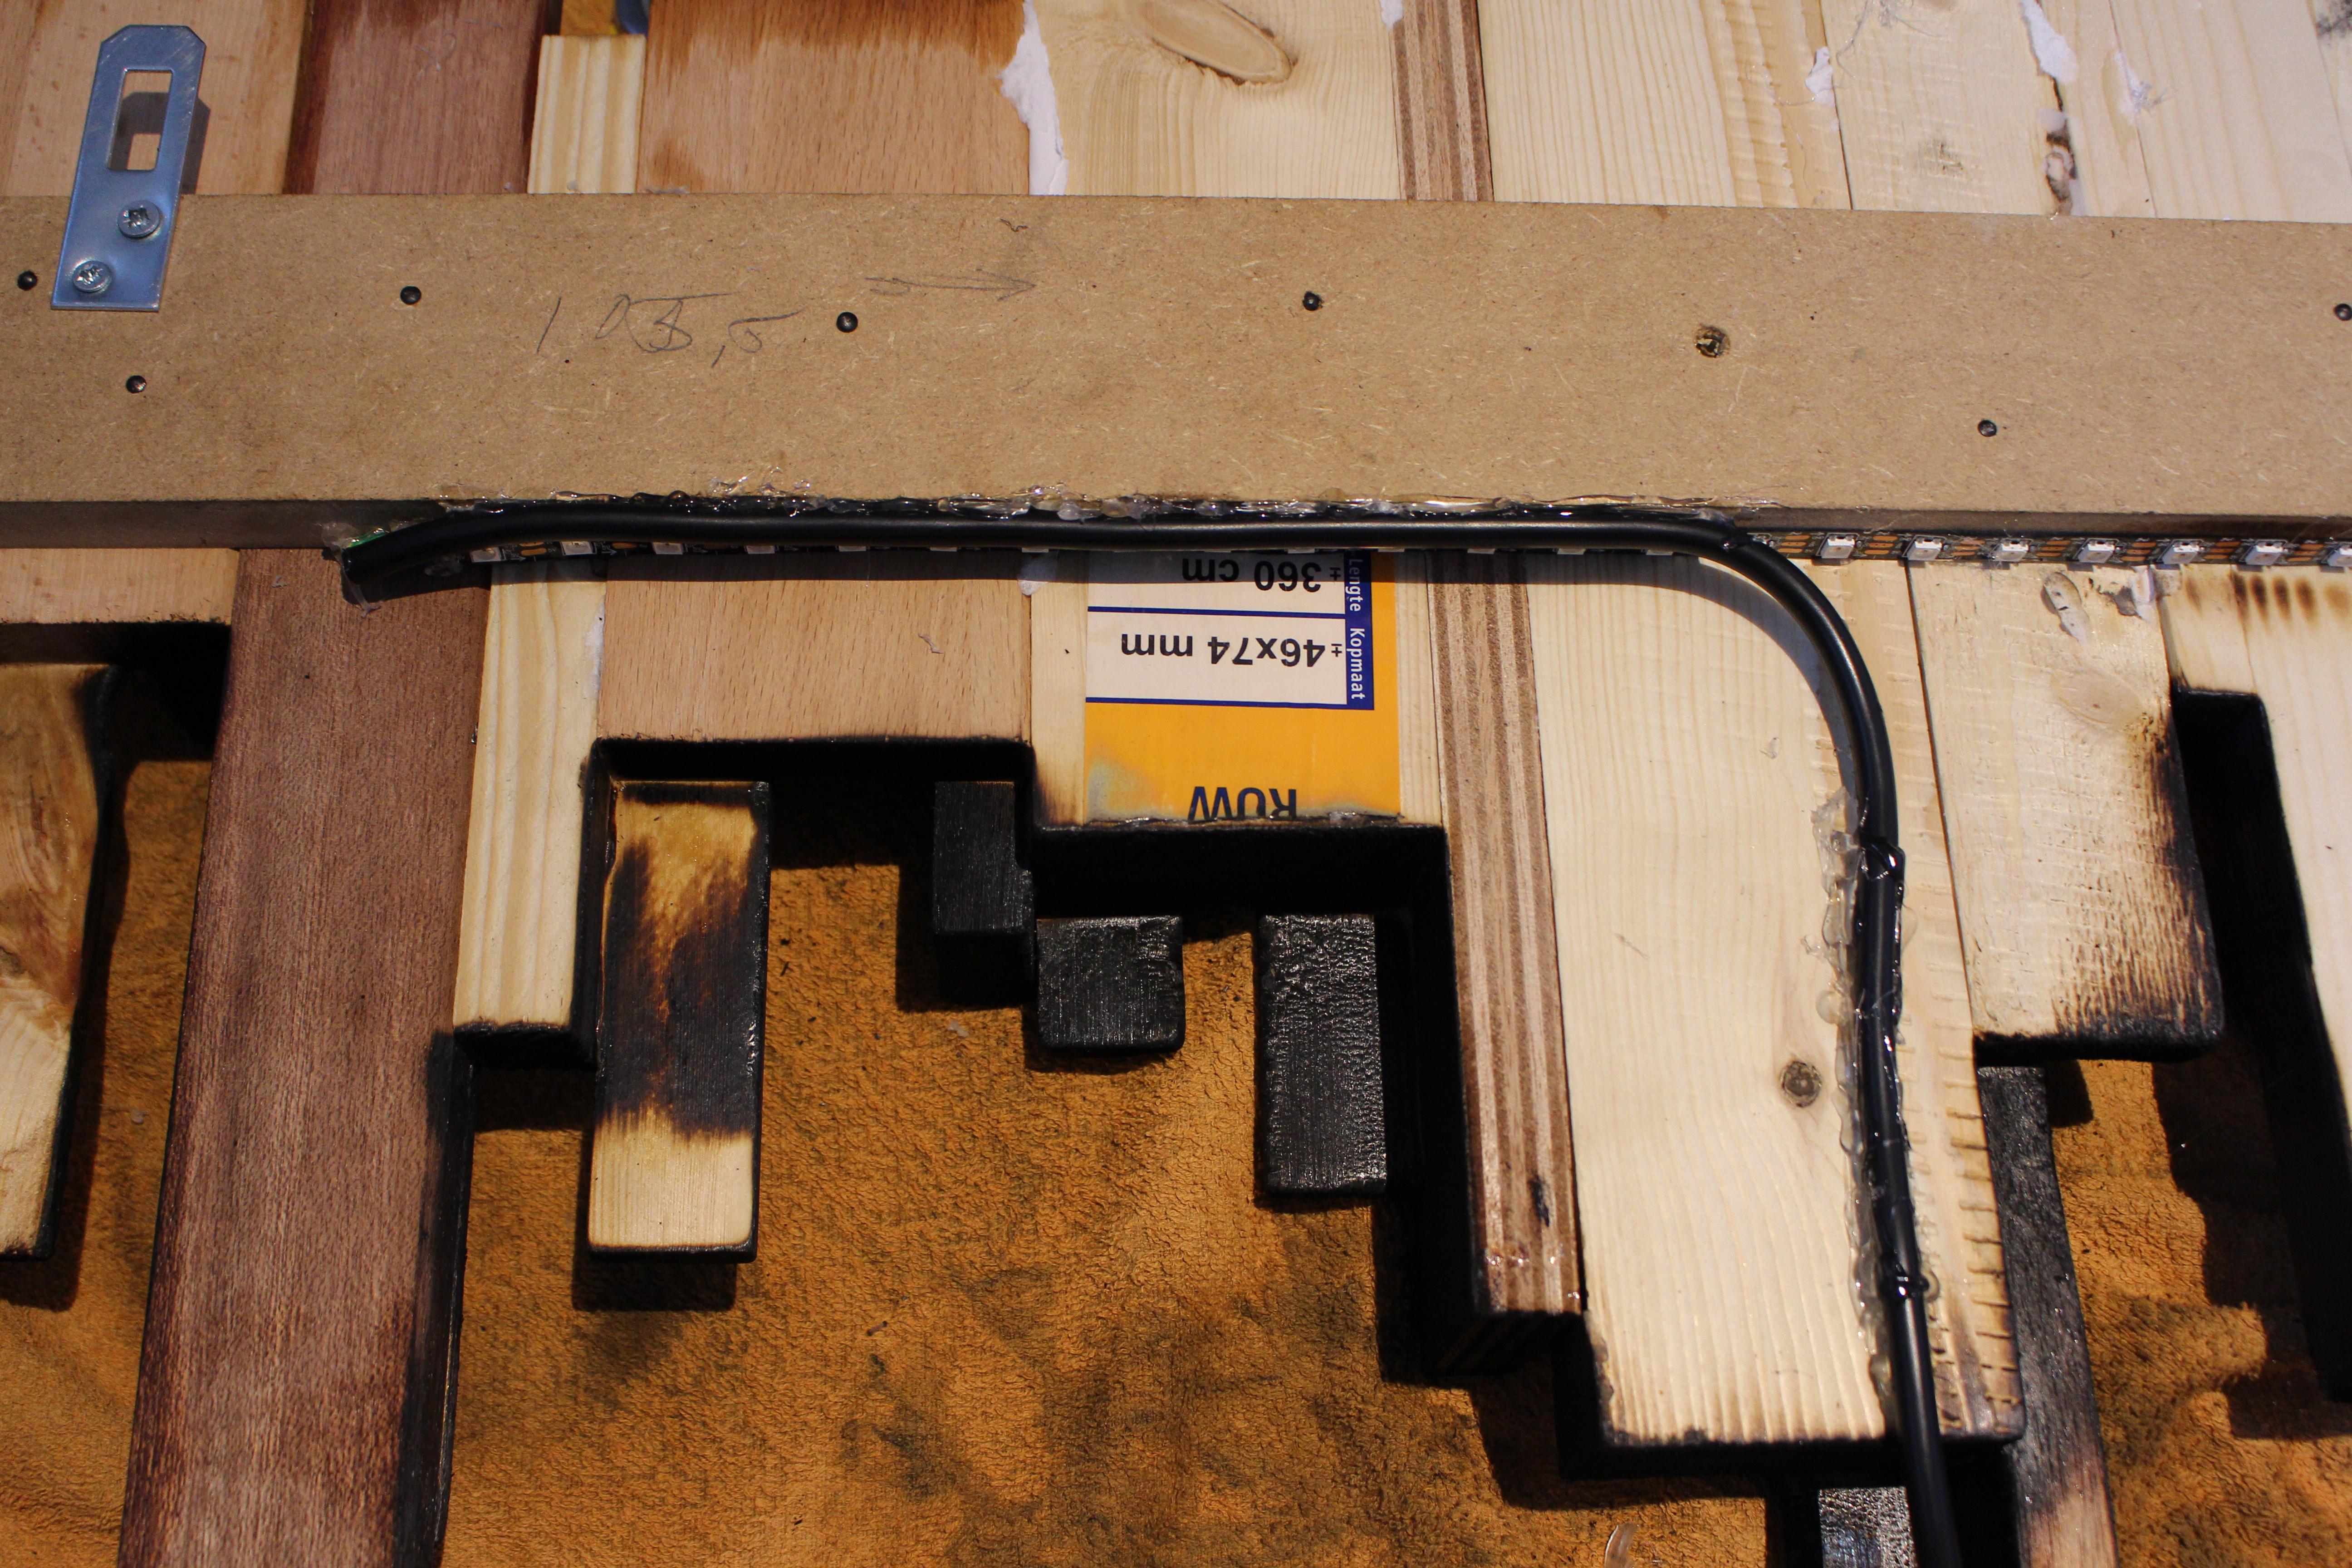
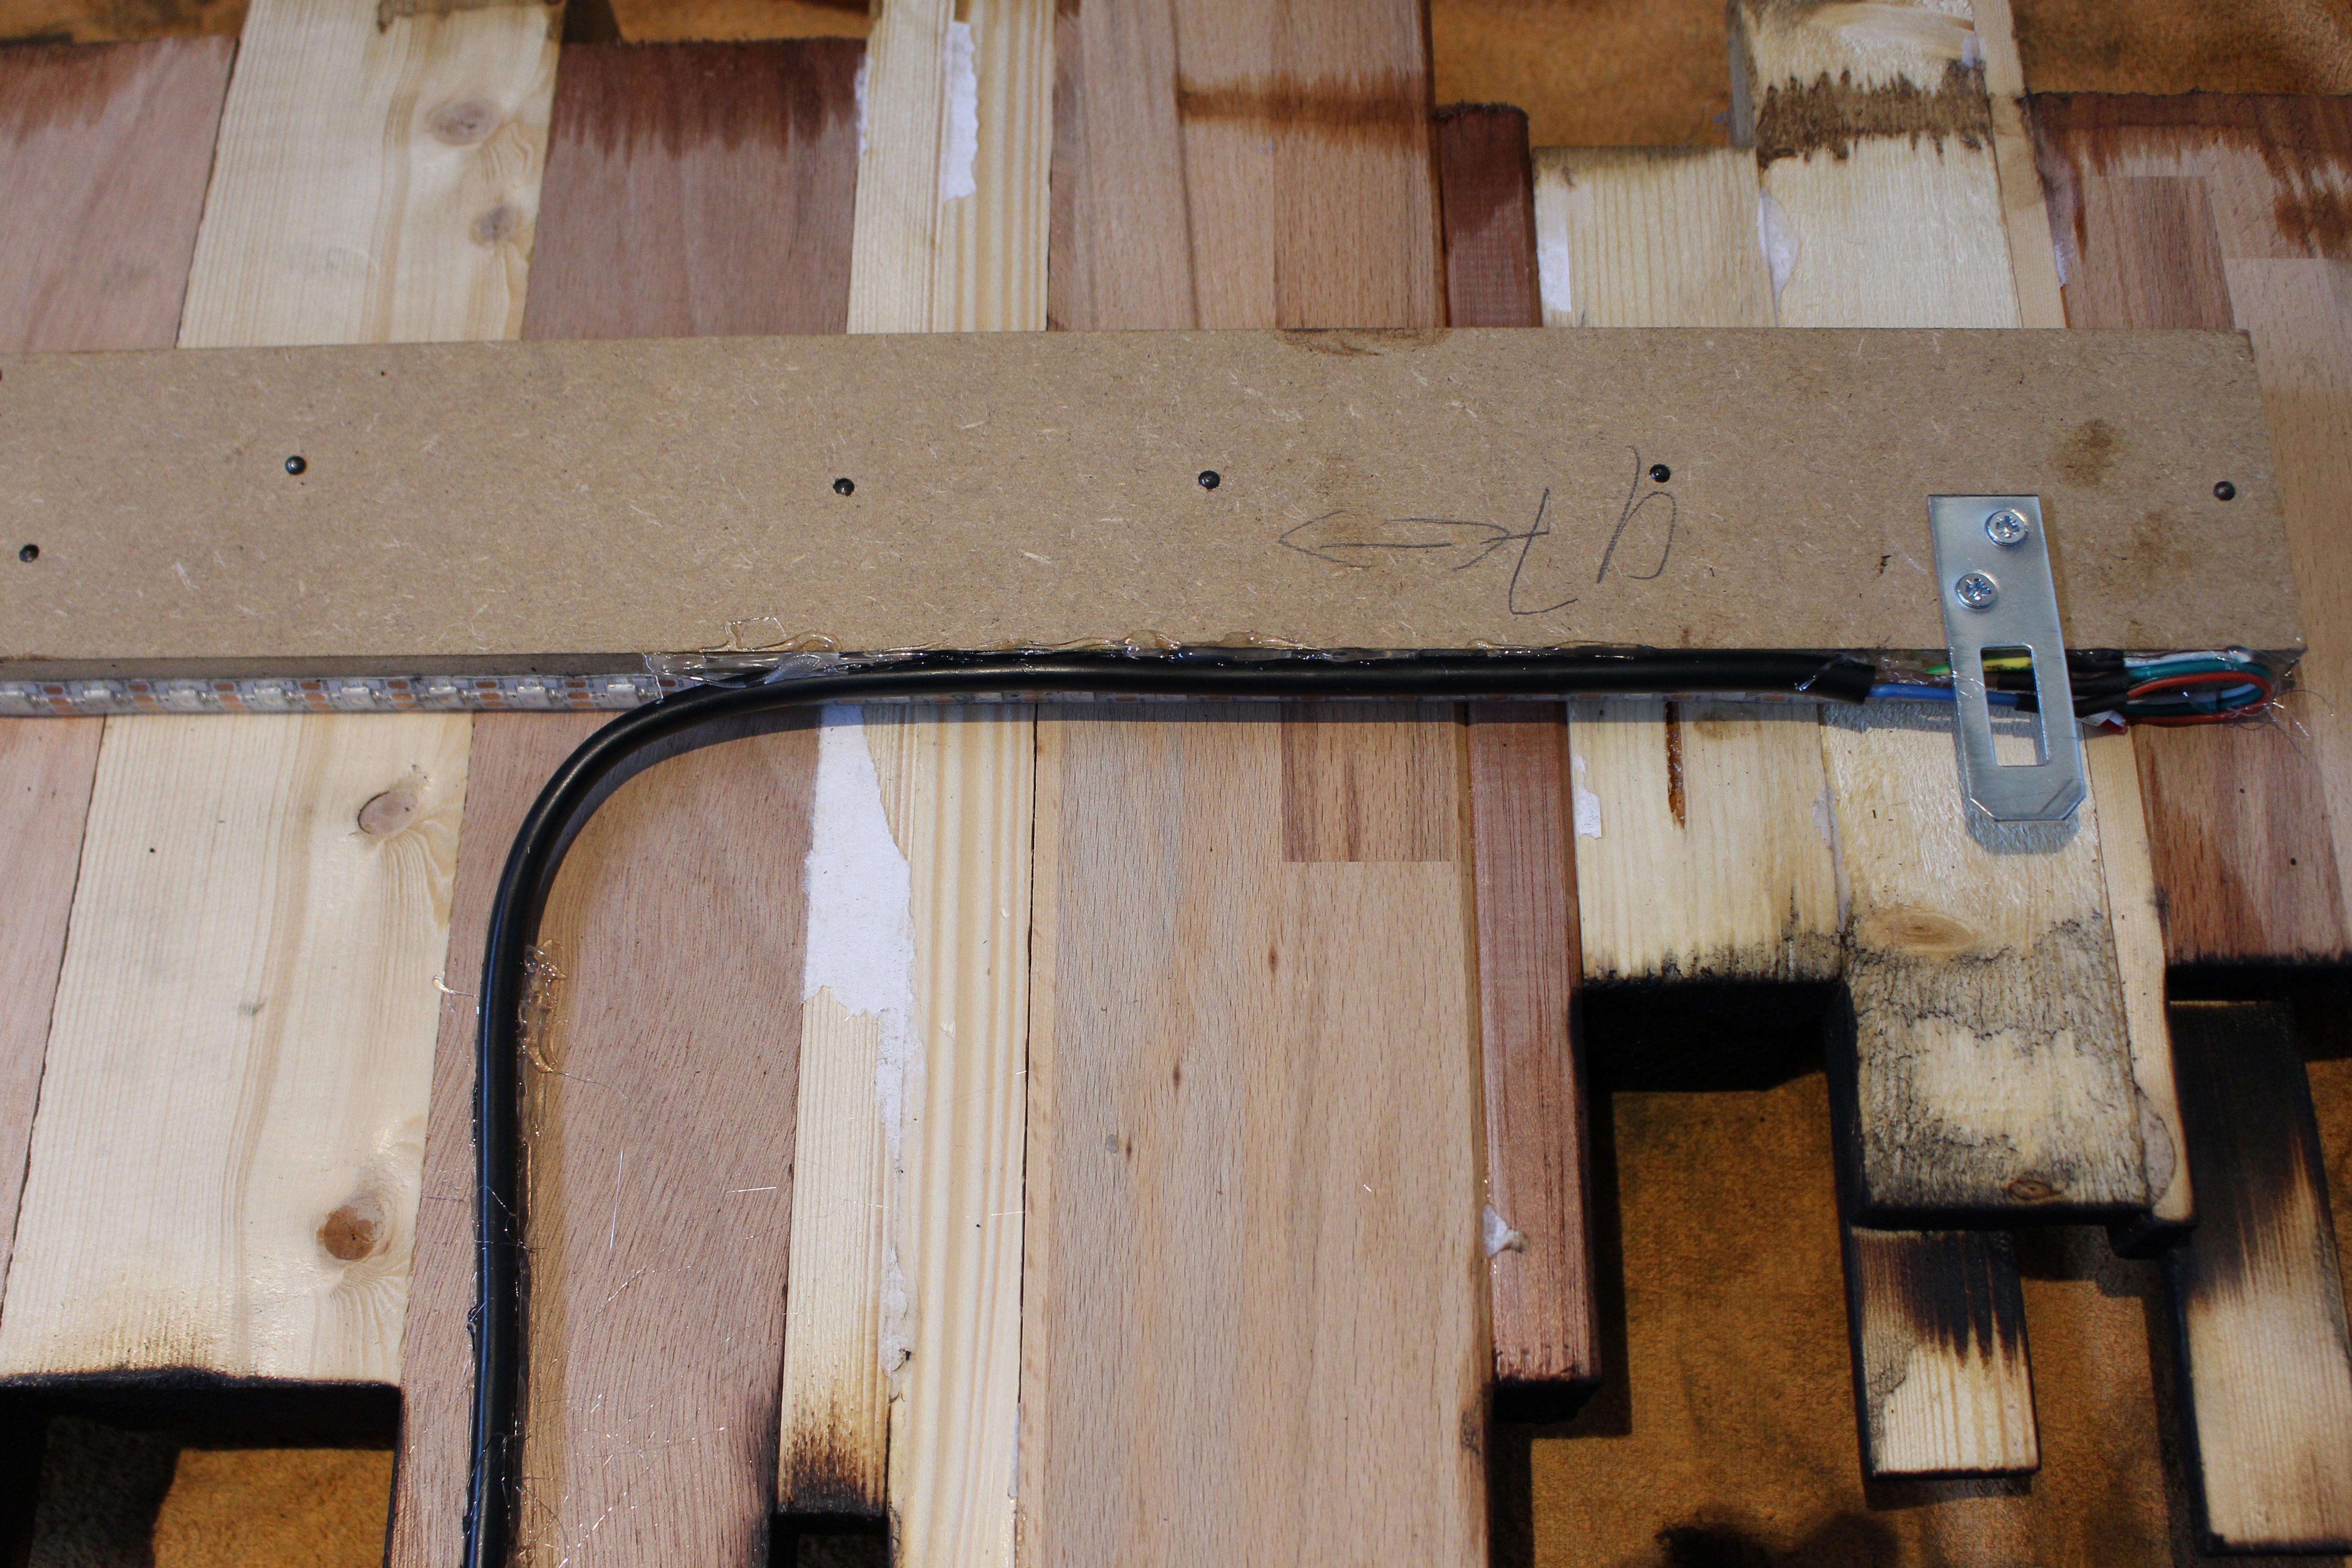
To make it easy to mount the panels I split the ledstrip in two parts with a header. I also made sure there was a connection between the two panels so I could route the cable behind it and make sure you cant see it.
Mounth the Panel
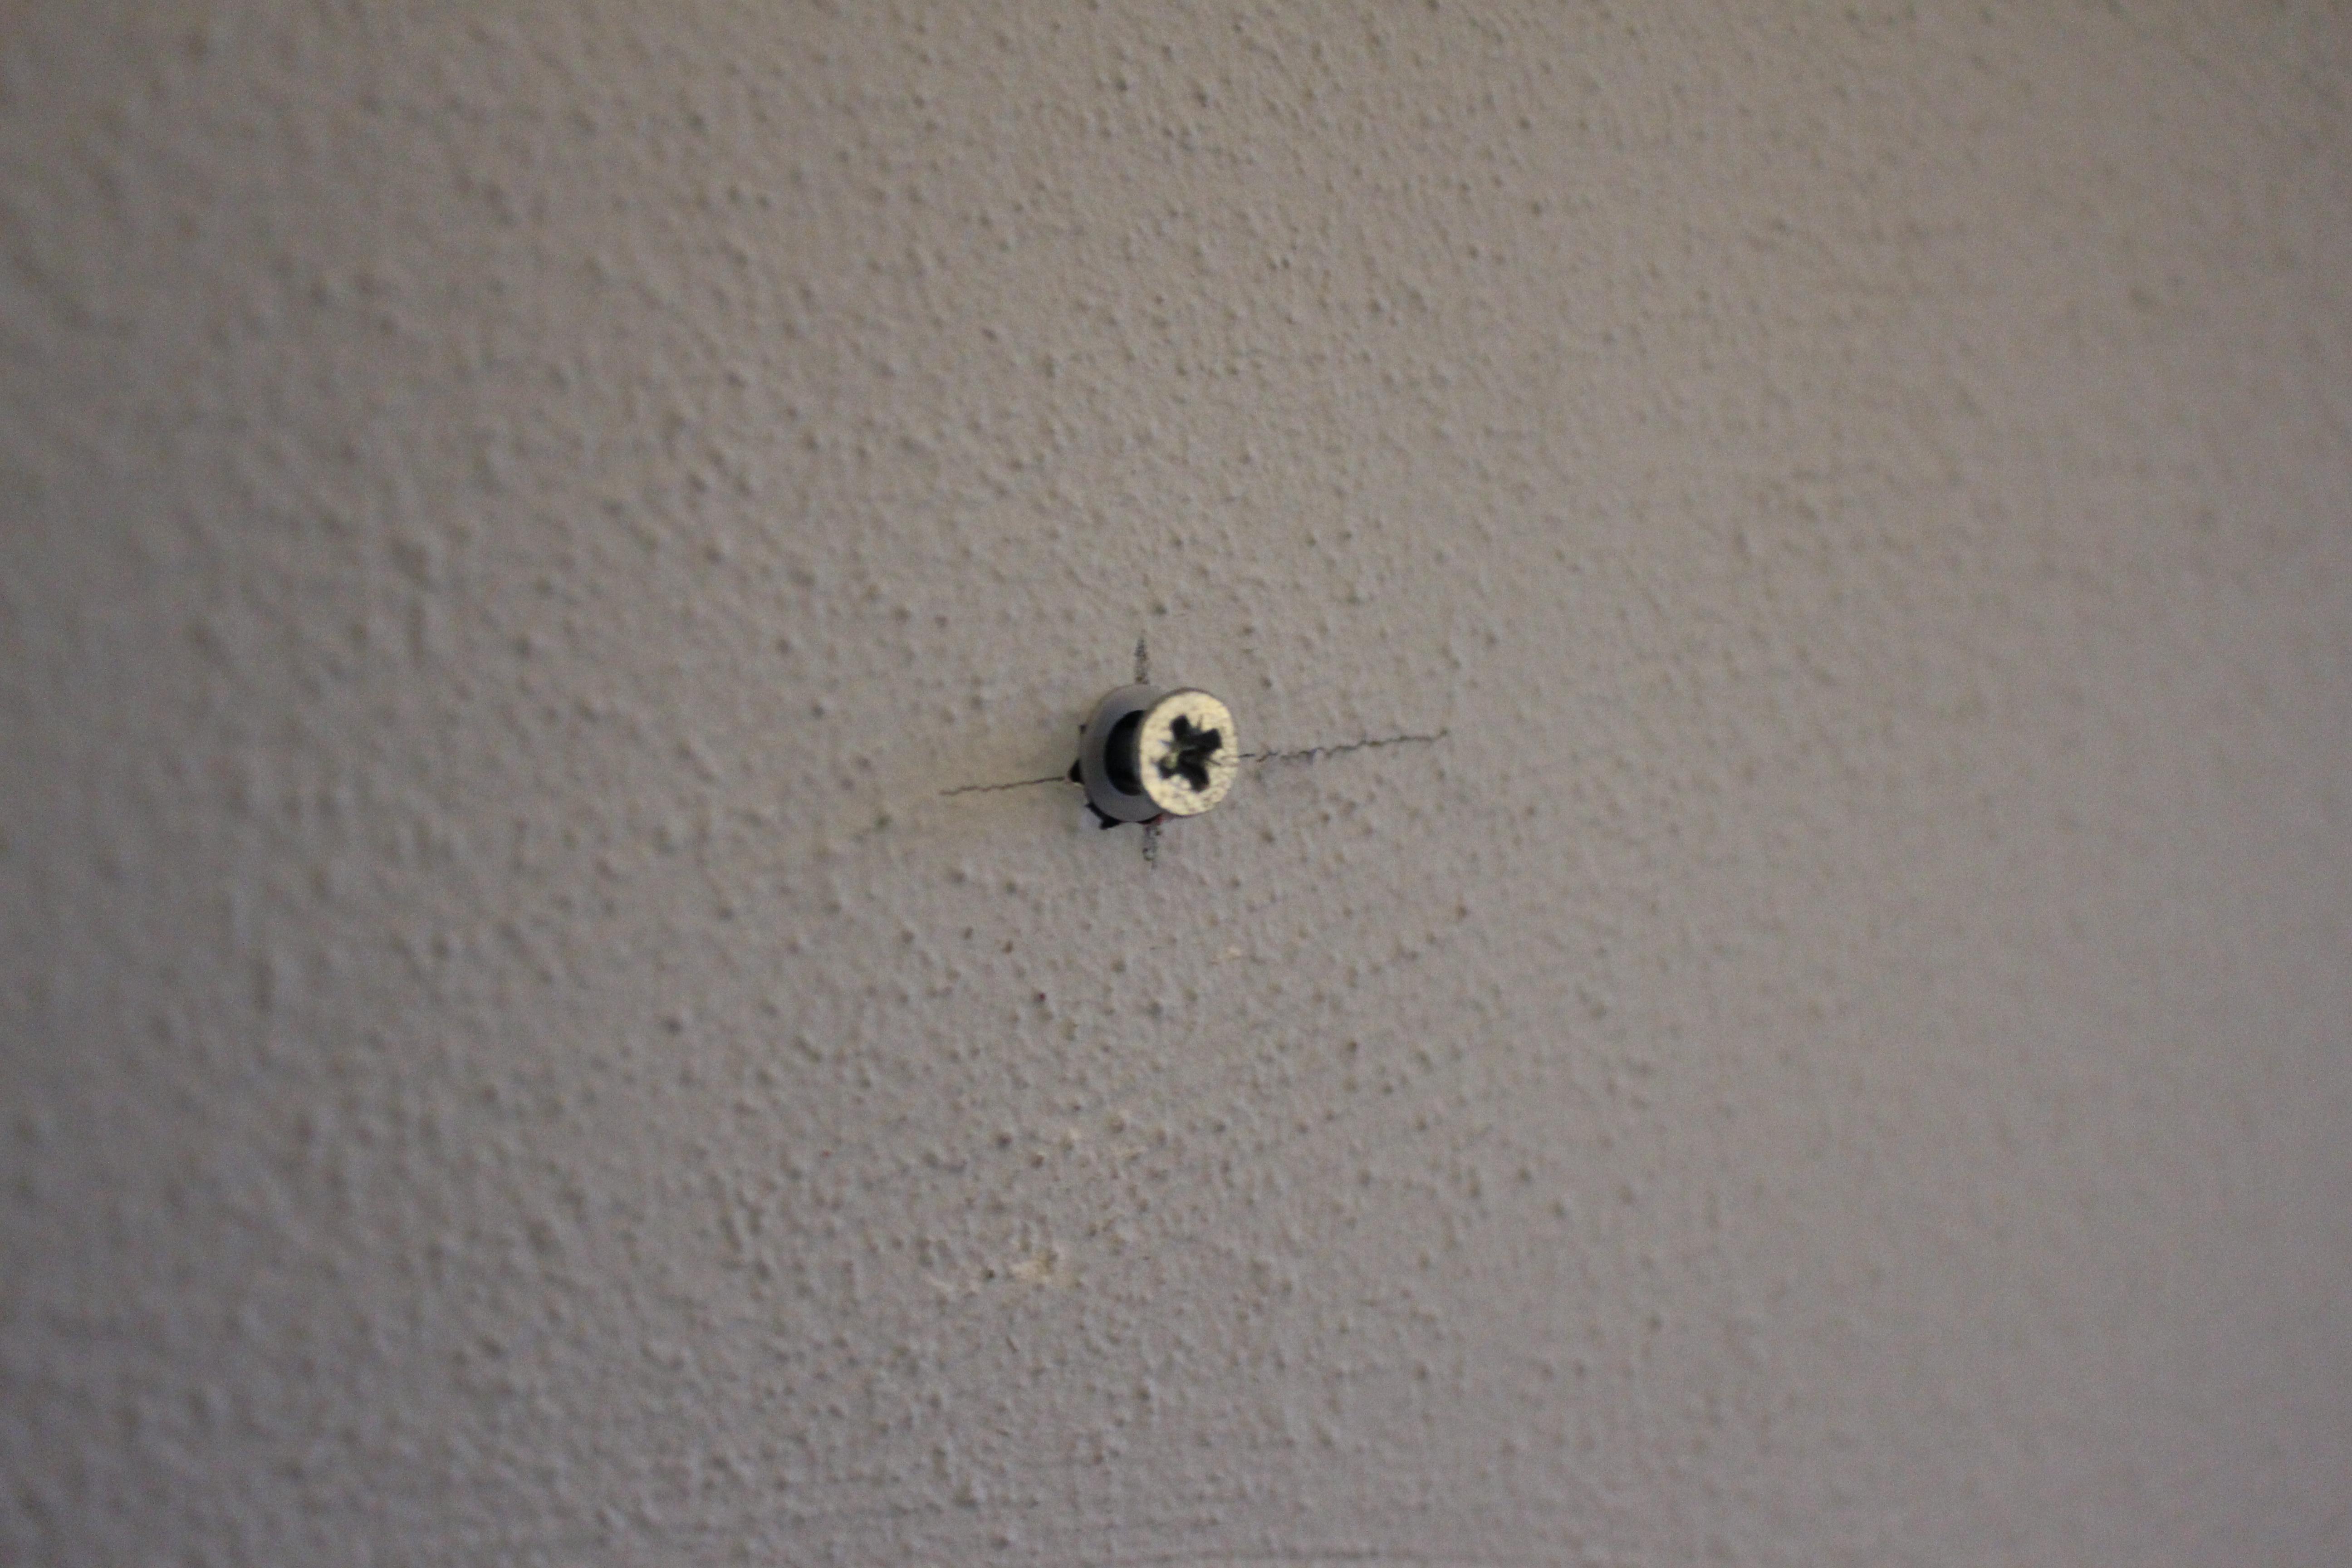
To mount the panels you need to screw some screws in the wall where the holes off the keyhole brackets are. When screwing in the screws make sure they stick out a bit so the keyhole brackets have a place to mount to.
Control the Ledstrips + Final

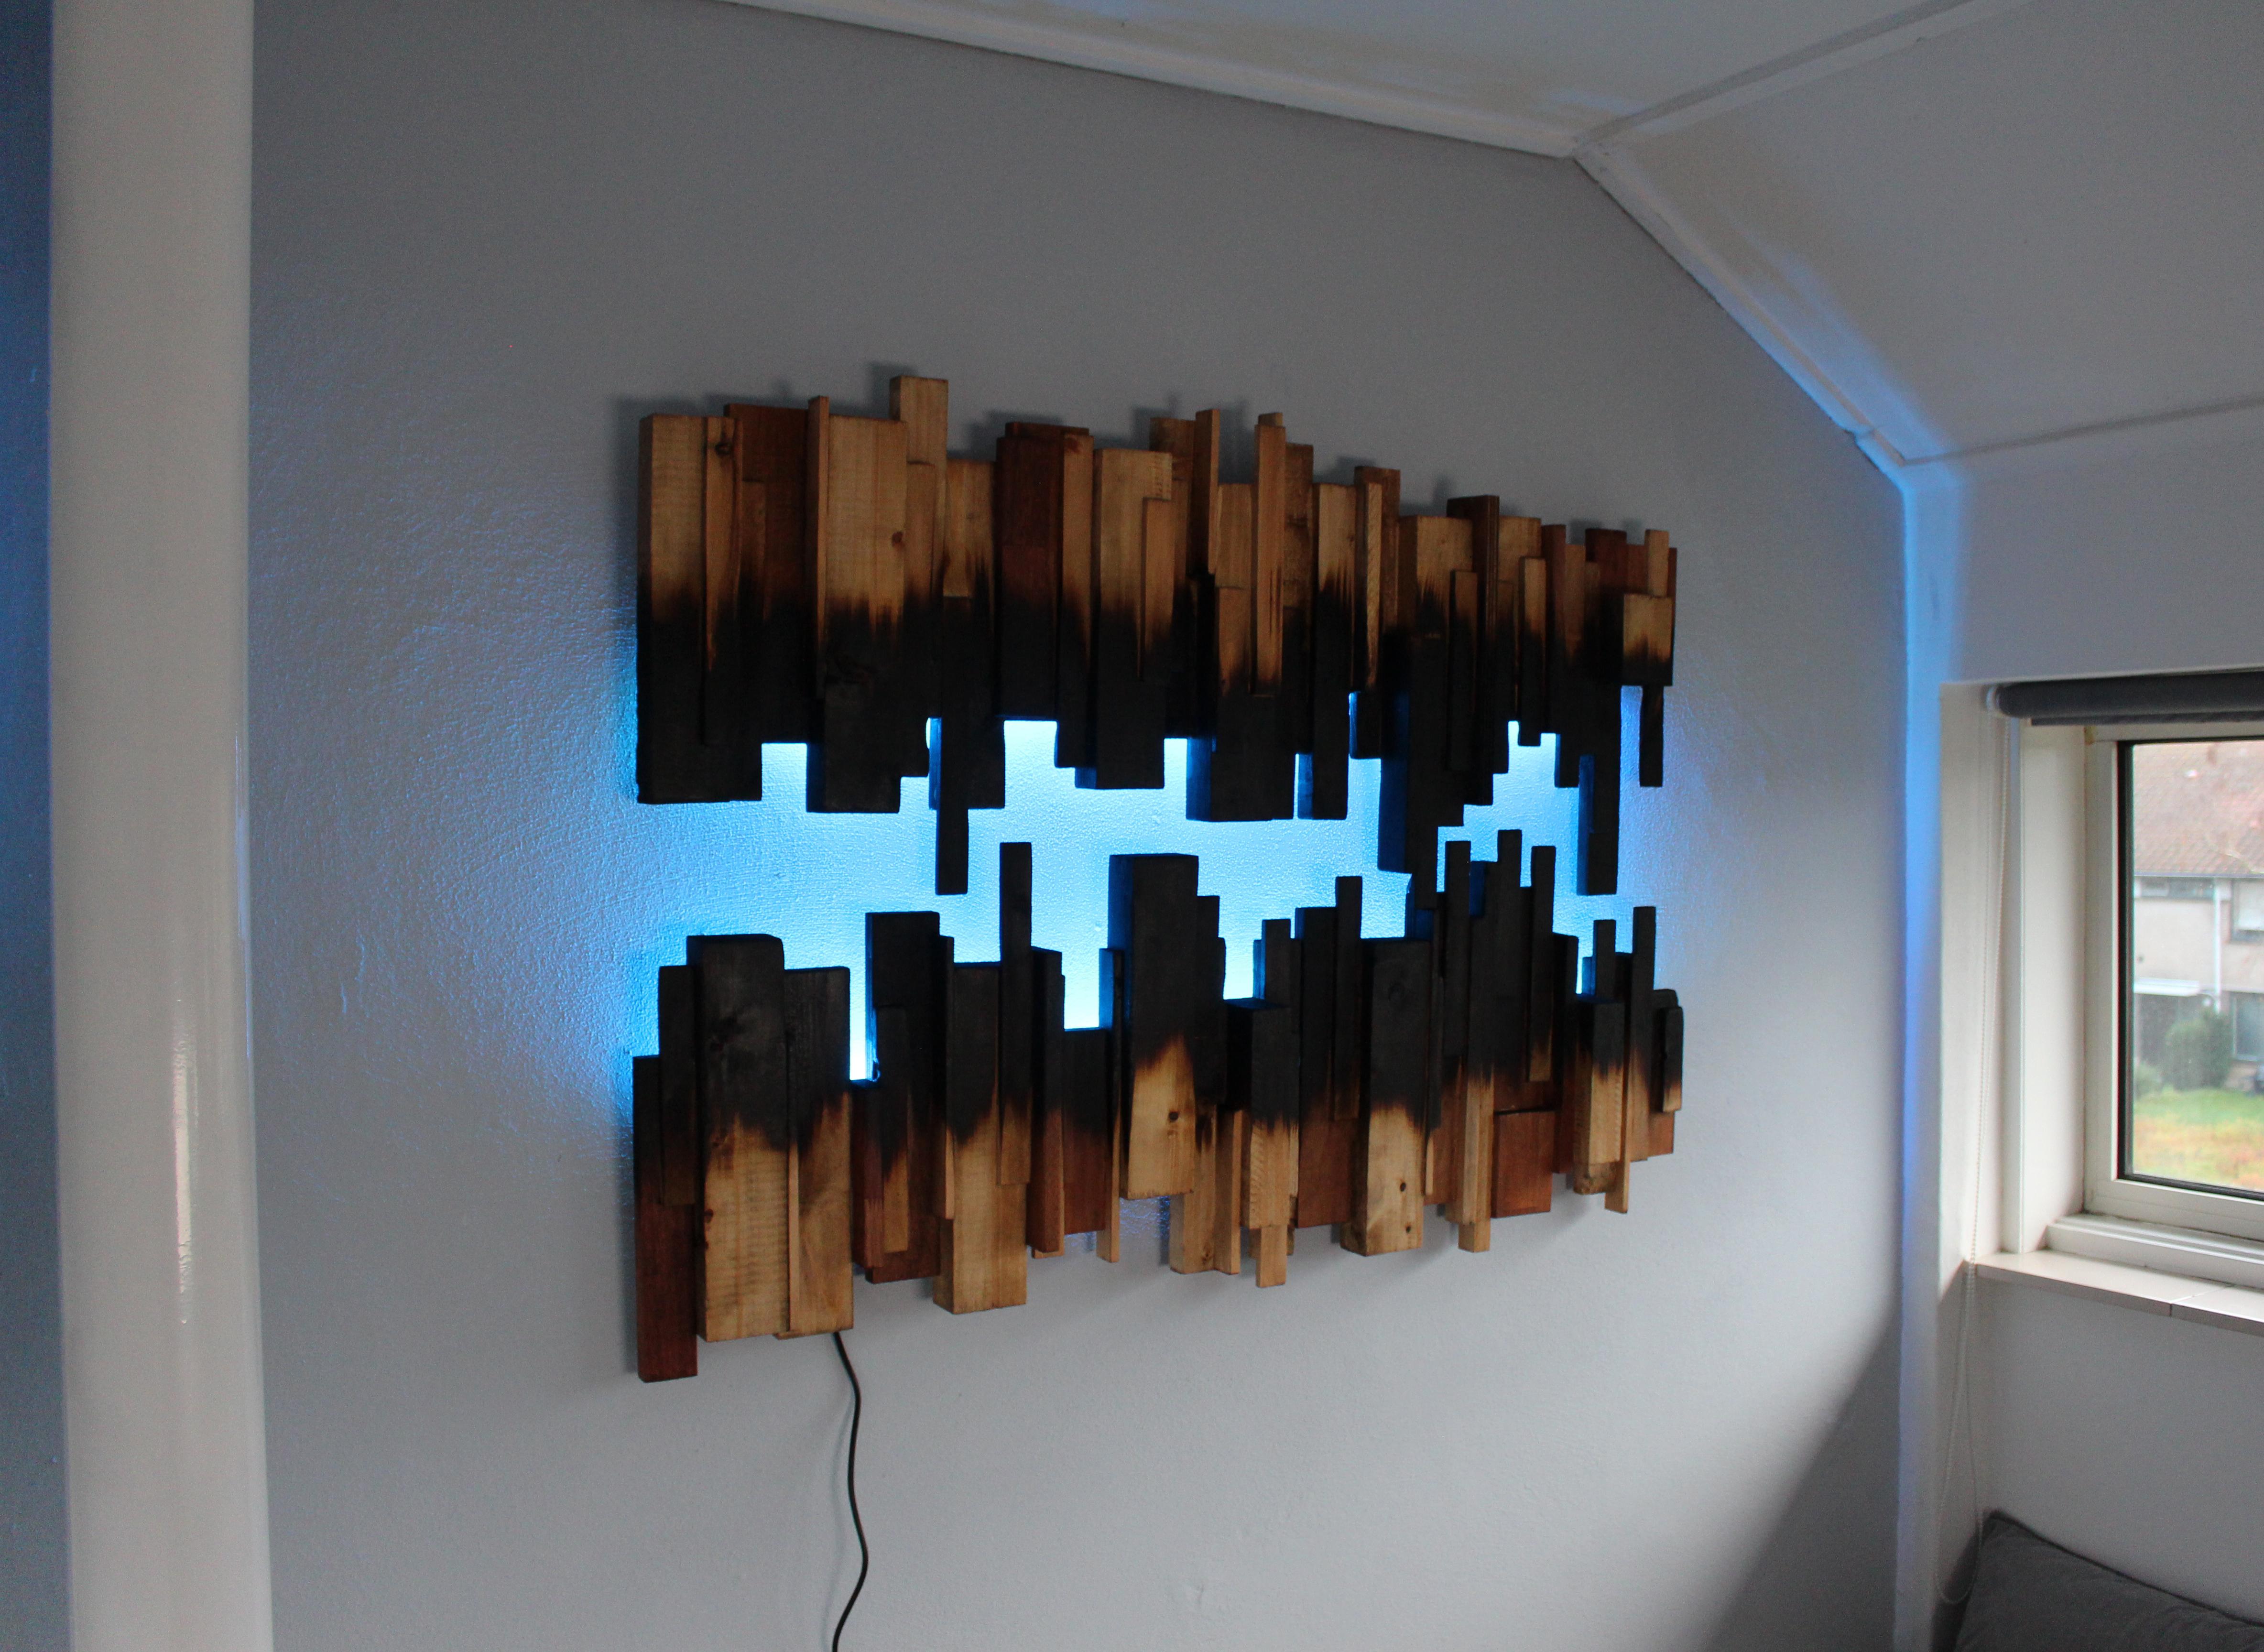
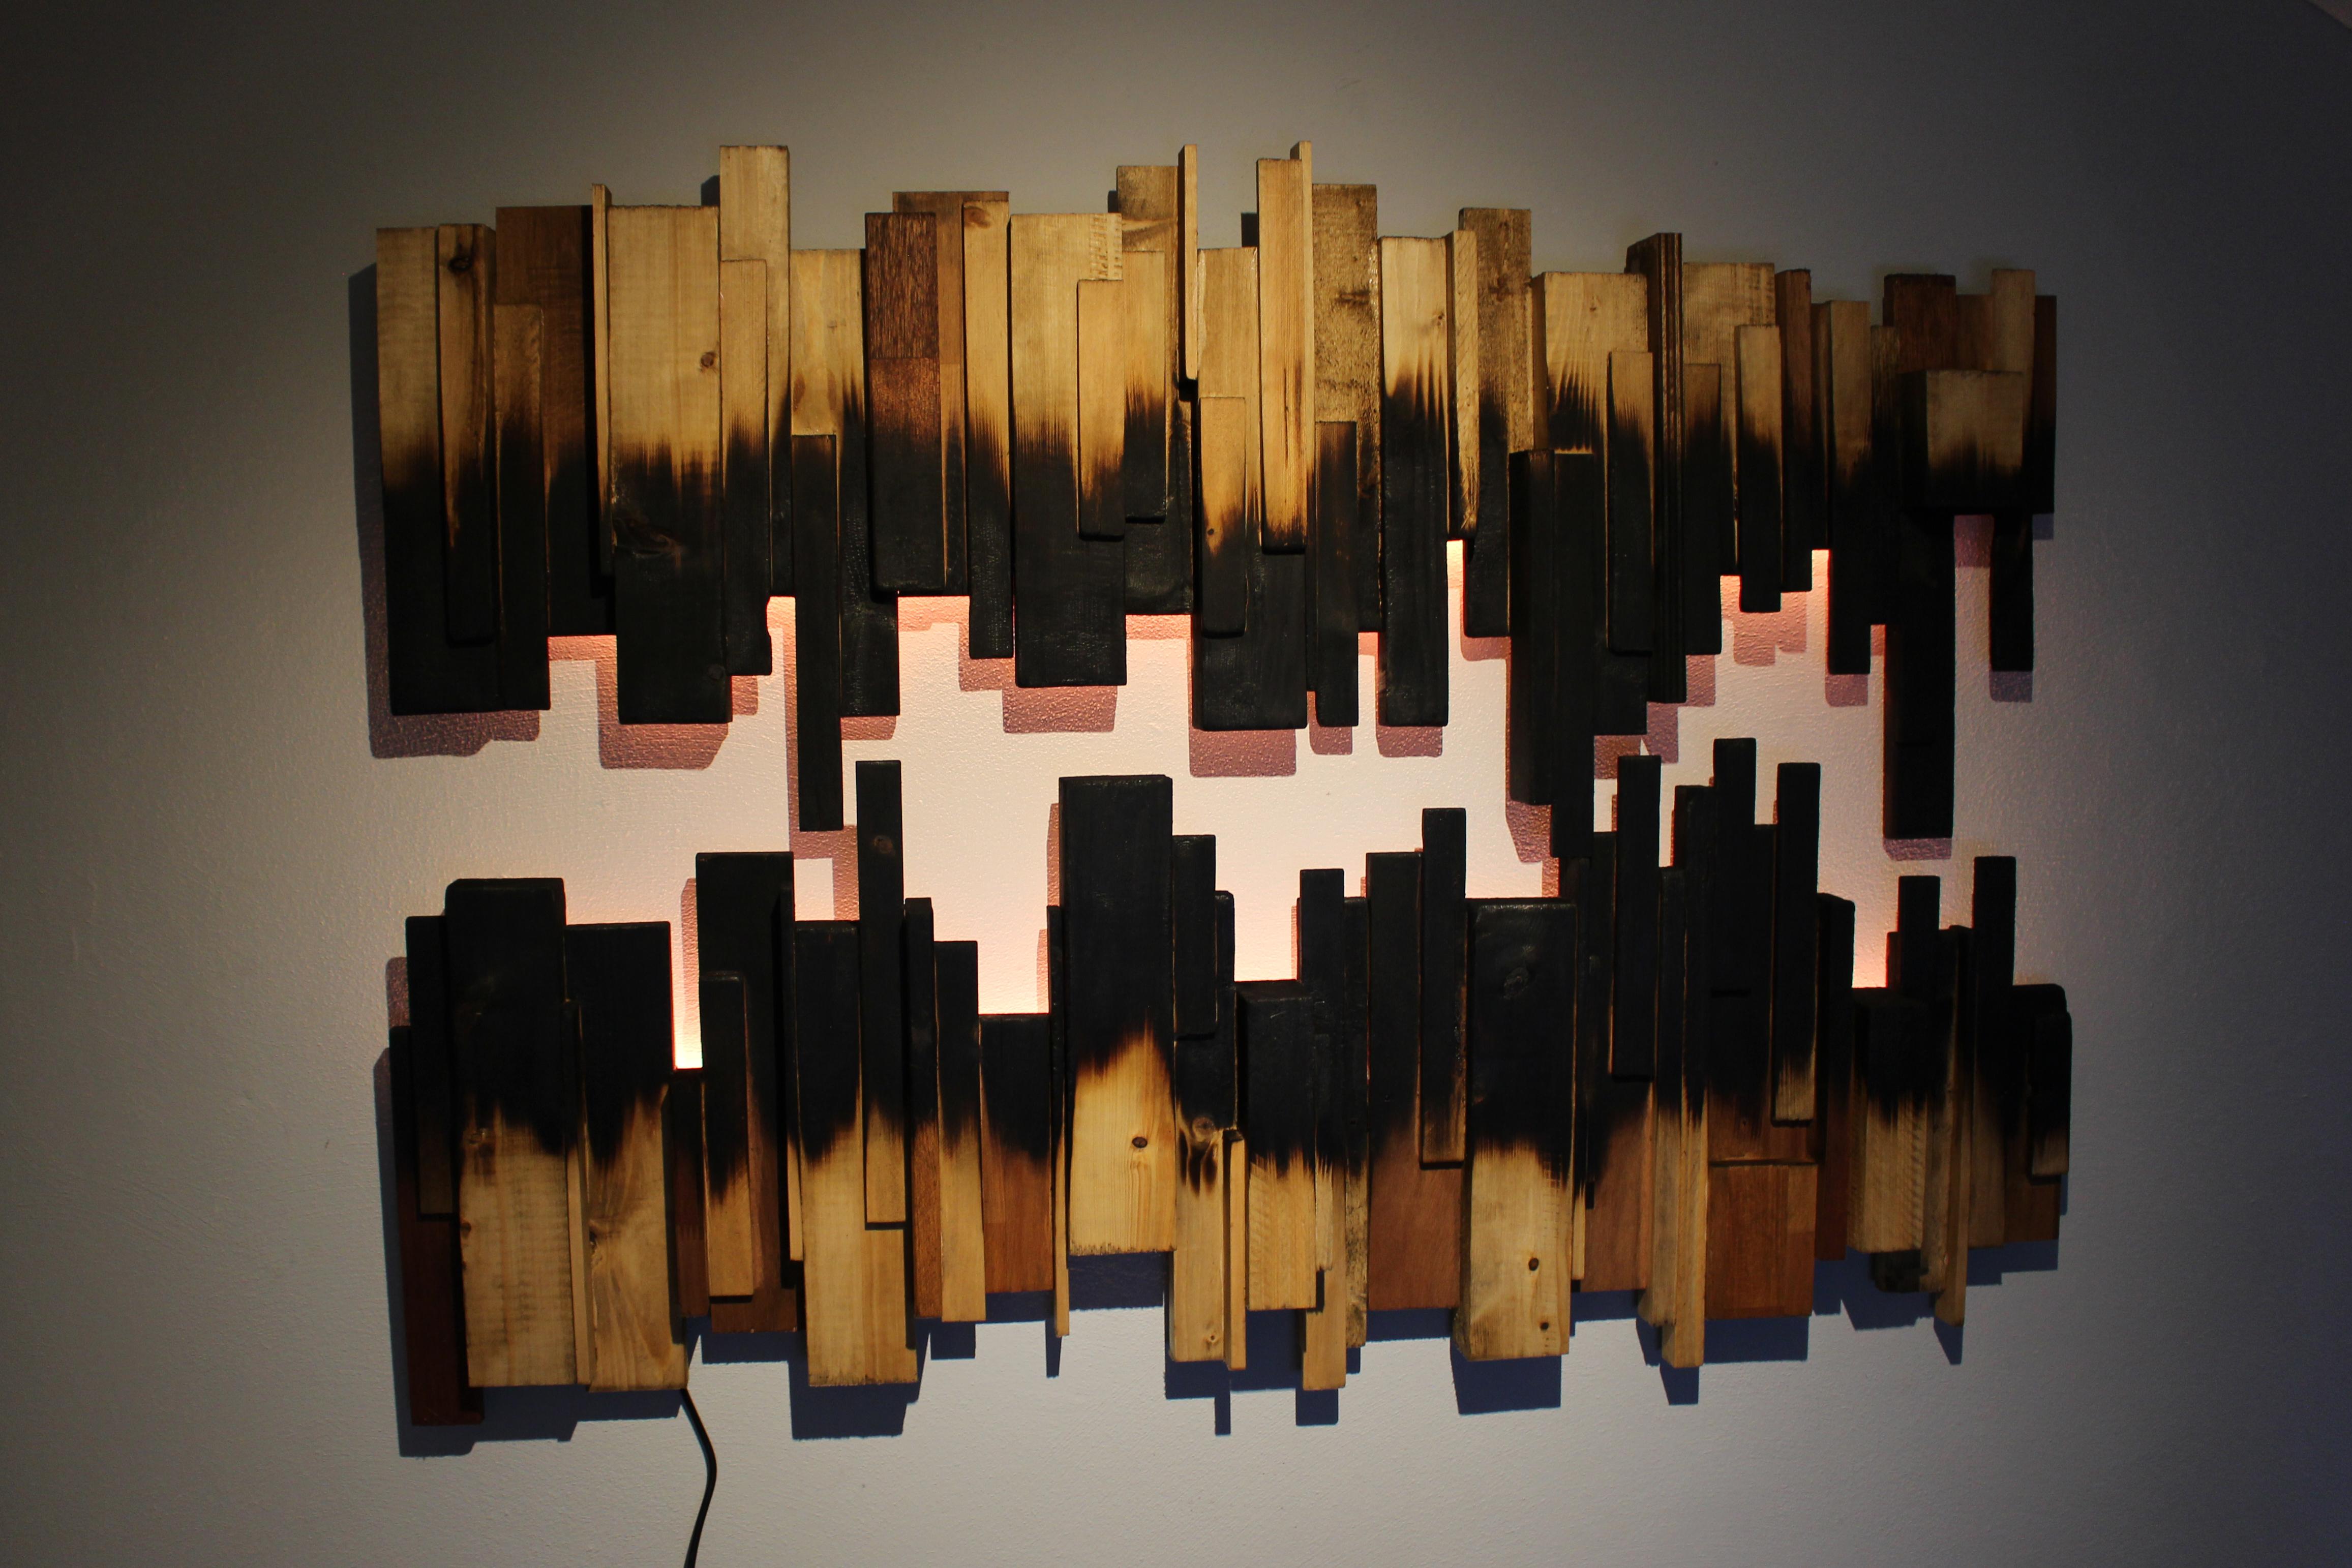
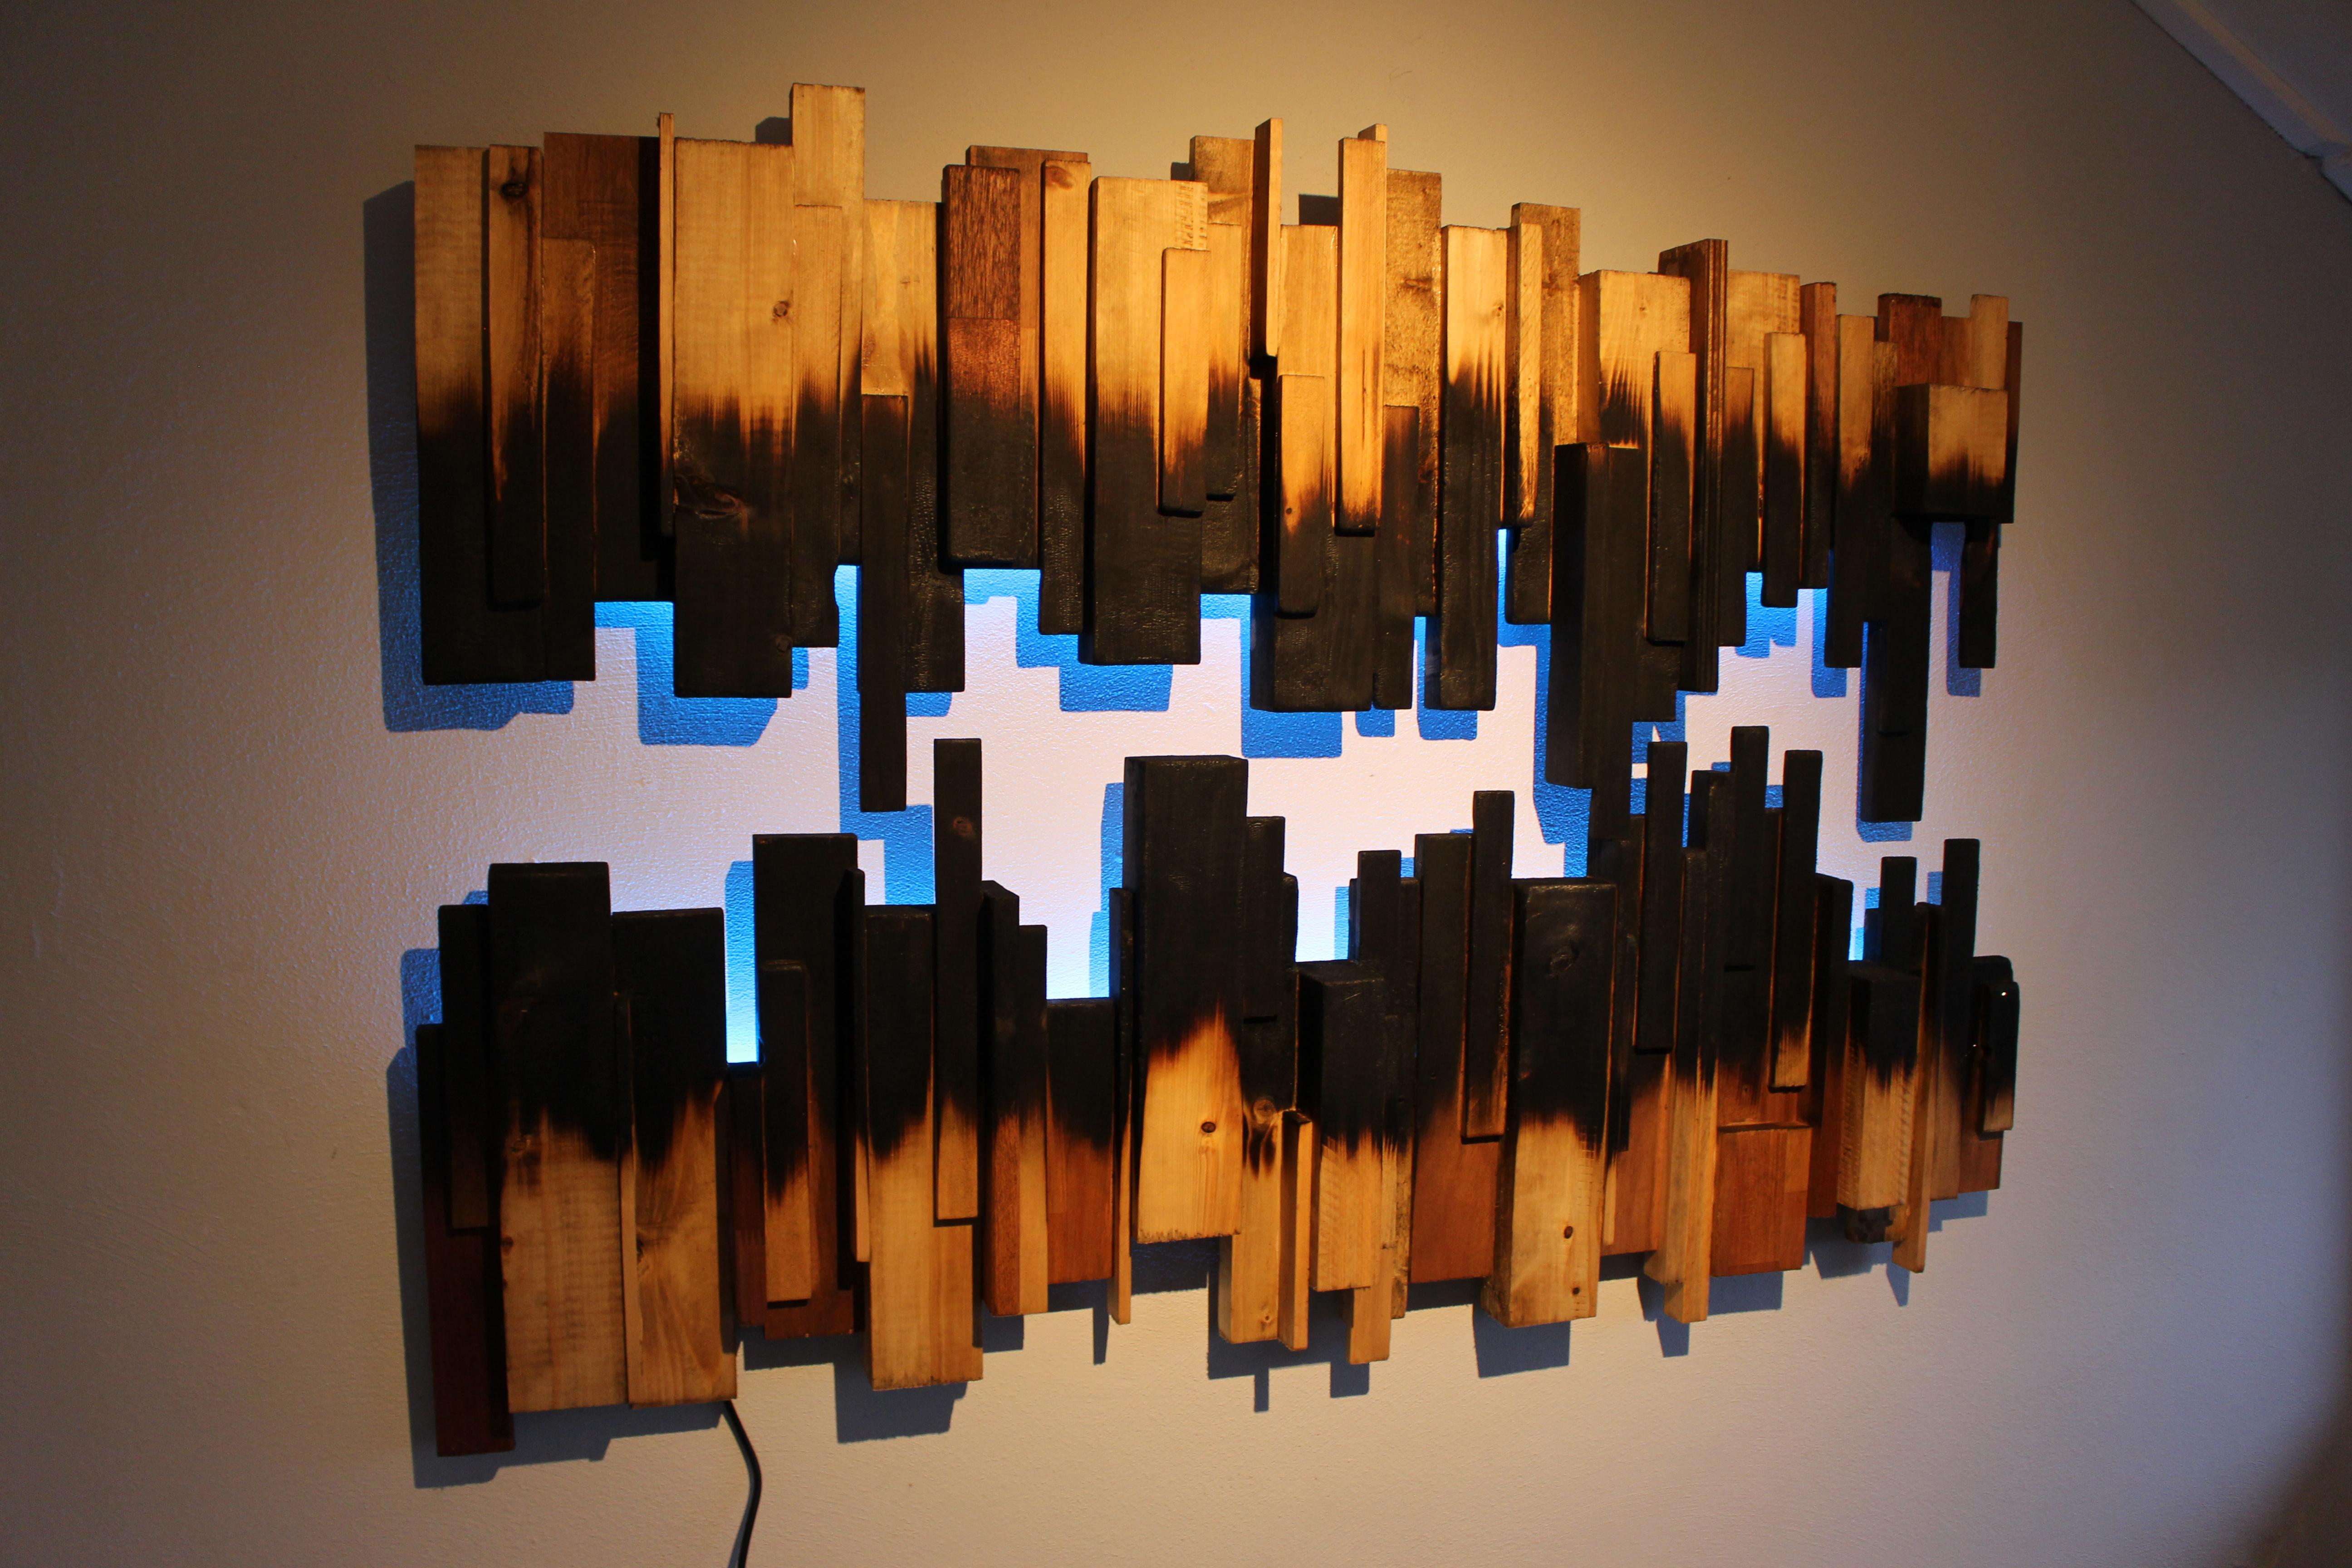

To control the ledstrips you need to enter the url you got from Step 6 in any browser you like. The website has 5 effects you can choose from.
- Static
- Breathing
- Fire
- Rainbow Cycle
- Rainbow Fade
To select the effect just click the button and select the settings next click upload and the ledstrip will change to the chosen effect. Note: number input is max 255.
And you are done!!!!