Building a Debian Linux Distribution for the Intel Galileo
by Nava-Juarez in Circuits > Software
11427 Views, 13 Favorites, 0 Comments
Building a Debian Linux Distribution for the Intel Galileo

Hello Internet,
Today we'll be learning how to build and install a Debian Linux Distribution for the Intel Galileo Gen 1/2.
Why Debian?
The Debian distribution allows a more native linux familiar command line interface. Commands such as apt-get and aptitude are available straight out the box rather than in a Yokto distribution where using opkg and finding repositories could lead you to an infinite loop.
Lets Get Shopping:
1) Intel Galileo Gen 1 or 2
2) SD Memory Card (8GB Recommended)
You will also need a computer with Linux Installed.
Preparation
Format SD Card to FAT file system
On Mac: Run Disk Utility. Go to Applications on your Mac. Open Utilities. Run Disk Utility.app.
Insert the micro SD card into your computer. In the left hand sidebar of Disk Utility, select the card. In this case, the card has never been formatted before and is called NO NAME. Click the Erase tab. From the Format drop-down list, select MS DOS (FAT). In the Name field, type Debian to make it easier to identify in the steps below. Click Erase to confirm your settings. Click Erase in the confirmation message to erase the contents of your card.
On Linux: Run Disks, as follows: Run Unity Dash (desktop search utility). Enter the command: disks. Select the Disks app. Insert the micro SD card into your computer. In the left sidebar, select the micro SD card. If you see multiple partitions, select a partition and click the - icon to delete the partition. Click the + icon to create a new partition. From the Type drop-down list, select Compatible with all systems and devices (FAT). In the Namefield, type Debian to make it easier to identify in the steps below.
Adapted by: http://intel.ly/1JWSTC9
Preparing your linux machine
On your linux machine, enter the following commands which will install debootstrap and setup the environment for mounting a Debian image.
# apt-get install debootstrap
# mkdir galileo-debian
# cd galileo-debian
# mkdir mnt-loop
# mkdir image
Creating the Debian Image
Creating the filesystem for the new Debian Image
Entering the following command will create a new Debian image.
# dd if=/dev/zero of=loopback.img bs=1G count=1
# mkfs.ext3 loopback.img
Mounting the Image
Download:
We will start by downloading the original image for the Galileo from Intel.
http://downloadmirror.intel.com/24000/eng/LINUX_IMAGE_FOR_SD_Intel_Galileo_v1.0.2.zip
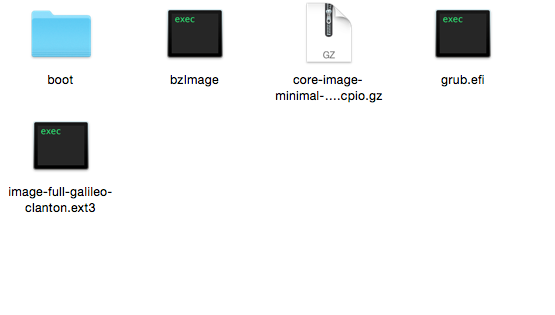
Extract the zipped folder, go into the SD CARD directory, and copy "image-full-galileo-clanton.ext3" to your galileo-debian folder.
Enter the following commands:
# mount -o loop loopback.img ./mnt-loop
# debootstrap --arch i386 wheezy ./mnt-loop
# mount image-full-galileo-clanton.ext3 image
Copying Files
These copy commands will put together our Debian system with the necessary original linux files needed for the Galileo.
# cp -ru image/lib/ mnt-loop/
# cp -ru image/usr/lib/libstdc++.so* mnt-loop/usr/lib
# cp -ru image/lib/libc.so.0 mnt-loop/usr/lib
# cp -ru image/lib/libm.so.0 mnt-loop/usr/lib
# cp image/usr/bin/killall mnt-loop/usr/bin/
# cp image/etc/inittab mnt-loop/etc/inittab
# cp image/etc/modules-load.quark/galileo.conf mnt-loop/etc/modules
# cp -r image/opt/ mnt-loop/
# cp image/etc/init.d/galileod.sh mnt-loop/etc/init.d/
# cp image/etc/init.d/quark-init.sh mnt-loop/etc/init.d/
Configuring Our Debian Build
From this point on, we will be working inside our Debian build configuring important settings such connecting to the internet, ssh, and our hostname.
Run the following commands:
root@debian:/ mount -t proc proc mnt-loop/proc
root@debian:/ mount -t sysfs sysfs mnt-loop/sys
root@debian:/ chroot mnt-loop /bin/bash
root@debian:/ echo "Galileo" > /etc/hostname
root@debian:/ nano /etc/network/interfaces
Edit the file with the following:
auto eth0
iface eth0 inet dhcp
root@debian:/ apt-get install ssh
root@debian:/ passwd
Set your new password
root@debian:/ mkdir /media/realroot
root@debian:/ mkdir /sketch
root@debian:/ update-rc.d galileod.sh start
//(If this gives you errors, don't worry about it). I had errors, fixed them with the help of google and forums
//for them just to come back again. If you have a permanent fix please share and I will update :)
Packing Up

Wrap it up, we are almost done packing and sending out new Debian Linux Distribution.
Enter the following commands:
root@debian:/ exit
# umount mnt-loop/proc
# umount mnt-loop/sys
# umount image
# umount mnt-loop
cp loopback.img /pathToSDRoot/image-full-galileo-clanton.ext3
Copy all files that were in the folder "SD CARD" except for "image-full-galileo-clanton.ext3"
to the root of the SD card.
Running Debian on the Intel Galileo
Pop the SD Card in and wait 1-2 minutes for Linux to boot.
At this point it is safe to check if the board will save Arduino Sketches uploaded.
Upload the blink sketch provided in the Arduino Examples.
Once you have your LED blinking, Restart the Galileo.
Within 1-2 minutes, if the LED Starts blinking again, Congratulations, you have successfully installed
Debian on your intel Galileo.
Next what you'd want to do is to check if your ethernet port is running and SSH into it.
ethernetTest Arduino Sketch
Download the sketch provided to test your network and its IP Address.
Using the serial monitor, if the IP address of the Galileo is listed, then you are now ready to SSH into it.
Copy down your IP Address.
Downloads
SSH Into Debian
Open a terminal, or putty, or you favorite program for SSH-ing
In terminal, you would type
sudo ssh root@
Enter your sudo password and the password you chose when configuring your Debian Build.
If you receive a message of success, then pat yourself on the back for successfully SSH-ing into your Debian Build on the Intel Galileo.
Wrap It Up
From here on I recommend entering a couple of commands:
# apt-get update
# apt-get install ntp //Configures the Network Time Protocol for automatically setting time and date
# apt-get install build-essential //Configures Build Essentials (Make)
If you'd like to set-up a local server on your Intel Galileo (Which I Strongly Recommend for DIY-ers)
# apt-get install apache2 php5 libapache2-mod-php5
You can then access your server by entering /index.html in your browser
You can manage your server in the /var/www directory on your Galileo.
Thank you for taking your time to learn from this Instructable,
I would appreciate all comments and feedback!
Goodluck!