Build Your Own Surveillance Camera With Raspberry Pi and Motioneye
by yourdiy in Circuits > Raspberry Pi
43588 Views, 205 Favorites, 0 Comments
Build Your Own Surveillance Camera With Raspberry Pi and Motioneye
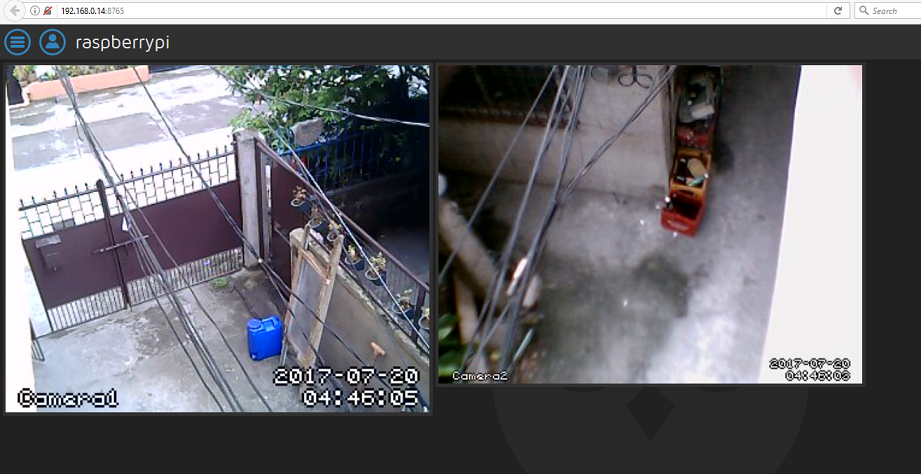
Hi there, in this project I'm going to show the steps I done how I setup my raspberry pi security camera with 2 webcam using motioneye in this tutorial I use a 1080P A4 - Tech camera & low resolution A4 - Tech camera you can plug multiple camera on the raspberry pi but I suggest to max it up to 2 or 3 of any webcam you want. Also note that this will not cover how to access the surveillance camera at office or at other places ( can only be access thru your network ), this will focus on how you'll able to setup a home surveillance with multiple camera using a raspberry pi and motioneye an easy step by step procedure.
Here's the hardware I use for my home surveillance system:
-
( I purchased my pi year 2015 that time Raspberry Pi 3 Model B was not yet been released. If you're planning to build your own home surveillance system with raspberry pi I suggest get the latest model )
-
SanDisk - Memory ( More space much better for saving images & videos )
-
A4 - Tech Camera
-
USB WiFi Dongle ( not needed on Raspberry Pi 3 Model B )
Notice that I use a heat sink and a fan to reduce the temperature and since it's processing an image & video obviously the temperature can go easily high but it's normal and optional it's not required though it's up to you.
Installation ( Fresh Setup No OS )
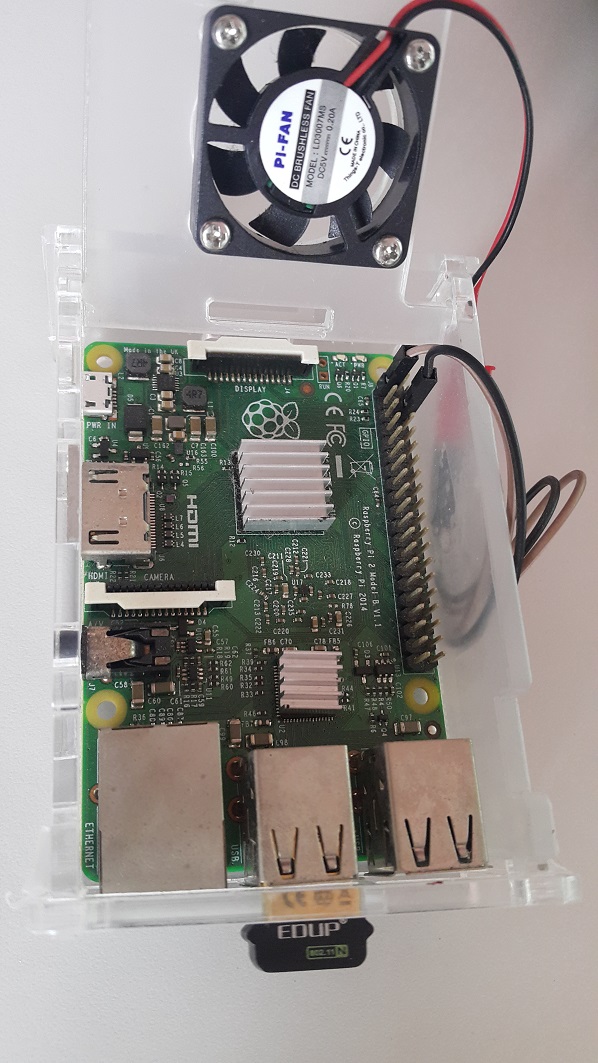
Assuming that you have a new pi and trying to figure out how to build your own affordable home surveillance with multiple cameras that's capable of motion detection and records it or take a pictures using a raspberry pi and motioneye. Here's what you need to do:
Download the latest OS here get the latest raspbian version, in my case I use the latest RASPBIAN JESSIE WITH DESKTOP version "2017-07-05" by the time this tutorial was made.
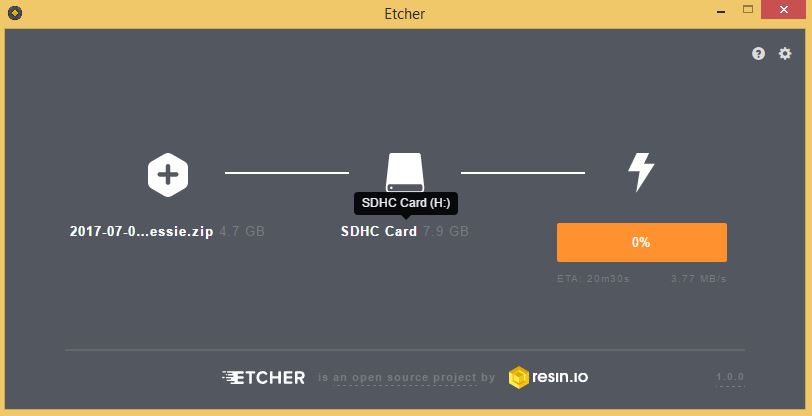
Write it to your SD Card, download & install the software etcher it's easy to use don't worry, it takes a couple of minutes to write the image depending on your machine and when it's finished writing, your SD Card will look like only a couple of MBs space left but it's normal don't panic when it happened.
Insert the SD Card to your pi remember at first installation SSH is disabled by default so the only work around here is to plugged your monitor to the raspberry pi hdmi, you'll gonna need a VGA to HDMI converter. It's necessary to enable so you can access your pi in other PC / Laptop / Devices using a Putty client if there's something you want to add or you want to shutdown / reboot your pi. Unless you want to run it with monitor for a long time.
Once the raspberry desktop has start click the command line at the task-bar and type the following command:
sudo raspi-config
This will show you a bunch of options similar to the image below:
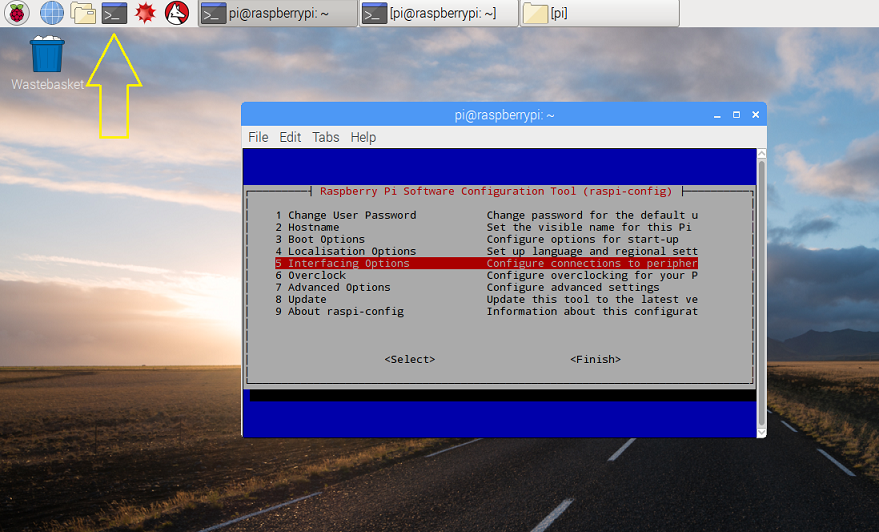
Choose #5 and another screen will follow this time Select P2 SSH after doing this your ssh is now enabled.
For fresh install raspbian you need to set the root password manually ( if you don't know the default password ) to do this just enter this command and enter your desired password:
sudo passwd root
You need to remember some command can't be used without a root privileges that's why we need to log as root user for us to be able to perform administrative tasks to do this just type "su" at the command line and enter the password that you set at Step 4. Once you're log in as root, type this command to updates the dependencies of the pi.
sudo aptitude update && sudo aptitude upgrade
motioneye require some dependencies for it to enable some features in this tutorial we will going to install all dependencies required for it to run all the features. Let's start by installing the ffmpge for the video let's download the package by using this command:
wget https://github.com/ccrisan/motioneye/wiki/precompiled/ffmpeg_3.1.1-1_armhf.deb
After the download let's install it to our pi, in here you need to have a root privileges as discussed at Step 5.
dpkg -i ffmpeg_3.1.1-1_armhf.deb
We need to make sure that there's no duplicate libraries for your home security camera to work properly. Let's remove some packages that can interfere on motioneye using this command.
apt-get remove libavcodec-extra-56 libavformat56 libavresample2 libavutil54
Let's install a couple of dependencies using this command:
apt-get install python-pip python-dev curl libssl-dev libcurl4-openssl-dev libjpeg-dev libx264-142 libavcodec56 libavformat56
libmysqlclient18 libswscale3 libpq5
Download the motioneye package:
wget https://github.com/Motion-Project/motion/releases/download/release-4.0.1/pi_jessie_motion_4.0.1-1_armhf.deb
After the download let's install it:
dpkg -i pi_jessie_motion_4.0.1-1_armhf.deb
pip install motioneye
Prepare the configuration directory:
mkdir -p /etc/motioneye
and copy the config file just in-case you will be editing it in future:
cp /usr/local/share/motioneye/extra/motioneye.conf.sample /etc/motioneye/motioneye.conf
Prepare the media directory:
mkdir -p /var/lib/motioneye
Add an init script, configure it to run at startup and start the motioneye server:
cp /usr/local/share/motioneye/extra/motioneye.systemd-unit-local
/etc/systemd/system/motioneye.service
systemctl daemon-reload
systemctl enable motioneye
systemctl start motioneye
Installation Done!
That's it you have now installed the motioneye and you now have a home surveillance camera using raspberry pi. To access the configuration go to your raspberry IP Address there's two way to get your IP:
- If you are still connected to your raspberry pi, you can type this command: ifconfig
- Or access your router dashboard to find your raspberry pi address.
If you are able to find it type this to your browser: Your-raspberry-ip-address:8765 and you'll be able to render a login form.
Motion Eye Basic Setup
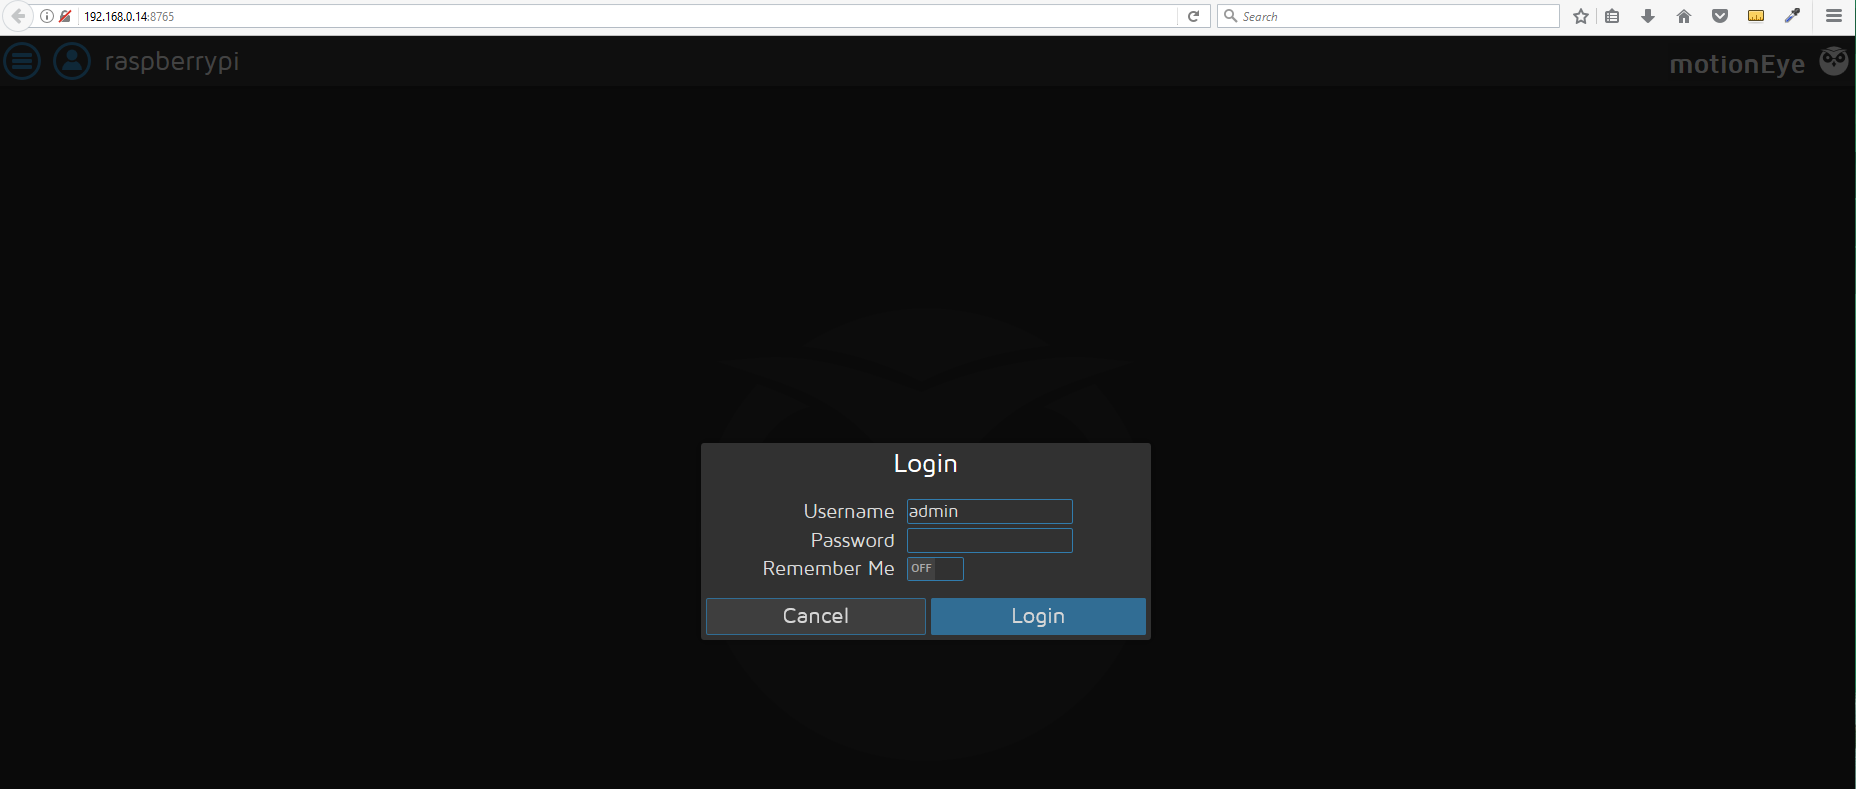
Once you access your Raspberry IP address you'll be prompt with a login form, remember at default the user is 'admin' and leave the password empty.

It's time to plug-in those web camera for your DIY home surveillance system wait for a couple of seconds to be recognized by your raspberry pi.
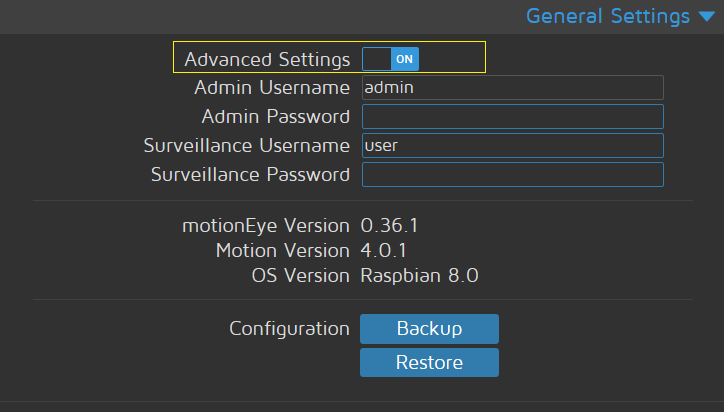
Once you add all you home surveillance camera you need to have an access to the advance settings of motioneye.
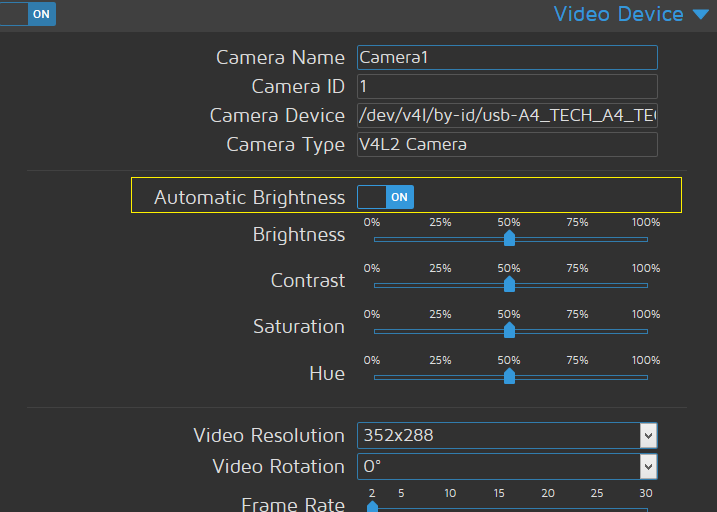
"Automatic Brightness" is required only if your camera is capable of it in my case the 1080P A4-Tech has this.

Settings for image capture when motion is detected it will take a pictures.
Image Quality: Self explainable it's up to you if you go 100%.
Capture Mode: There are 3 other options here I haven't tried the other except 'Motion Triggered' this settings allowed to take a snapshot if it's triggered by motion.
Preserve Pictures: Duration how the image will be saved to your storage (SD Card).
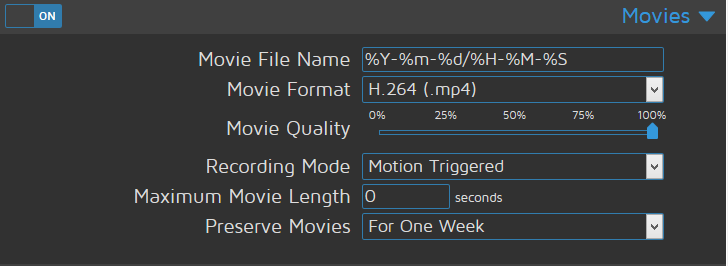
Set this ON it's a settings for video recording when a motion is detected it's the same settings to image.
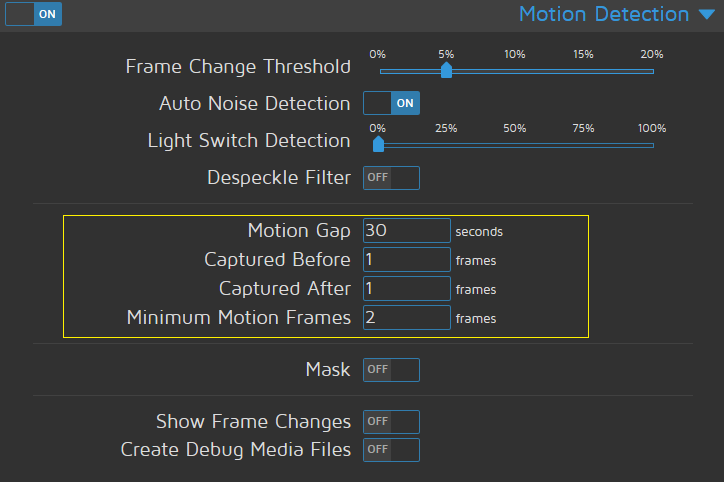
Motion Detection settings for your surveillance camera this is also important you'll be able to tweak some default settings in motion detection.
Frame Changes Threshold: I found this sensitive in my test I can say the option that fit best for my camera is 5%, It checks the slightest changes on the environment and found no problem when I check the log of my home surveillance camera I found images / recordings with people walking.
Motion Gap: The gap between movement and none movement.
Captured Before & Capture After: Self explainable.
Minimum Motion Frames: Count of frame that it detect of motion, meaning to say if the camera found a motion it will wait for two frames and check if those motion are not the same, if found not match it will start to take a pictures & take a video recording of those motions, this settings rely on the Frame Changes Threshold.
That's it enjoy! :D