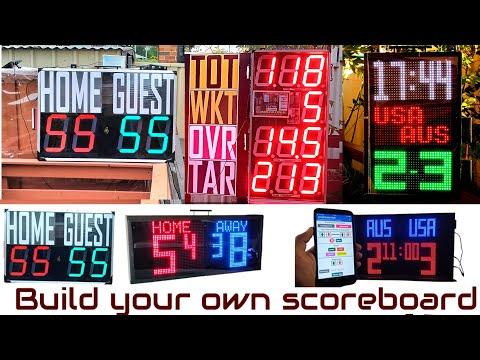
Build Your Own Scoreboard, Timer and Up Down Counter in 4 Steps. Single Display P10 Scoreduino DMD Based DIY Digital Scoreboard for Cricket and Soccer
by buildcircuit in Circuits > Arduino
1095 Views, 2 Favorites, 0 Comments
Build Your Own Scoreboard, Timer and Up Down Counter in 4 Steps. Single Display P10 Scoreduino DMD Based DIY Digital Scoreboard for Cricket and Soccer


In the vibrant realm of community sports, Scoreduino’s Single Display Scoreboard stands as a beacon of innovation, offering professional-level scoring for local players. Community sports, often played on local grounds with limited resources, have long sought an affordable solution to enhance the game experience. Scoreduino's Single Display Scoreboard meets this need, ushering in a new era of inclusive and engaging sports events.
Traditionally, digital scoreboards were reserved for elite competitions, leaving community players reliant on manual scorekeeping. Scoreduino bridges this gap with a compact 320mmx160mm display, bringing professional scoring to grassroots sports without hefty costs.
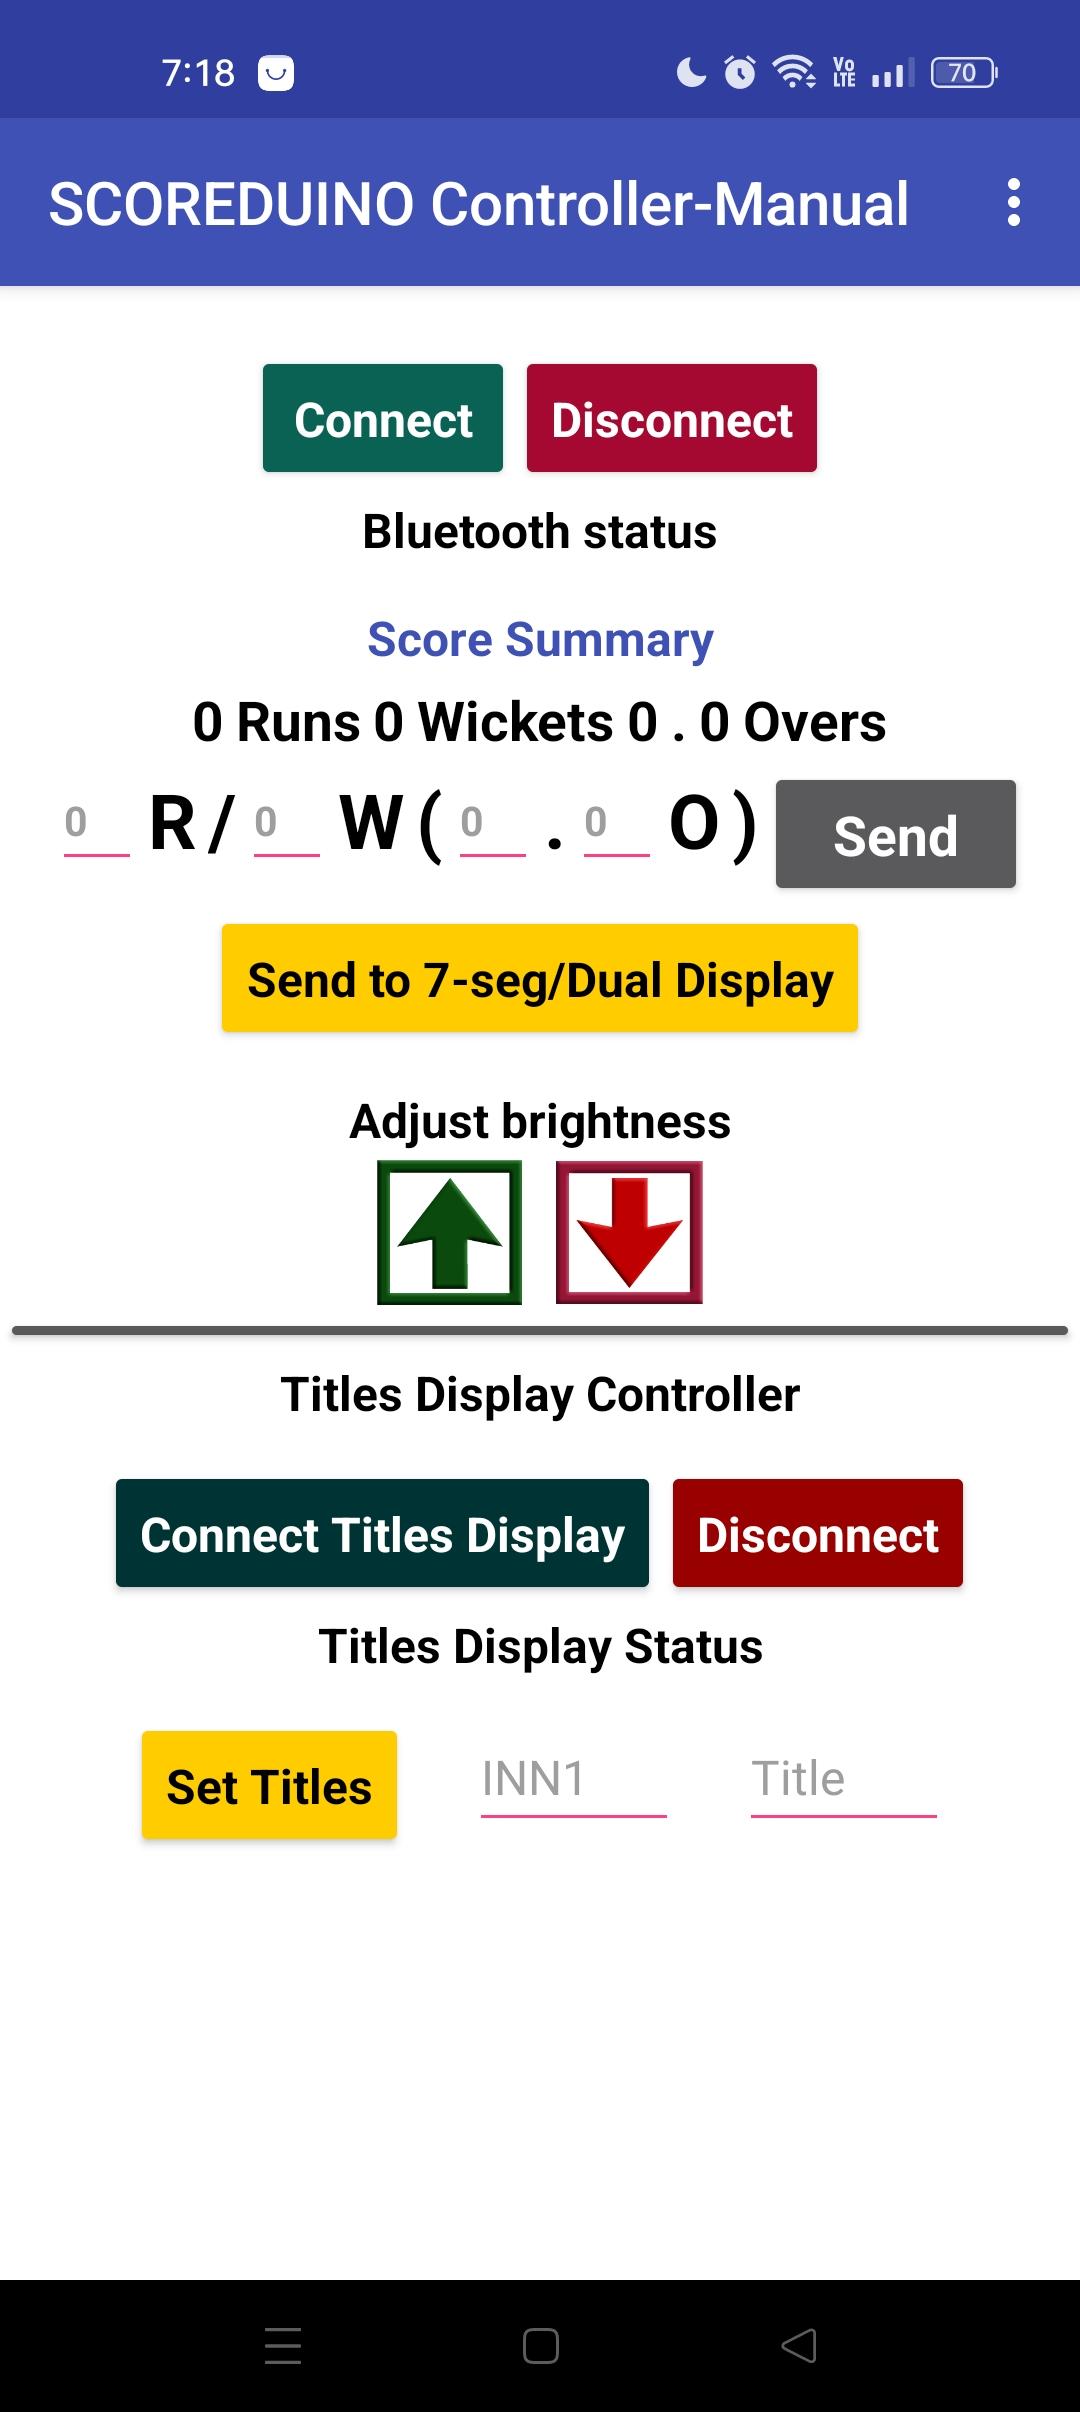
The innovation lies in its accessibility. With an integrated Android app, players can effortlessly operate the scoreboard. Whether it’s automatic score updates from popular cricket platforms like cricclubs.com and playhq.com or manual inputs for a football or cricket match, Scoreduino’s user-friendly approach empowers every player to transform their sports events into organized and dynamic spectacles.
Scoreduino’s Single Display Scoreboard is a game-changer in community sports, democratizing the scoring experience and enabling players to enjoy professional-level competition.
Scoreduino DMD module is designed to make digital scoreboards accessible for everyone, from local sports clubs to school teams and community leagues.
The Scoreduino-DMD module can create scoreboards of various sizes, from a compact 32cmx16cm for indoor sports to a massive 96cm by 48cm for outdoor matches. This flexibility lets you tailor your scoreboard to your event’s specific needs, ensuring maximum visibility and impact.
Each module comes preloaded with your preferred output option, enabling you to personalize your scoreboard effortlessly. Setting up the displays is straightforward: connect them to the Scoreduino module, power it up, and you're all set. It's as simple as that.
This tutorial shows how to build a large size 640mmx480mm scoreboard. This is just one example, there are more than 30 possibilities. Depending on the size, you can purchase the display modules and accessories to build other types of scoreboards as well.
Supplies
.JPG)
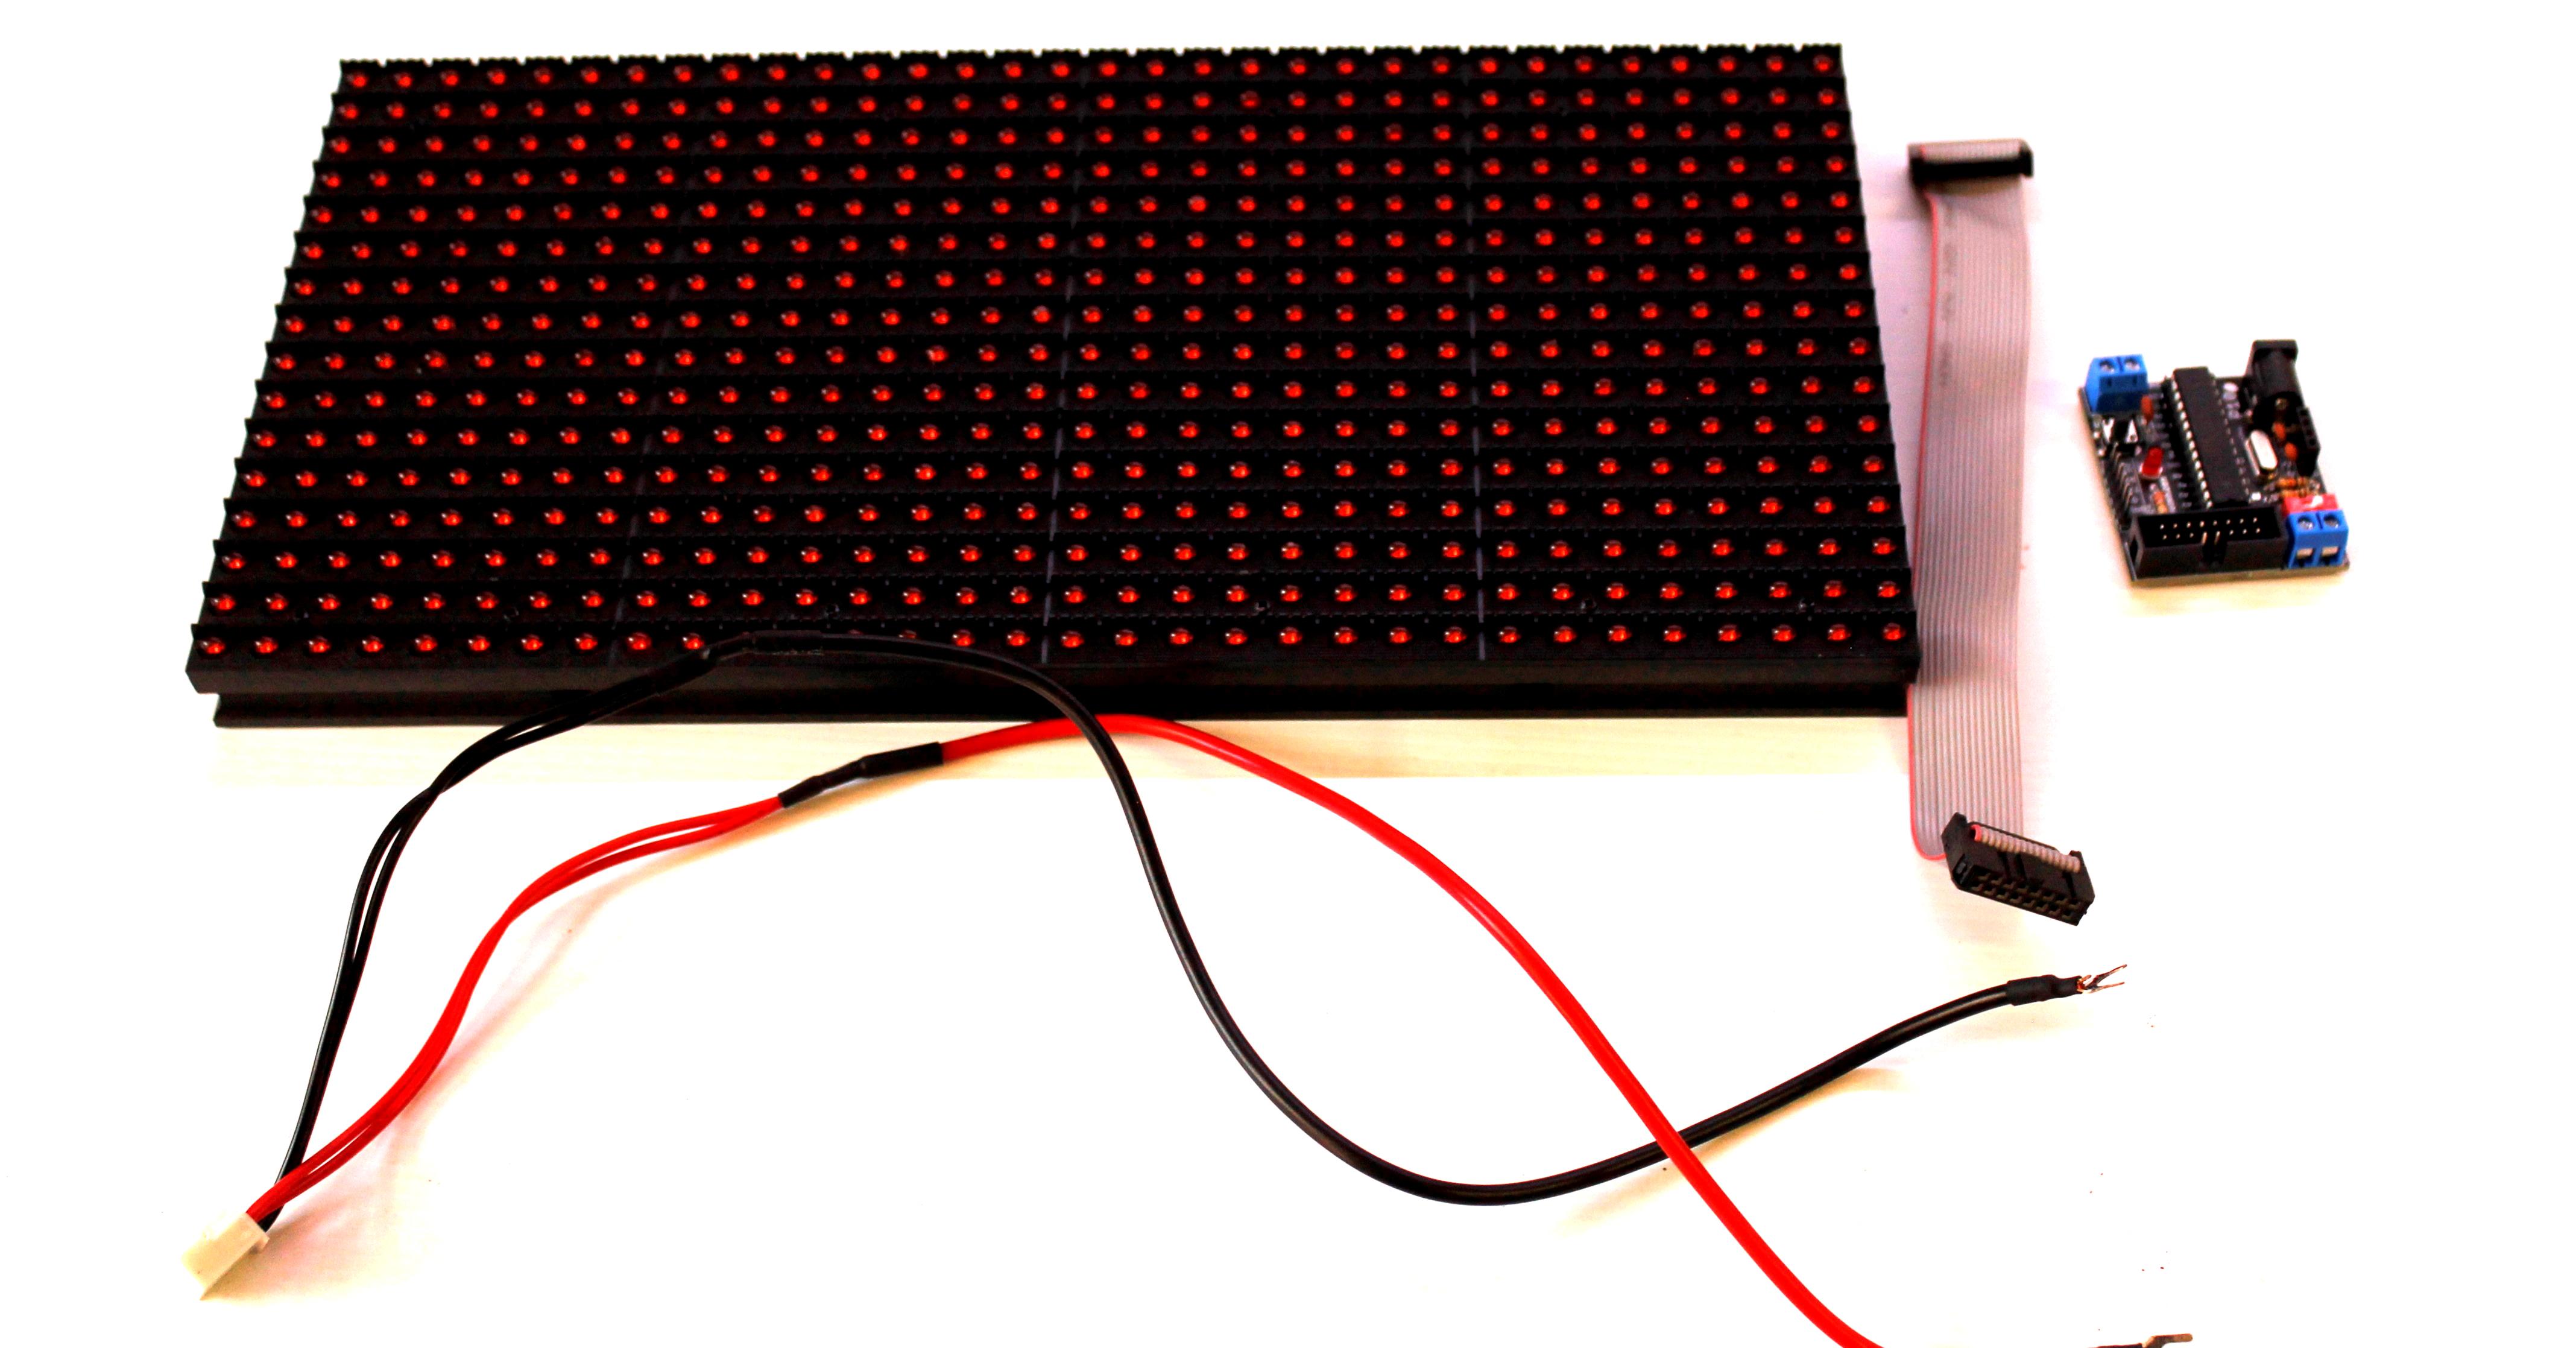

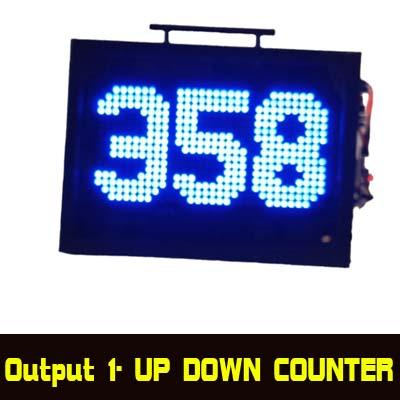
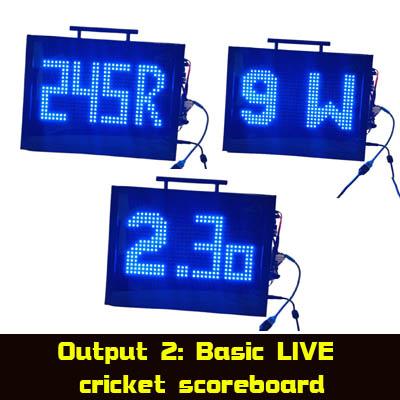
This tutorial is for basic single display soccer, cricket scoreboard, timer and up/down counter. There are more than 30 possibilities, this is just one of them.
- 1 x P10 dot matrix display
- 1 x 16 pin IDC cable (included with the dot matrix display)
- 1 x Power cable(included with the dot matrix display)
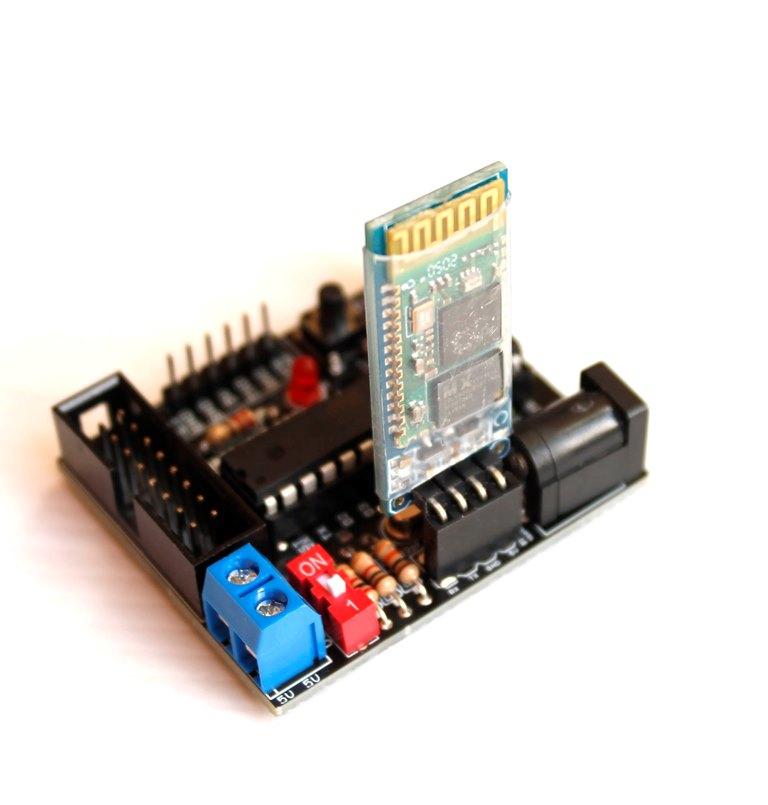
- 1 x Fully assembled SCOREDUINO-DMD module. 1 module-1 output, meaning each module provides only one output. Choose the output while placing the order. Option 2: Scoreduino module using Arduino Pro Micro
- 1 x HC-06 Bluetooth Module
- 1 x 5V 4A power supply
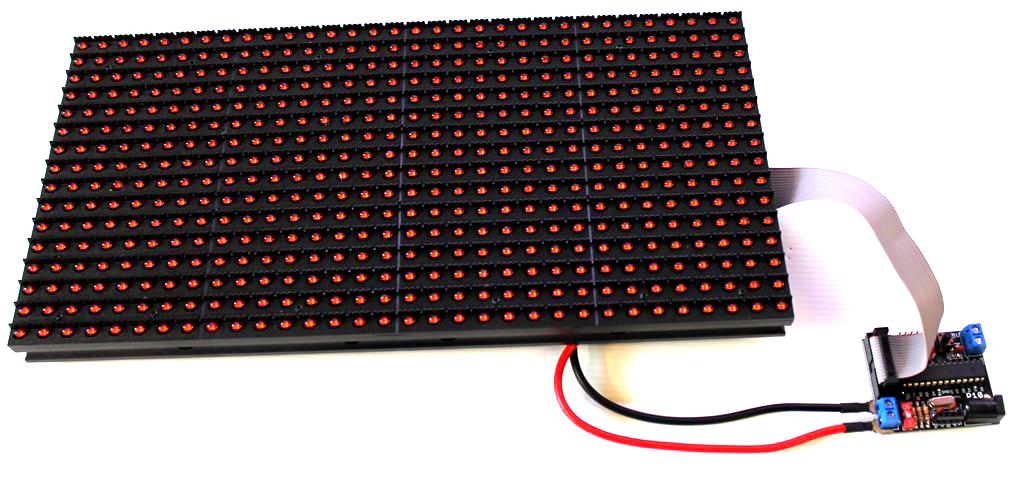
PREPARE THE SCOREBOARD UNIT

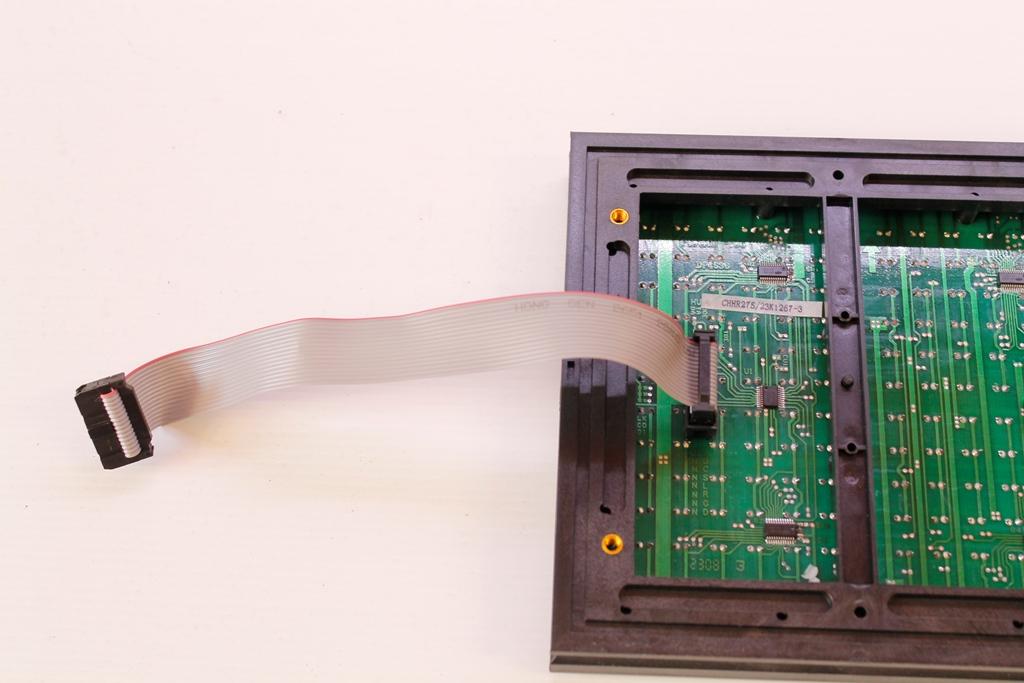
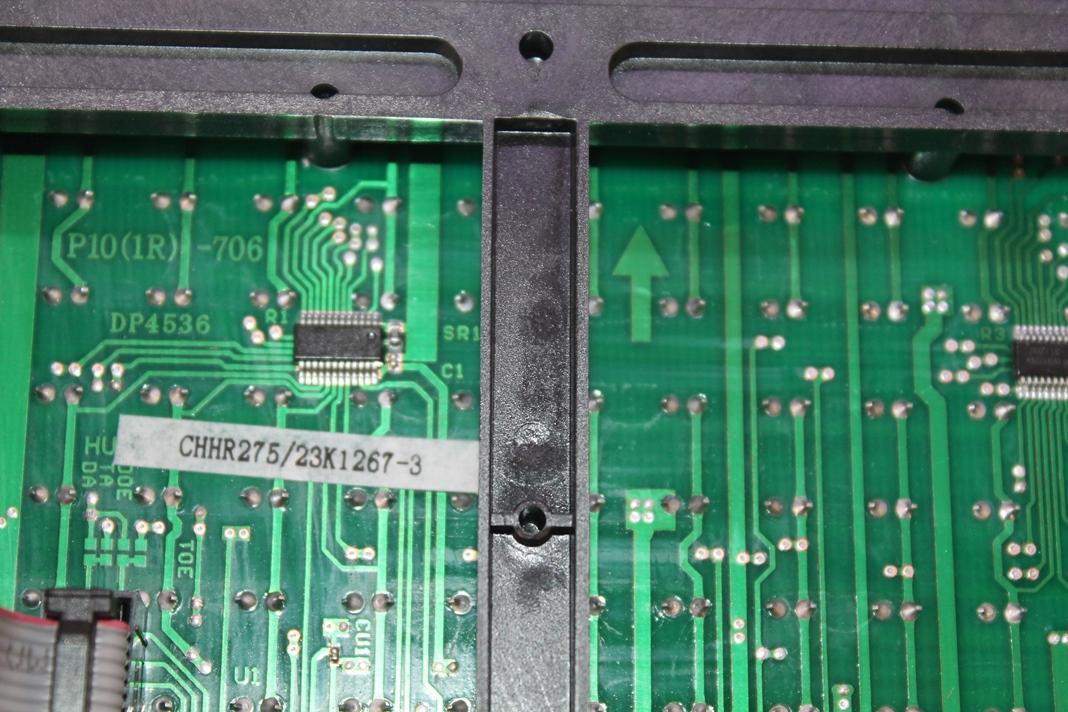
You will see arrows at the back of the display: 1 or 2 pointing upward and 1 or 2 pointing to your right. Place the display on your table exactly as shown in the image.
- Connect the 16-pin IDC cable to the LEFT IDC socket.
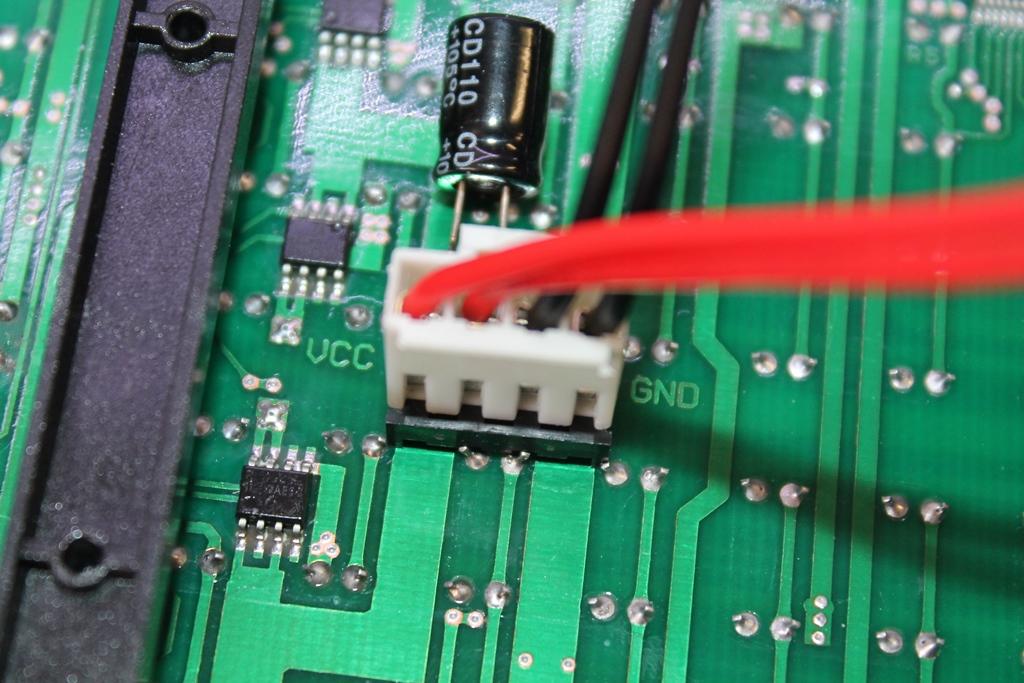
- Connect the power cable to the VCC and GND terminals on the display board. The RED wire goes to the VCC pin, and the BLACK wire goes to the GND pin.
CONNECT THE SCOREBOARD UNIT TO THE SCOREDUINO-DMD Module
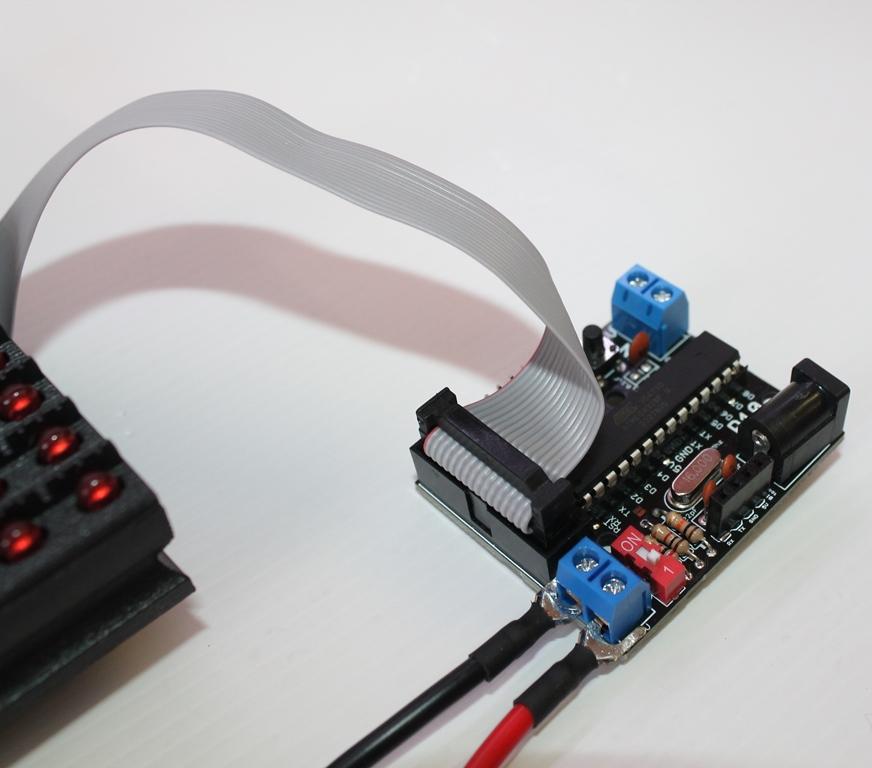
- Use a screwdriver to connect the power cable to the screw terminal of the SCOREDUINO-DMD module.
- Plug the IDC cable into the IDC socket on the SCOREDUINO-DMD board.
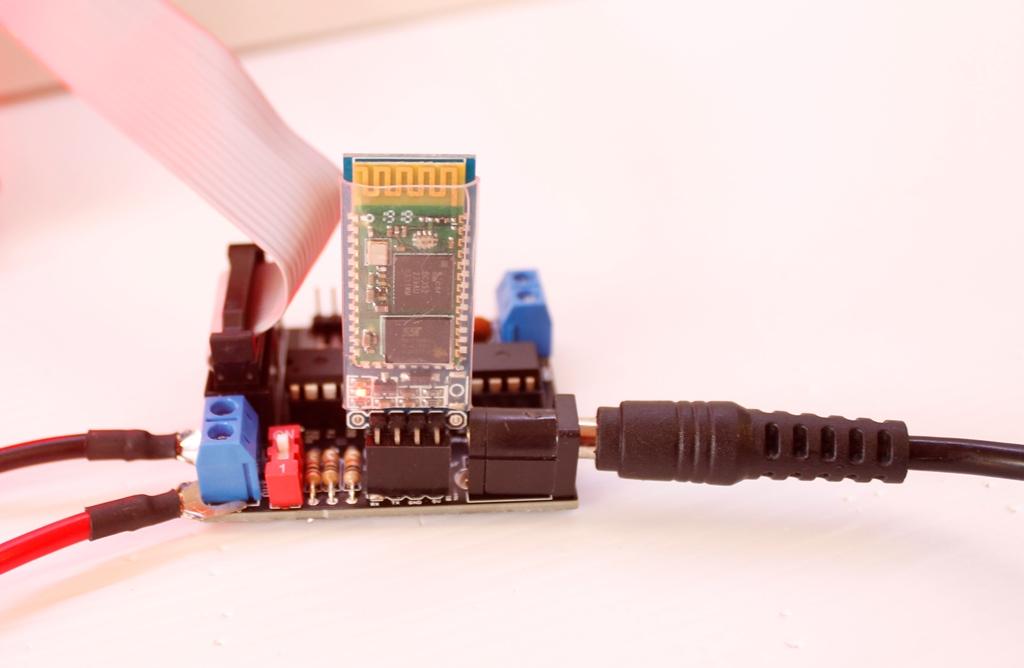
- Attach the HC-06 Bluetooth module to the SCOREDUINO-DMD board.
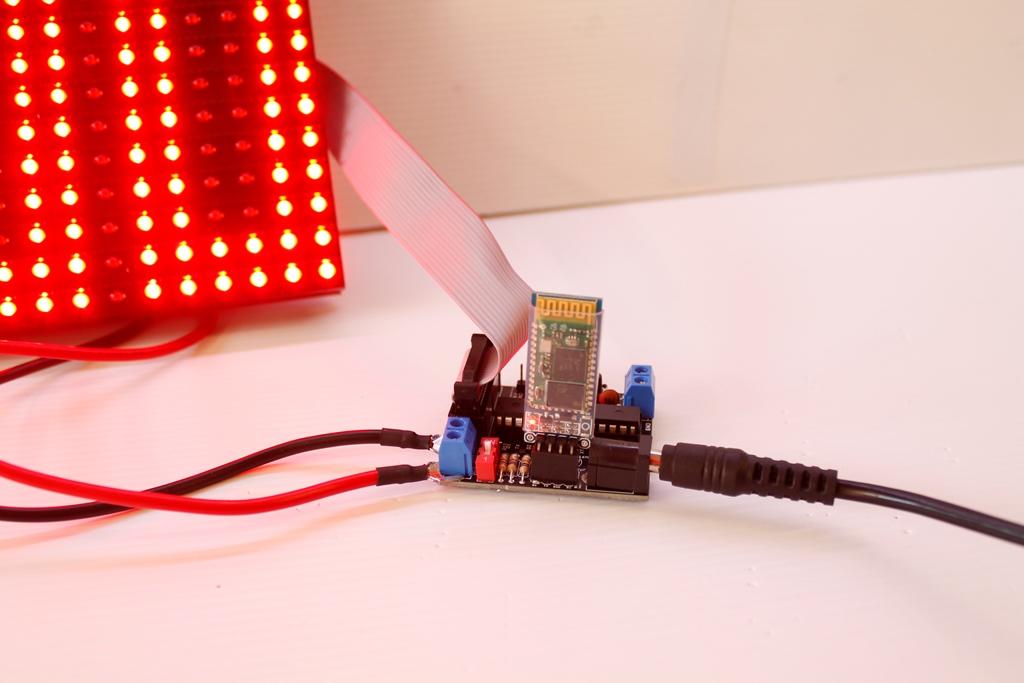
Power Up the Scoreboard Display and Scoreduino DMD Using 5V-4A Power Adapter
.jpeg)
.JPG)
.JPG)
.jpg)
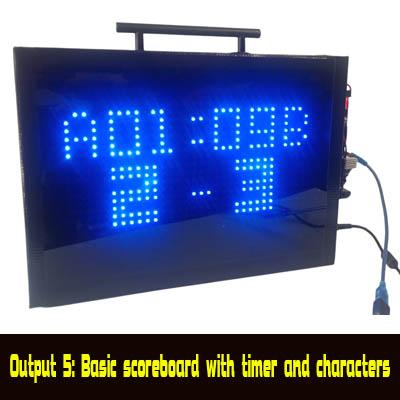
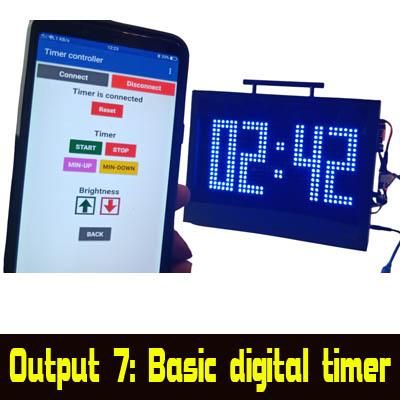
After the IDC cable and power cable are connected to the scoreboard, you can power up the SCOREDUINO-DMD module. You will see the output that you have selected while ordering the module.
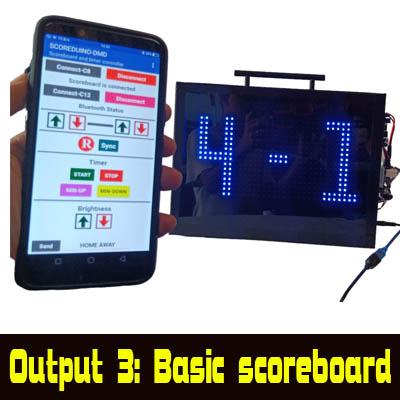
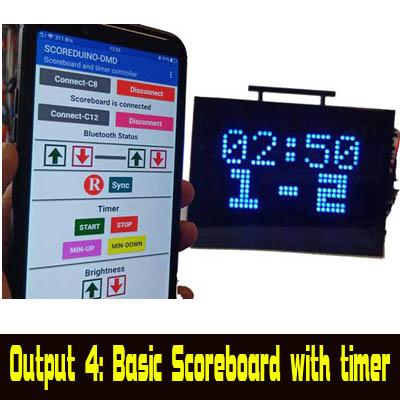
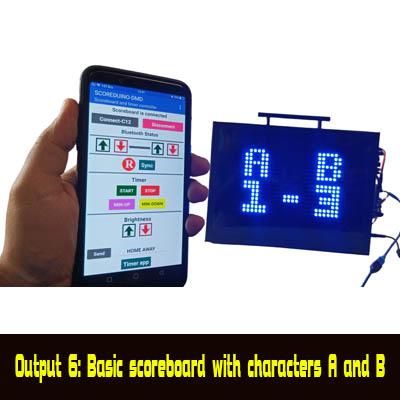
Operate Using Scoreduino App
.jpg)
.jpg)
.jpg)

To operate the scoreboard, follow these steps:
- Download the app. This app is for controlling your scoreboard. There are more than 20 apps built for different scoreboards. Users will be given a link to the correct app to operate the scoreboard of their choice.
- Go to your phone's settings and pair your phone's Bluetooth with the scoreboard's Bluetooth.
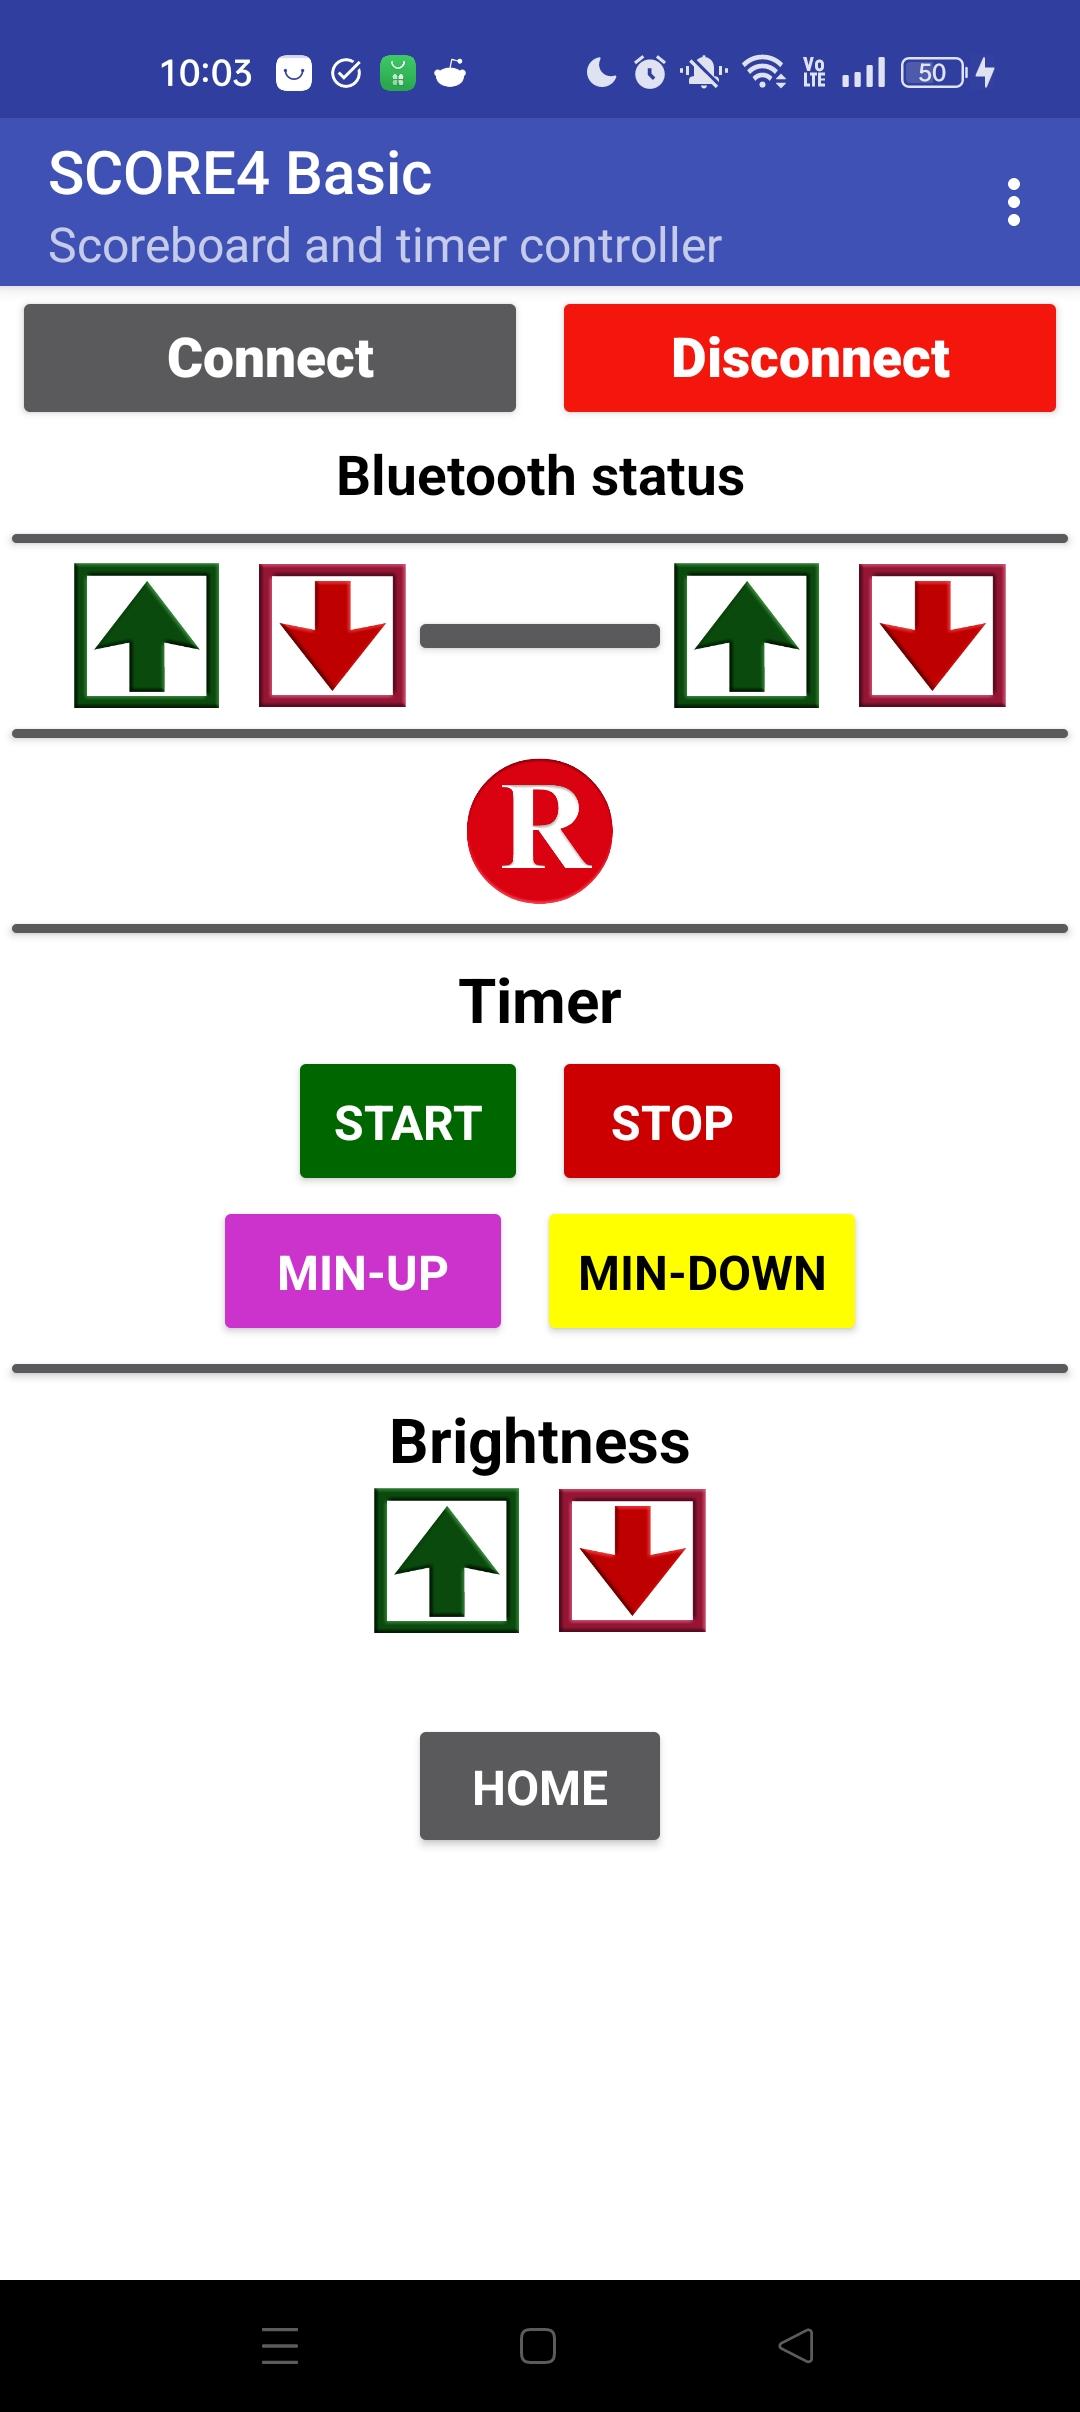
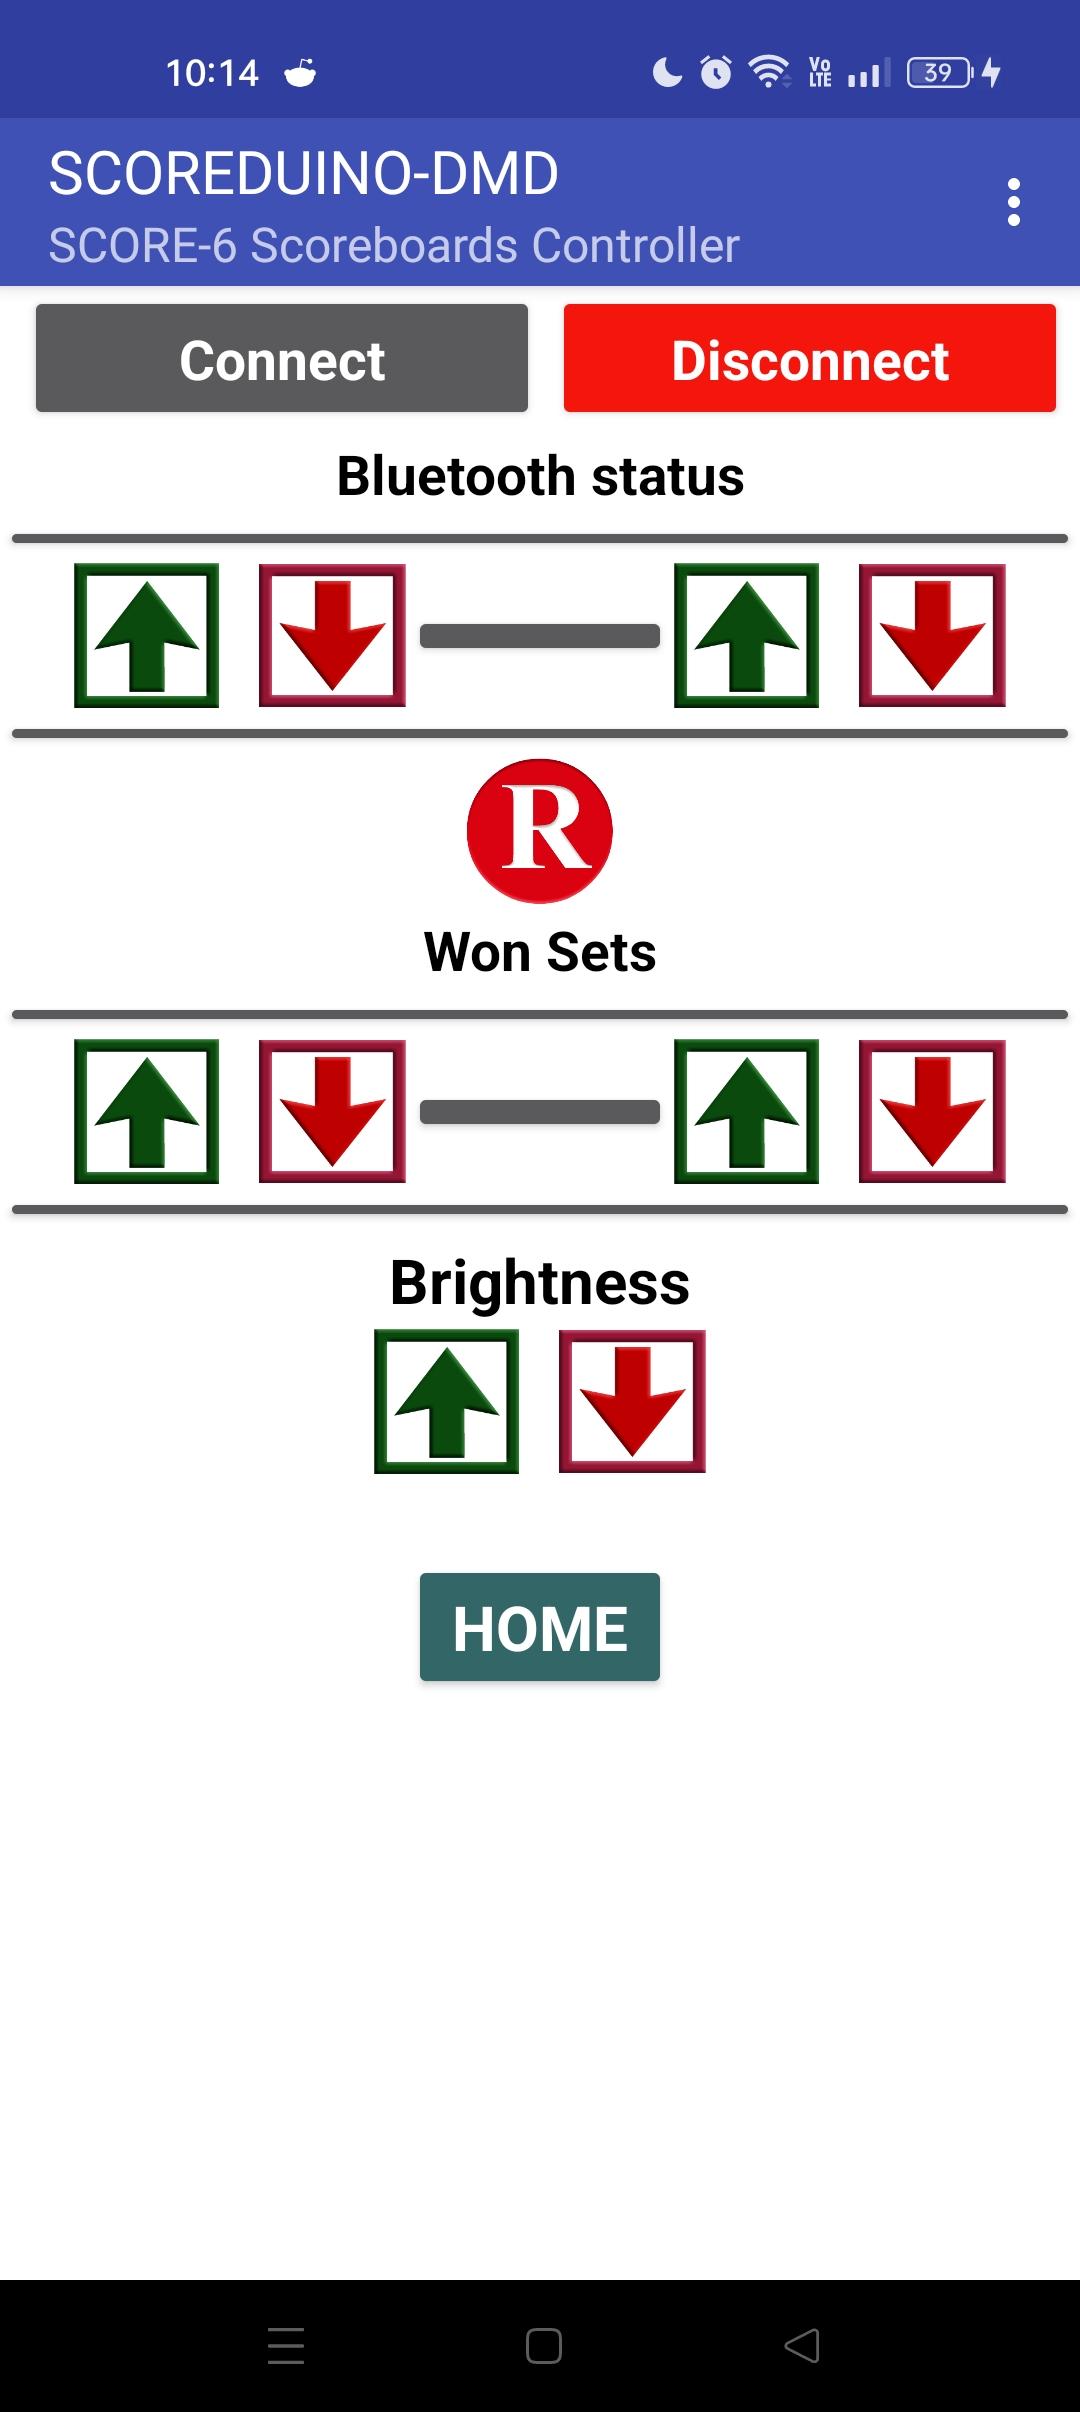
- Open the app and navigate to SCORE4 Basic.
- Connect your phone to the scoreboard's Bluetooth through the app.
- You can now operate the scoreboard. When you send commands, the scores will increase or decrease accordingly.