A Step-by-Step Guide to Building Your Own Blynk Alternative With Node.js, Socket.io, and ESP8266 Microcontroller
3480 Views, 6 Favorites, 0 Comments
A Step-by-Step Guide to Building Your Own Blynk Alternative With Node.js, Socket.io, and ESP8266 Microcontroller

Unleash the Power of IoT and take control of your connected world.
Tired of the limitations posed by using just a local network for your IoT projects?
In this step-by-step guide, I'll show you how to build an IoT platform from scratch using Node.js, Express.js, Socket.io, and the ESP8266 microcontroller.
Say goodbye to the restrictions of local networks and third-party services.
Supplies

Gather your ESP8266-based dev board like NodeMCU and an LED, or use the onboard LED if available.
Intro to the System We Are Building

In this project, we'll bring together three crucial elements to create a seamless IoT platform:
the user interface, the server, and the hardware.
The front-end and back-end will communicate in real-time, making it easy for users to control their IoT devices.
Although MQTT is a popular communication protocol in the world of hardware, we've chosen to simplify things and leave it out for the cost and ease of running our server.
For our IoT platform, we'll be using Web Sockets, a powerful alternative to MQTT.
Our trusty ESP8266 microcontroller is more than capable of handling Web Sockets, and with the help of the Arduino IDE, programming it will be a breeze.
The server component of our platform will be built with Node.js and leverages the express.js library for HTTP connections and the Socket.io library for WebSockets.
The user interface is kept simple with HTML, CSS, and a touch of JavaScript. No need for complex frameworks like React, Angular, or Vue - just a simple button to click and listen to.
With the help of JavaScript, we'll update the server in real-time over WebSockets, making it a dynamic and responsive platform.
Clone the Code Base

Ready to get your hands dirty? Let's start by downloading and installing Node.js on your machine. The installation process may vary depending on your Operating System, but once it's done, it's time to clone the project codebase using this command:
git clone git@github.com:B45i/ESP-Websocket-Switch.git
Or you can download and extract the code from GitHub, just make sure you've got git installed on your machine first.
The firmware folder has our Arduino code, and the src folder contains our server and UI code.
package.json file has information about the libraries that we are going to need, though it's not installed in our folder.
Open our project folder in the terminal and type
npm i
(make sure your terminal points to the location with the package.json file)
This will install all the necessary libraries.
If you take a look at the script section of package.json, you can see commands like this:
"scripts": {
        "dev": "nodemon src/app.js",
        "start": "node src/app.js"
}
You can run these commands by typing npm run dev or npm run start.
npm run dev will run your server in development mode, so it will listen for any file changes and automatically restart the server.
And voila! Your server is now up and running. Just open http://localhost:4001/ and see the magic unfold!
amal@Amals-MacBook-Pro esp-socket % npm run dev
> esp-socket@1.0.0 dev
> nodemon src/app.js
[nodemon] 2.0.19
[nodemon] to restart at any time, enter `rs`
[nodemon] watching path(s): *.*
[nodemon] watching extensions: js,mjs,json
[nodemon] starting `node src/app.js`
Running on :  { address: '::', family: 'IPv6', port: 4001 }
Backend Code Walkthrough

When we deploy our code, the server will be run using npm run start command.
Both of these commands point to app.js in src folder.
Let's take a look at that file.
app.js file starts like this
import express from 'express';
import http from 'http';
import { Server } from 'socket.io';
Here we are importing all the libraries we are going to use.
Please note that here I'm using ES6 import statements, in the package.json file set type as module to enable this.
When we deploy our code to a platform like Heroku, the port in which our server is going to run will be coming from an environment variable called PORT.
const PORT = process.env.PORT || 4001;
In local, the environment variable will be empty, so if it's empty we will set the port as 4001.
now let's configure express (node.js HTTP framework) and Socket.io (WebSocket library)
const app = express();
const httpServer = http.createServer(app);
const io = new Server(httpServer, { cors: { origin: '*' } });
We need to send our UI HTML / CSS and Javascript files when a browser sends a request.
This is done using expresse's staticmiddleware
app.use(express.static('src/ui'));
We need to maintain our button's state in the server, this is done using buttonState.
let buttonState = false;
The rest of the code is to manage our WebSocket connection.
io.on('connection', socket => {
	console.log('New Connection');
	io.to(socket.id).emit('buttonState', buttonState);
	.
	.
	.
}
This code gets executes when a new WS client is connected to the server.
Inside this arrow function, we will write the rest of our WS-related code.
WebSocket is event bases, whenever you want to send some data, you propagate it as an event, and attach some information to it.
This will be much clearer when we take look at our UI code.
We need to tell our clients the current state of the button when they join so that they can be in sync.
io.to(socket.id).emit('buttonState', buttonState);
this piece of code takes the id of the newly joined client and sends the current state of the button to it.
Inside the connection callback function, you can see code related to various WebSocket events.
socket.on('disconnect', () => {
        console.log('Disconnected');
    });

    socket.on('buttonState', value => {
				buttonState = value;
        socket.broadcast.emit('buttonState', value);
    });
The first one is the disconnect event when a client gets disconnected this event gets fired, we are not going to use this event at this moment.
socket.on('buttonState', value => {
	 			buttonState = value;
        socket.broadcast.emit('buttonState', value);
    });
This is the code that is responsible to connect our UI and hardware.
When the user clicks the button on the UI, our frontend javascript code fires an event (buttonState)
That will execute the above piece of code.
First, we will update buttonState variable then we take this value and send it to all other clients except for the one from which it originated using
socket.broadcast.emit('buttonState', value);
We need to serve our express app on the port that was specified (4001 on local), This code does exactly that.
UI Code Walkthrough

UI code resides in src/ui folder.
You will get to see three files, index.htmlindex.js and style.css
HTML and CSS files are very basic, it just contains and style for the button.
So let's take a look at the JS file.
We need to initialise the socket.io object, this is done by calling the io() function.
const socket = io();
We need to get the button element using JS so that we can attach an event listener to it.
const toggleBtn = document.getElementById('toggleBtn');
we will declare a variable called buttonState that represents our button's state in the UI, we flip the values of this variable when the user clicks the button.
Now we will attach a click event and listen to these button clicks.
toggleBtn.addEventListener('click', () => {
    buttonState = !buttonState;
    updateUI();
    socket.emit('buttonState', buttonState);
});
we will negate the buttonState variables value if it's true then it becomes false. and vice versa.
then we call the updateUI() function ( we will take a look at this function in a moment)
Till now our changes are on the UI itself, the server is not aware of it.
We need to tell our server about the new update, and for that we will use
socket.emit('buttonState', buttonState)
function.
This will tell the server about the change in our UI, and the server will broadcast this change to other clients.
When the user clicks the buttons, based on the state, its color and text change.
If the button is off, then it will be red in color and when it's on it will be green.
updateUI is responsible for this change.
const updateUI = () => {
    buttonState
        ? toggleBtn.classList.add('on')
        : toggleBtn.classList.remove('on');
    toggleBtn.innerText = buttonState ? 'Turn off' : 'Turn on';
};
if the value of toggleBtn is true then we add a CSS class called on else we remove it. this class is responsible for the colors.
We also change the text inside the button based on the value.
if you run the command npm run dev in the terminal and open localhost:4001 in your browser, you should be able to see our application UI.
If you open the same address in multiple tabs, you can see the UI in one tab gets updated automatically when you click the button on another tab.
Deploying Server to the Internet
Our app is running, but it's on our local machine, we need to deploy it so that it can be used from anywhere on the internet.
We are going to use a platform called Heroku to host our application.
Create a free account from Heroku: https://signup.heroku.com/dc
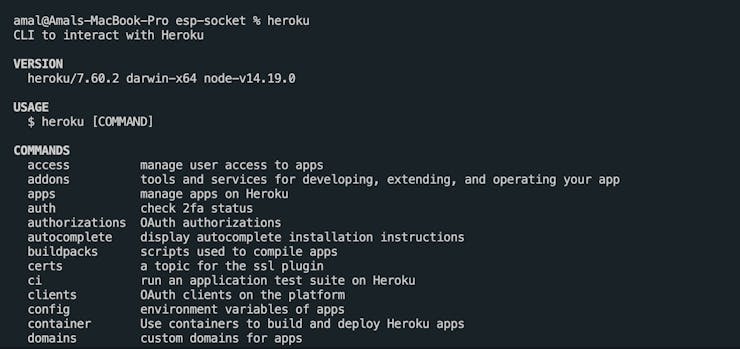
Install heroku cli from https://devcenter.heroku.com/articles/heroku-cli
we will use this command-line utility to manage our app.
Make sure that git and Heroku is successfully installed on your machine by typing the command heroku in the terminal.
Right now the CLI doesn't know about the account that you created, to connect your CLI and account, type
heroku login
in a terminal, this will open up a browser window, from which you can sign in to your Heroku account.
heroku login
heroku: Press any key to open up the browser to login or q to exit
 ›   Warning: If browser does not open, visit
 ›   https://cli-auth.heroku.com/auth/browser/***
heroku: Waiting for login...
Logging in... done
Logged in as me@example.com
Now let's create an app on our Heroku account
heroku create
This will create a Heroku app, where we can host our code.
heroku create
Creating sharp-rain-871... done, stack is heroku-18
http://sharp-rain-871.herokuapp.com/ | https://git.heroku.com/sharp-rain-871.git
Git remote heroku added
Deploying our code to Heroku is dead simple, we can do it using a single command.
git push heroku main
Our code will get deployed to the internet once this command is finished executing.
git push heroku main
Counting objects: 488, done.
Delta compression using up to 8 threads.
.
.
.
.
remote: Verifying deploy... done.
To https://git.heroku.com/nameless-savannah-4829.git
 * [new branch]      main -> main
To make sure at least one instance of our app is running, run this command:
heroku ps:scale web=1
To open our web app, run
heroku open
this will open our app's URL in a browser.
You should be able to open this from anywhere on the internet.
If you open this URL from another device, you can see the UI gets updated in real-time as you click the button on another device.
Hardware Code Walkthrough
.jpeg)
Now we are going to code our ESP8266 microcontroller using Arduino IDE.
Make sure that you have installed ESP8266 core and the necessary libraries on your Arduino IDE.
Libraries needed for this project:
open firmware/firmware.ino file on Arduino IDE.
You have to customize this code a little bit.
#define SSID "Your WiFi SSID"
#define PASSWORD "Your WiFi password"
#define SERVER "esp-socket-switch.herokuapp.com"  // Server URL (without <https://www>)
SSID is the name of your WiFi, and PASSWORD is your wifi password.
You need to copy the URL that u got when you typed heroku open and paste it as SERVER.
Make sure that there is no <http://www> in the URL.
We need to create an Object of the class SocketIOclient
SocketIOclient socketIO;
This object will manage the WebSocket connection on our MCU.
Let's take a look at the setup function now, here we will are going to connect to WiFi, register Output pins and Socket.IO event handler.
For the sake of simplicity, I’ll be using the onboard LED of NodeMCU, you can connect an external LED if you want.
PS: On board LED on NodeMCU is inverted, ie it will light up when the pin is low.
pinMode(LED_BUILTIN, OUTPUT);
Serial.begin(9600);
Hope everyone is familiar with what this piece of code does, we are setting our pin as output and setting the baud rate of serial connection.
Now we will call setupWiFi() function, which will connect the MCU to the WiFi SSID you have specified.
The next two lines are related to Socket.IO
socketIO.begin(SERVER, 80, "/socket.io/?EIO=4");
socketIO.onEvent(socketIOEvent);
Here we will try to connect to the WebSocket server, and register the Socket.IO event handler.
socketIOEvent is our event handler function, let's take a look at that now.
void socketIOEvent(socketIOmessageType_t type, uint8_t* payload, size_t length) {
  switch (type) {
    case sIOtype_DISCONNECT:
      Serial.println("Disconnected!");
      break;

    case sIOtype_CONNECT:
      Serial.printf("Connected to url: %s%s\\n", SERVER, payload);
      socketIO.send(sIOtype_CONNECT, "/");
      break;

    case sIOtype_EVENT:
      messageHandler(payload);
      break;
  }
}
Inside this function, you can see a switch statement, we are not using the connect and disconnect even right now.
But for sIOtype_EVENT event, we are calling messageHandler function, which parses the event data.
void messageHandler(uint8_t* payload) {
  StaticJsonDocument<64> doc;

  DeserializationError error = deserializeJson(doc, payload);

  if (error) {
    Serial.println(error.f_str());
    return;
  }

  String messageKey = doc[0];
  bool value = doc[1];

  if (messageKey == "buttonState") {
    digitalWrite(LED_BUILTIN, value);
  }
}
In this message handler, we are trying to parse the JSON data that we received with the event.
parsed data will be in doc variable, doc[0] will contain the event name and doc[1] will have the value.
if the key is buttonState then we'll switch our pins state to the value we got from the server.
Now when we click the button on the UI, LED should turn on and off.
I hope this small tutorial helped you learn something new.