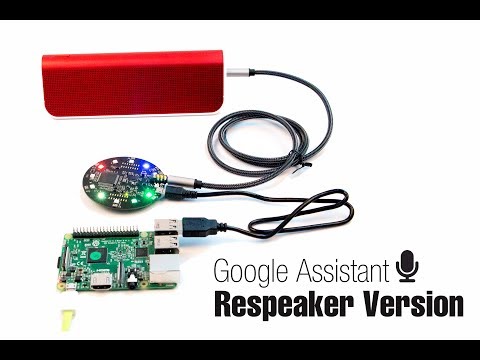
Build Google Assistant on Raspberry Pi With ReSpeaker Mic Array
by Seeed Studio in Circuits > Raspberry Pi
6806 Views, 10 Favorites, 0 Comments
Build Google Assistant on Raspberry Pi With ReSpeaker Mic Array


Introduction
With ReSpeaker Mic Array, now we can build Google Assistant on Raspberry Pi !!!
Hotword detection(means that you can directly talk to it from 2 meters away), cool LEDs(diy) and easy installation(no jump wire need and more portable), it is worthy for you to make one for yourself. Own your own Artificial intelligence assistant from now on:)
What We Need
Raspberry Pi(with network connected) *1
Respeaker Mic Array with audio jack *1
sd card with raspberry pi image *1
earphone or speaker with 3.5mm audio cable *1
usb cable *2
PC or Mac
Install Google Assistant Library on Your Raspberry Pi
The first step we need to do is installing the Google Assistant Library and environment on our Raspberry Pi. Of course Google has an official guide, please click here to see it: https://github.com/googlesamples/assistant-sdk-py...
This step is a bit tough, so please be patient. If you have any questions, please search or post an issue here: https://github.com/googlesamples/assistant-sdk-py...
After the first step, you should be able to use “OK Google” by running the demo.
Download Our GitHub
At this step, you need to download our GitHub:
git clone https://github.com/respeaker/mic_array.git
cd mic_array
Test
1. Run pixel_ring.py to control the pixel ring of the Mic Array through USB HID. After running this, ReSpeaker Mic Array will start to blink.
sudo pip install pyusb
sudo python pixel_ring.py
If you don't want to access USB device with sudo, add a udev .rules file to /etc/udev/rules.d:
echo 'SUBSYSTEM=="usb", MODE="0666"' | sudo tee -a /etc/udev/rules.d/60-usb.rules
sudo udevadm control -R  # then re-plug the usb device
2. Read 8 channels audio from the Mic Array and estimate sound's DOA. Then the LEDs on Mic Array will show the direction of the sounds.
sudo apt-get install python-numpy    # or pip install numpy
python mic_array.py
3. Do VAD and then estimate DOA. Then the LEDs on Mic Array will show the direction of the sounds, too.
sudo pip install webrtcvad
python vad_doa.py
4. Do KWS and then estimate DOA.
Get snowboy work and run python kws_doa.py. Then you should say “alexa” to Mic Array to wake it up, if you sound is detected, the LEDs will show the direction of the sounds.
git submodule init
git submodule update
cd snowboy/swig/Python
sudo apt-get install python-dev libatlas-base-dev swig           # requiremetns to compile snowboy
echo 'from snowboydetect import *' > __init__.py     # create __init__.py for a python module
cd ../../..                                          # chang to the root directory of the repository
ln -s snowboy/swig/Python snowboydetectpython kws_doa.py
Run Google Assistant
After step3, it is time to run Google Assistant now. Don’t forget to activate the Python virtual environment you configured just now. And please make sure your raspberry pi is able to visit google.com
then run:
python google_assistant_for_raspberry_pi.py
Say “OK Google” or “Hey Google” to wake it up and ask it anything you want, just as the video. Enjoy it!!