Bluetooth Serial Adapter for Pro Mini
by dmjlambert in Circuits > Arduino
36690 Views, 37 Favorites, 0 Comments
Bluetooth Serial Adapter for Pro Mini
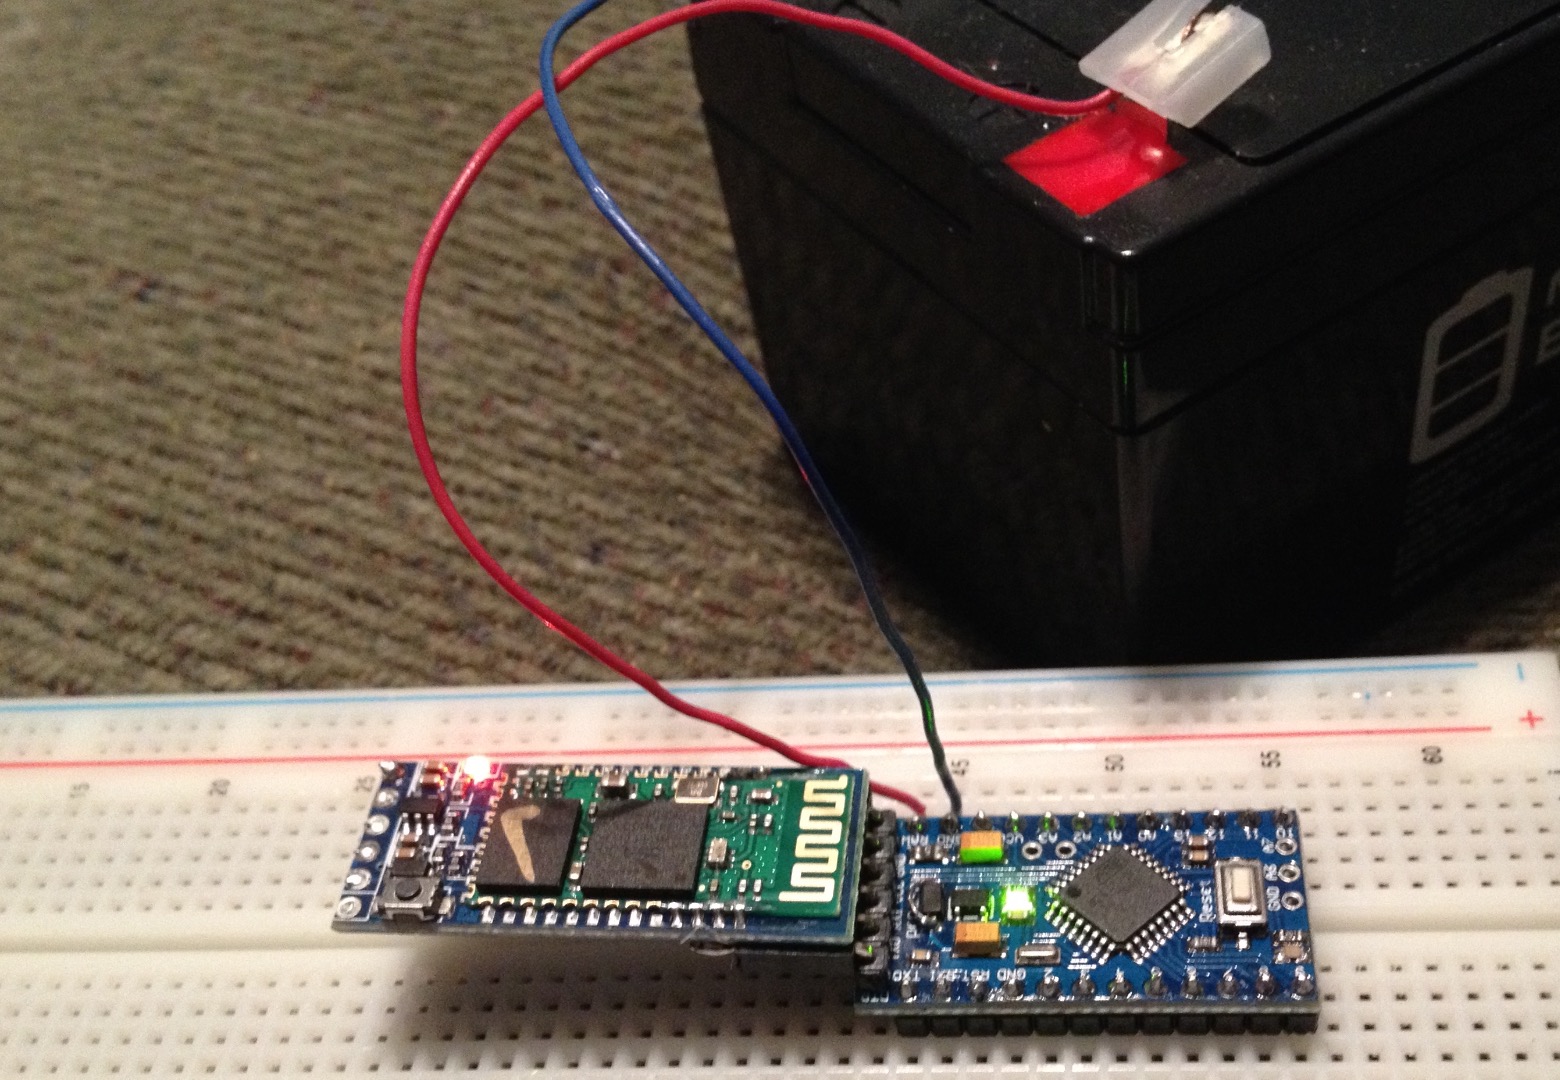
This is how to make a wireless FTDI-like adapter for 5V Pro Mini. FTDI is actually a brand of chips, and serial adapters used for programming Arduinos are often informally called FTDI adapters, even if they use other brands of chips. Since I have a Mac with built-in Bluetooth, I like to go wireless.
You can upload sketches to the Pro Mini, and interact with the Pro Mini via the Serial Monitor.
Pick the Bluetooth Transceiver

I like these HC-05 modules sold on eBay. You can get them post-paid for $1.75 to $4.50 USD. I recommend getting one with 3 features:
- State pin available on the header
- Key button to put it in programming mode
- Onboard regulator to allow powering via Arduino 5V
Recently, I have seen on eBay some boards that are shorter than most, and you can tell from the pictures there no circuitry between the HC-05 stamp-shaped module and the header pins. Unless there is circuitry on the back, these are the ones that do not have the 3.3 V regulator onboard, and they don't have the Key button. I recommend paying attention to the photo of the board to get the best one. Ask questions of the seller if you are not sure, including asking for photos of the back side of the board if it is not shown in the listing.
This Instructable covers using the HC-05 module, not HC-06, which is programmed differently.
Program the Bluetooth Transceiver
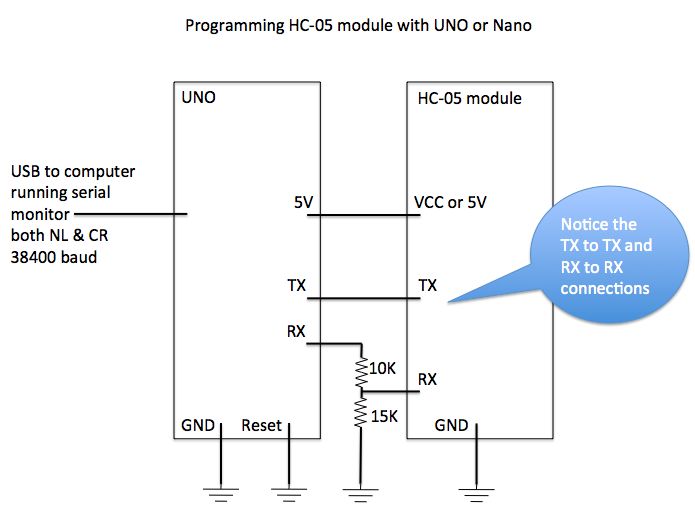
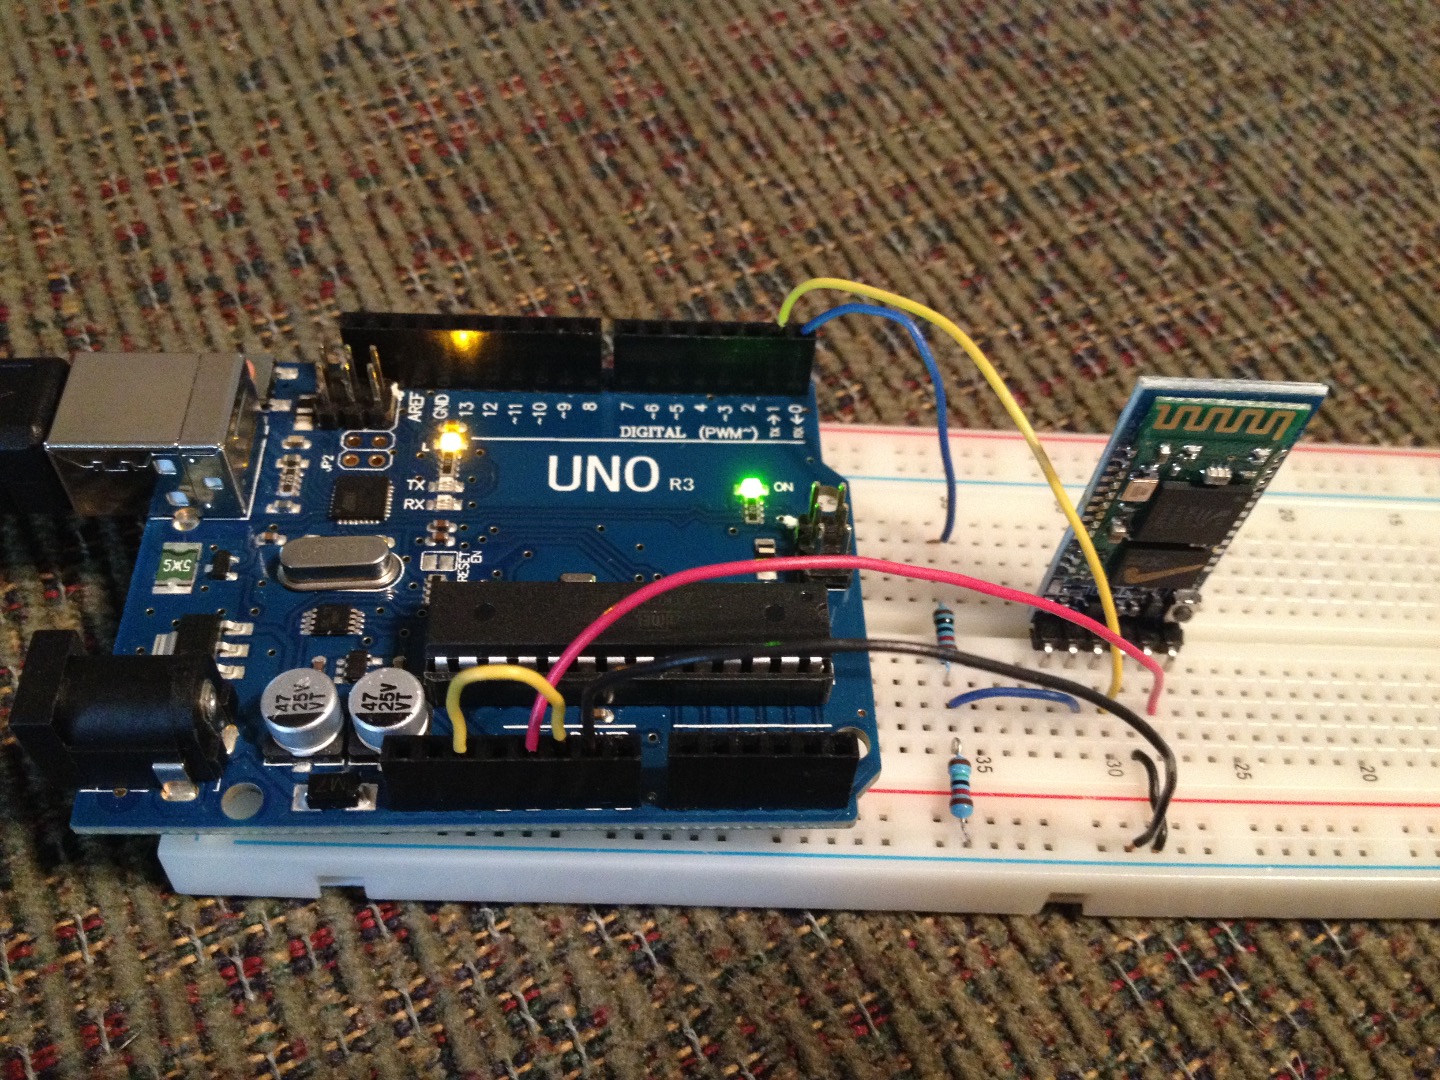
Set the Bluetooth transceiver to 57600 baud, and give it a name and password so you can pair it with your computer and communicate with the Pro Mini. The schematic and picture show the wiring and show using an UNO for this.
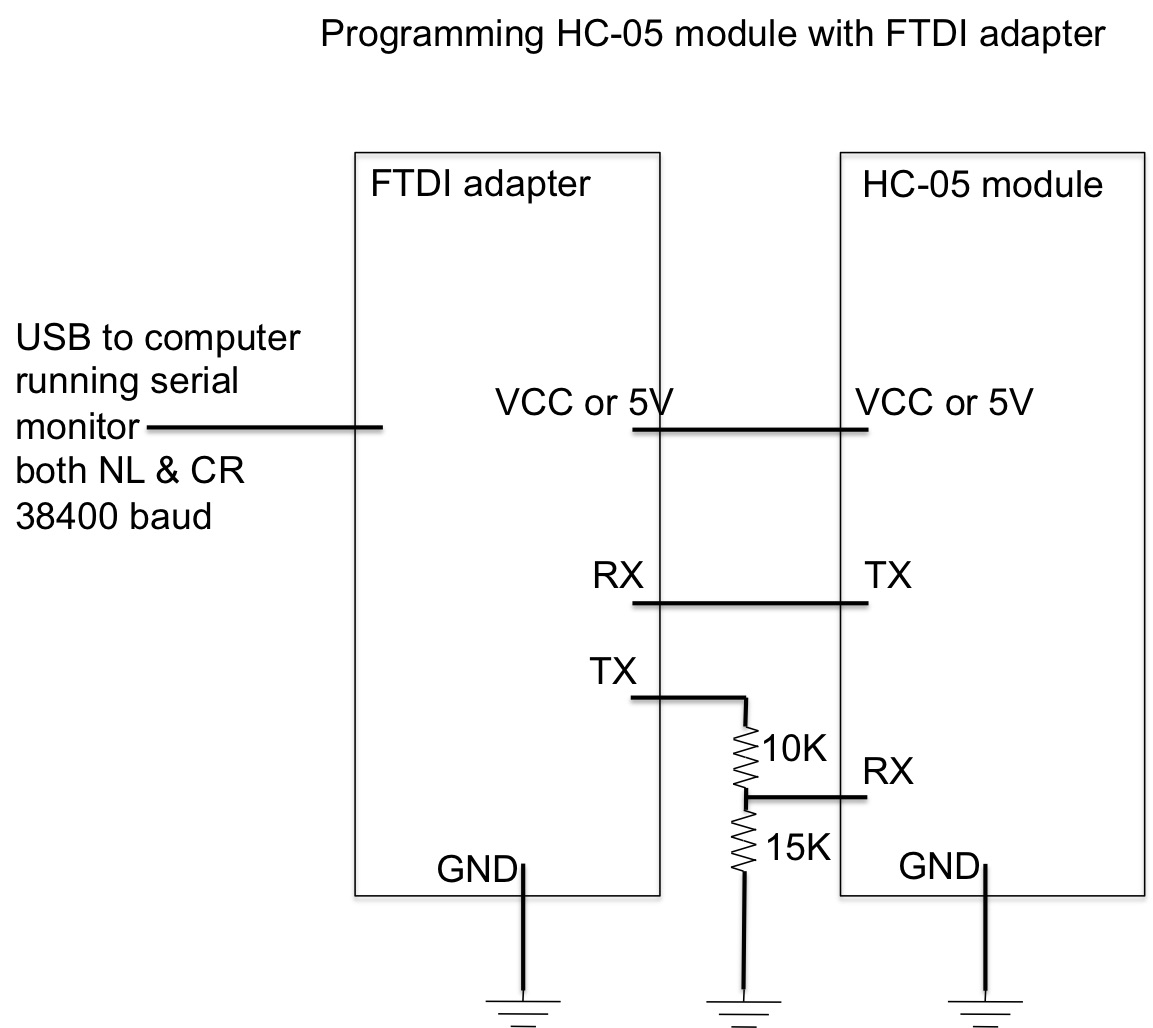
The UNO can be running a sketch that does nothing with the Serial port, such as the Blink sketch, or you can connect the Reset pin to GND to make the UNO main processor do nothing. We are just using the USB-to-serial adapter on the UNO to communicate with the Bluetooth transceiver. You could also use an FTDI adapter to program the transceiver.
Hold the Key button on the Bluetooth transceiver down while you connect the Arduino to the computer to power it up. After power up you can release the button. The LED on the transceiver will blink slowly to indicate it is in programming mode and it is listening for commands at baud rate to 38400.
Open the Serial Monitor window. Set the Line Ending to Both NL & CR and baud rate to 38400. Enter AT on the send line and click Send. It is all right if the response you see to the first AT command is ERROR. Just send AT again and it should then respond OK. You can enter AT commands in lower or upper case. You should see an OK response in the Serial Monitor for each command. You will not see the command you enter repeated back to you in the Serial Monitor, you will only see the OK responses. Enter these commands and see the responses:
at
OK
at+orgl
OK
at+role=0
OK
at+polar=1,0
OK
at+uart=57600,0,0
OK
at+name=Arduino
OK
at+pswd=1234
OK
Close the Serial Monitor window and disconnect the Arduino to remove power. Reconnect the Arduino to the computer to power it up. Go into your System Preferences or Control Panel on your computer and pair the Bluetooth transceiver with your computer using the password you programmed into the transceiver as the pairing code.
Your Bluetooth transceiver is now prepared for use with Arduino. It is programmed for baud rate 57600, which is the baud rate of the bootloader on the Pro Mini. If you need a different baud rate, follow the same procedure above, except change the at+uart command to program your preferred baud rate. The transceiver name Arduino shown above is an example. You can name it whatever you wish. You can also program it with whatever pairing code you wish.
Glue Header and Resistors to Bluetooth Transceiver
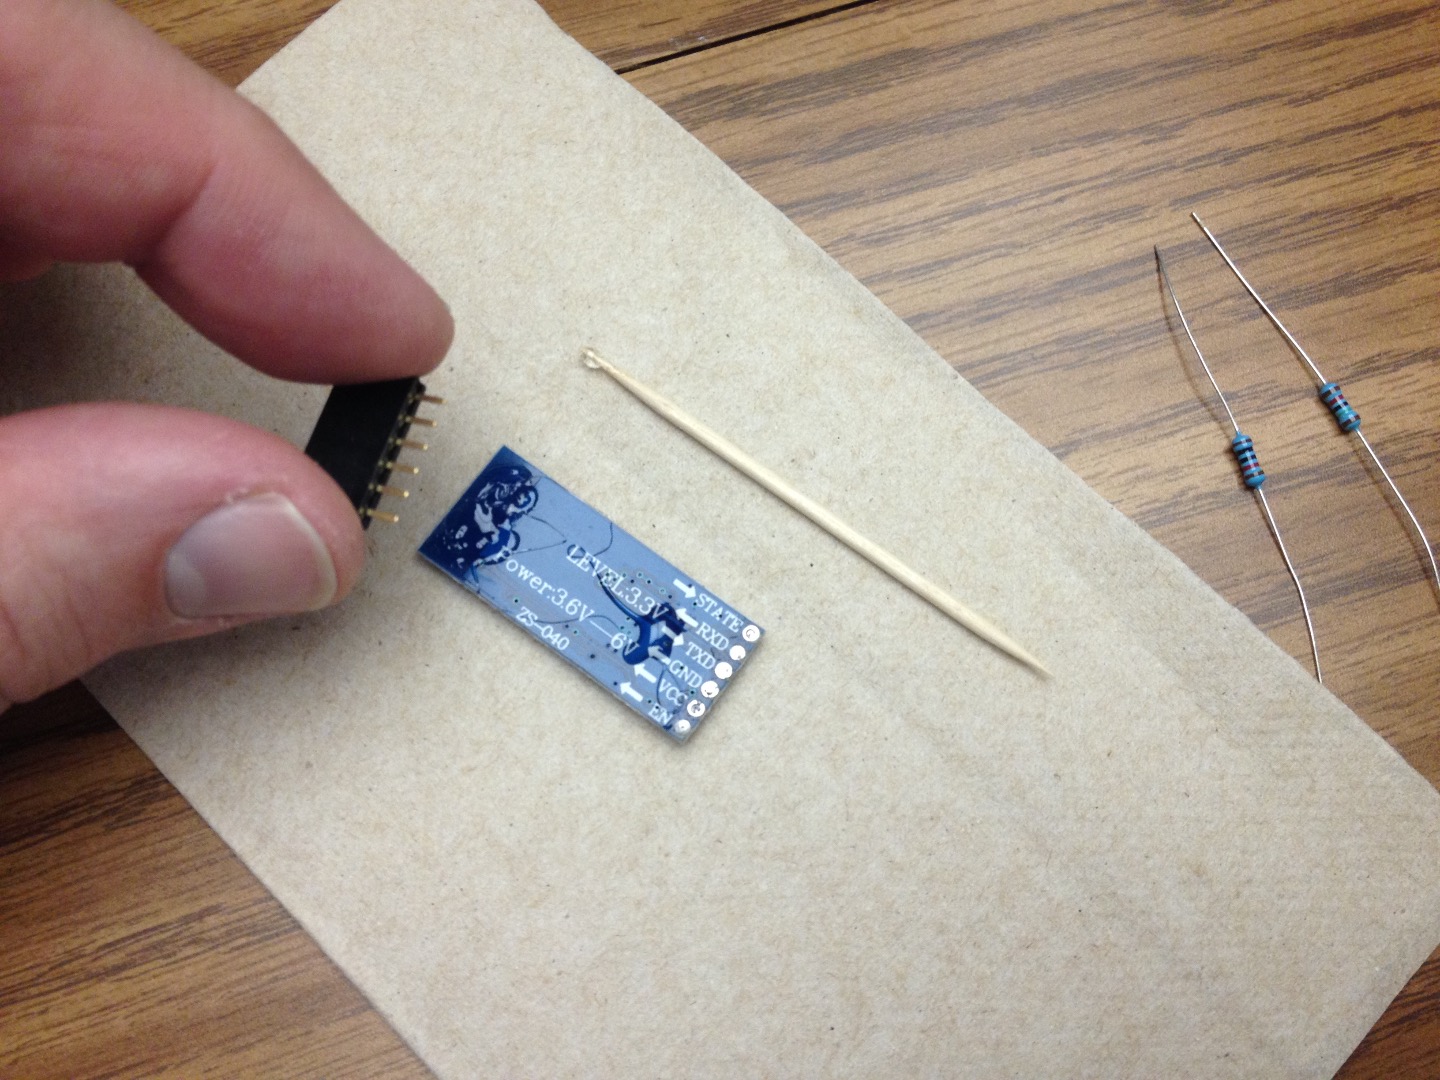
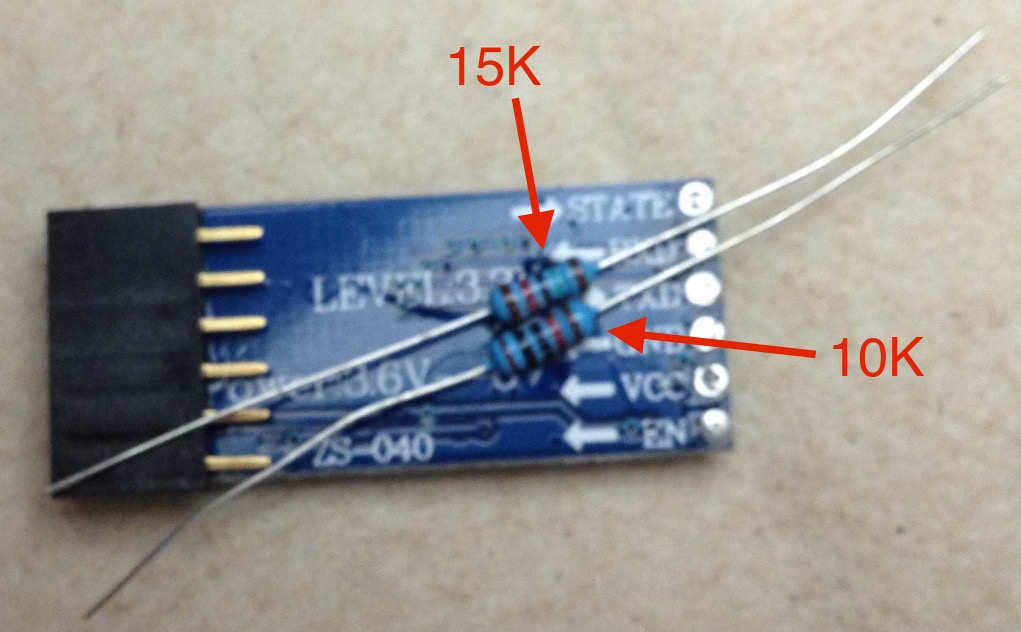
Cut the shrink-wrap plastic off the Bluetooth transceiver. Desolder, remove, and discard the header from the Bluetooth transceiver. I find it easiest to cut the pins off at the bend so they are flush with the plastic standoff that is part of the header. Then pry the plastic standoff loose and discard it. Now you have individual pins exposed that you can grab one at a time with needle nose pliers, heat each solder joint one at at time, and pull the pin out, and move on the the next pin. Heat each solder joint as quickly as possible and remove heat as soon as possible after removing the pin.
Use some general purpose adhesive to glue a 6-pin single-row female header and 15K and 10K resistors on the back of the transceiver. Point the resistors towards the RX pin, because that is where the connection will be made. The 15K resistor is closest to the RX pin and the 10K resistor is closest to the TX pin.
Note: The wiring I did was to connect to a derivative Pro Mini and the header is oriented so the Bluetooth transceiver faces up. I would reverse the positions of the resistors to reverse the orientation of the header for a SparkFun Pro Mini, so the 10K resistor is closest to the RX pin and the 15K resistor is closest to the TX pin. See the next step for more information about the header pin differences between SparkFun Pro Mini and derivative Pro Mini.
Let the glue dry.
Complete Wiring
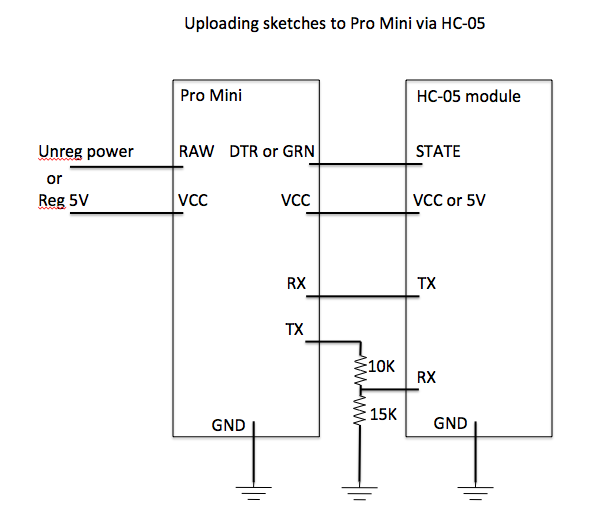
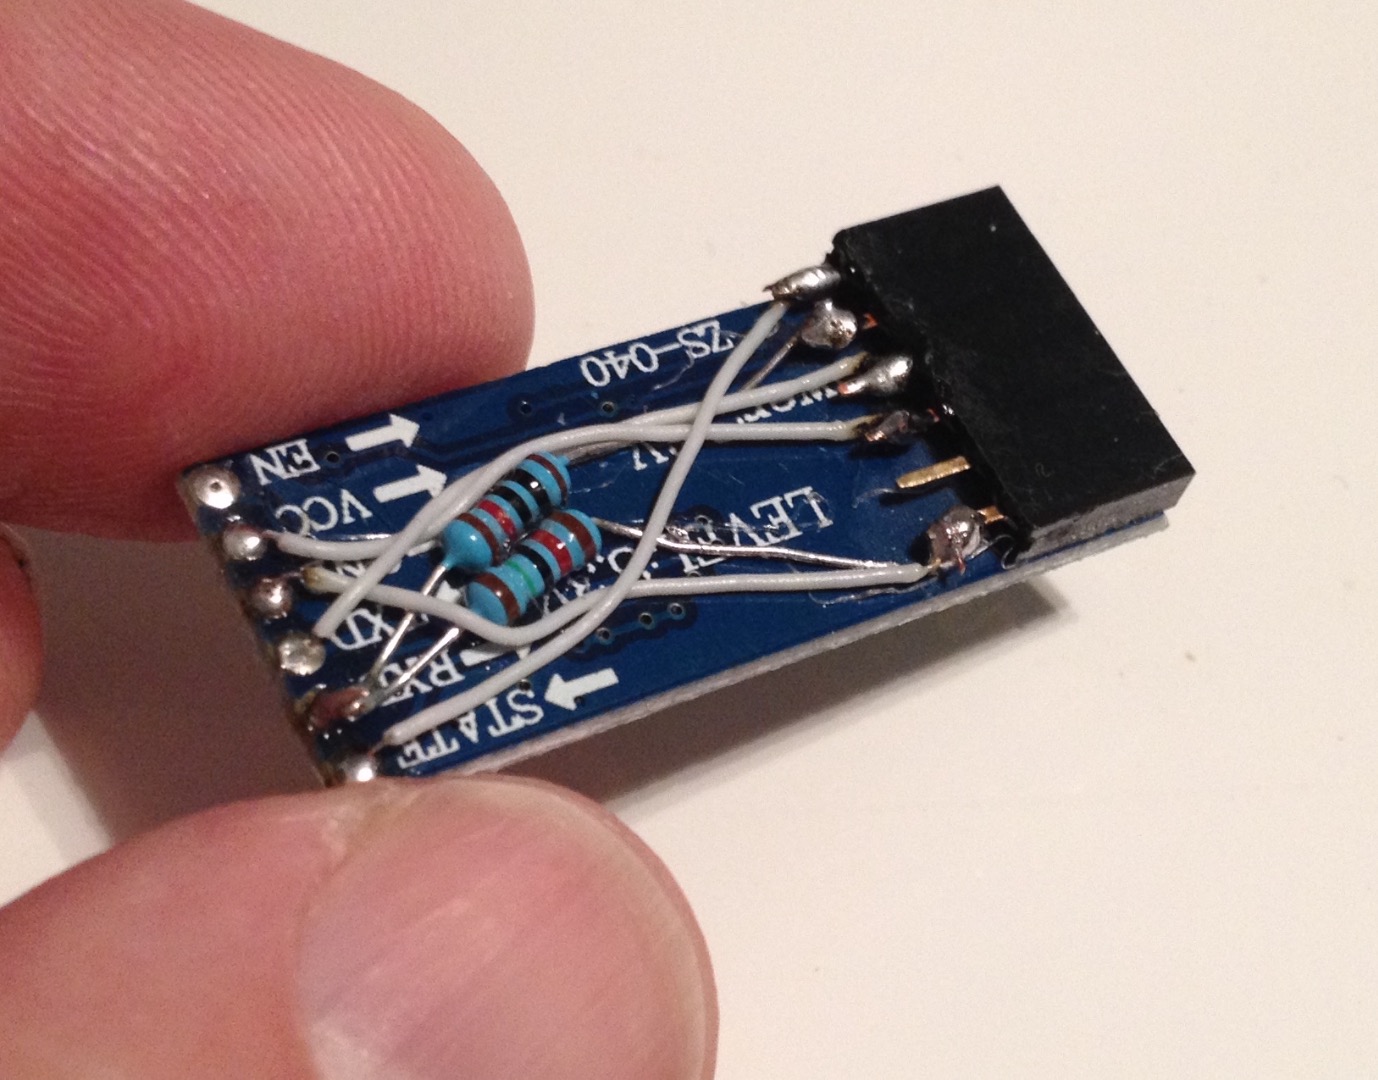
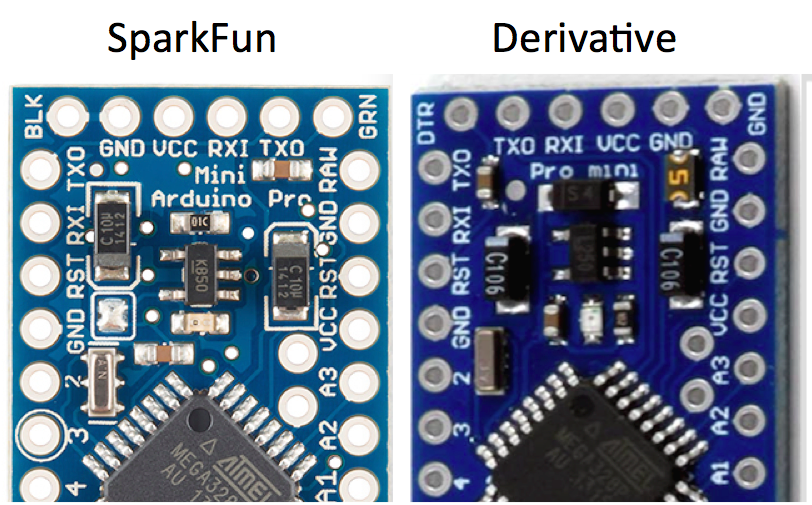
Wire to the female header to connect:
- TX of Pro Mini to RX of HC-05 through the voltage divider resistors
- RX of Pro Mini to TX of HC-05
- VCC of Pro Mini to VCC of HC-05
- BLK or GND of Pro Mini to GND of HC-05
- GRN or DTR of Pro Mini to State of HC-05
Derivatives sold on eBay often have reversed pinouts on the programming header, compared to the original SparkFun model, as seen in the picture above. I like to wire mine so the top side of the HC-05 is facing up when plugged into the Pro Mini. If you wire the female header on the HC-05 for a SparkFun Pro Mini, to use it on a derivative you will flip it over and plug it in. I recommend putting a spot of green paint on the DTR side of the header to remember the orientation.
Verify 5V Is Available on the Pro Mini Header
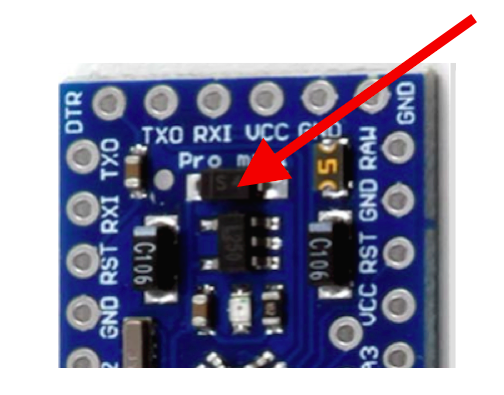
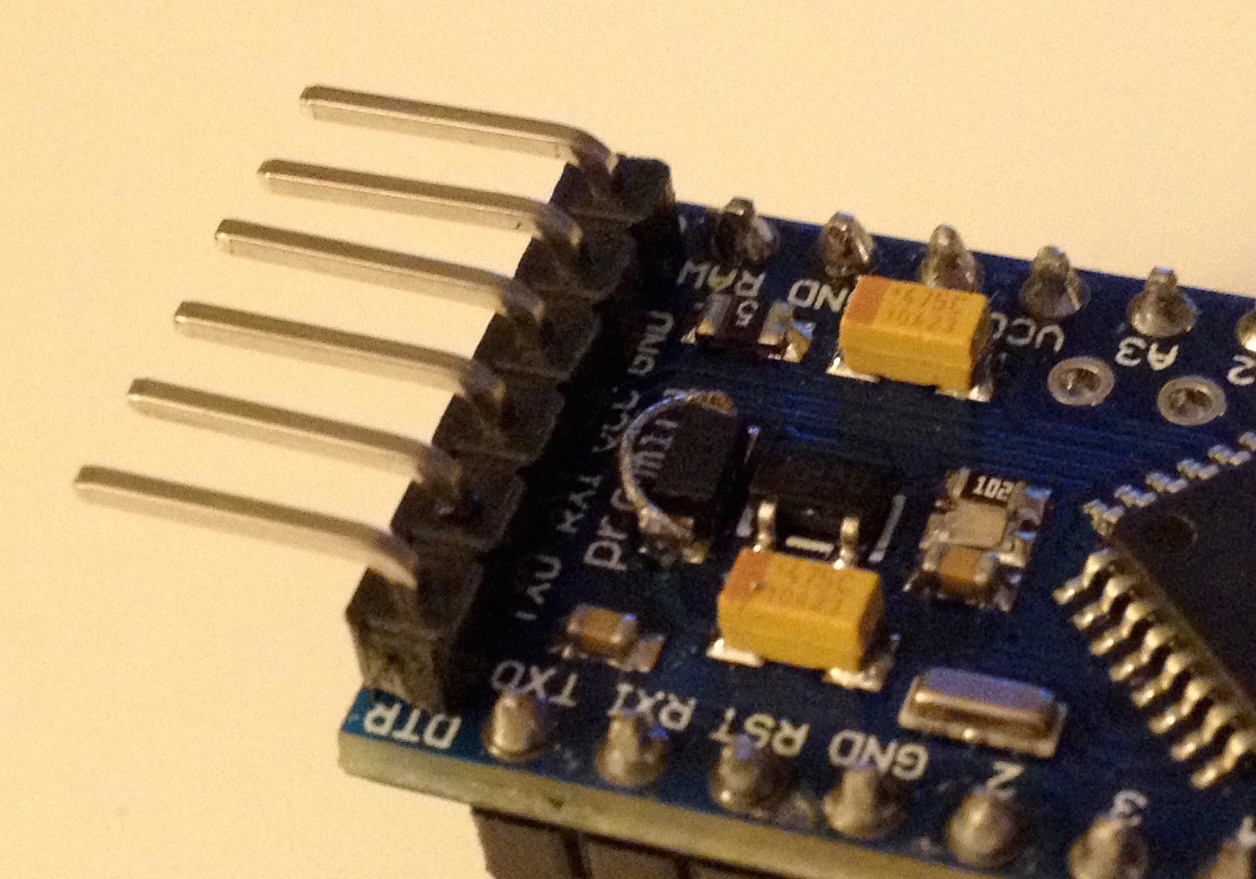
Another difference between SparkFun and derivatives: some derivatives have a diode added to the circuit that prevents VCC from flowing towards the programming header. The programming header can provide power to the Pro Mini, but the Pro Mini can't provide power to the programmer. This is an additional component that is not on the official Pro Mini schematic on the SparkFun website. I have a derivative board, so I added a small wire to short the diode. This allows the Pro Mini to power the Bluetooth transceiver.
Plug It In
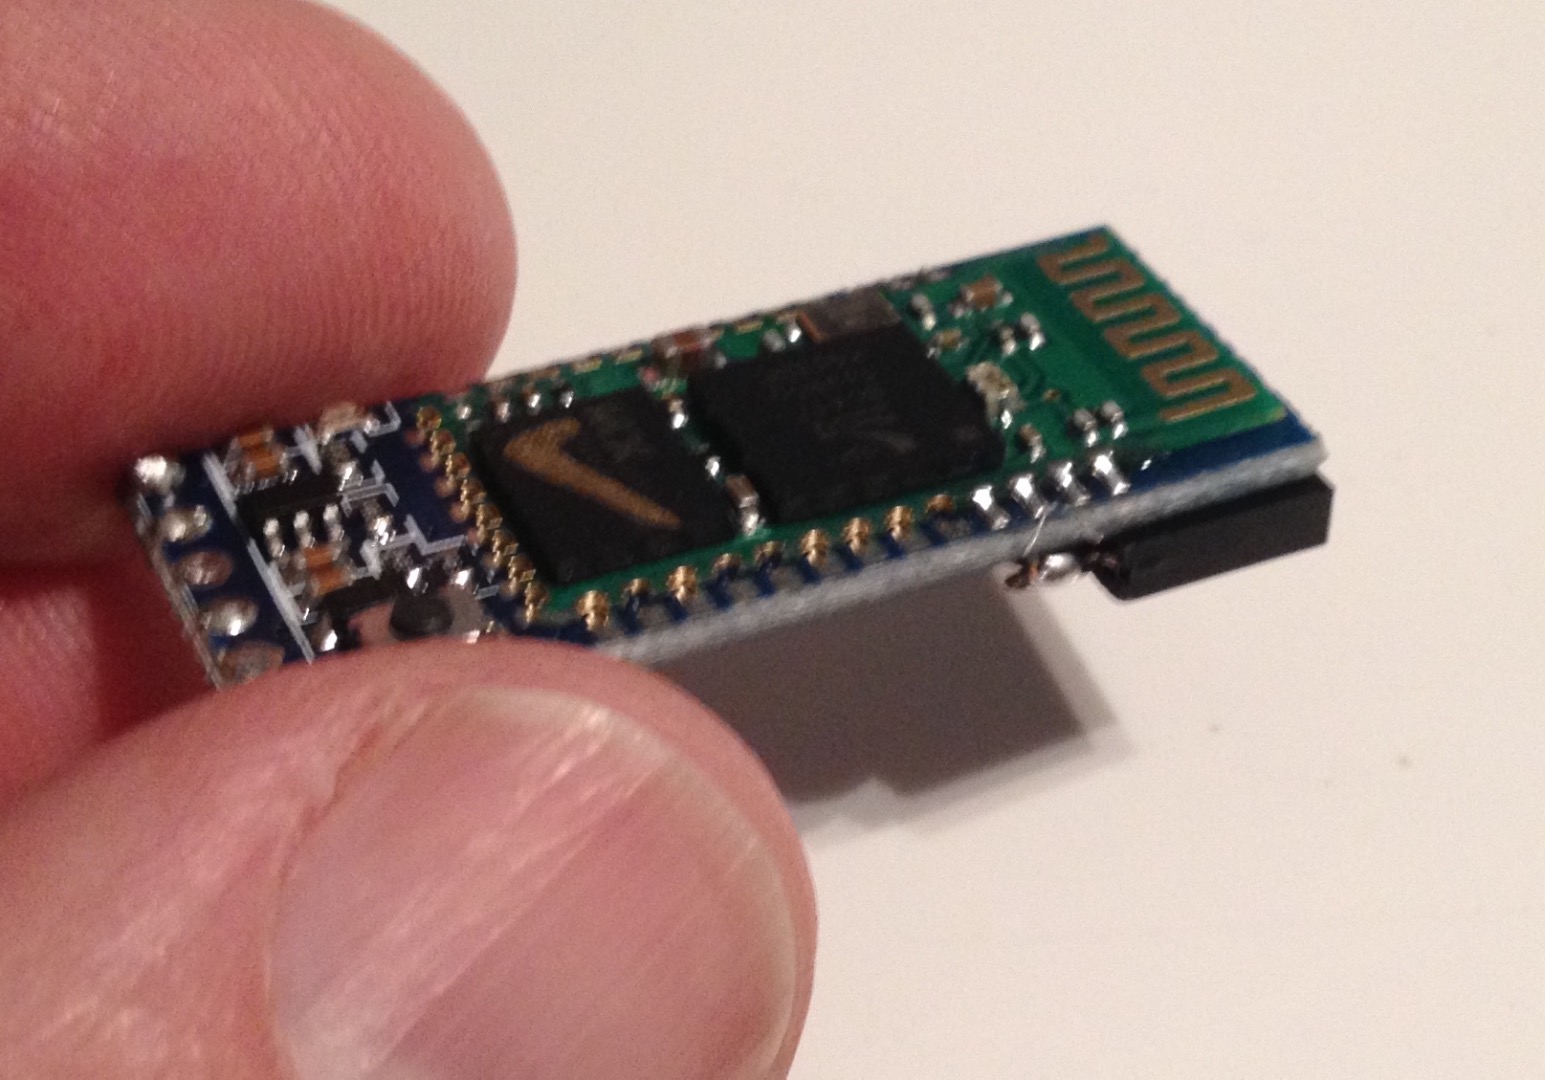
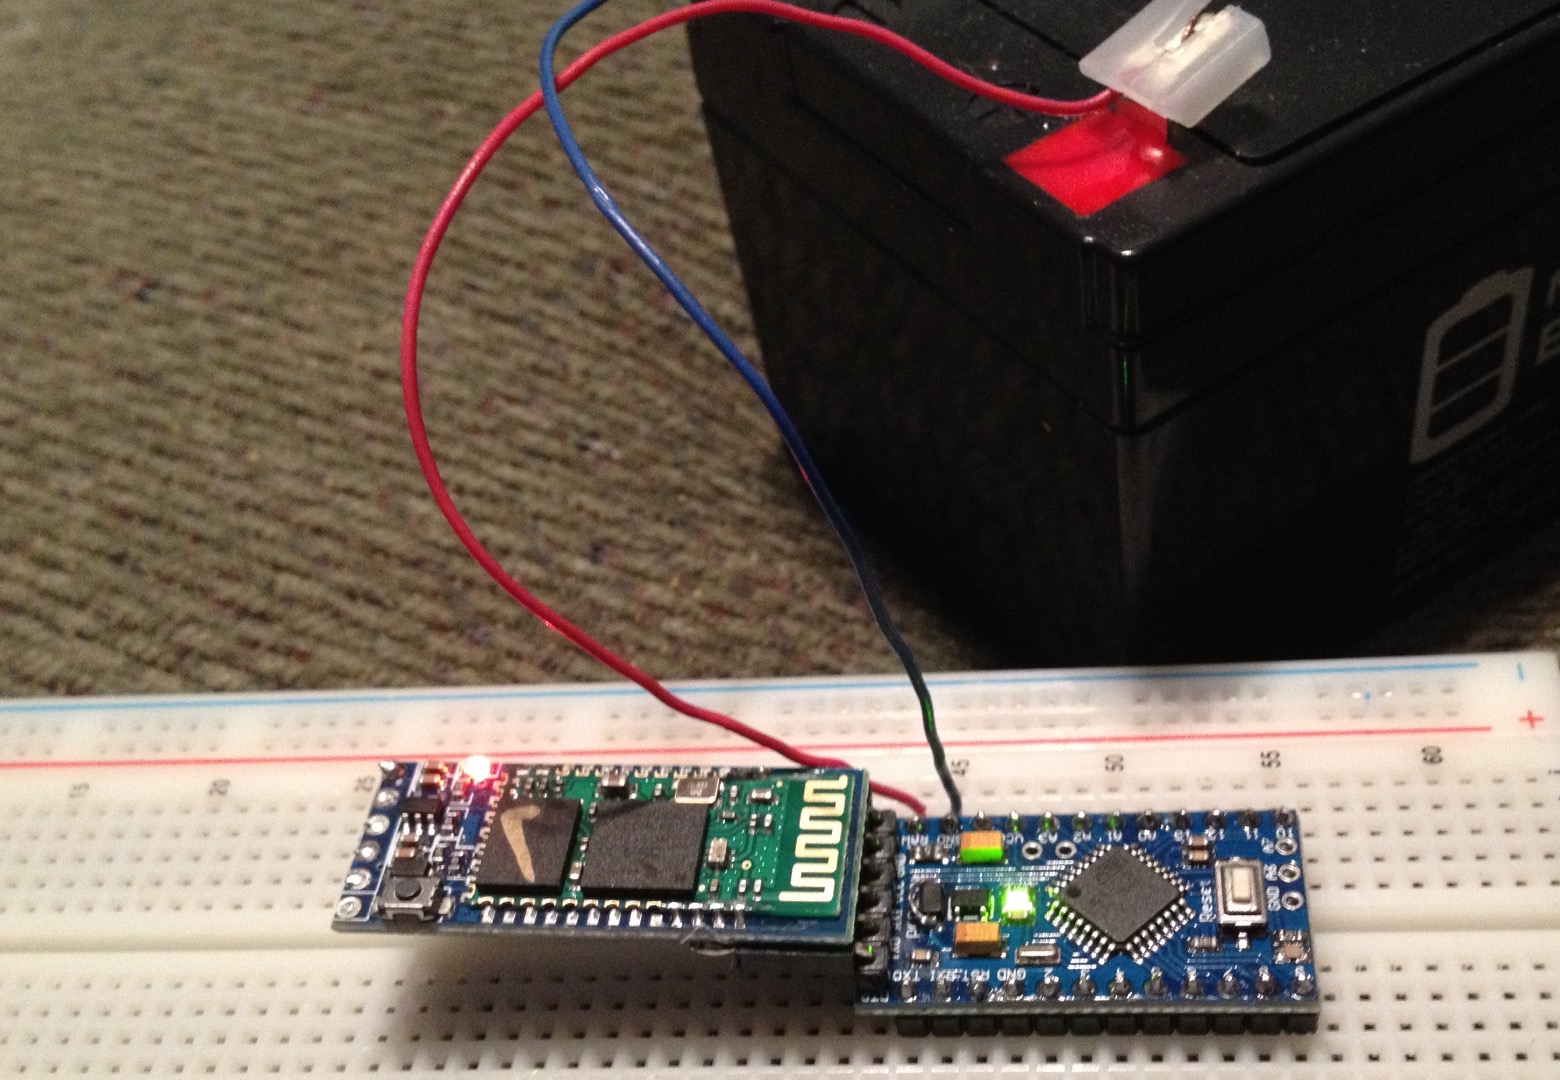
The wireless adapter is complete. Plug it in to the Pro Mini header, connect a battery to the RAW input, or connect a regulated 5 V power supply to the VCC pin of the Pro Mini. Choose the Bluetooth adapter in the Arduino IDE Tools, Port menu. Choose the Pro Mini in the Tools, Board menu. Upload a sketch.
If you include any Serial statements in your sketch, you will need to use Serial.begin(57600); in your setup because the Bluetooth adapter does not dynamically change baud rates.
Further Reading
To make an adapter for a 3.3V Pro Mini, you can omit the voltage divider resistors and buy the HC-05 module that does not have the onboard regulator.
To see more details about the HC-05 modules, or to use a Leonardo or other ATmega32U4-based Arduino to program the HC-05, see my other Instructable where I have included more details.
More info:
https://www.instructables.com/id/AT-command-mode-of-HC-05-Bluetooth-module/
Now that you have a wireless Arduino, you can use it as a wireless ISP programmer. Note that as of Arduino IDE 1.6.6 and later from arduino.cc, you have the ability to set the baud rate in the ArduinoISP sketch. For earlier versions of the ArduinoISP sketch, should you have the need to use an old version for some reason, you can edit the sketch to allow higher baud rates: