Bluetooth Controlled Fan Regulator With Arduino
by Gautam1807 in Circuits > Remote Control
4168 Views, 13 Favorites, 0 Comments
Bluetooth Controlled Fan Regulator With Arduino
.jpg)
Hello friends,
In this instructable, i have shown how to make a diy system to control fan regulator the help of Arduino servo motor & a Bluetooth module.
We can switch on & off a fan easily with a relay but controlling speed is a difficult part but with a servomotor it is easy to control its speed, & we can do it wirelessly too.
Things we will need
Arduino Nano
Servo motor
Bluetooth module ( i used HC-05)
Breadboard
Rubber band or some thing like rubber band. ( i used small pieces of Tyre tube)
Jumper cables
Double sided tape
Glue
Gluing, Sticking, Attaching & Placing..
.jpg)
.jpg)
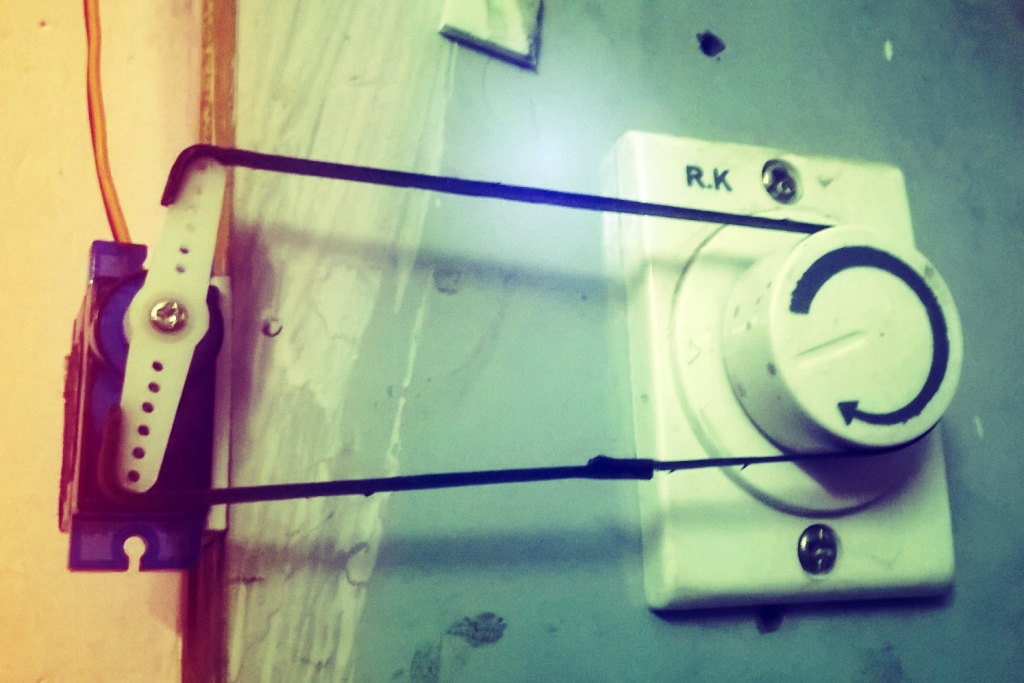
Gluing : Take the rubber band and stick it with metal/plastic piece of servo motor with the help of glue.
Use enough glue so rubber & give it some time to set so it don't slip from its position.
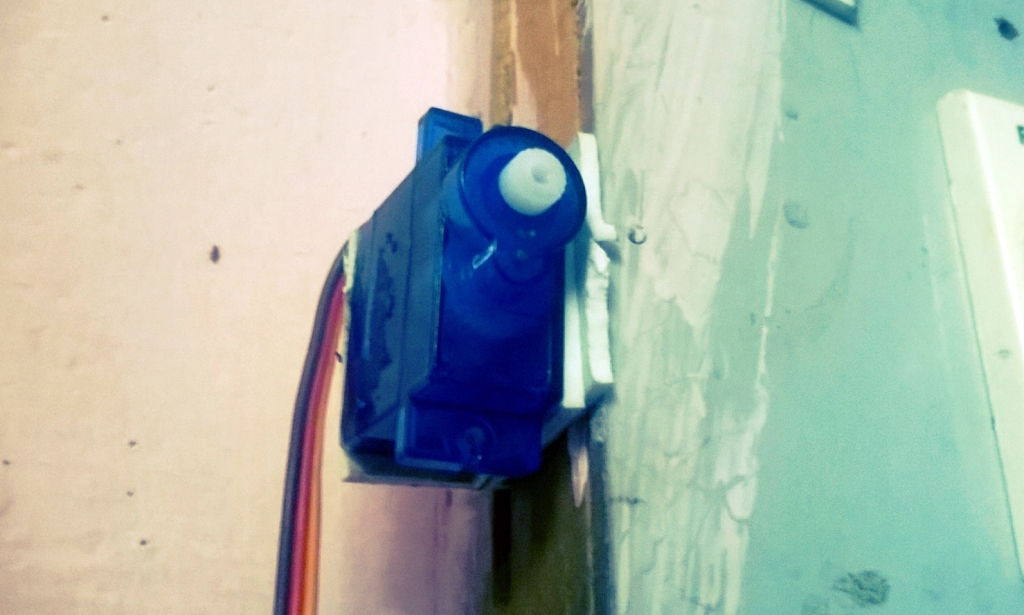
Sticking : take the servo motor and stick it to your switch board with double sided tape just like the image.
like the rubber band, use enough tape to stick it at least two side of servo motor. other wise it rip off from its position because of rubber band's stretching.
When you finish sticking & gluing,
Attaching : Attach the plastic piece to the servo motor.
Placing : place the rubber band to fan regulator like the image above.
Coding
// Created by Gautam ( https://www.instructables.com/member/Gautam1807/ )
// On February 22, 2016.

#include <Servo.h>

int pos = 0;
int input = 0;
Servo myservo;

void setup()
{
  Serial.begin(9600);
  myservo.attach(11);
}

void loop()

{
  if (Serial.available() > 0);

  {
    input = Serial.read();

    {
      if (input == '1')
      {
        pos = pos+5;
        pos <= 180;
        myservo.write(pos);
      }
      if (input == '0')
      {
        pos = pos-5;
        pos >=0;
        myservo.write(pos);
      }
    }
  }
}
Downloads
Wiring
Stick a small breadboard nearby switch board,
and place Nano and Bluetooth module on it.
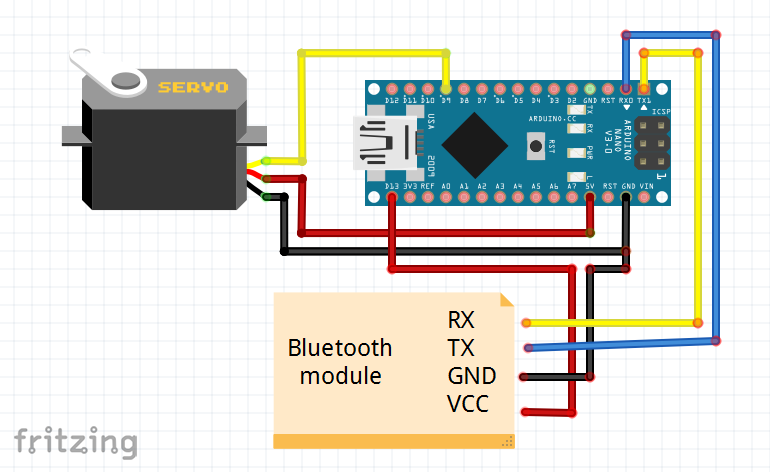
take some jumper cable attach all the things like the image above.
Servo :
Yellow wire > D9
Red wire > 5V
Black > GND
Bluetooth module :
Rx > Tx
Tx > Rx
GND > GND
VCC > 3.3V
Power Up
When you finish all the steps. power up your nano.
The led of Bluetooth module should blink.
Connect to Bluetooth module via PC & select the right port in IDE.
Now open serial monitor.
type 1 & enter, the servo will move 5 degrees clock wise.
type 0 & enter the servo will rotate 5 degree anti clock wise.
If you have any suggestion related to this instructable or need help,
you can write to me in the comment section below. ^_^