Blogger.com Custom Theme Layouts
by MrDIYLab in Design > Websites
2044 Views, 0 Favorites, 0 Comments
Blogger.com Custom Theme Layouts
.png)
If you want to use Blogger.com but want to transform the way it looks from the standard layouts to something more modern or looking to host your static website for free, keep reading!
Watch the Video
The video tutorial gives you the basic understanding needed to customize the HTML, JavaScript and CSS code in Blogger.com themes and shows you how to host your images, so you can build any layout you like for your blog.
Create a Blog

The first step is to create a blog: pick a name, an address, display name and click "Finish".
PS: Skip this step if you already got a blog setup.
Custom Template
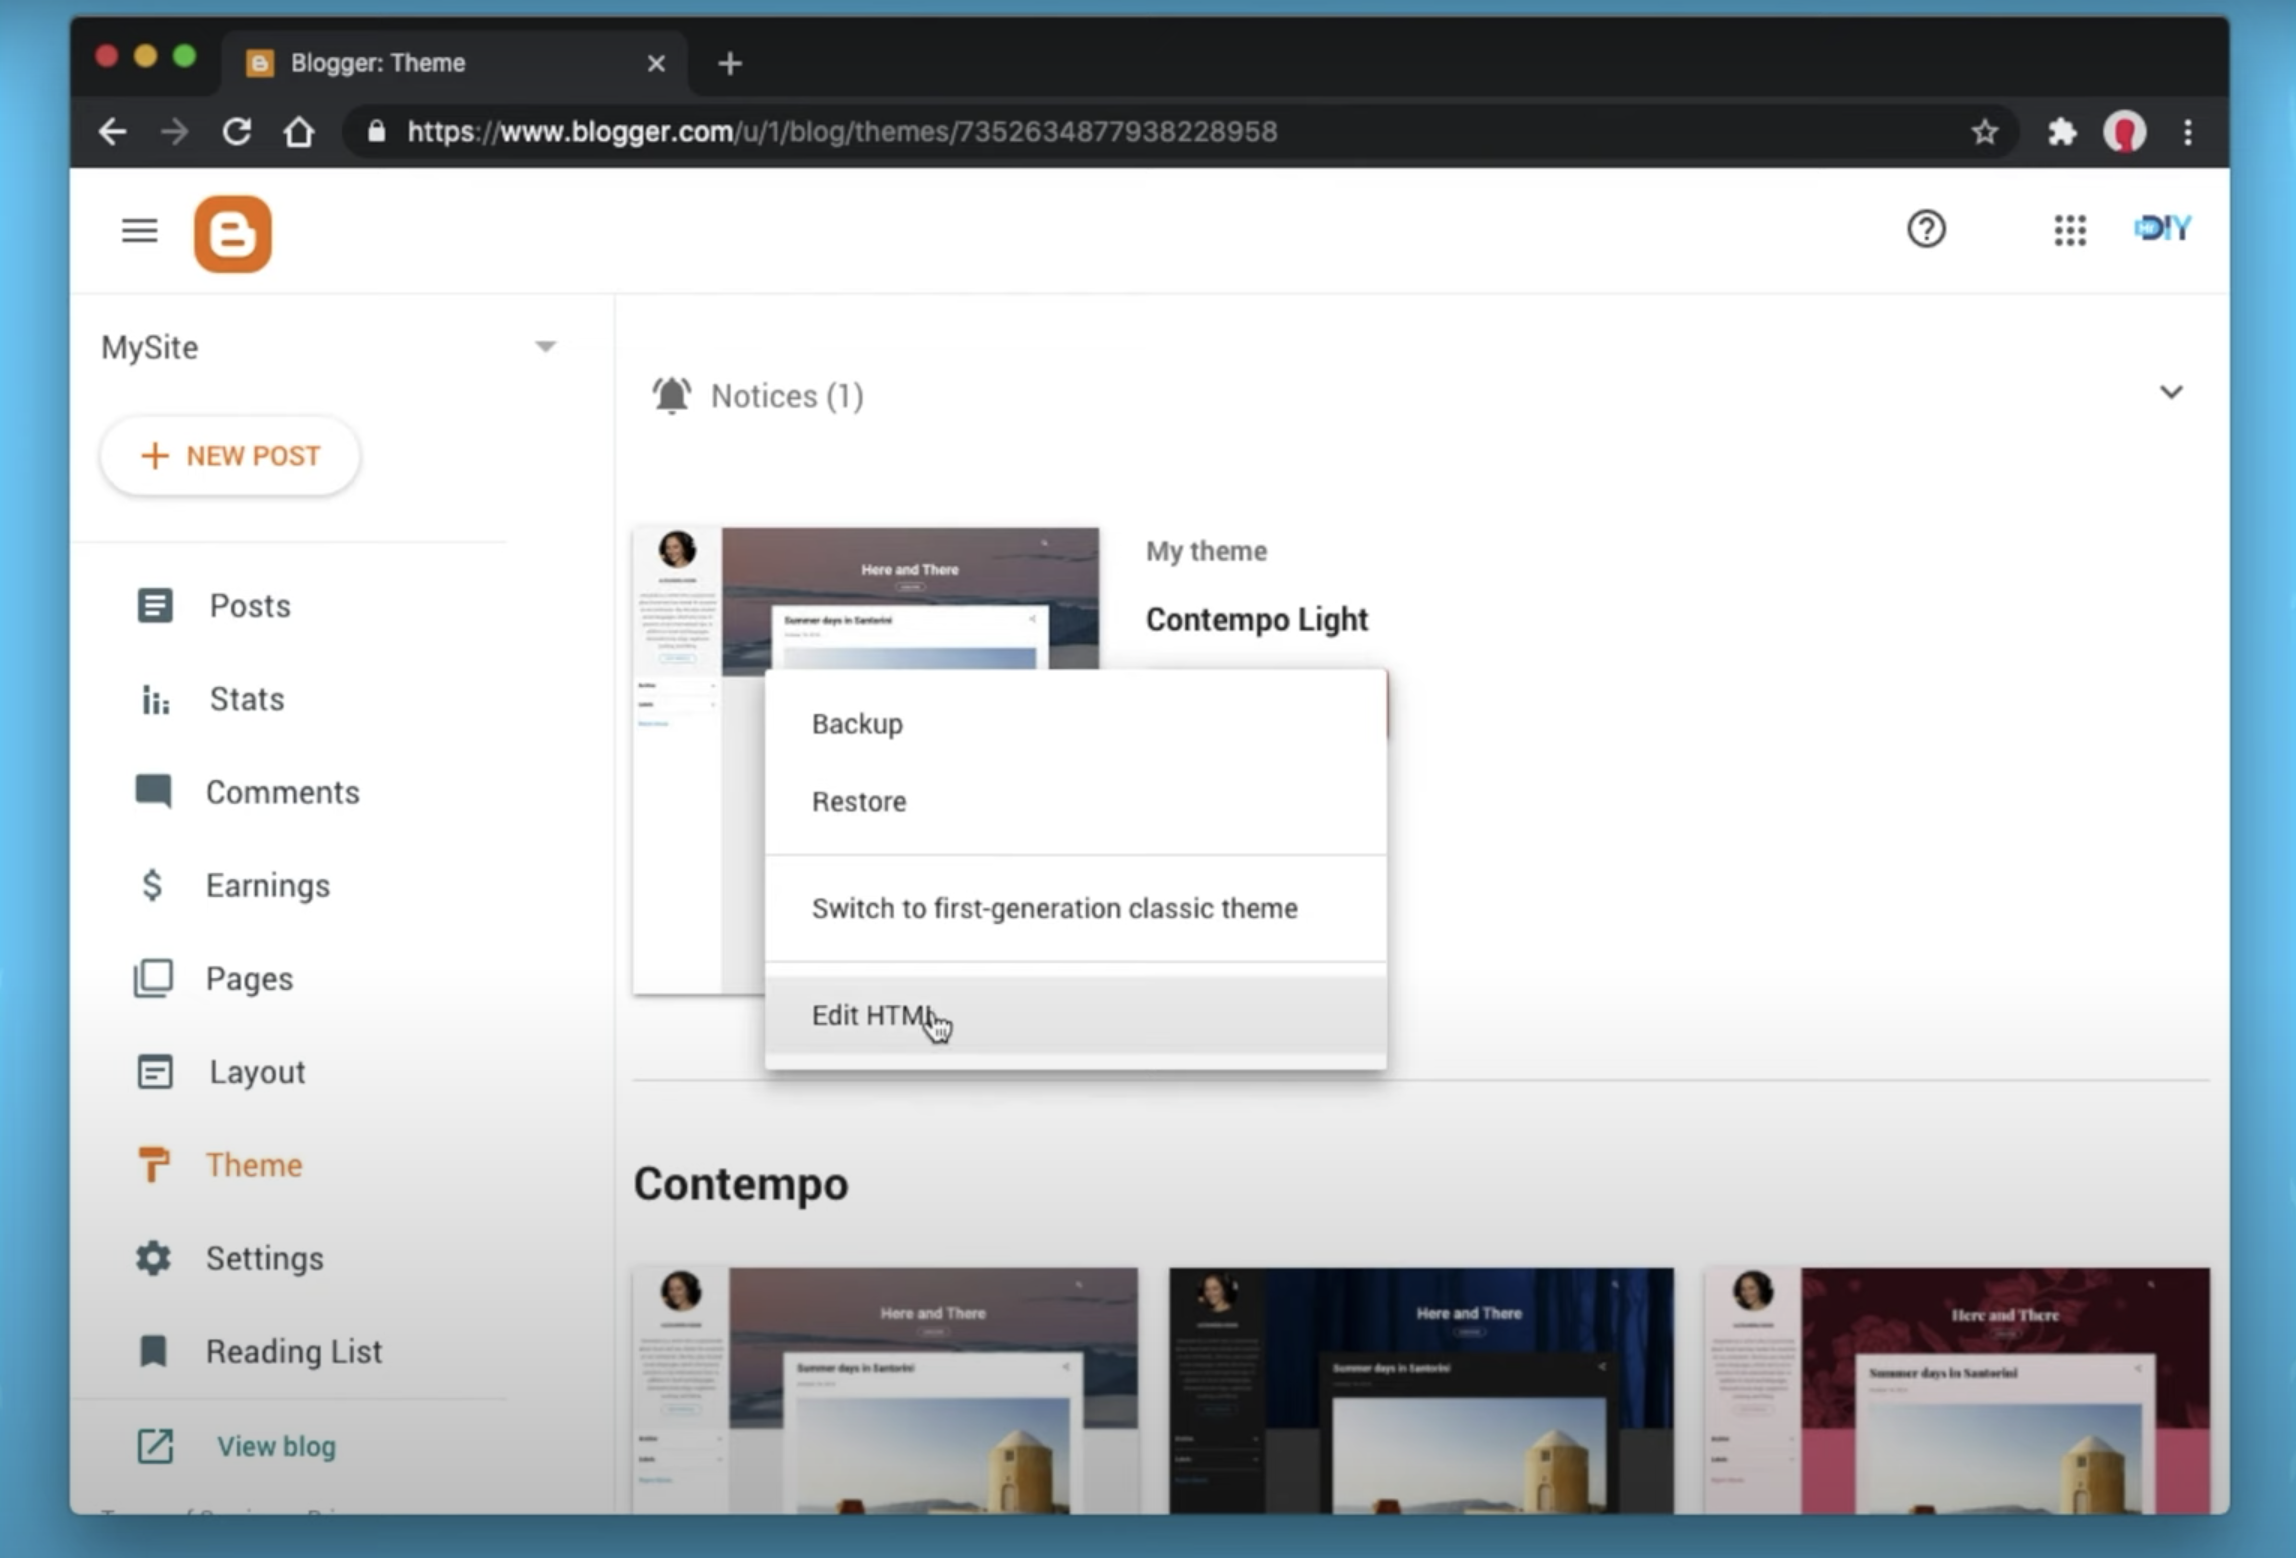
Head over to the Theme section in the left menu, click on 'Customize' icon and then 'Edit HTML'.
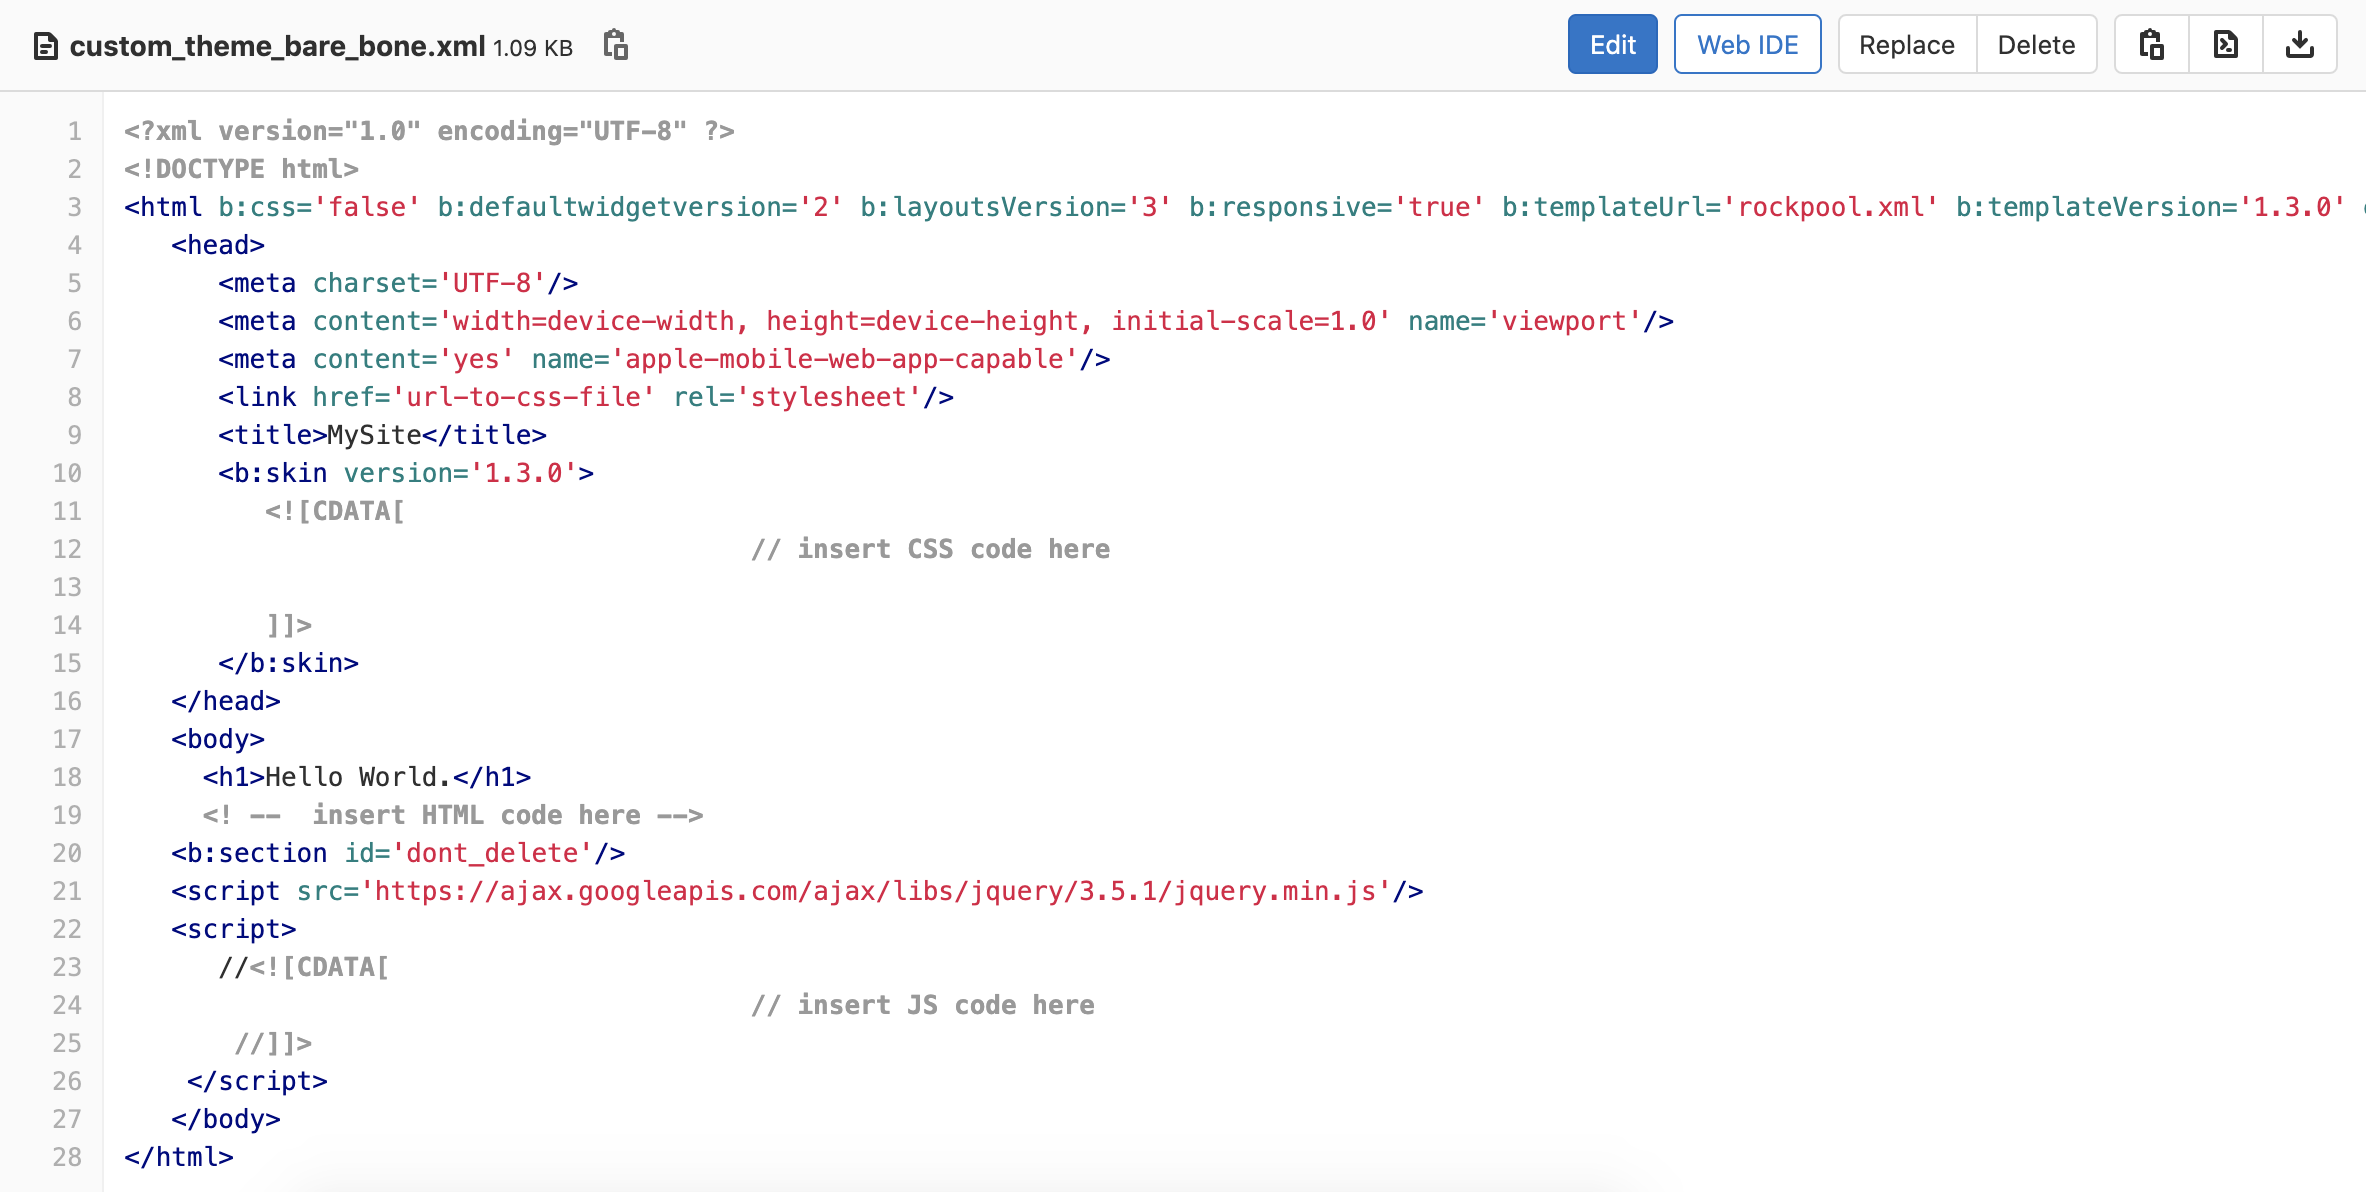
There, you have the option to edit the row HTML code as long as it is formatted in a specific XML format.
Luckily, I took care of this in my template. So head over to my Gitlab and get it here. Copy and paste it in Blogger.com's template editor and save. Congratulations, you just created your first custom 'Hello Word' page on Blogger.com.
Understand Te Building Blocks
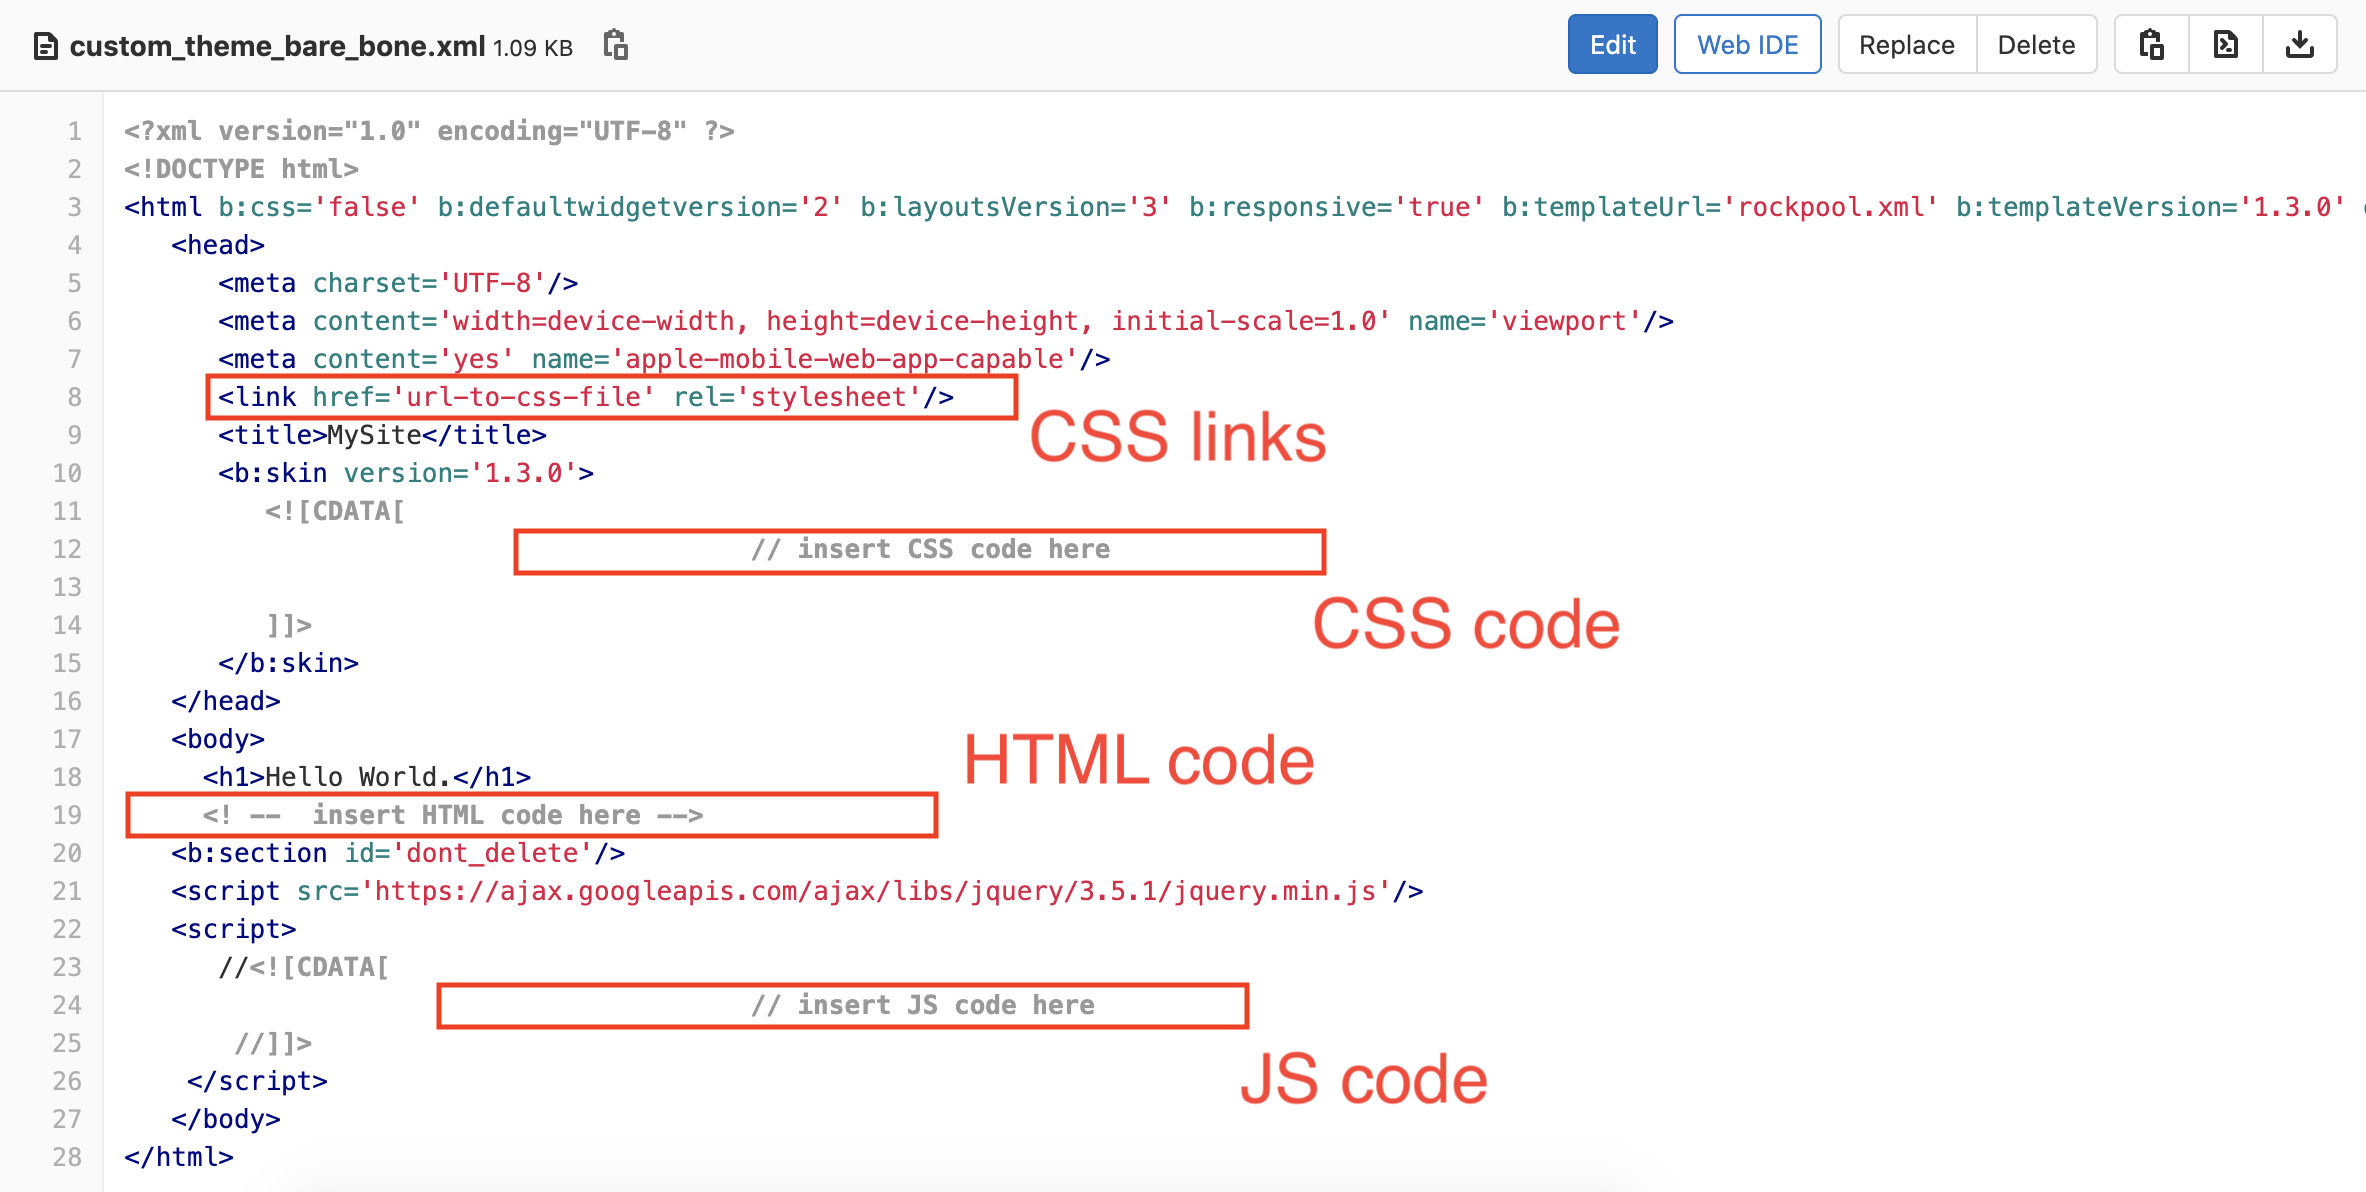
The template has 4 sections:
- the CSS header links go at the top
- the incline CSS code goes in second block
- the actual HTML body code goes in third block
- And finally the inline JavaScript code goes at the bottom block
* I am refering to the RED blocks shown in the image above.
Hosting Your Images
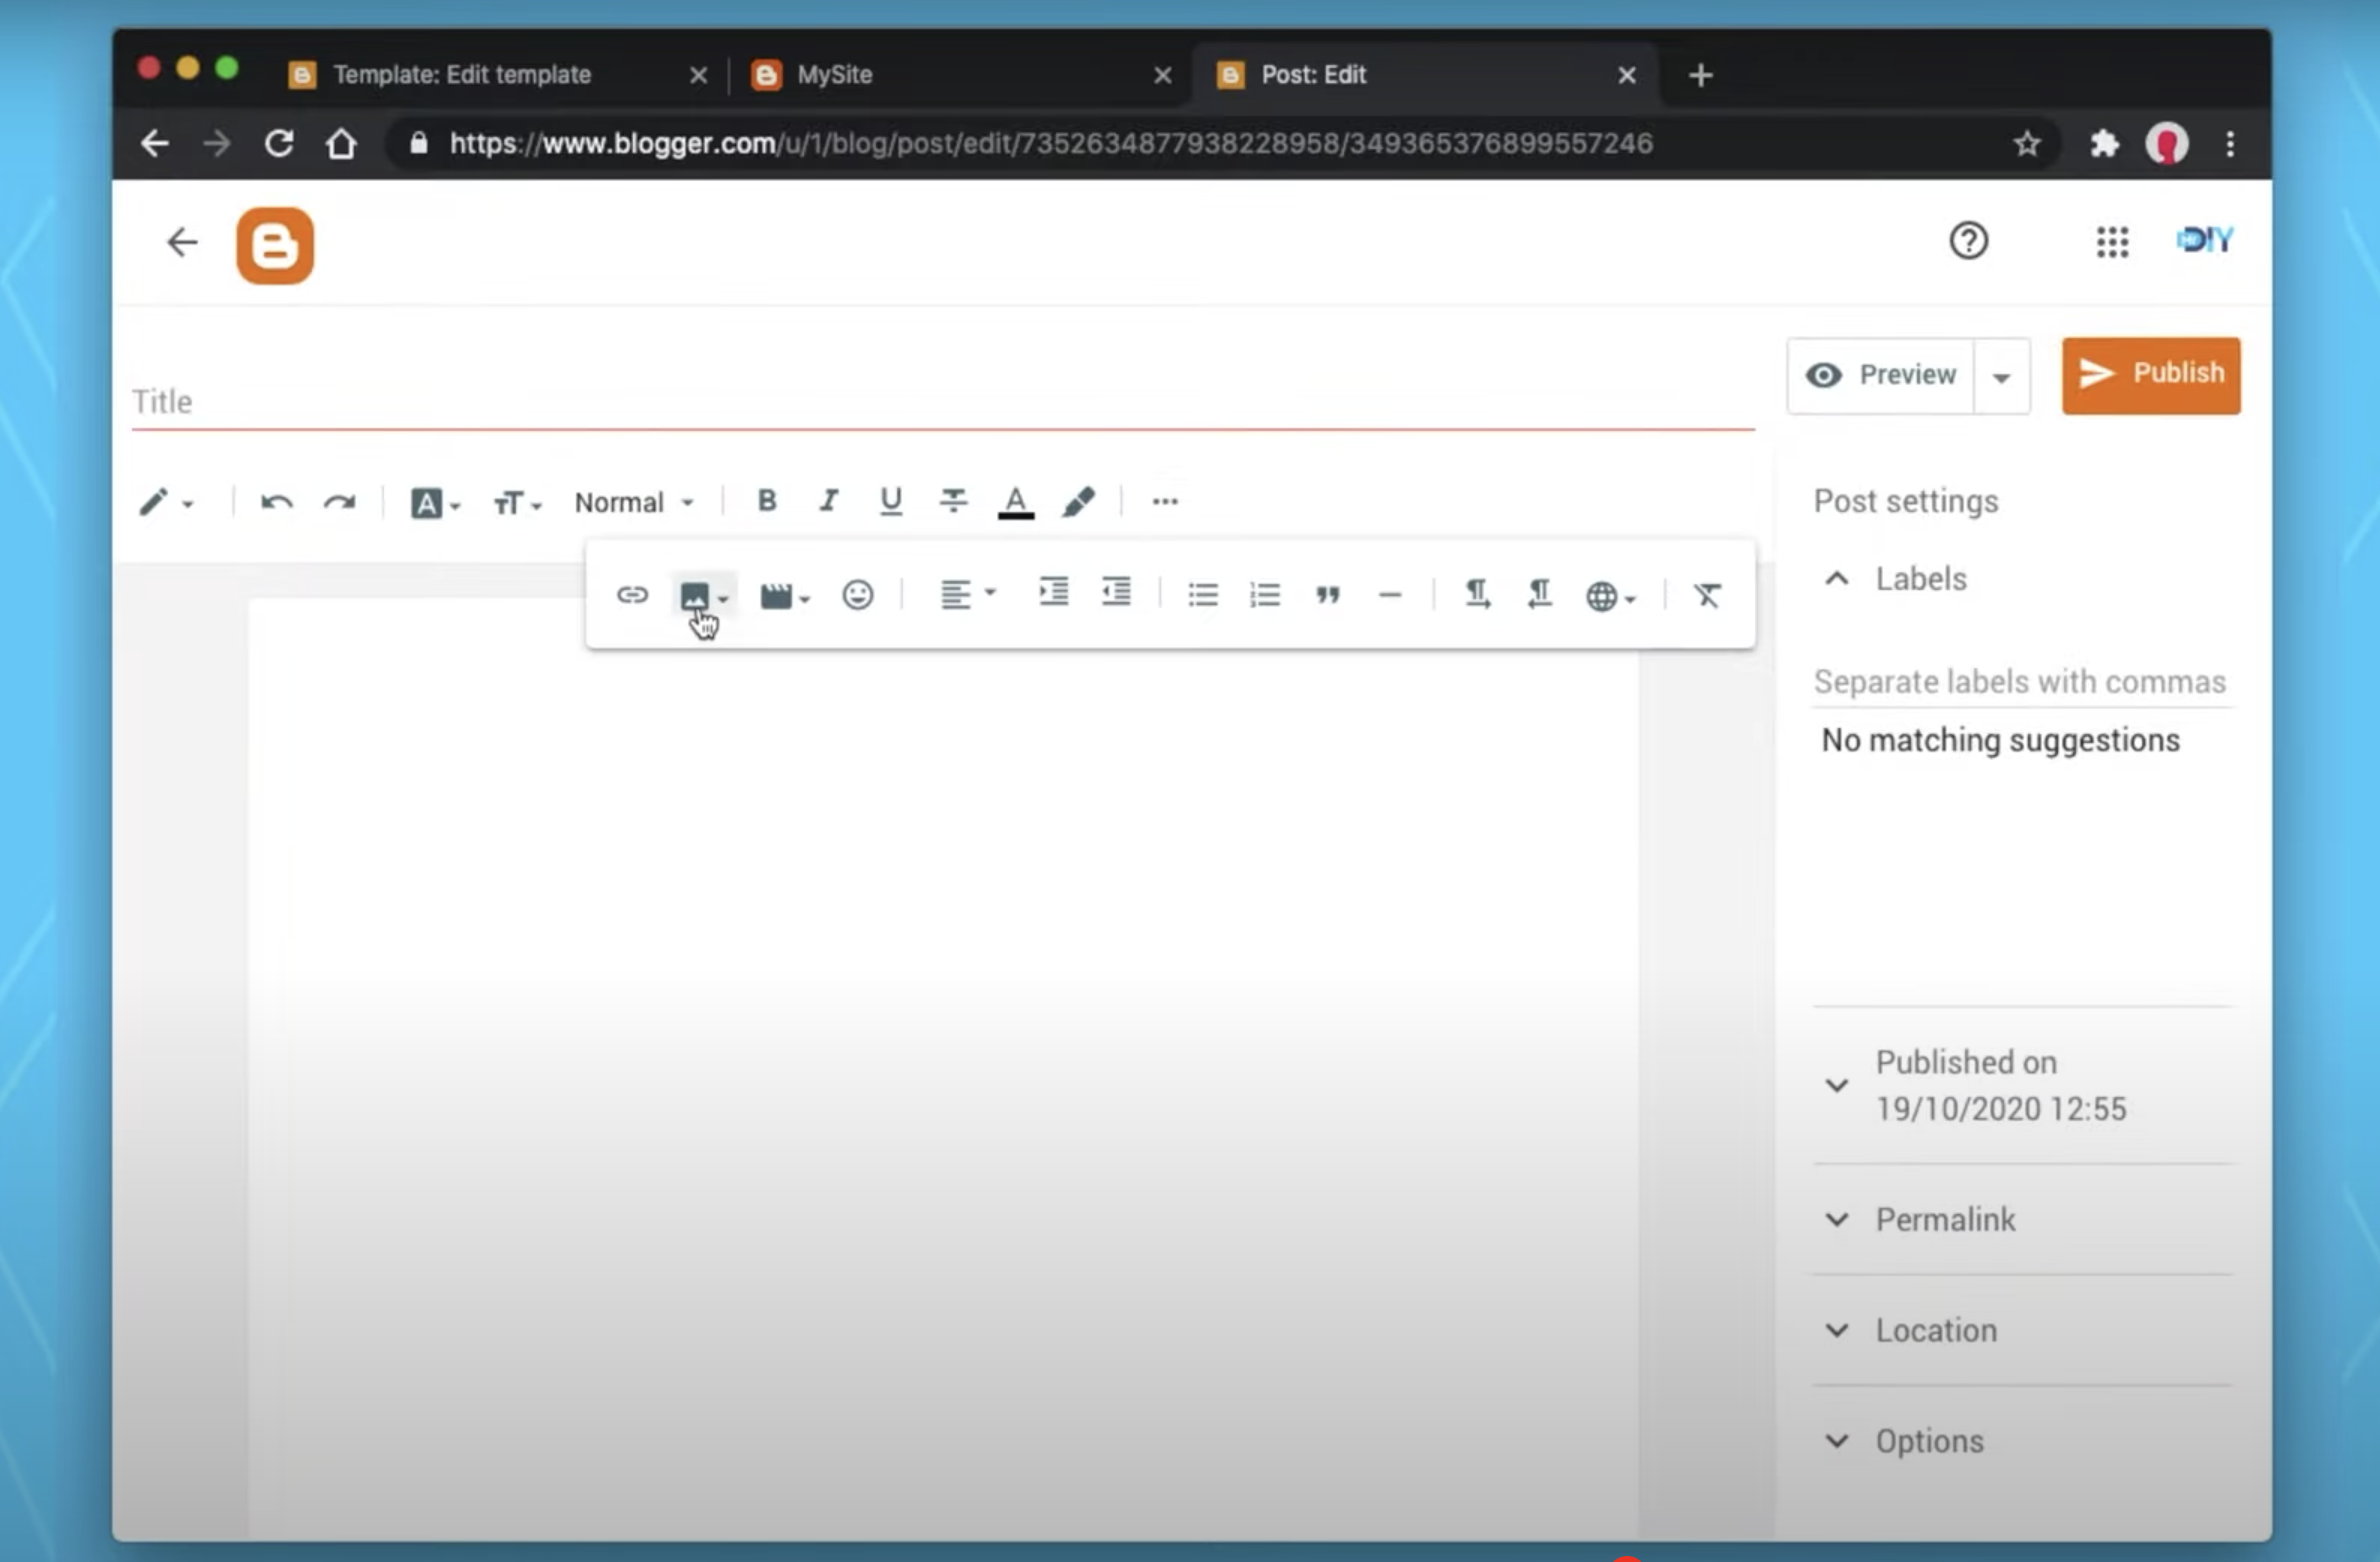
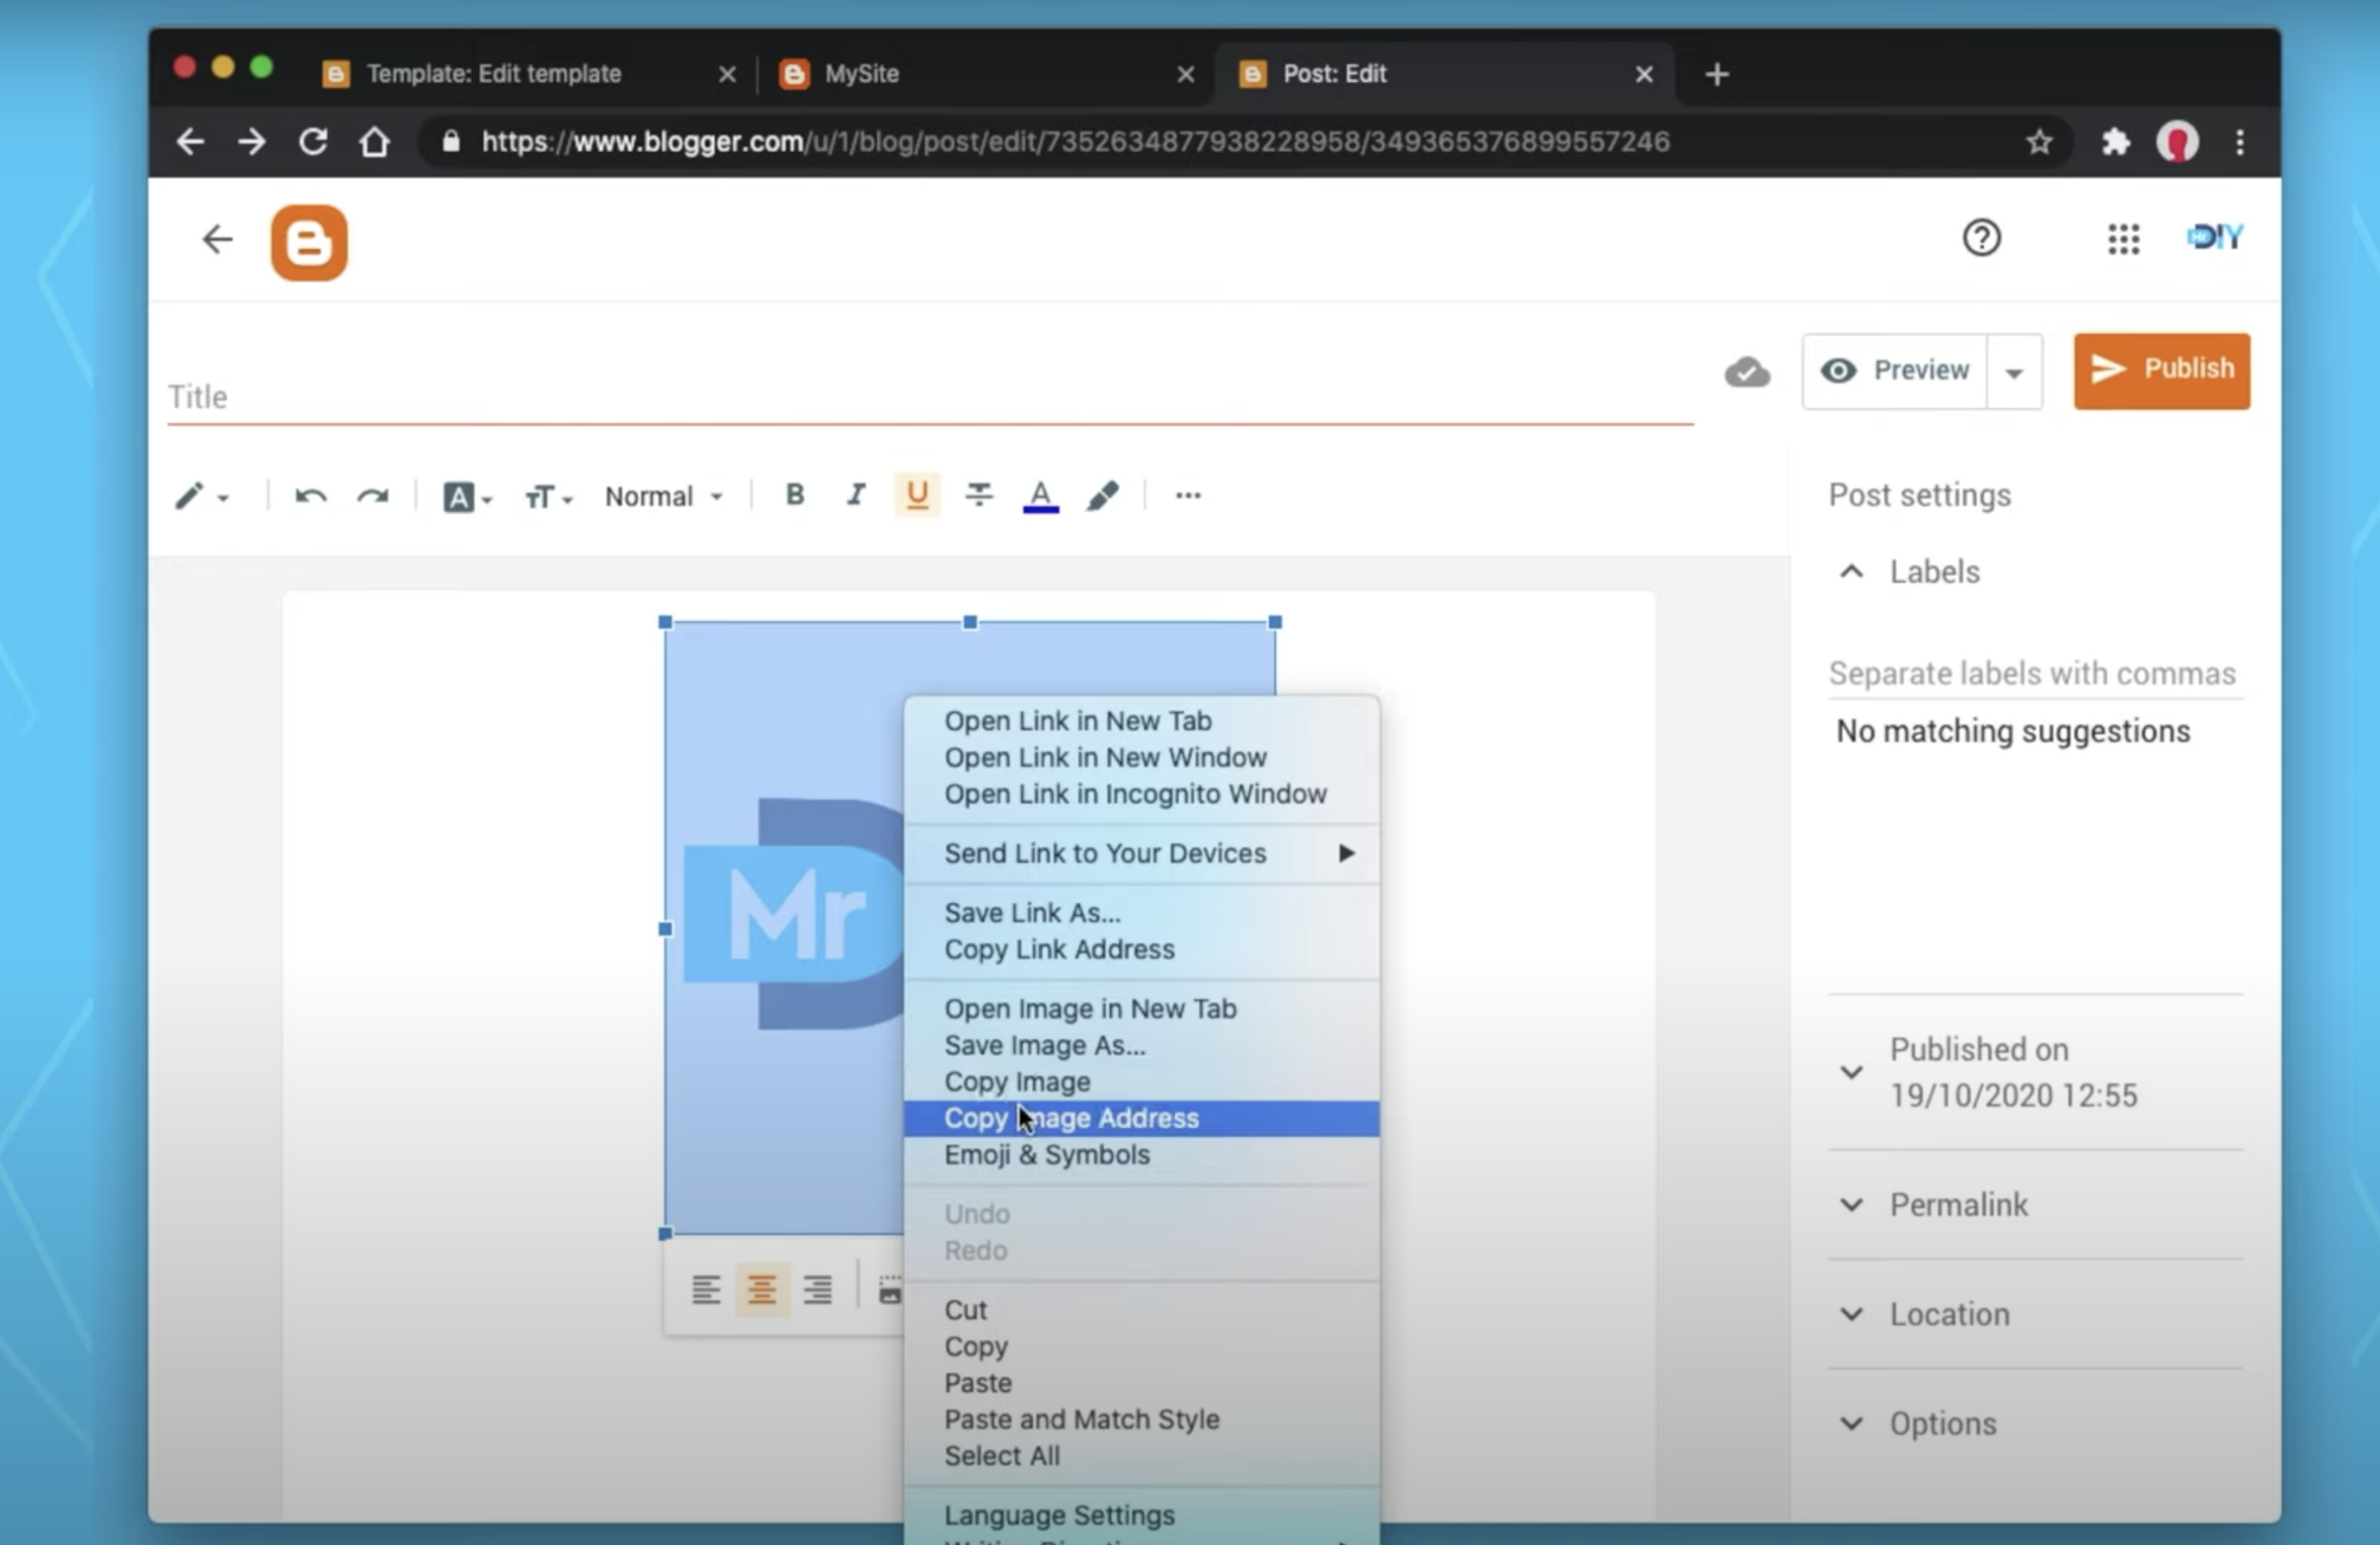
The next challenge you will face is "Where do I host my images?" This is easy too!
Here is the trick: Create a new blog post. Upload an image, right-click on the image and copy "Copy Image Address".
This is the address you will put in the src attribute of the img tag, for example:
<img src="put-the-image-url-here" />
Repeat this step for all your images.
Build Your Own
Now you can use this bare bone template to pretty much build any layout you like.
And in case you don't have the advanced HTML experience needed, you can use any website builder like DesignModo Slides, as featured at the beginning of the video.
These services will provide you with to the HTML, CSS and JS code and you simply copy-paste them in the blocks I showed you earlier. It is that simple now.
Done
You are now armed with the basic understandings needed to customize your Blooger.com layout. I hope this helps you break free from the default Blogger.com look & feel and opens a door to new possibilities.
Before you go, if you found this tutorial useful, please consider subscribing to my YouTube channel. I cover other topics like home automation, hardware and softweare design. And if you are interested in supporting my work, please check my Patreon page. Follow me on Twitter