Blink a Series of LEDs Using Python Programming Language and Raspberry Pi
by mirza irwan osman in Circuits > Raspberry Pi
15183 Views, 15 Favorites, 0 Comments
Blink a Series of LEDs Using Python Programming Language and Raspberry Pi
In the first phase, I will install only one LED. Next, I download the LED class python module that represent one hardware LED. I will run the LED class python module to blink that LED. The first phase serves as a "Proof of Concept".
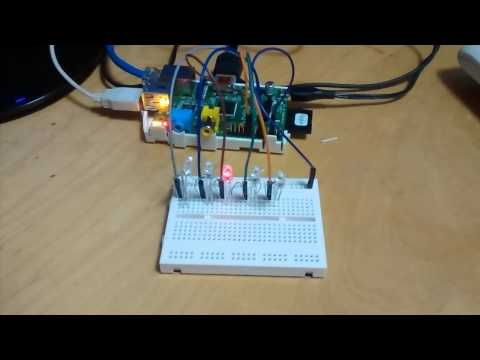
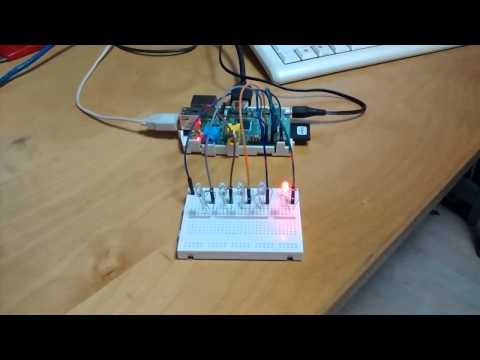
In the second phase, I will install another 4 LEDs. Finally, I run the python main module to create a series of five sequentially blinking LEDs as depicted in the video above
Materials
Gather the following materials:
1 Raspberry Pi device running on standard Raspbian Linux installation
5 LEDs rated at 2.4V
5 Resistor (can be between 185 Ohms to 270 Ohms)
5 single-core wire (also called solid wires, solid-core or single-strand wire, consists of one piece of metal wire. Solid wire is useful for wiring breadboards. I stripped an unused telephone wire to get the single-core wire. There are 4 thin insulated single-core wire in a telephone cable. Choose any one and strip the insulator off just enough to expose bare metal at the two ends.)
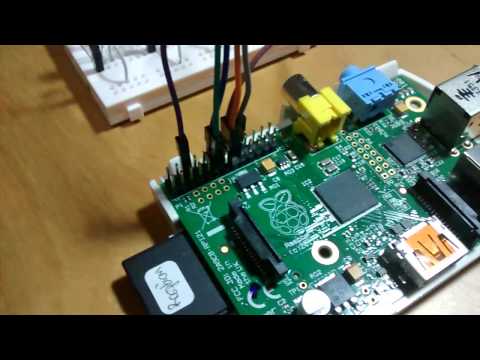
Installing the First LED
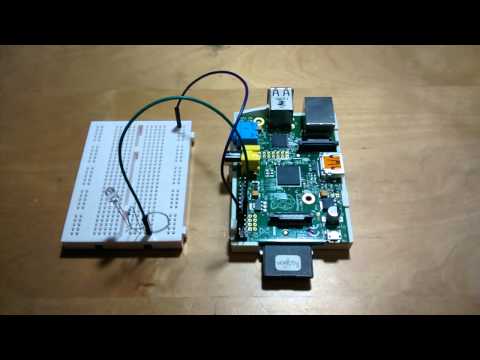
Be careful when installing the LED with the Raspberry Pi as it may short-circuit and damage Raspberry Pi device. Do this at your own risk. Remove all power supply source from your Raspberry Pi device.
MaterialsThe following materials are required:
1 X Raspberry Pi
1 x LED
1 X 165 Ohm Resistor
2 X Male-Female Jumper Wire
1 X 5cm single core wire 1 X Breadboard
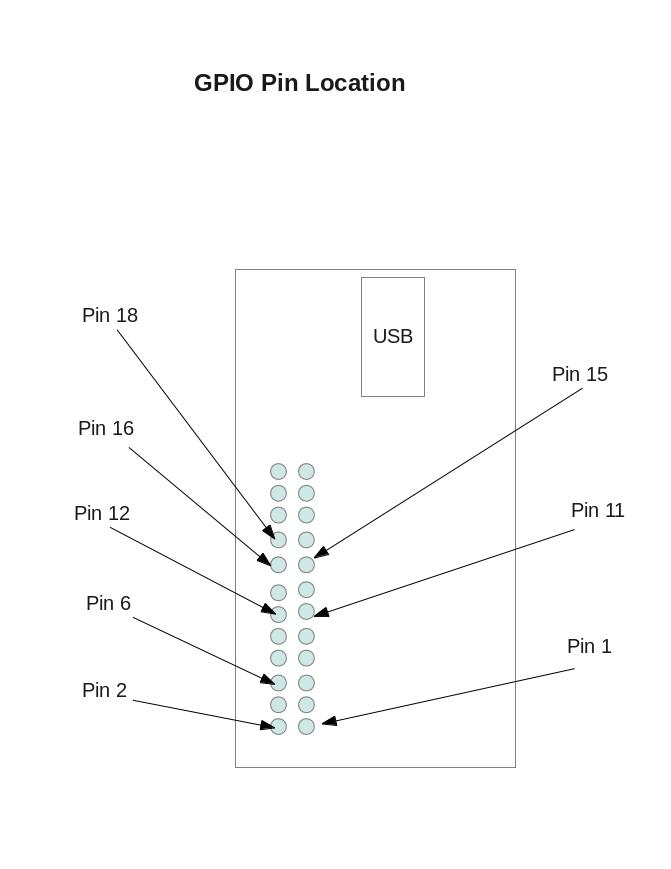
Installation- Read to the GPIO diagram to locate the pins.
- Connect female end of jumper wire to the GPIO Pin 11. (This pin will be programmed to supply 3.3 Volts)
- Connect male end of jumber wire to the breadboard as shown in video.
- Connect resistor to breadboard as show in video.
- Connect LED to breadboard as shown in video.
- Connect the single-core wire as shown in video
- Connect female end of another jumper wire to GPIO Pin 6 (This pis is at 0 Volts.)
Start Up Raspberry Pi
- Boot up the Raspberry Pi by pluggin in the power supply micro usb
- Log in using pi account
Use a Python Class Module to Flash an LED
- Load the LXTerminal.
- Install or update the Rpi.GPIO software by typing the following bold commands. The command might ask you for your input:
pi@raspberrypi ~ $ sudo apt-get update
pi@raspberrypi ~ $ sudo apt-get install python-rpi.gpio
- Download the attached file called led.py and saved it as led.py in Raspberry Pi directory: /home/pi/python_proj/gpio
- Load the IDLE by typing the following:
pi@raspberrypi ~ $ sudo idle
- On the IDLE's Python Shell Window: Click File -> Open -> Choose led.py that you saved in #1 of this step
- Read the documentation and source codes of led.py.
- In IDLE's Python Shell Window, type the following
>>>import sys
- Then press ENTER
- Type the following:
>>>sys.path.append('/home/pi/python_proj/gpio')
- Then press ENTER
-
Type the following:
>>>import led - Then press ENTER
-
Type the following to setup the LED connected to Pin 11:
>>>led11 = led.Led(11) - Then press ENTER
-
Type the following to blink the LED connected to Pin 11:
>>>led11.blink_non_stop()
- Then press ENTER key
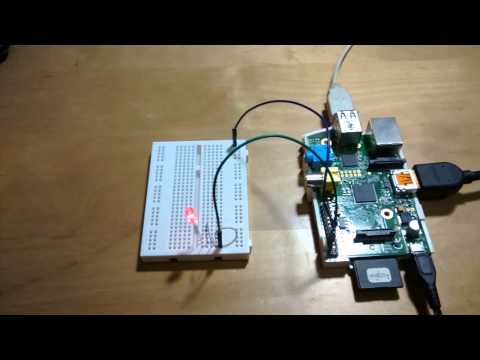
- Observe that the LED blinks continuously.
-
Press Ctlr+C to exit program
-
Type the following:
>>>led11.clean_up() - You have successfully completed the "Proof of Concept" phase if the LED blinks continuously.
Downloads
Install and Test the Next 4 LEDs
You need the following:
4 x LED
4 X 165 Ohm Resistor
4 X Male-Female Jumper Wire
4 X 5cm single core wire
Installation- Shut down Rasbian OS
- Unplug the power cable off Raspberry Pi
- Follow the same instruction described in Step 2.
-
Use the following GPIO Pin:
Pin 12
Pin 15
Pin 16
Pin 18 - Play the attached video for detail to see the layout of the components in the breadboard and Raspberry Pi
- Load the IDLE (Python Editor) by typing the following:
pi@raspberrypi ~ $ sudo idle - On the IDLE's Python Shell Window: Click File -> Open -> Choose led.py
- In IDLE's Python Shell Window, type the following:
>>>import sys - Then press ENTER
- Type the following:
>>>sys.path.append('/home/pi/python_proj/gpio')
- Then press ENTER
- Type the following:
>>>import led
- Then press ENTER
- Type the following:
>>>led12 = led.Led(12)
- Then press ENTER
- Type the following:
>>>led12.blink_non_stop()
- Then press ENTER key
- Observe the LED blinks continuously.
- Press Ctlr+C to exit program
- Type the following:
>>>led12.clean_up()
- Repeat instructions No 11-15 for the rest of the LEDs. Remember to change the Pin number for each LED:
led15 = led.Led(15)
led16 = led.Led(16)
led18 = led.Led(18)
Blink the Series of LEDs
- Download led_effects.py and led_main.py and save the 2 files as its original name in /home/pi/python_proj/gpio
- In IDLE's Python Shell window, click Menu -> Open -> Choose led_effects.py
- Read the source codes
-
In IDLE's Python Shell window, click Menu -> Open -> Choose led_main.py
-
Read the source codes
- In the window that displays led_main.py, click on Run -> Run Module
- Observe all 5 LEDs blinking in sequential order