Blender: Basic Rigging Process
by StormyDoesVR in Circuits > Art
84526 Views, 10 Favorites, 0 Comments
Blender: Basic Rigging Process
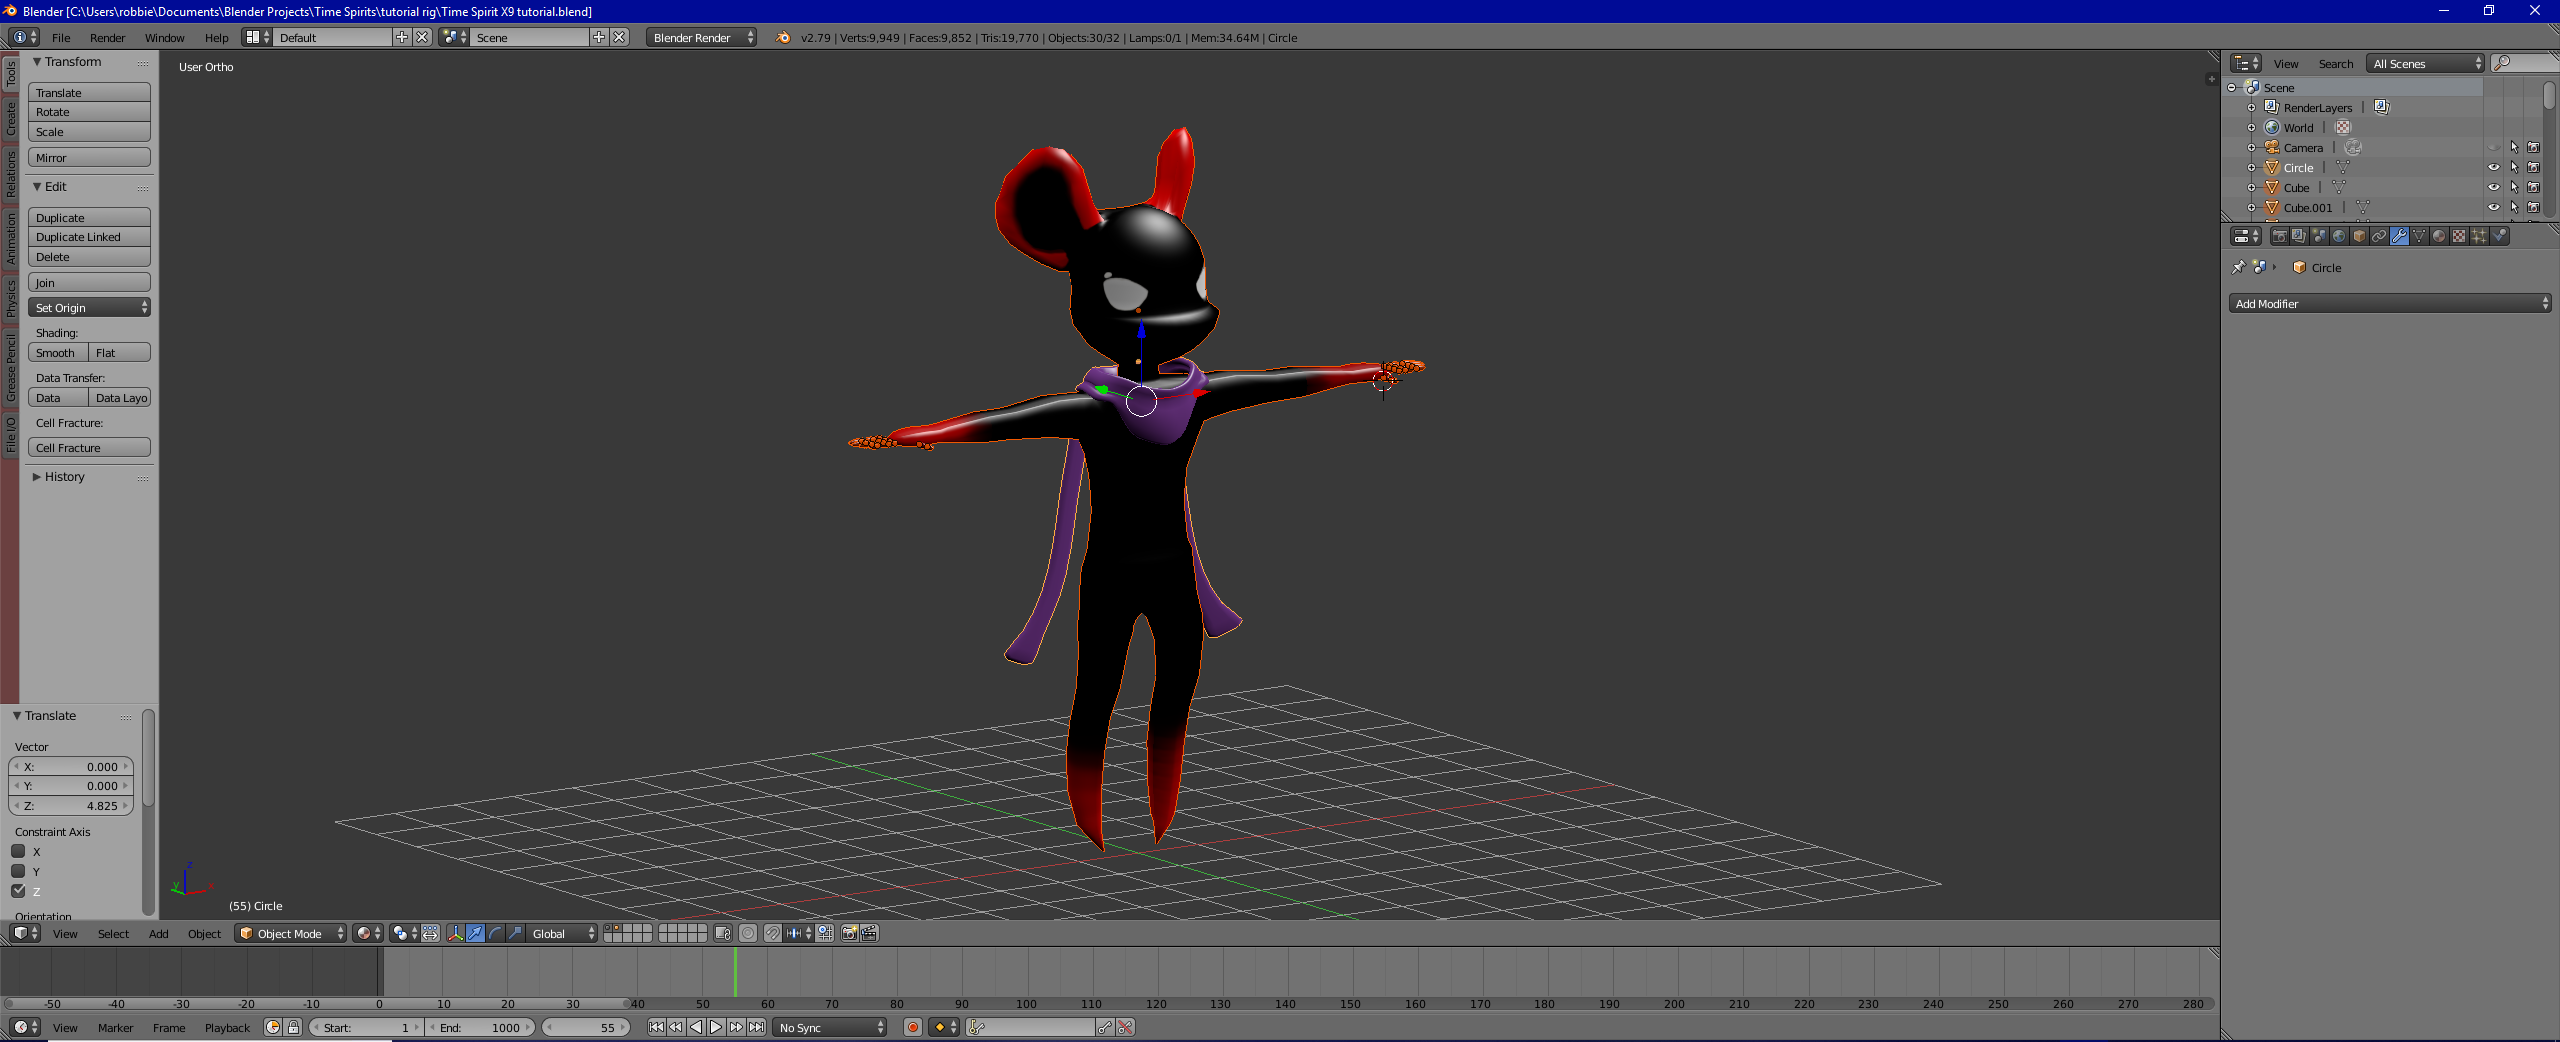
Hello everyone! Welcome to this instructable! As an avatar creator for VRChat, something I do very often is rig characters for use in Unity! Every character is different, but I find that most often, they all follow a basic design. That is what I'll be going over in this instructable: a basic, beginner process for rigging your avatars, whether they be weighted or bone-parented! (If you don't understand what I just said there, don't worry, I'll explain later.)
Start Blender and Bring in Your Model!
For this tutorial, I'll be using Blender to create a basic rig for my character, The Time Spirit! this tutorial will work on any humanoid model though, as long as it has two legs, a chest, arms, hands, neck, and head! Other programs can make rigs as well, but for the features I want I feel like Blender is the best choice.
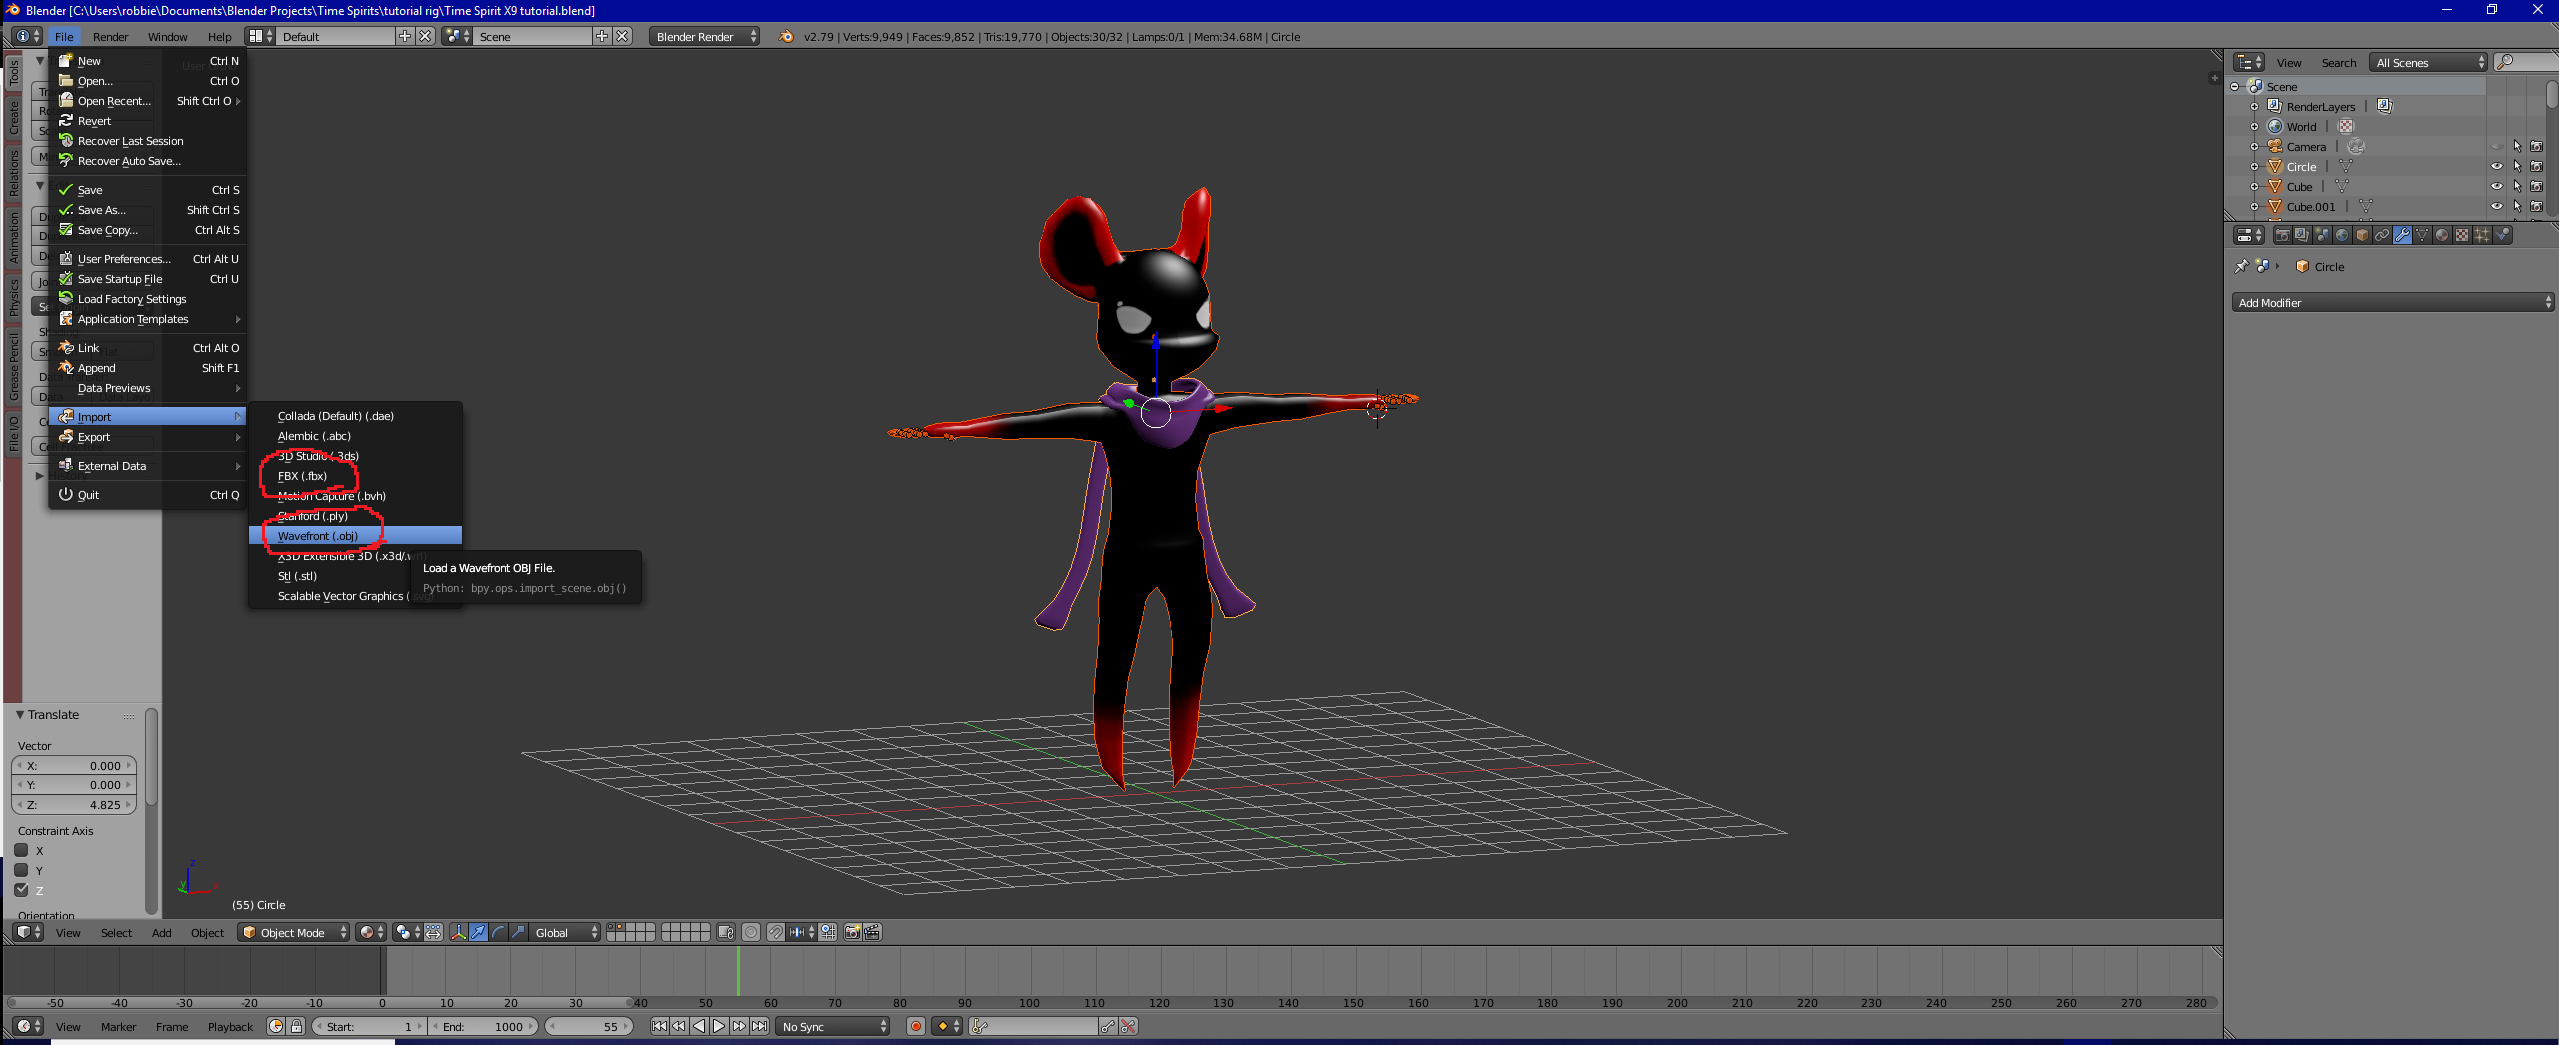
In this instance, I already have a model inside of Blender that I've been working on, but if you have a model that needs to be brought into blender, simply click on File in the top left corner of the Blender window, then import, and choose whatever model type your model is (fbx or obj the most common I use). Then find your model in windows and import it!
Line It Up!
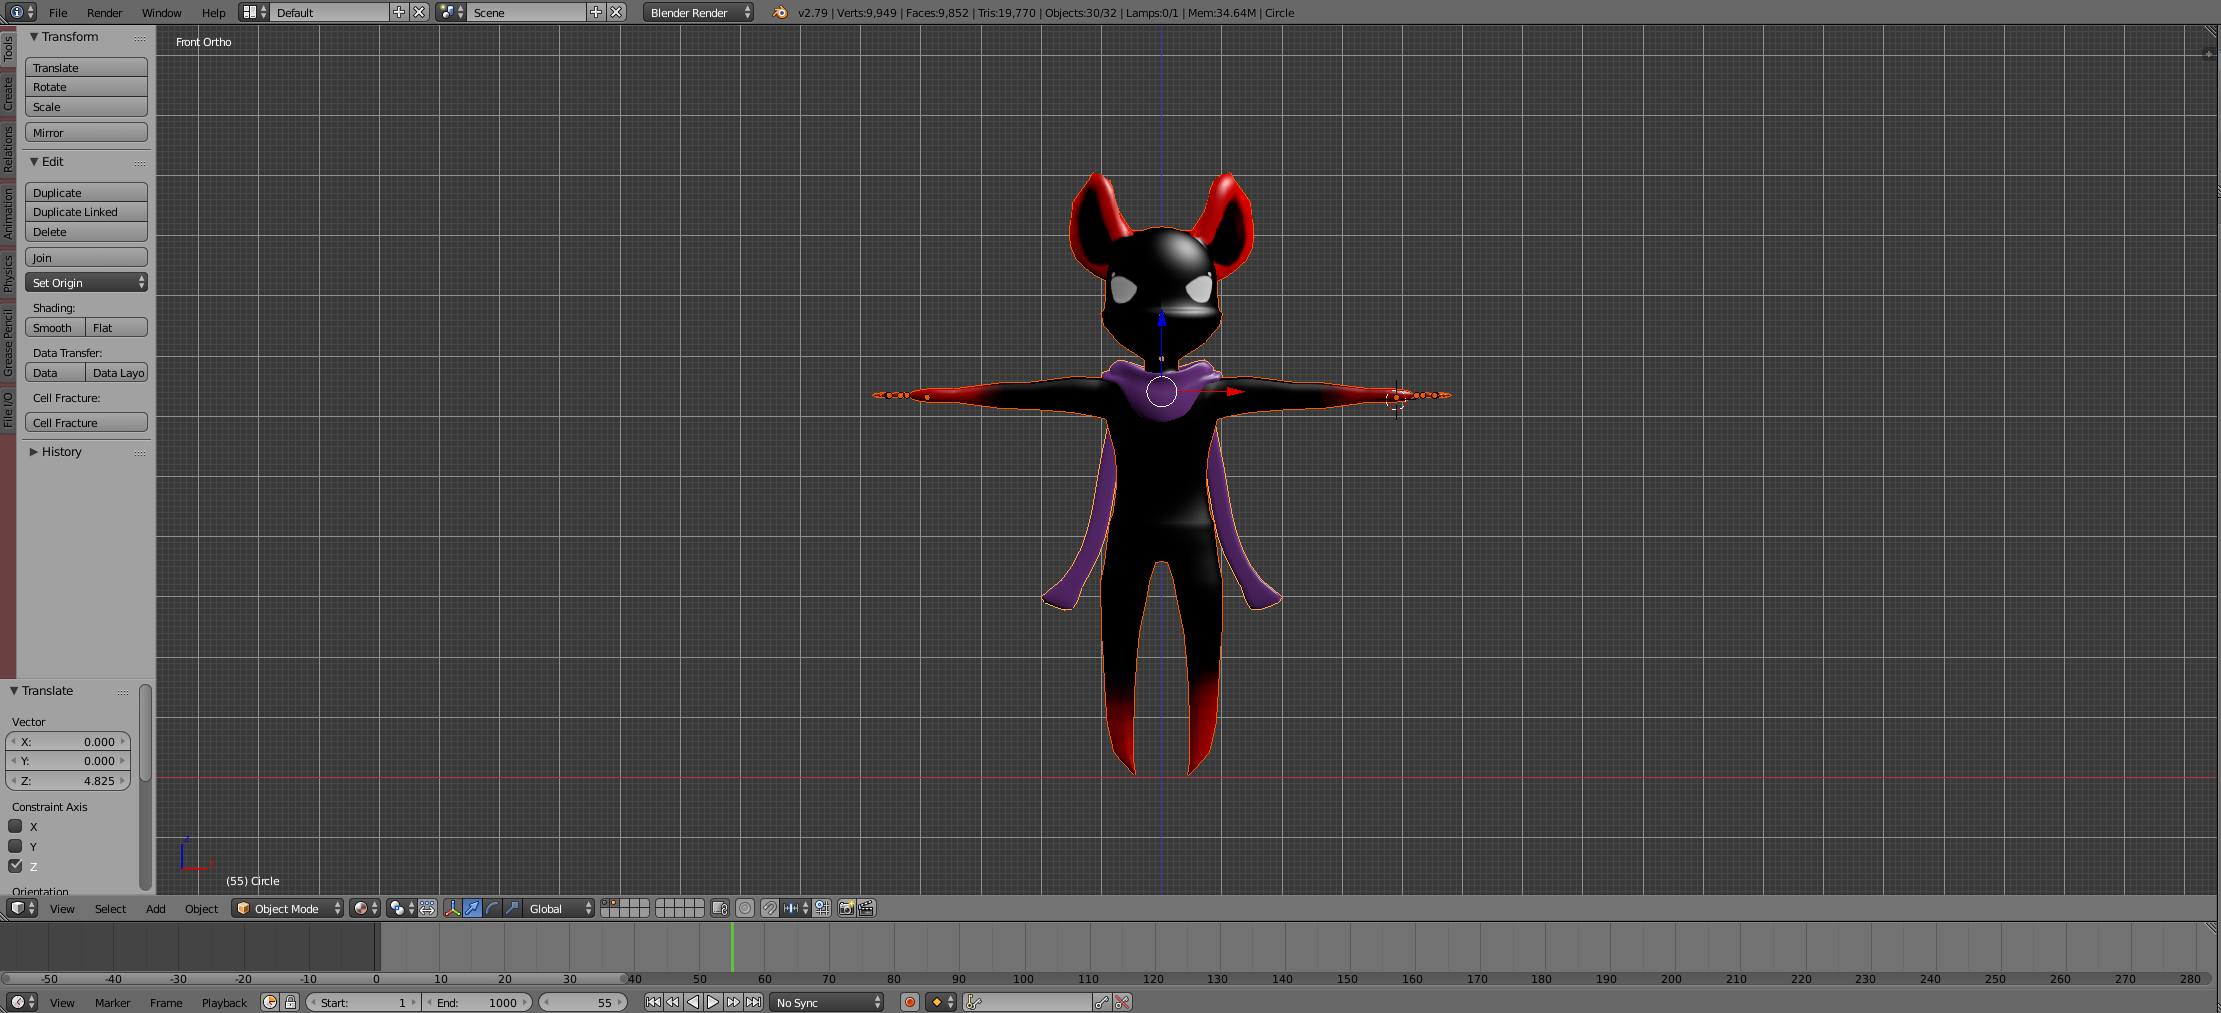
One of the first things you should always do with a new model (especially for VRChat) is line it up with the origin plane. (that's where x,y, and z intersect in Blender's grid, if you didn't know)
The easiest way that I've found to do it, is to select all the parts of your model (if your scene is blank a simple double tap of the a button should suffice) and then to make sure we move it straight, hit the 5 key on your numpad (if you have one) to enter orthographic mode (non-perspective 3D, less like an fps cam and more like a CAD cam) and then hit the 1 key on the numpad to switch to front ortho view. This gives you the flatest view of your character from straight on, making it (hopefully) easier to see your feet. Then simply line your feet up so the sole of the foot/shoe is right on top of the red line.
doing this ensures that when Unity is running, the character always stays above the ground plane in idle. If you have the character halfway beneath the ground-plane, you may experience animation glitches in VRChat, or other Unity games.
Center the Origins!
One final adjustment to make is to make sure that the origin for the model is properly centered inside the model.
to do this, simply select all the model's pieces, hit ctrl+alt+shift+c , and then hit "origins to geometry"
(make sure not to click "geometry to origins" or your model may move!)
Once you are sure that your origins are centered, we can begin the model's rig!
Begin at the Hips!
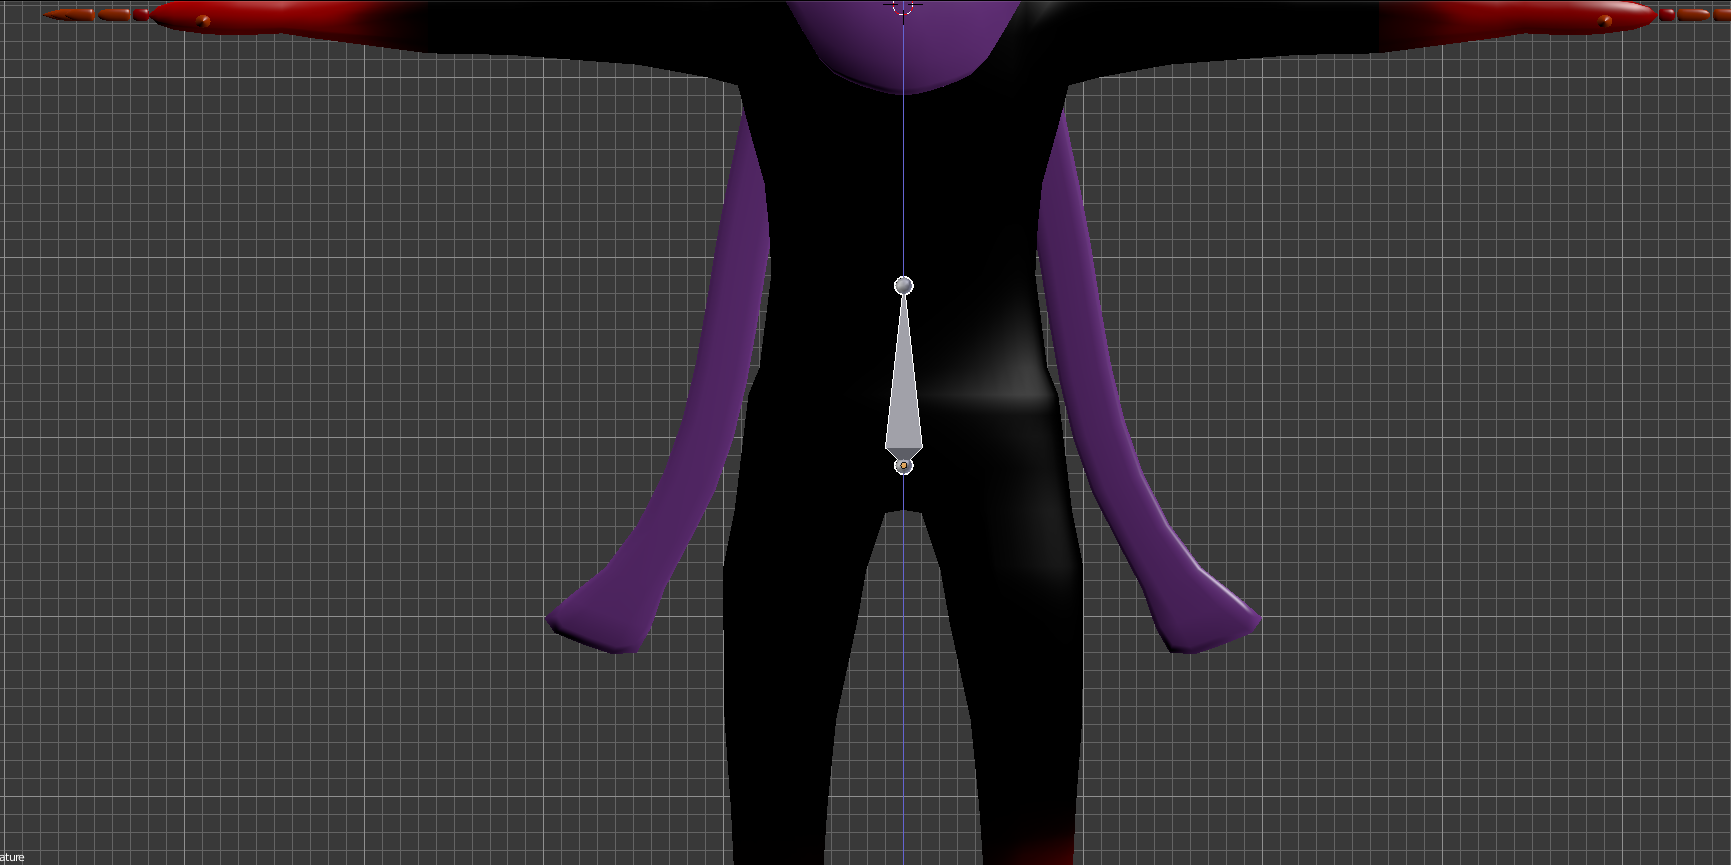
Alrighty, now we can finally begin making our character's rig!
For humanoid rigs I always start at the hips (as everyone should) and go up to the head and arms, and then finish at the legs and go down to the feet. That's what we'll do here.
To center your 3D cursor so we spawn a rig where we want it, make sure your model is selected (and the avatar model only), hover over the 3D viewport and hit shift+s. A menu will pop up, select "cursor to selection", and the 3D cursor will move right to the location of the model's origin! It should be right above the hips in most cases.
Now the fun begins! Hit shift+a to enter the spawn menu, and select "armature" and "single bone".
You'll suddenly have a set of translation arrows on-screen, but you probably cant see anything else, right?
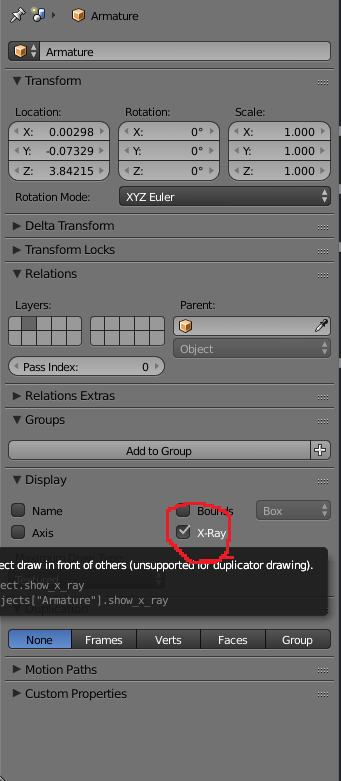
go over to the menu on the right hand side of your Blender screen, and you should see that a new "armature" is selected! Now we just have to change one setting to see it. go to the Object tab (the orange cube) and down under the "display" dropdown you should see a box called "xray" that's unchecked. Check that, and you should see a pyramid in the middle of your character!
that is the beginning of your rig, a bone! Now, take a look at the second photo on this step. Move your armature down by clicking and dragging on the blue arrow until it's in your character's general hip area, then release!
Name's Galore!
Now, a hip bone is great and all, but it won't help us much by itself, will it?
So, we obviously want to add more bones to give our character more flexibility! To do that, hit the tab key on your keyboard to enter EDIT mode! you should see the little orange cube in the bottom left corner of the 3D view change to a grey cube with orange dots on the corners.
Now that we're in edit mode, we want to give this specific bone a specific name other than "armature". to do that,
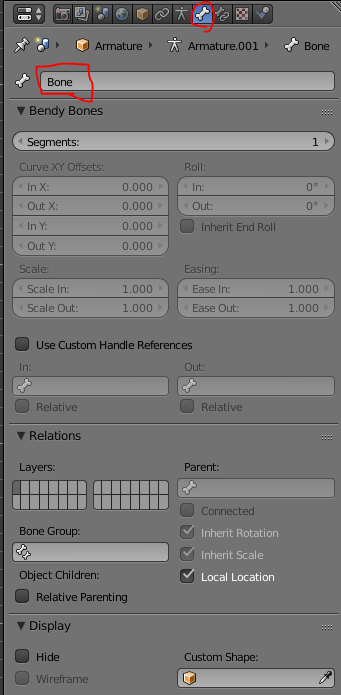
click on the tab up on the top of the inspector with a single bone in it. (bone tab)
You'll see this bone is simply named bone right now. click and change it to say hip!
Now, Blender makes it's bones hereditary, which means that any new bones created off of a previous bone will carry the name of the bone they came from. For instance, a second bone off the hip would be called hip.001. Later, we'll use this to our advantage to finish faster! For now though, we'll just change the names to what we need them to be.
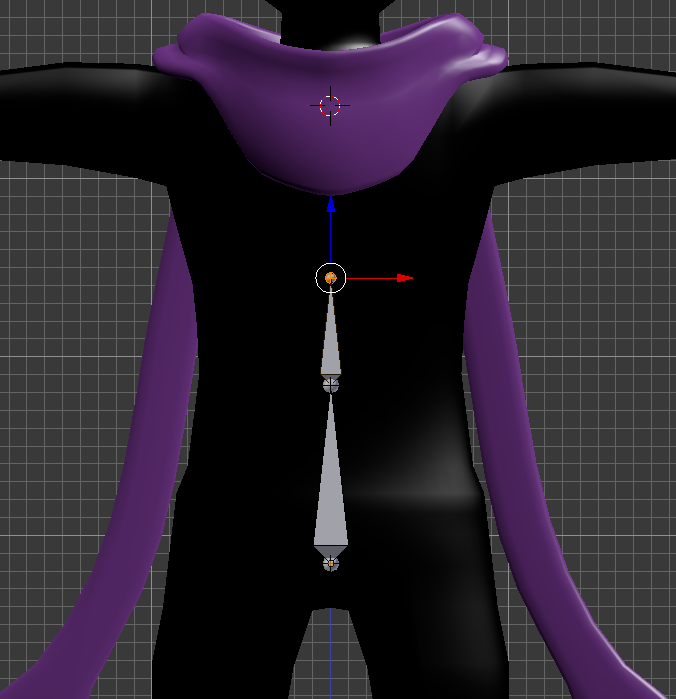
Now, for this next part, go back to the viewport and select just the top circle of the bone (not the whole thing, that'd break the rig) and hit e+z. That combination will begin to extrude a new bone and lock it to only the z axis, meaning we can stretch it up, but not forward/backwards or side to side. (good thing for a spine).
Drag it up to the bottom of the chest area, and left click to release it. (should look like pic 2 up there) If you look back to the inspector, you can see we now have "bone.001" selected. We'll change that to "spine". Every bone past here will do something like this, so dont forget!
Moving on Up!
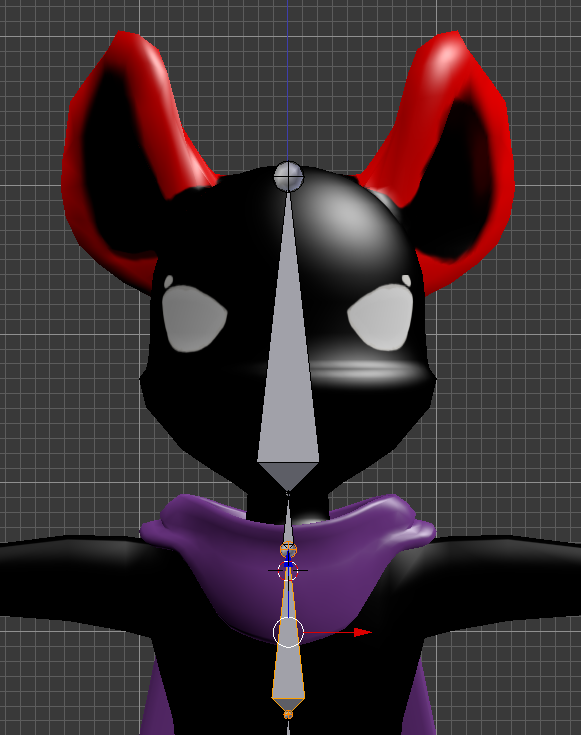
We need 3 more bones for this straight line:
1. Chest
2. Neck
3. Head
Unless your avatar is super deformed (which doesn't always work well with humanoid rigs) then just keep going straight up with those bones. (even if your character is female and has a chest, for this basic rig it'll all just move with that one chest bone. the head should pretty much just be one big rod going all the way up through the skull.
Arms Away!
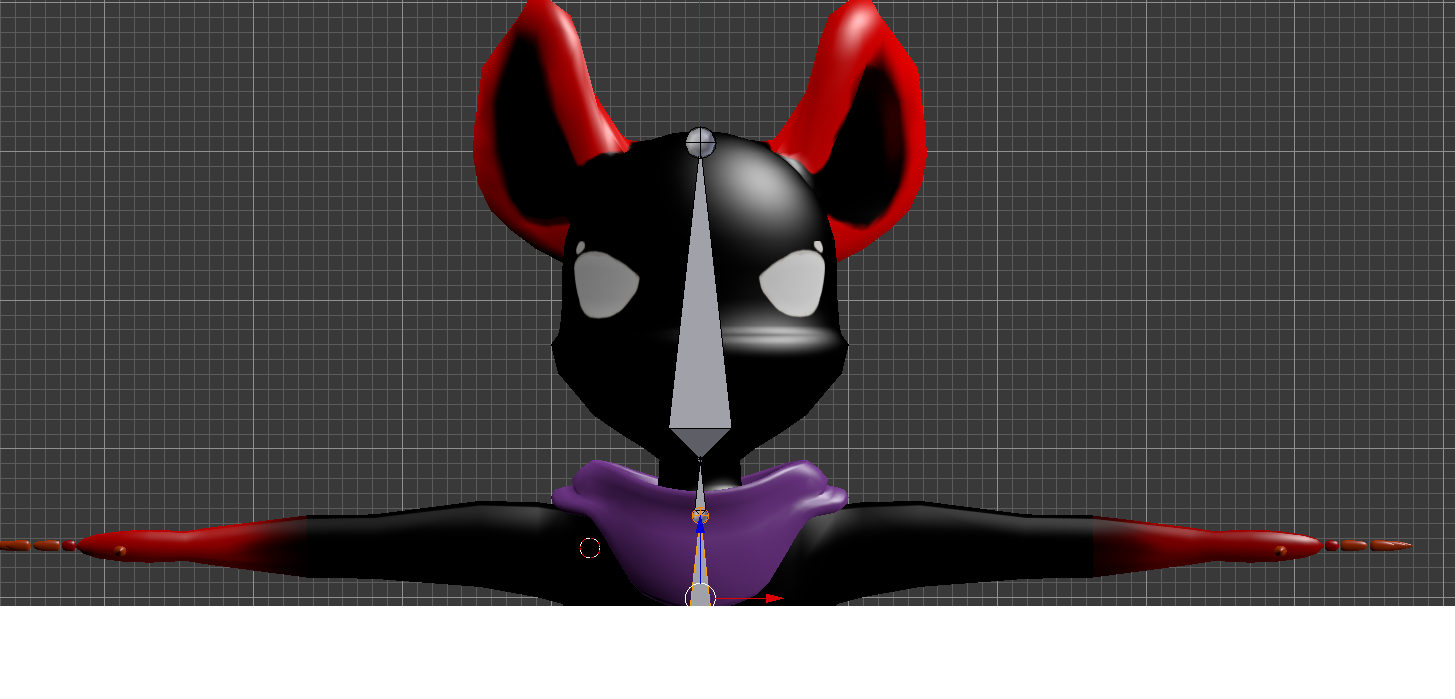
Now things begin to get a bit more tricky from here. You remember how we centered the cursor to spawn the rig?
Well, we need to do the same thing with the arms, except there isn't really anything for the cursor to latch onto (unless you have completely cylindrical arms, in which case you could select some vertices, but that's beyond the scope of this tutorial, so we're going to wing it!
Now, we wont actually be winging it as much as just choosing where to start the shoulders ourselves. for most models, eyeballed shoulder placement can actually work 100% ok (as long as you're a good judge of distance, that is!)
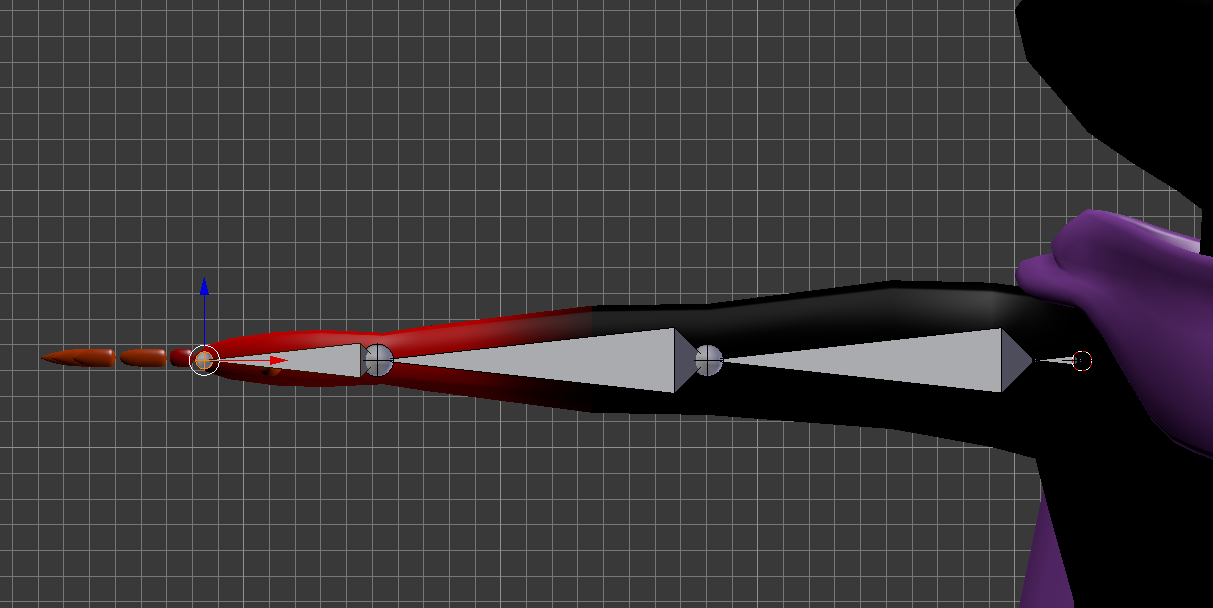
Left click where you want the cursor on the right shoulder to begin. Remember, the shoulder bone is more of a collarbone than a real shoulder, so make sure to give it some space before the start of the arm! Take a look at the location of the cursor in the image above to get a good idea of where it should go. Then hit shift+a to insert a bone at the location of the cursor!
Now we want to rotate that bone and move it into place. Move it you ask? Yes! First, hit r and then -90 to rotate it flat ninety degrees, and then on the numpad hit 7.
As you should be able to see, the bone isn't anywhere near the middle of the arm! To fix that, left click the middle of the bone, then just grab the green (y) arrow and drag the bone into place. Anywhere close to the middle will work fine, just try and get it as close as you can (hitting z to go into wireframe mode may help you here). you'll also likely need to move it in the x axis to realign it with where you originally placed the back of the bone.
Now, you'll probably notice the bone is too big now (we want this bone to end right where the chest meets the arm in the armpit, just higher) so to fix that, once again, click on the ball and the end of the bone and drag it back. (Don't worry if it gets really small, it should be).
Past here, the arm will have 3 main bones (although fingers will come later):
1. r.upperarm (make sure to name it this way, so we can flip the name for the left side later!)
2. r.arm
3. r.hand
The upperarm should end at the elbow, the "arm" at the wrist, and the hand at the point the fingers begin, or somewhere halfway to that point in the palm. (either is fine). If you want to be really exact about it, hit e+x to only extrude bones in the x axis.
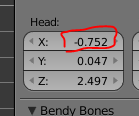
once you have those bones named, quickly select your shoulder bone again and check it's x location. We'll need this later to get your bones in the right spot on the other side, so don't forget it! Mine was something like -.7.
it's time to duplicate them all! Yup! to duplicate the arm bones, zoom out so you can see them all and shift+ left click on all the bones, starting with the hand and go backwards til you get to the shoulder, and then hit shift+d! This will then make a duplicate of the bones you selected, and attach them to your mouse to move them around. We don't want to move them yet, so right click once to release them back to their original spot.
Scaling and Duplicating!
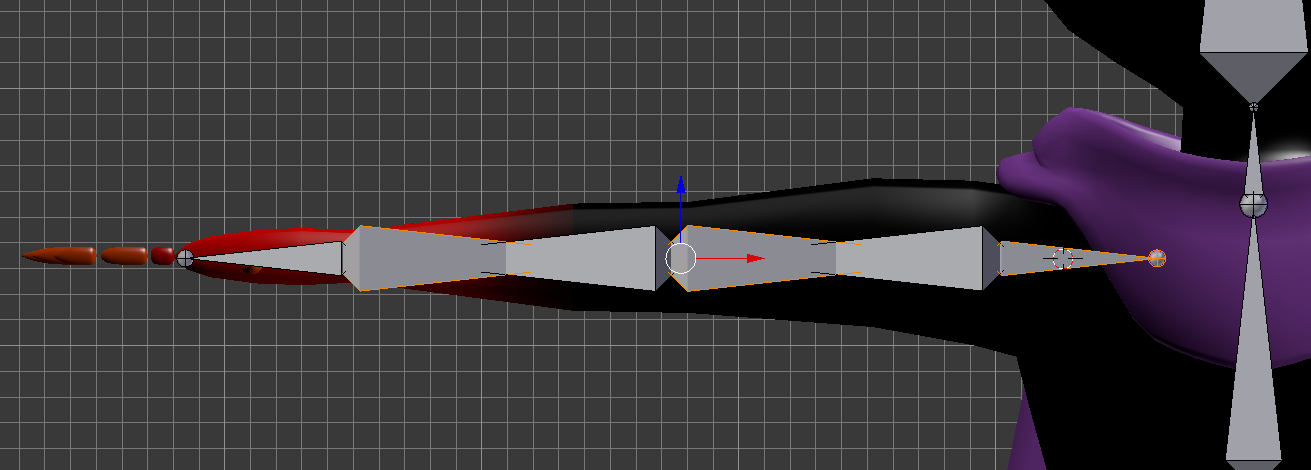
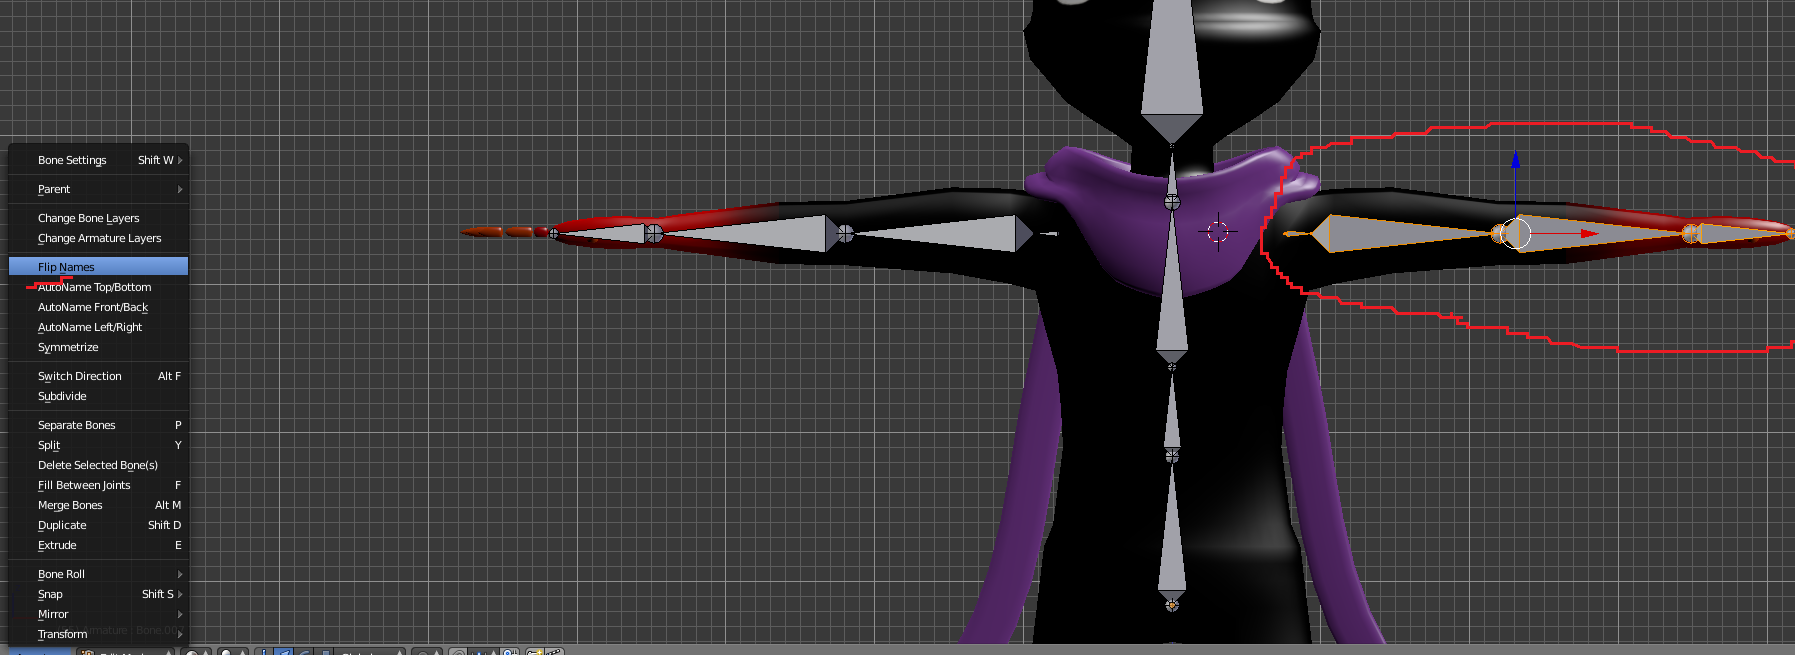
Now, since you released the duplicate, you should only currently see one set of bones, but don't worry, the second set is definitely there! Now, in order to use these bones on the other side of the body, the bones will have to face the other way. A very simple way to do this I figured out was to hit s (for scale) and then x and -1. This will effectively scale all the bones to be -1 times scale on the x axis only, just flipping them around. you should see them sitting backwards inside the original bones, now!
Now, with all the bones selected, move your bones along the x axis until the number in the x box to the right is as close as you can get to the positive version of that negative number we looked at before. then click to set them!
Then, with all the bones for the new arm still selected, go to the armature tab down in the bottom left, and select "Flip names" (the option should be about two-thirds of the way up the menu). You should see the r. turn to l. and some of the numbers change, if you have any! (these are both ok).
Now one final thing to do with the arms for now is parents them "with an offset" to the chest.
To do so, select one of the shoulder and shift click the chest to select it too, and then hit ctril+p and select "offset".
If you did it correctly, a black dotted line should appear to connect the end of the shoulder with the top side of the chest! Do that for the other side and you've just made two arm rigs! Those black lines will keep the arms moving with the chest later on.
Legs!
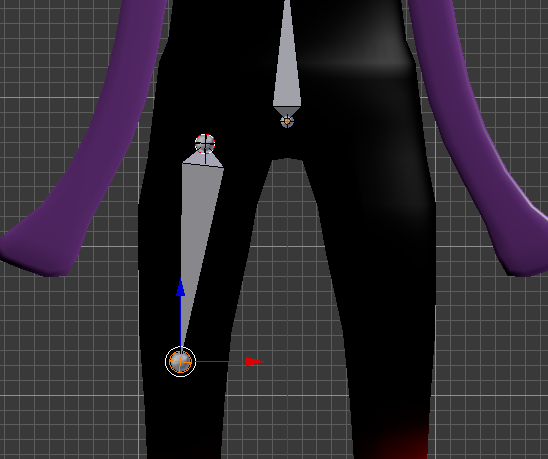
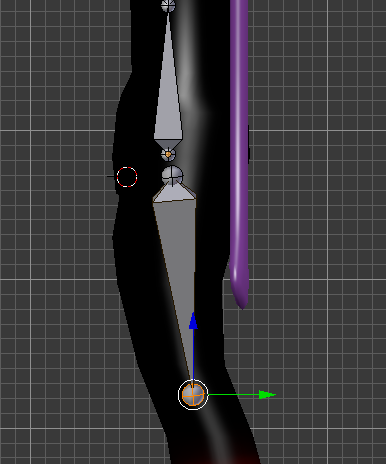
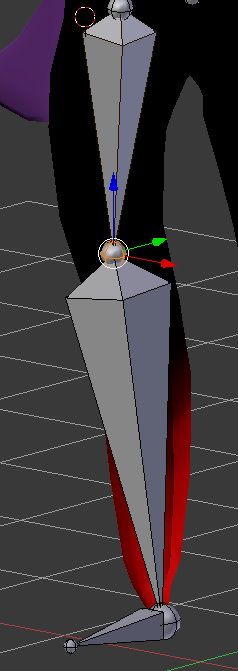
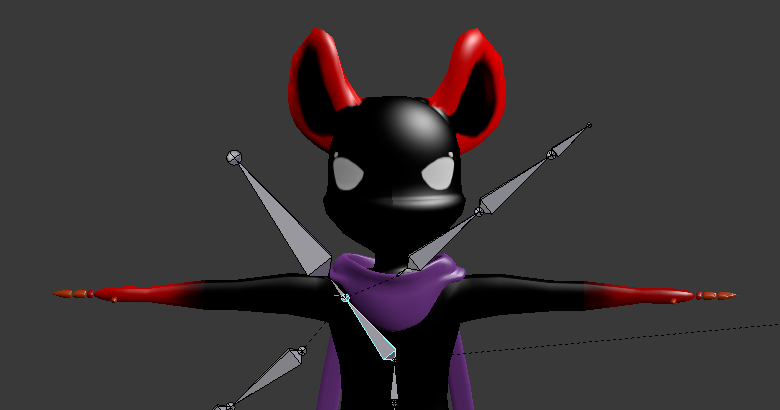
Now to the legs! We're going to eyeball the joint's location again, so just left click where you want it and shift+a to add a bone. Youll notice it's facing straight up! Just rotate that bad boy 180 degrees by going r then 180 and enter to put it pointing down towards your feet. Then you can drag the end of the bone wherever you want specifically to put it in exactly the right location with the g key. (I like to also switch the view to side as well with 3 to make sure it's in the middle both ways)
My avatar here has more animal-like legs, so my leg bones bend a bit more than normal, but for most humanoid rigs you should be ok pointing mostly straight down. This bone, like the arm, is called r.upperleg (by the reference photo above) and then the next two should be:
1. r.leg
2. r.foot
My character doesn't actually have a foot, it ends at a point for the legs, but I still need the bones
for the rig to work correctly. they just sit out at an angle facing front (but if you have a foot, put it at where the toes start.)
Once again, write down the x value for the top leg joint, and then, starting at the bottom, shift select all of them up to the upperleg and shift +d!
If you have any bends for the leg in the x at all, make sure to scale the bones to -1 in x, otherwise simply begin moving the leg bones to their appropriate leg, and switch the names!
to finish off the legs, select the left upperleg, then shift select and offset parent it, and repeat again for the right upperleg bone!
A quick way to test if your offset parents worked is to hit ctrl+tab to enter pose mode. Then, select either the hip or chest bone and hit r to rotate! If your arms rotate with your chest and your legs and arms rotate with your hips, everything's working fine!
And with that you have successfully made the basic skeletal system for a humanoid rig in Blender! It's late here, so I wont go into hand bones today, but that'll be coming in the next day or so! for now, we're going to jump right into parenting your model to your armature!
Attachment!
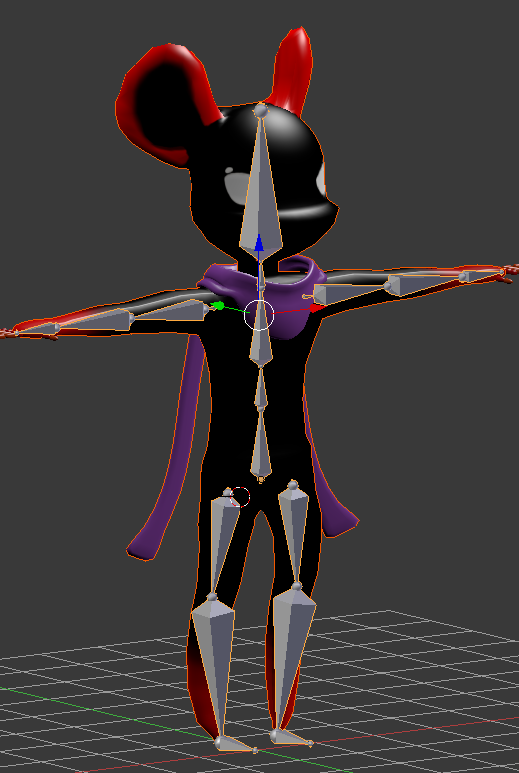
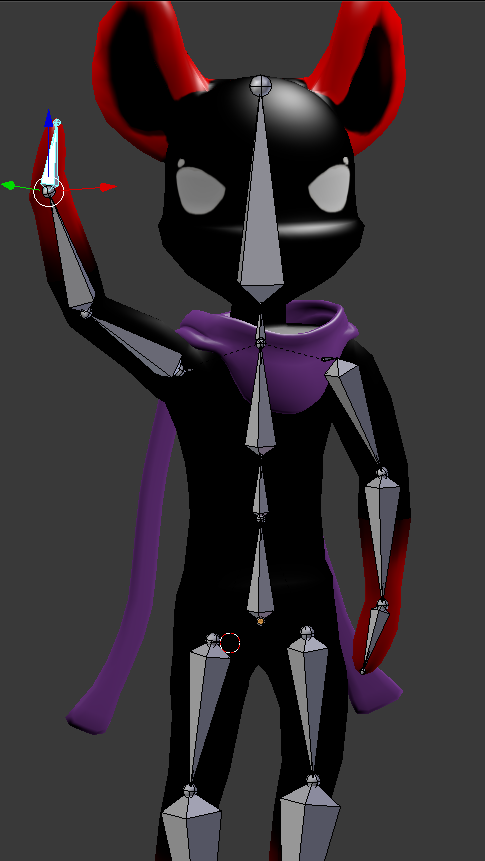
Now the real fun part begins! with a complete rig, it's time to attach our mesh to it and start posing!
Note: this is where the tutorial will deviate for robotic rigs/ rigs with items that don't stretch. I'll be making a separate instructable and linking it here for you guys. It'll be up soon!
Go back to object mode by hitting tab. this should now let you select the model you want to parent to the rig. Select it (any and all pieces if it's not one coherent model) and then shift+right click until you also select the rig.
Then hit ctrl+p again and select "armature deform with automatic weights". This is a very basic and not always fantastic weighting system for rigging, but for getting started on rigging, and/or starting weight painting, it gets the job done!
Now, go select just the rig again, and hit ctrl+tab to reenter pose mode. if you select any joint and move it, now the rig moves the model too!
for now, try not to move the bones around permanently, as we'll need the avatar in T-pose for programs like Unity to correctly use the rig. If you're moving a bone and want to cancel, just right click. If you have bends already, just hit ctrl+z a few times. just be careful not to unparent the rig! xD
And with that, we're done with this basic rigging tutorial! I hope you guys learned a lot and enjoyed the process! I plan to bring a lot more tutorials to Instructables on the topic of modeling in the coming weeks, I am super excited to show more with you guys! I'll also be recording this for my youtube soon, so if you like watching videos more, stay tuned for that! thank you all for reading, and best of luck on your modelling adventures!