Black Lives Matter Electronic Scrolling Names Sign
by AmpedAtelier in Circuits > LEDs
512 Views, 1 Favorites, 0 Comments
Black Lives Matter Electronic Scrolling Names Sign

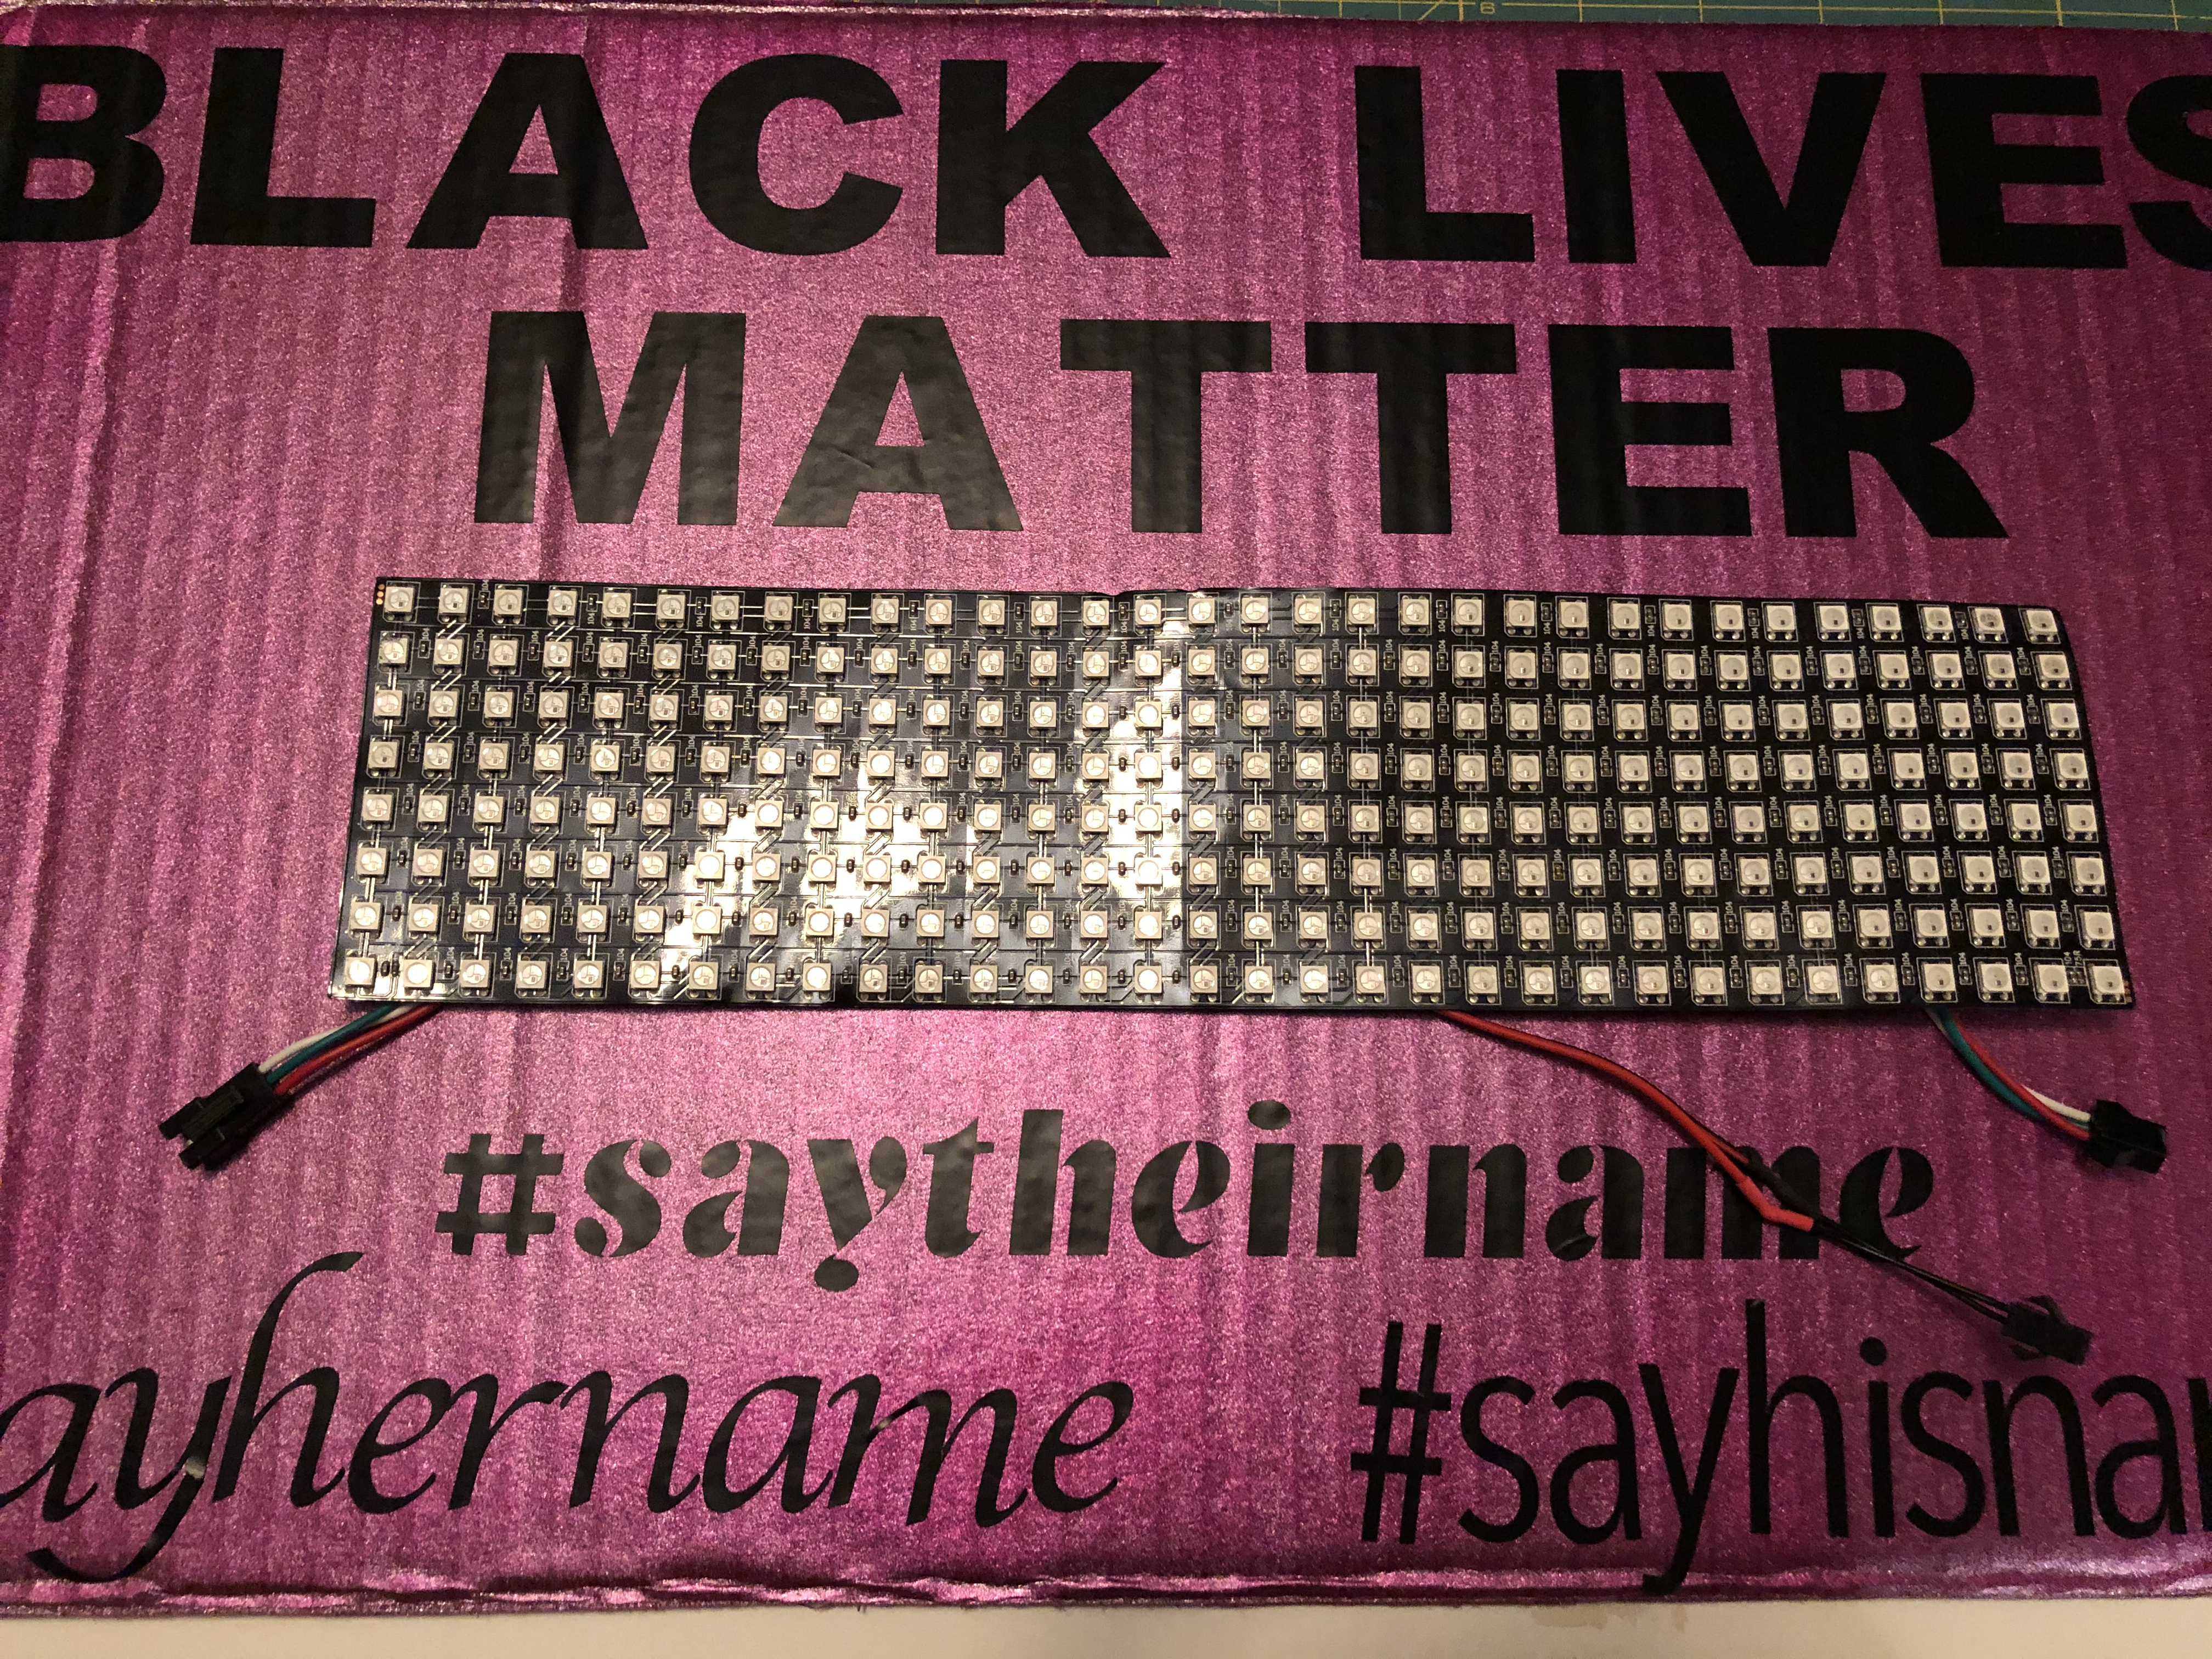
The #sayhername, #sayhisname, and #saytheirname campaigns bring awareness to the names and stories of black people who have been victimized by racist police violence and encourages advocacy for racial justice. More information about the demands and policy of the Say Her Name campaign can be found at the African American Policy Forum at https://aapf.org/sayhername.
This programmable memorial names sign uses an addressable LED matrix, and a microcontroller, to build a scrolling electronic banner featuring the victim's names.
This is an advanced beginner to intermediate level project that requires a small amount of soldering and some familiarity with the Arduino IDE.
Supplies
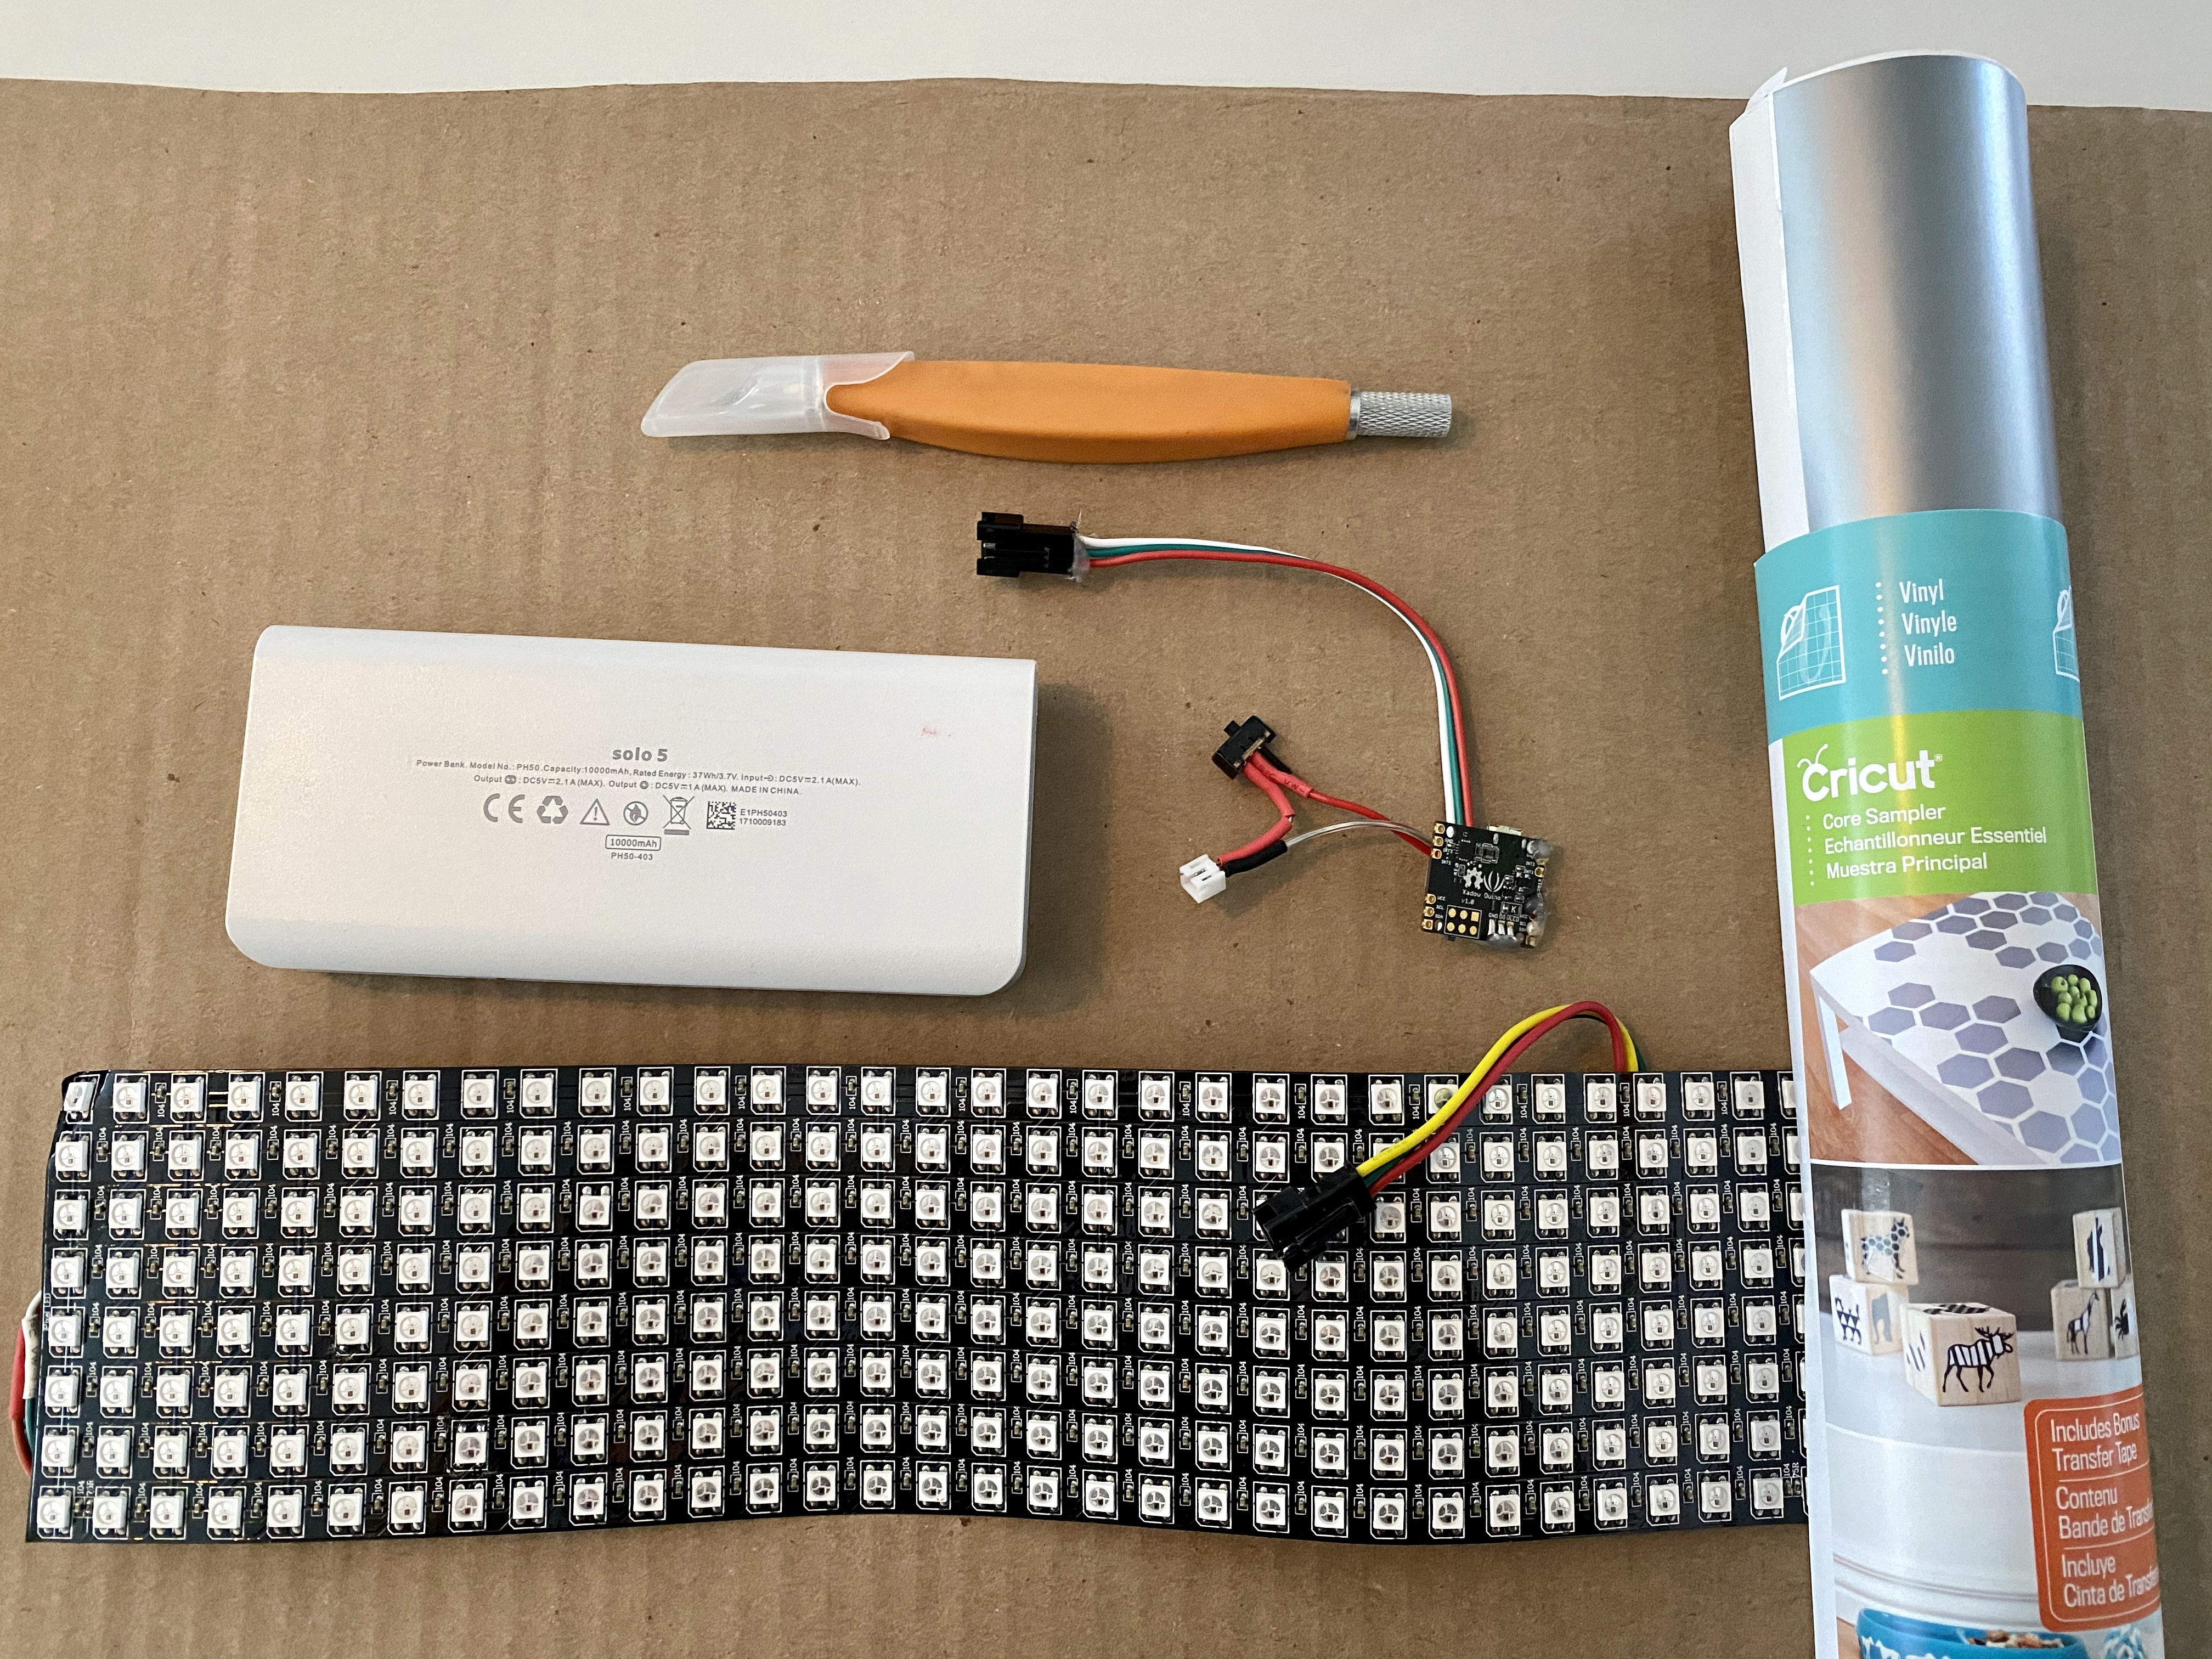
Flat piece of cardboard - should be fairly rigid (recycled shipping box) at least 18" X 10", ours was 19" X 12"
Paint and/or Vinyl for lettering (or pre-purchased letters or paint/markers to draw letters) and sign decoration
small Arduino like an Arduino Nano or Arduino-type microcontroller that has a microUSB connector https://www.arduino.cc/ or Adafruit Feather
5V power bank/battery and datacable
8 X 32 LED matrix WS2812B https://www.digitspace.com/ws2812b-sk6812-matrix-d...
USB A to microUSB data cable for programming the arduino
JST 2 SM 3-pin connector/cable https://www.sparkfun.com/products/14575
Alligator clips (optional)
Solder
Soldering Iron
Hobby knife
Double sided tape/double sided foam tape
Tape
Make the Cardboard Sign and Add Lettering
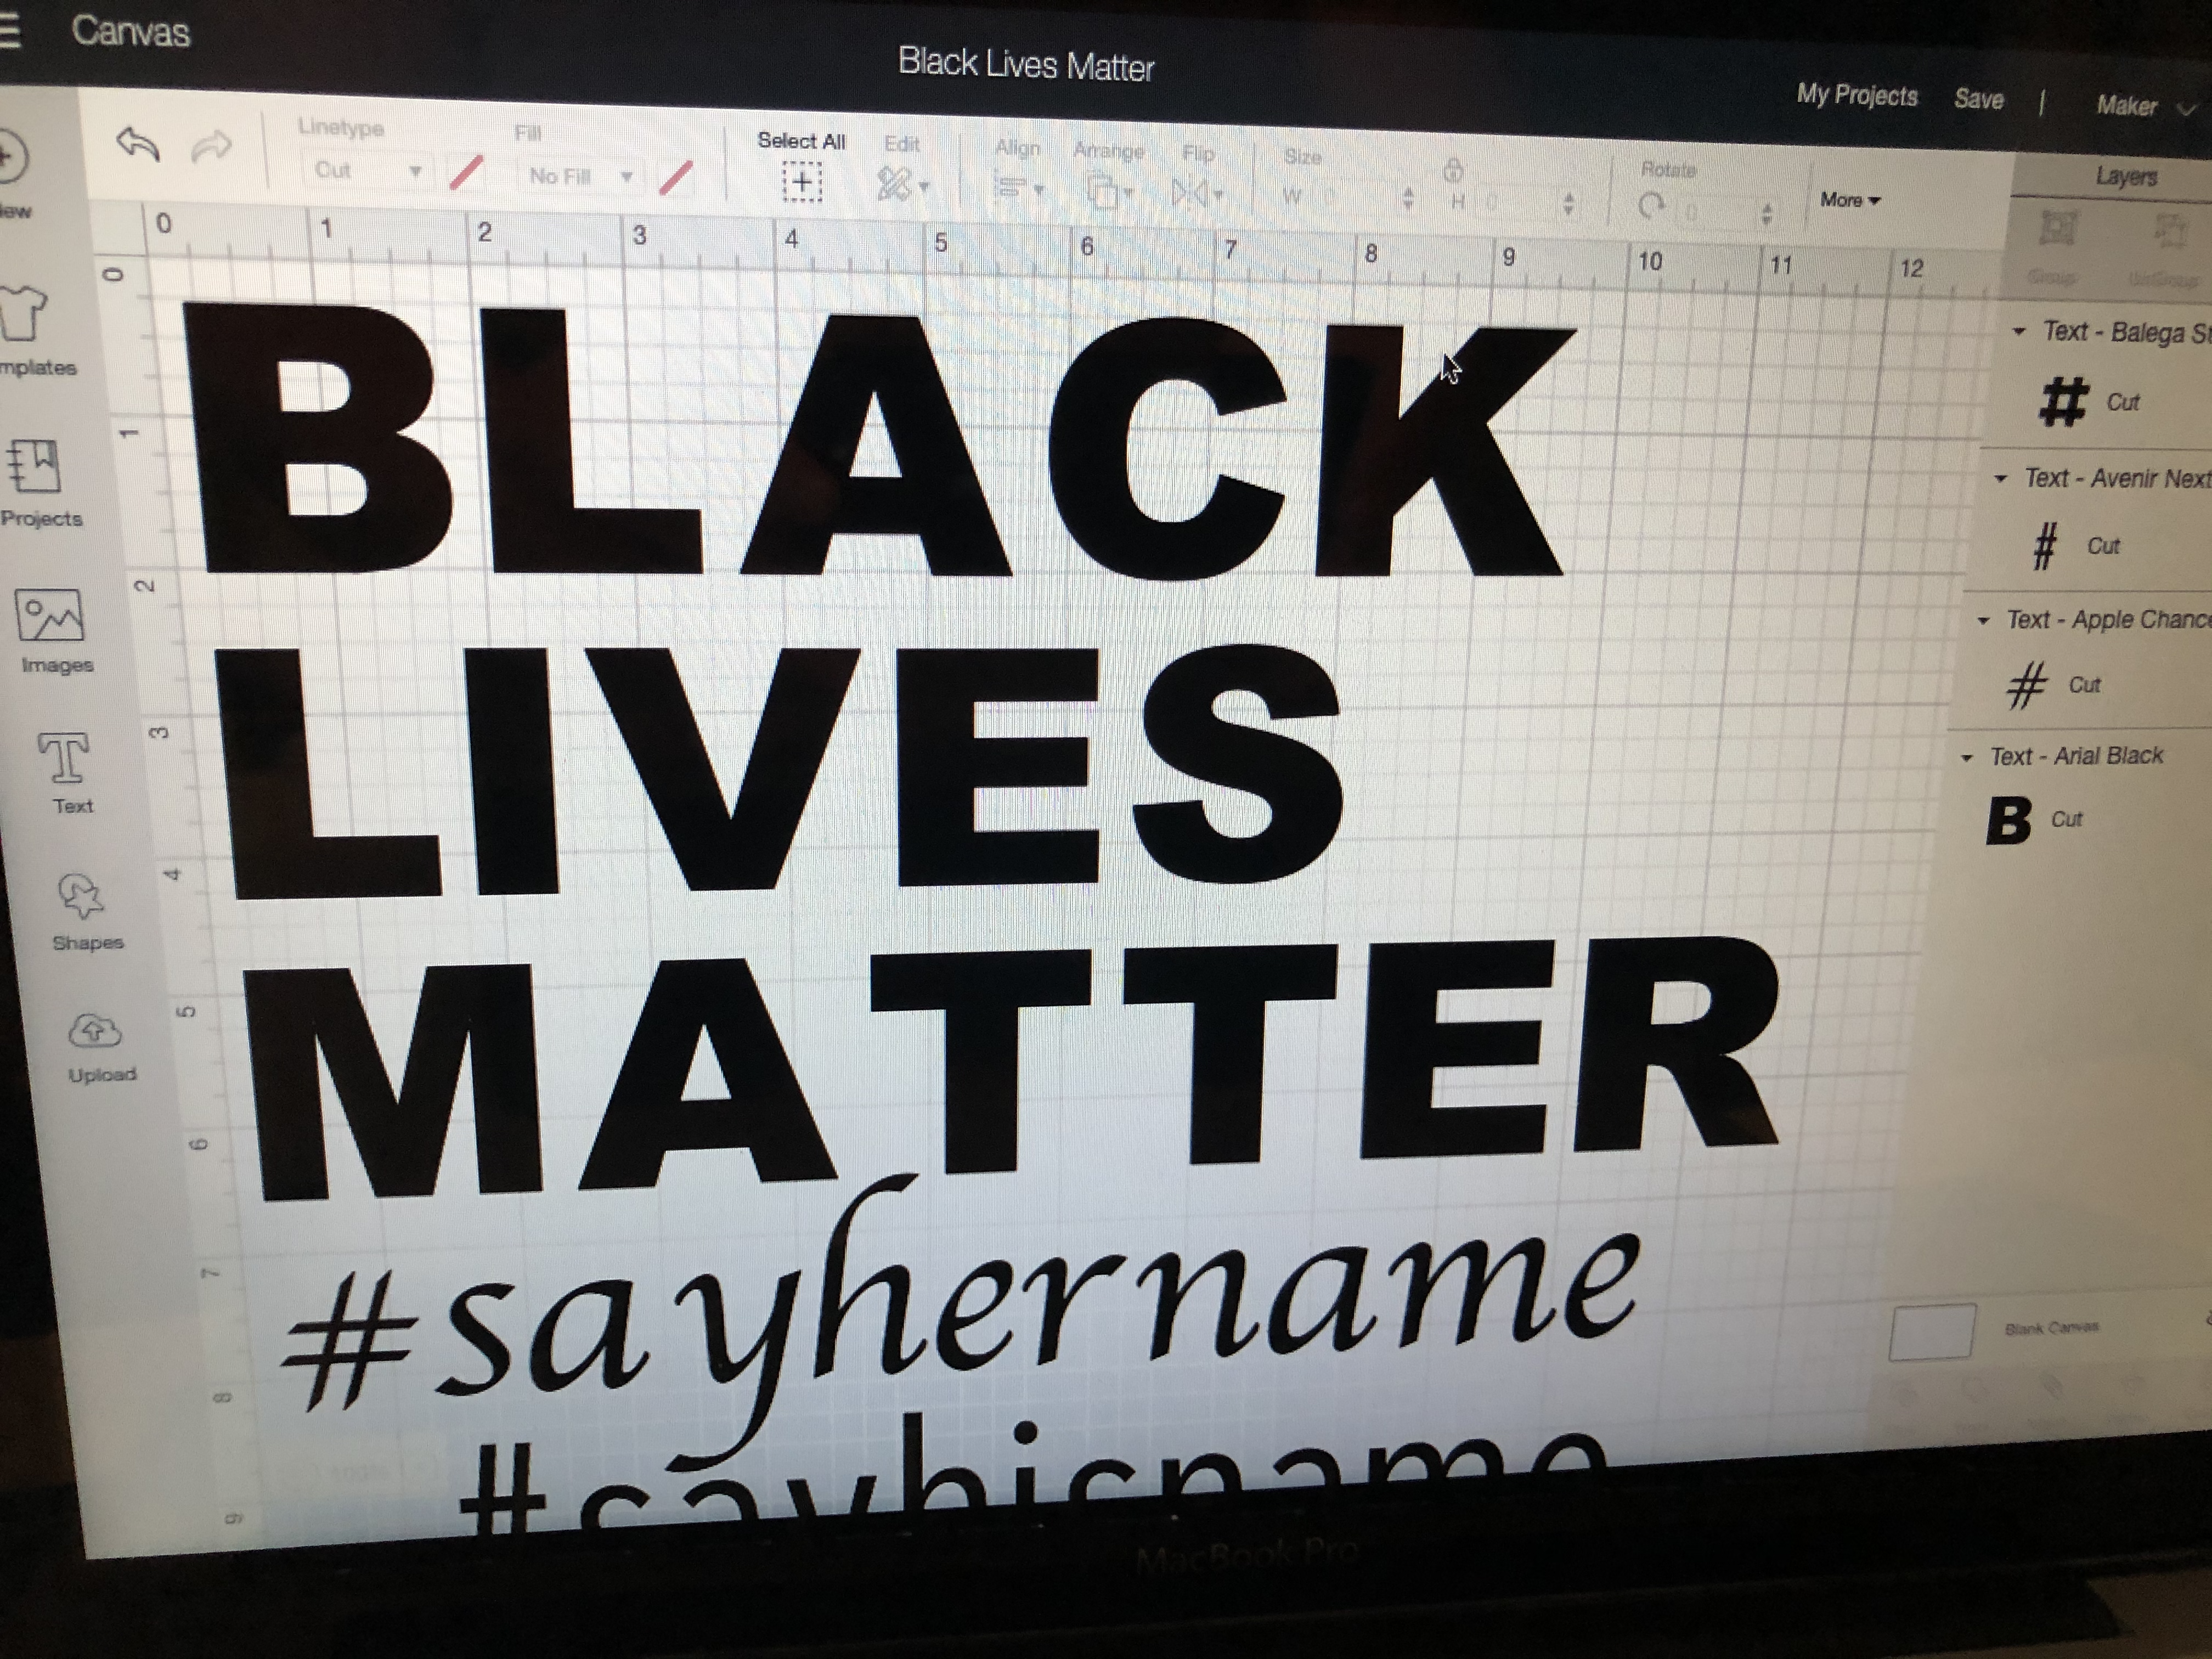
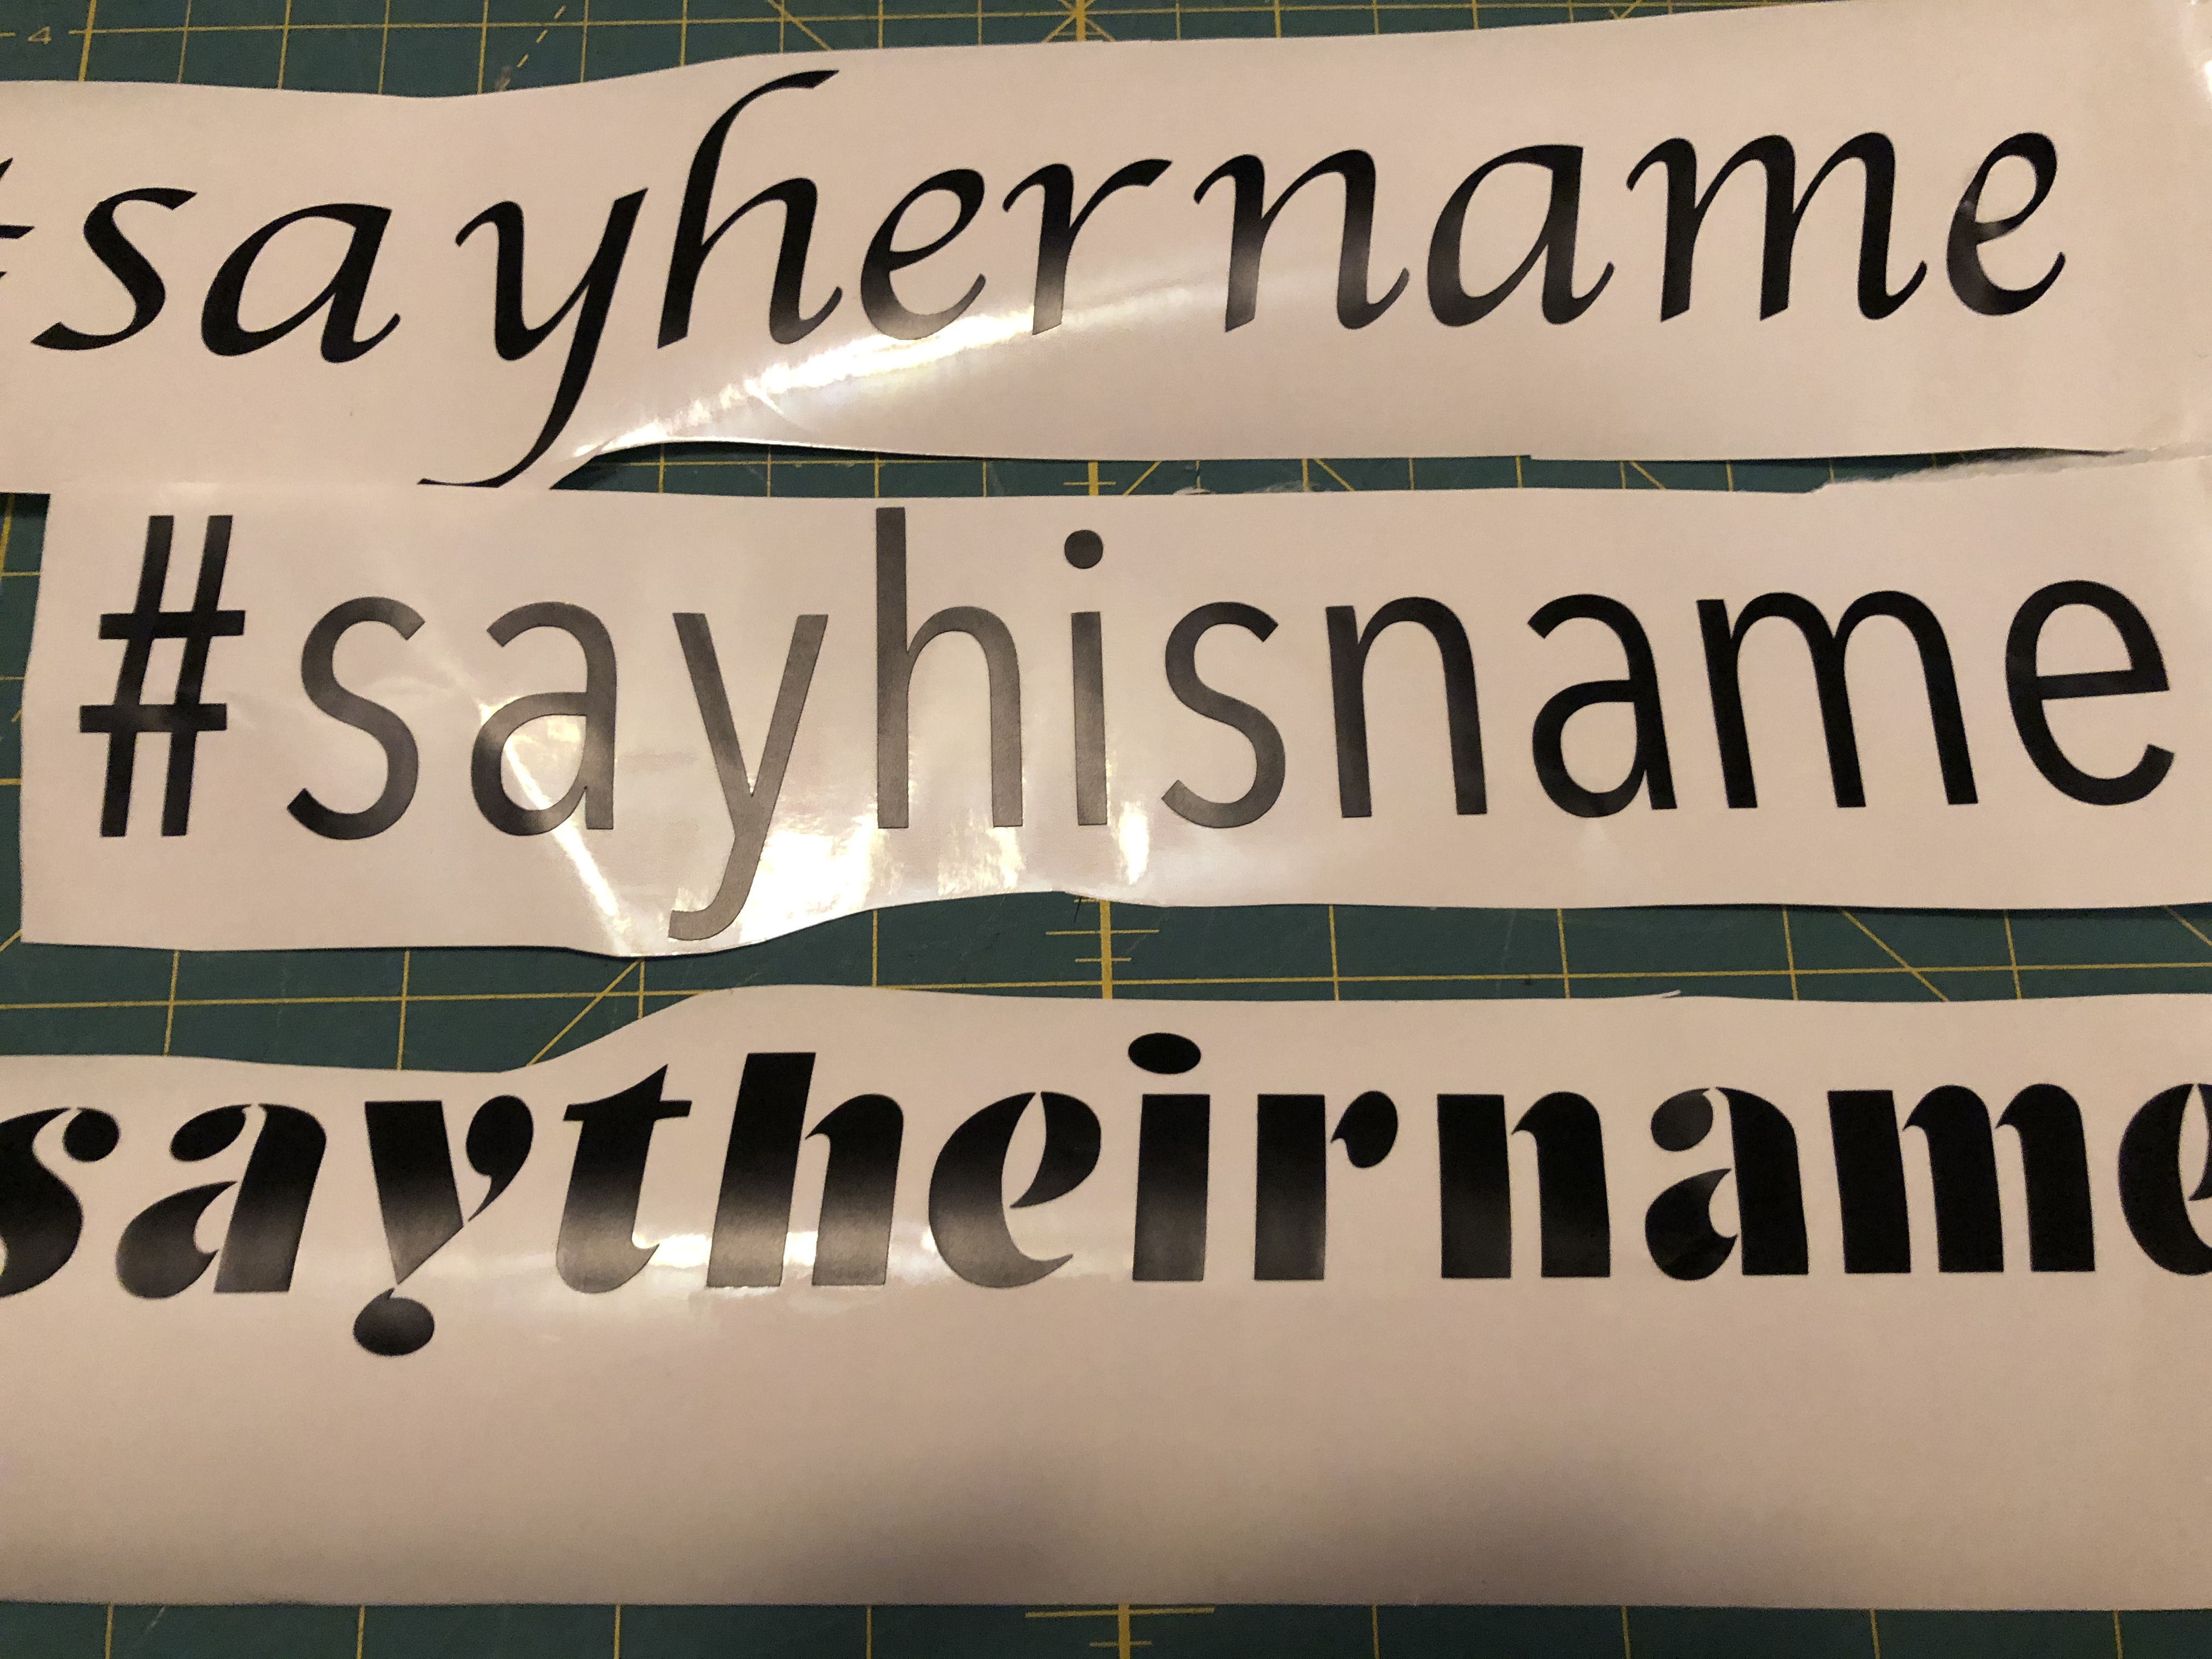
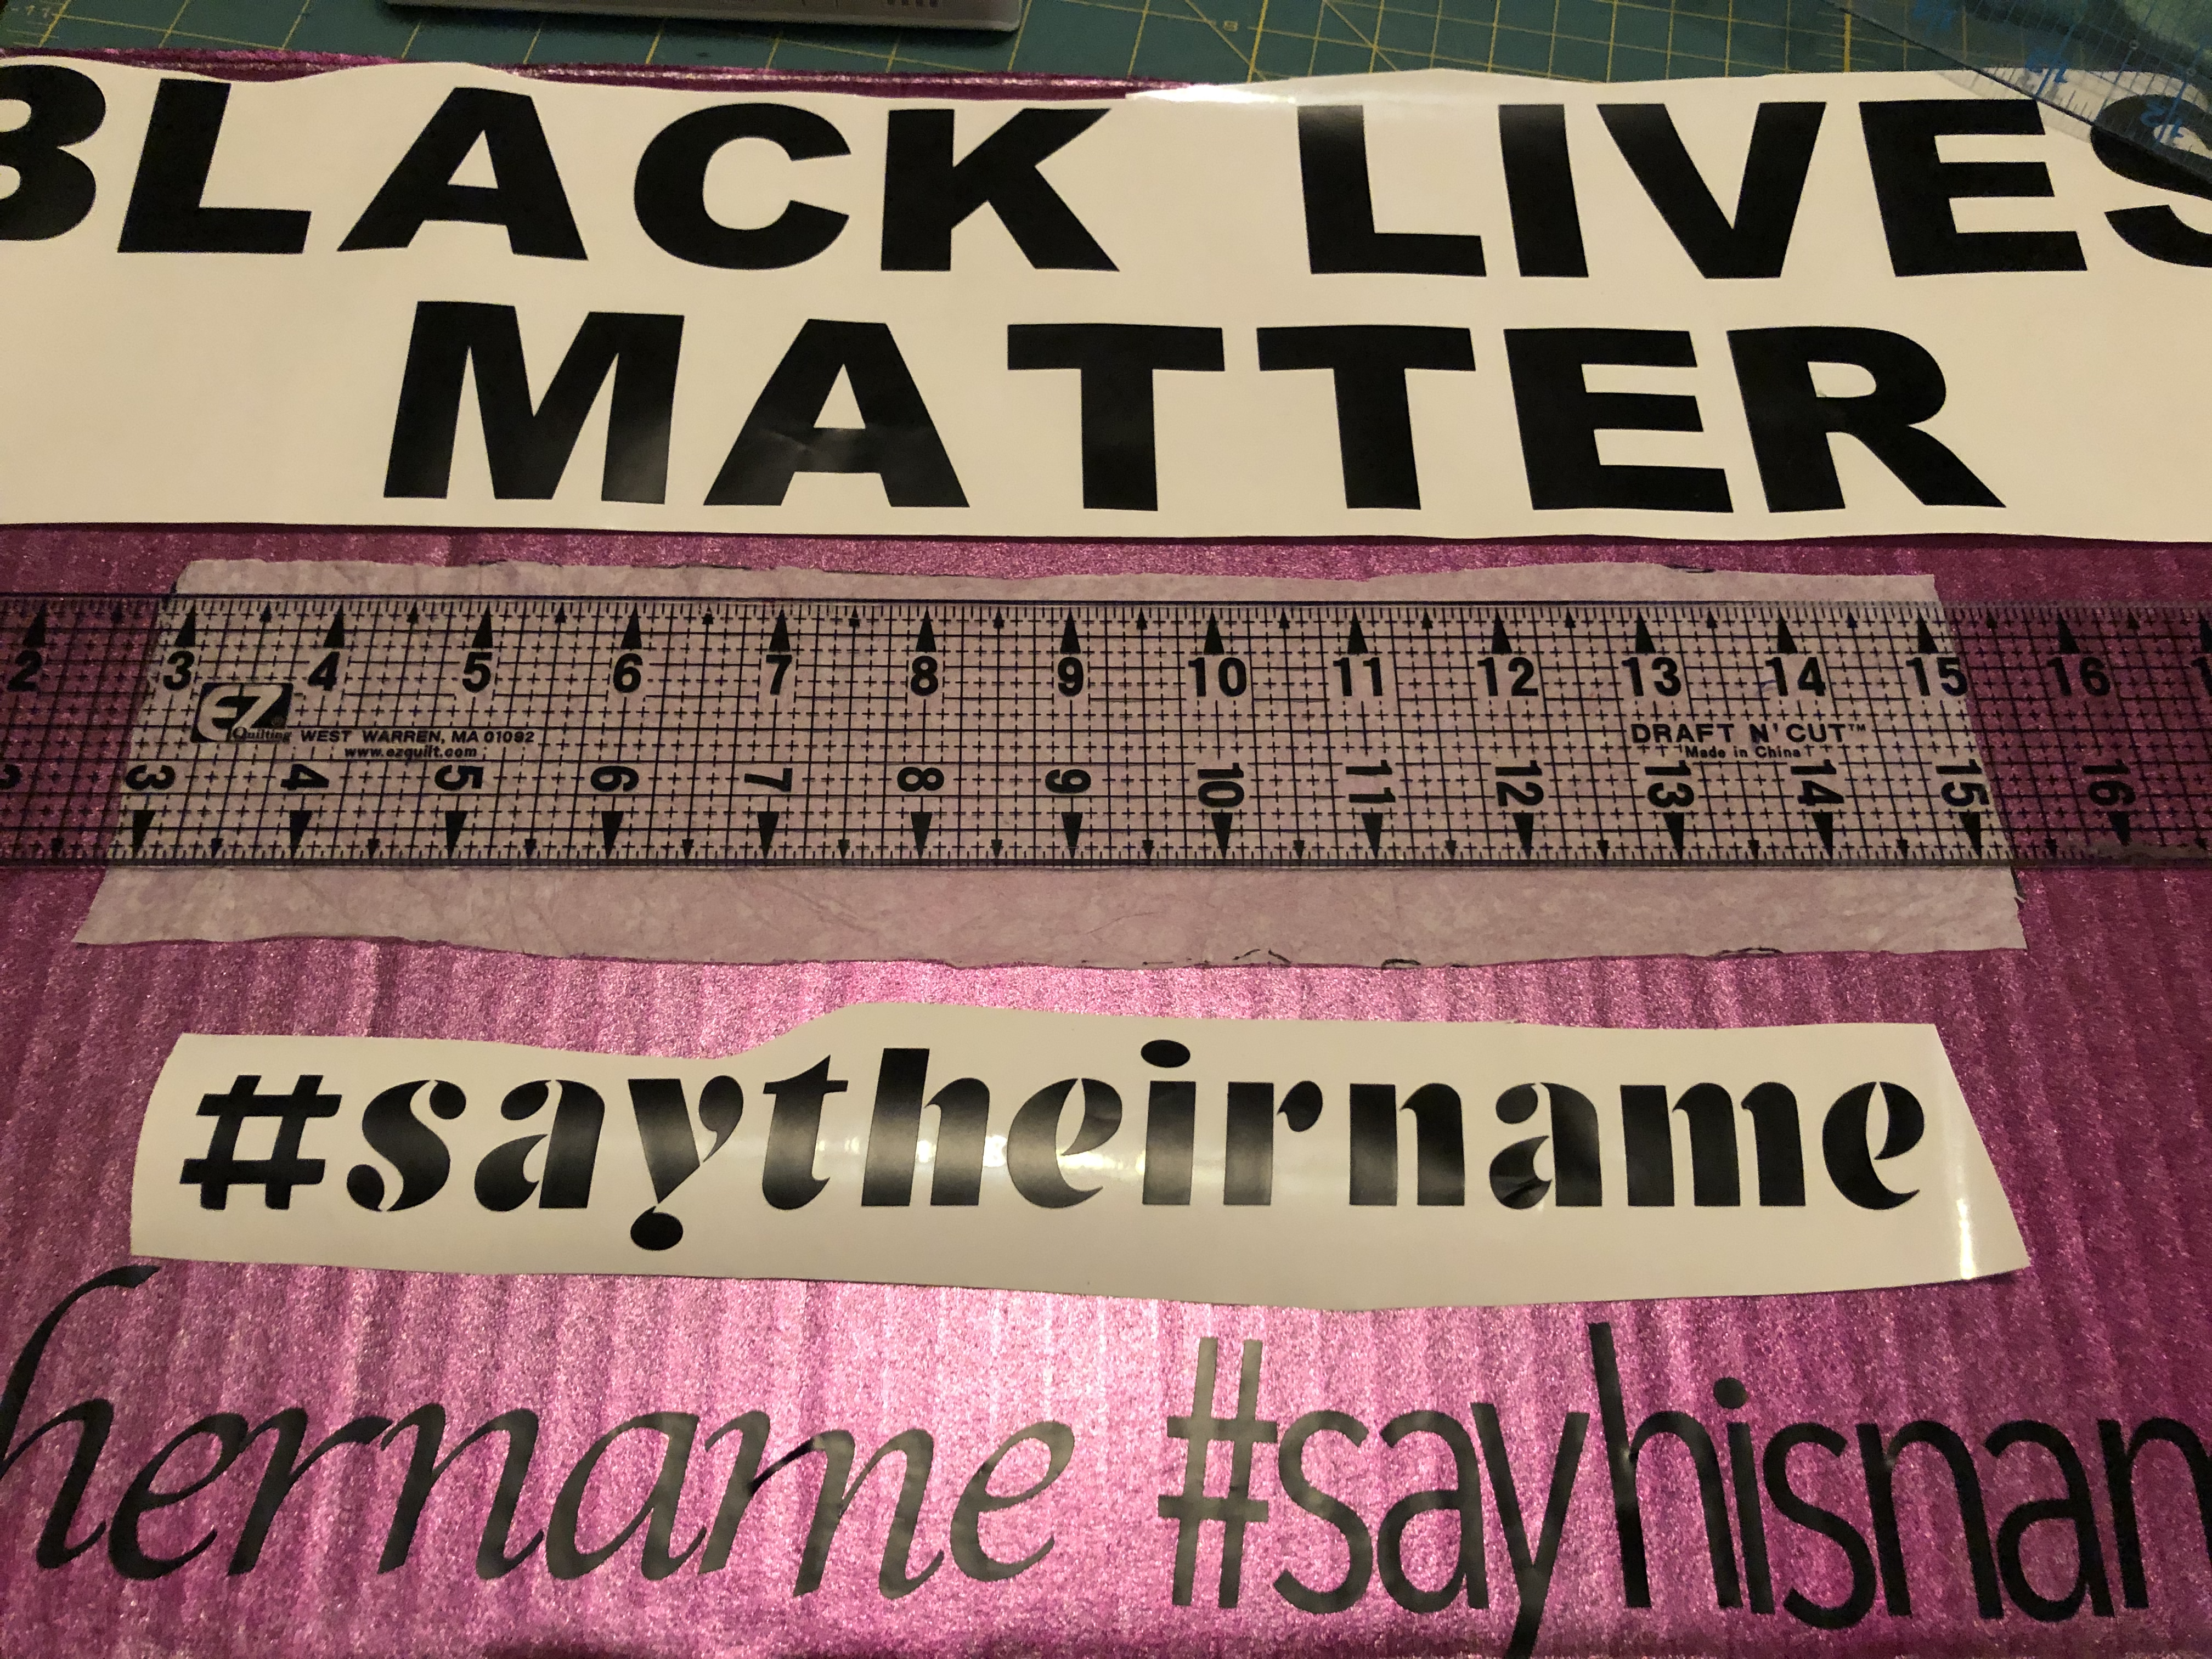
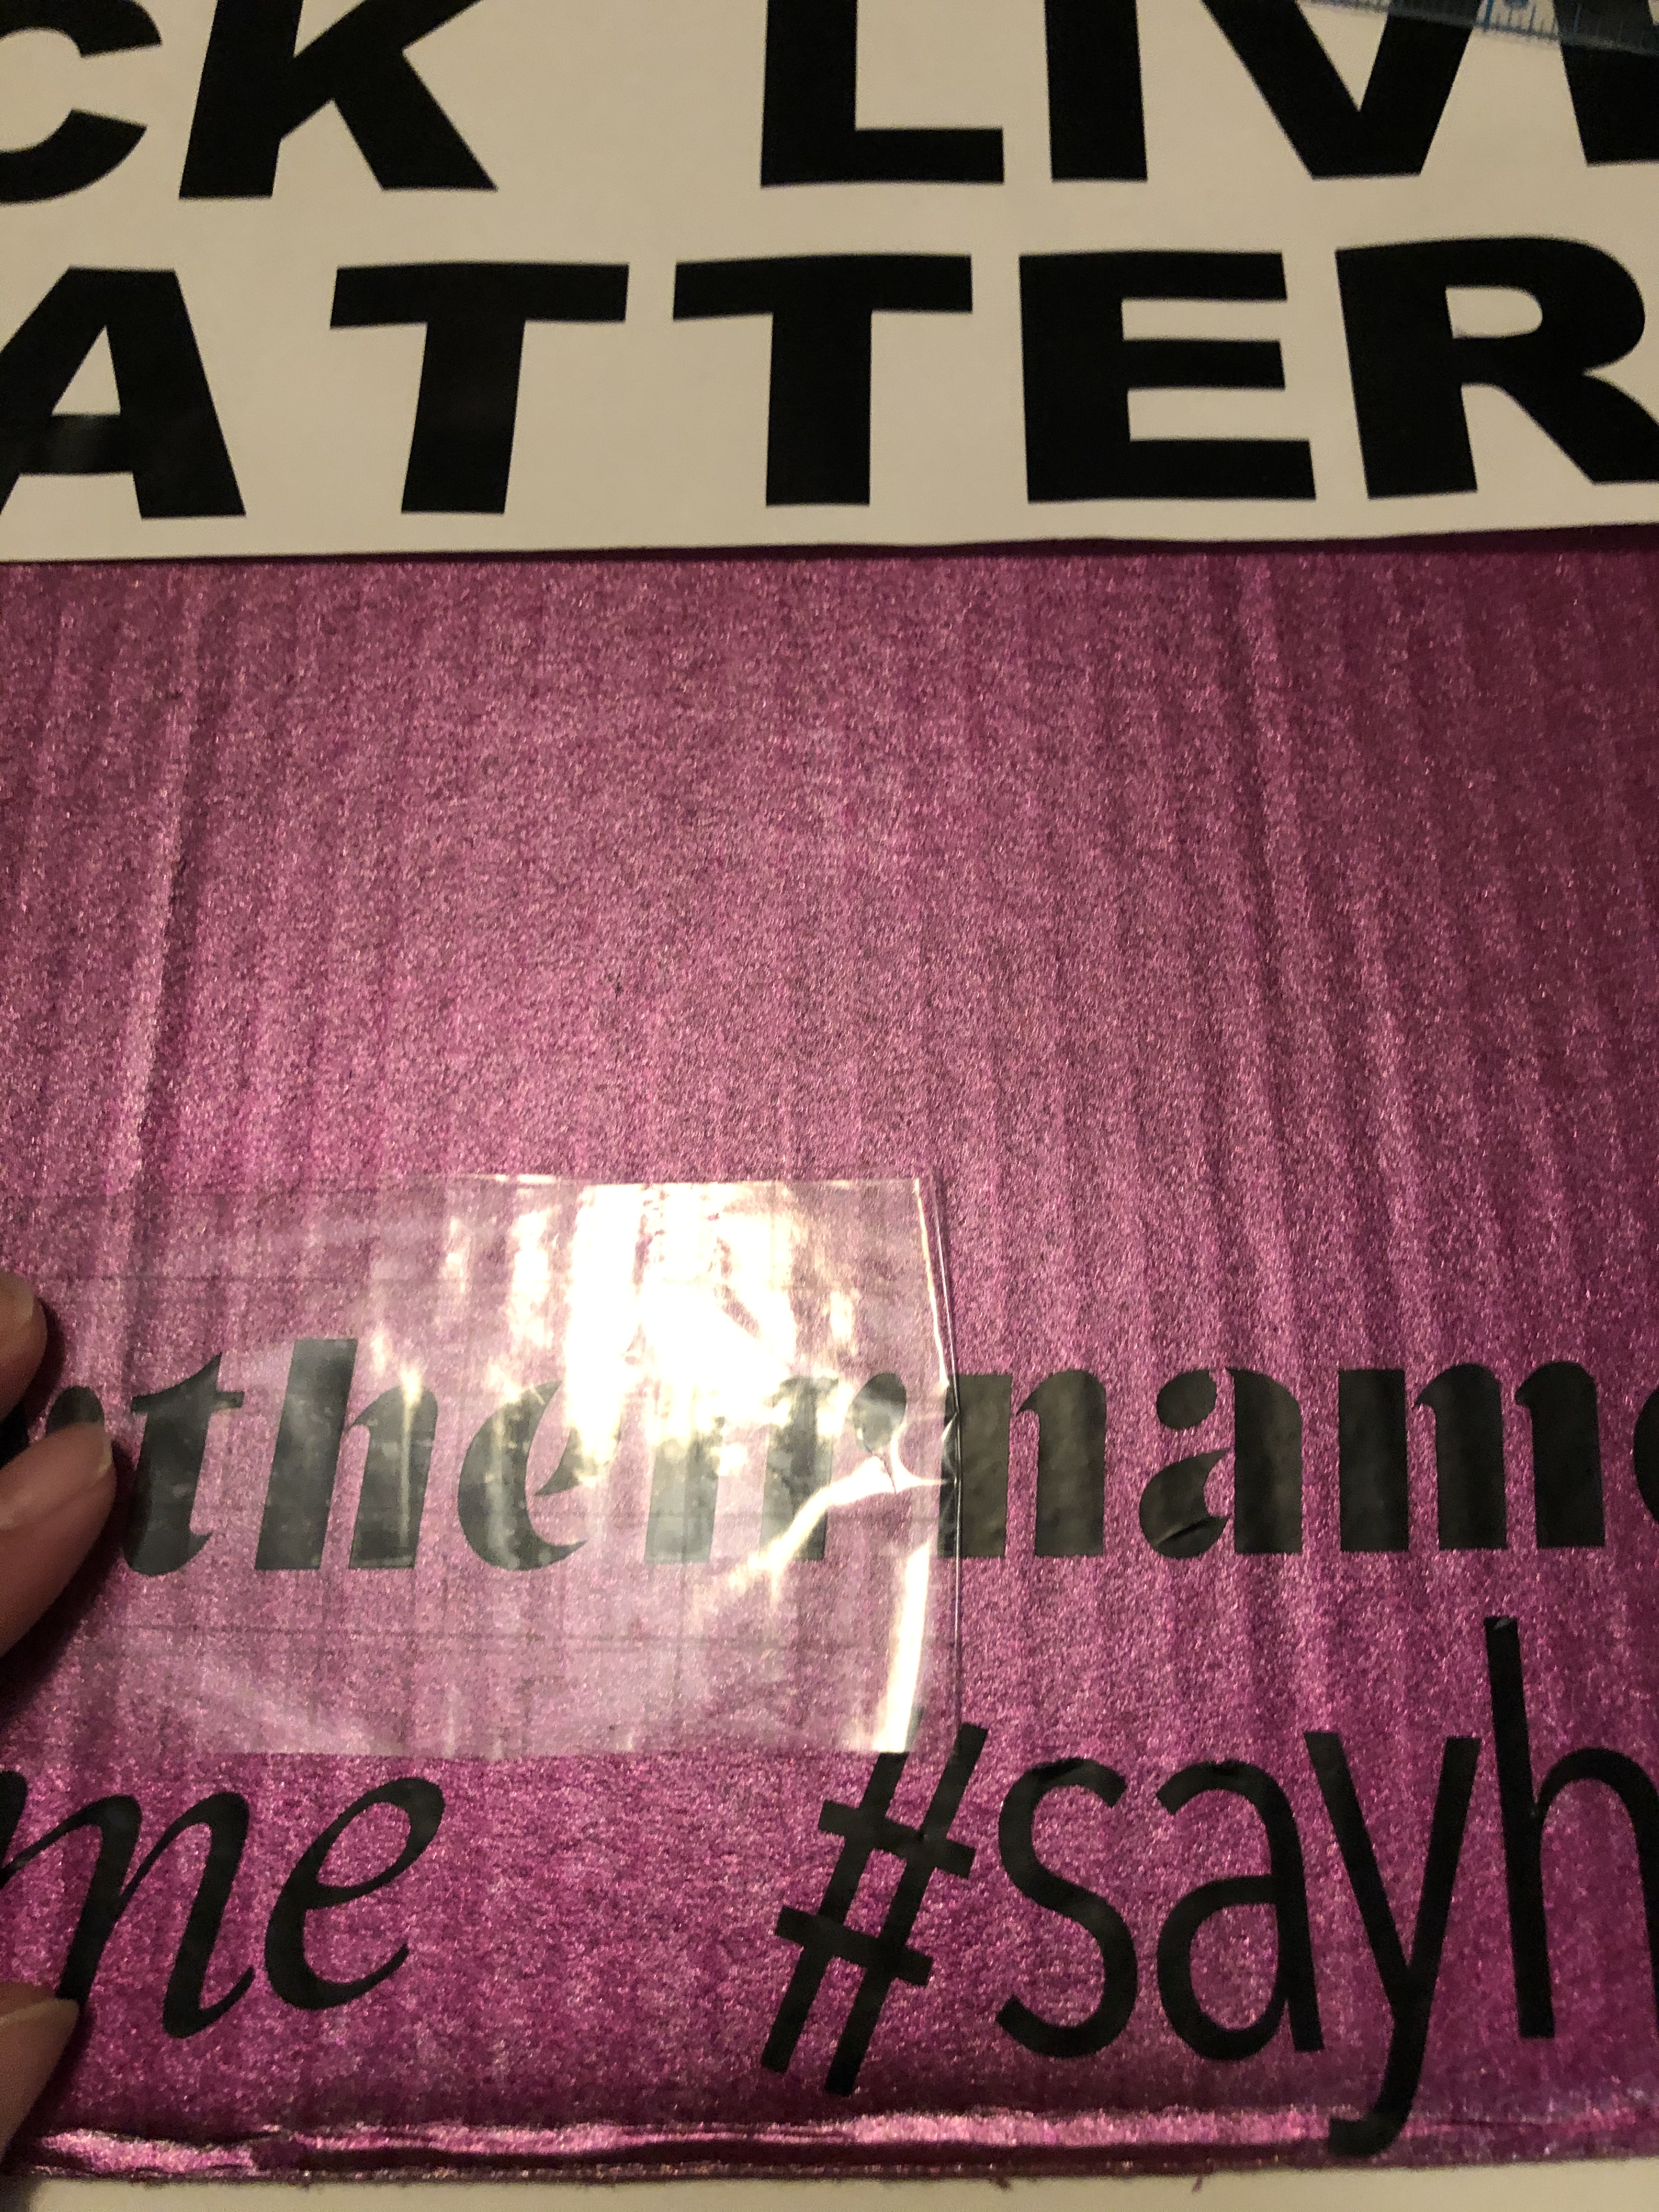
1. Paint your cardboard. We used spray paint but any kind of paint that works on paper will be fine. Allow to dry.
2. Apply your lettering. You can use stencils, store-bought letters, or paint and draw your own. We used vinyl letters that were cut out on our Cricut cutter.
3. The LED matrix is 31.5 cm X 8 cm (approximately 12.5 X 3.25 inches) be sure to leave enough space on your cardboard for the matrix to fit.
Solder Your Microcontroller and LED Matrix Cables.
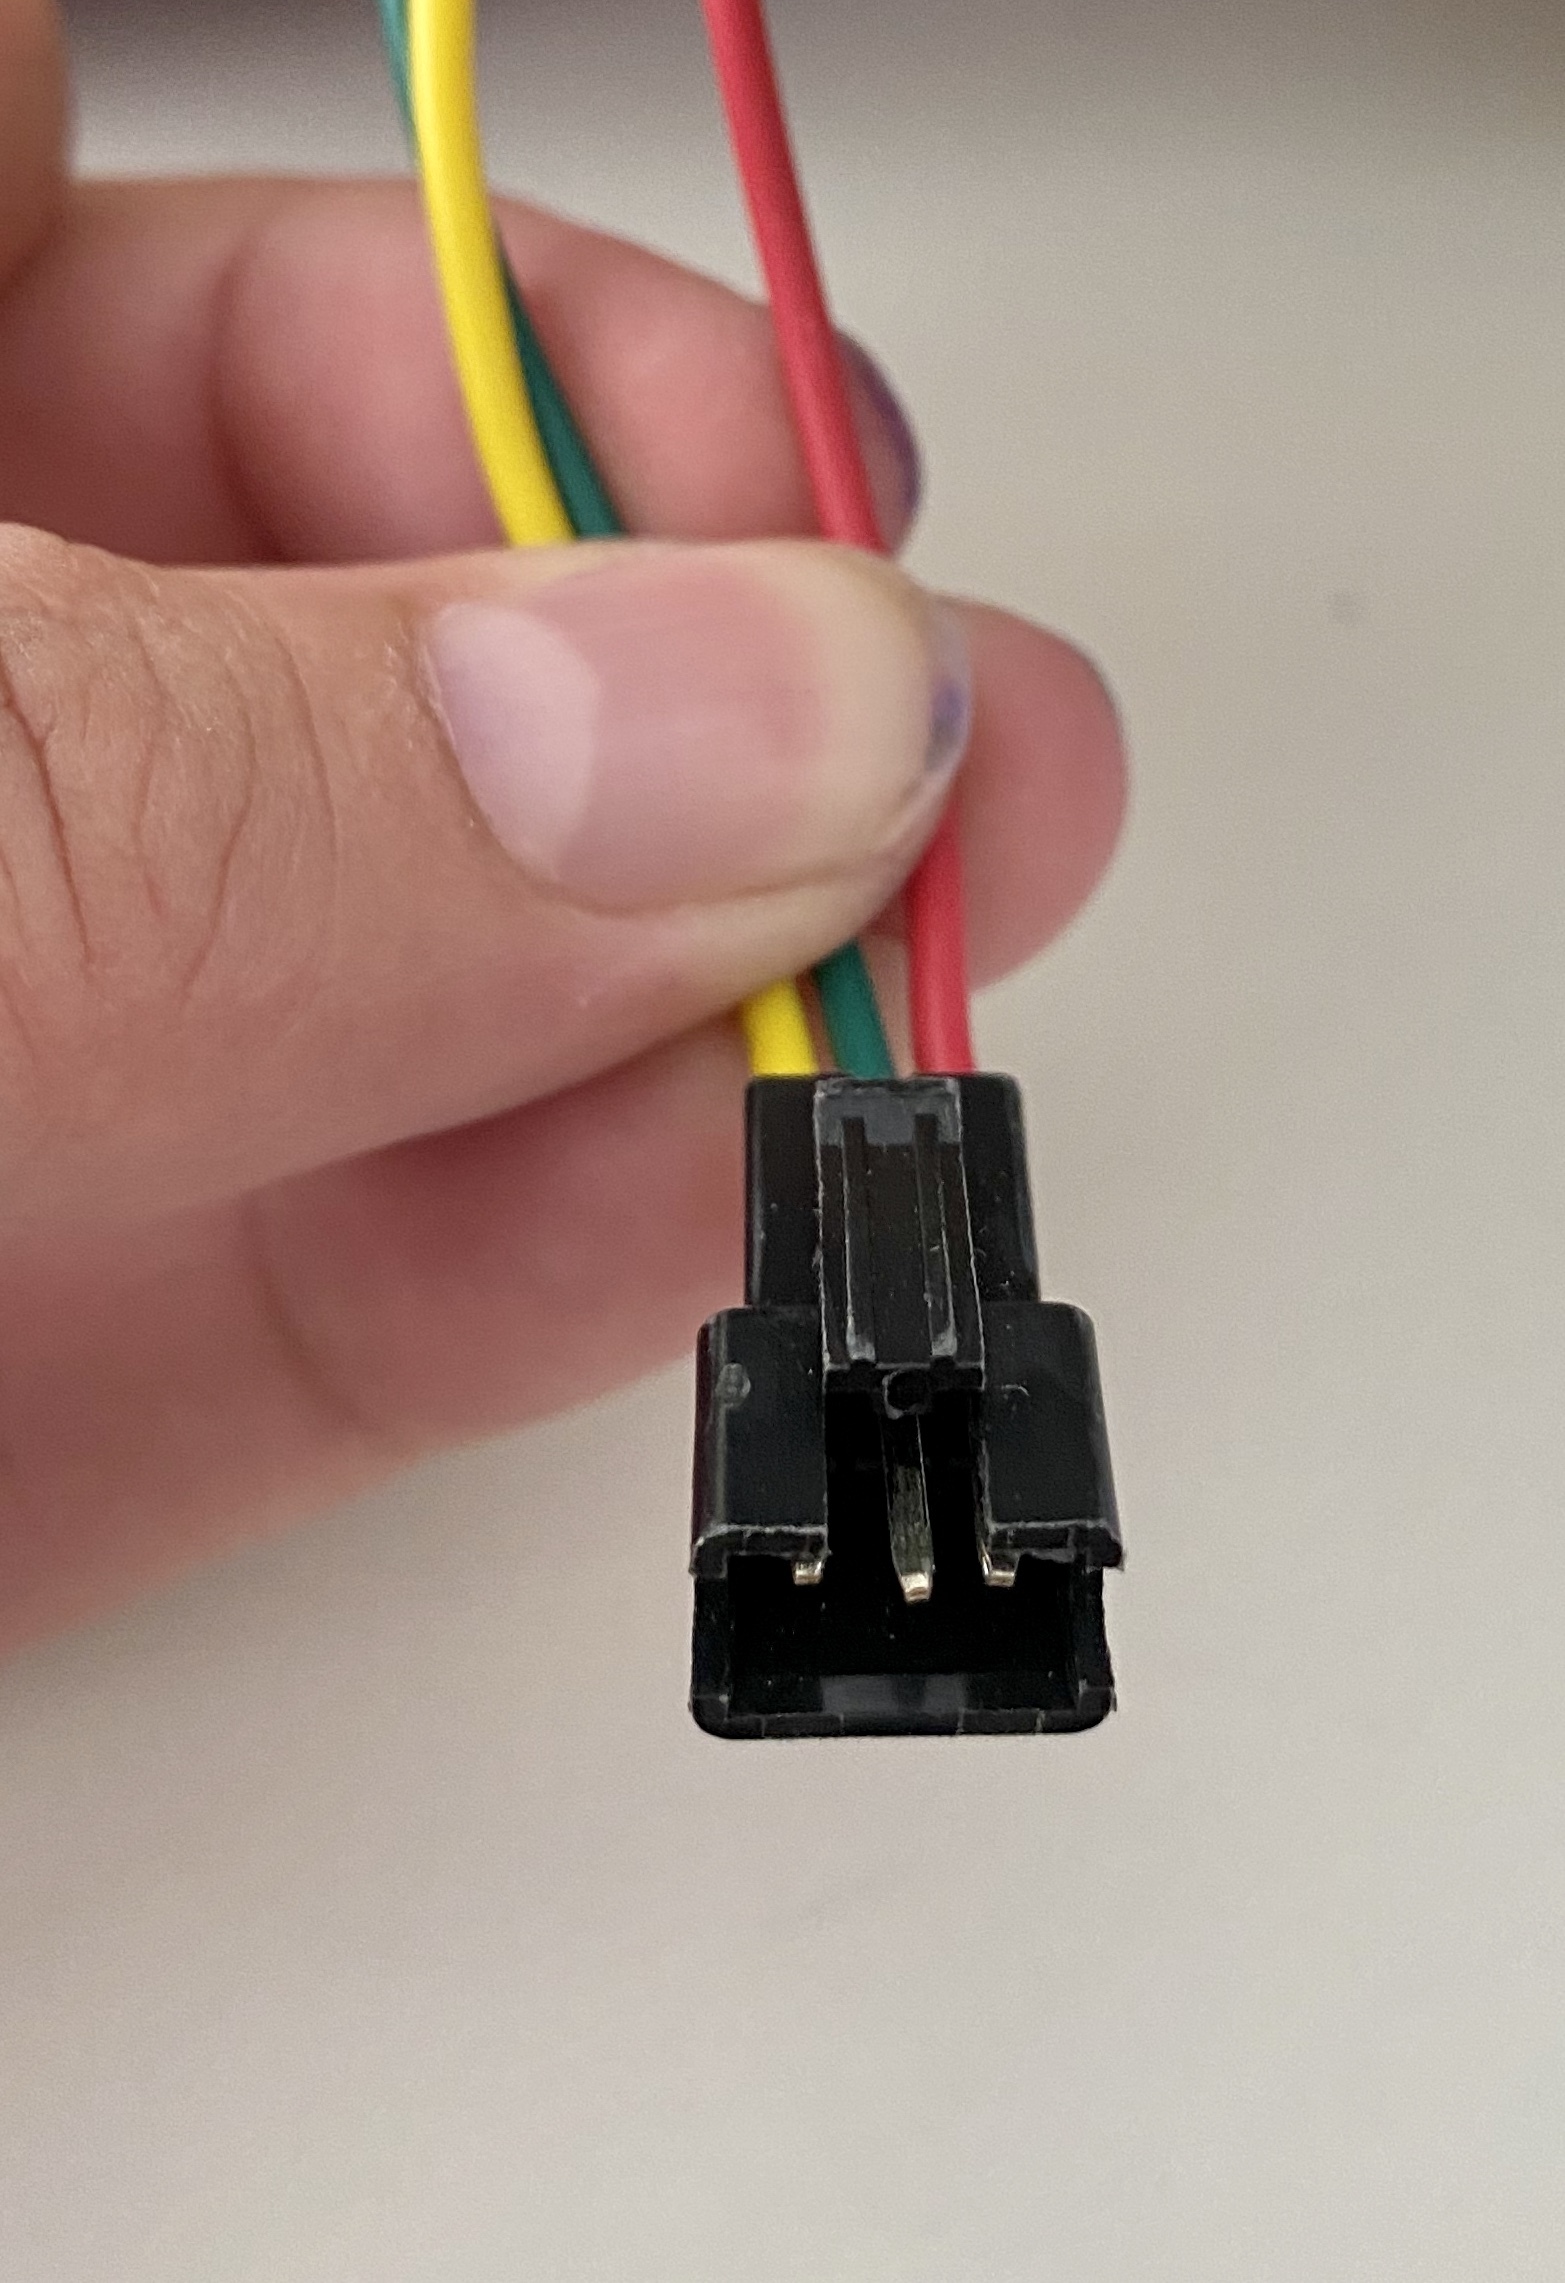
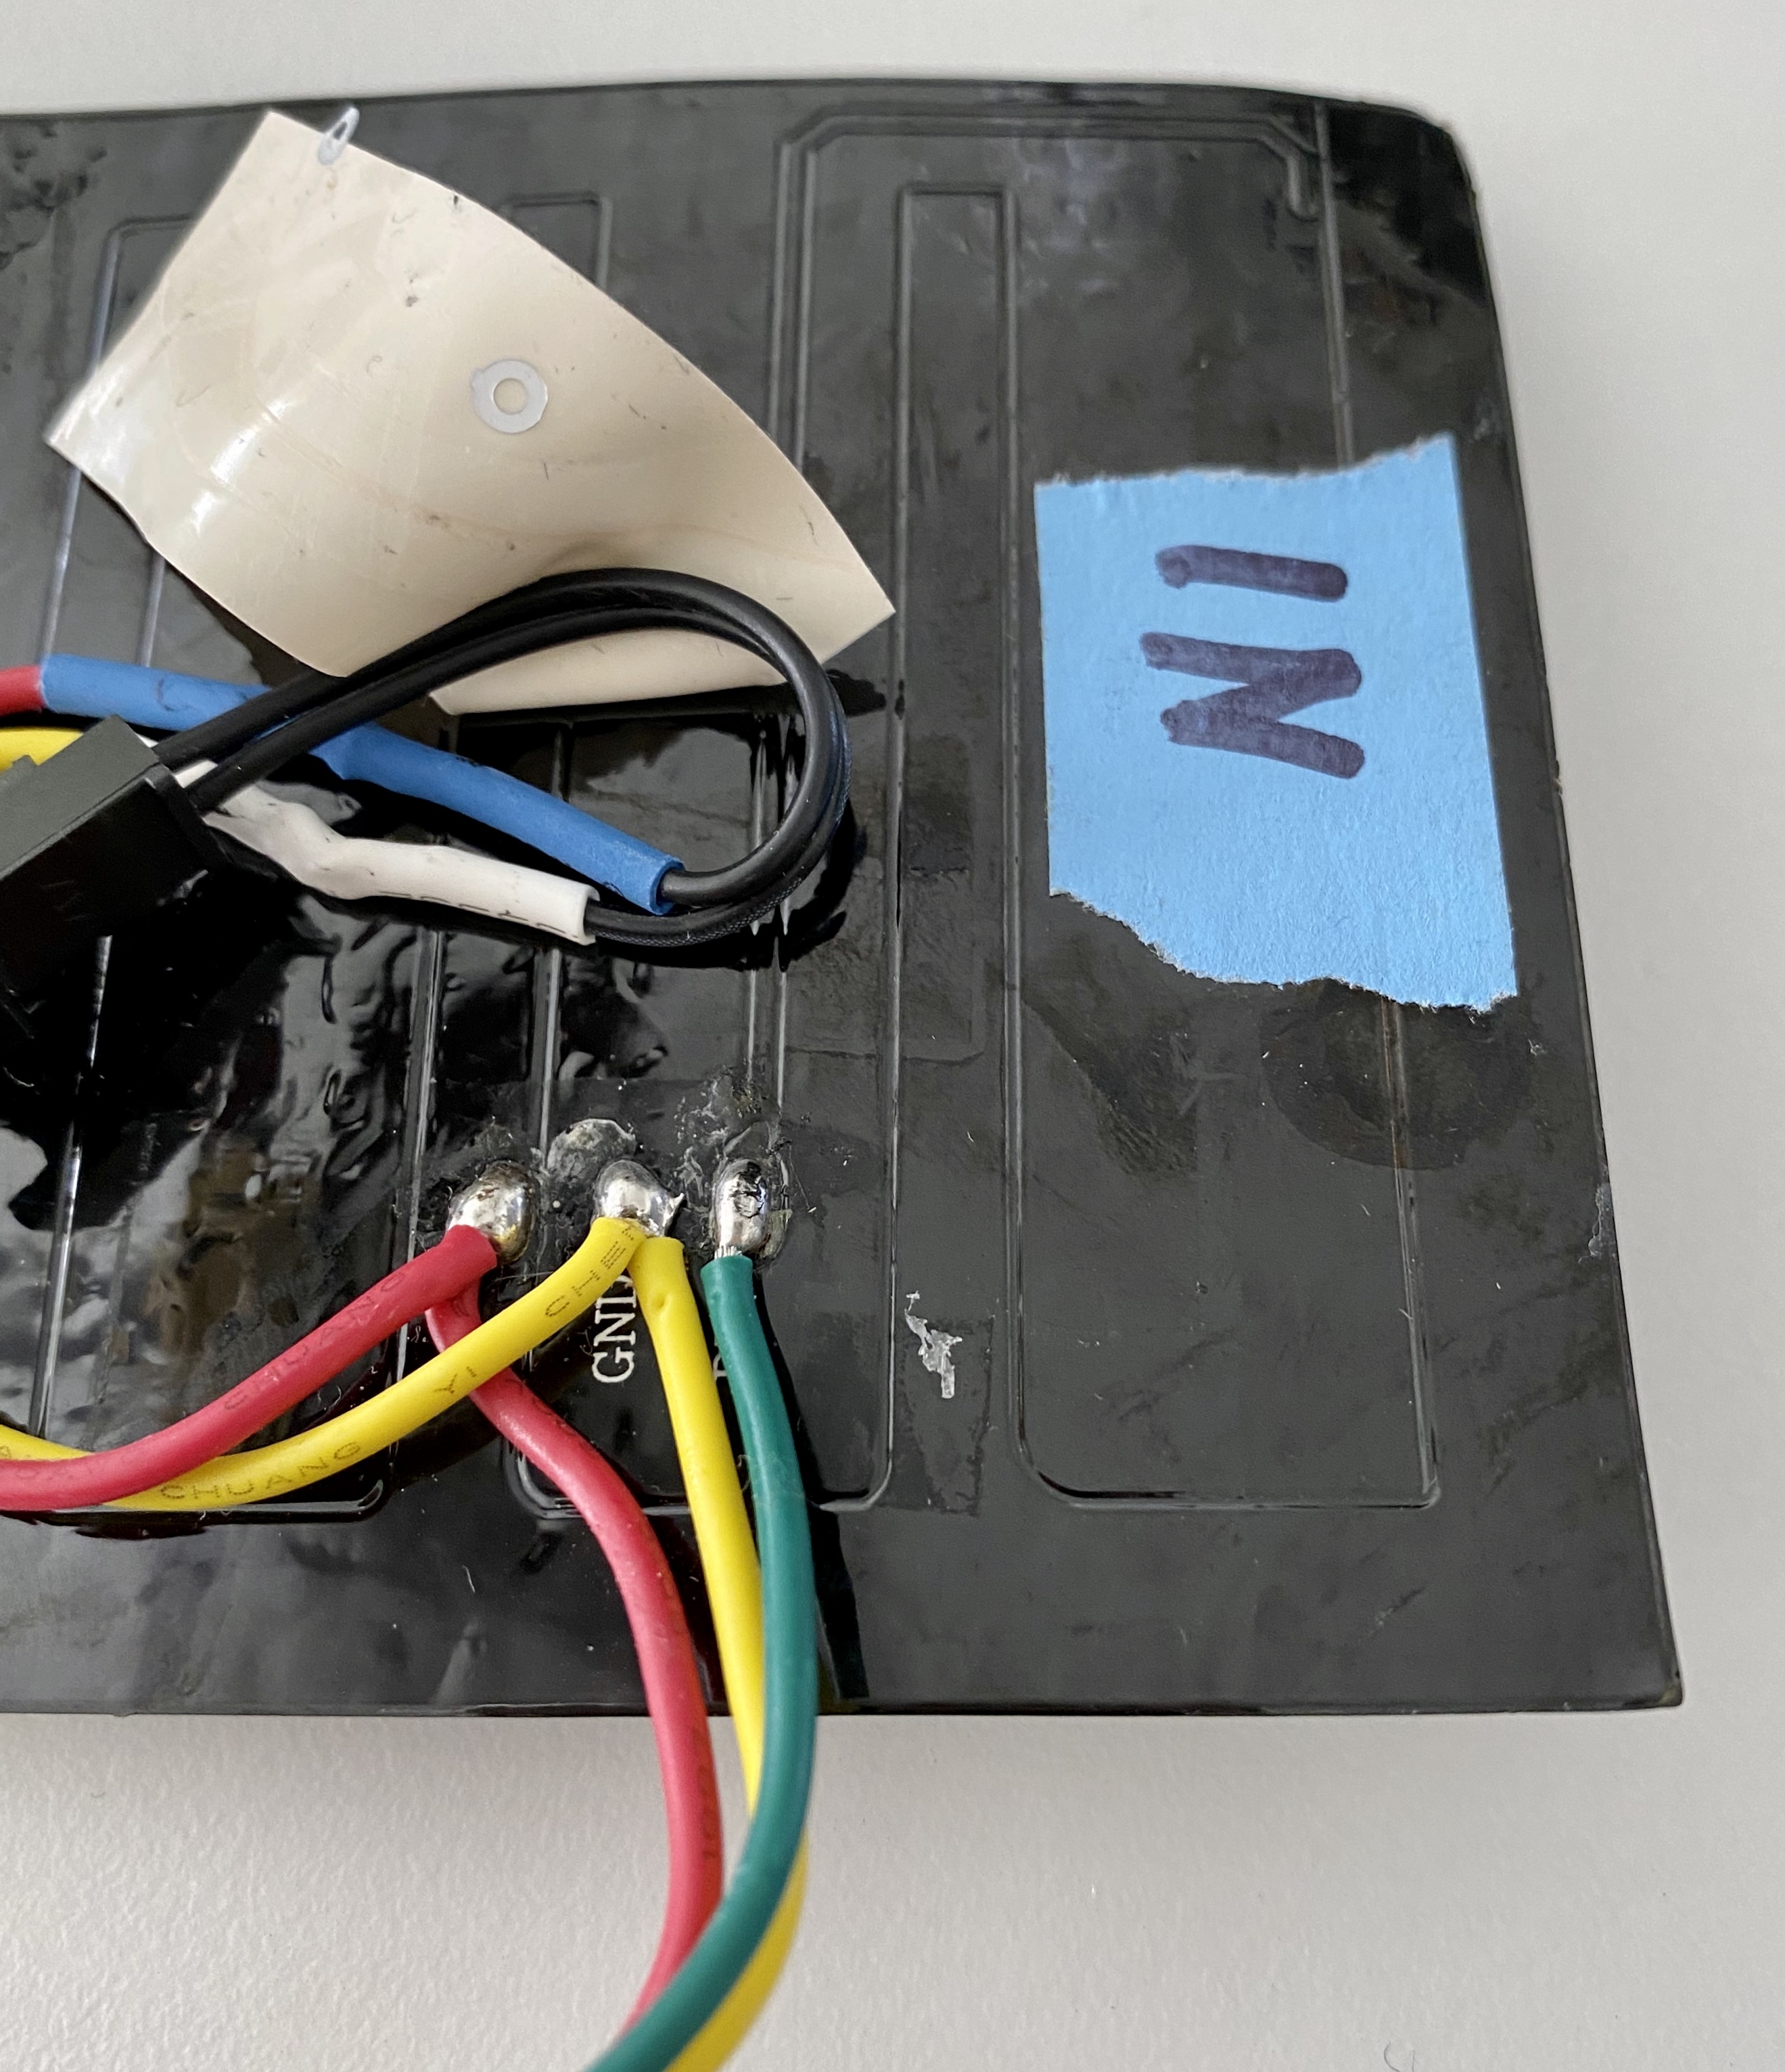
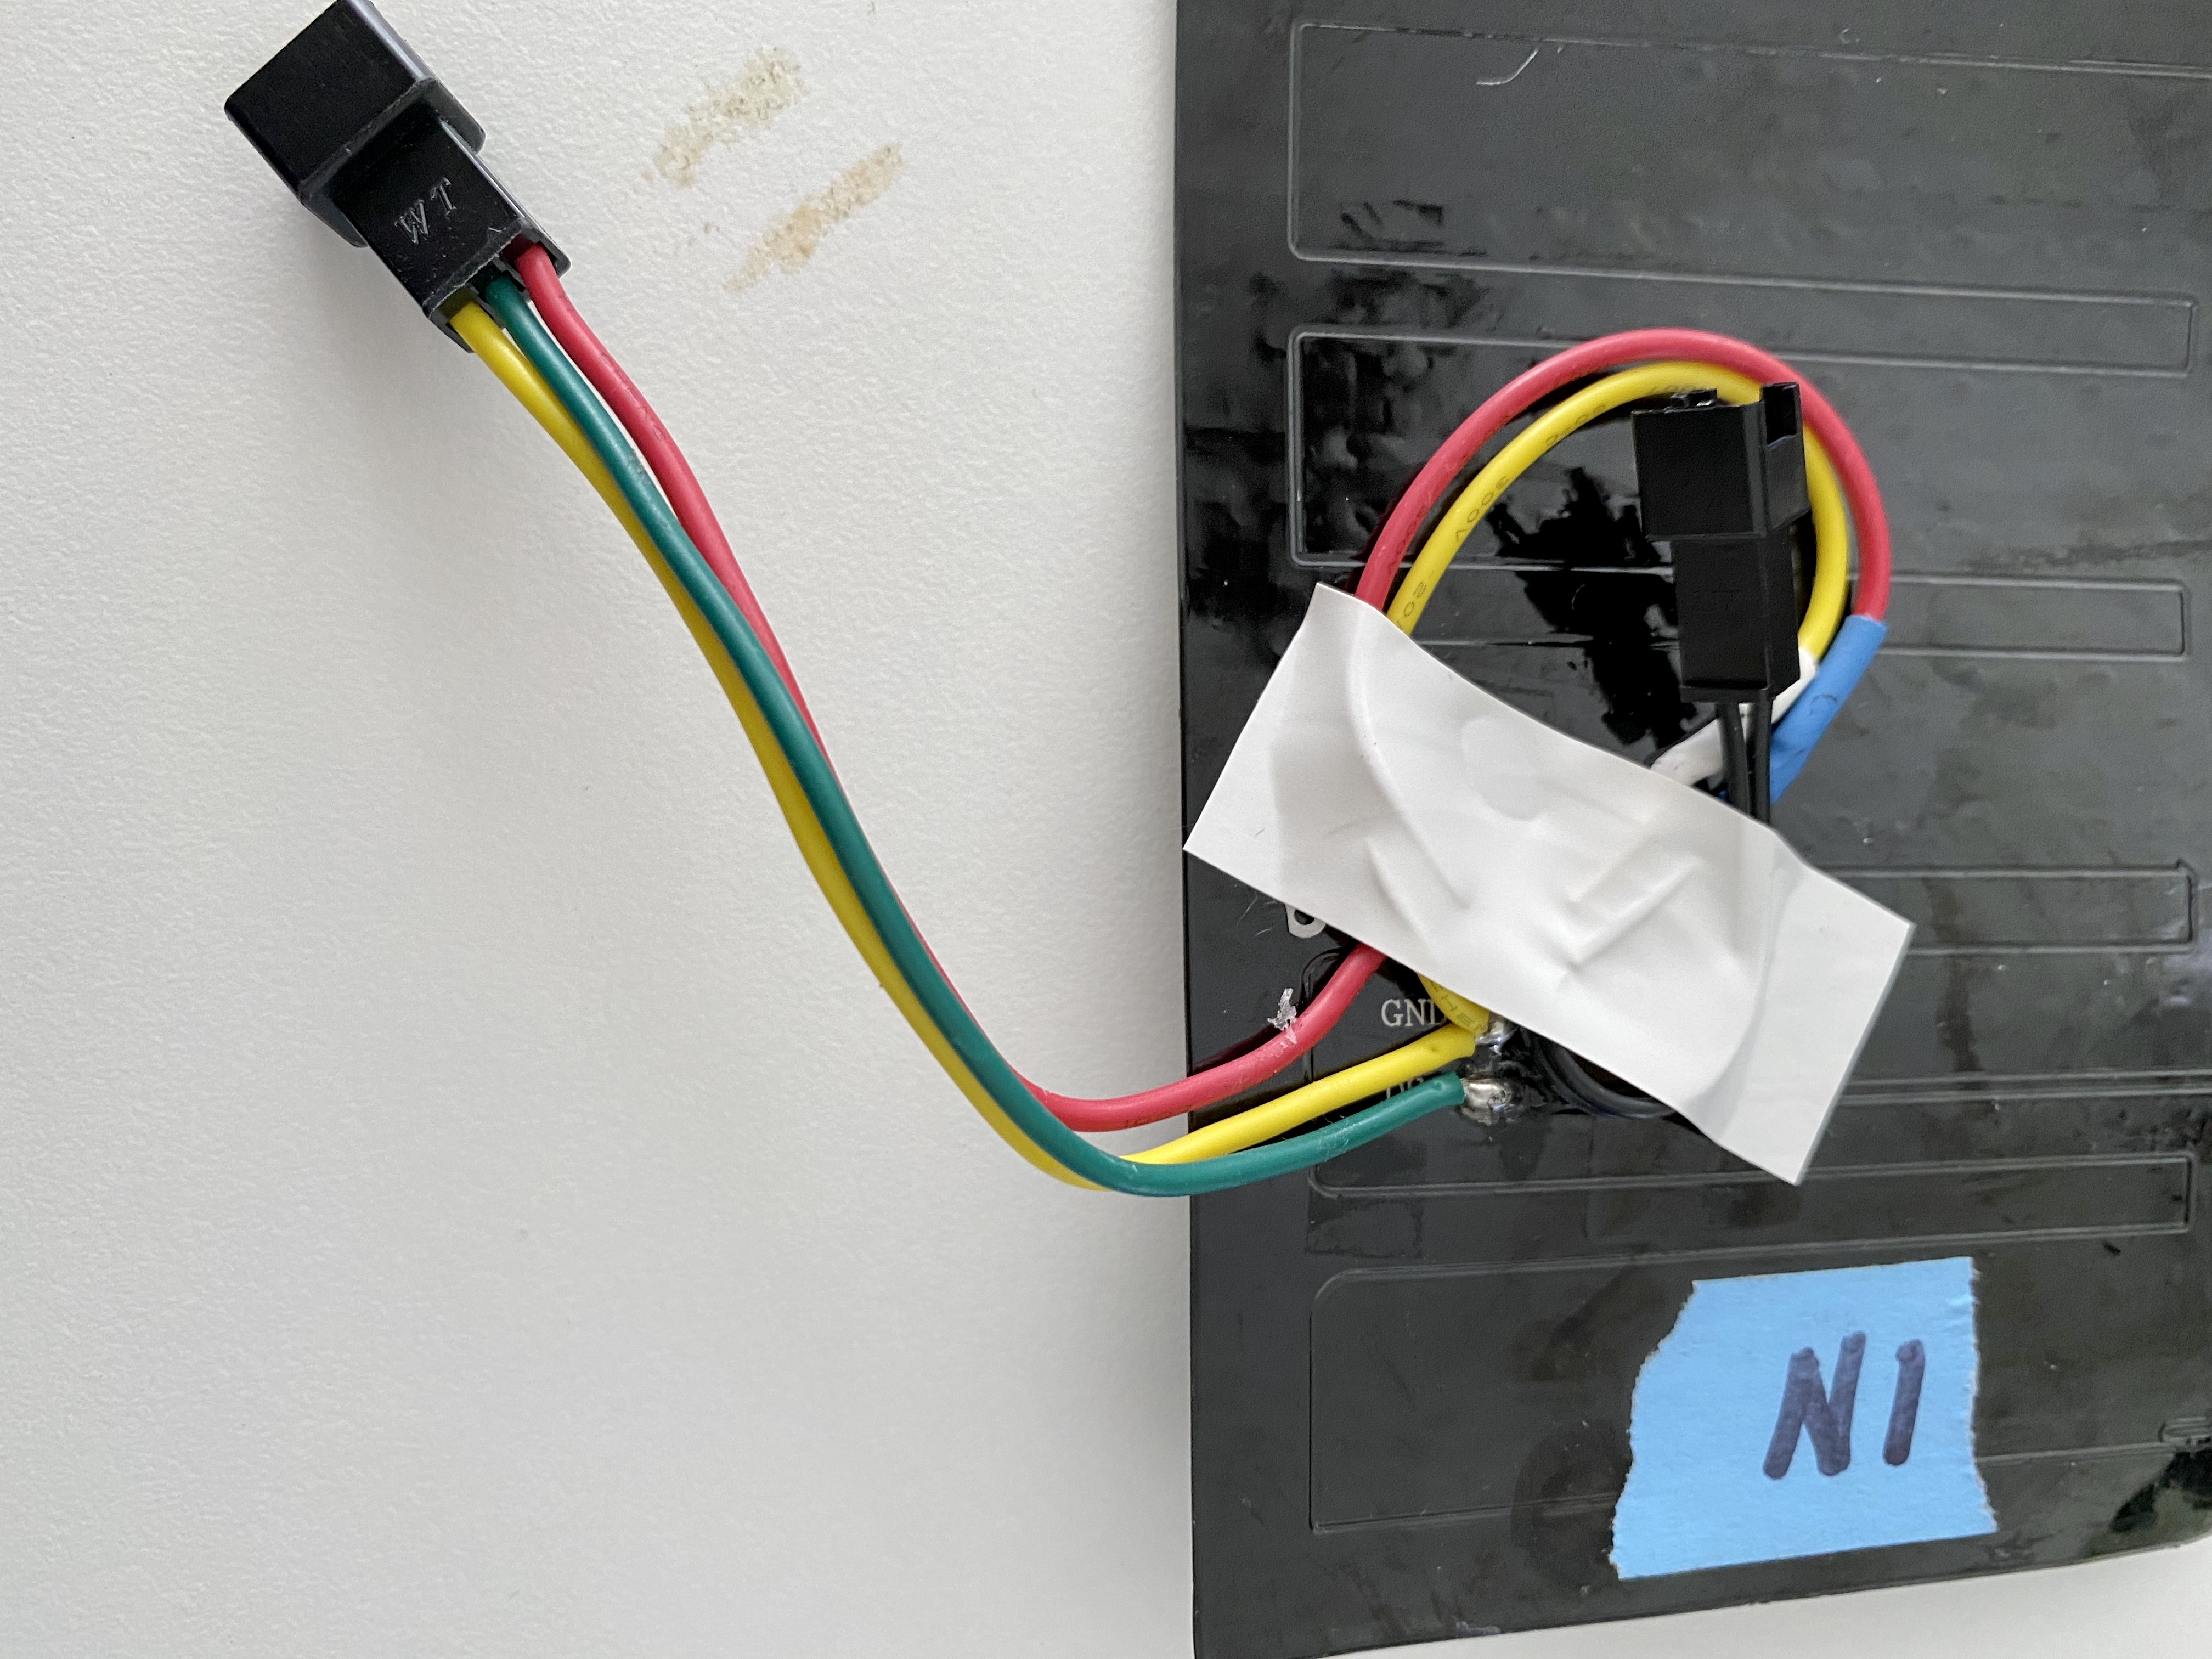
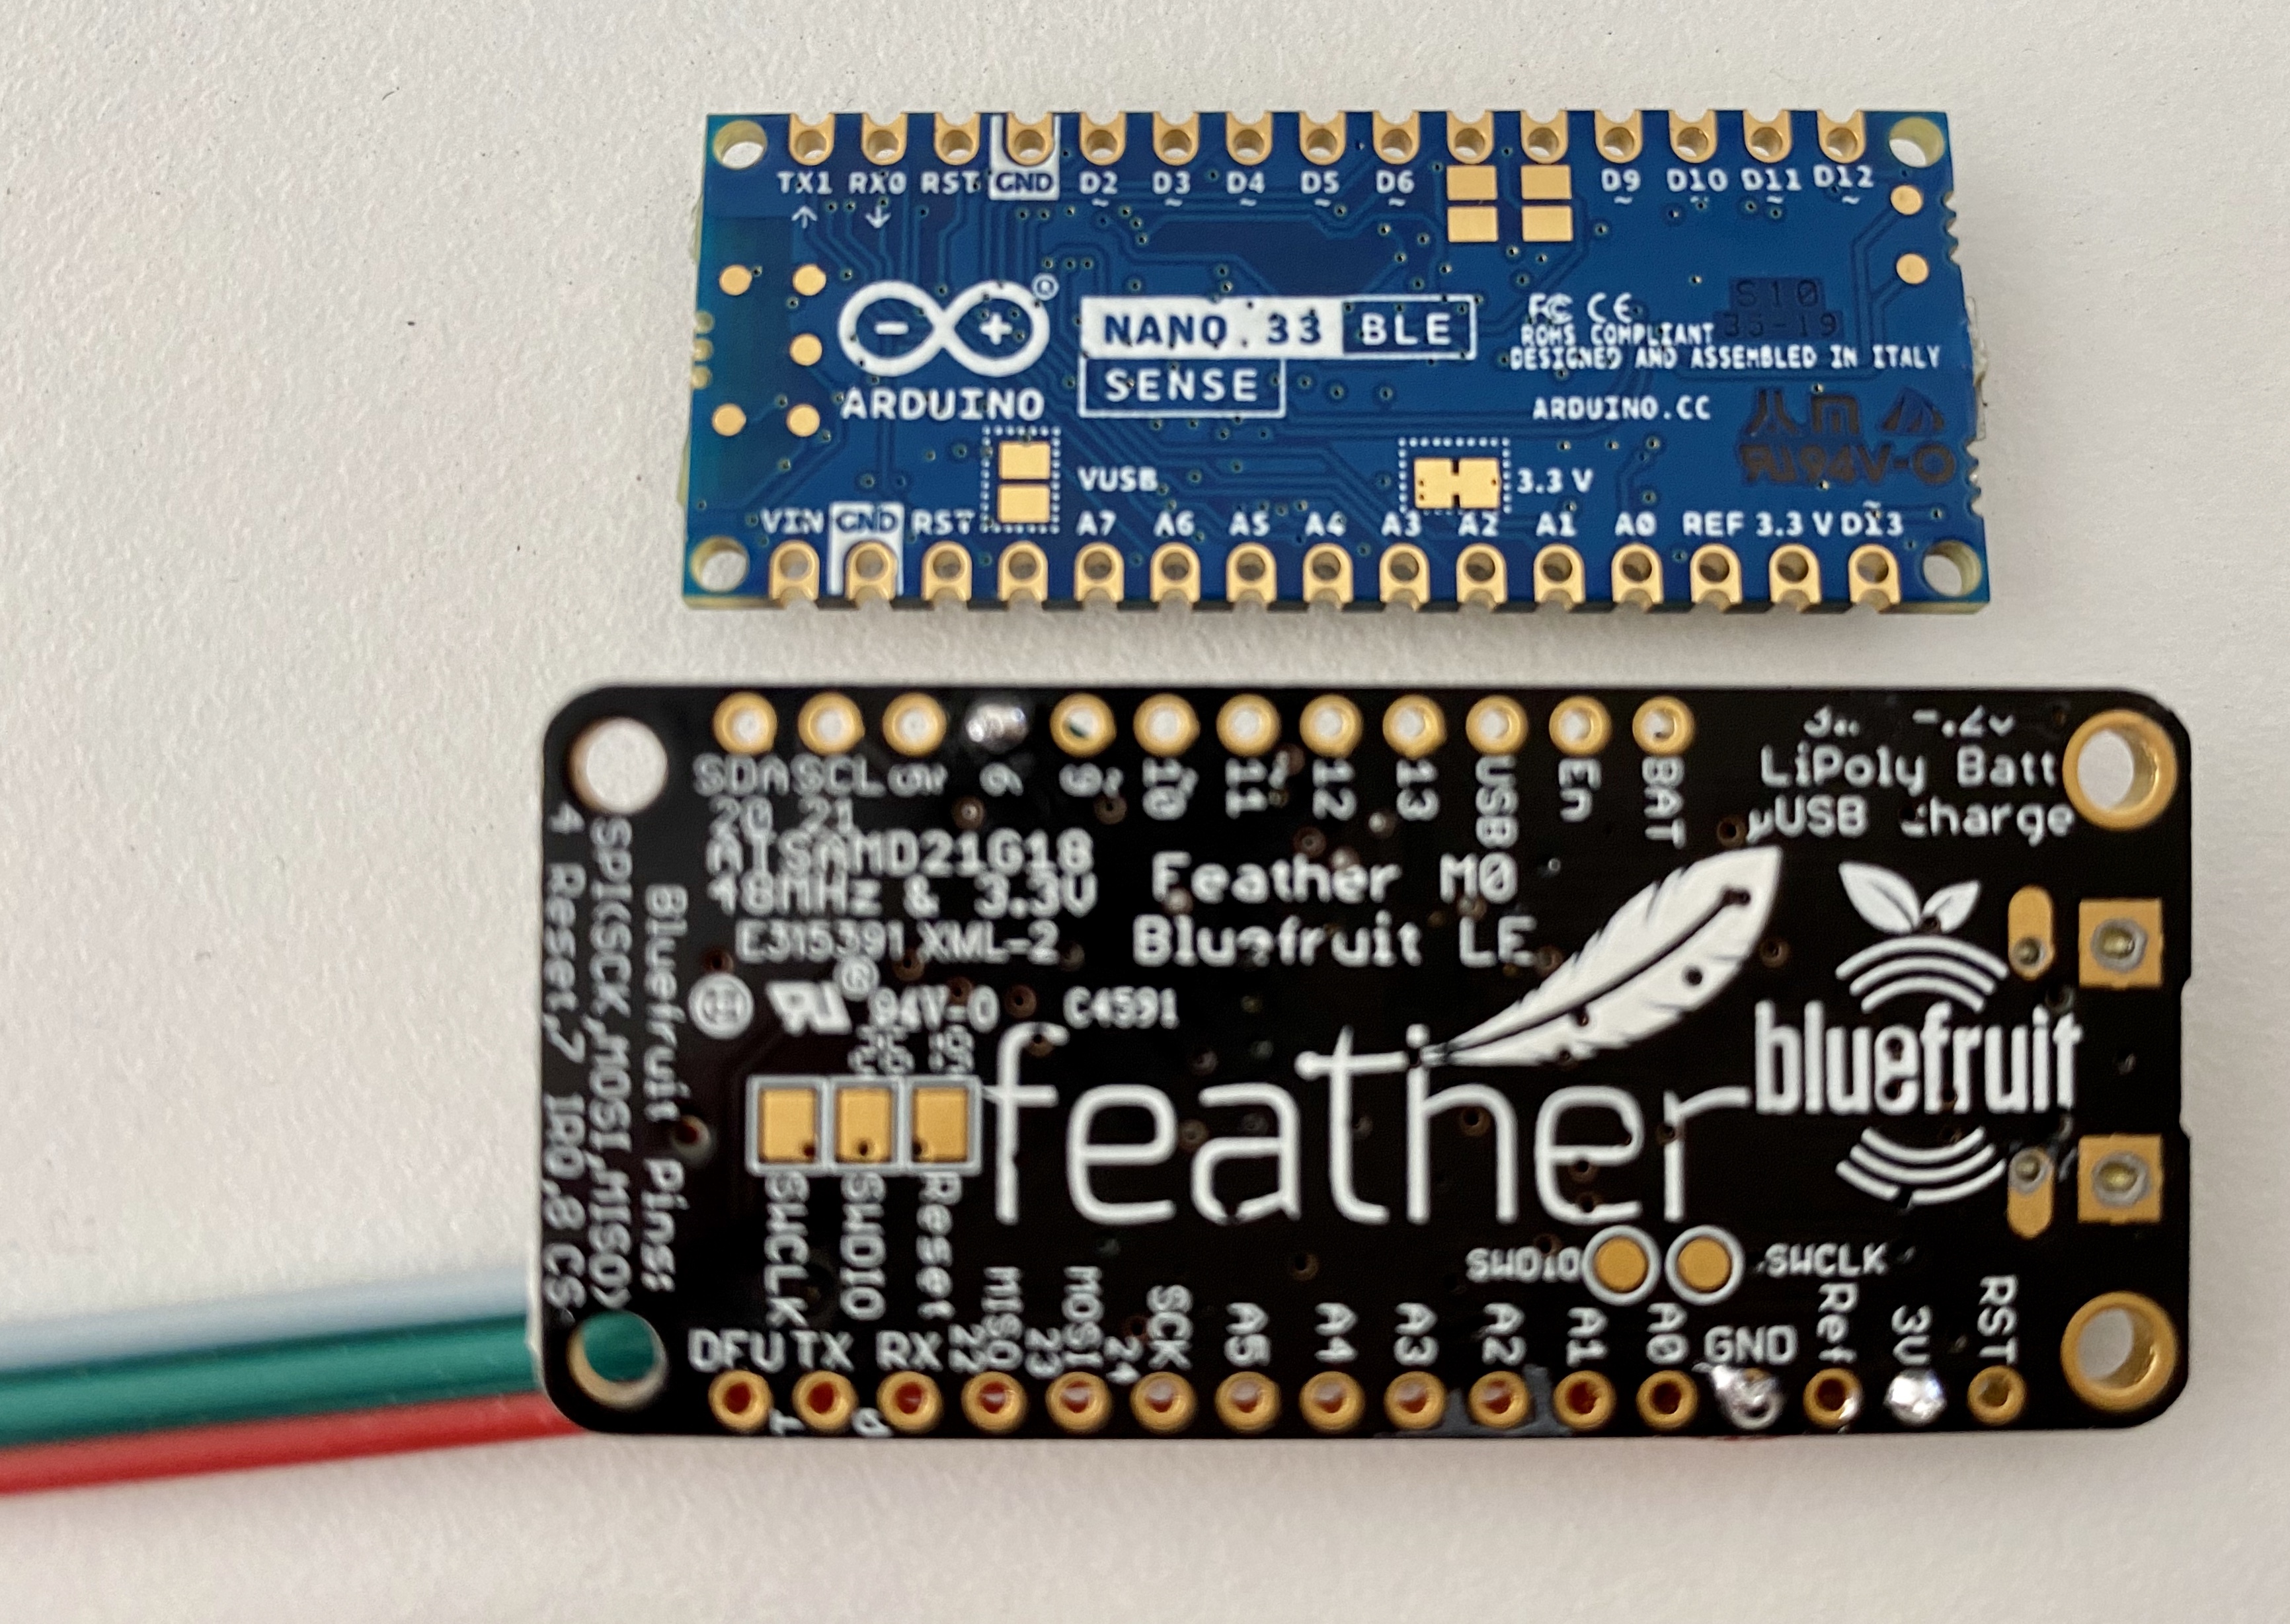
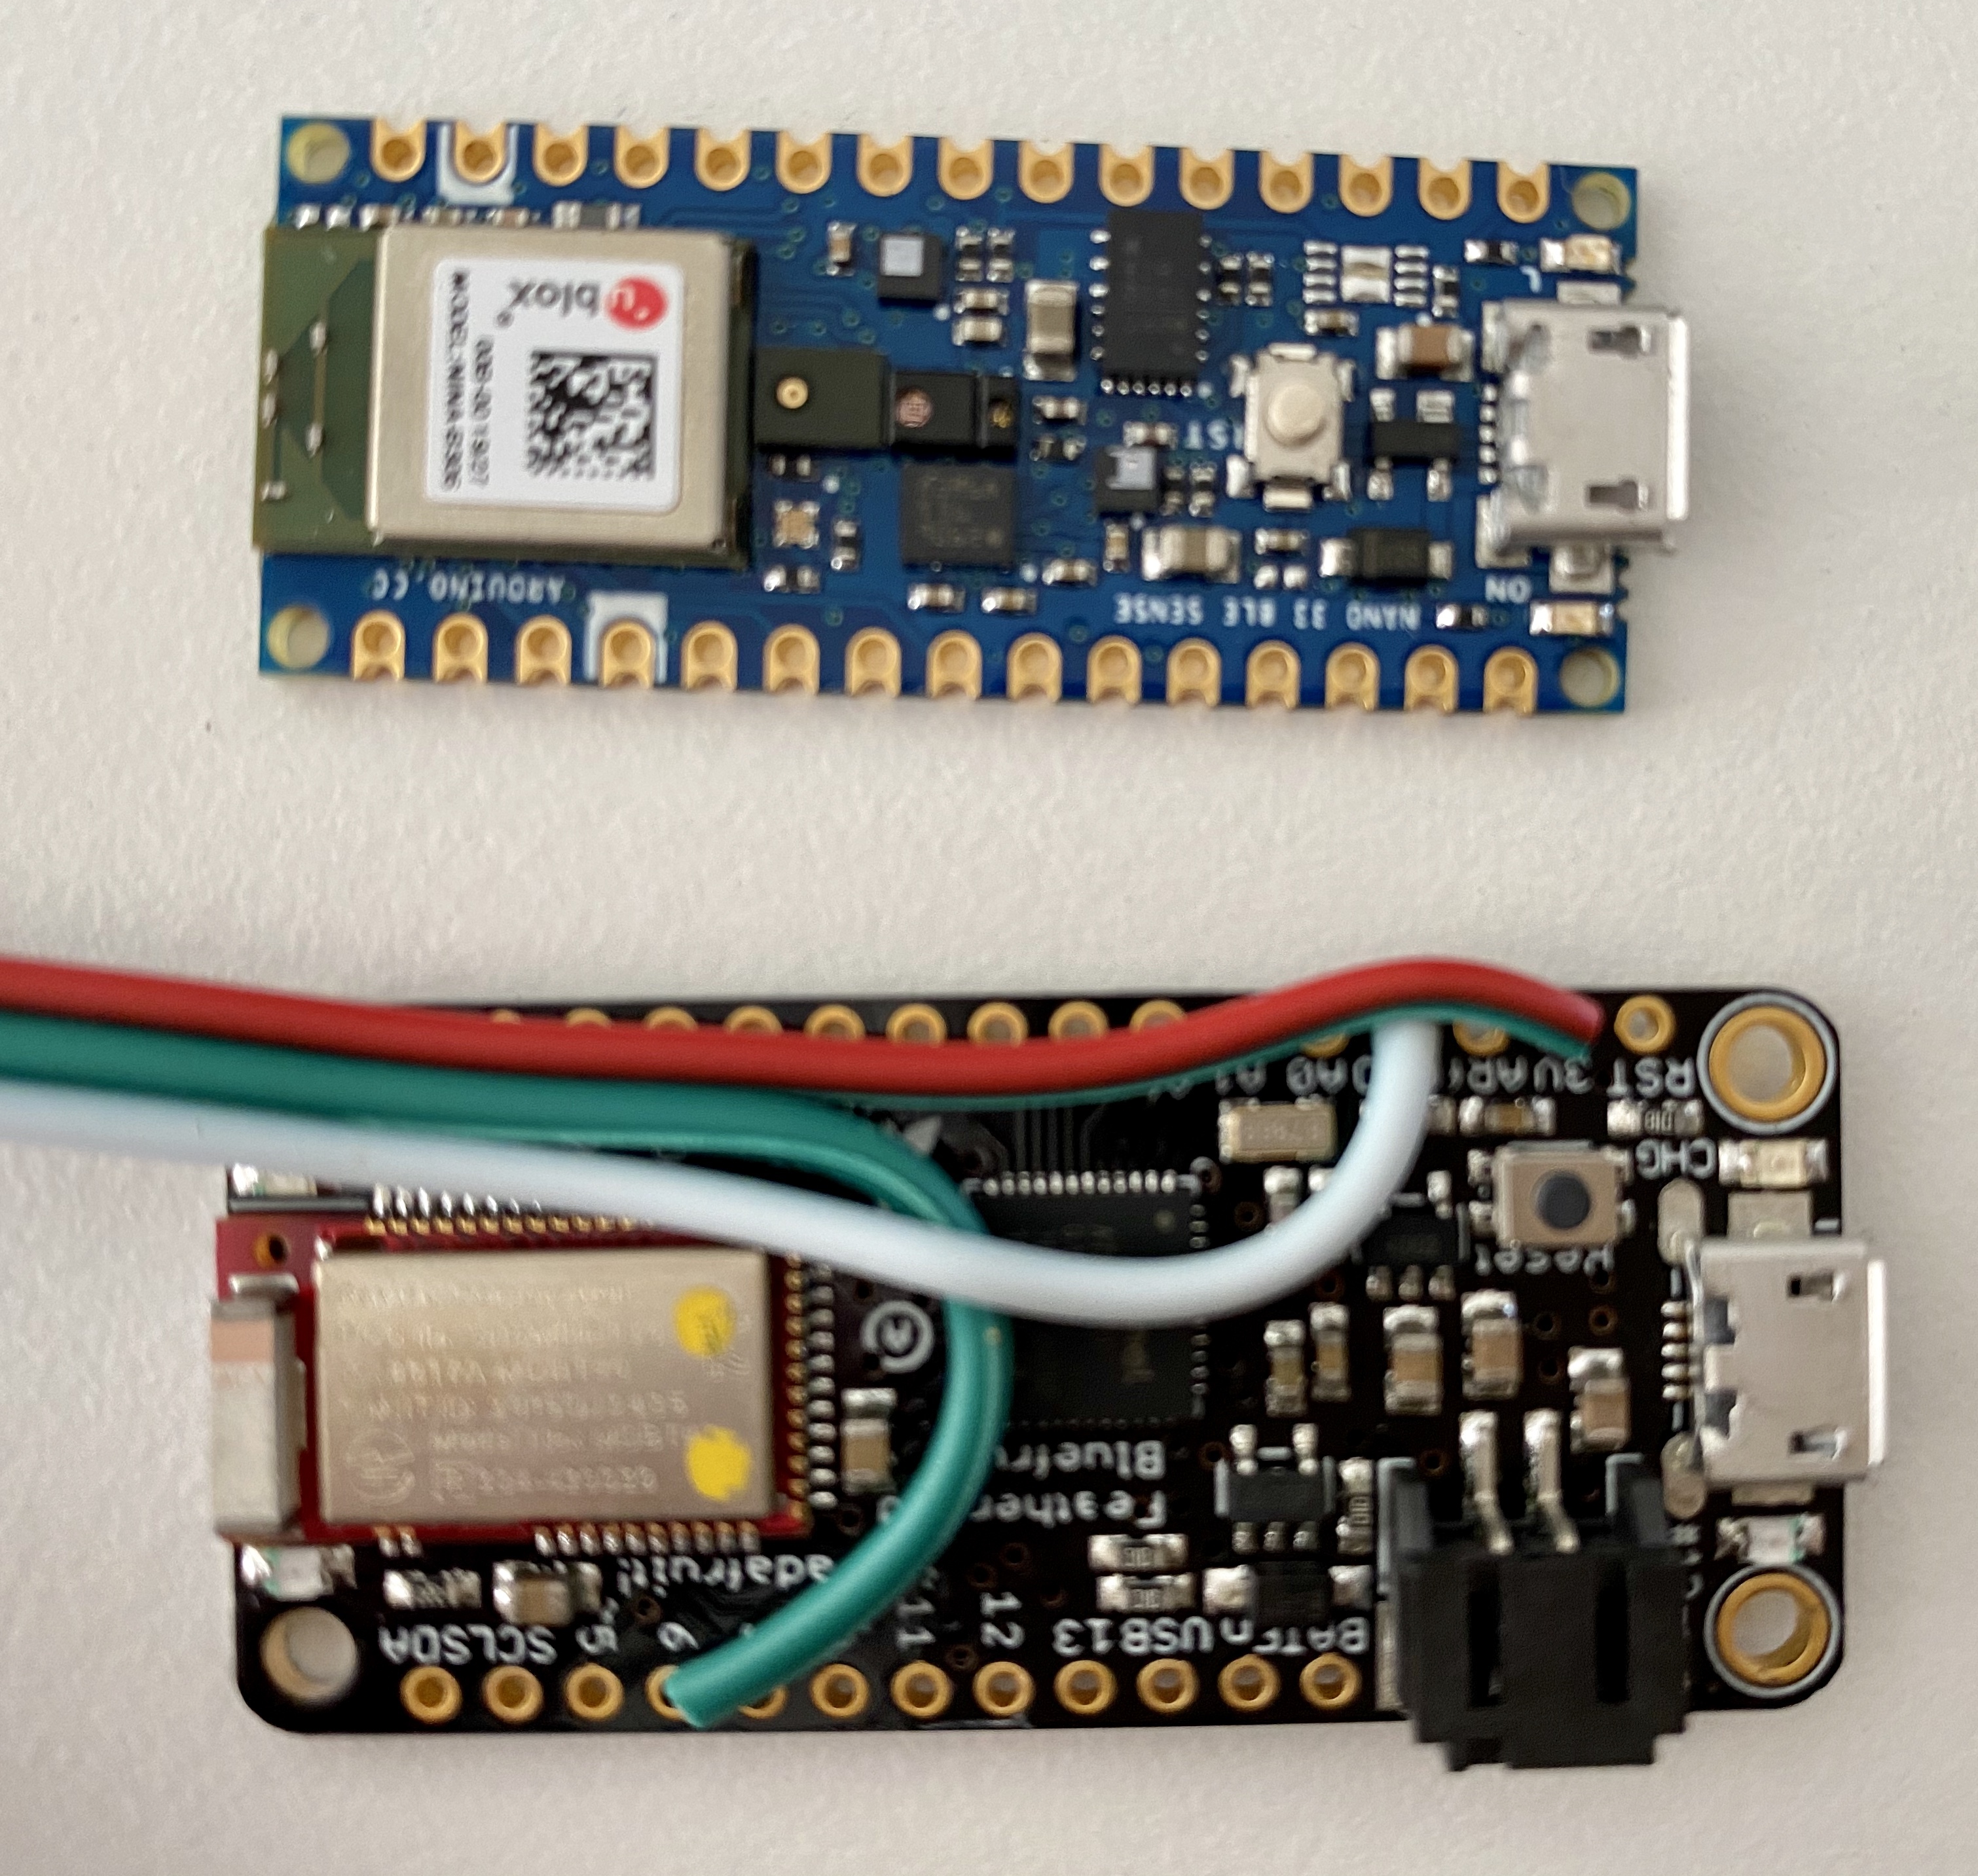
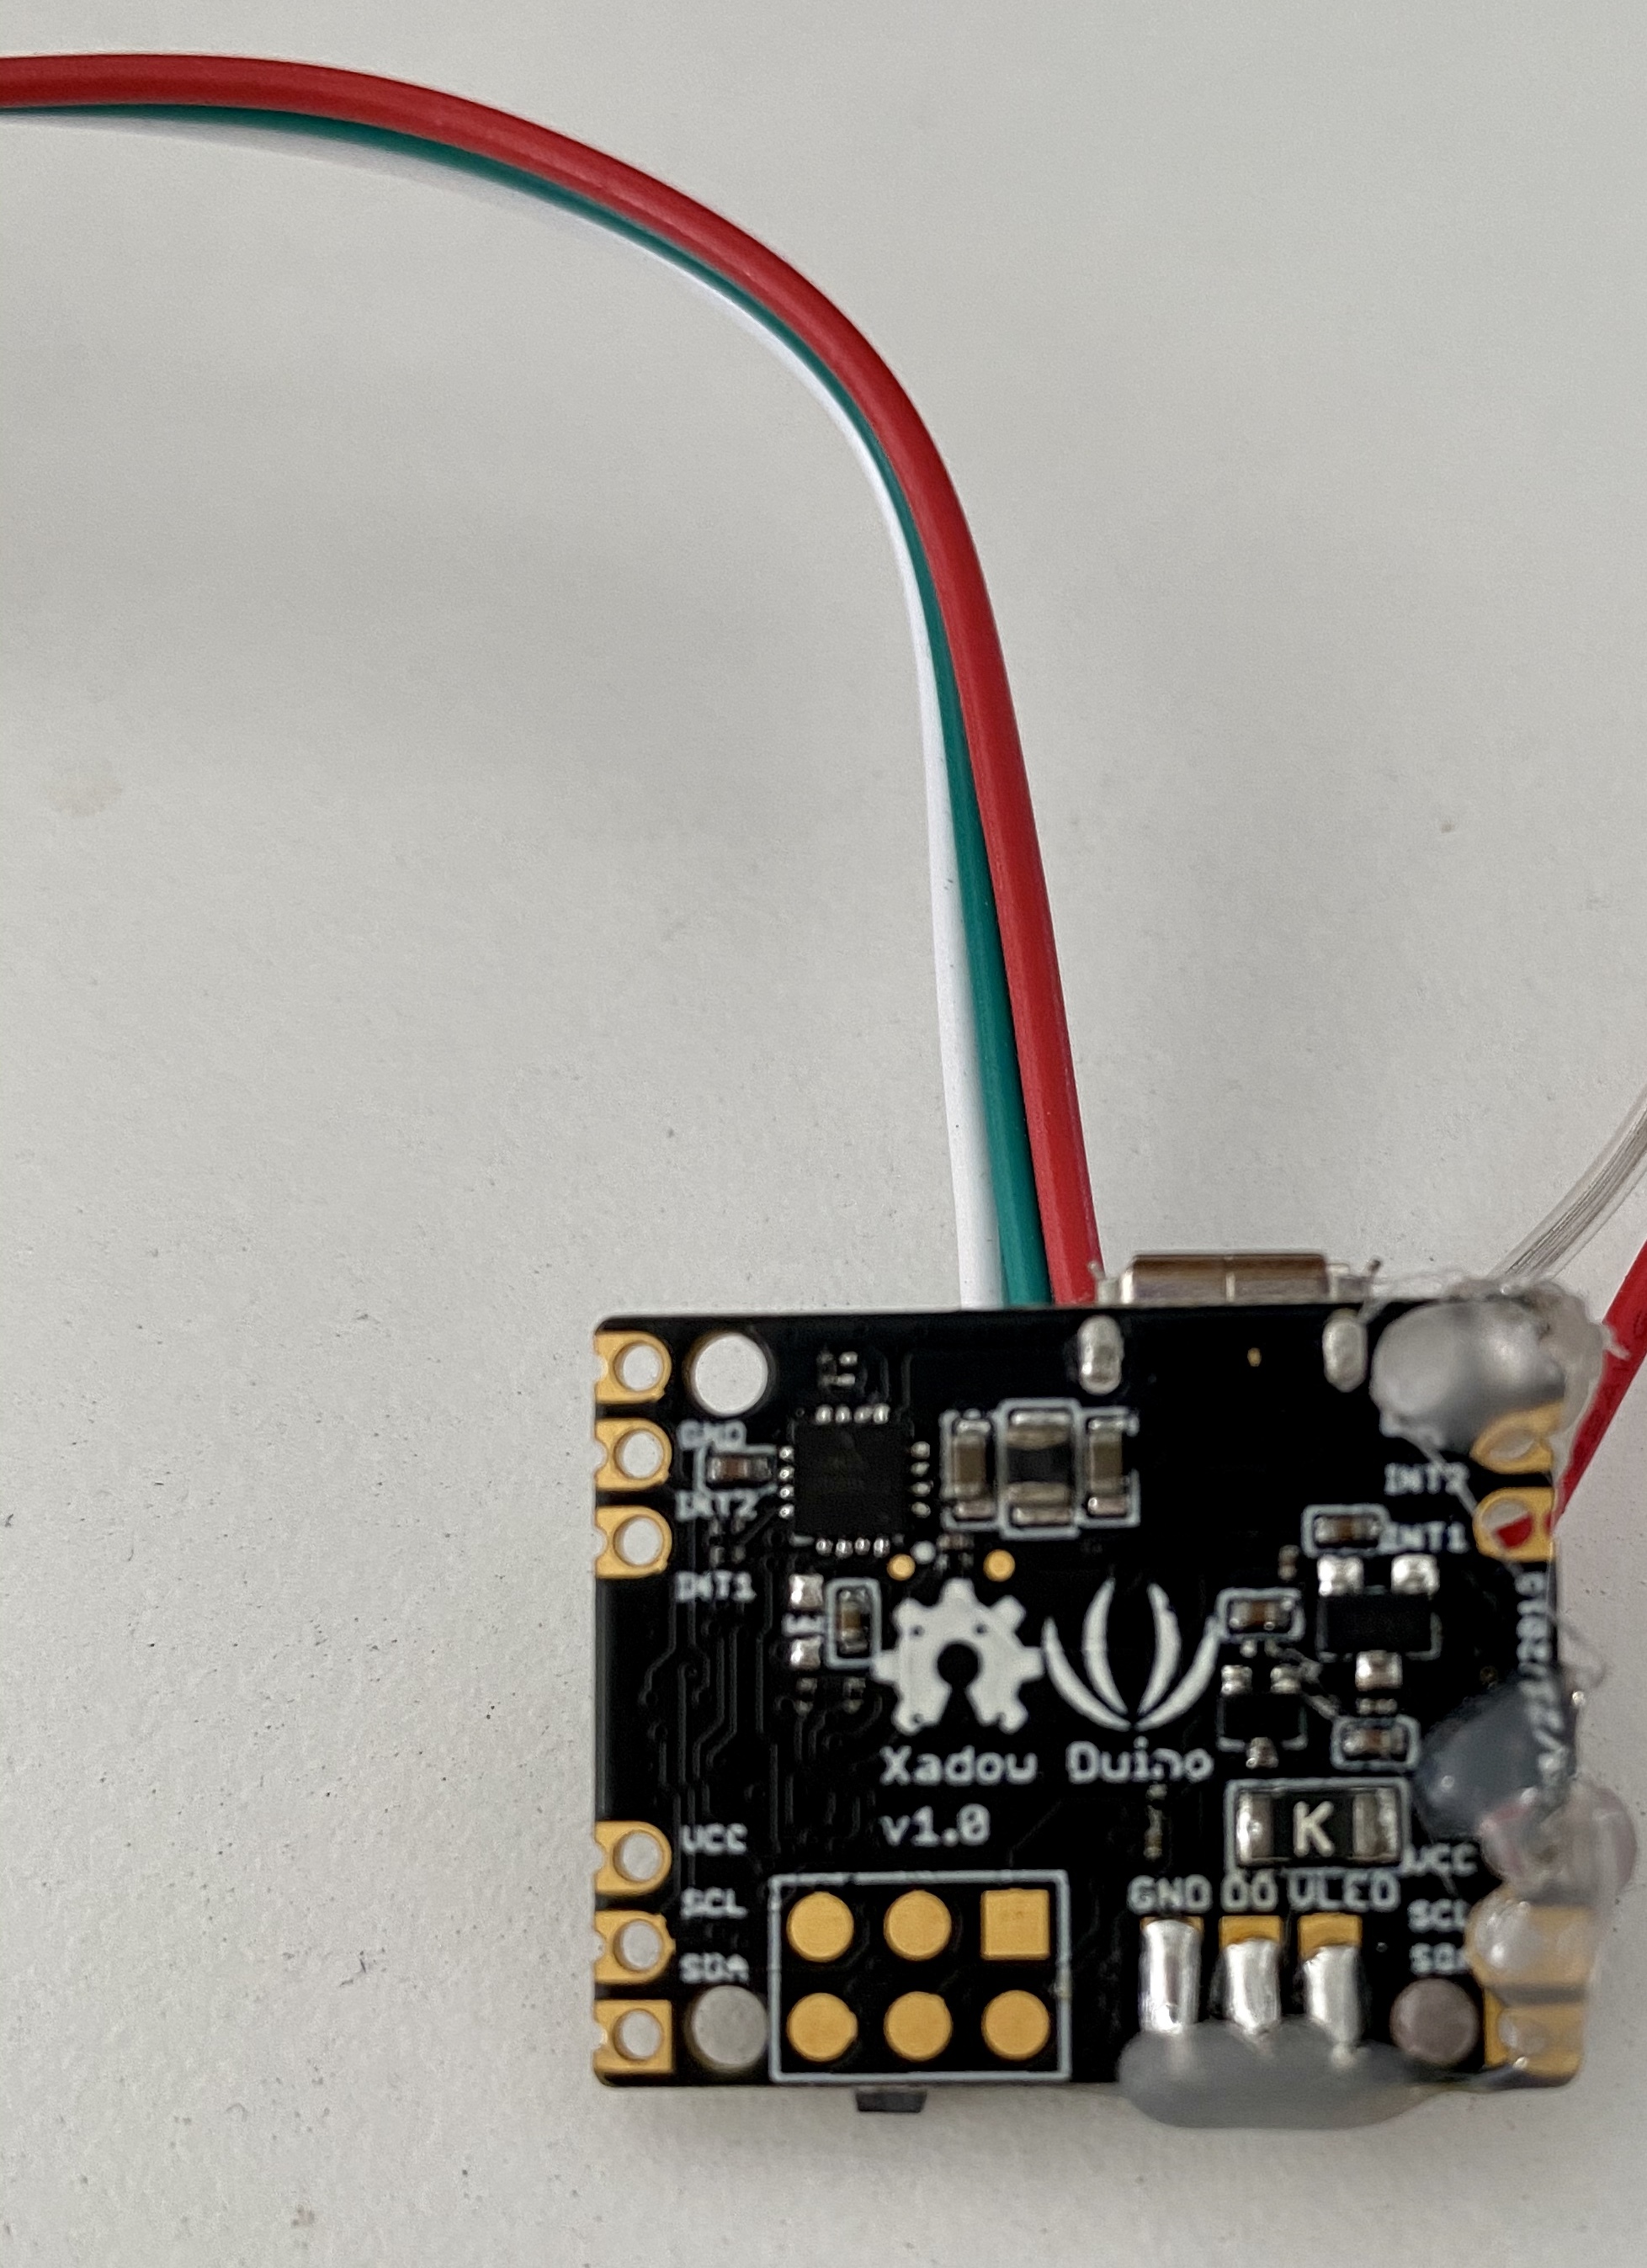
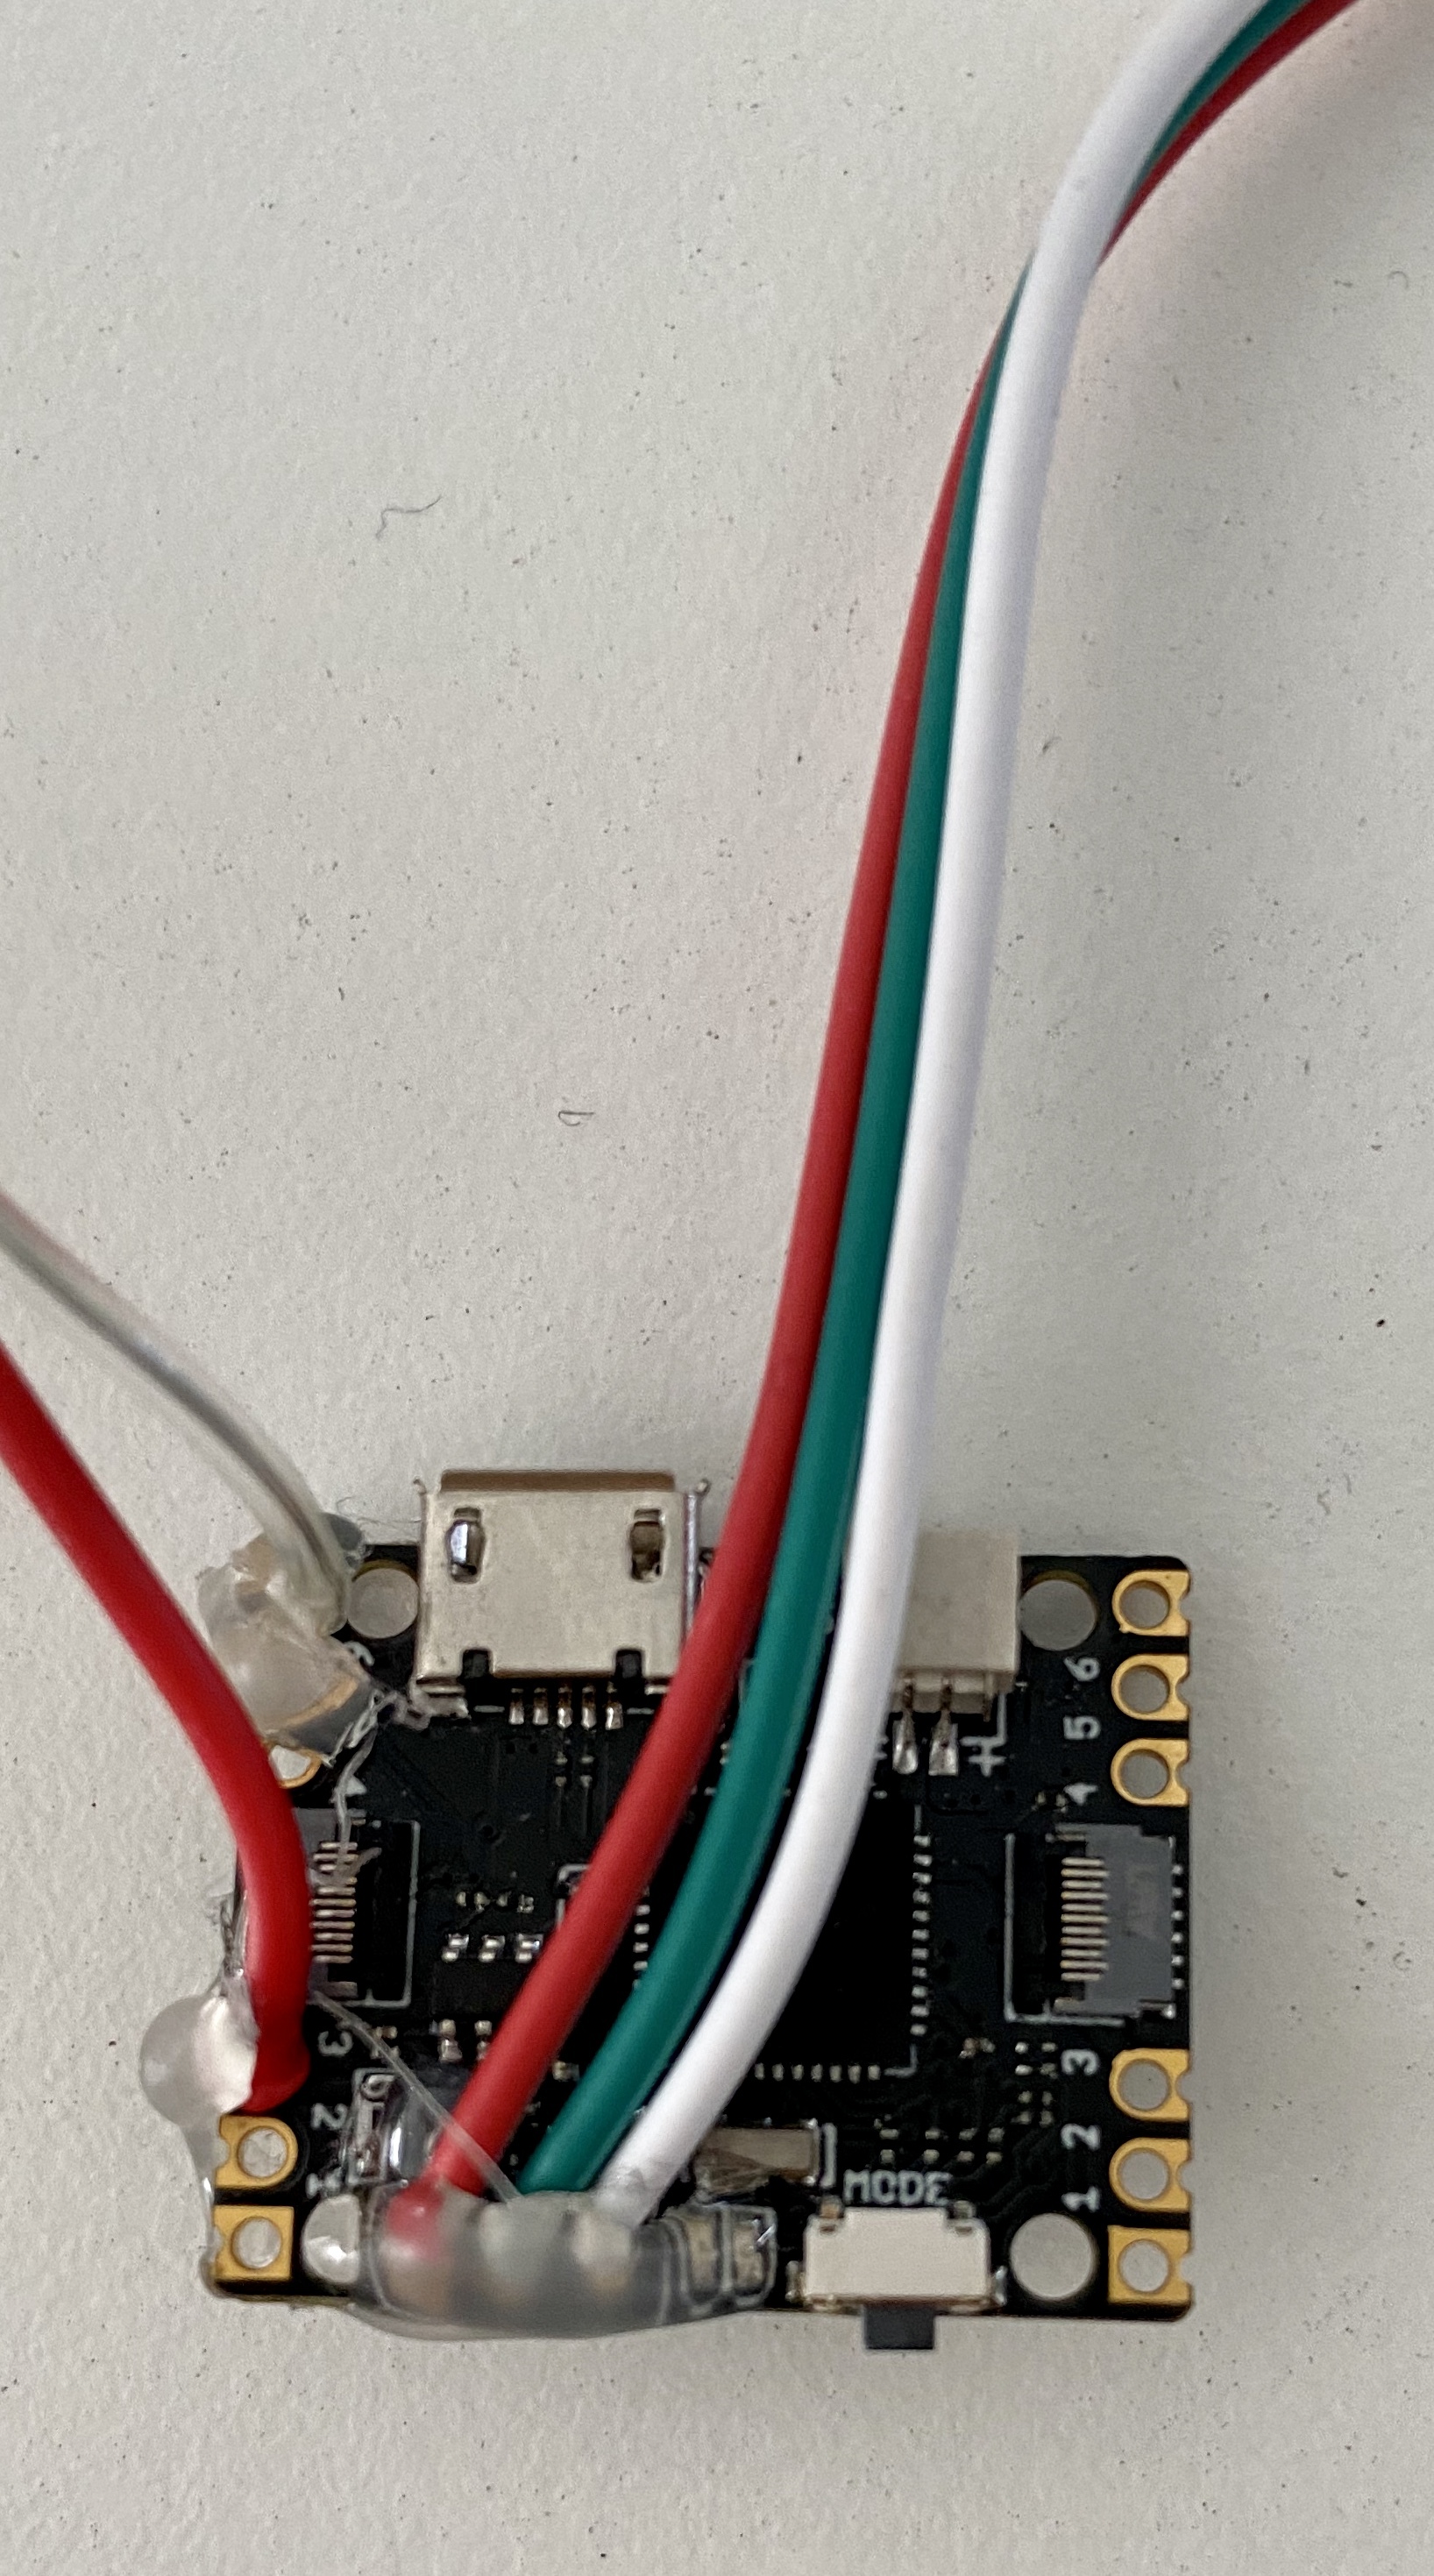
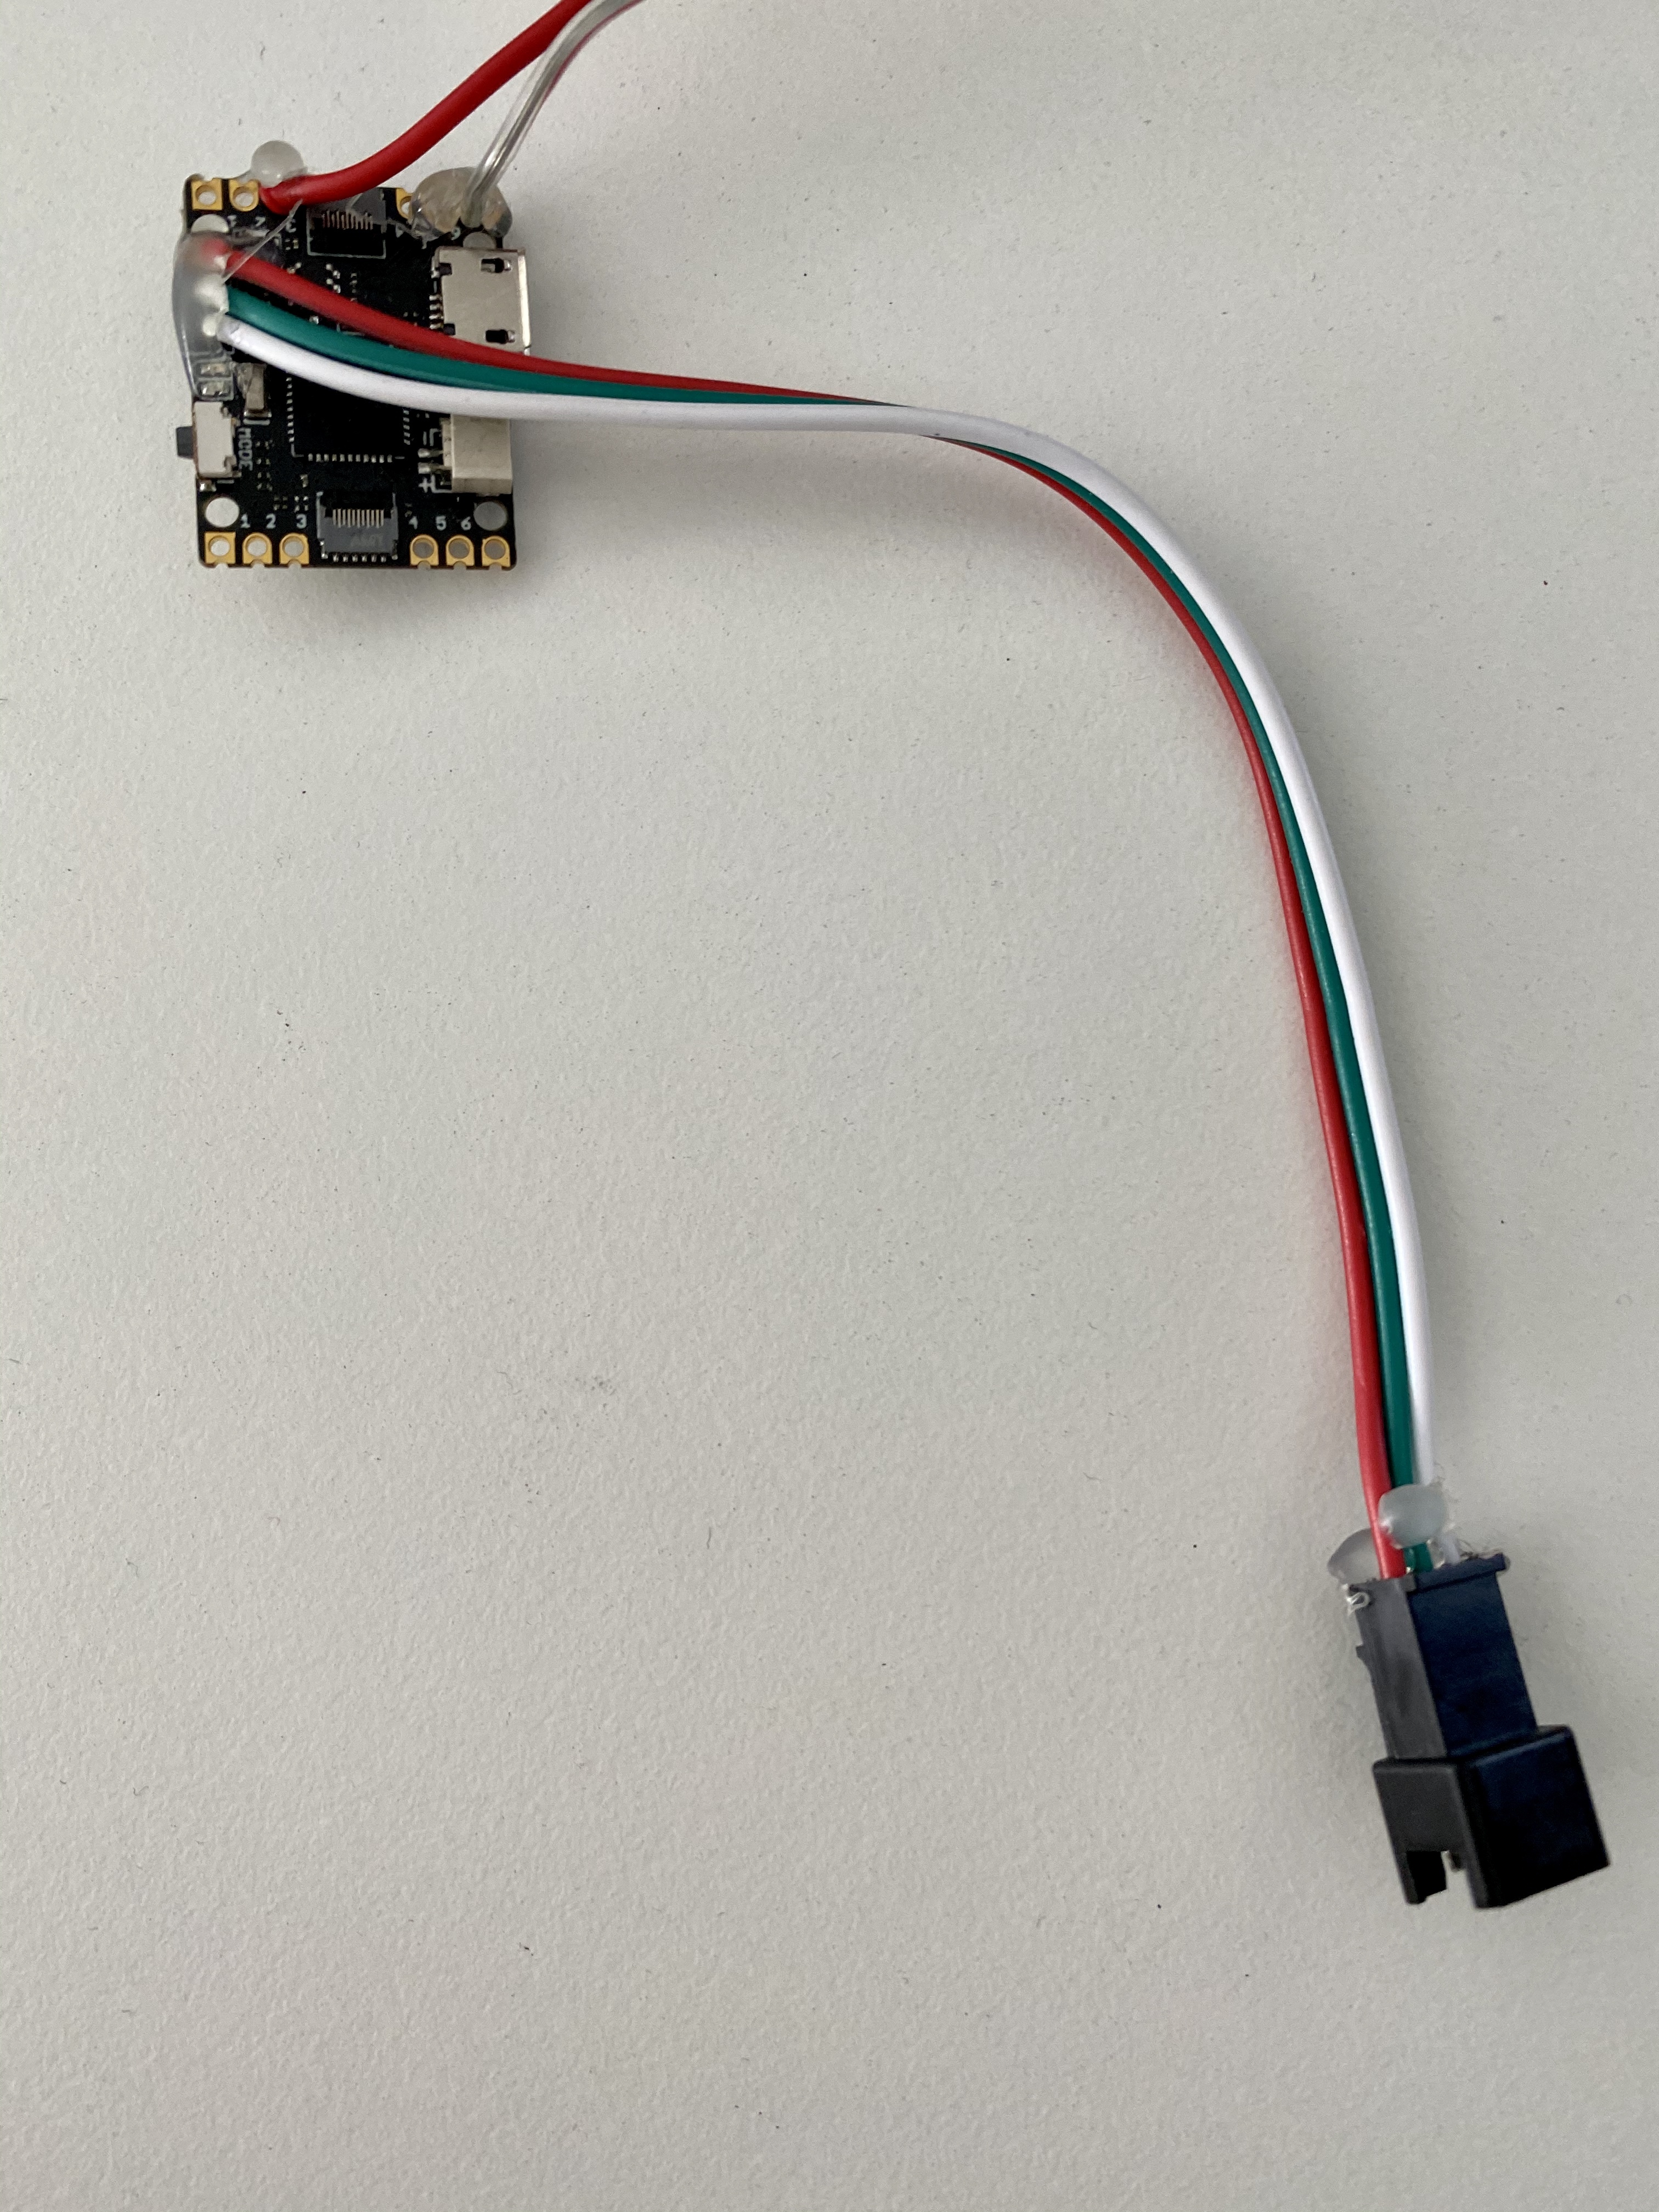
We've found it useful to connect components with a JST cable so that you can disconnect them easily to assemble the sign or swap out parts if either part gets damaged and you need to replace it. You could solder your LED matrix directly to your arduino/microcontroller board if you want to reduce a step, but it will be hard to hide the Arduino on the back of the cardboard sign.
1. Learn how to Solder using the Adafruit Guide to Excellent Soldering https://learn.adafruit.com/adafruit-guide-excellen...
You will need to solder the wires on your connector through the holes in your arduino board.
2. There is a good chance your LED matrix already has a 3-pin JST cable connected on the back of the matrix. The JST connector that you want to use should be labelled DIN where the wires are connected to the matrix. Look to see if it has a plug or a socket end on the connector. You will need the opposite end (either plug or socket) to connect to your board. Your matrix might also have a 2 wire connector attached at the same place as the 3 pin connector. We won't need that connector for this project. If your matrix does not have a JST connector already attached you should pick one side of the cable and solder it to the matrix at DIN matching up the red wire to power/voltage, the middle wire to data, and the third wire to ground (GND).
If there are other connectors (2 wire connectors, 3 wire DOUT) on the matrix you can just leave them there. We will hide them on the backside of the sign. You can also connect two matrices together for a longer scrolling sign on a bigger piece of cardboard.
3. You will need to solder the matching (plug or socket) JST connector to the Arduino. There are three wires on your connector. One should be red and the others are usually white and green, or sometimes yellow or black. The red wire is connected to power, usually labeled 3V or 3.3V on the Arduino/board. Place the bare wire end through the 3V or 3.3V hole on the board and solder to the board. The other outside wire from your 3 wire JST is the ground wire. Place the bare end of this wire through the hole labelled GND in your board. Solder into place. The middle wire is for data. This can be connected to any digital pin (PWM) on your Arduino or microcontroller. We will use pin 6 for this project. Solder the middle wire on your connector to pin 6 on the board.
4. You do not need to solder any other wires to the arduino/board. We will use a USB cable for power and it will connect to the microUSB connector on the board.
Program Your Arduino

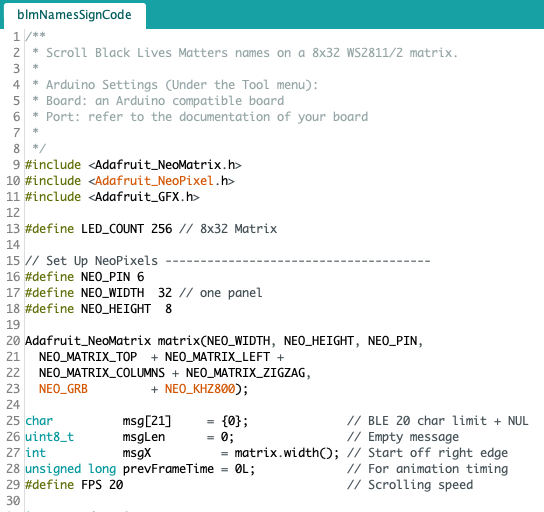
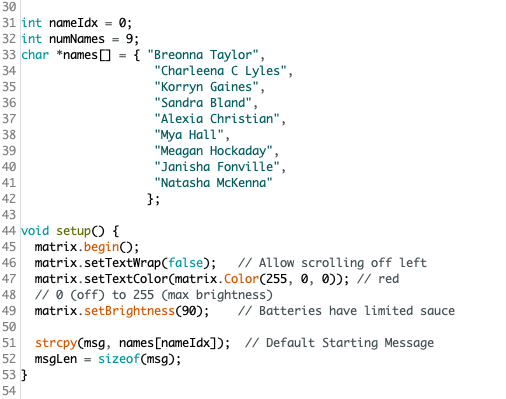
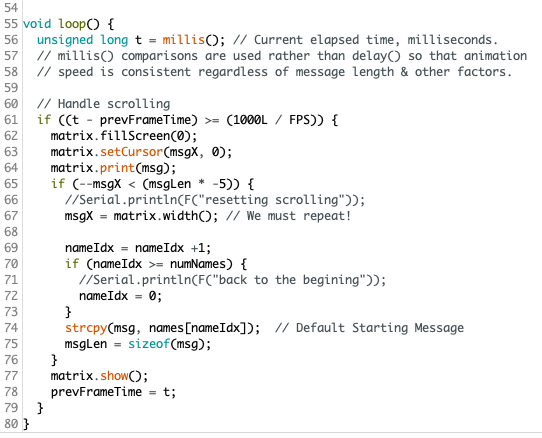
Before we put the board on the sign we will need to program the it. You will need your computer and a data USB to microUSB cable (the cable that came with your charger might just be for power. You need one that is data and power).
1. Download the Arduino IDE from https://www.arduino.cc/en/main/software. If you are not familiar with the Arduino software and code we recommend you try some of the tutorials on the Arduino website.
2. You will need to add three Arduino libraries. They can be downloaded from with the Arduino IDE.
2a. Open the Arduino IDE.
2b. Using the menus at the top of the page go to Sketch > Include Library > Manage Libraries...
2c. This brings up the Library Manager. In the right hand search bar search for "neomatrix". Then click the Install button. Repeat this search and install for "neopixel" and "adafruit gfx library"
3. Download the code from this tutorial - We've included the code as a file download with this tutorial. Arduino files need to be in a folder with the same name as the file. When you download the file here and try to open it you will get a message that says "The file "blmNamesSignCode.ino" needs to be inside a sketch folder named "blmNamesSignCode". Create this folder, move the file, and continue?".
Click Ok and create the folder. We are also including the code as screenshots in this step in case you want to type it into the Arduino IDE yourself.
4. Open the .ino file in the Arduino IDE.
5. In our code we are using a subset of names from the #SayHerName campaign. You can add additional names of women and girls who were victims of anti-Black violence by adding lines after line 41 and formatting like the names in the previous lines. A list In Memoriam may be found here at the Say Her Name Campaign https://aapf.org/shn-inmemoriam. Other names remembered as part of the Black Lives Matter Movement can be found at #SayTheirNames List https://sayevery.name/ and in the Black Lives Matter Article on Wikipedia https://en.wikipedia.org/wiki/Black_Lives_Matter.
6. Plug your board into your computer with the USB/microUSB cable. Using the menu bar at the top select Tools. Scroll down to Board and select whatever board you are using. Then select Tools > Port from the menu bar your board should automatically show up in the port list. If it doesn't check to be sure you are using a data cable to connect your board to your computer.
7. Click the check mark Verify button. This will compile the sketch and will let you know if there are problems.
8. Click the right arrow Upload button to upload the program onto your Arduino.
9. Unplug your board from the computer.
10. Connect your Arduino to the LED matrix using the JST connectors. Connect the Arduino to the power bank/battery using the USB/USBmicro cable. Make sure your battery and board are turned on if they have on/off switches. There should be an LED on the Arduino that lets you know it has power and is on. Some boards take a few seconds to start-up. Names should automatically start scrolling on the LED matrix.
Troubleshooting:
Do you have power/is your battery charged? Is everything connected? Are your solder connections good? Have you mixed up any wires so your Arduino is not connected correctly to your matrix? If everything is on and there is no scrolling, have you Uploaded your program to the Arduino?
Downloads
Add the LED Matrix to the Sign
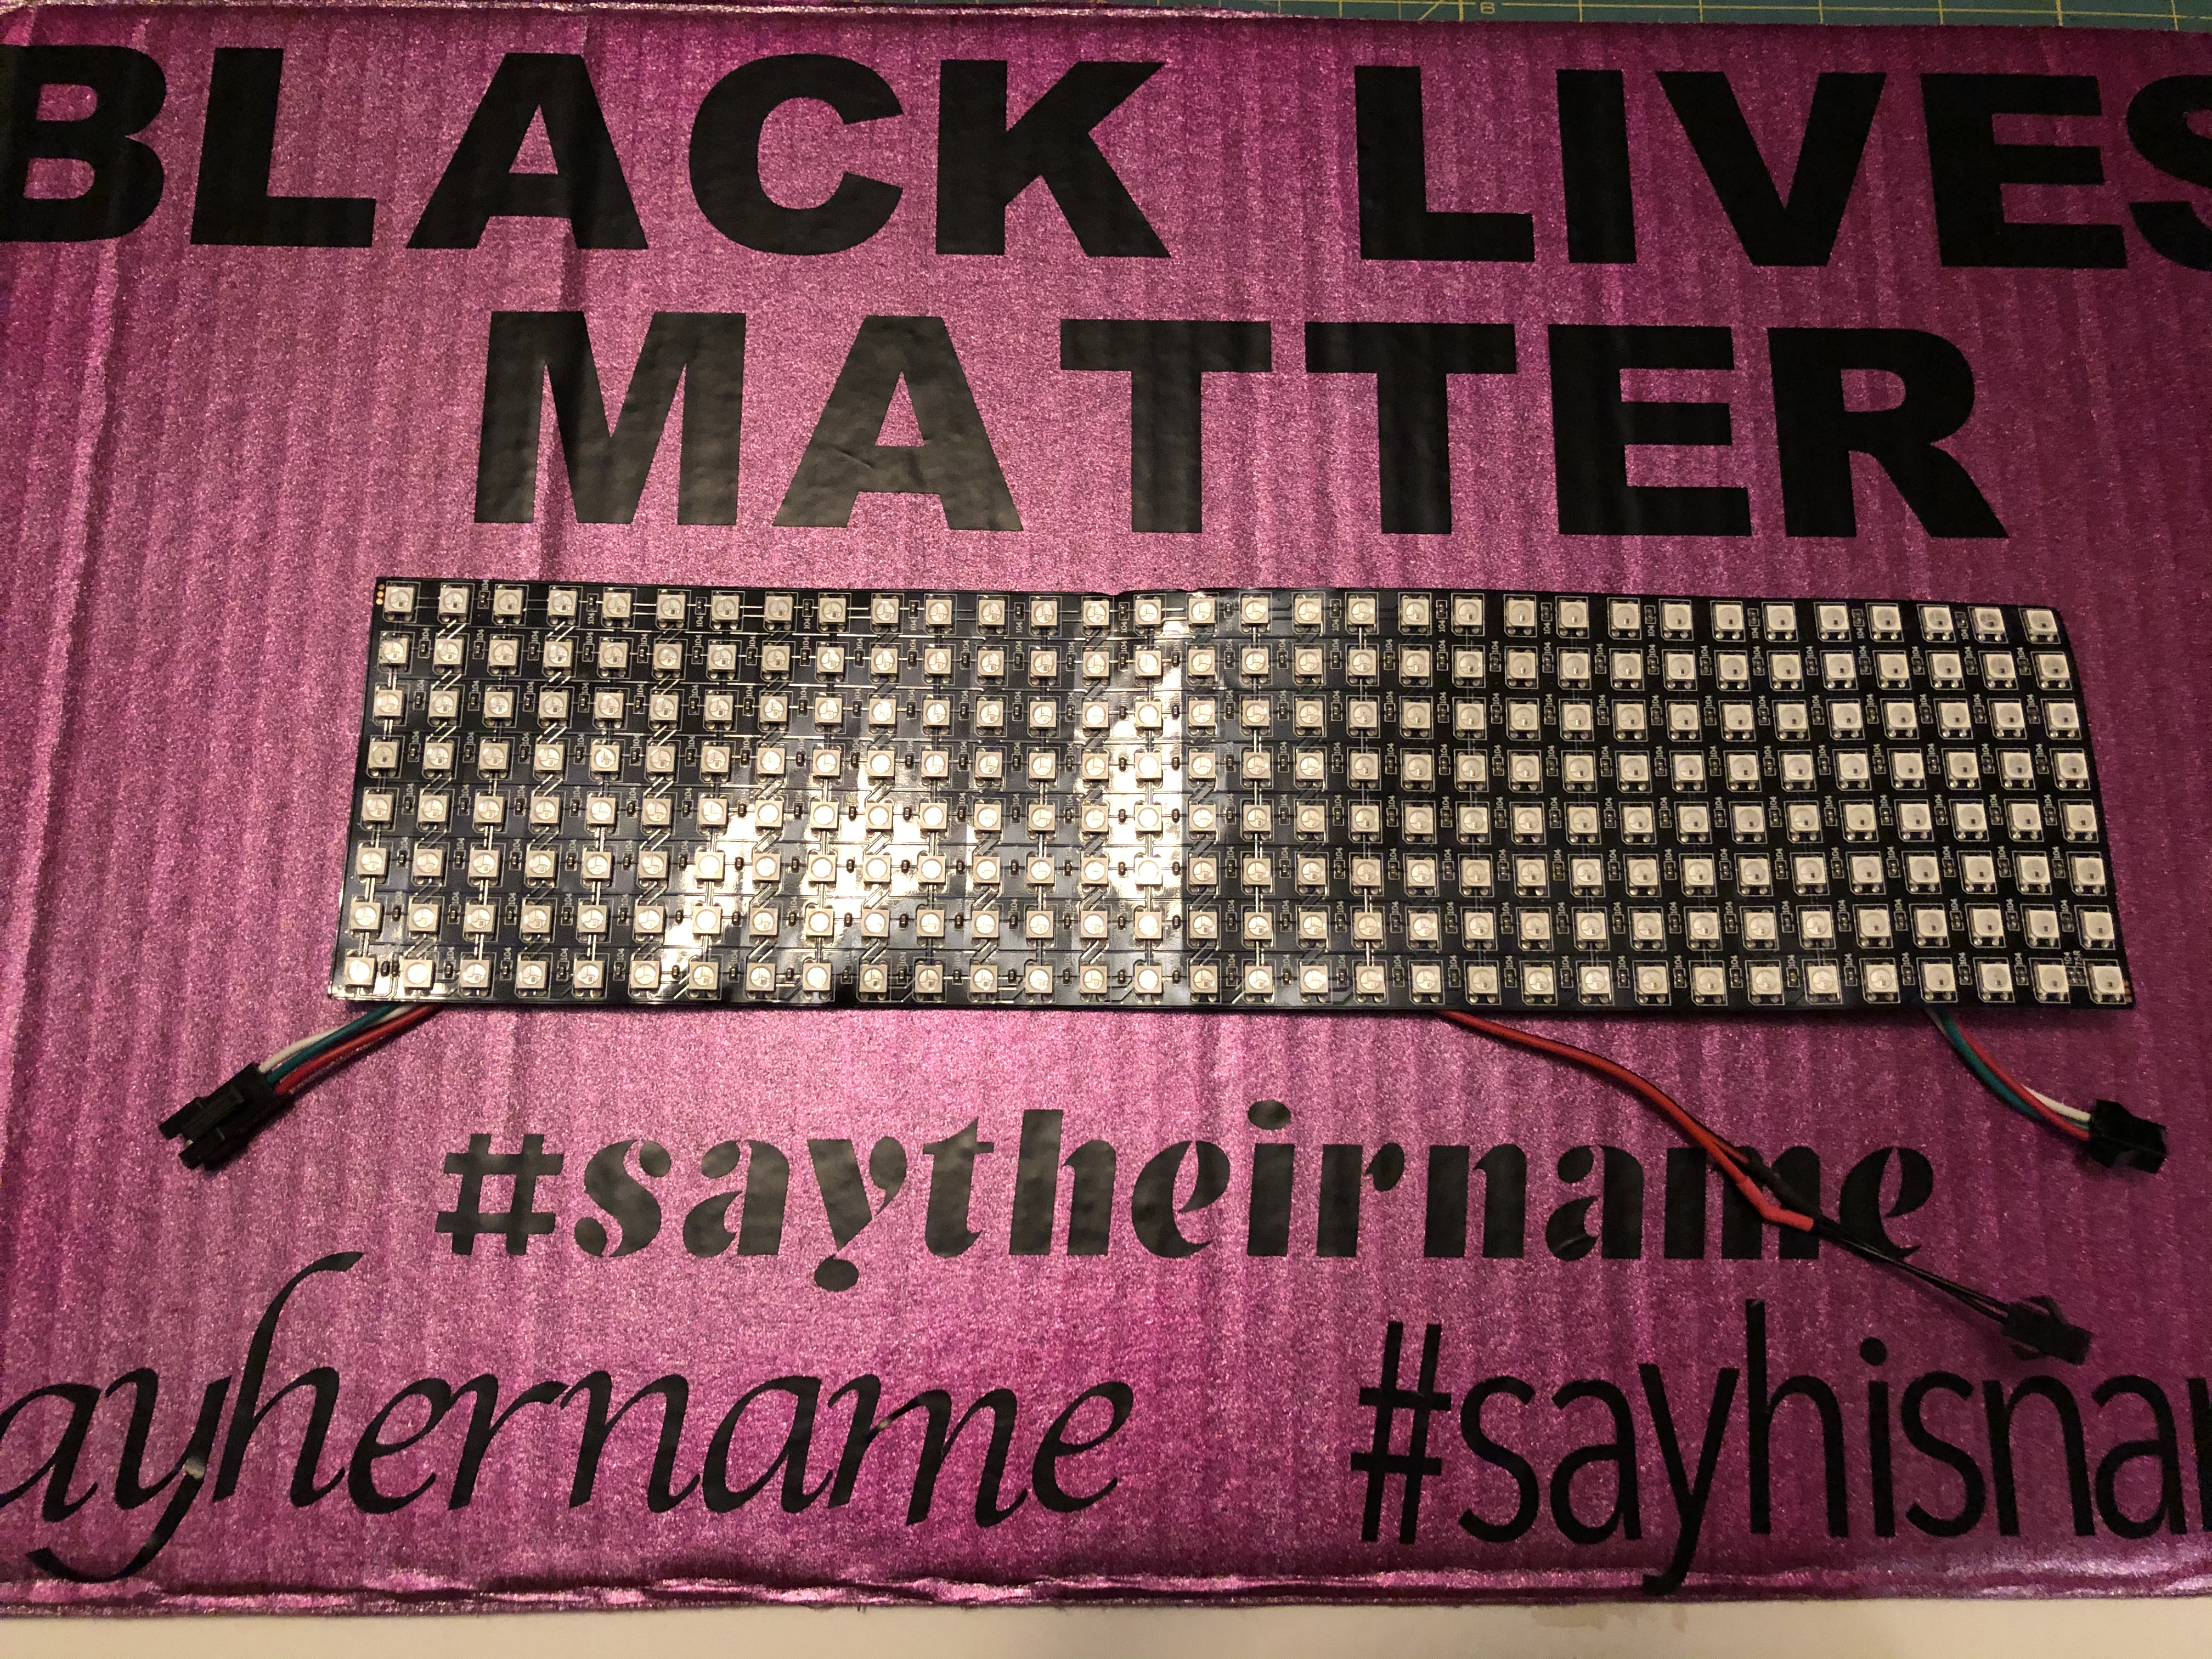
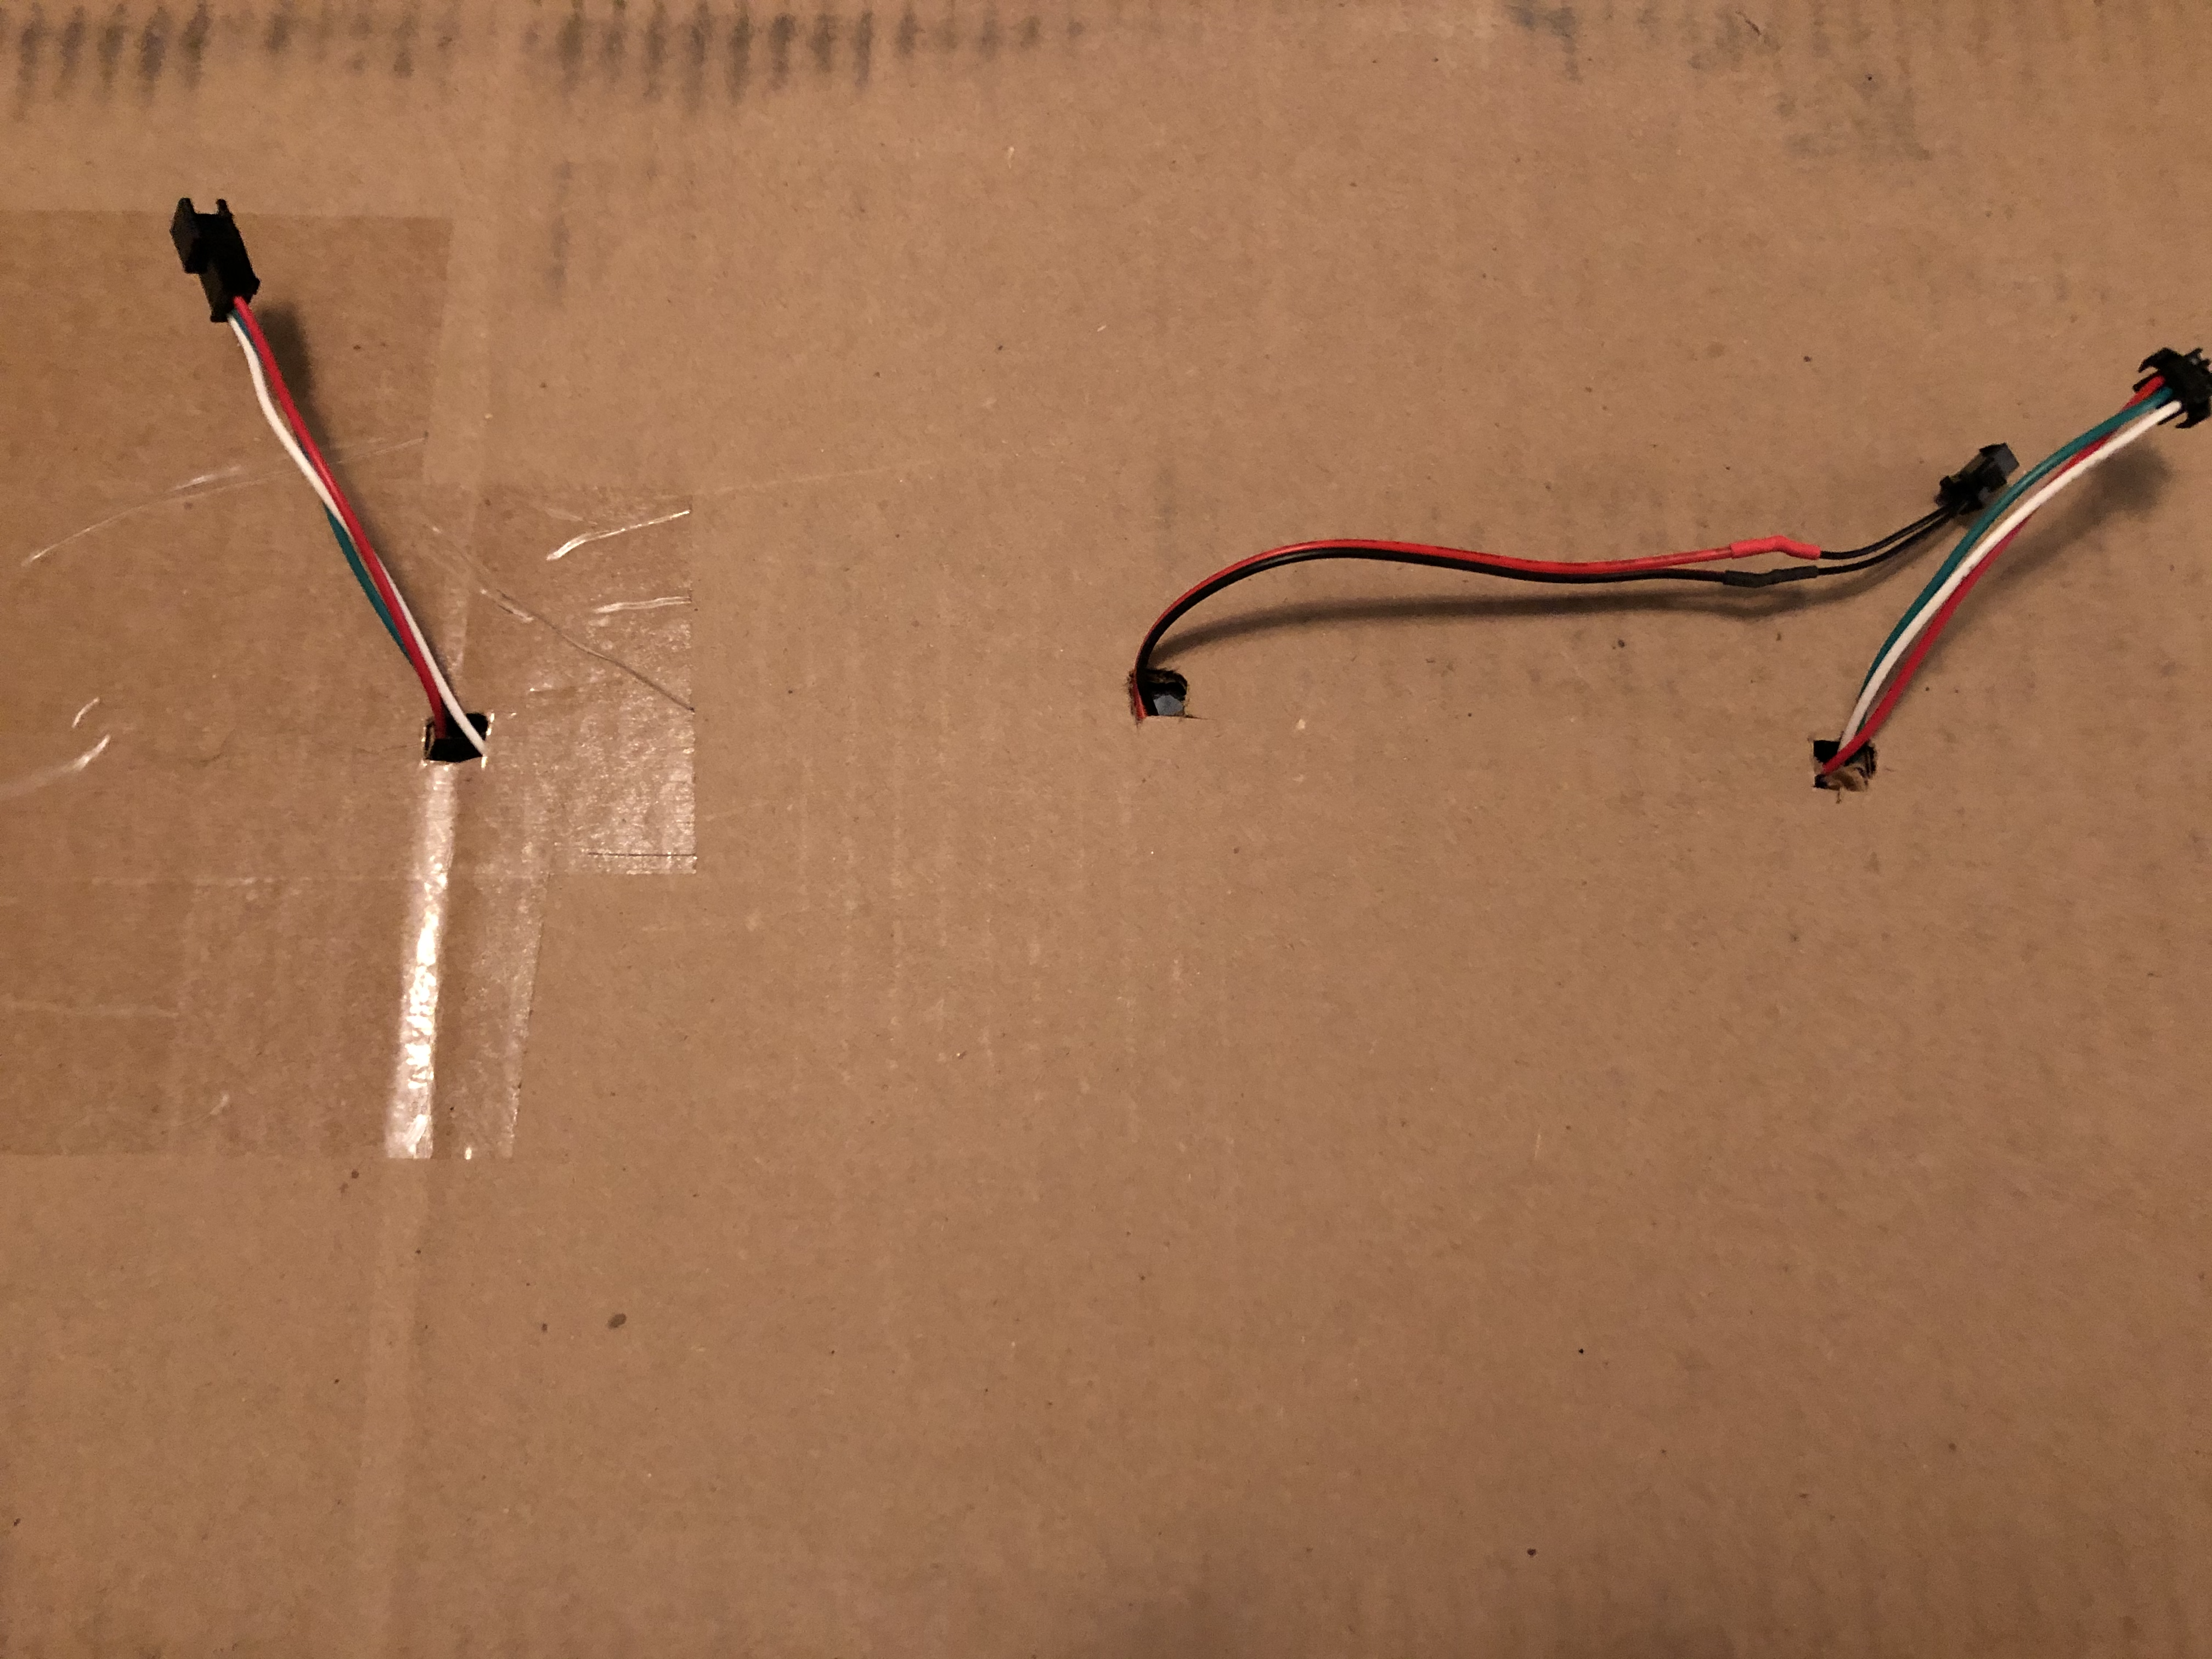
You started the layout of your sign in a previous step and left room for the LED matrix. Now we will put on the matrix and put the wires through to the back of the sign.
1. Disconnect the Arduino from the LED matrix at the JST connector.
2. Put the matrix in the open spot on the front of the sign with the wires in between the matrix and the cardboard.
3. Tilt the matrix up and using a pencil or marker, mark where the wires need to go through the sign. You probably have extra wires for DOUT, mark those also so they go behind the cardboard.
4. Remove the matrix. Using a flat surface and a hobby knife or box cutter, carefully cut small holes where all your cables need to go through to the back of the sign.
5. Carefully pull the cables through to the back.
6. Add strong double sided tape or double sided foam tape to the back of the LED matrix. Use firm pressure to tape the matrix in place on the front of your cardboard sign.
Finishing the Sign and Advocacy
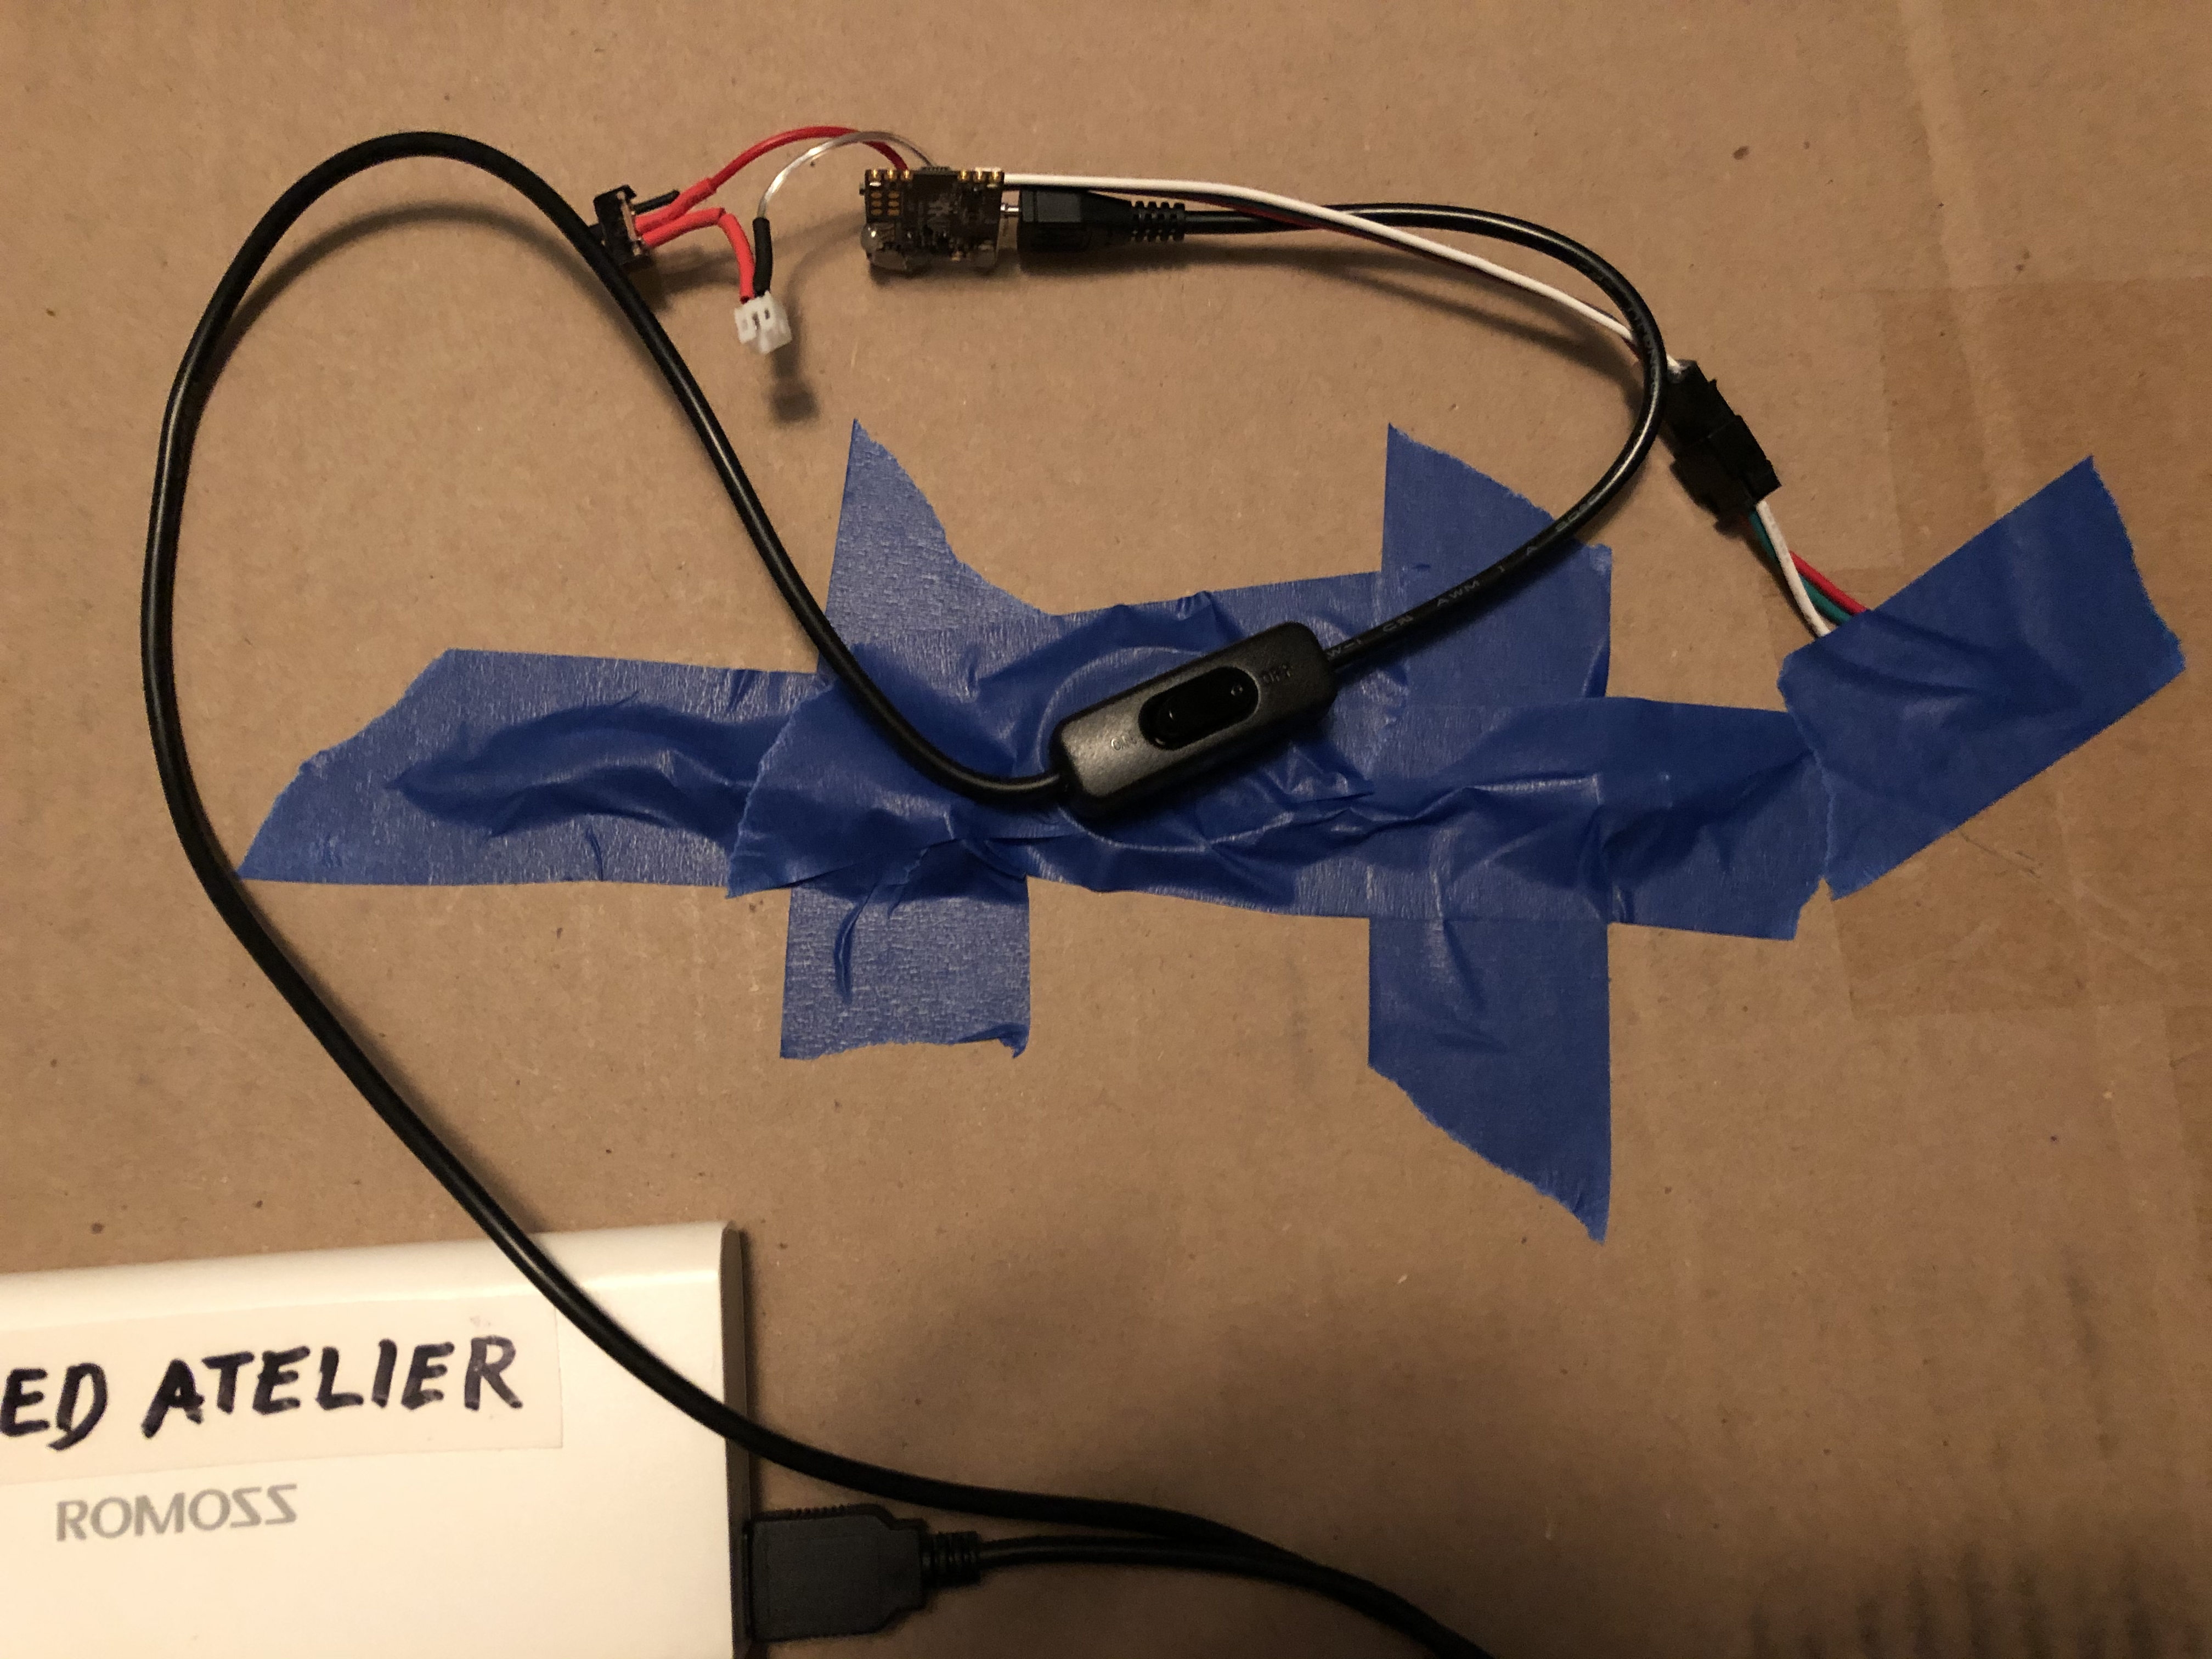
1. Reconnect the Arduino/board to the matrix on the backside of your sign. You can use masking tape or electrical tape to help hold down the extra cables and wires. We also use some electrical tape wrapped around the board as a little bit of extra protection. You may want to 3D print a case for more protection for the Arduino.
2. Plug your battery into the Arduino and flip over the sign to be sure your matrix is lit and scrolling words.
Troubleshooting: Are your connections tight and to the correct connectors? Does your battery have power?
Advocacy
This project was made for Black Lives Matter advocacy and continued remembrance of women and girls who have been killed in anti-Black violence. The #SayHerName Campaign has Demands and Policy Initiatives to make change a reality at https://aapf.org/shndemands. Advocacy for Justice for Breonna Taylor can be found at https://justiceforbreonna.org/ including specific Actions you can take to get #JusticeforBre. These include a petition and contact information for investigative agencies, institutions and individuals in charge of the investigation into her death.