Birthday Glow-in-the-Dark Constellation Quilt
by cchen4 in Craft > Embroidery
3869 Views, 101 Favorites, 0 Comments
Birthday Glow-in-the-Dark Constellation Quilt
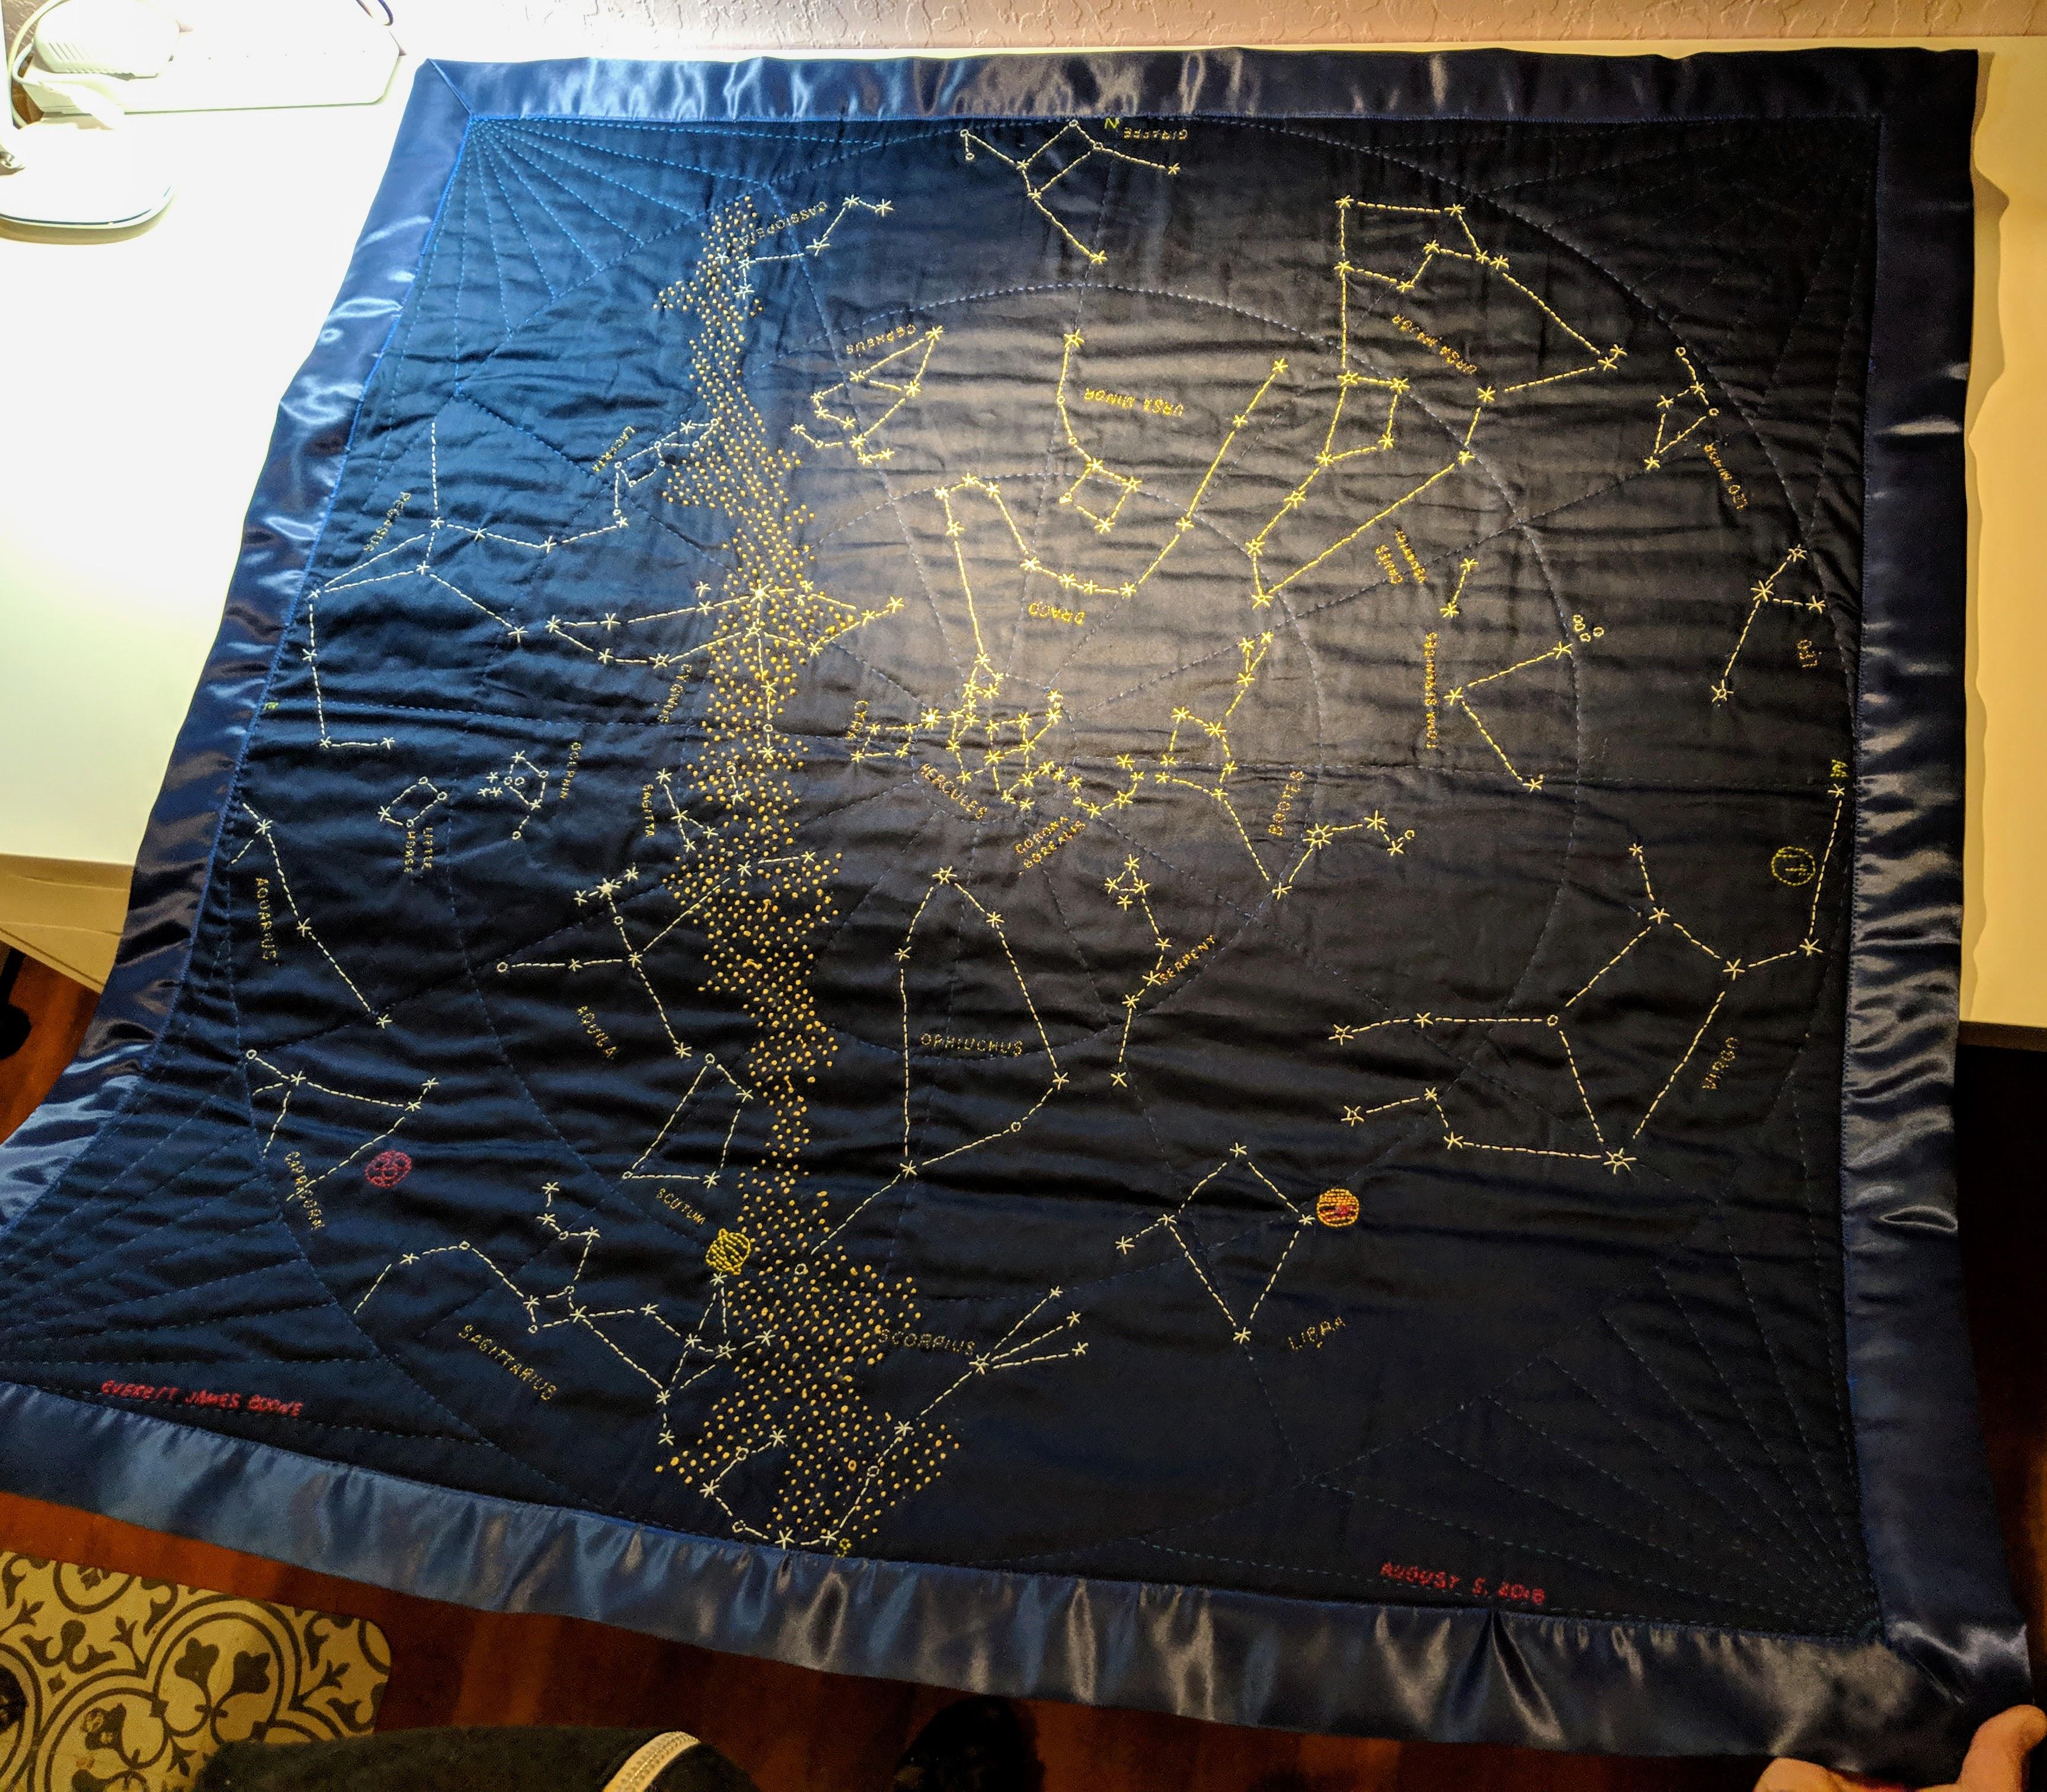
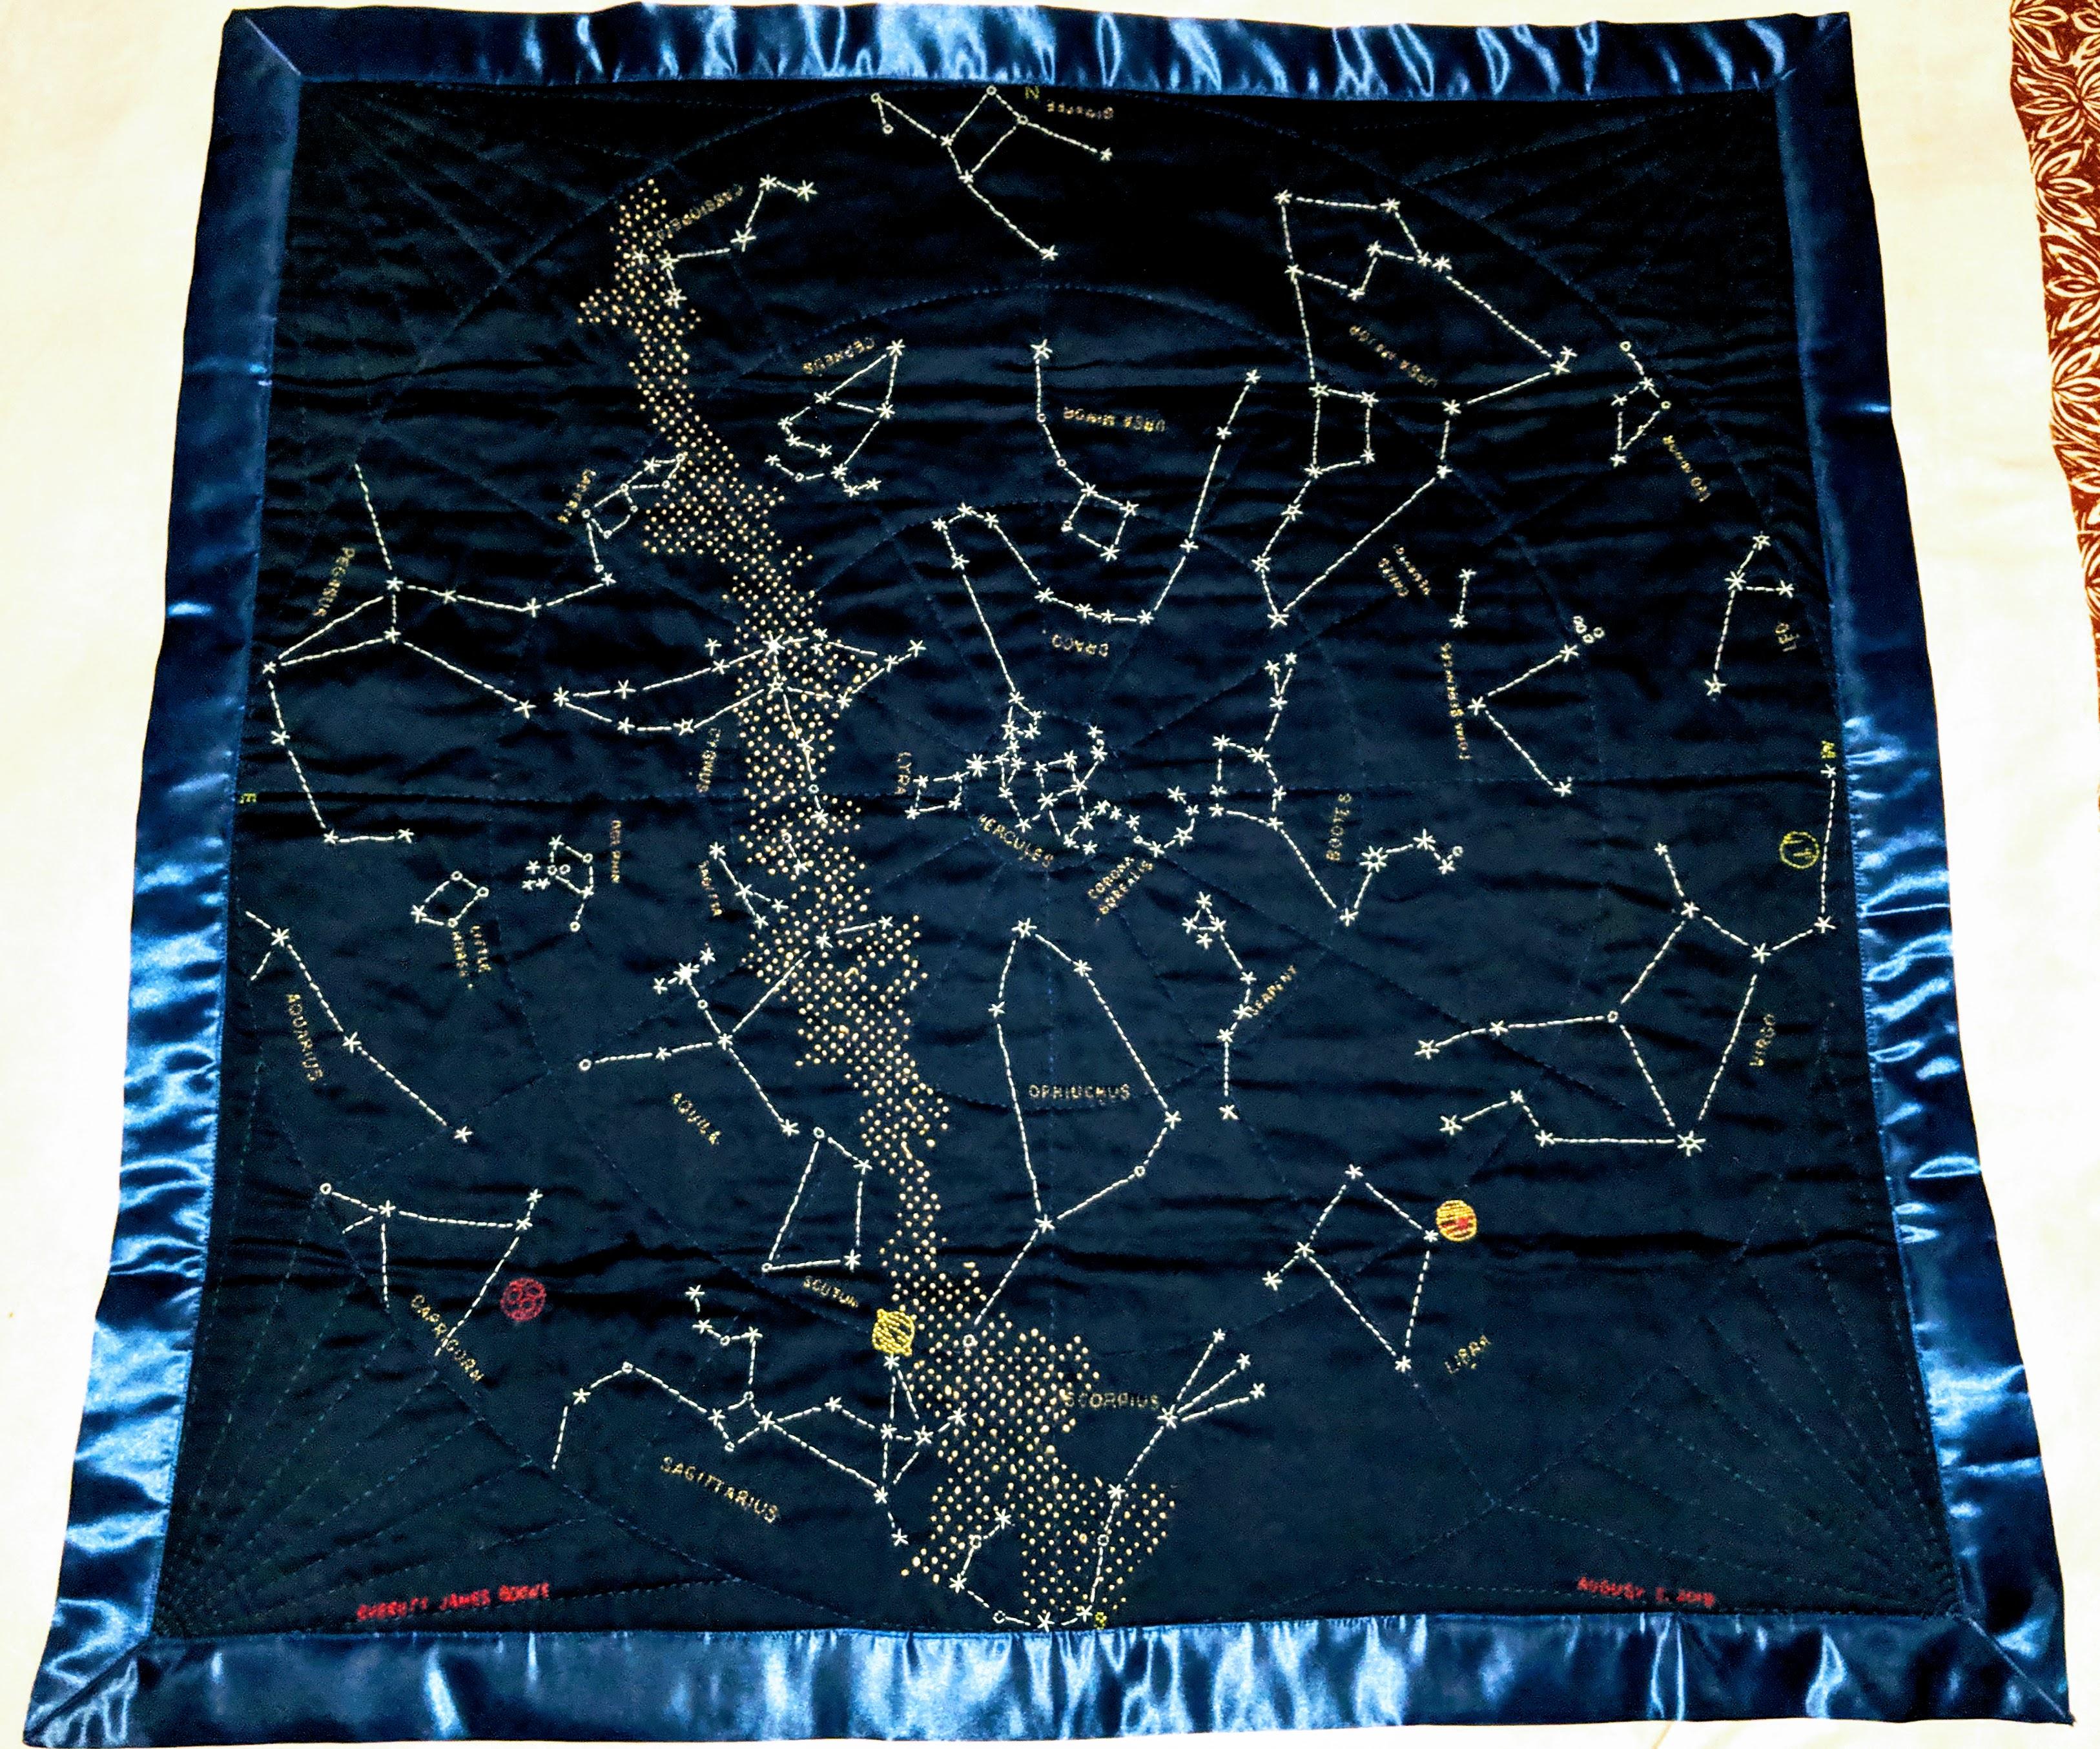
My best friend was expecting his first child, and I wanted to make the baby something special to commemorate the event. I came across the Constellation Quilt from Haptic Lab and decided to customize it for the baby's birthday. My friend is an astrophysicist so it seemed appropriate.
I used Stellarium to plot out the night sky view using the location, date, and time of the baby's birth.
I continued to use the grid provided with the Haptic Lab quilt kit pattern but drew in my own constellations based on the night sky when the baby was born.
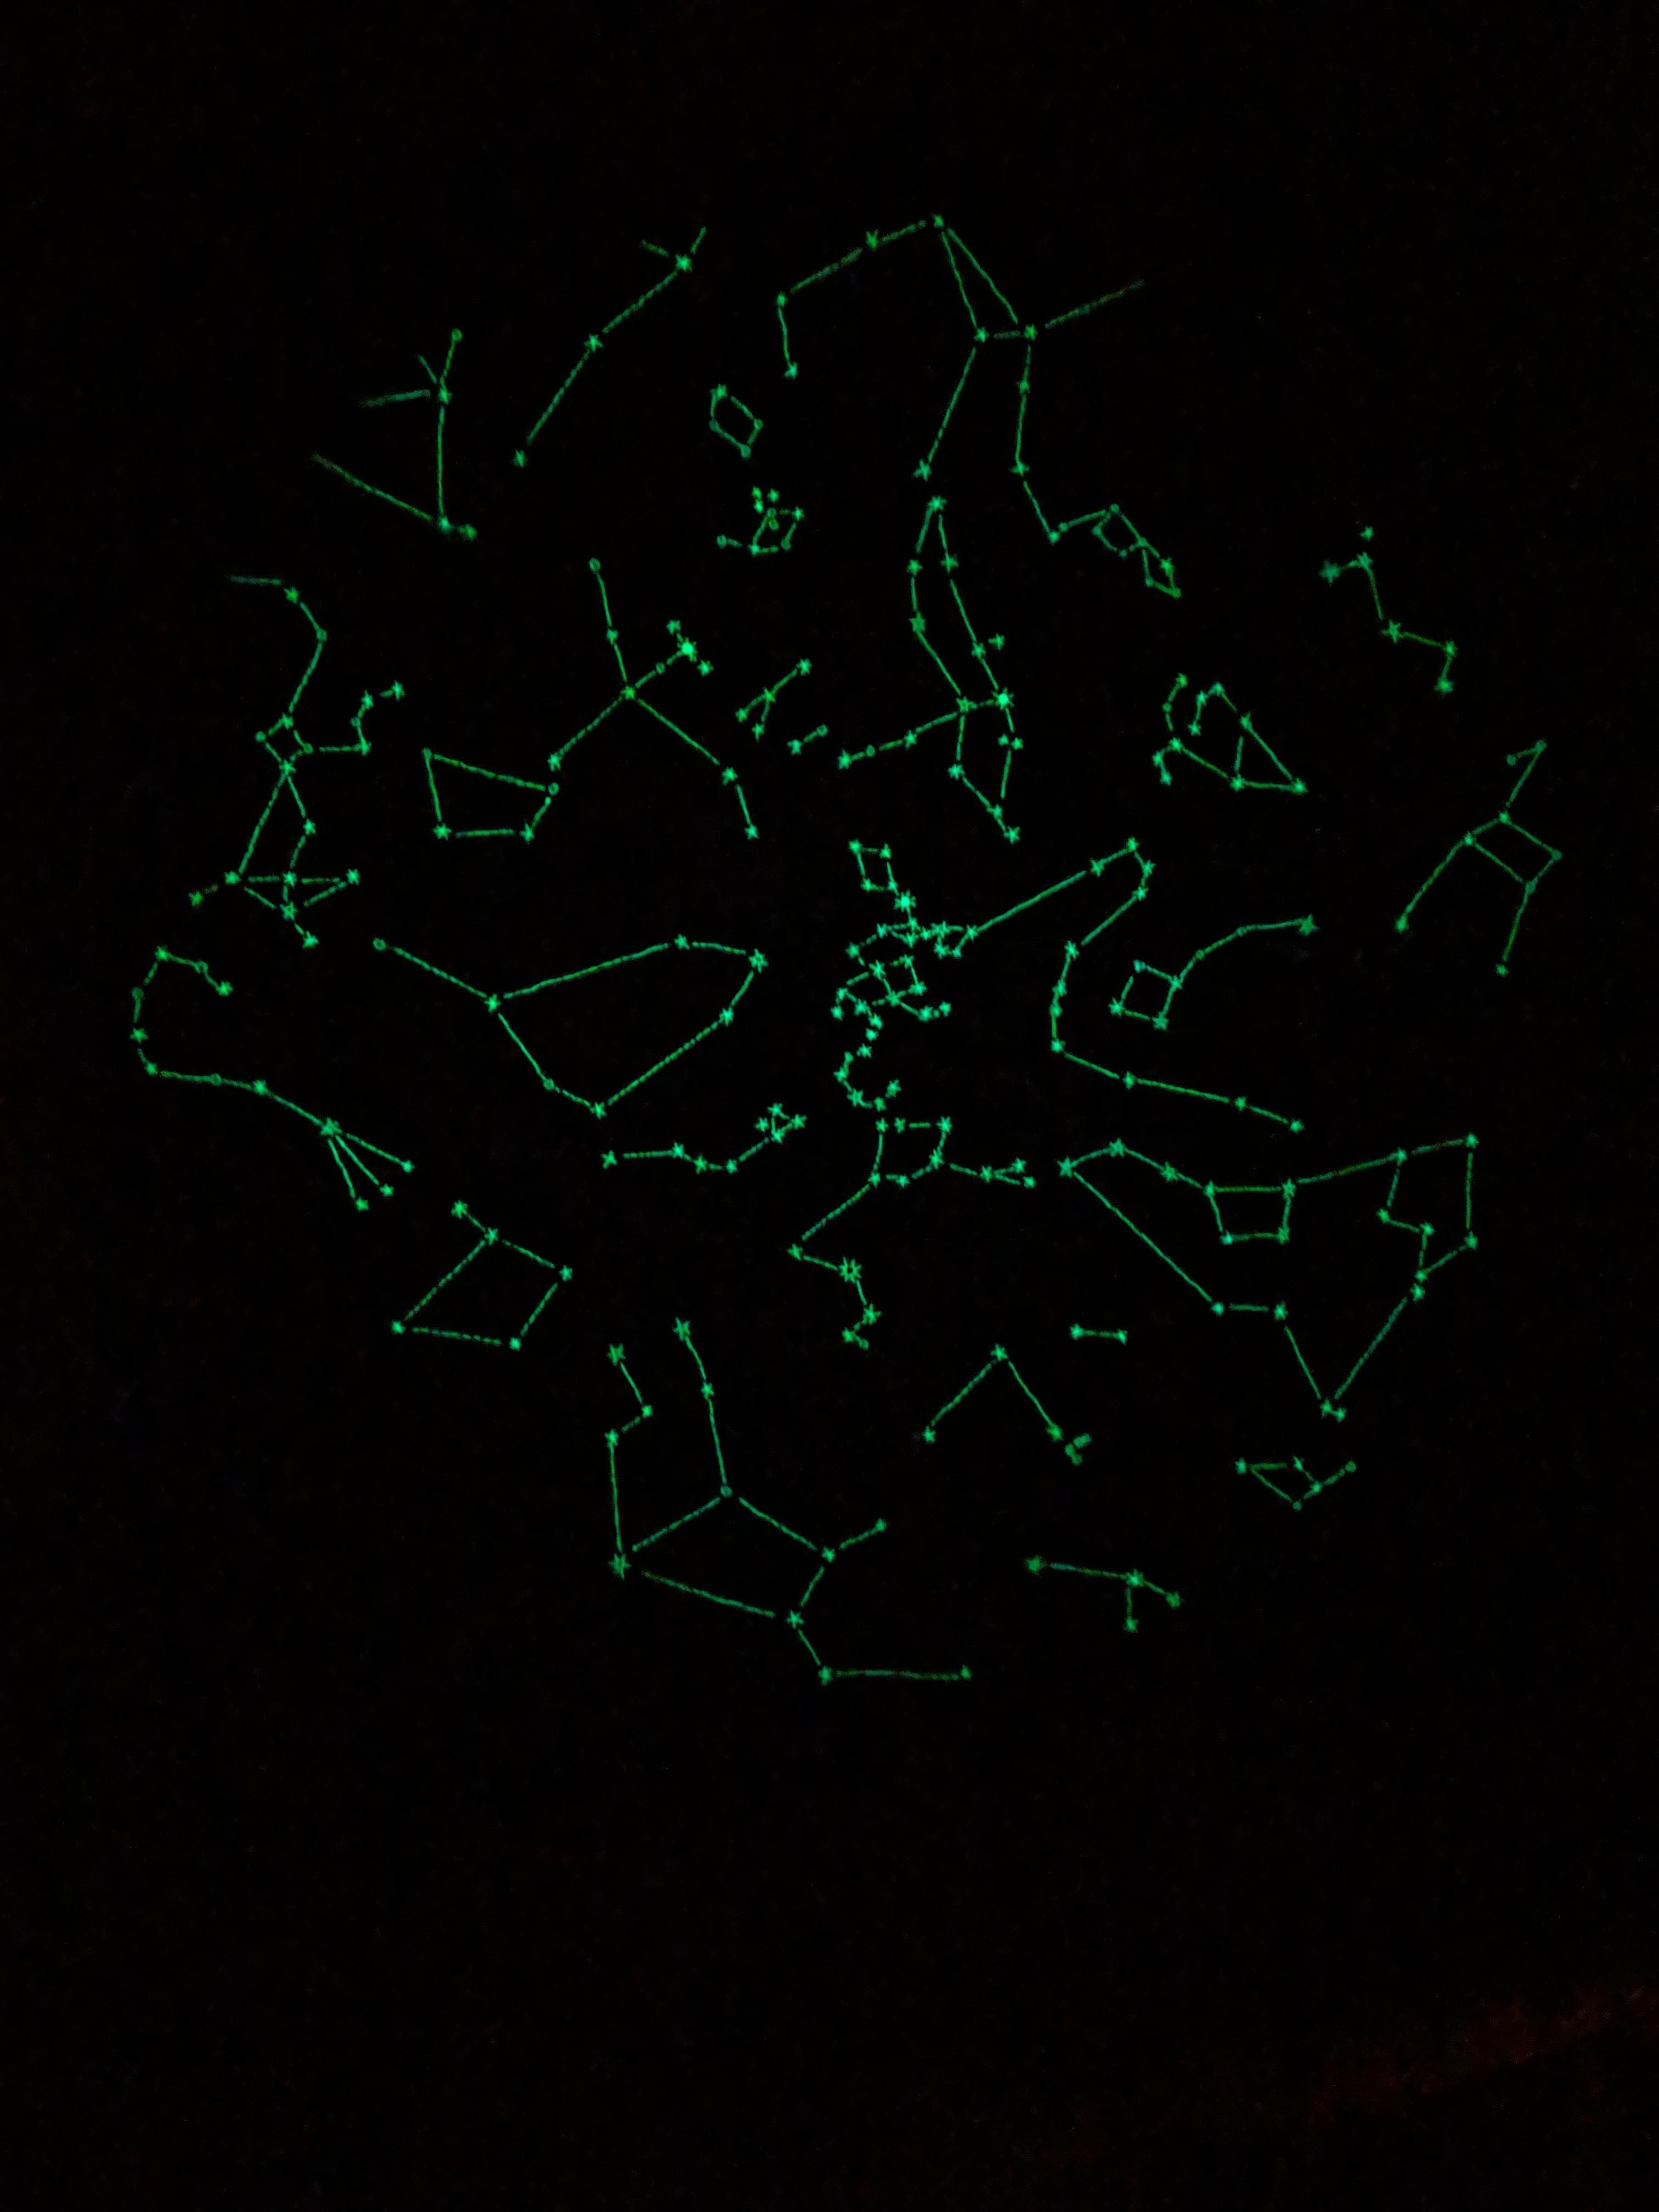
I decided to use glow-in-the-dark thread for the stars and constellations. I did the names of the constellations in gold thread. The Milky Way I did in yellow embroidery thread. For the grid and corner designs I used a turquoise blue and a navy blue silk thread. I added stylized icons of the four planets that were visible at the time - Mars in red, Venus in green, Saturn in yellow, and Jupiter in orange with a big red spot.
Supplies
For the quilt front: 36" x 36" piece of fabric (I chose a plain dark blue wave with a slight sheen, so the embroidery would show up better)
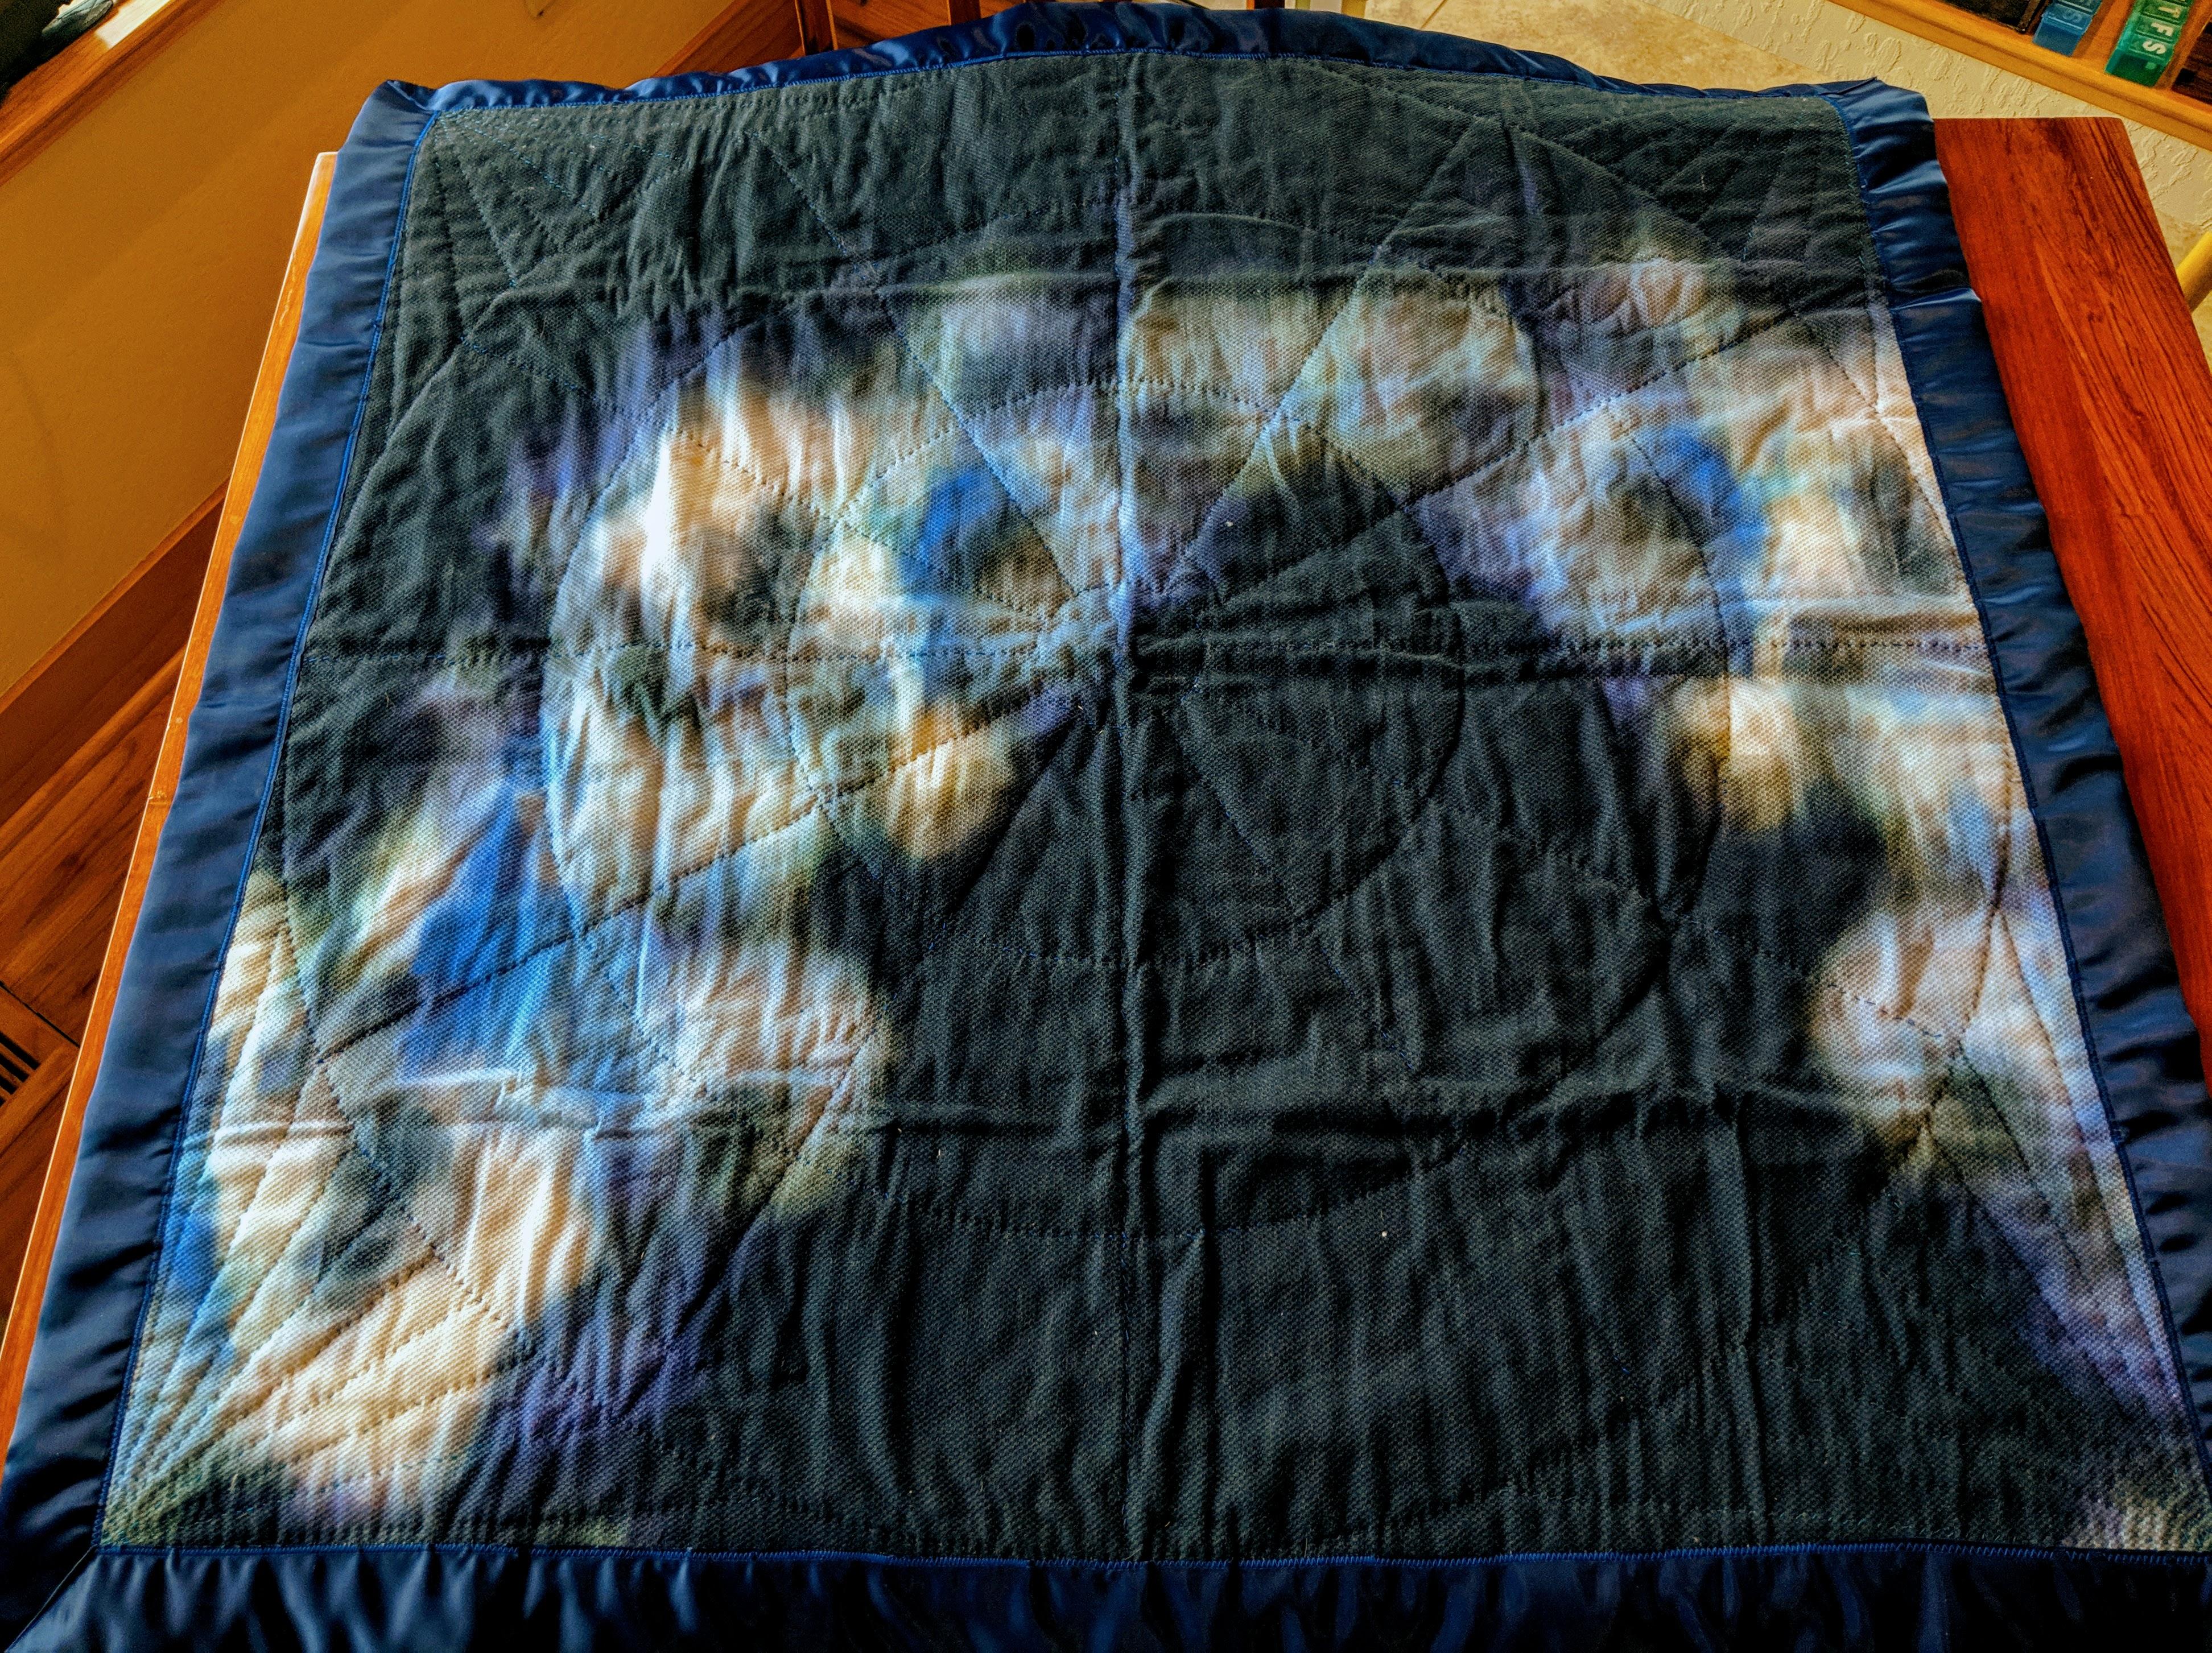
For the quilt back: 36" x 36" piece of fabric (I found a print that resembled a nebula)
For quilt batting: 36" x 36" piece (I used silk batting as it is lightweight and airy, and the baby lived in California)
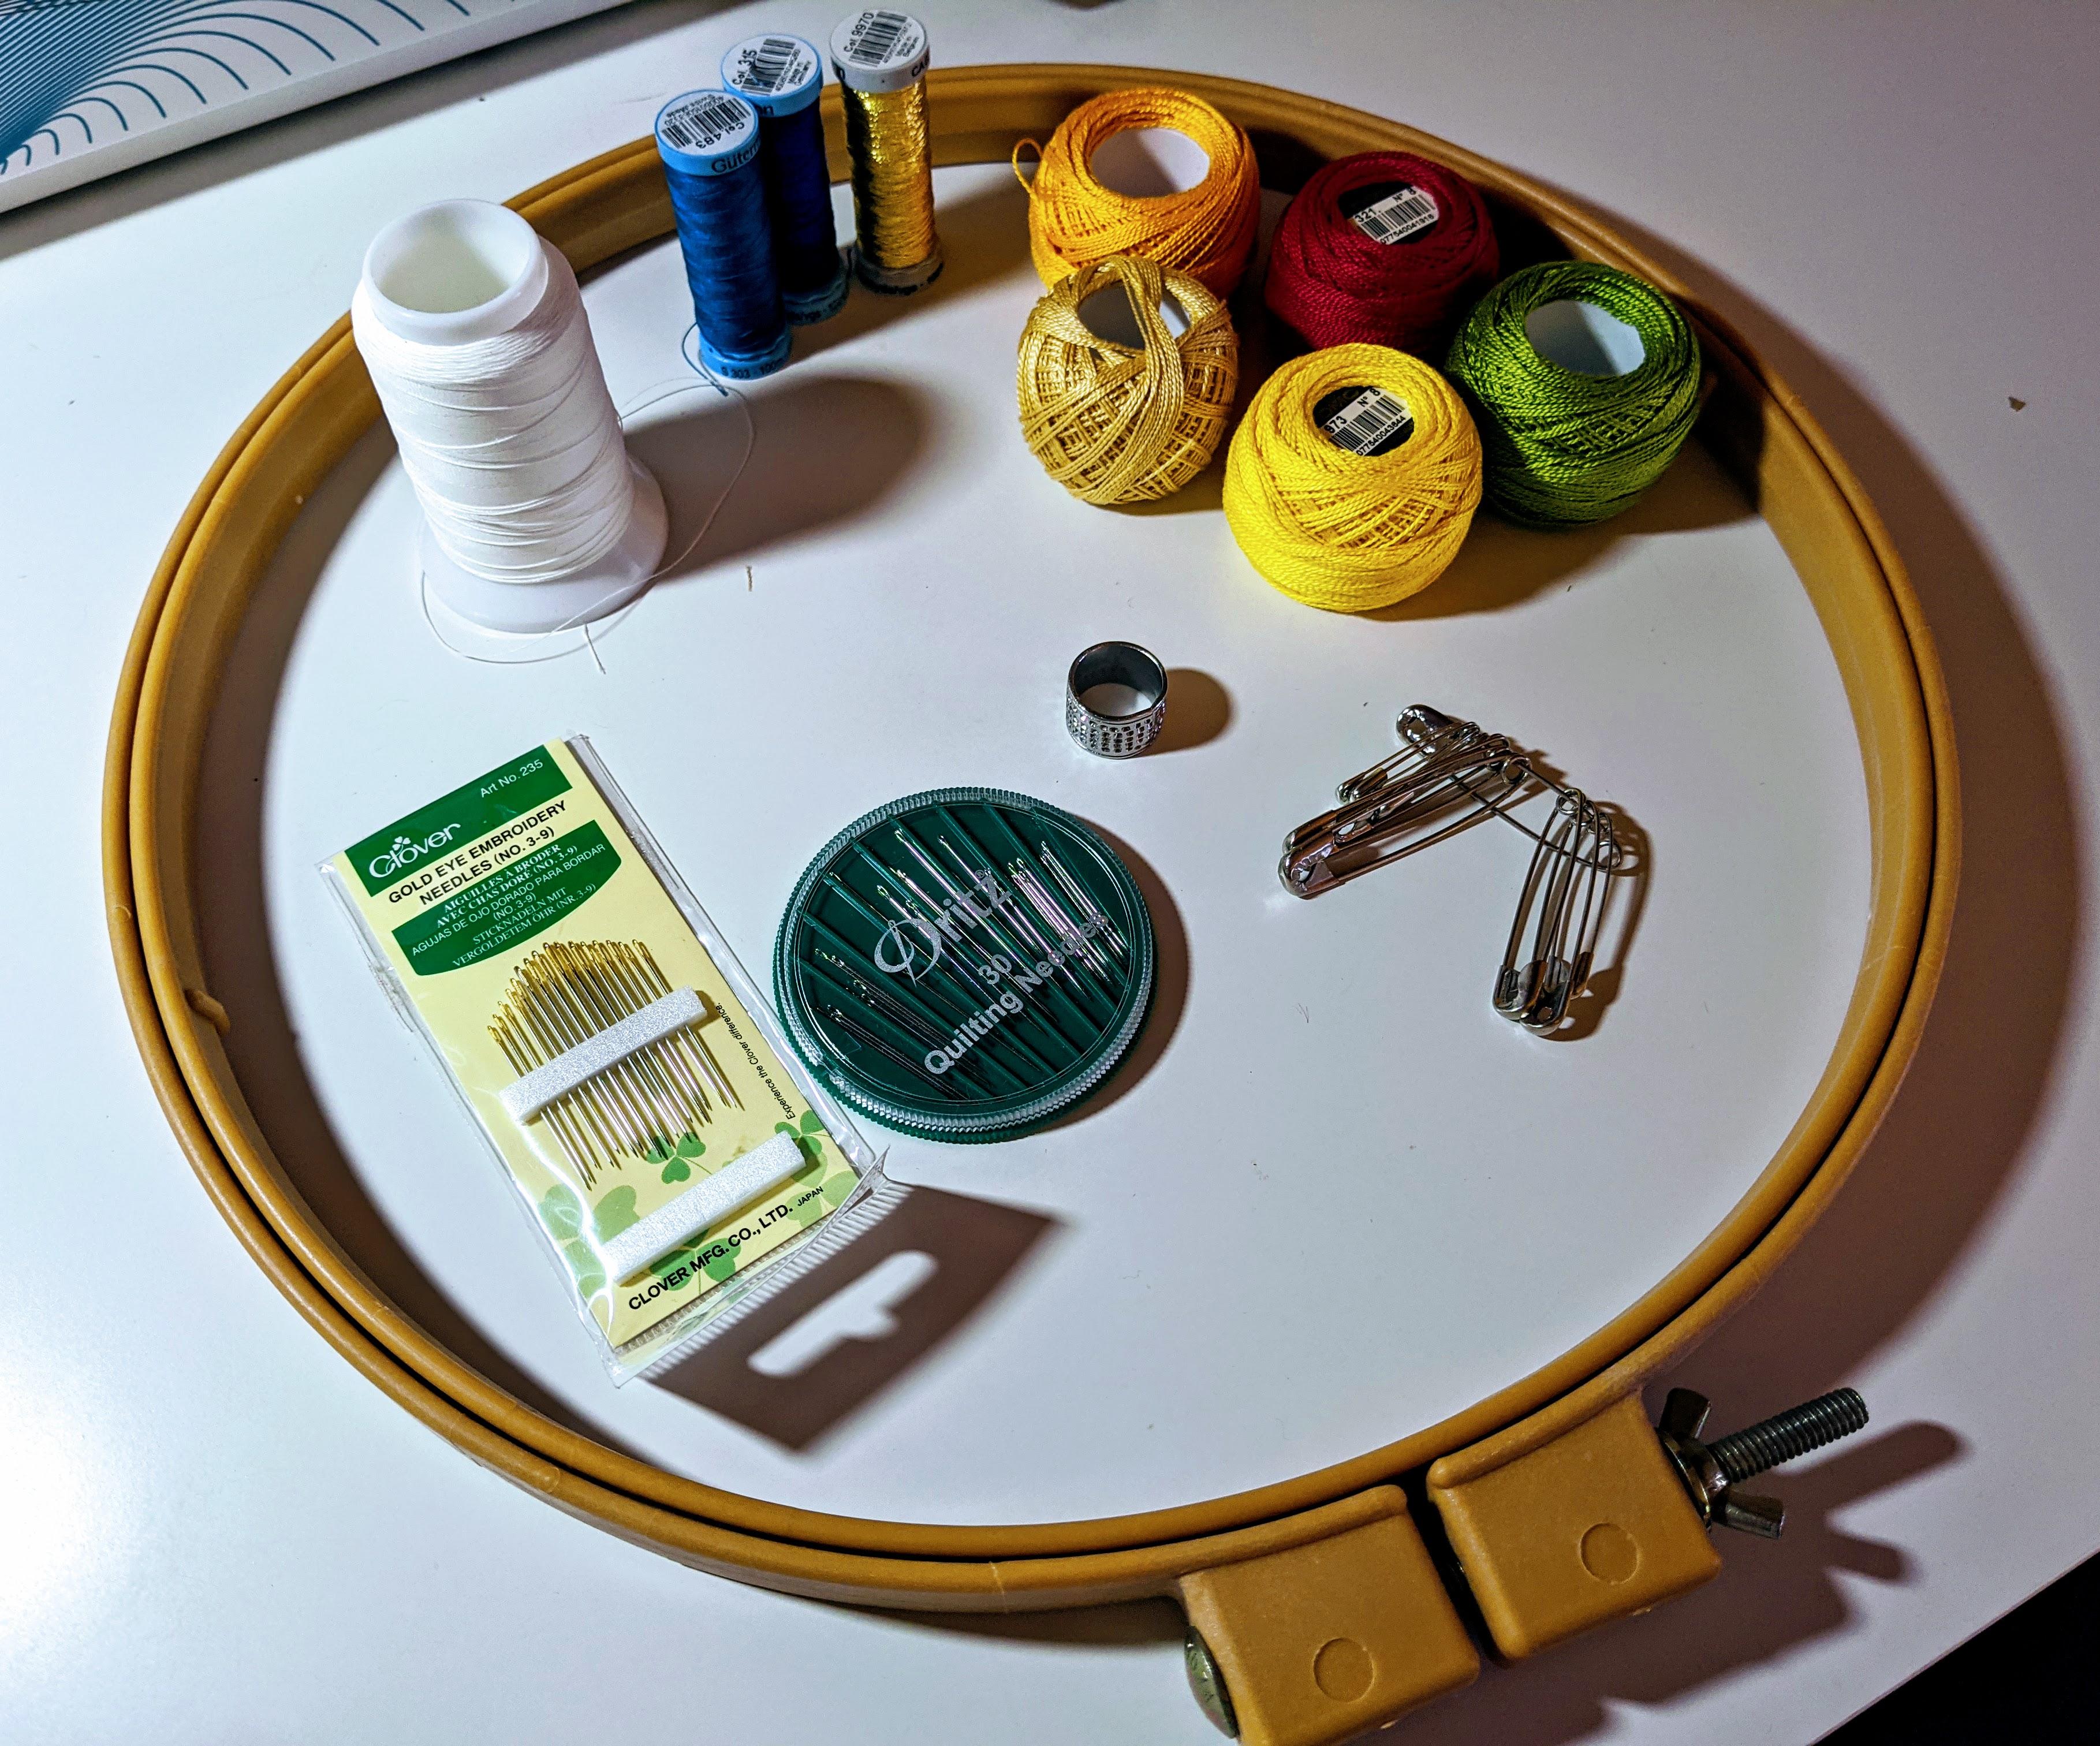
Embroidery threads in various colors. These are the colors I chose:
Turquoise blue silk thread (corner designs)
Navy blue silk thread for the (Azimuthal grid)
Glow-in-the-dark thread (stars and constellation lines) - I got white but threads come in several different colors
Metallic gold thread (constellation names)
Cotton embroidery floss (planets, red - Mars, green - Venus, orange/red - Jupiter, bright yellow - Saturn, golden yellow - Milky Way French knots)
Blanket edging for finishing the quilt
Quilting needles - I bought Dritz brand ones from my local fabric store
Embroidery needles (they have larger eyes to accommodate the thicker embroidery floss) - I got Clover brand from my local store
Safety pins
Pencil and pens for marking on the pattern
Stabilizer fabric - I used the actual pattern from Haptic Lab which is 36" x 36" and simply re-drew the constellation designs to fit my project. You can't buy such a large piece of stabilizer fabric as a single buyer; Haptic Lab has theirs made special as a wholesaler. However, you could piece together several pieces (they often come in 8" to 12" wide sheets and/or rolls)
Large embroidery or quilting hoop to keep fabrics taut and easy to work on
Thimble - pushing a needle through all those layers of fabric can be hard on your fingertips! I used a hard metal open thimble but there are many styles and materials to choose from. Here are two helpful tutorials on thimbles: Needlenthread and Dritz
Step 1: Creating the Constellation Map Template
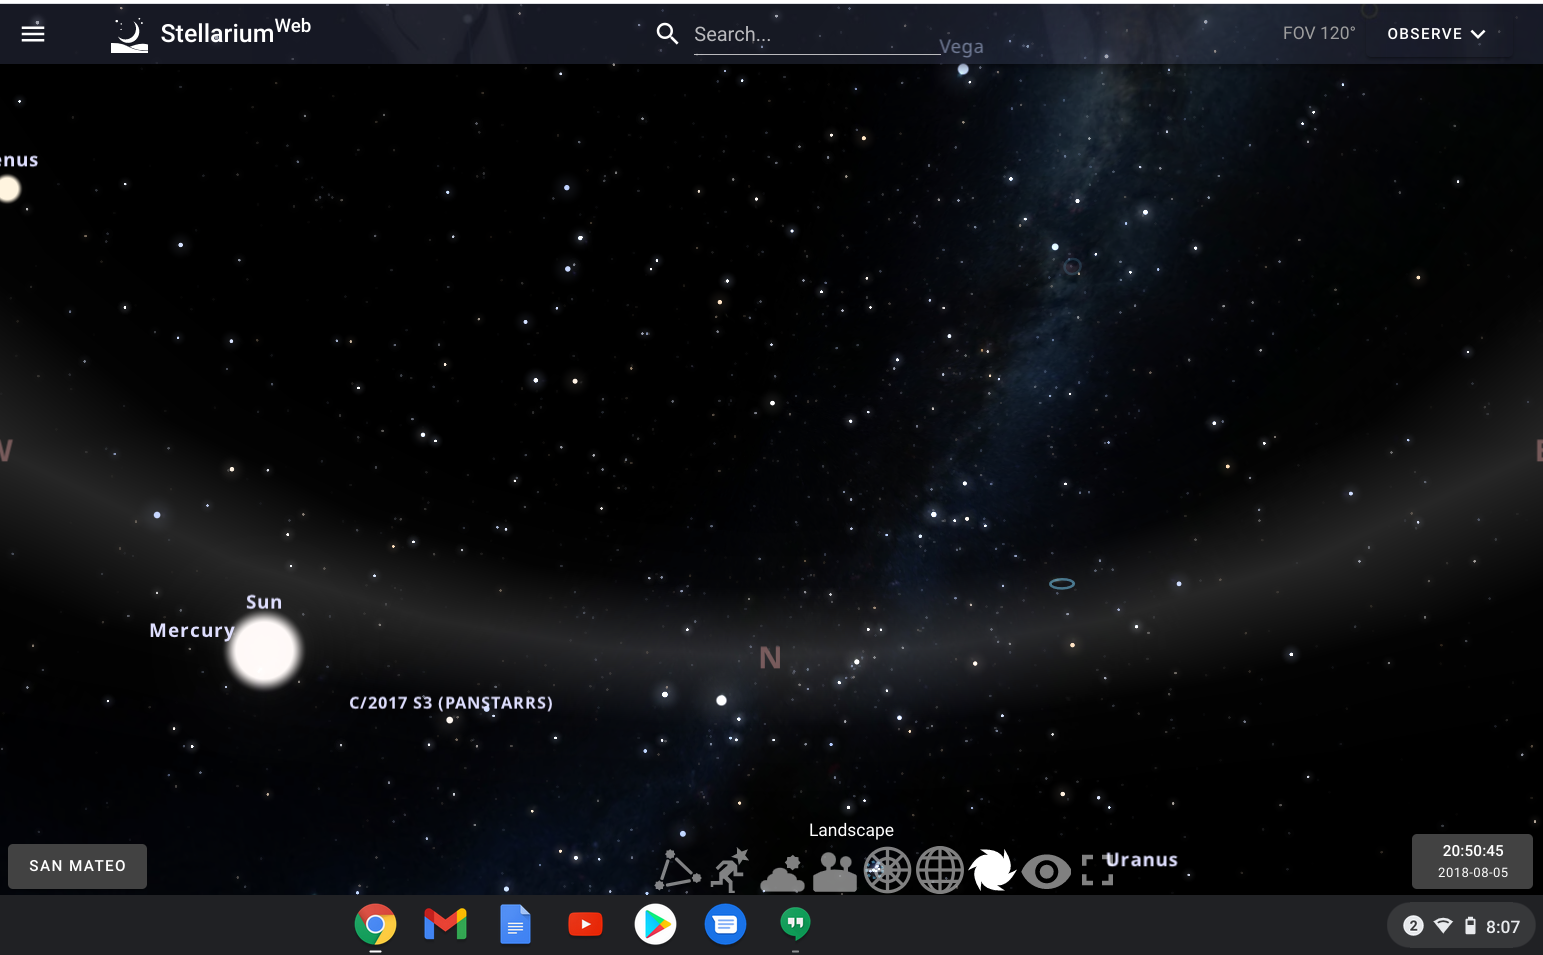
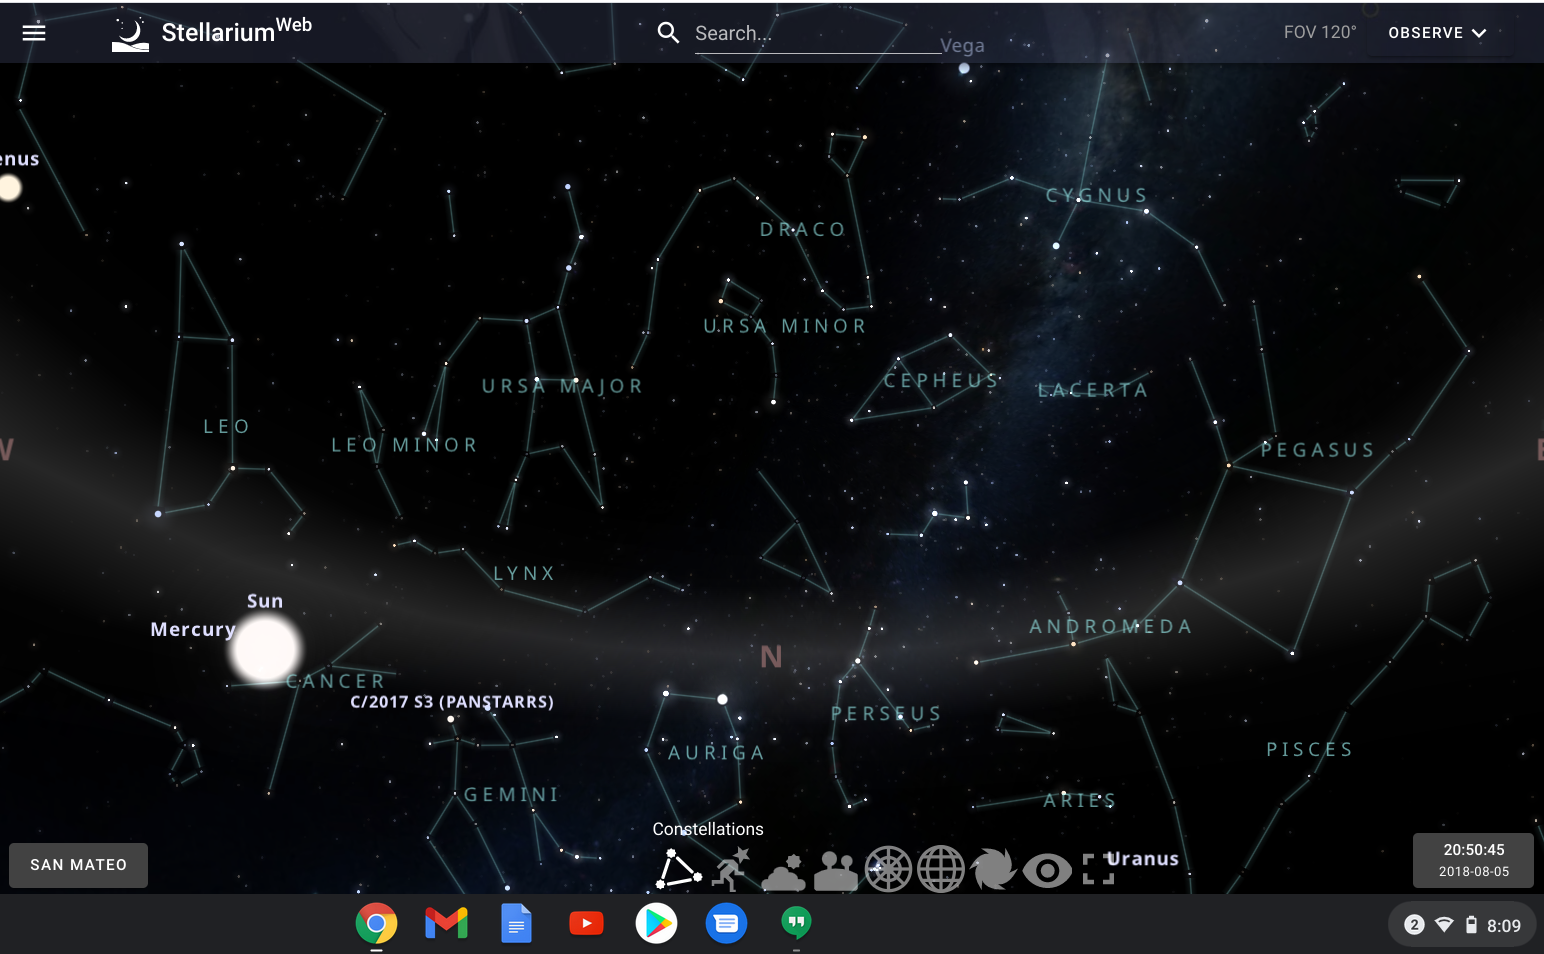
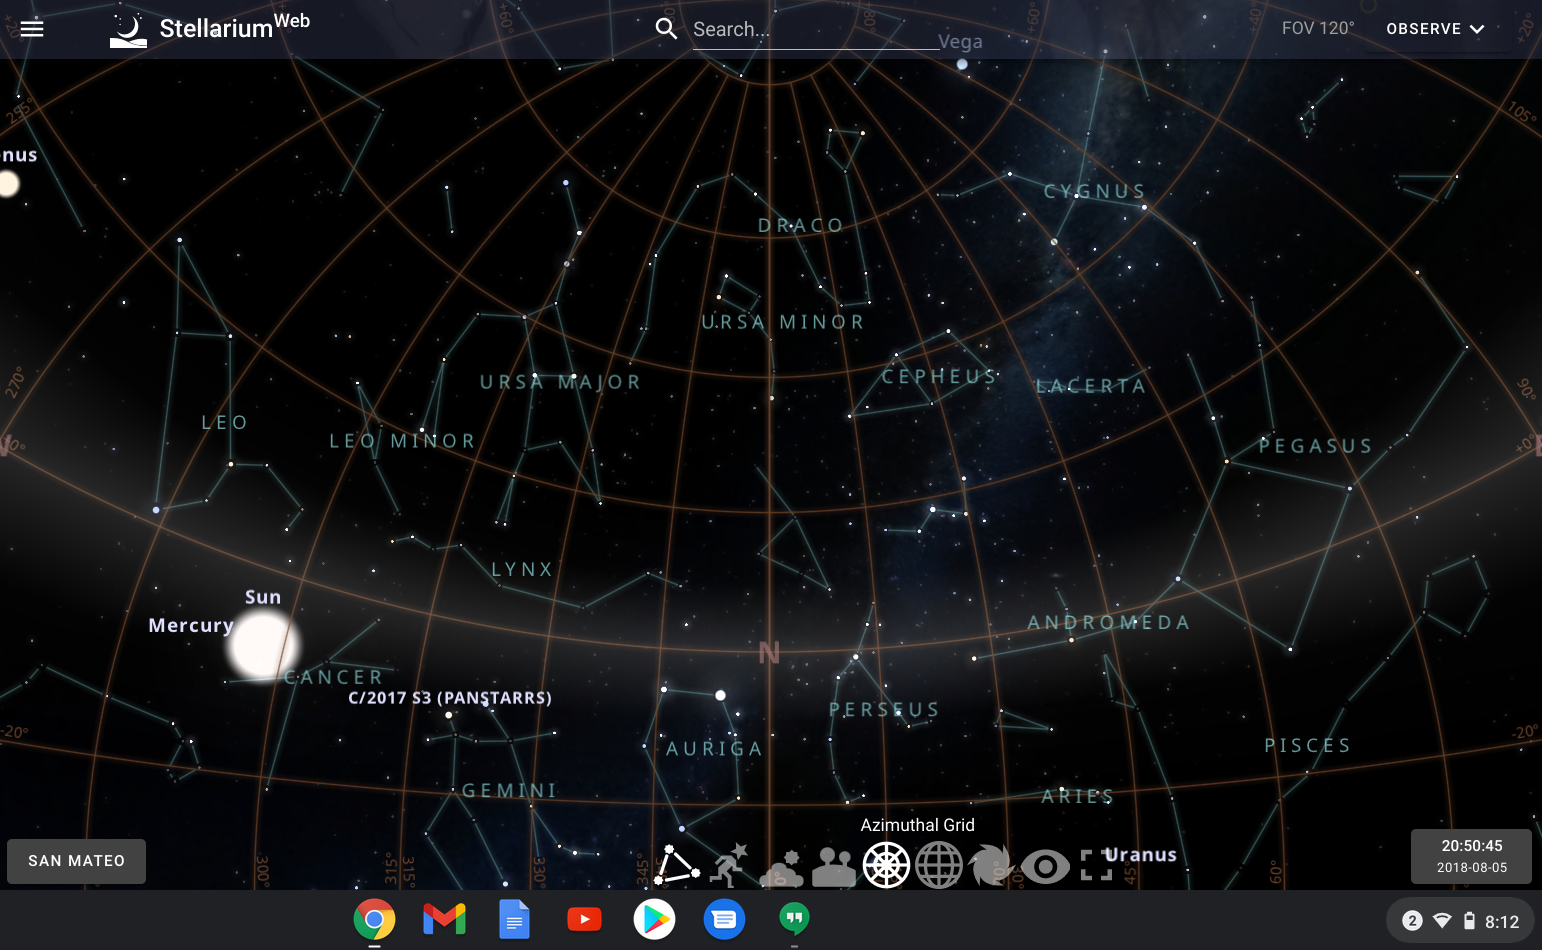
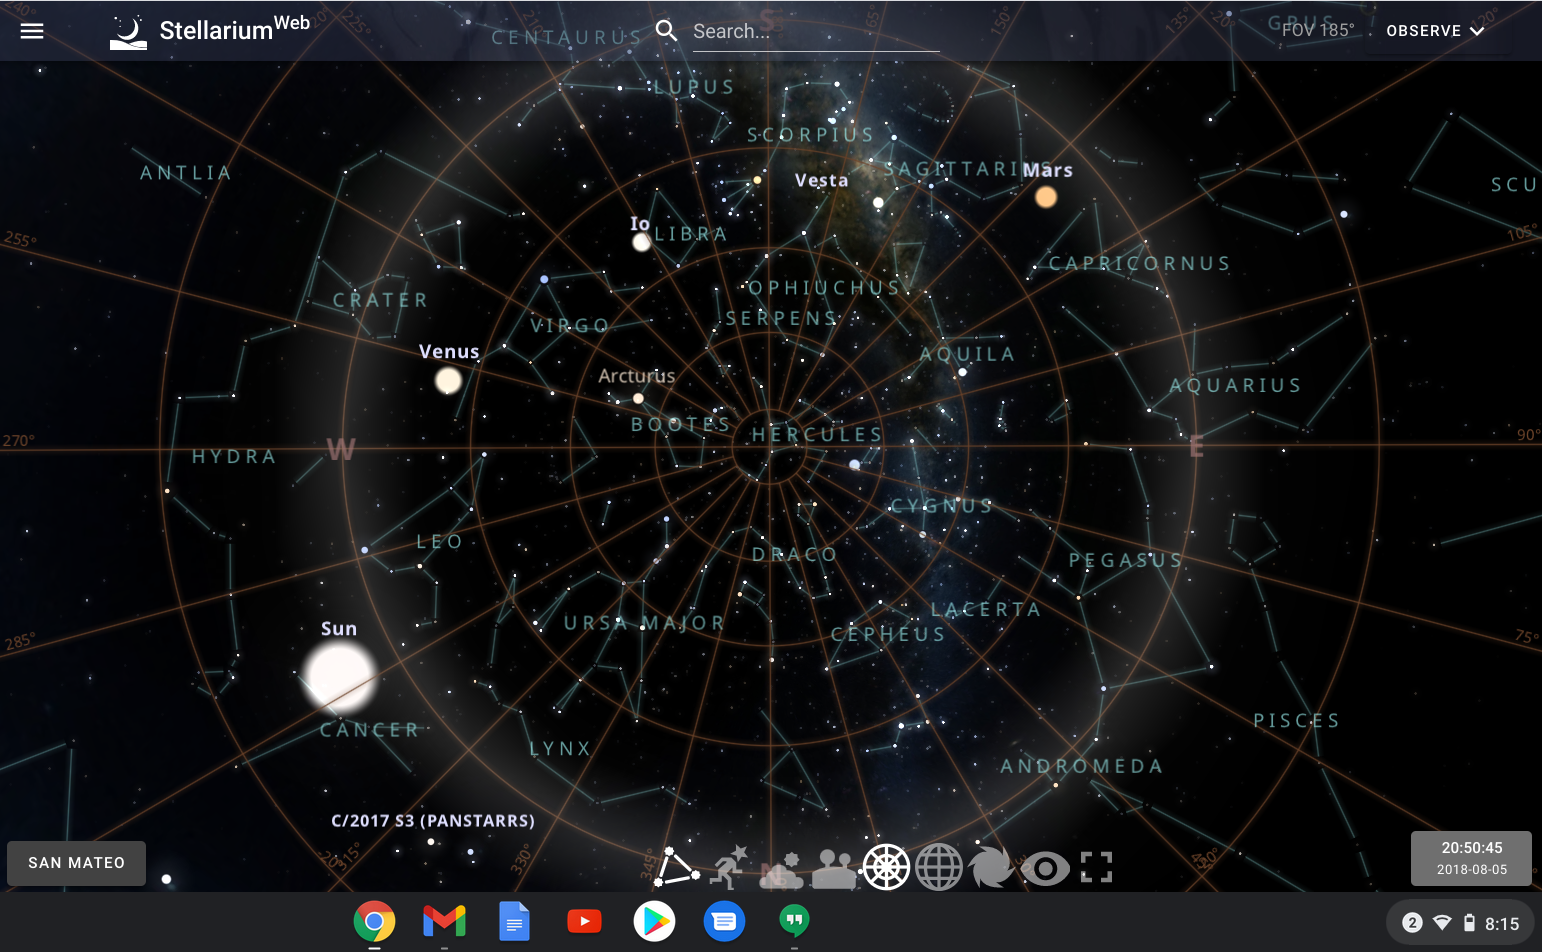
Go to stellarium.org
You can use the web version, or download the app. I used the web version.
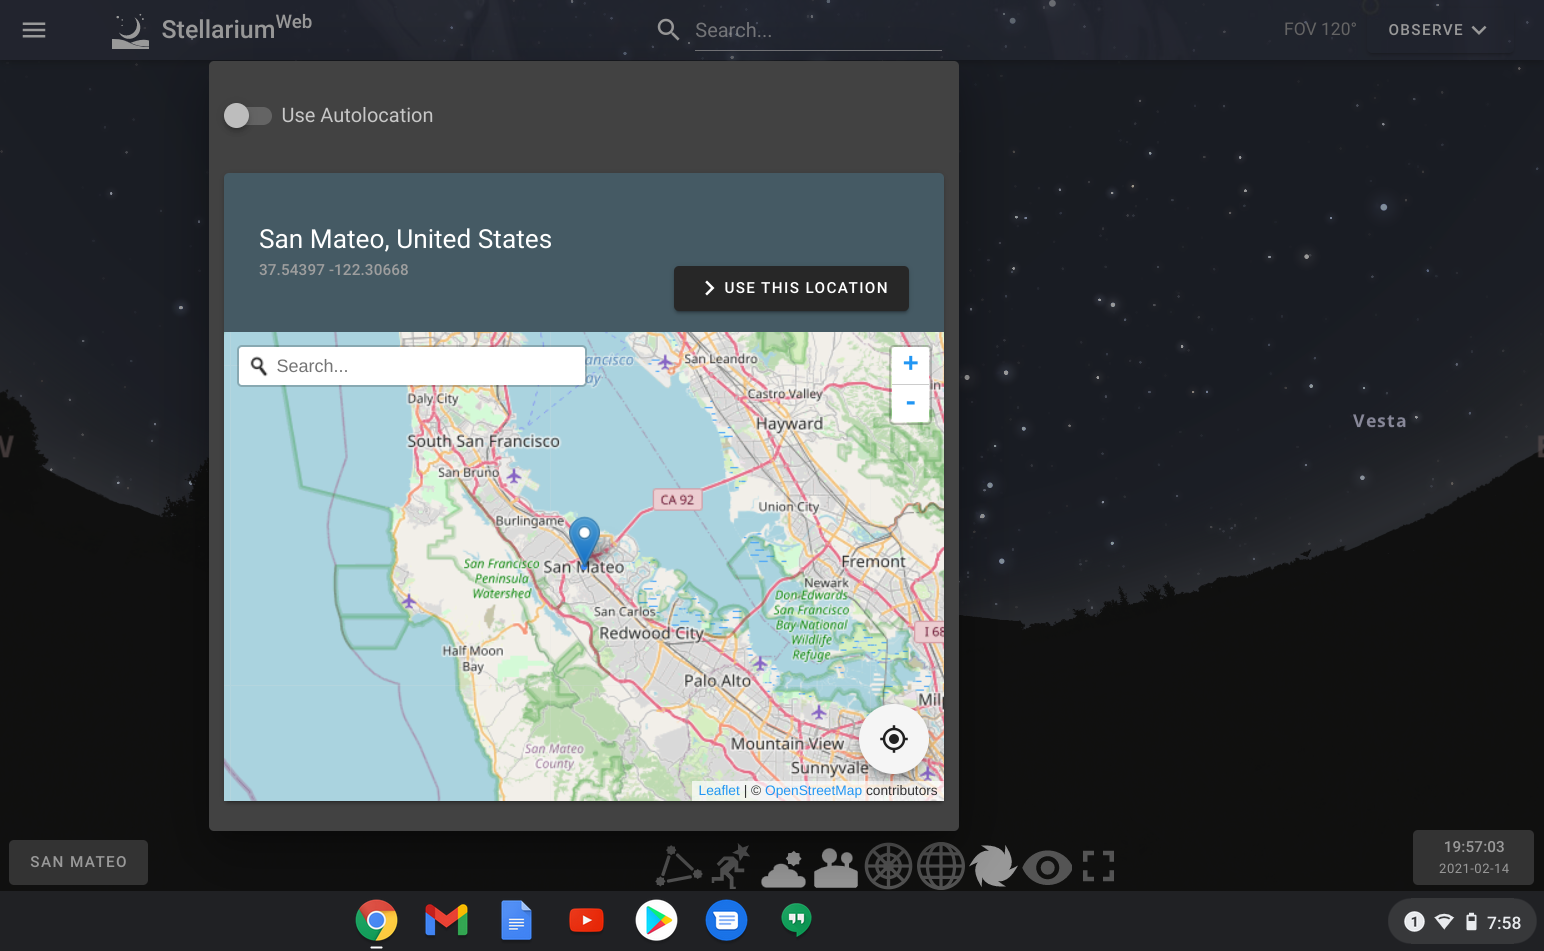
Set location: In the lower left hand corner of the screen, you will see a button that says "Near." Click on it, and input your location. In my case, I put in San Mateo, CA as that is where the baby was born. Click "Use this location."
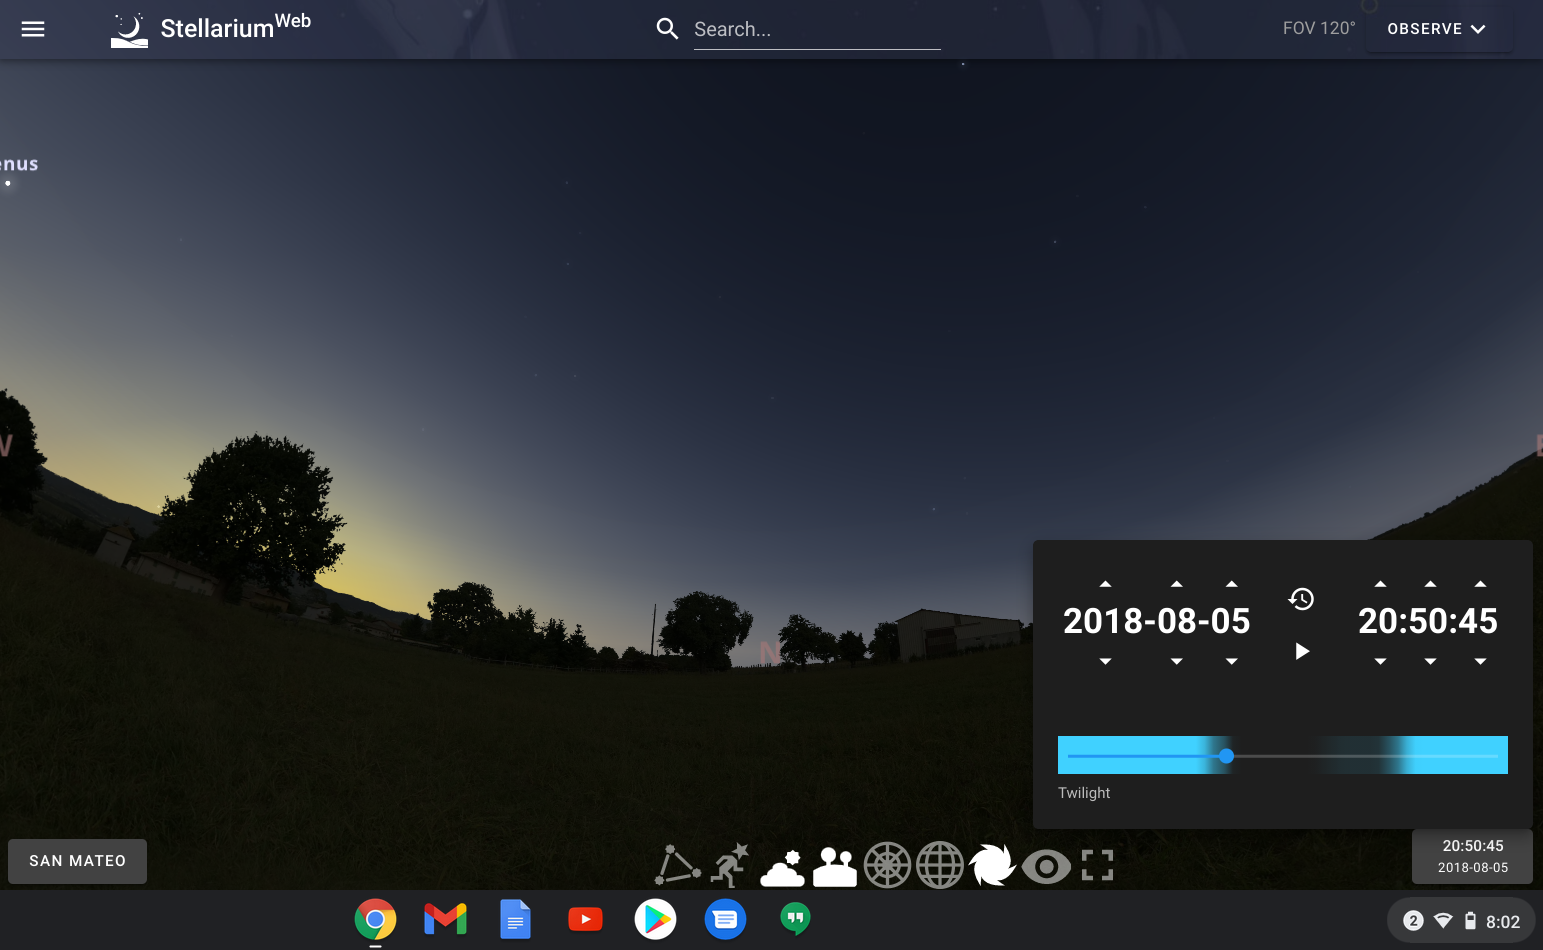
Set date and time: In the lower right hand corner of the screen, you will see a button with the current date and time ticking on it. Click on that. It will bring up the date and time stamp. Hit the pause button so that stars and night sky aren't continuously adjusting. My date and time was August 5, 2018 and 20:50.
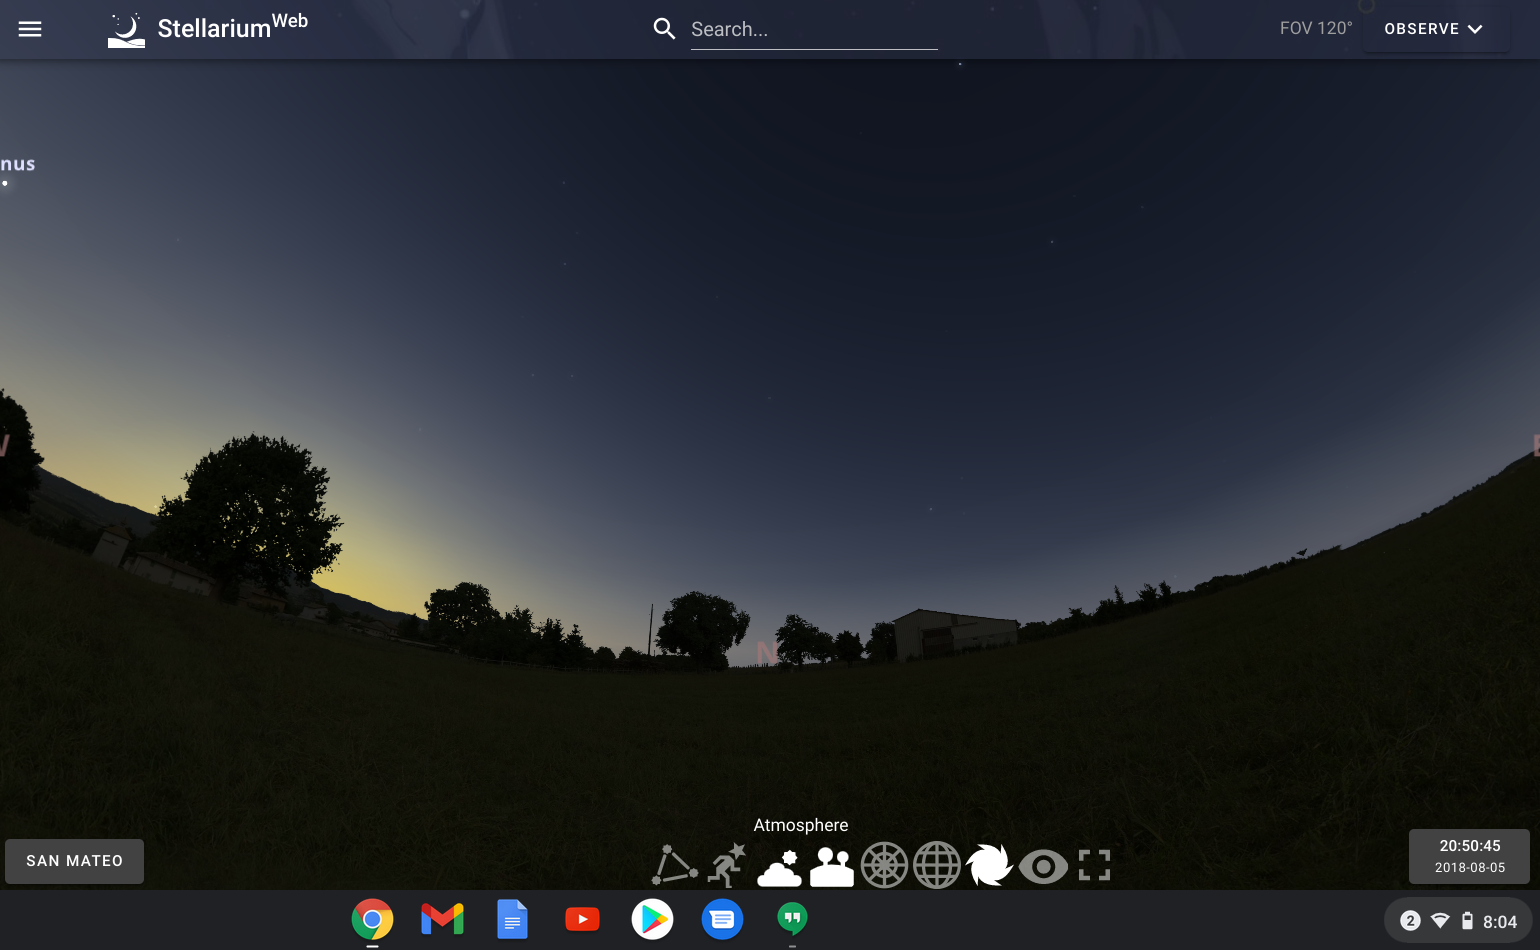
Adjust the filters: Make sure the "Atmosphere" option is off. This means you'll get a view of the constellations and stars that you want. This is especially important if you are doing a star map during daylight hours. Turn off the "Landscape" option as well if you want an unobstructed view of the entire sky.
Add constellations: Click on the "Constellations" button to have them appear.
Add Azimuthal Grid: Click on Azimuthal Grid to align and orient the constellations and stars to the quilt template grid. Adjust the grid on the website until the you are gazing directly at the smallest circle (this would be the equivalent of you lying on your back staring straight up at the center of the dome of the sky). Zoom out until you have the entire half sky visible on the screen (you can zoom in and out for details).
Step 2: Transfer the Pattern to the Stabilizer
If using several smaller sheets of stabilizer, I would recommend basting (very loosely sewing) or taping the stabilizer sheets together to make one large 36" x 36" sheet appropriate for the design.
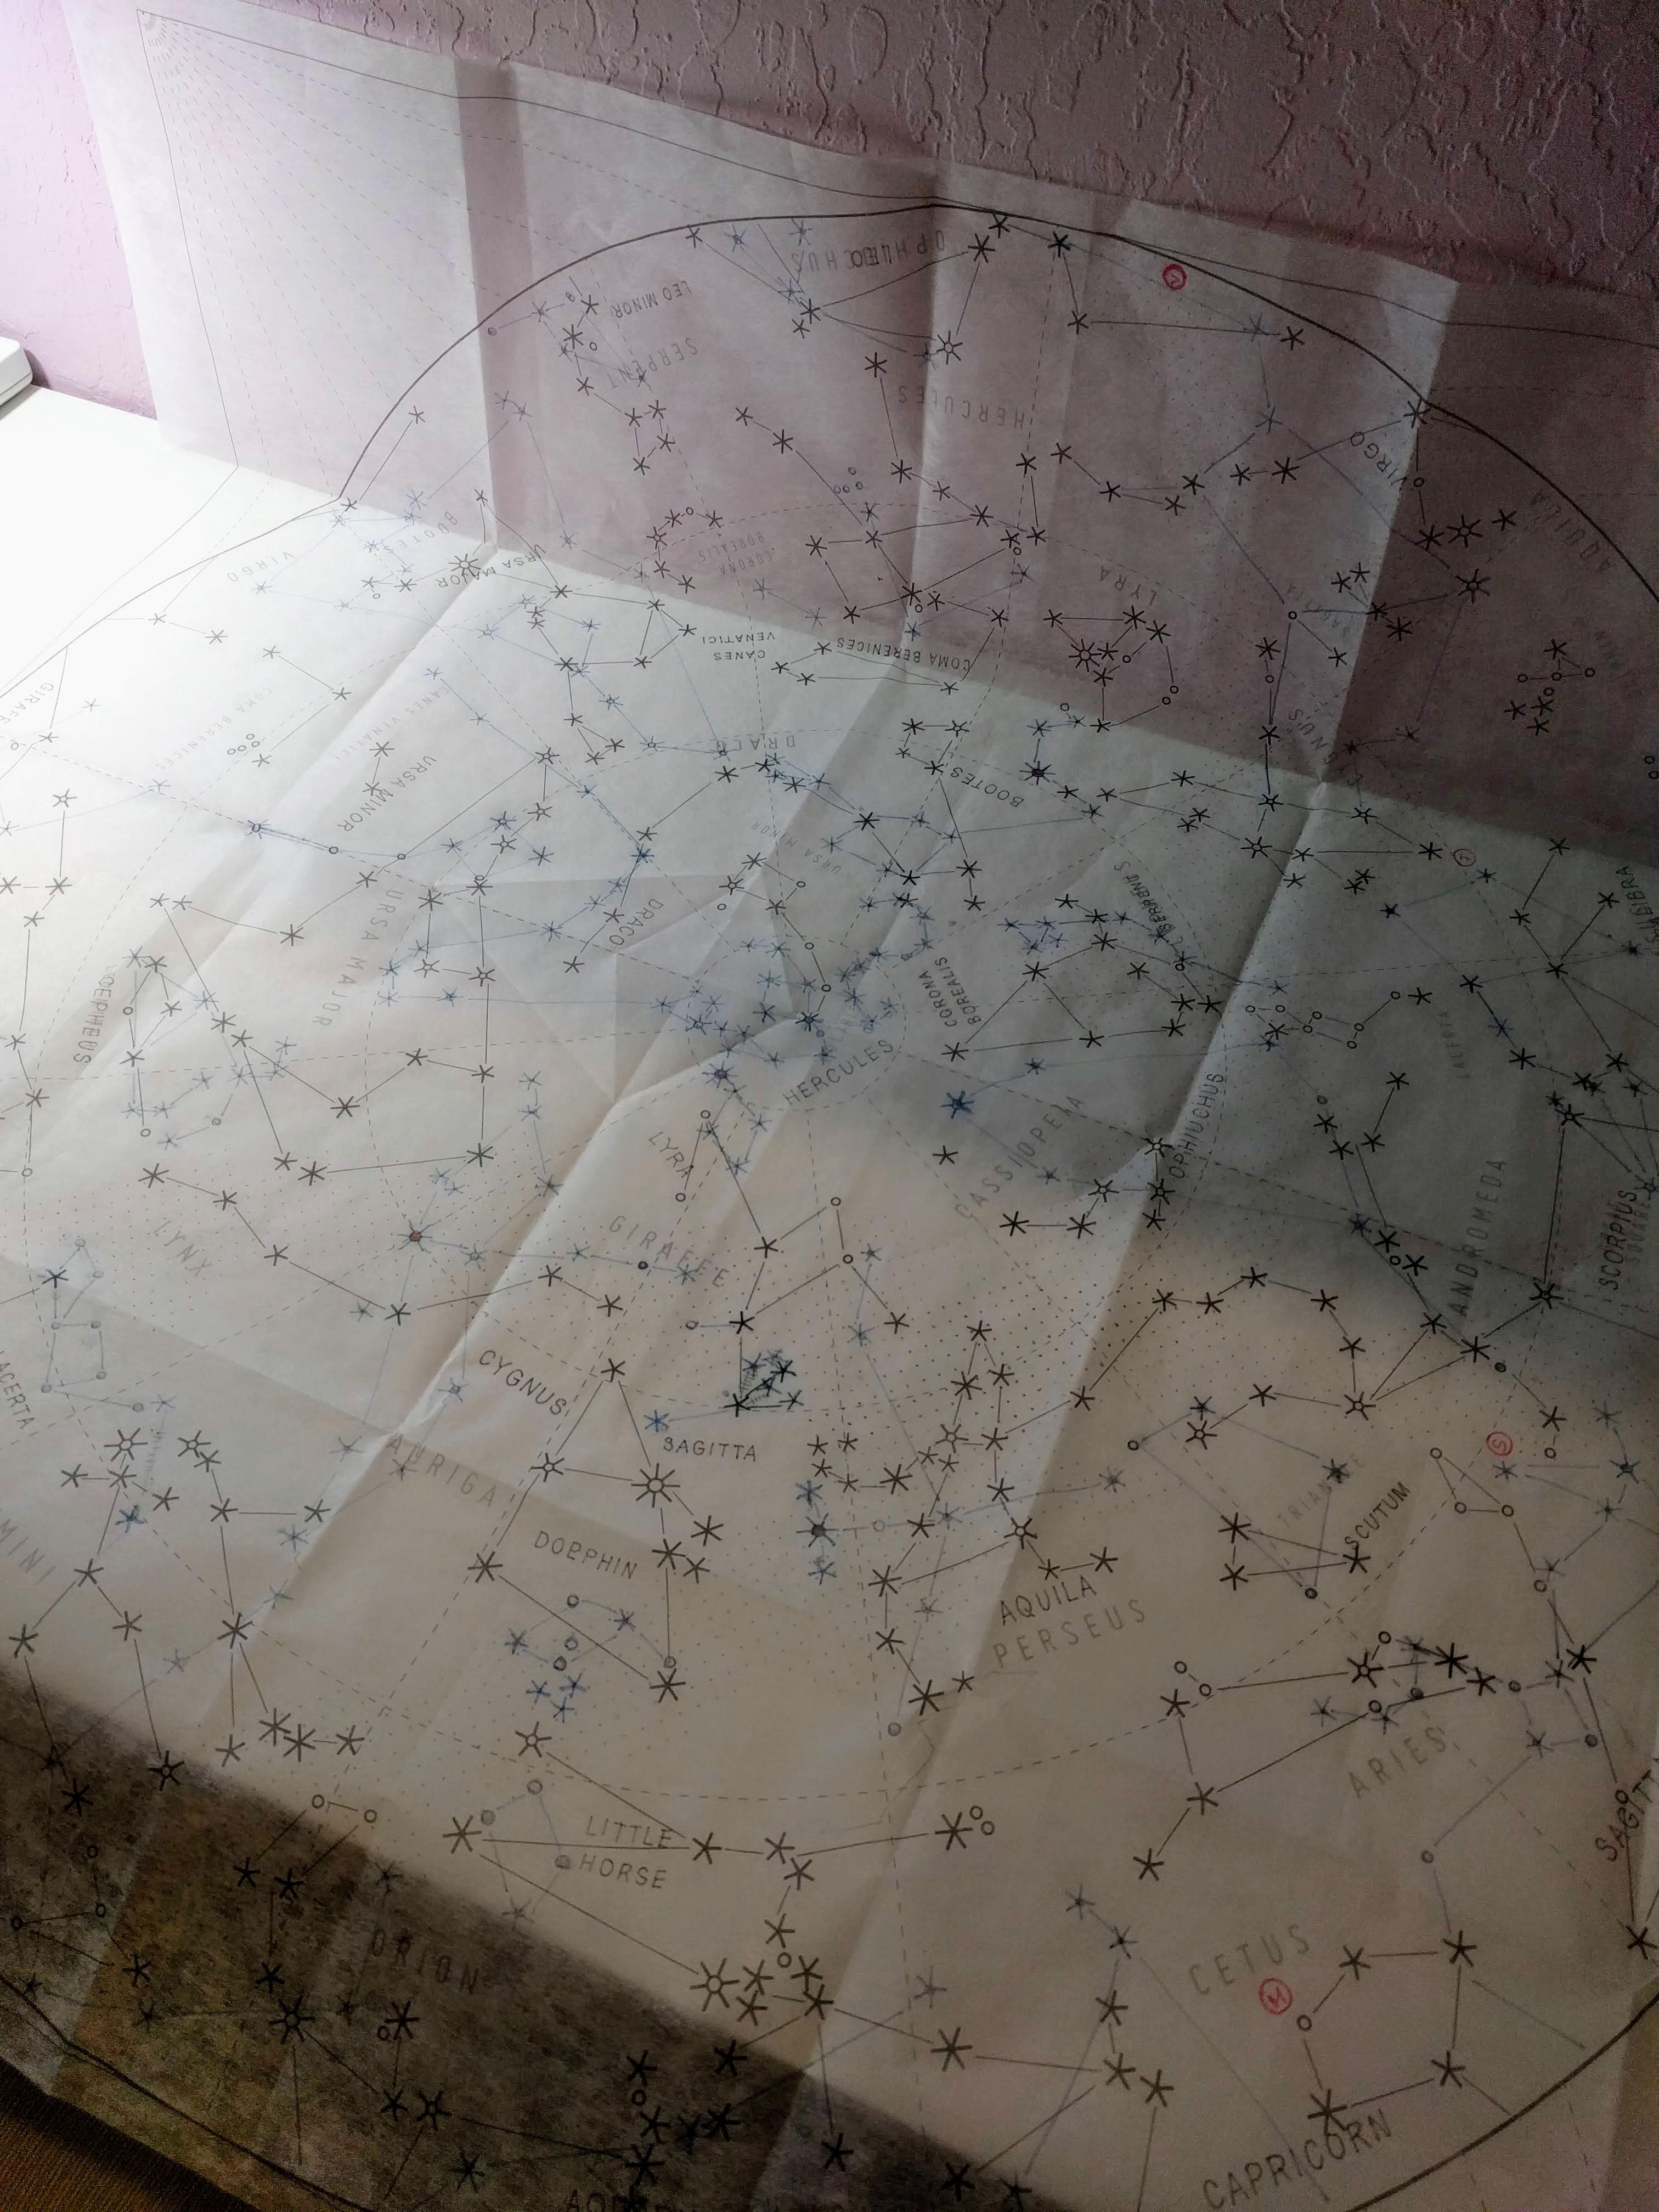
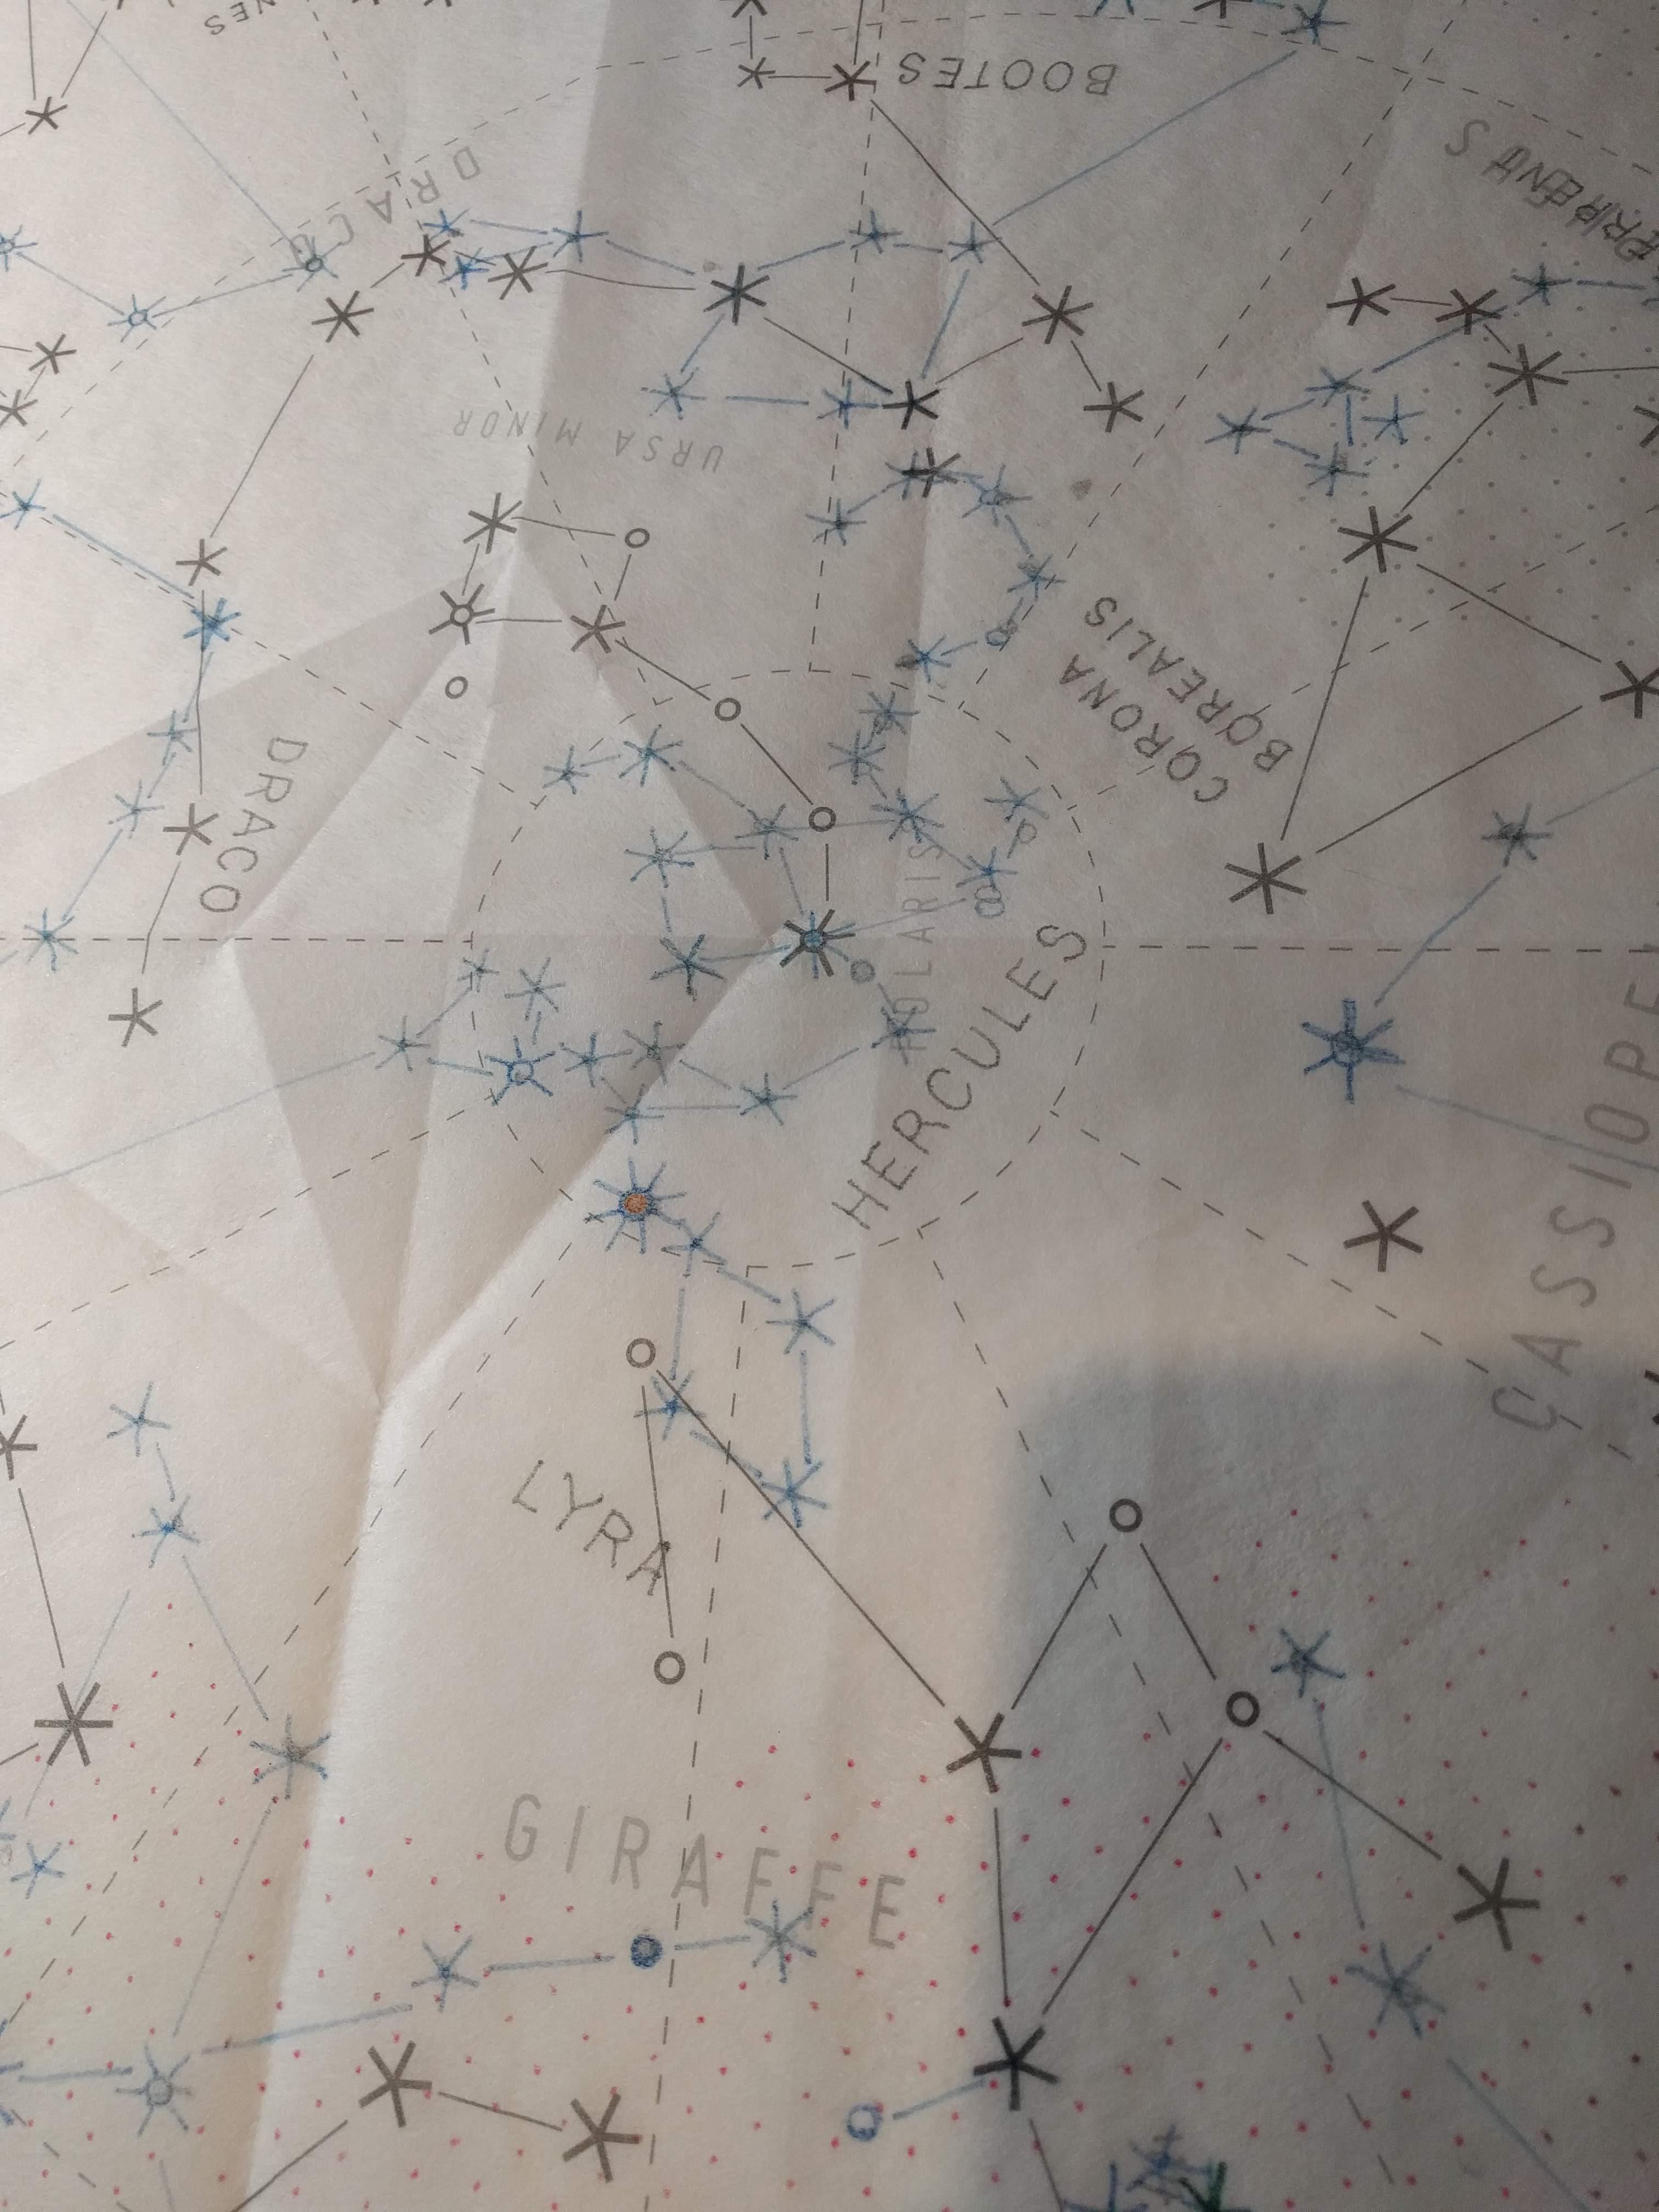
Transfer the constellation design to the stabilizer: I used the Azimuthal grid (the concentric circles and radial lines) already on the template. I drew in my constellations using a different colored marker to distinguish it from the stock pattern that came with the kit. In the pictures you can make out the original printed kit pattern in grey, and my drawn in pattern in blue. I also drew in the positions of the planets (in red, M for Mars, V for Venus, S for Saturn, and J for Jupiter) which would enable the viewer to theoretically plot out the exact date, time, and place of the event represented.
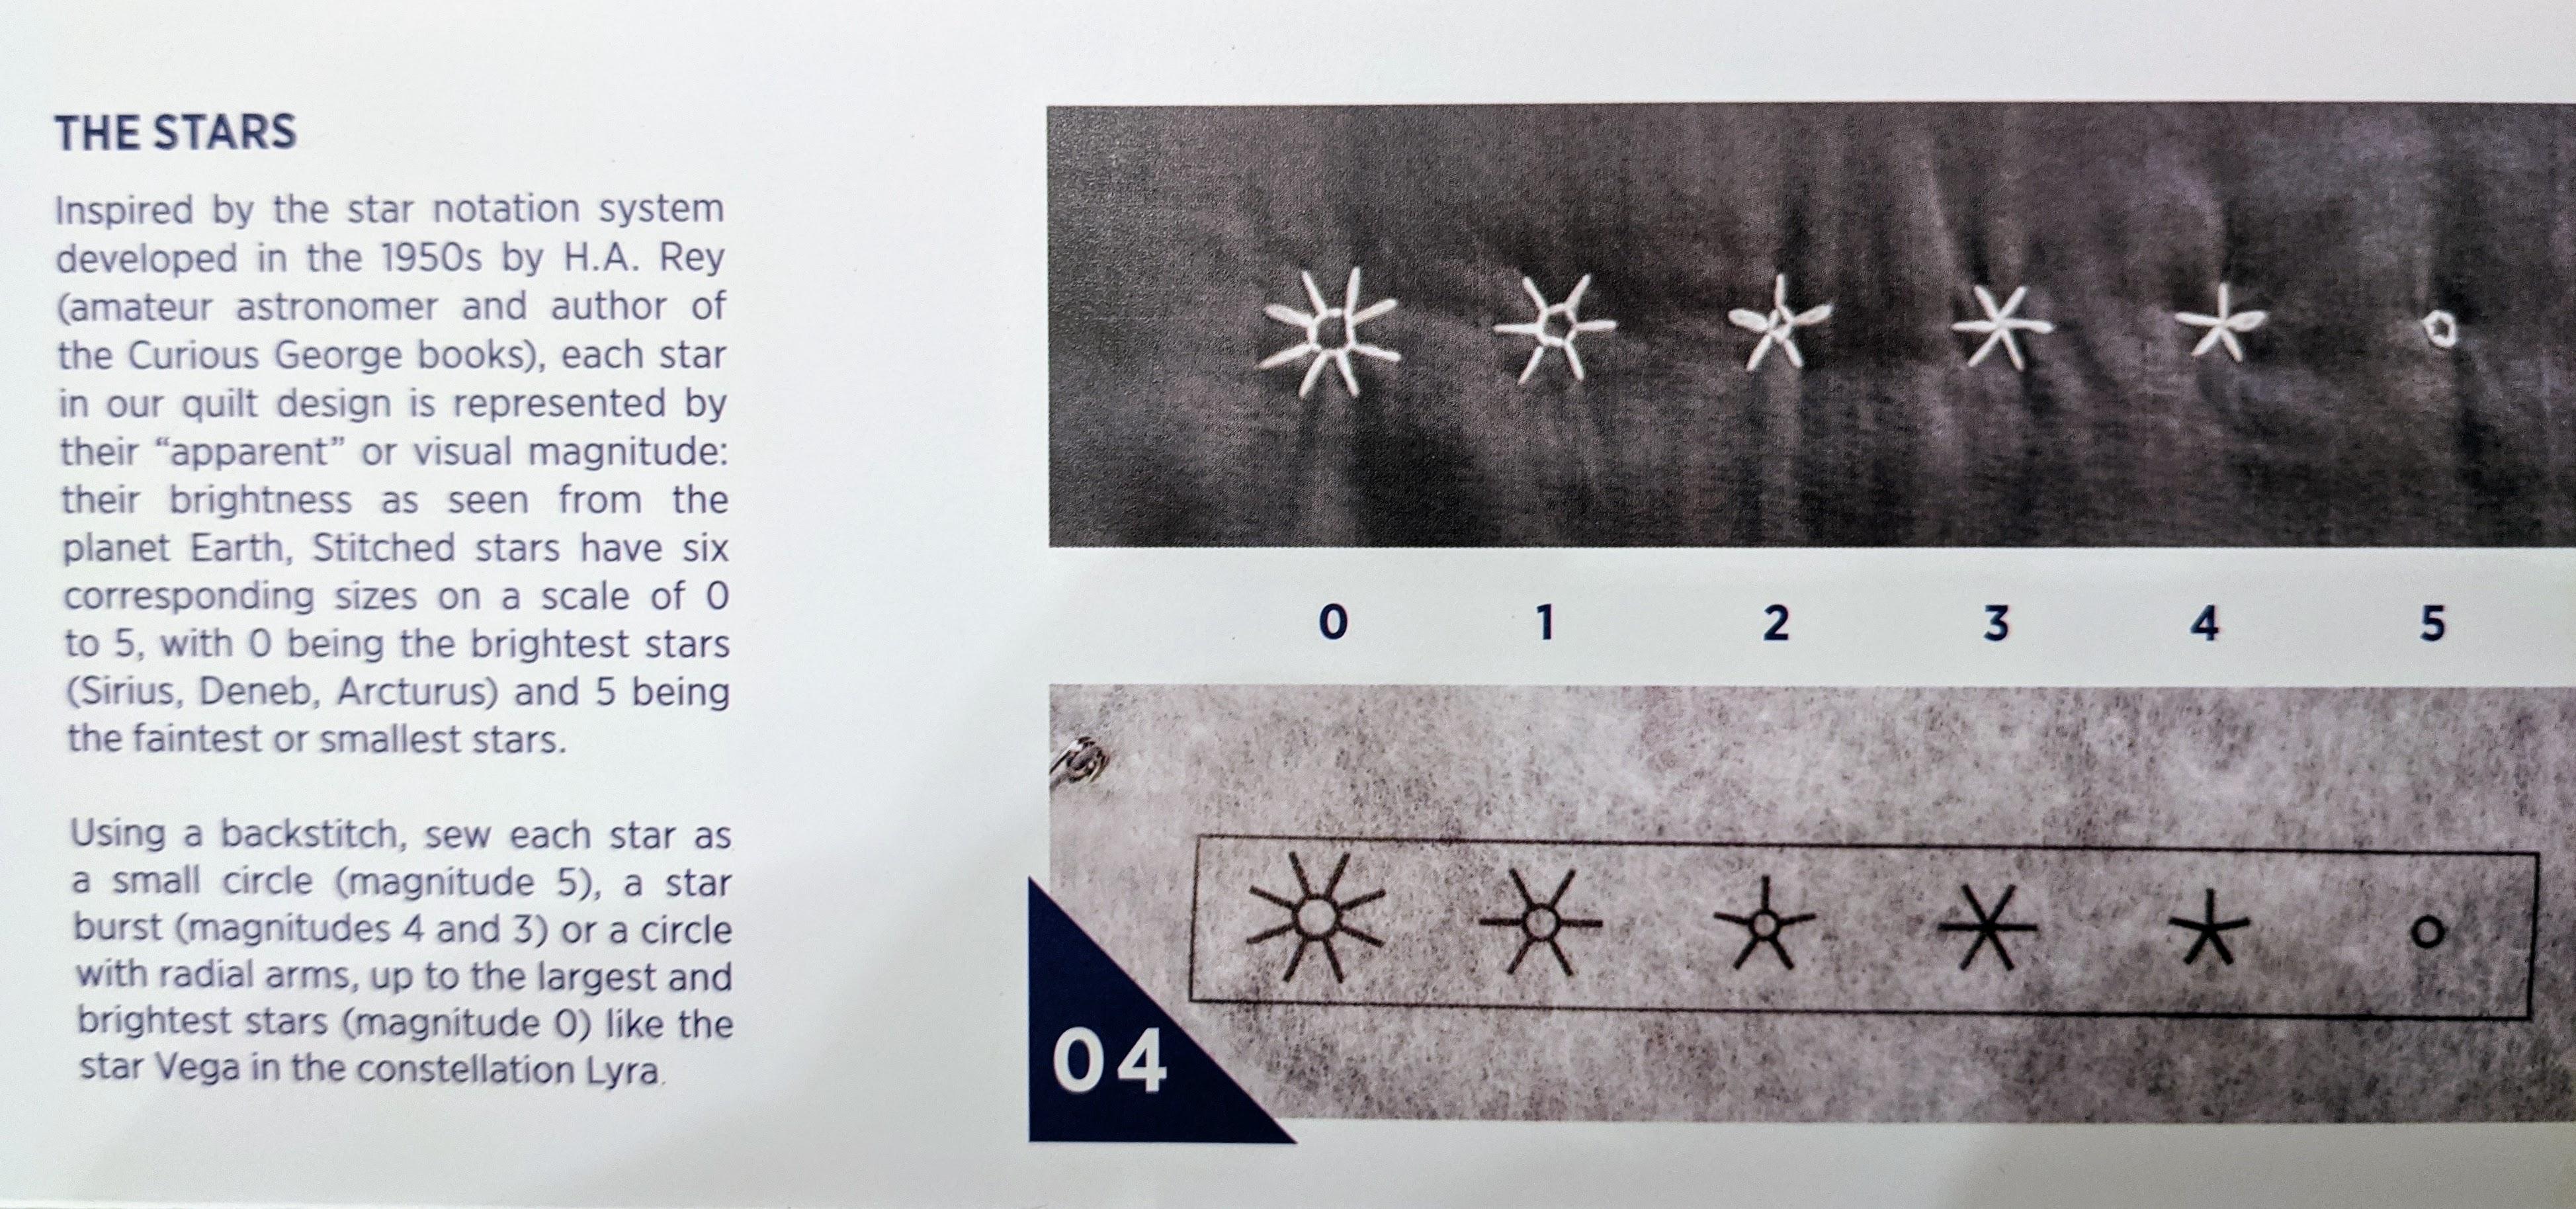
Plot the stars according to brightness: Each star in the constellations is represented according to brightness. The faintest stars are marked as a circle. Successively brighter stars are represented with increasingly larger stitched stars. See picture for reference.
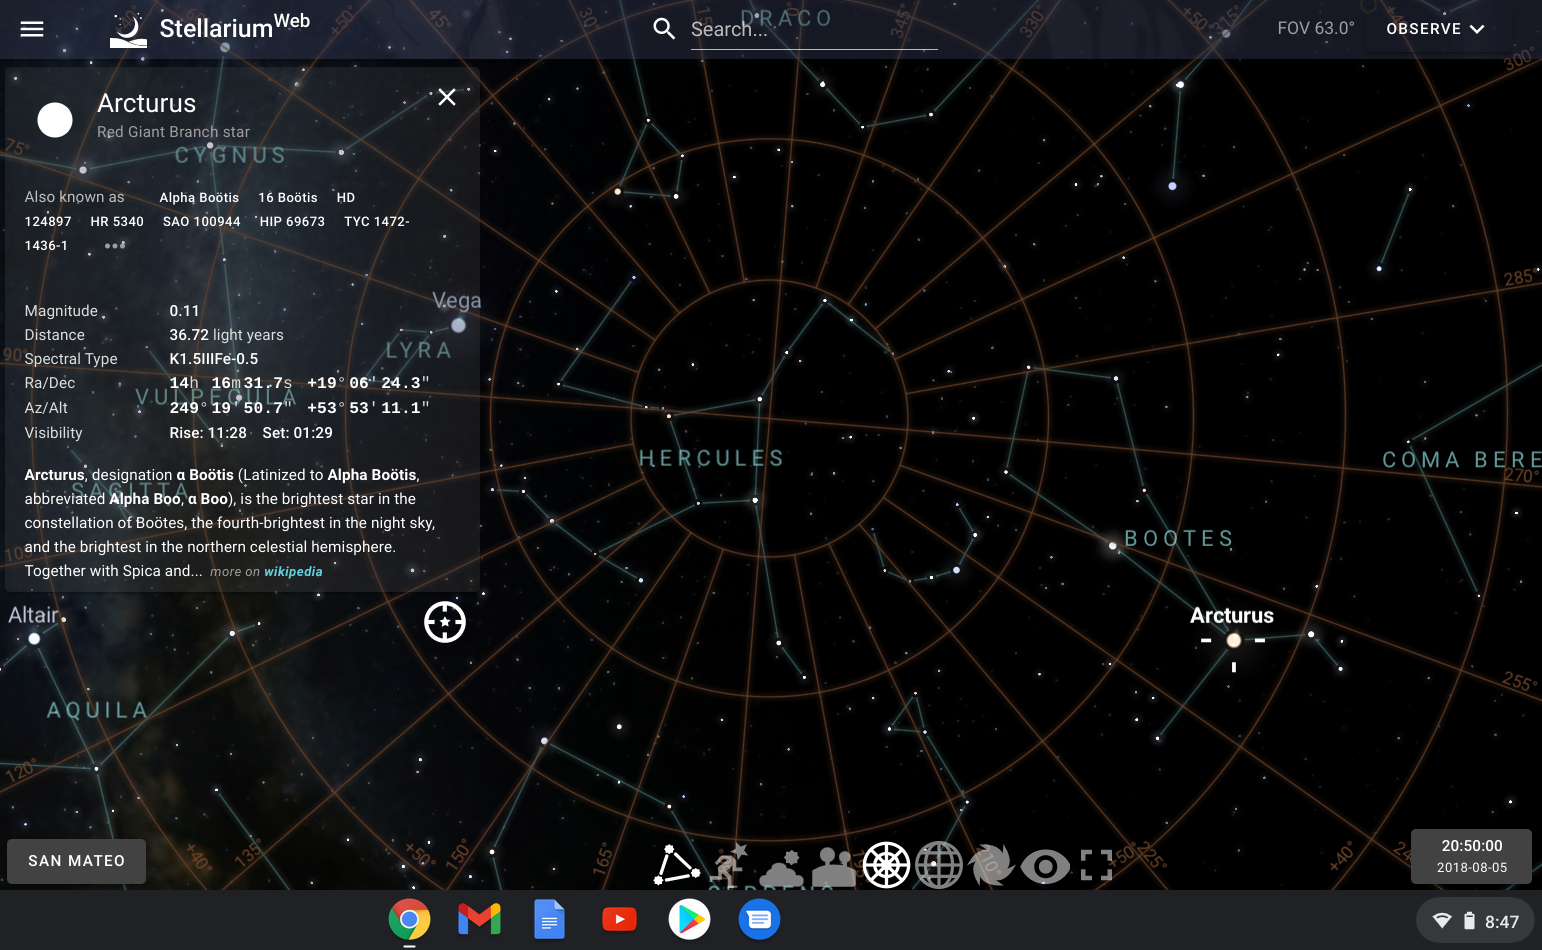
To find out what the magnitude of each star is, use the mouse to click on the star of interest in Stellarium, and information about the star (including magnitude) will appear. Round up or down to the nearest whole number for simplicity.
Label the constellations: I found a font I liked, typed out all the constellation names on word processor document, and printed it out, then copied and traced the names on to the stabilizer (which is pretty see-through). Nobody has perfect handwriting, so this was the closest I could get to making everything uniform.
Step 3: Make the Quilt Sandwich
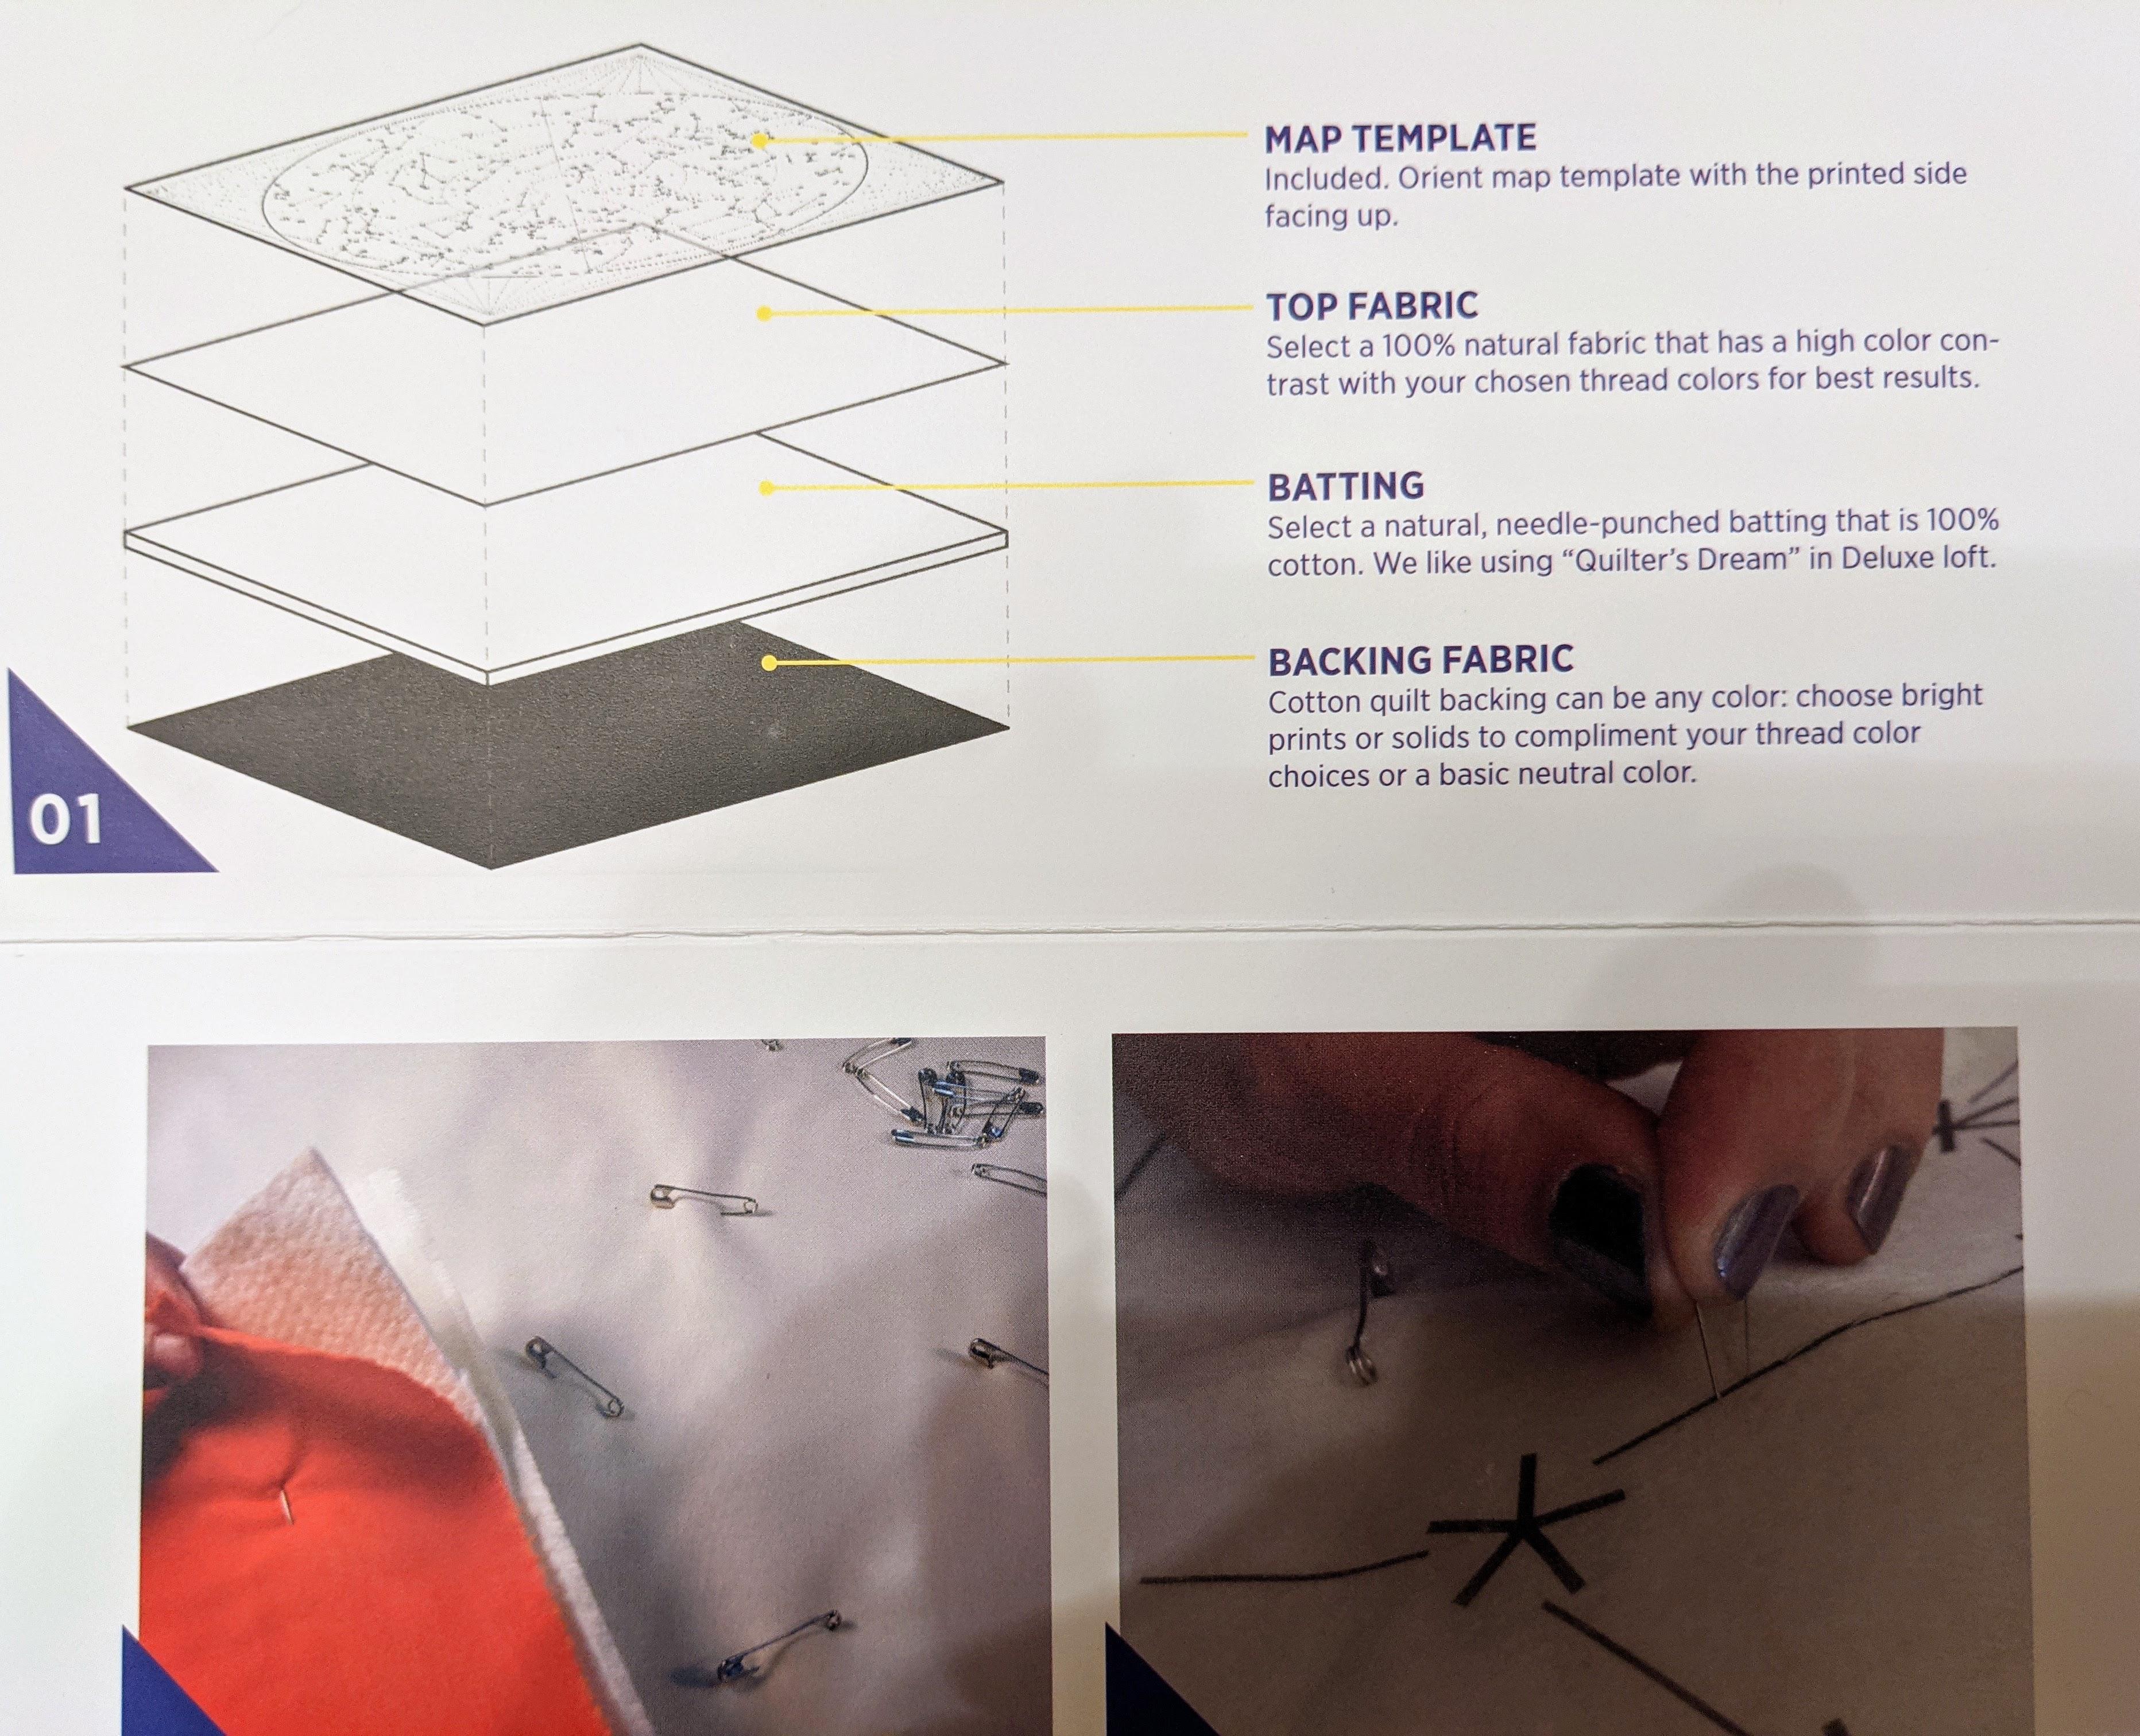
Some sources advocate washing and drying the fabrics before using them, as it will help prevent unexpected shrinkage afterward. I did not do this.
Iron fabrics so they lie flat.
On a clean flat surface, layer the materials with the quilt backing on the bottom (right side facing down), followed by the batting, and then finally the quilt top (right side facing up). Using safety pins, start pinning all the layers together at random 6 inch intervals, taking care not to move the fabric layers.
Place the stabilizer template on top of the quilt sandwich, with the print side facing up. Pin the stabilizer to the project with safety pins.
Step 4: Start Quilting!
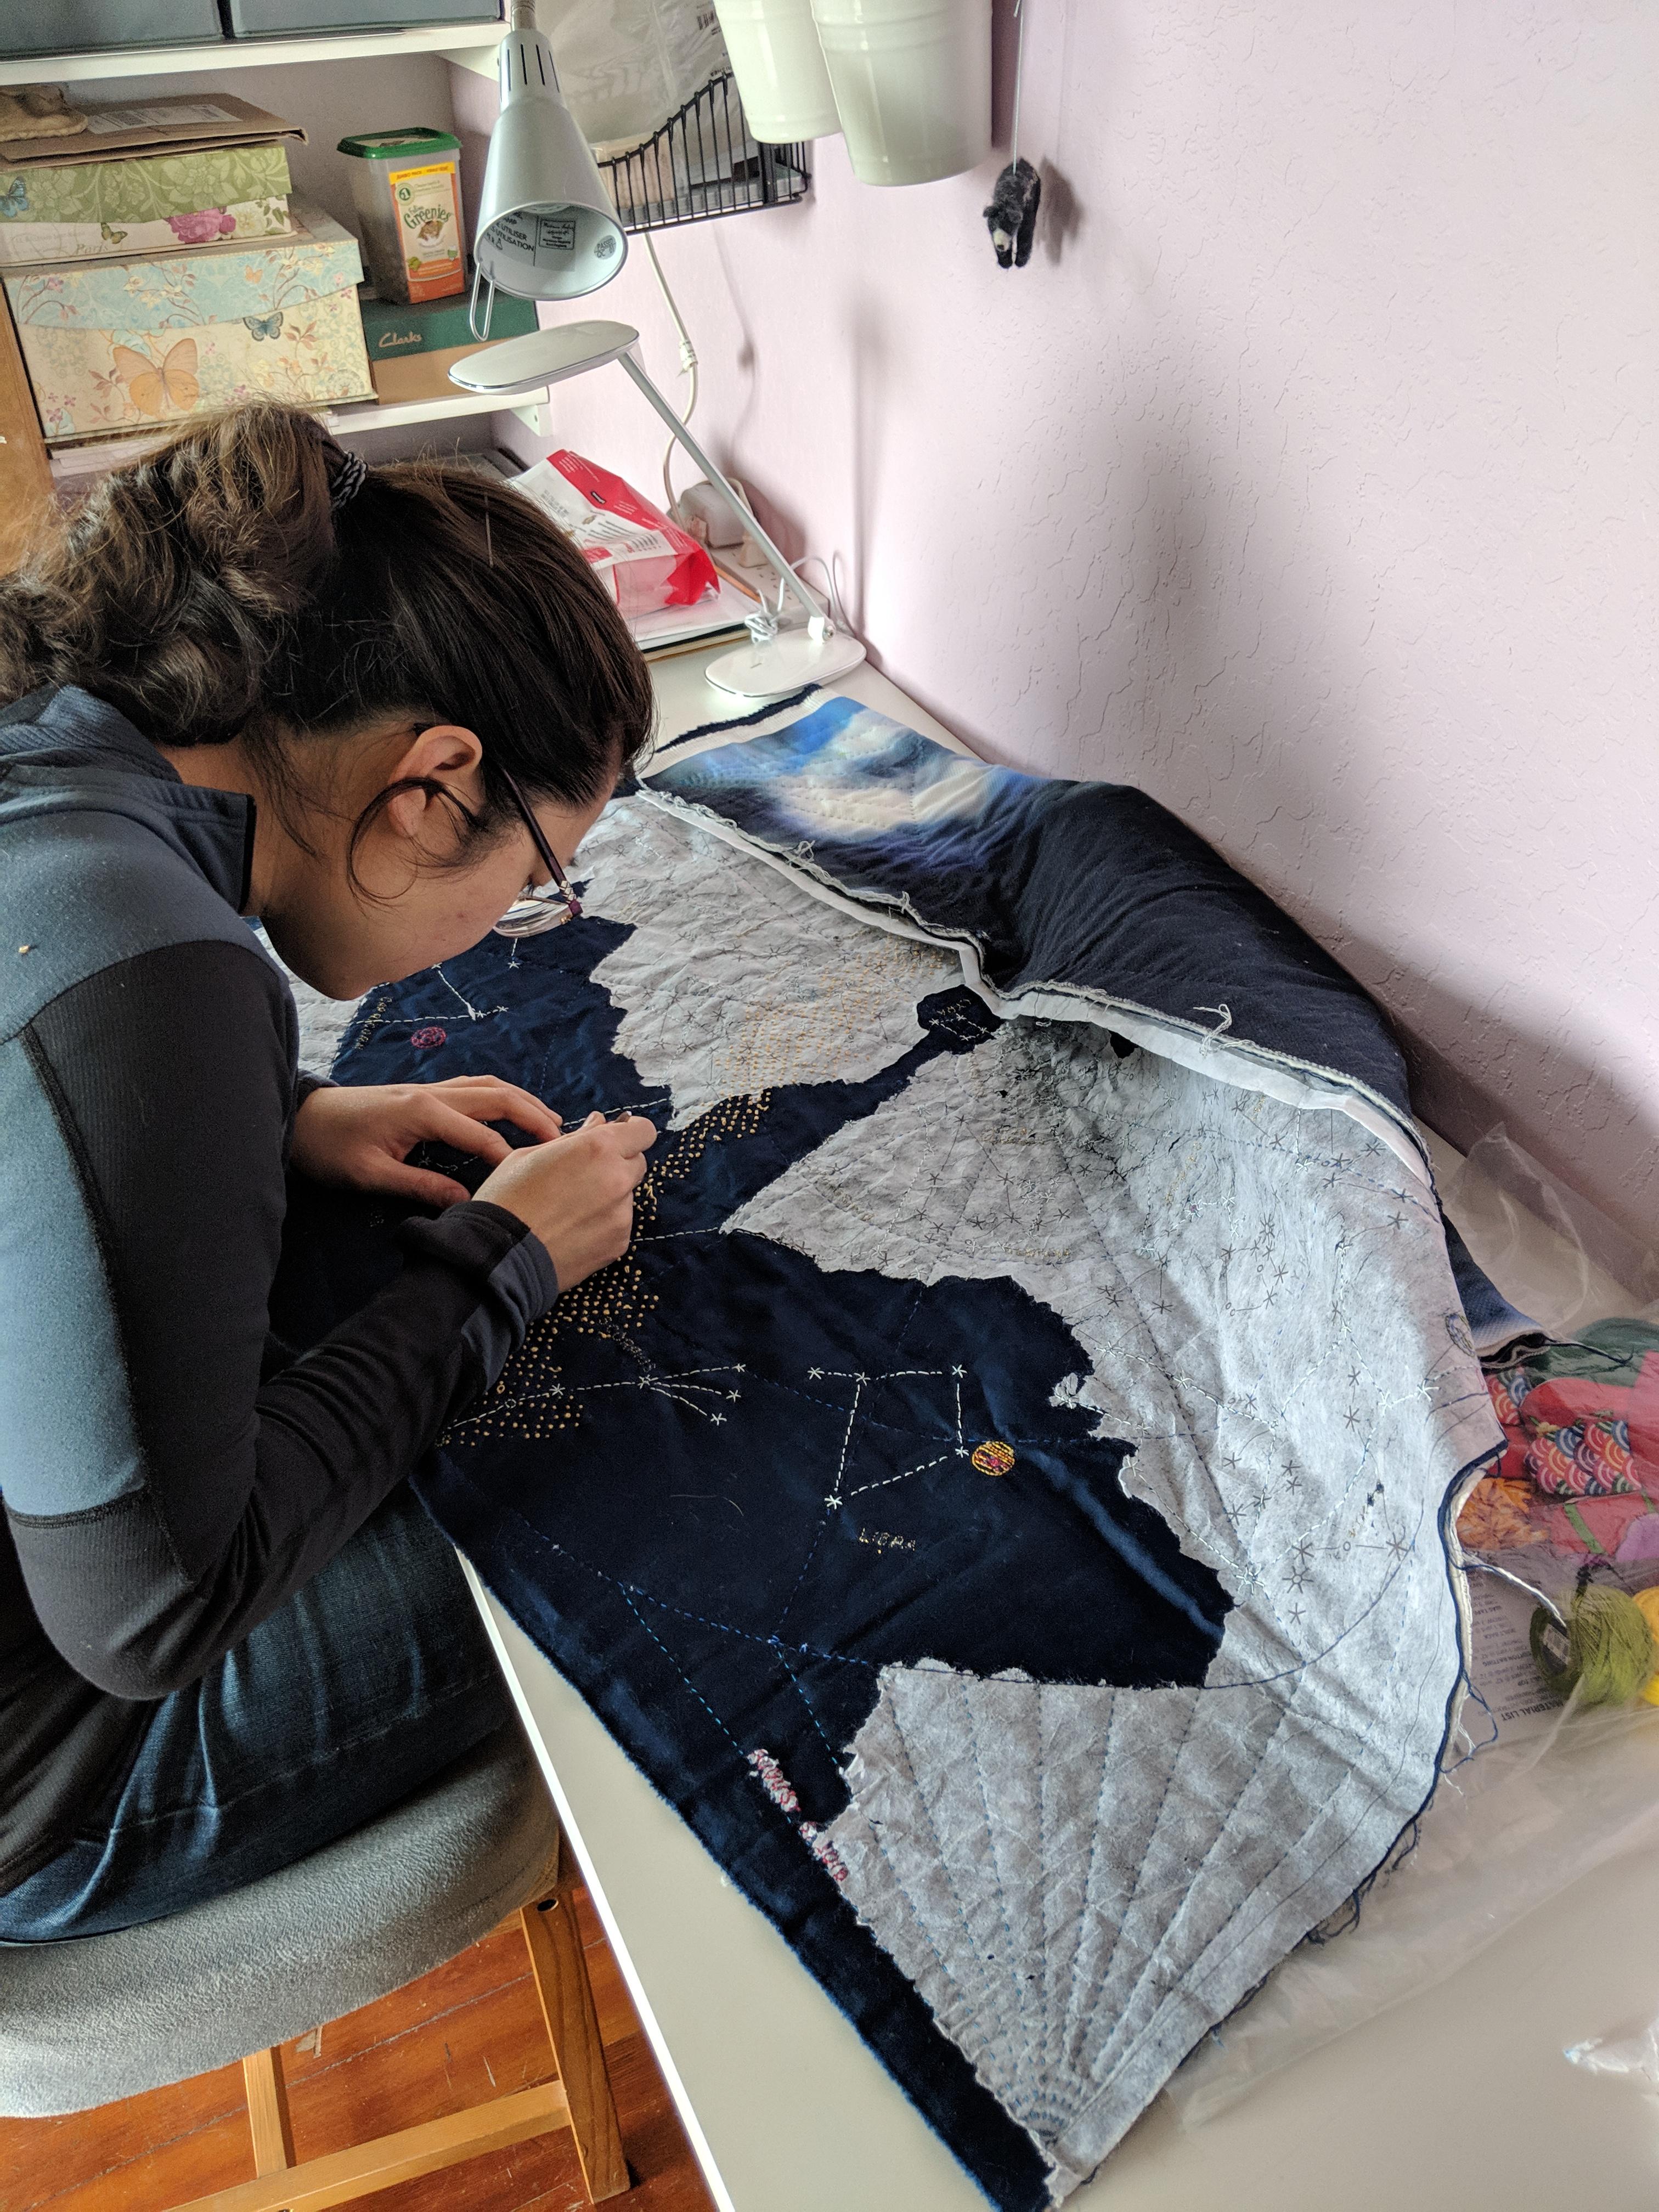
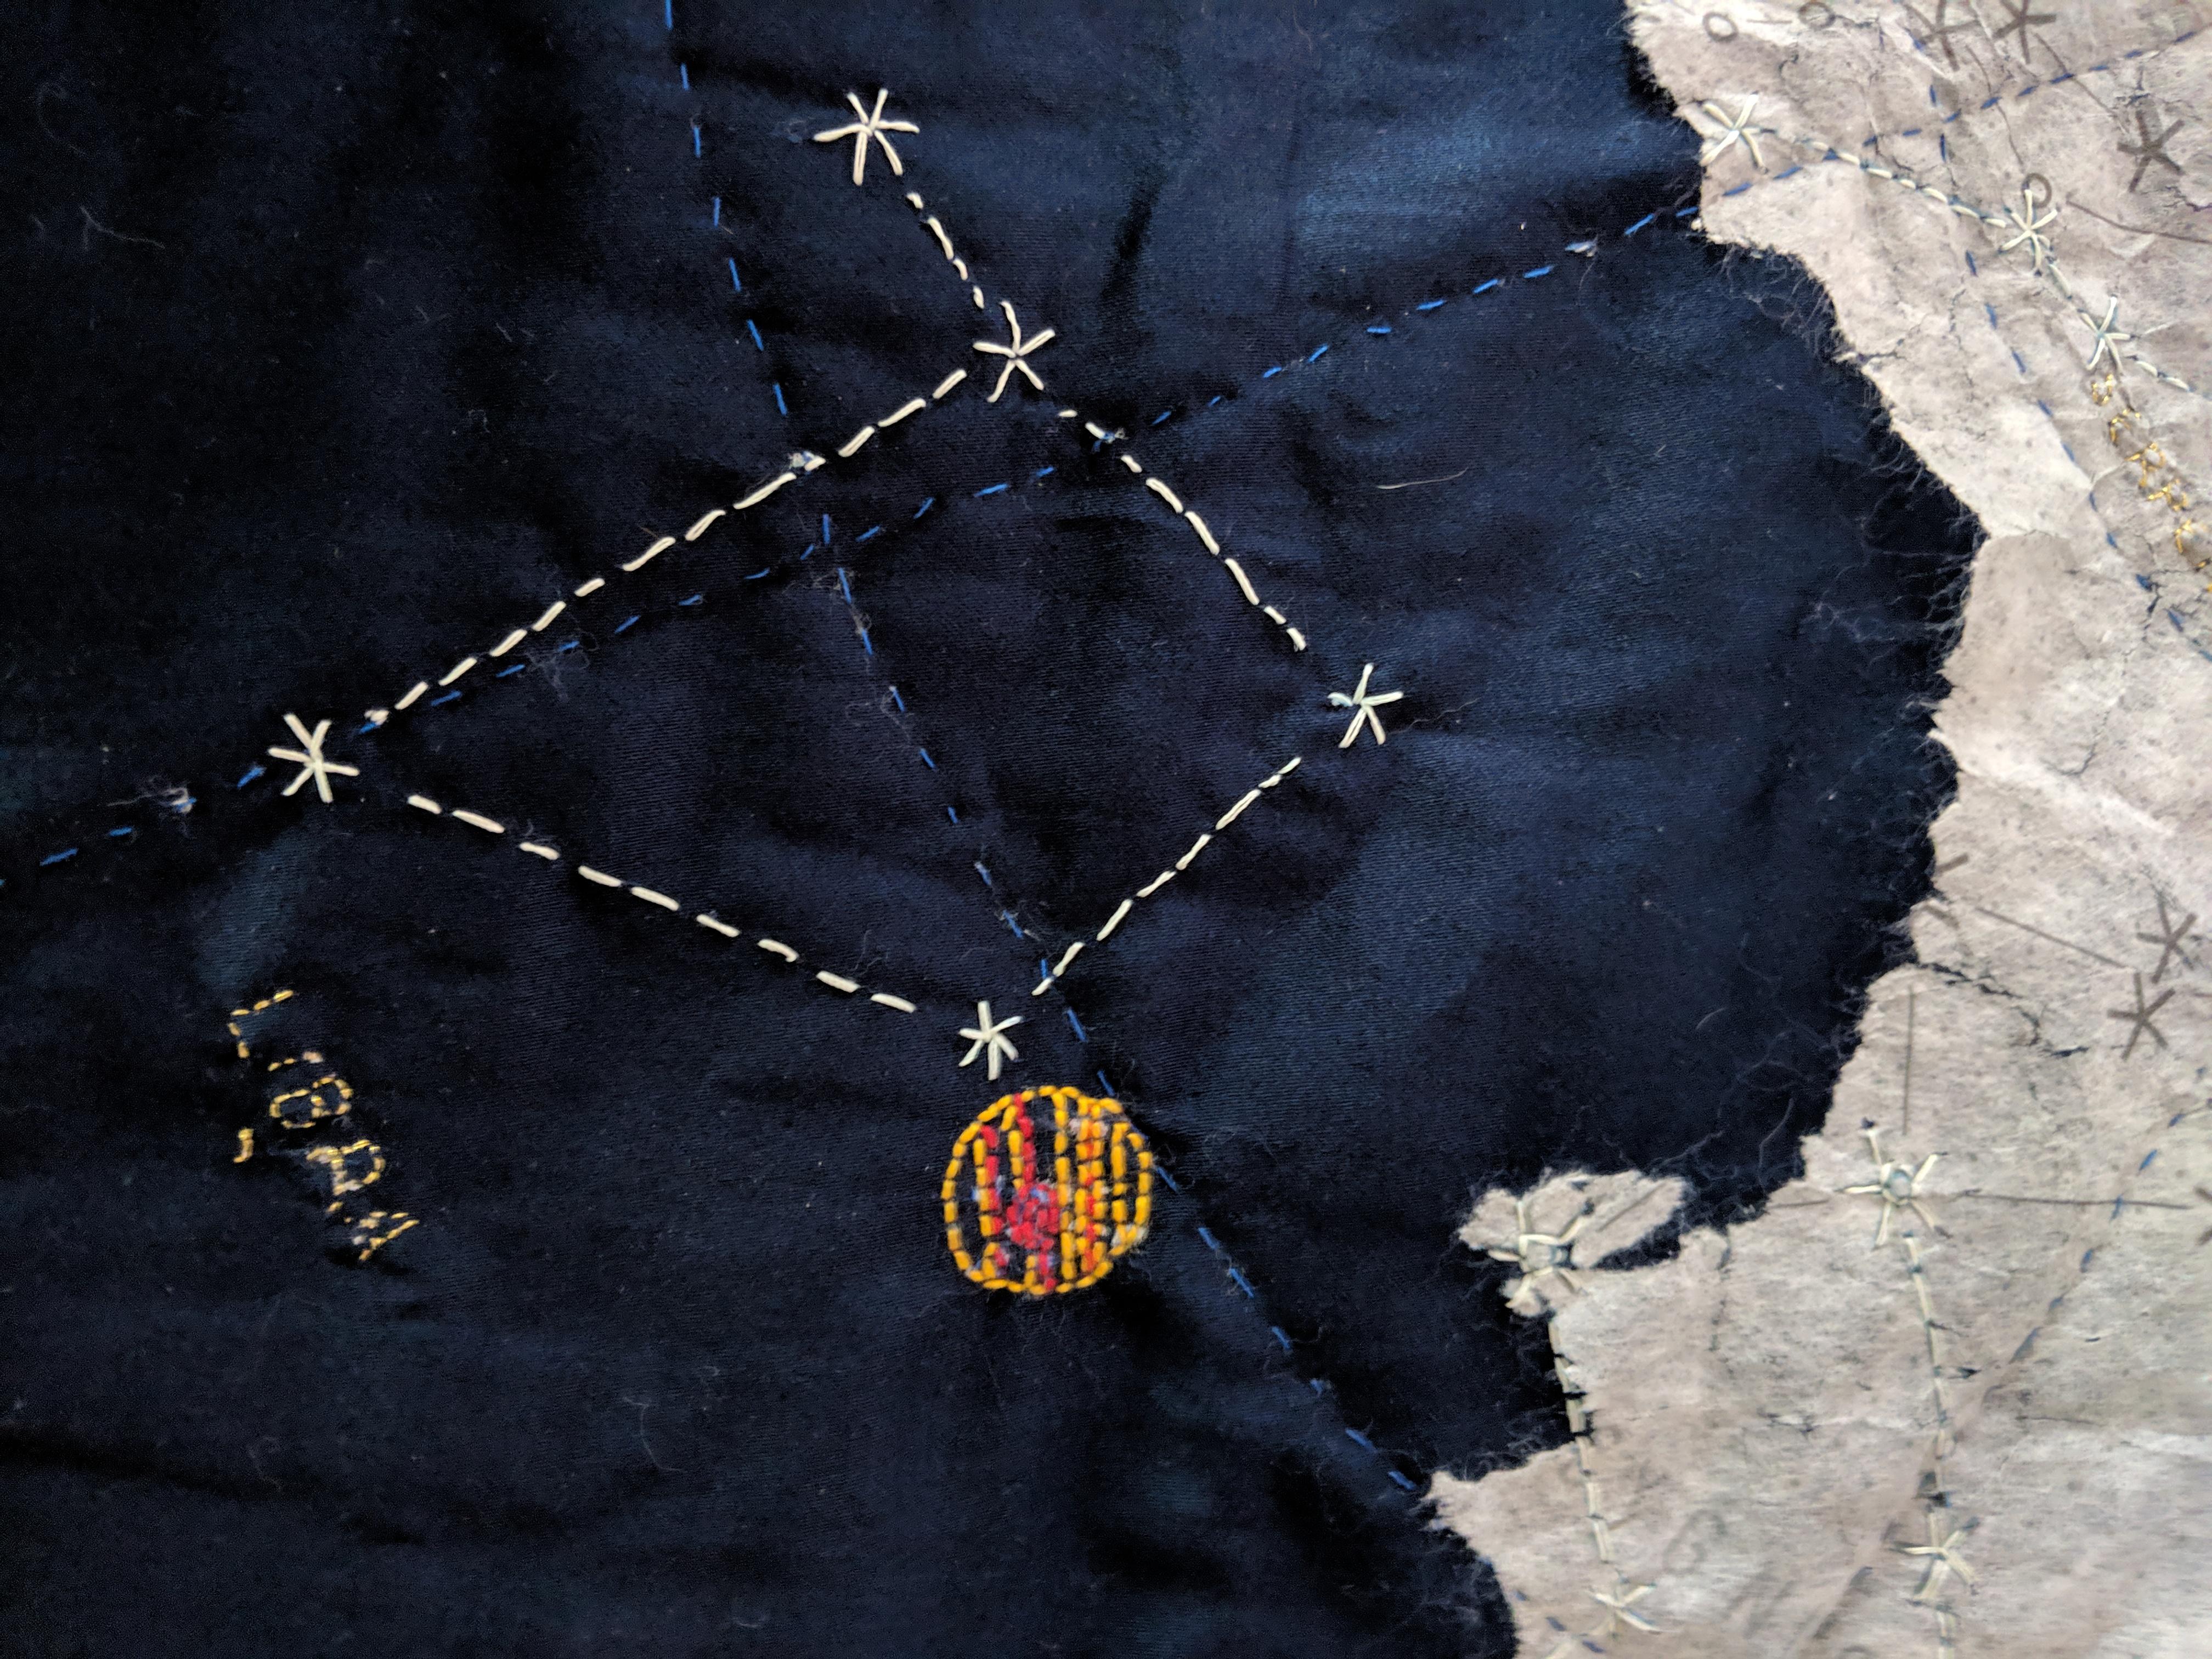
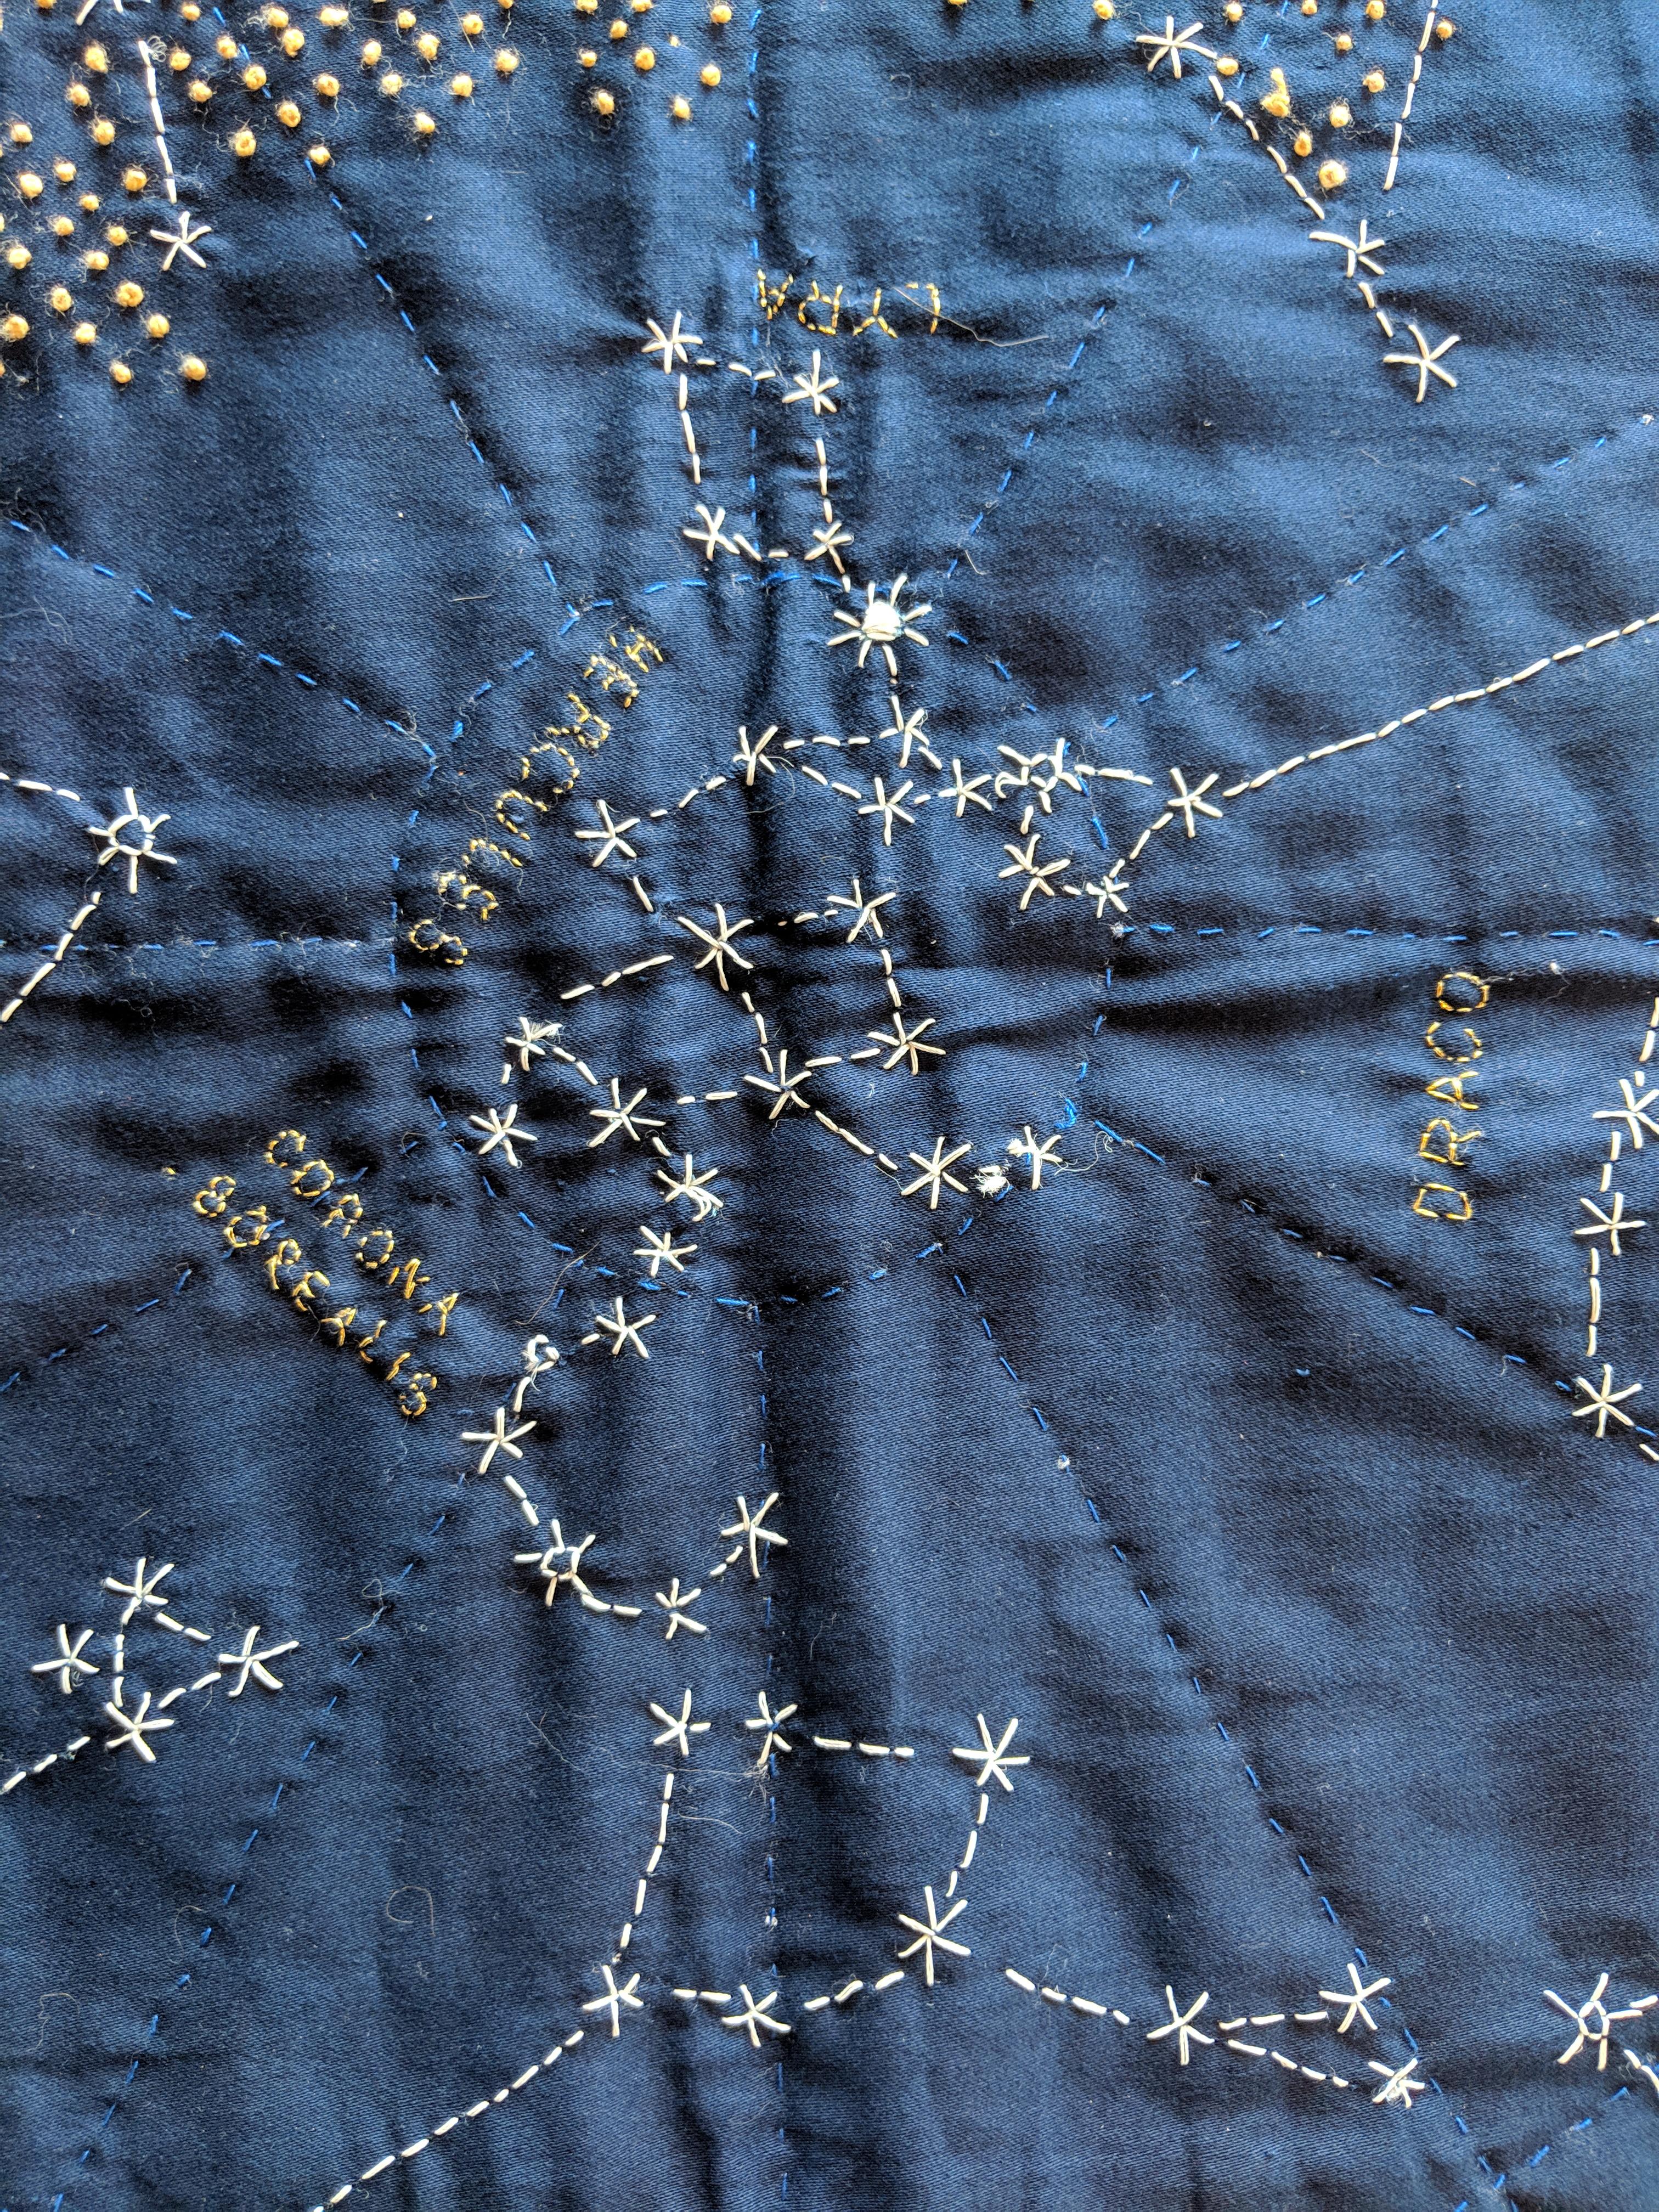
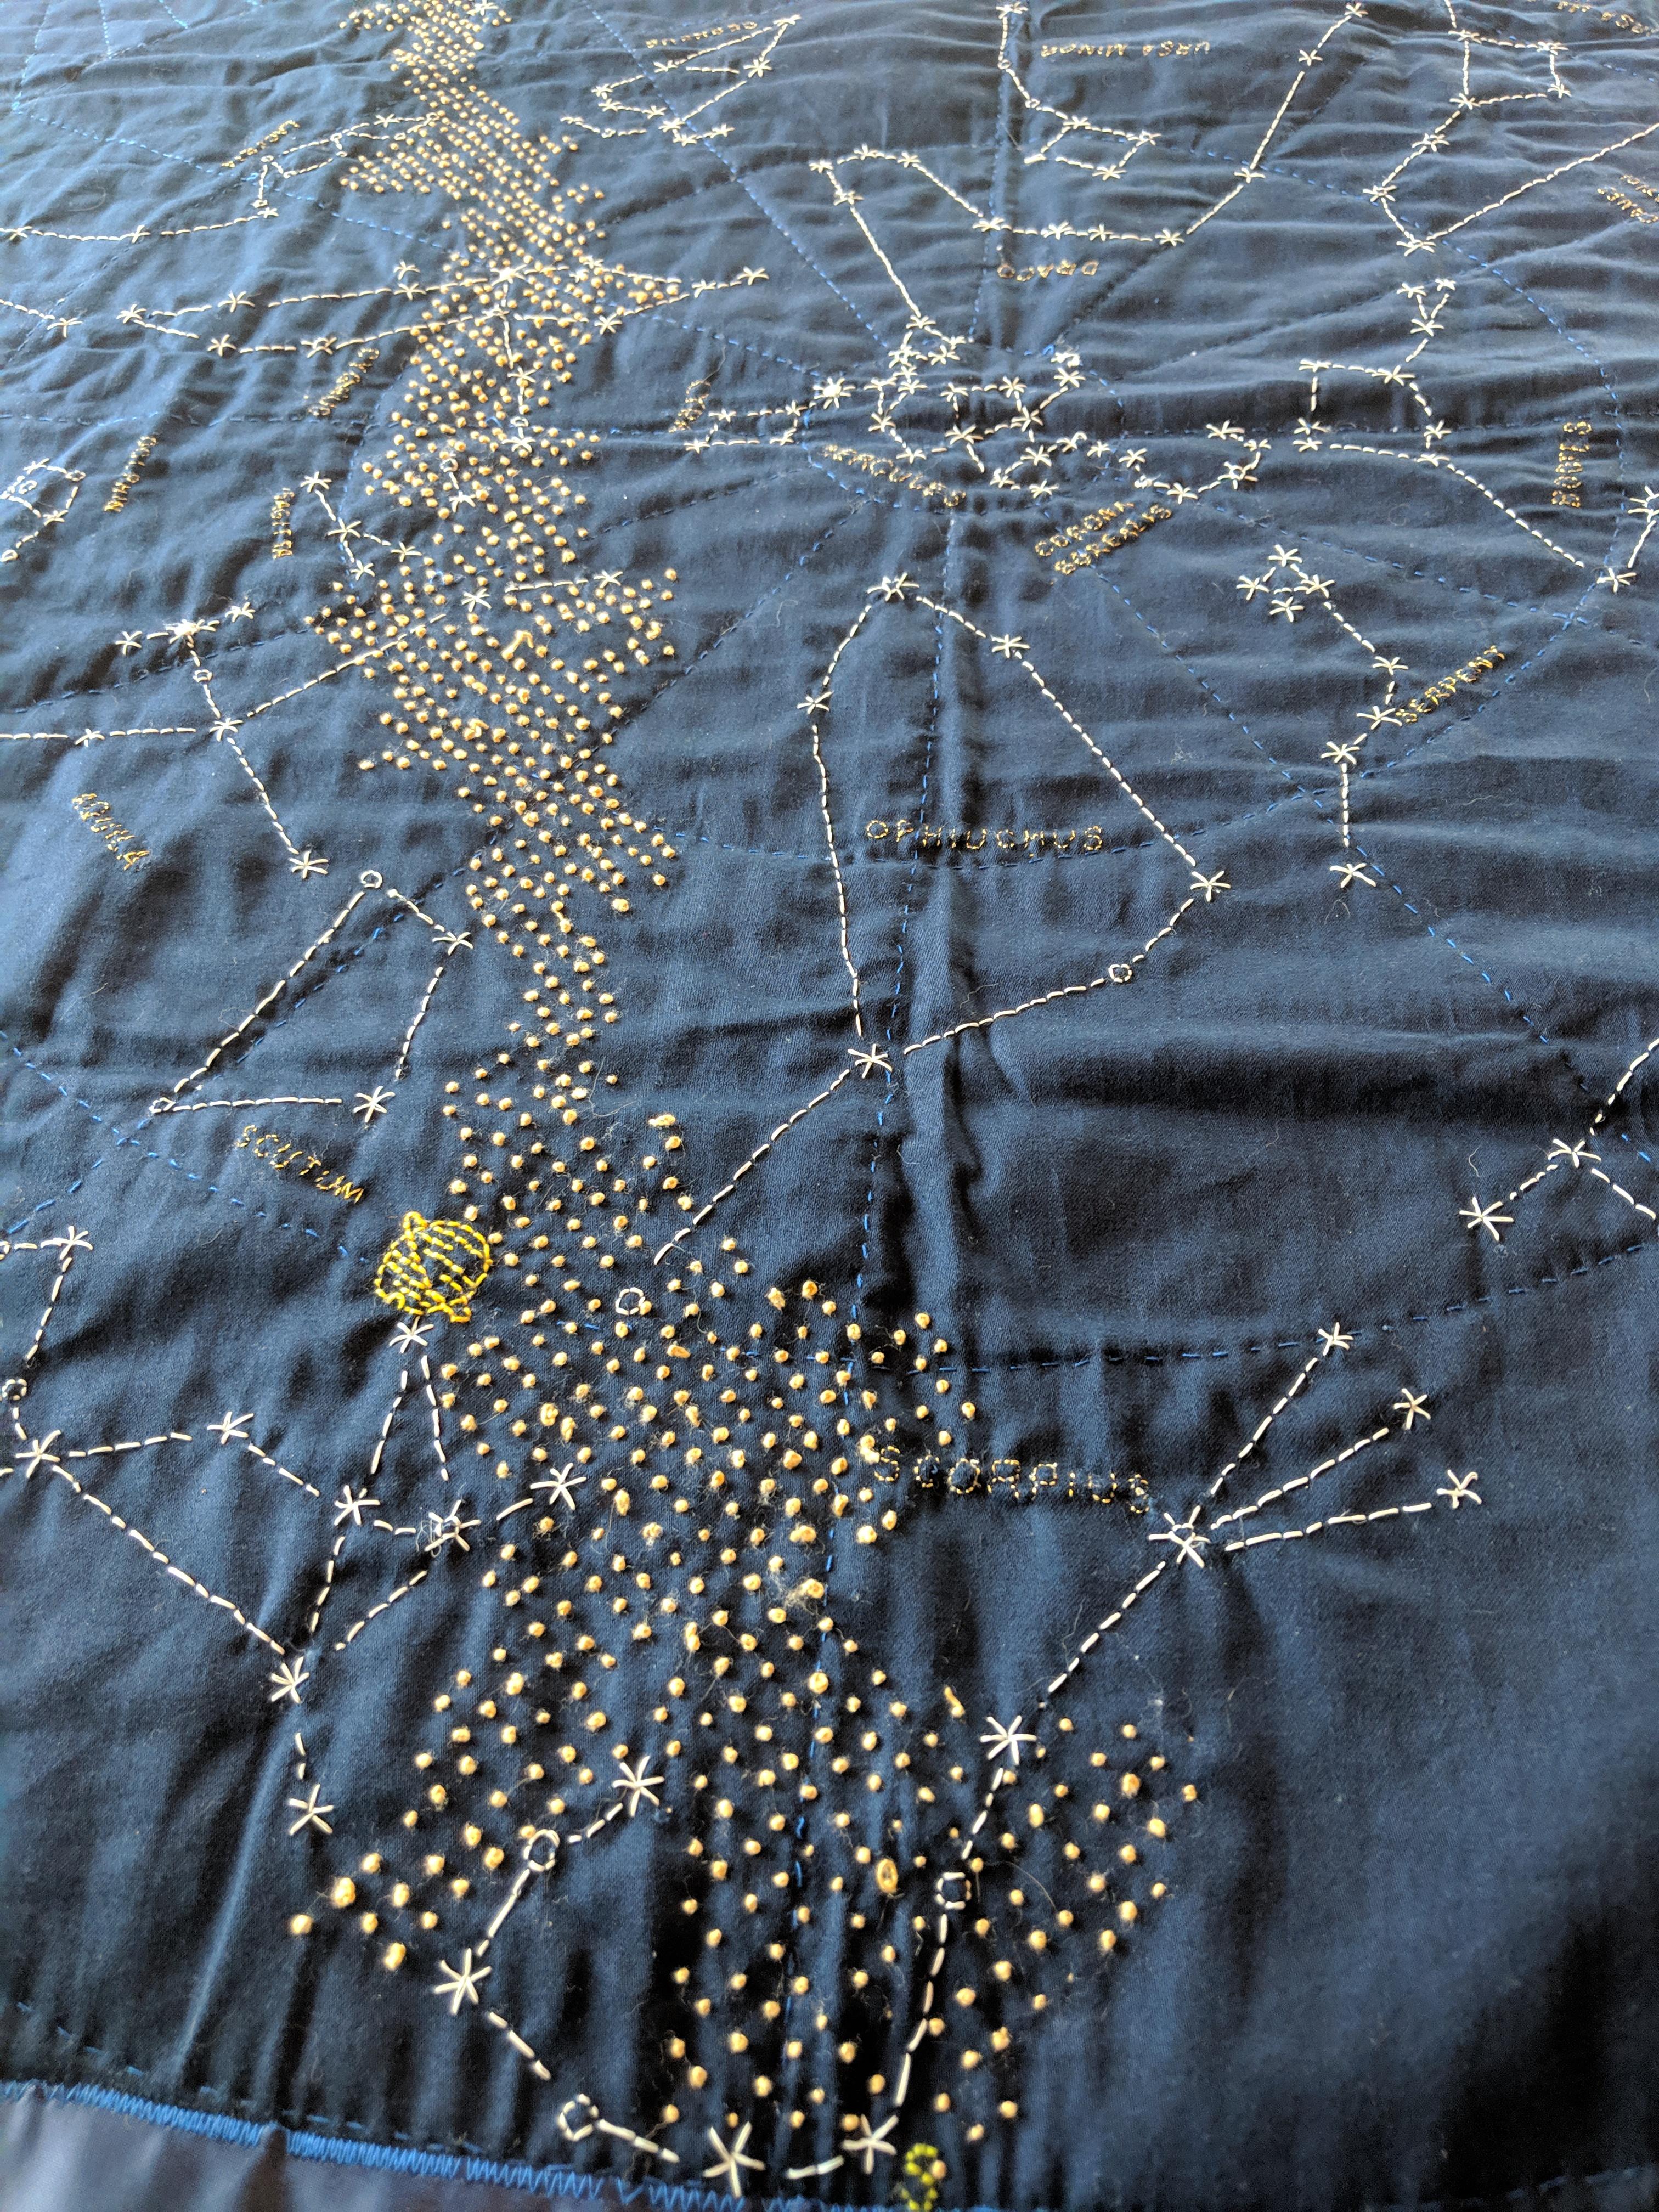
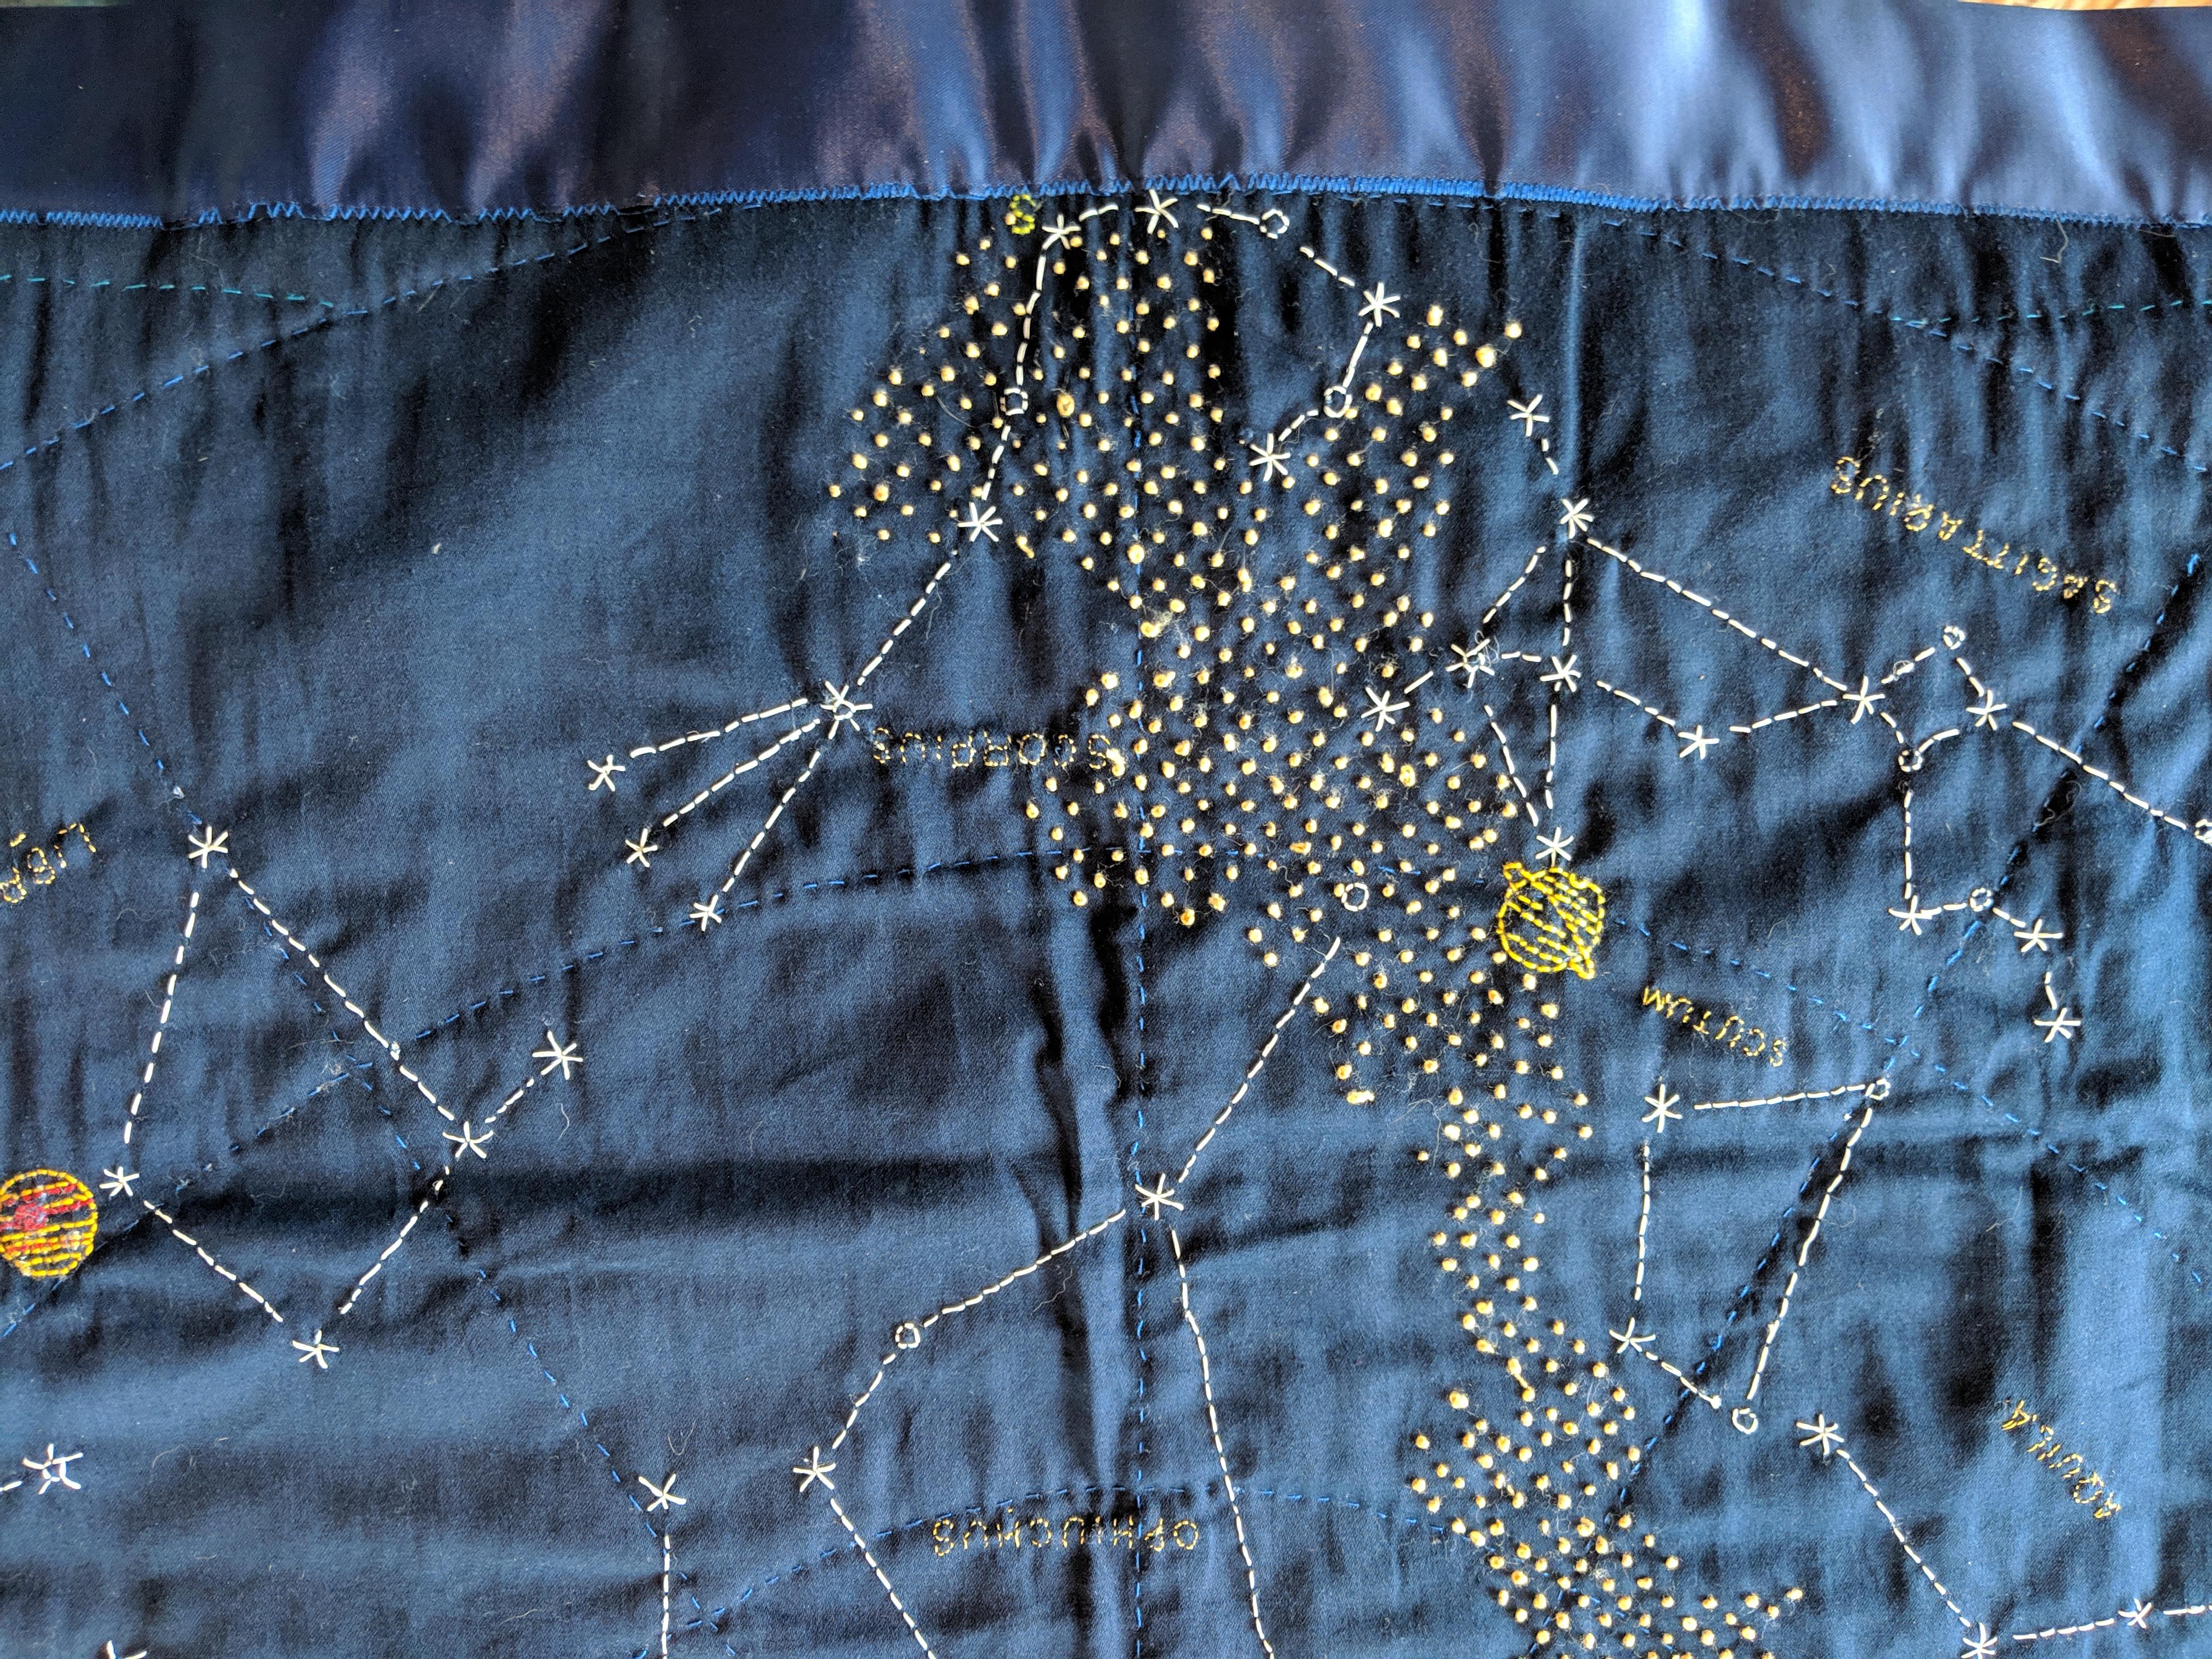
These are the stitches you need to know, along with links to instructions if needed.
Stretch the quilt sandwich over the quilting hoop. Adjust and move the hoop as needed to work on a particular section of the quilt.
Using the simple running stitch, stitch through all 3 layers (quilt top, batting, and backing) over the corner patterns and the Azimuthal grid lines. Here is a great video tutorial on how to make a quilter's knot, and hide both the starting and ending knots so they don't show.
Once I had the corner patterns and the Azimuthal grid sewn, I took out the safety pins because the fabric layers were held together pretty securely by the quilting threads.
Using the back stitch, embroider (without going through all 3 layers) the constellation stars and lines in glow-in-the-dark thread. Embroider any planets in the color of choice. Embroider the constellation names using metallic gold thread.
Embroider the Milky Way using individual French knots.
Step 5: Tear Away the Stabilizer
Once you are done with embroidering and quilting all the designs on to the fabric, tear the stabilizer away. I found it helpful to tear on either side of a line of stitching, and used a small pick and tweezers to remove any bits that remained stuck between stitches.
Step 6: Binding the Quilt Edges
To finish the quilt, take the blanket edging and pin over the quilt edge, covering both sides. I used a sewing machine to sew a zig zag stitch to attach the edging, but you could also do a running stitch by hand.
Here is a video on how to attach blanket binding to a quilt.
Step 7: Charge Up the Blanket!
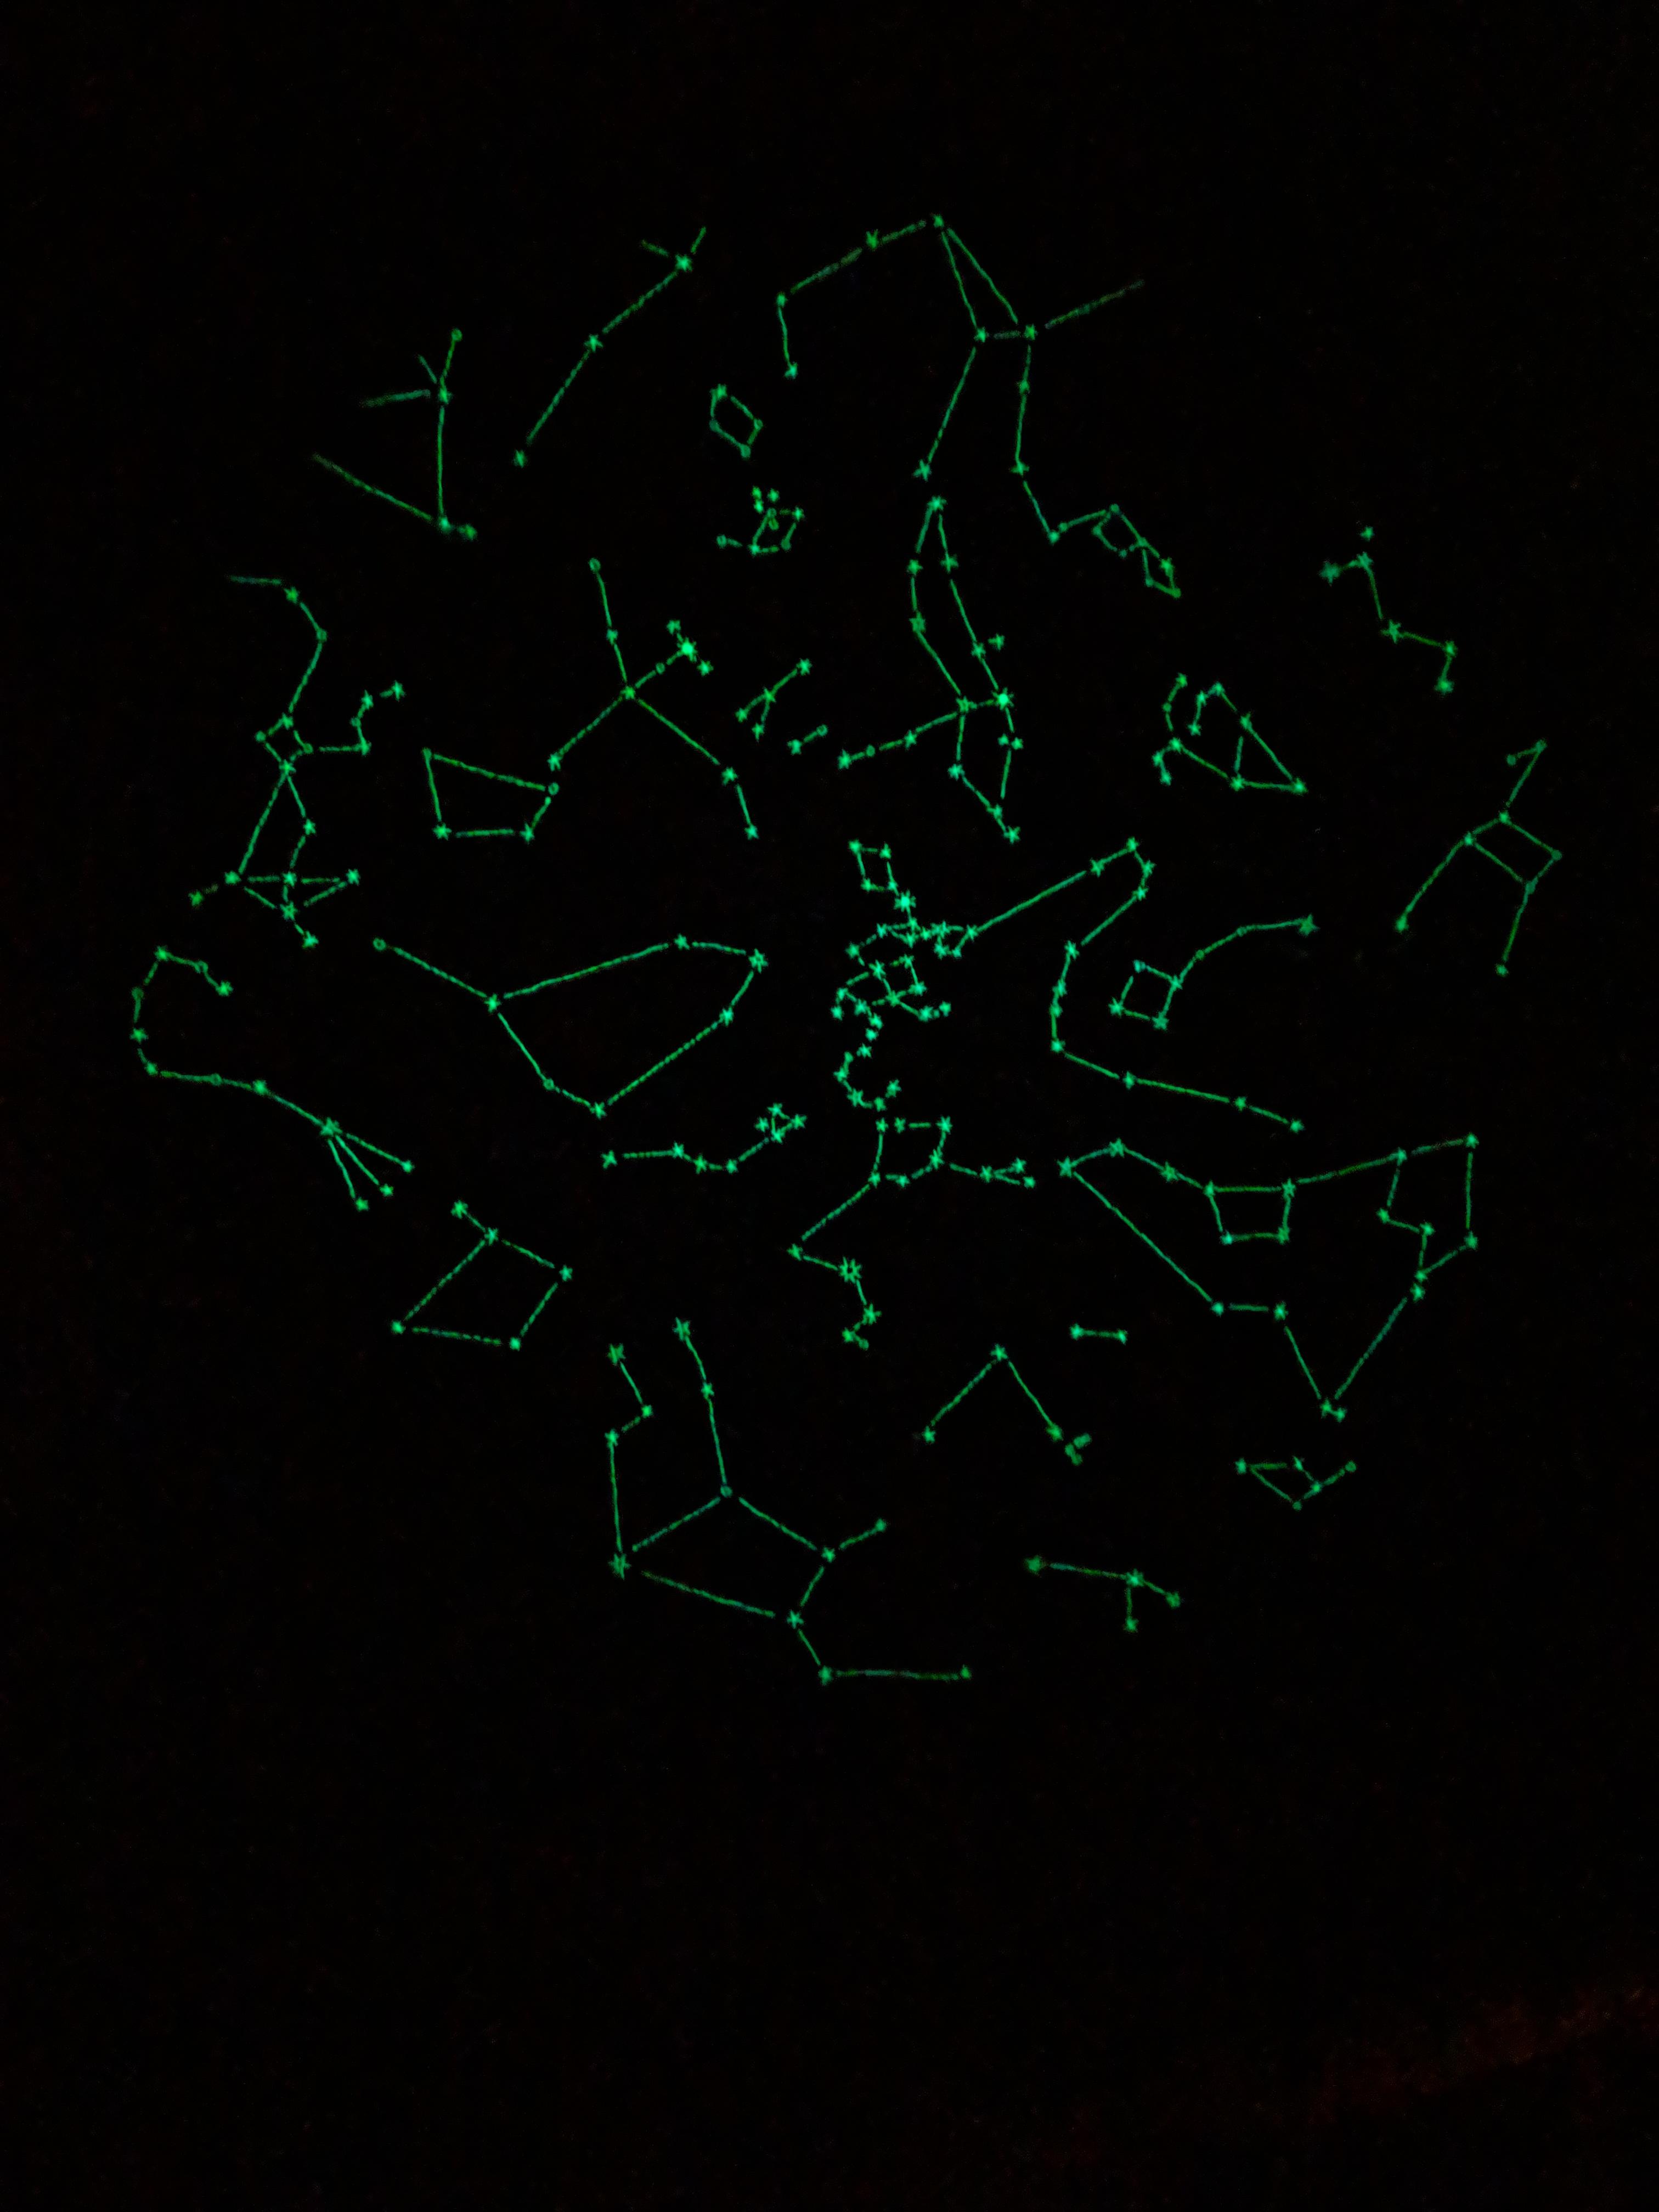
Time to make your blanket glow! This is accomplished by exposing to UV light. You can either let the blanket sit in the sun for a while, or if you want to get instant glow, shine a UV light flashlight (or black light) on the blanket for several minutes to super charge it.
Enjoy!