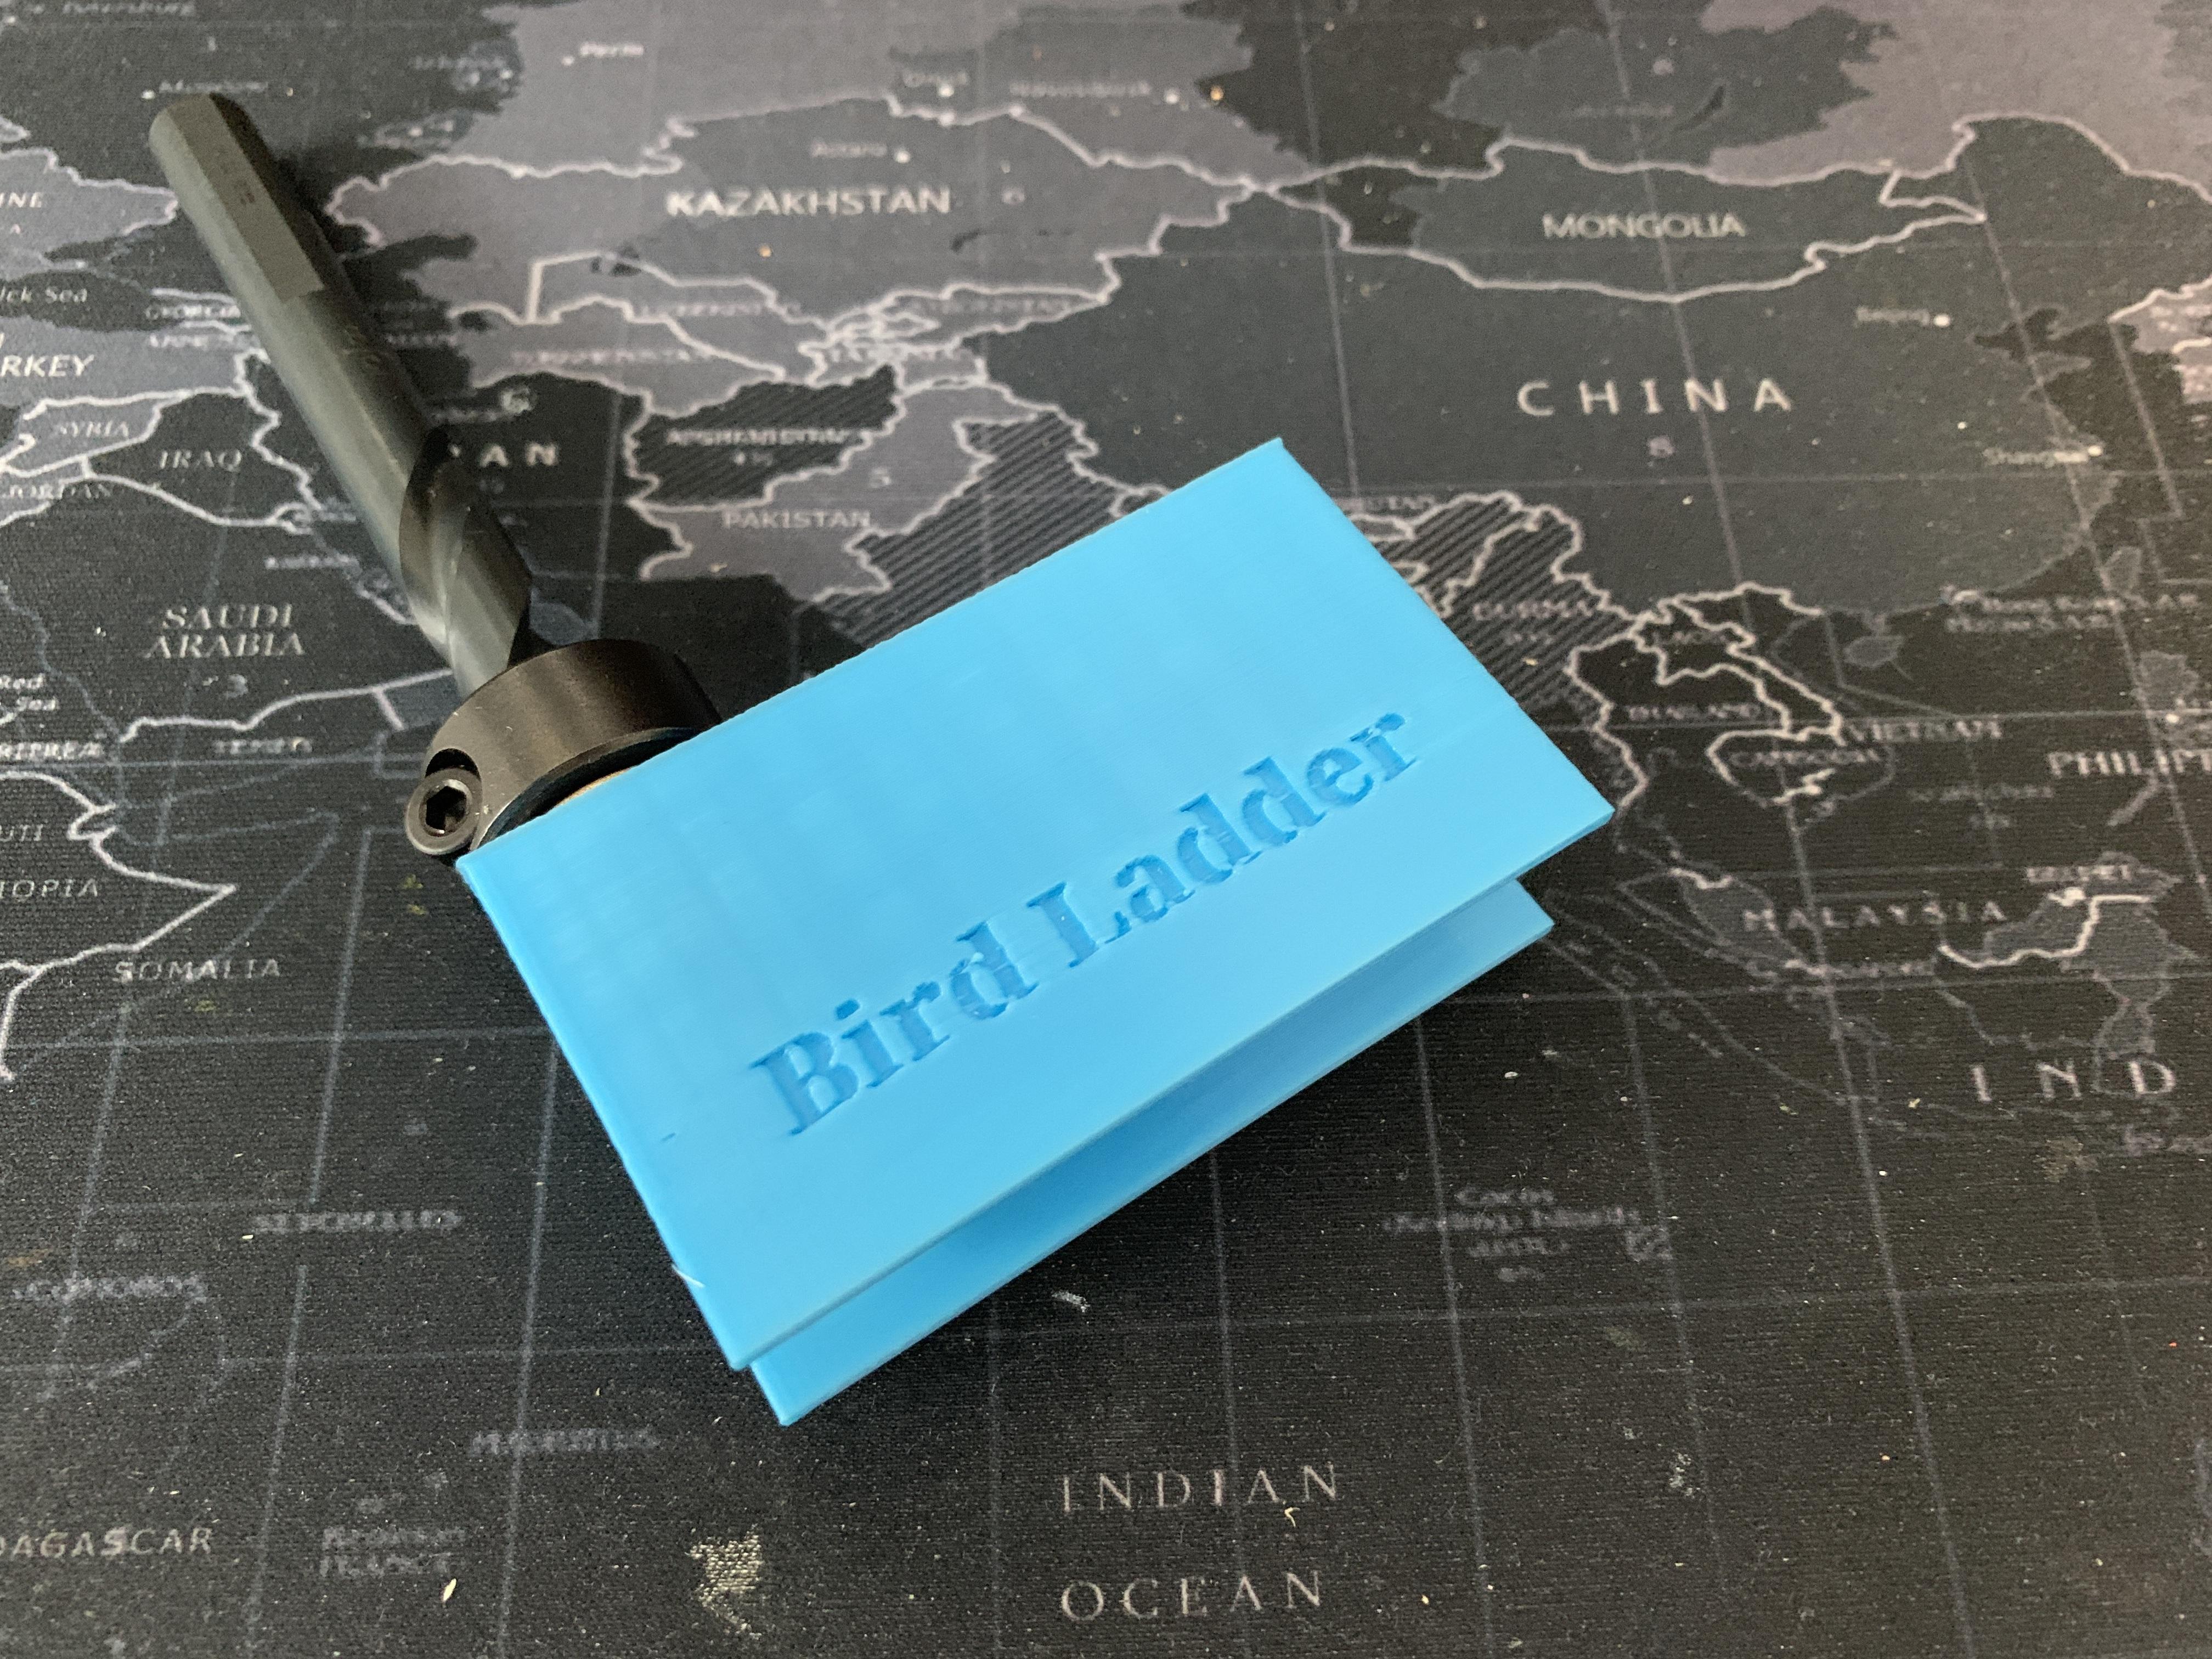
Bird Ladder Maker
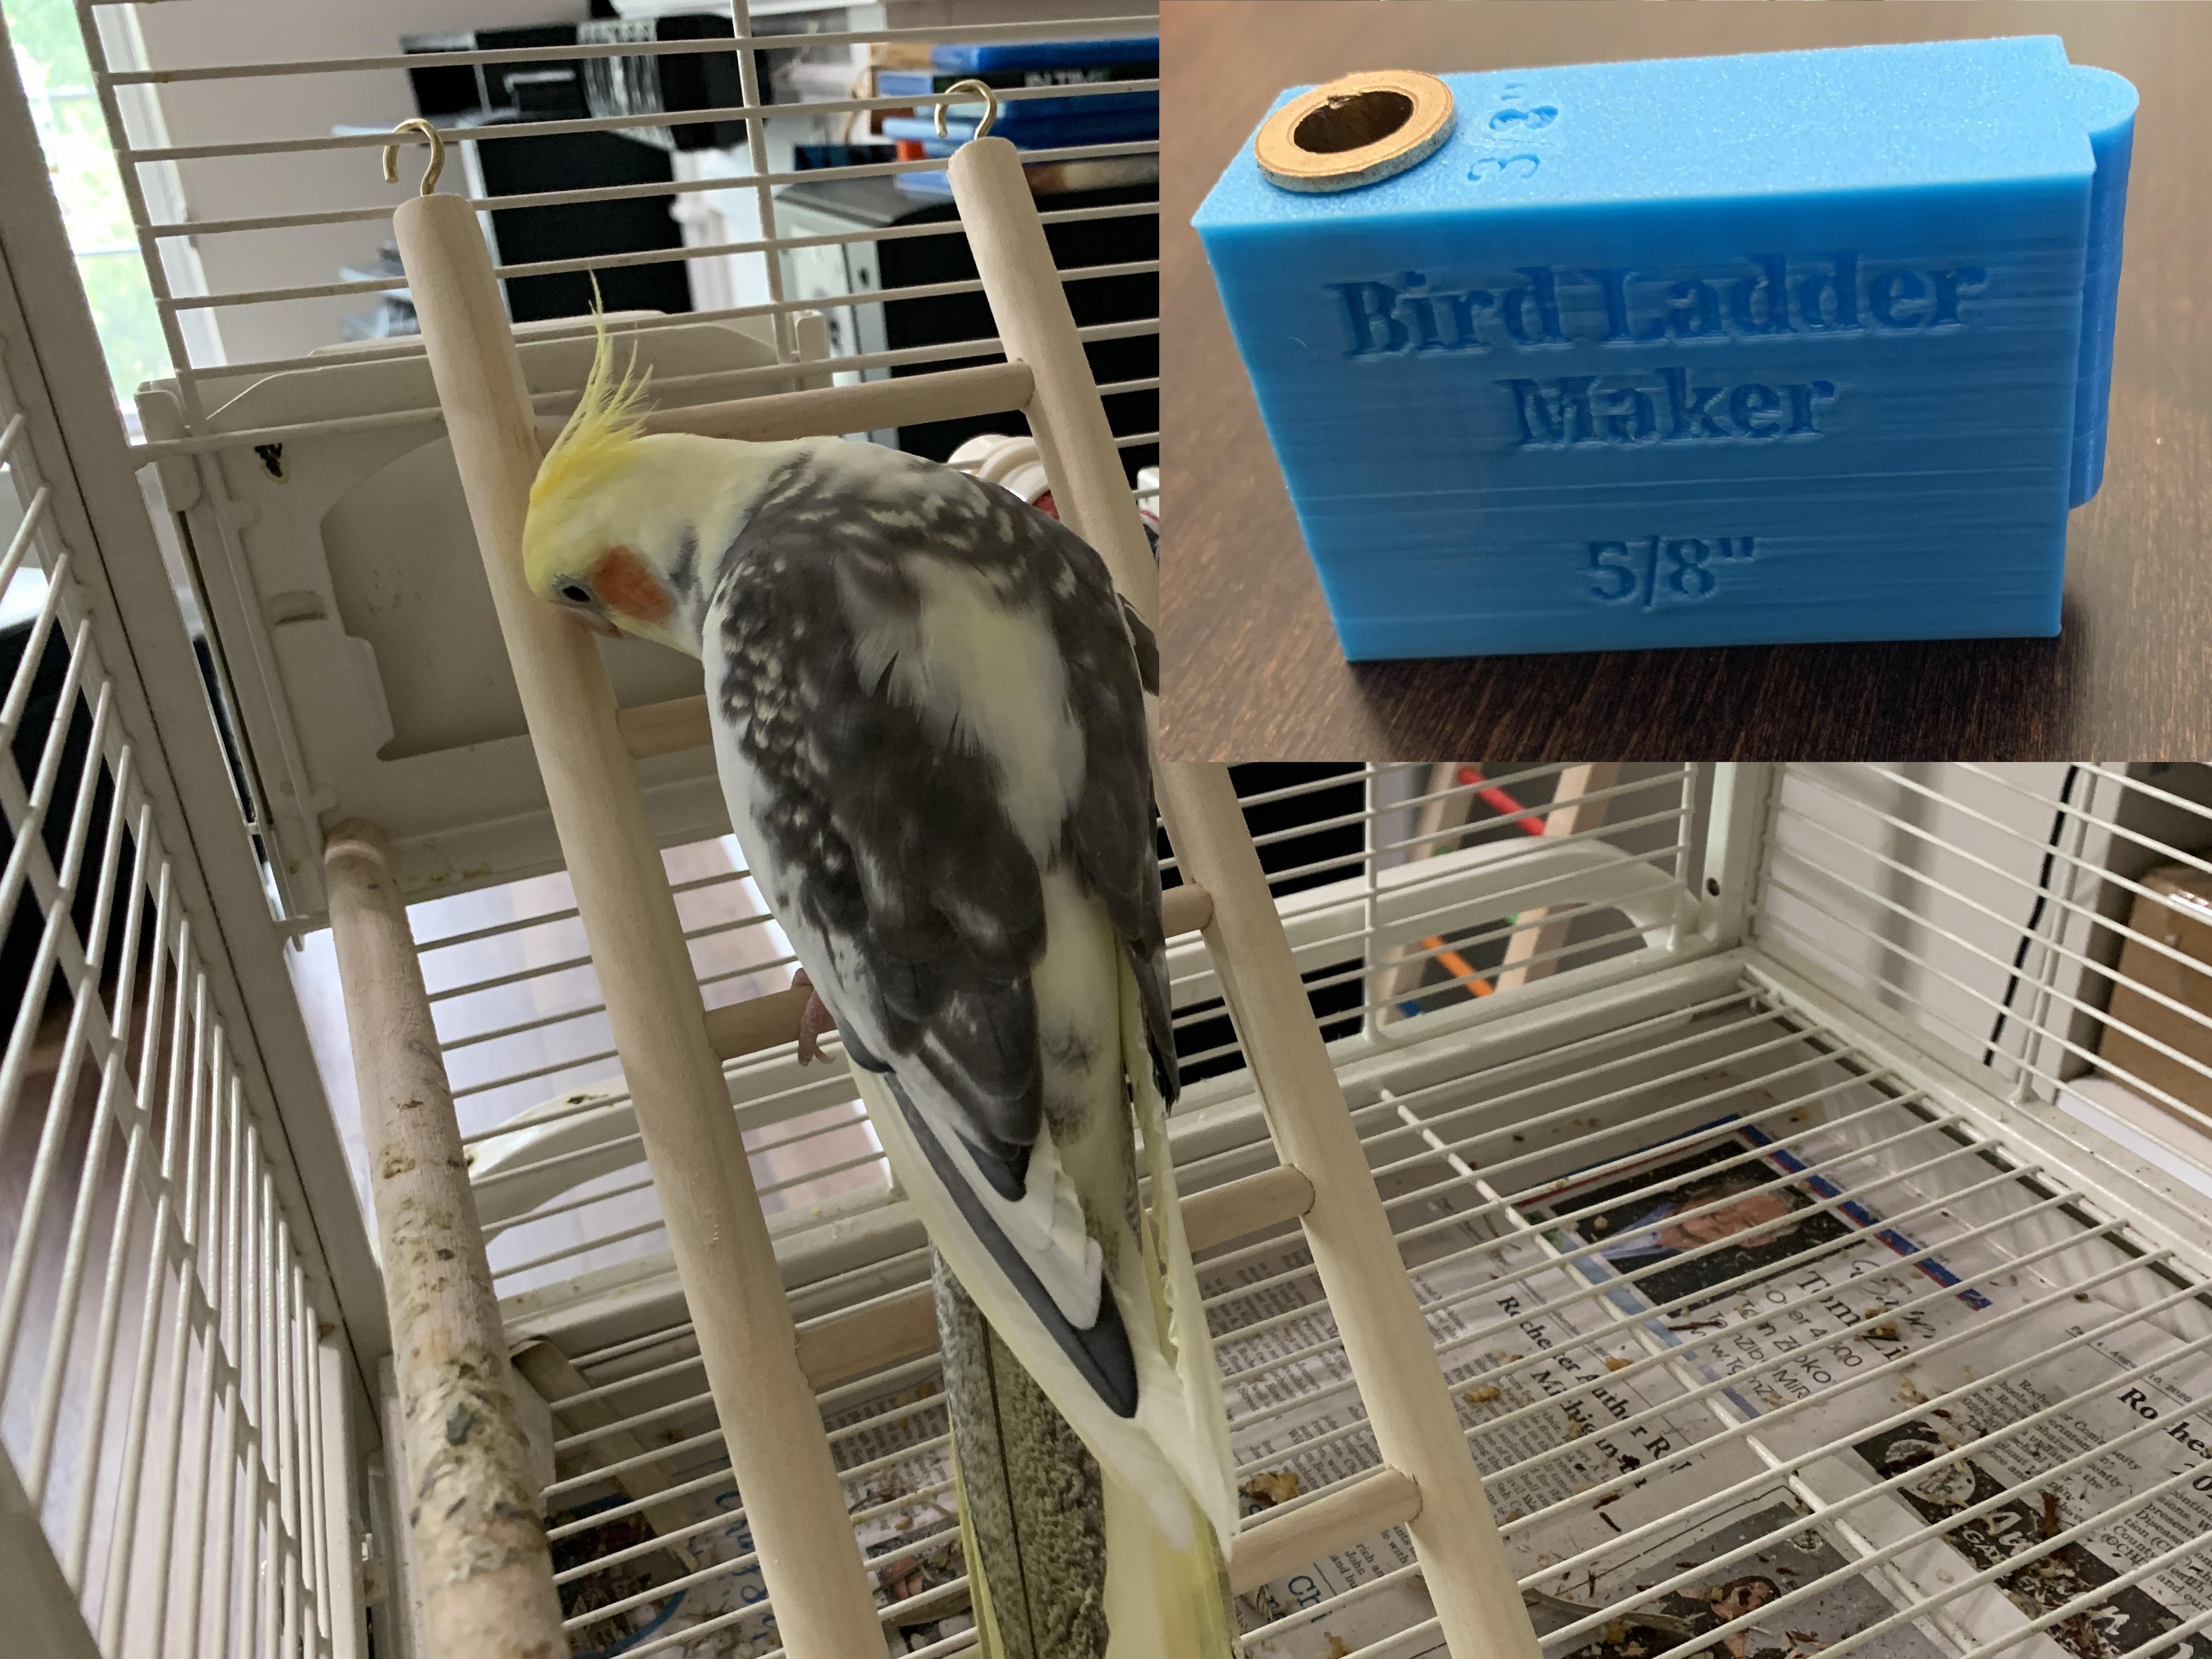

Ladders for birds and bird cages seem to have quite the markup (specialty item I guess). $20 for a small (less than 18 inches), $40 for a medium (two or three feet), $60+ for a large (four foot) length ladder. I've already had to repair a few (overpriced) ladders, due to Launchpad (My cockatiel) chewing the ladder rungs. Building a complete ladder has been on my project lists. I don't have a drill press... so how to line up the holes for the ladder rungs? A 3D printed solution and a drill bit isn't going to last long. Adding a collar or sleeve to the 3D print so the drill bit never touches the plastic?
What follows is two parts.
- Designing and printing the bird ladder tool
- Using the tool to make a bird ladder from dowels.
Don't have a 3D printer? There are services that will print for you. For instance, my local library has a Maker Space with 3D printers. I can place a pre-printed, assembled version on Etsy as well.
Supplies
- TinkerCAD account (or just download the completed STL/3MF)
- 3D printer or printing service. Print in PLA, PETG, or other non-flexible material
- Plastic printed jig
- Order printed and assembled from Etsy
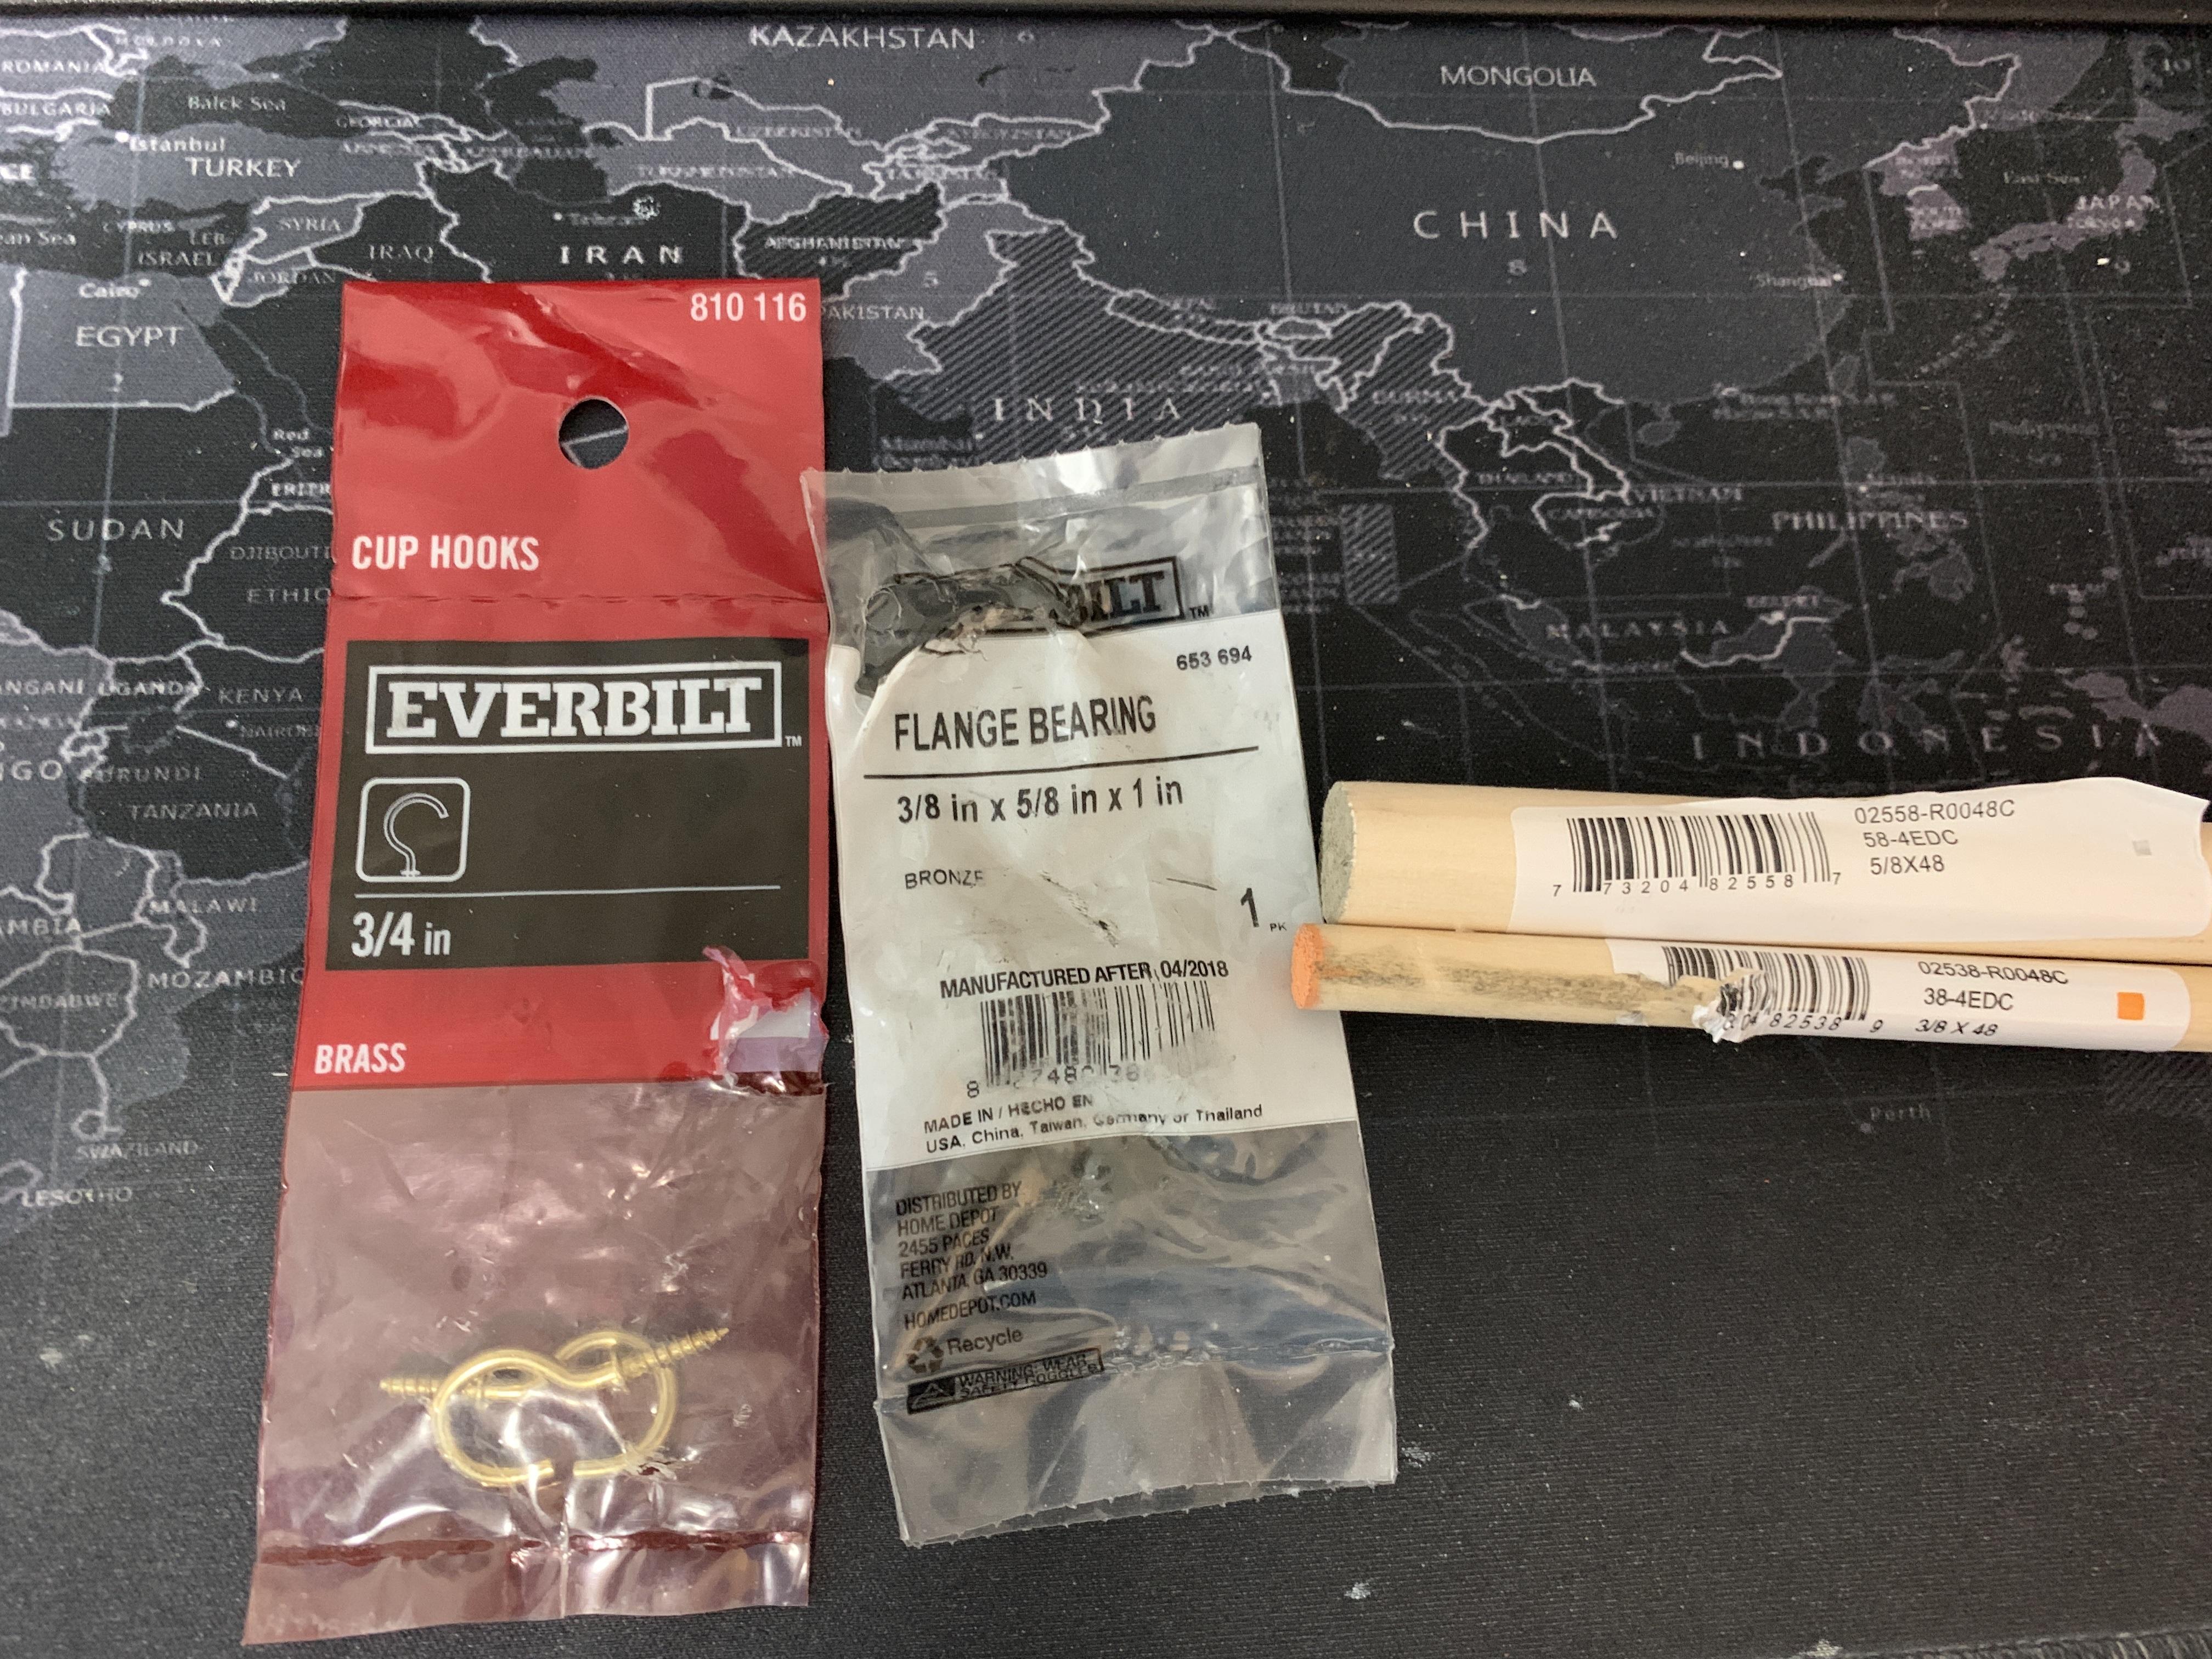
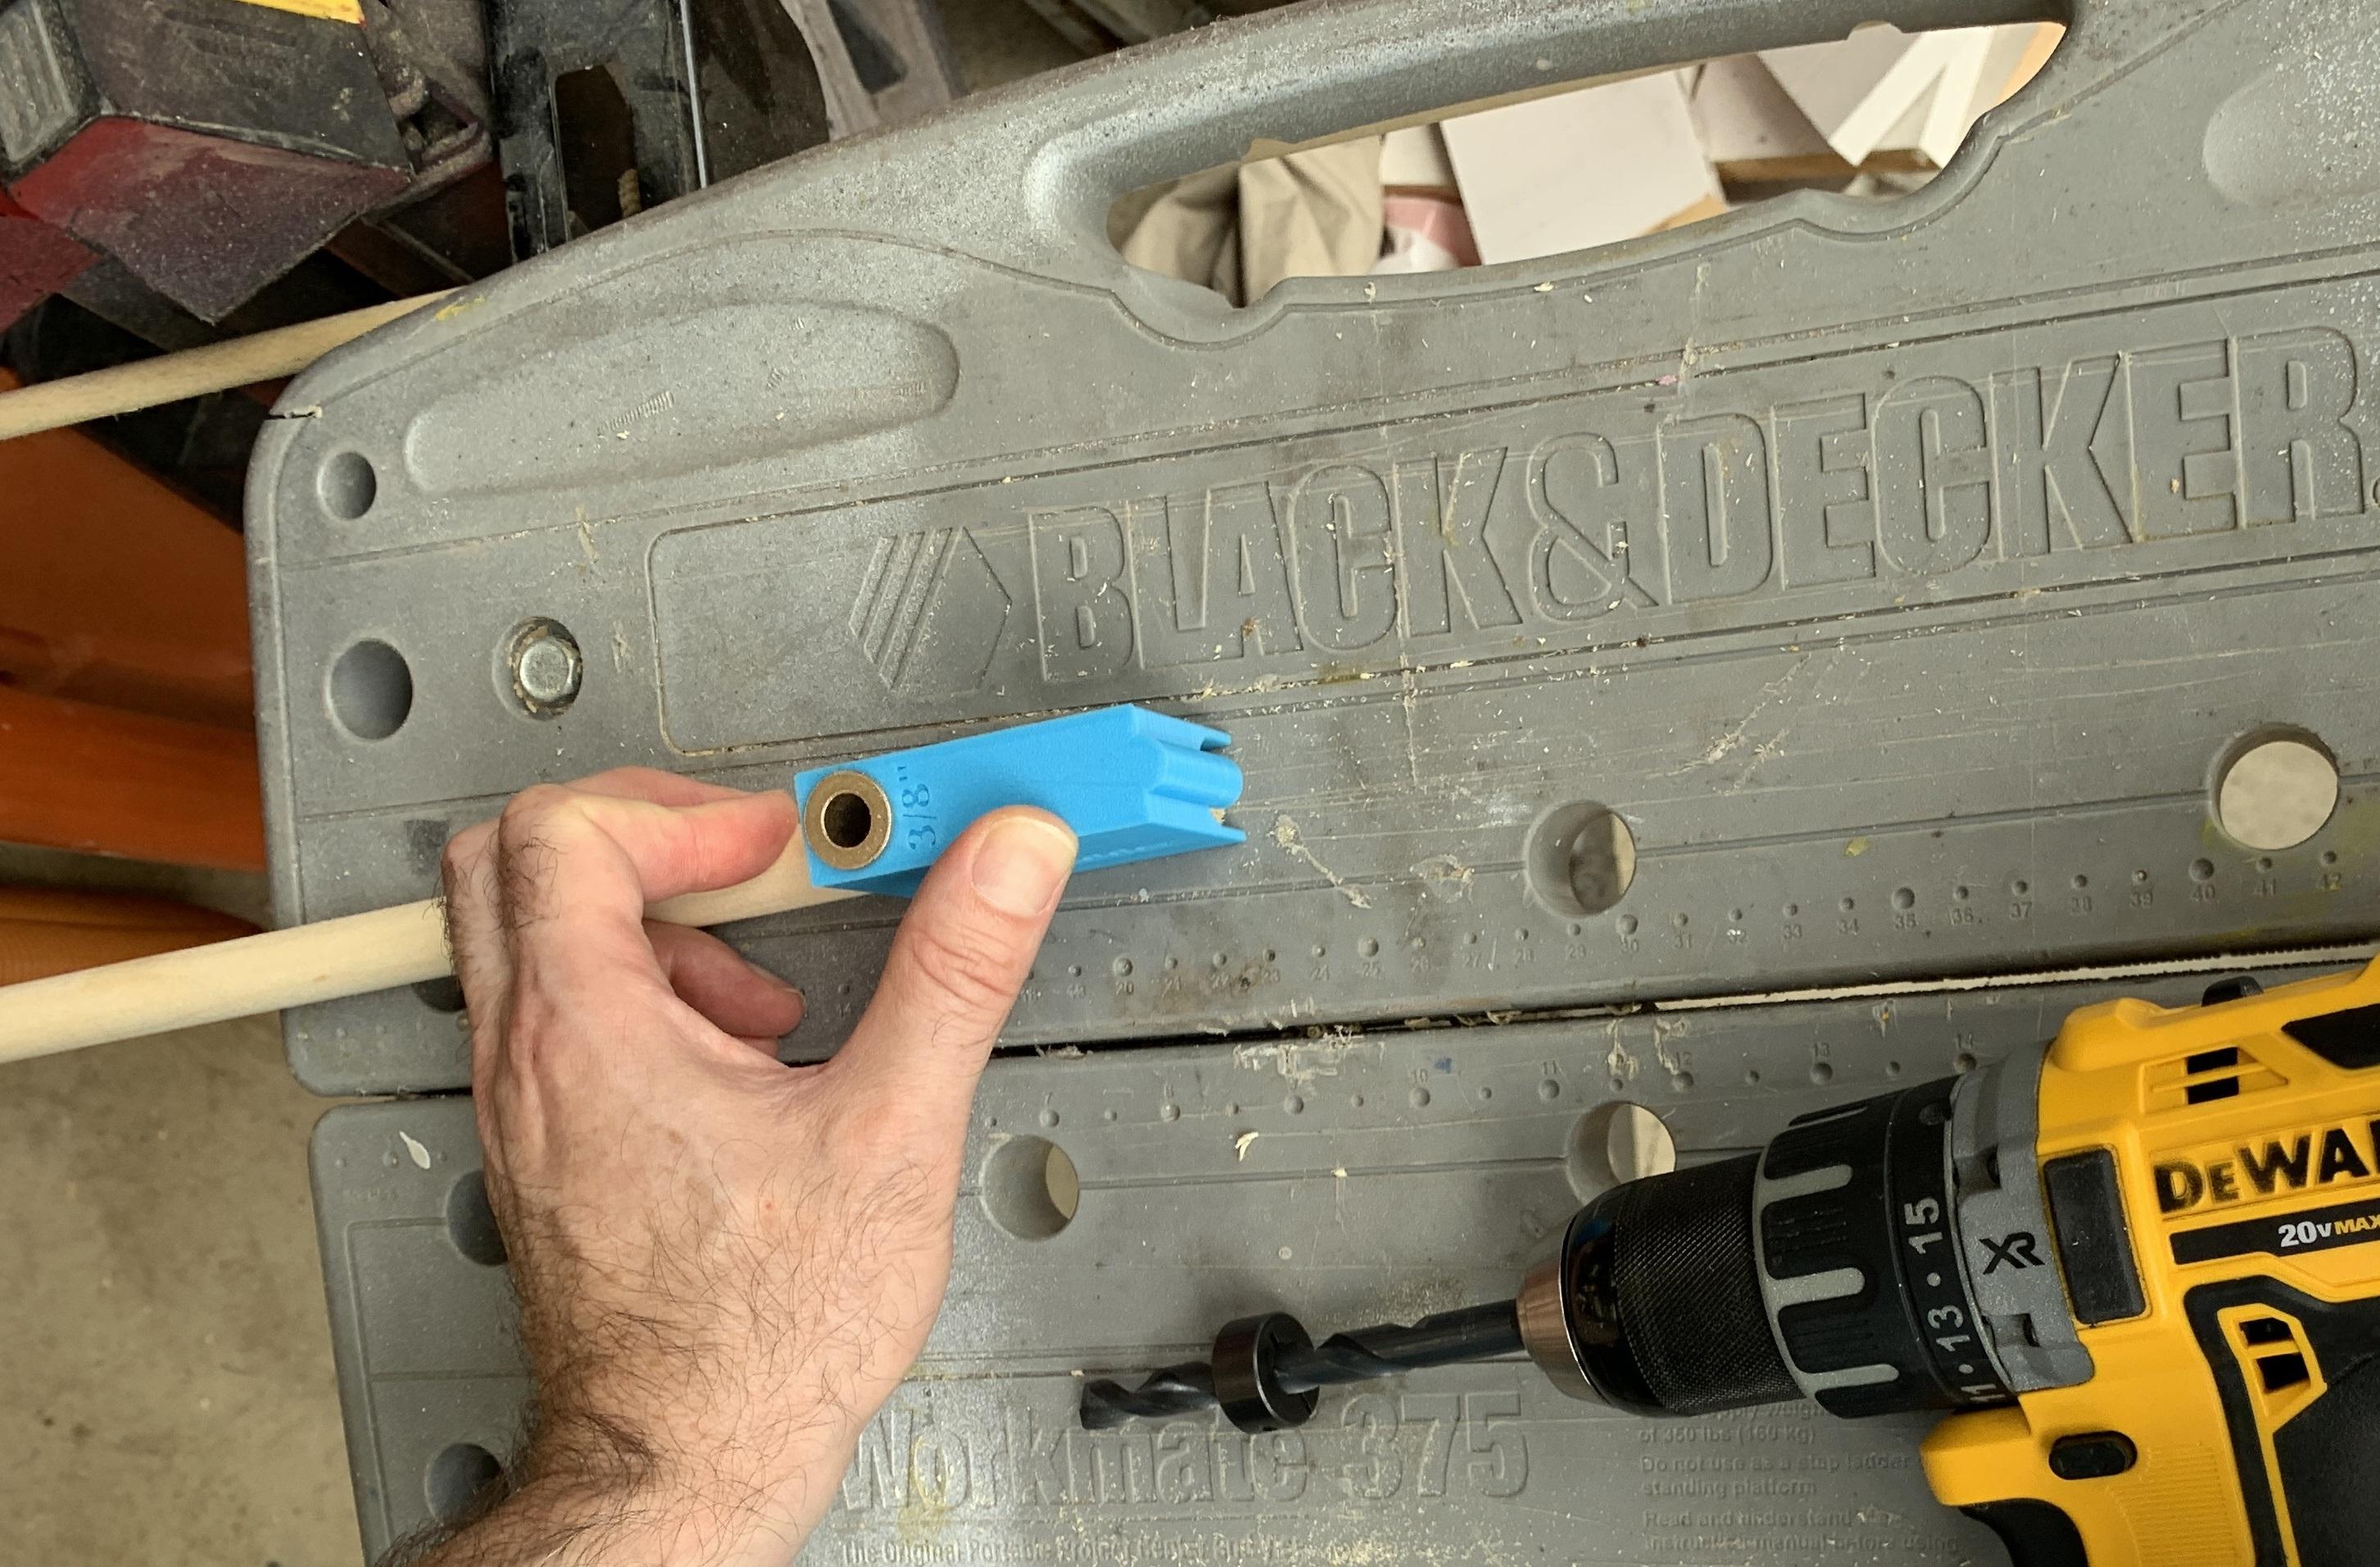
- 3/8" x 5/8" x 1" Flange Bearing (Home Depot $4)
- 3/8" drill bit
- 3/8" stop collar
- Drill
- Miter box (optional)
- Saw
- Cup hooks. 3/4", 15/16", or 7/8". Depends on the cage bars you are hooking it to, but any of those sizes is probably fine.
- 3/8" dowel for the ladder rungs
- 5/8" dowel for the ladder side rails (upright)
- Glue (Elmer’s white glue is sufficient)
- Rubber bands (to act as clamps)
- Sandpaper or sanding block
Downloads
Concept
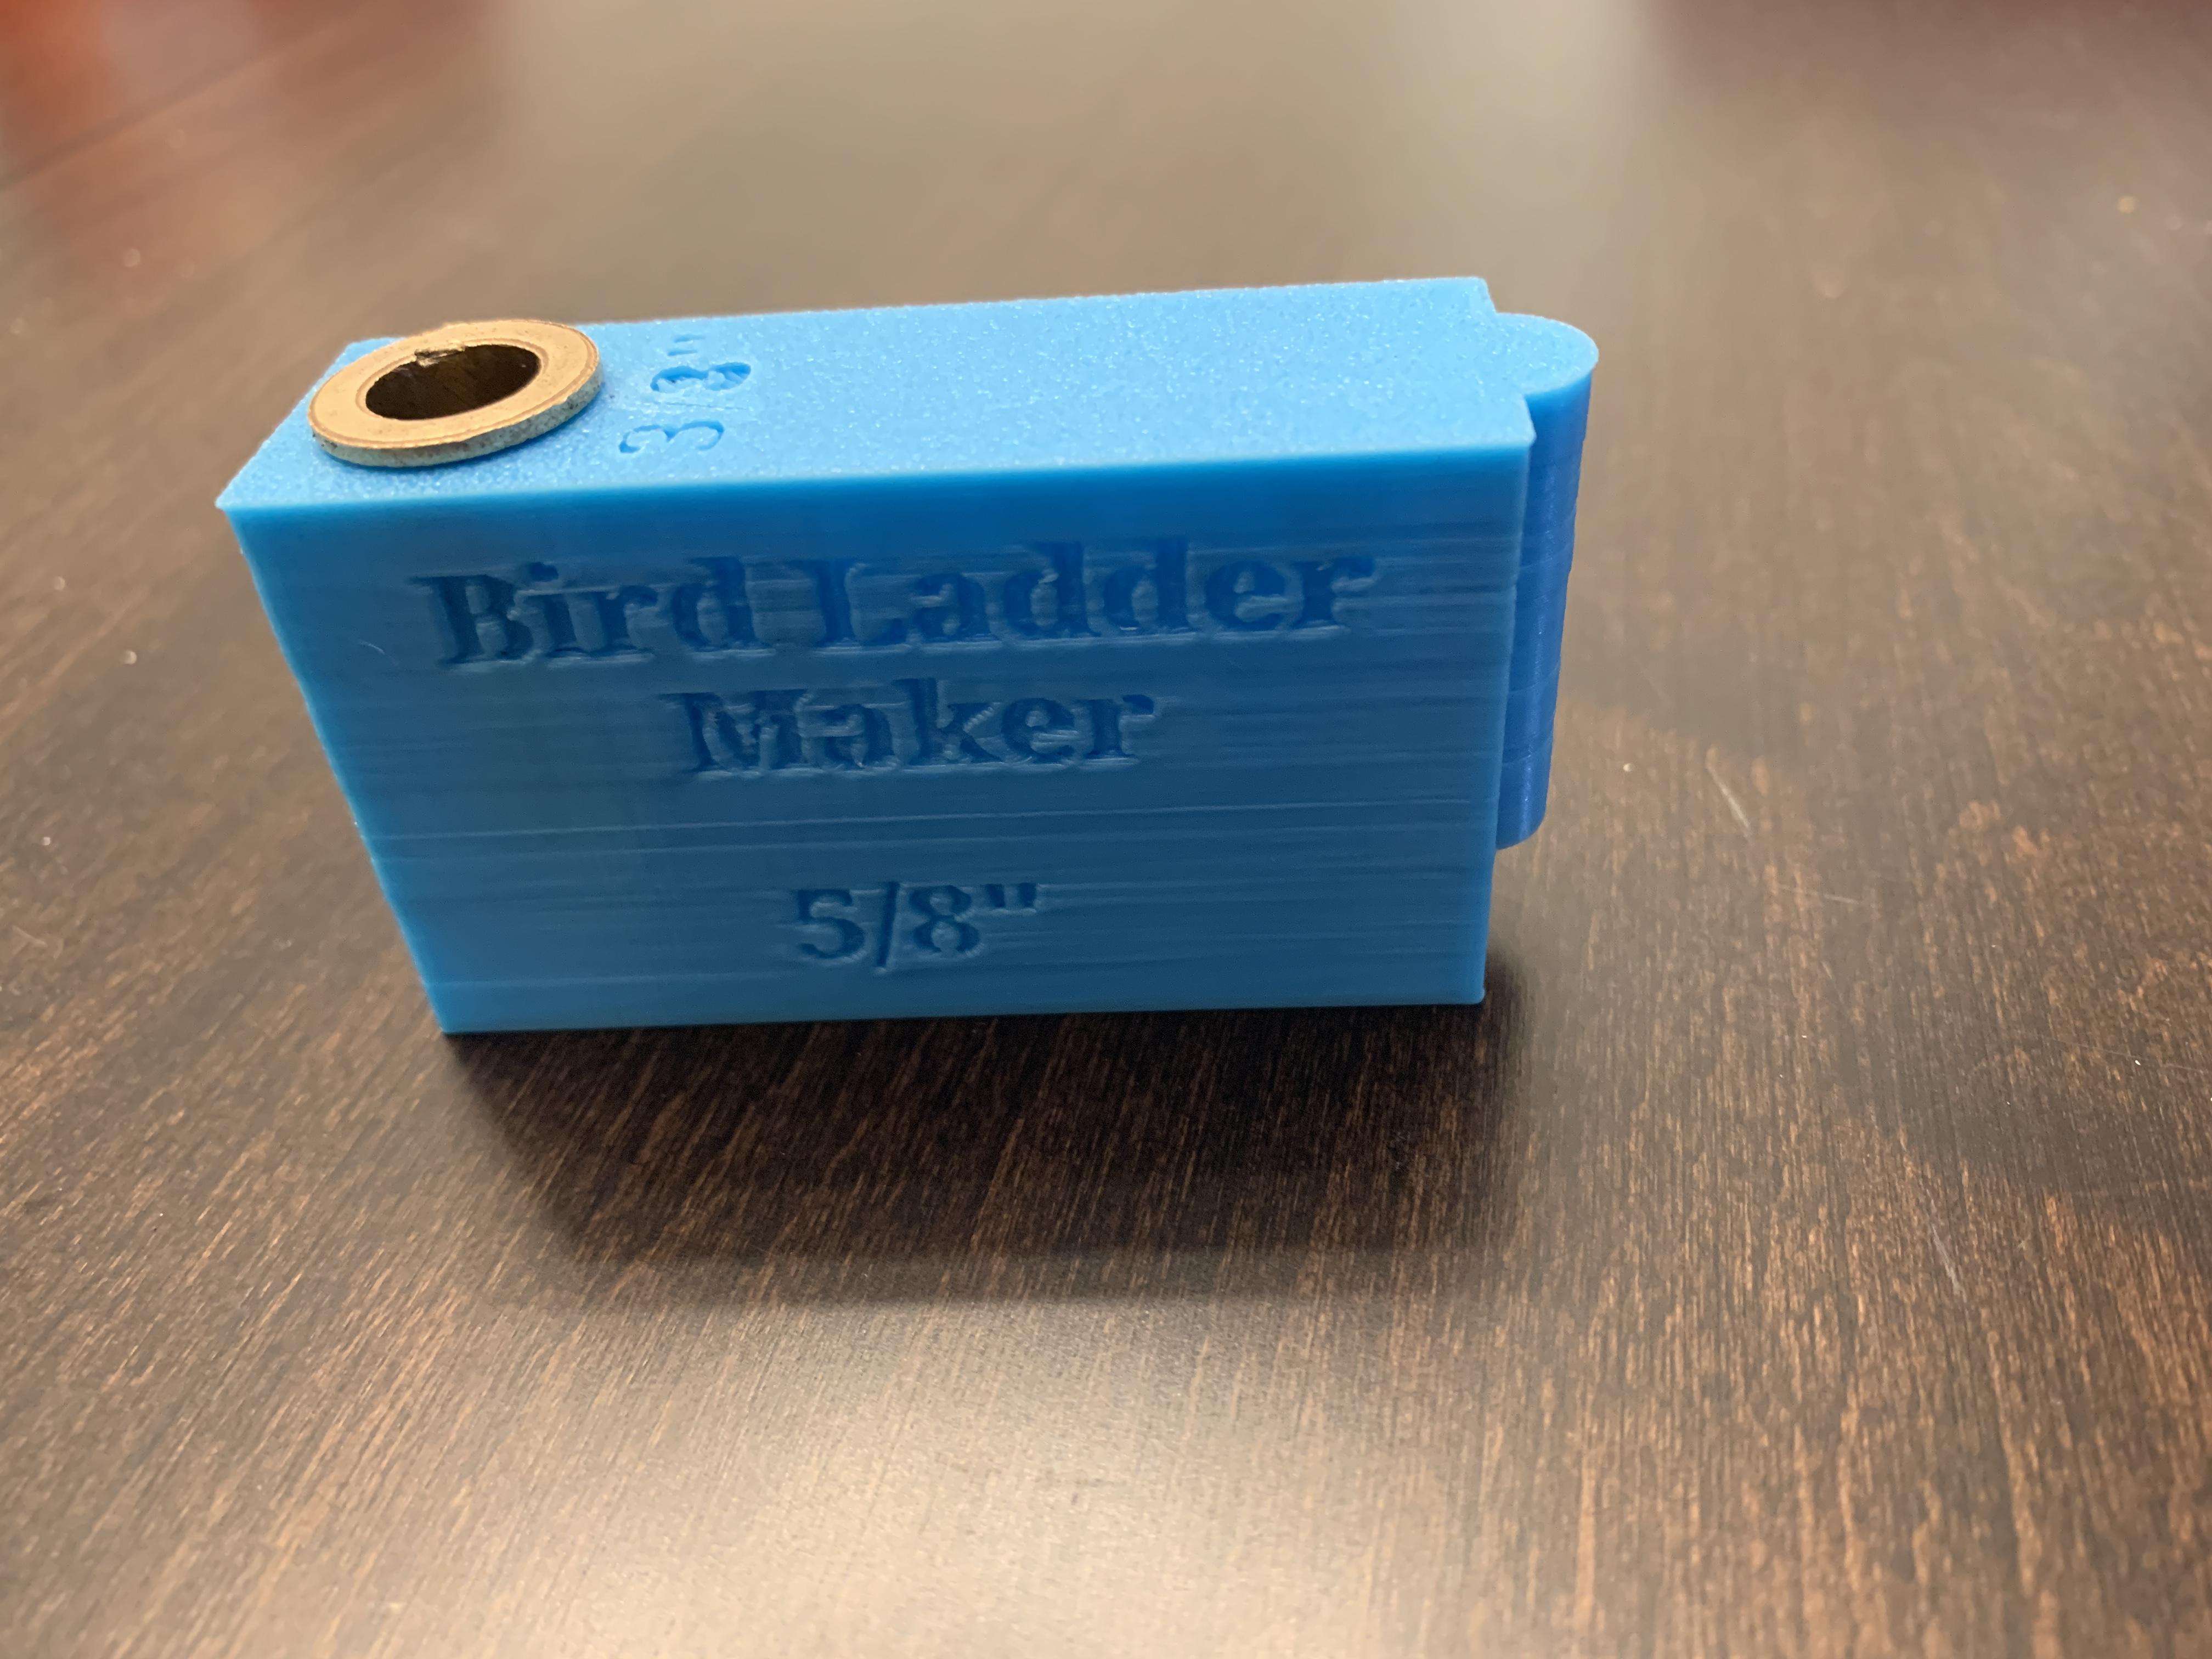
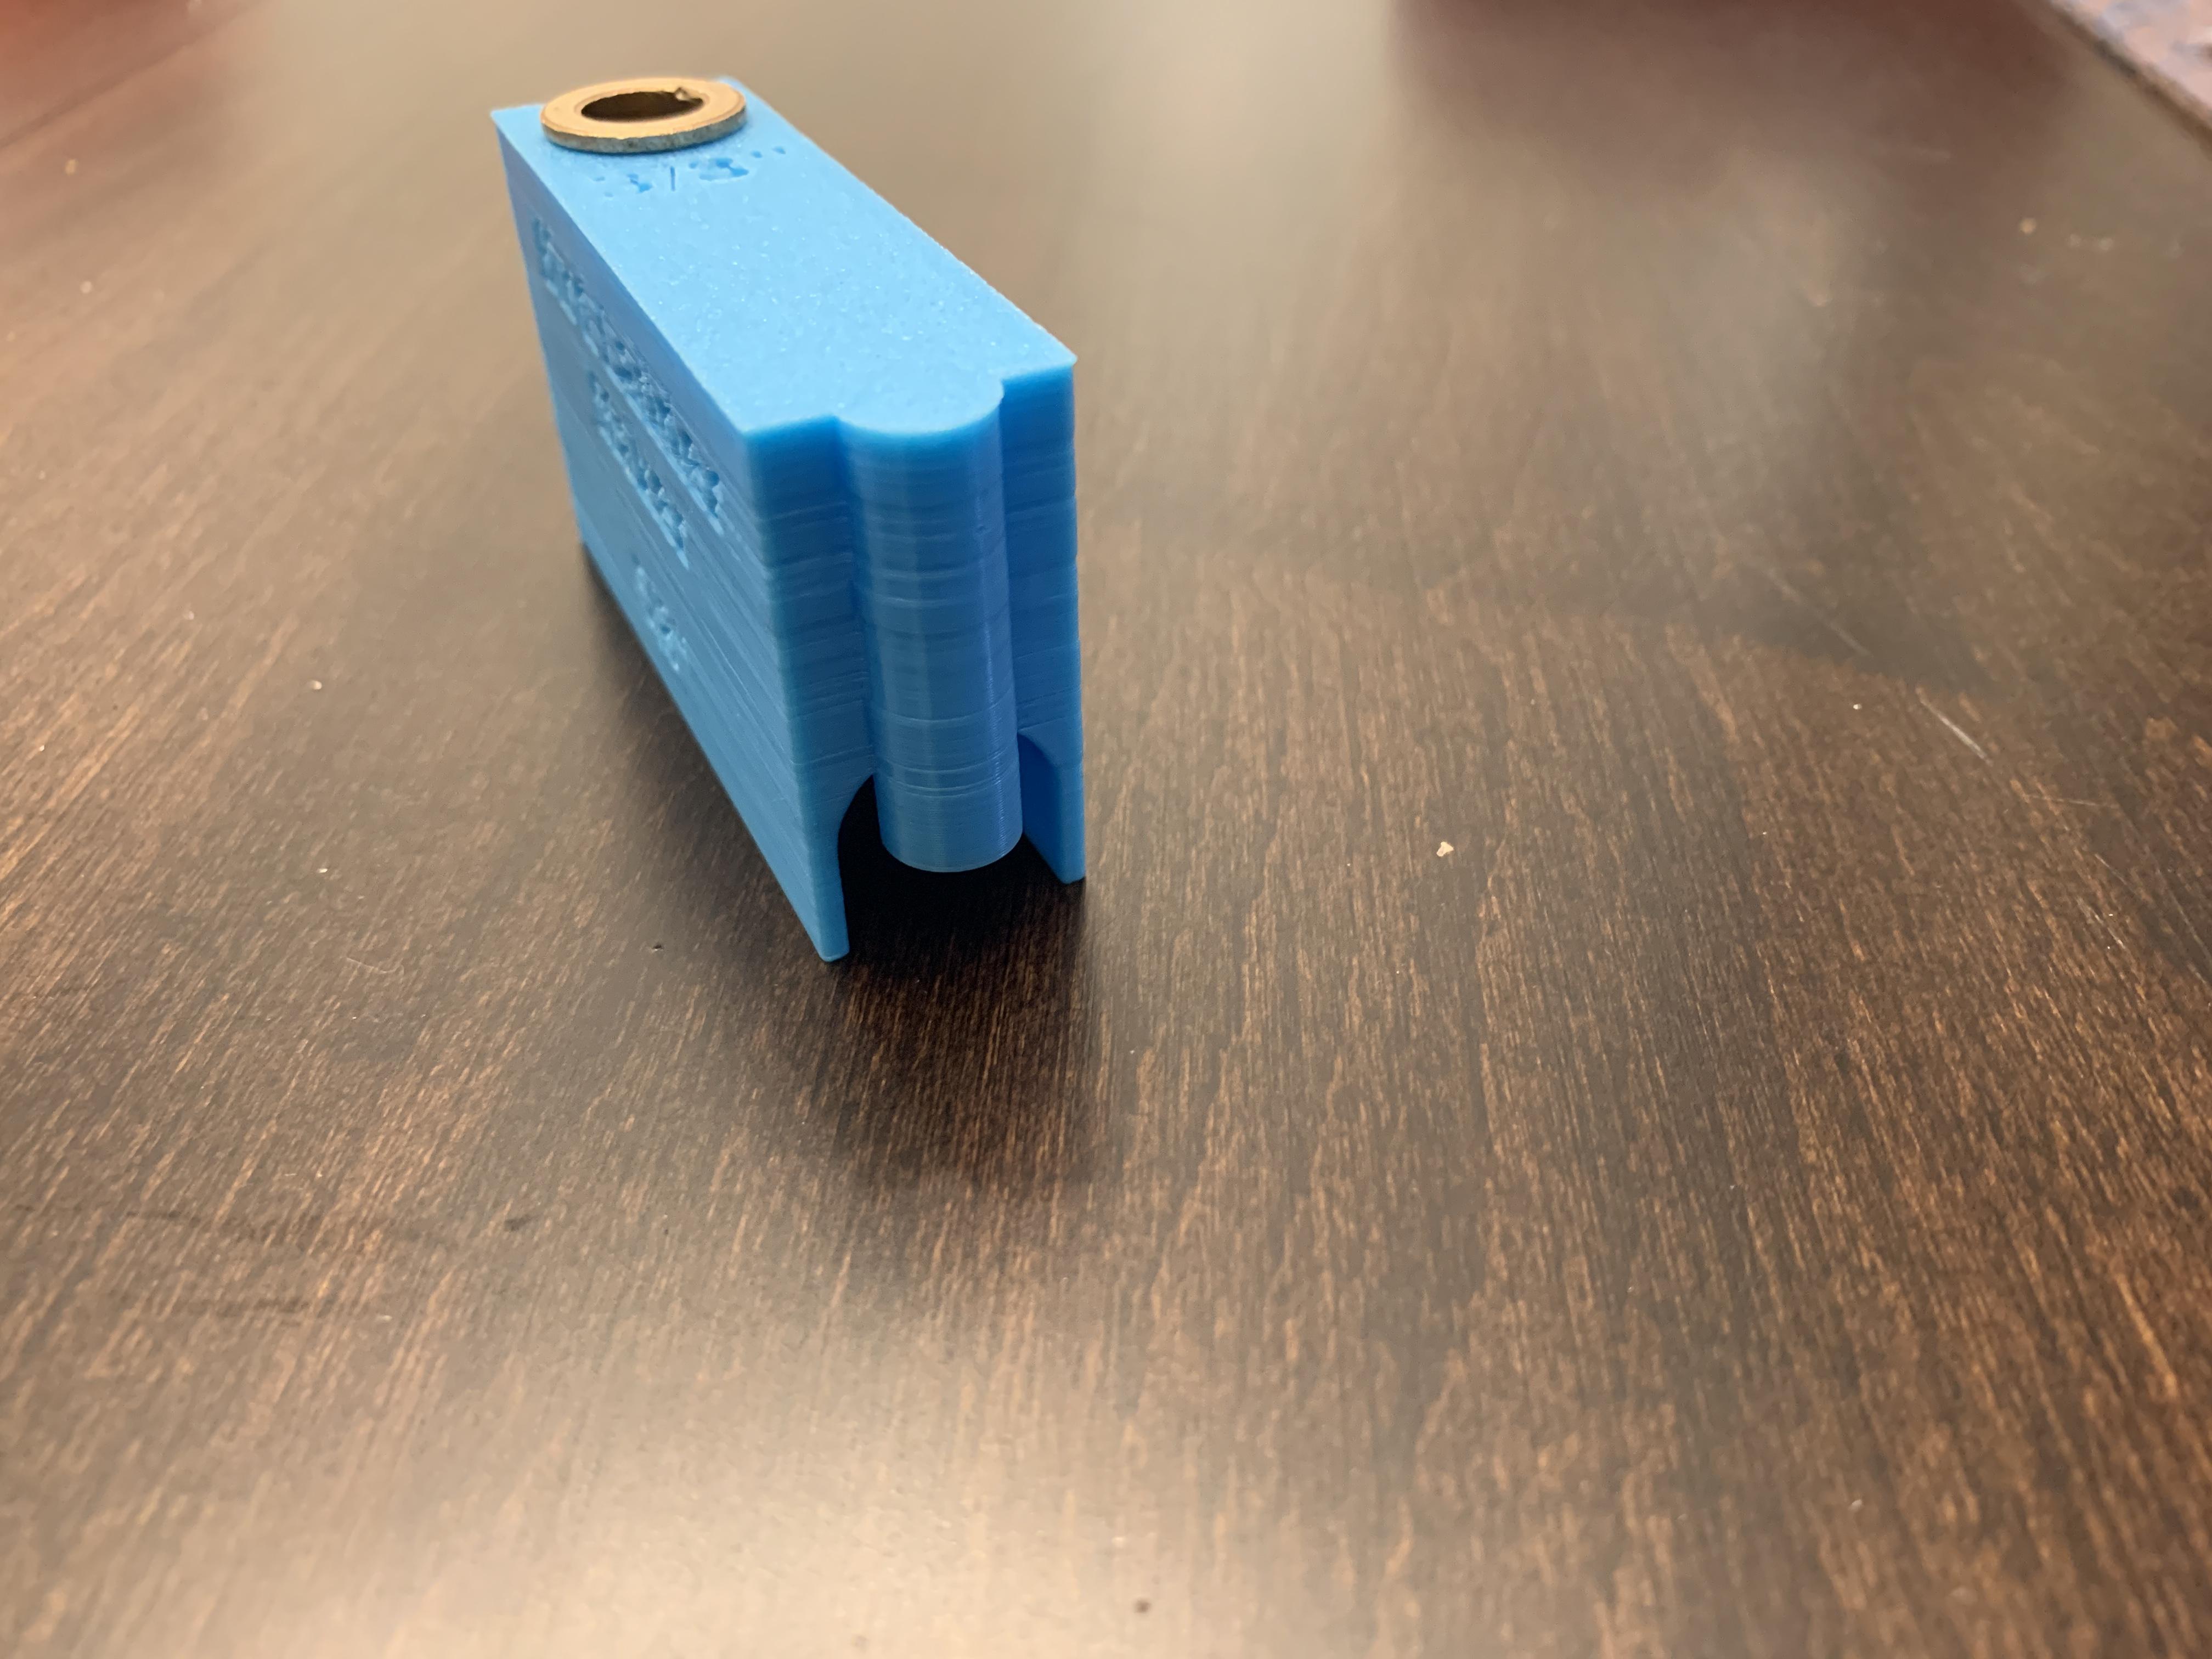
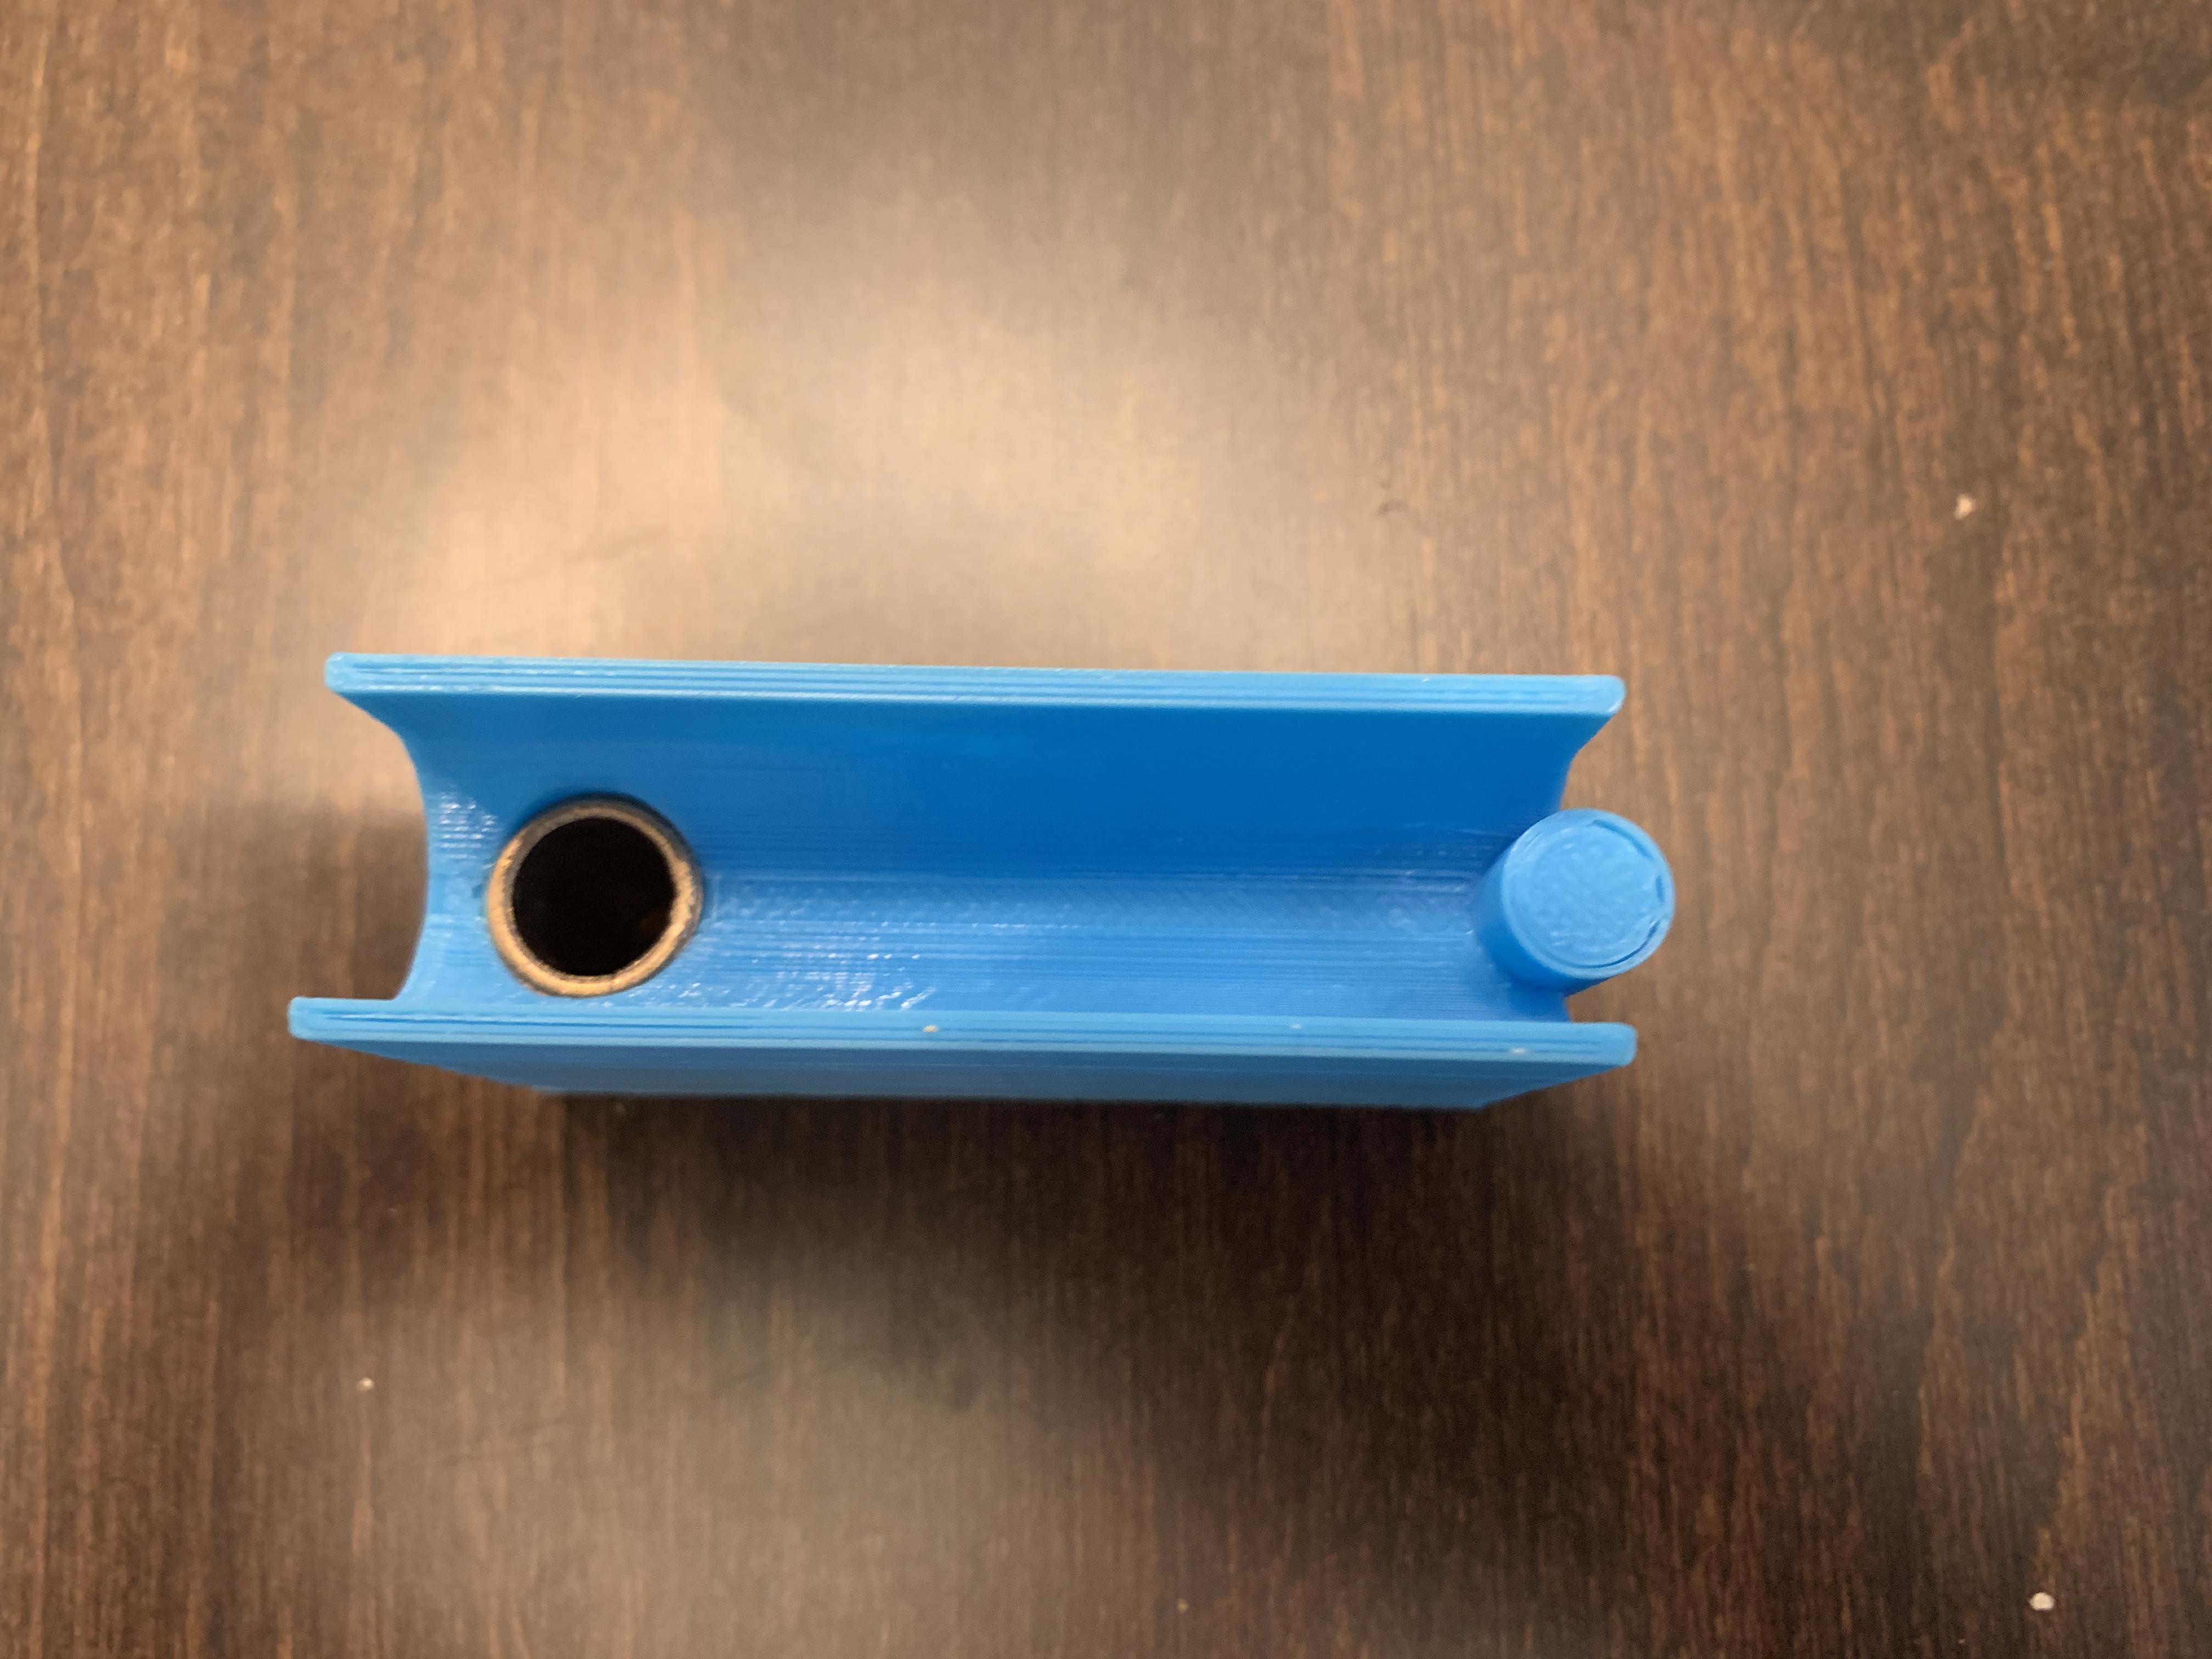
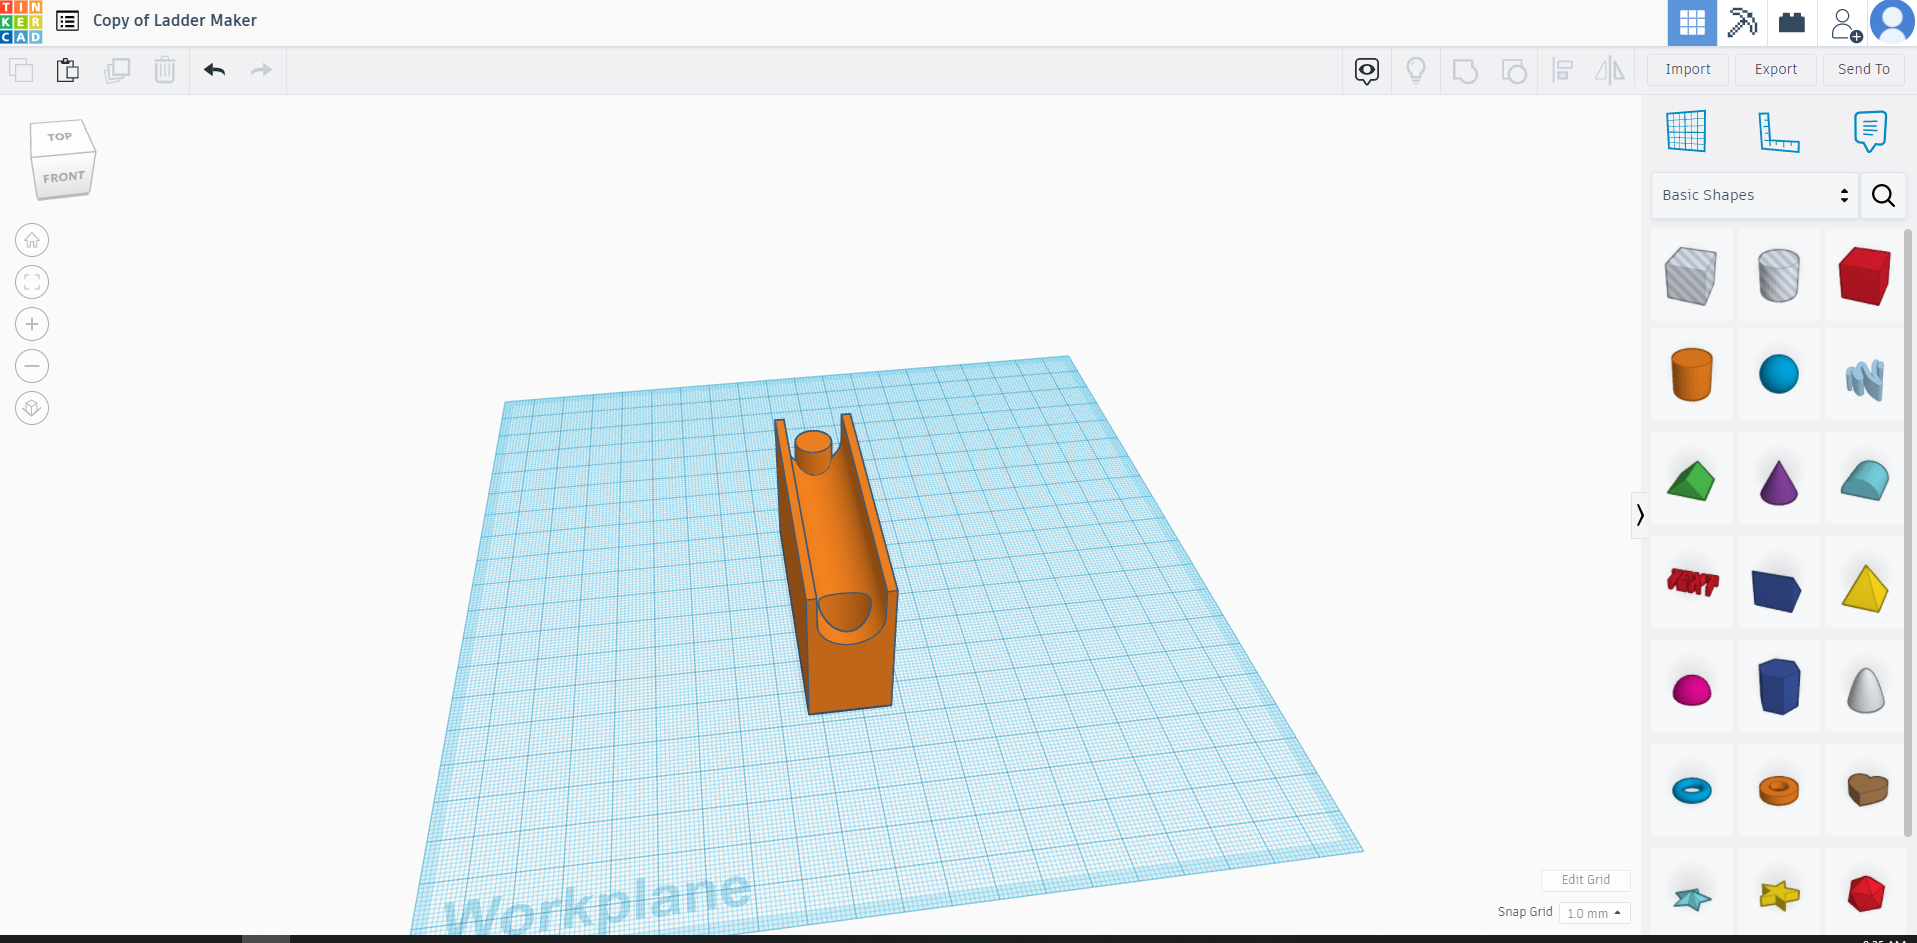
The side rails of the ladder will be a larger diameter than the ladder rungs. The jig needs to hold the ladder side rail in place, while drilling evenly spaced holes along the side rail (optionally not all the way thru, by using a stop collar). Cut equal length dowels for the runs and glue them into place between the two uprights. And finally screw in the hooks to hold the ladder in place. To keep the plastic from getting destroyed by the drill bit, we will utilize a flange bearing as a sleeve for the drill bit. There should be some type of indexing peg to align the jig with the previous hole to keep the holes in the same side of the dowel and ensure the consistent spacing.
Designing in TinkerCAD


I'm going to go over the higher level steps, because its already designed and ready to download.
We're basically going to hollow out sections of a rectangle. But it will be easier to add the rectangle housing slightly later.
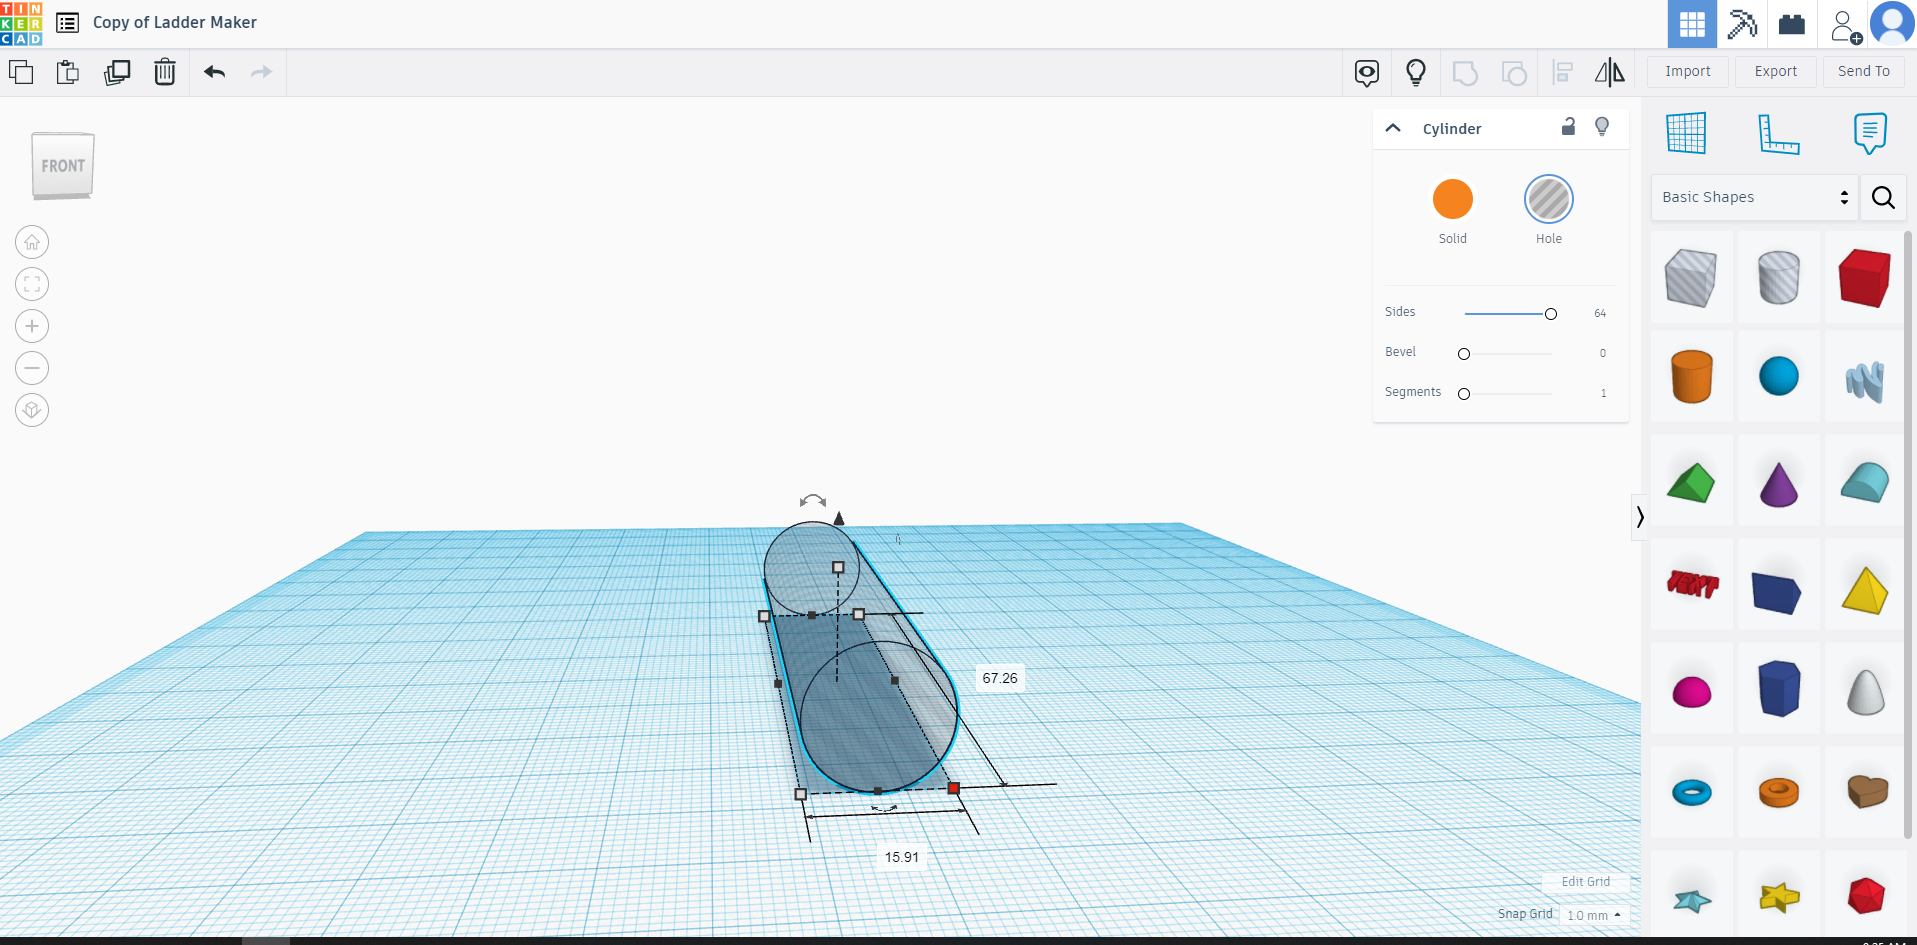
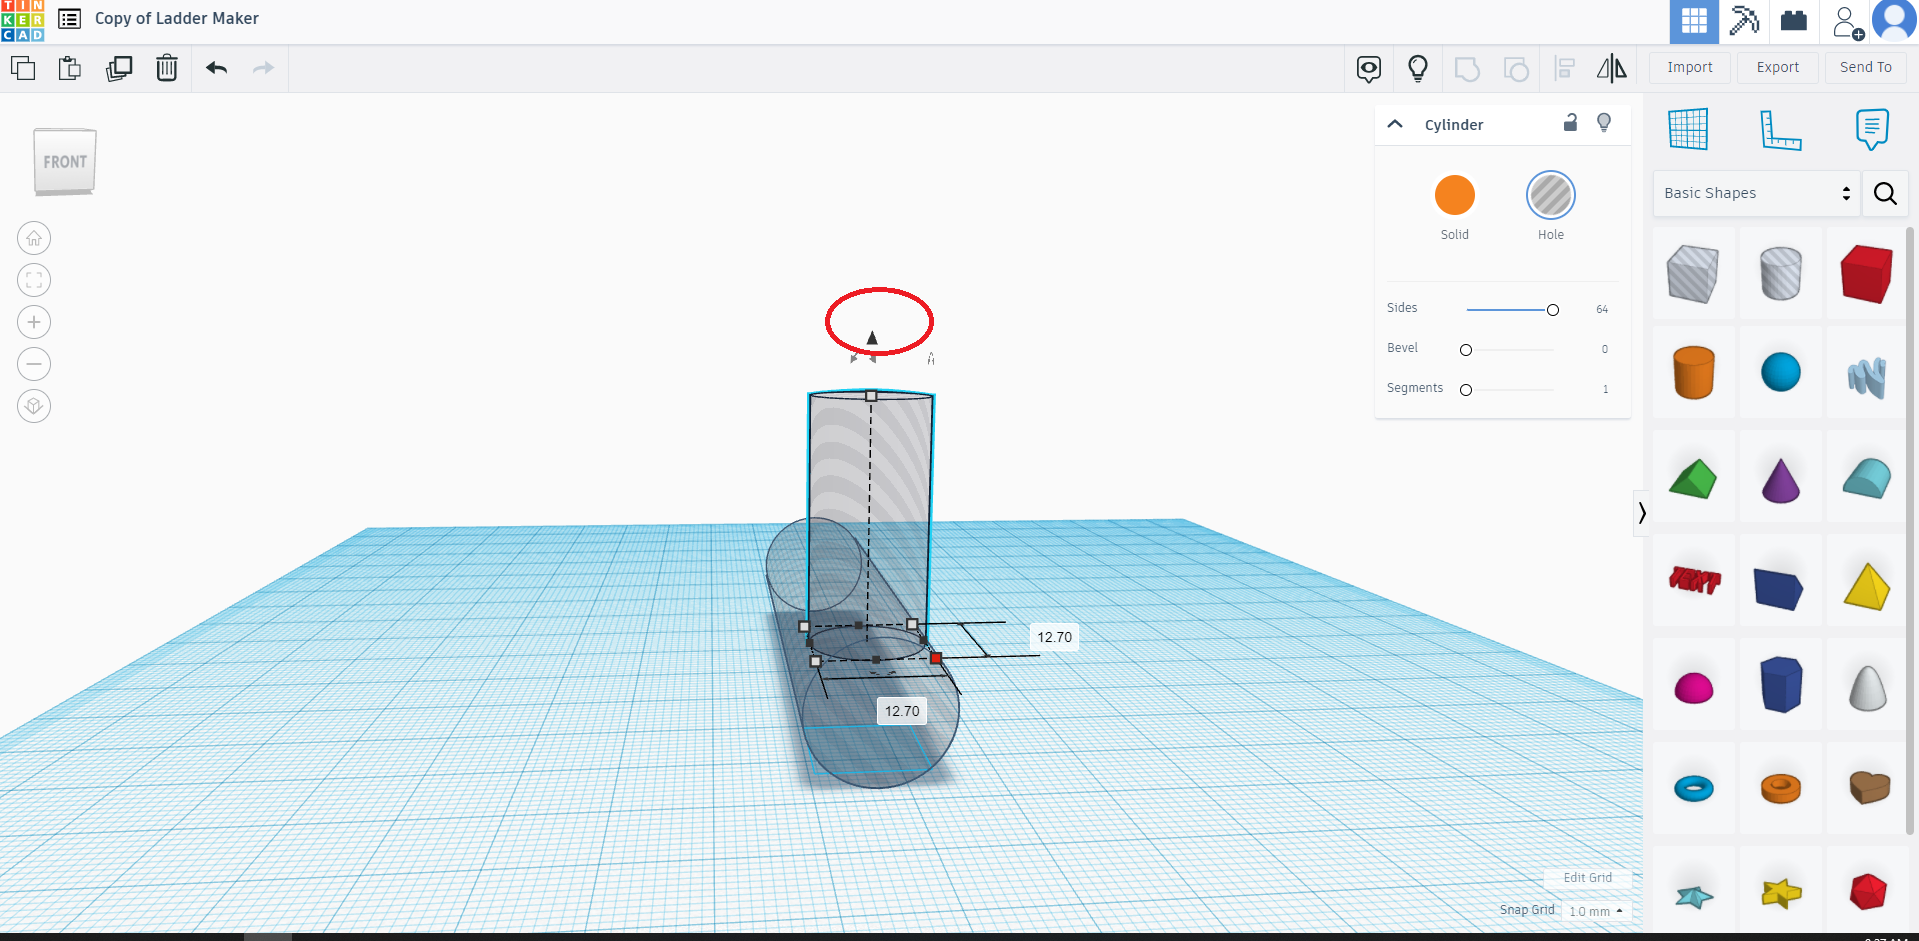
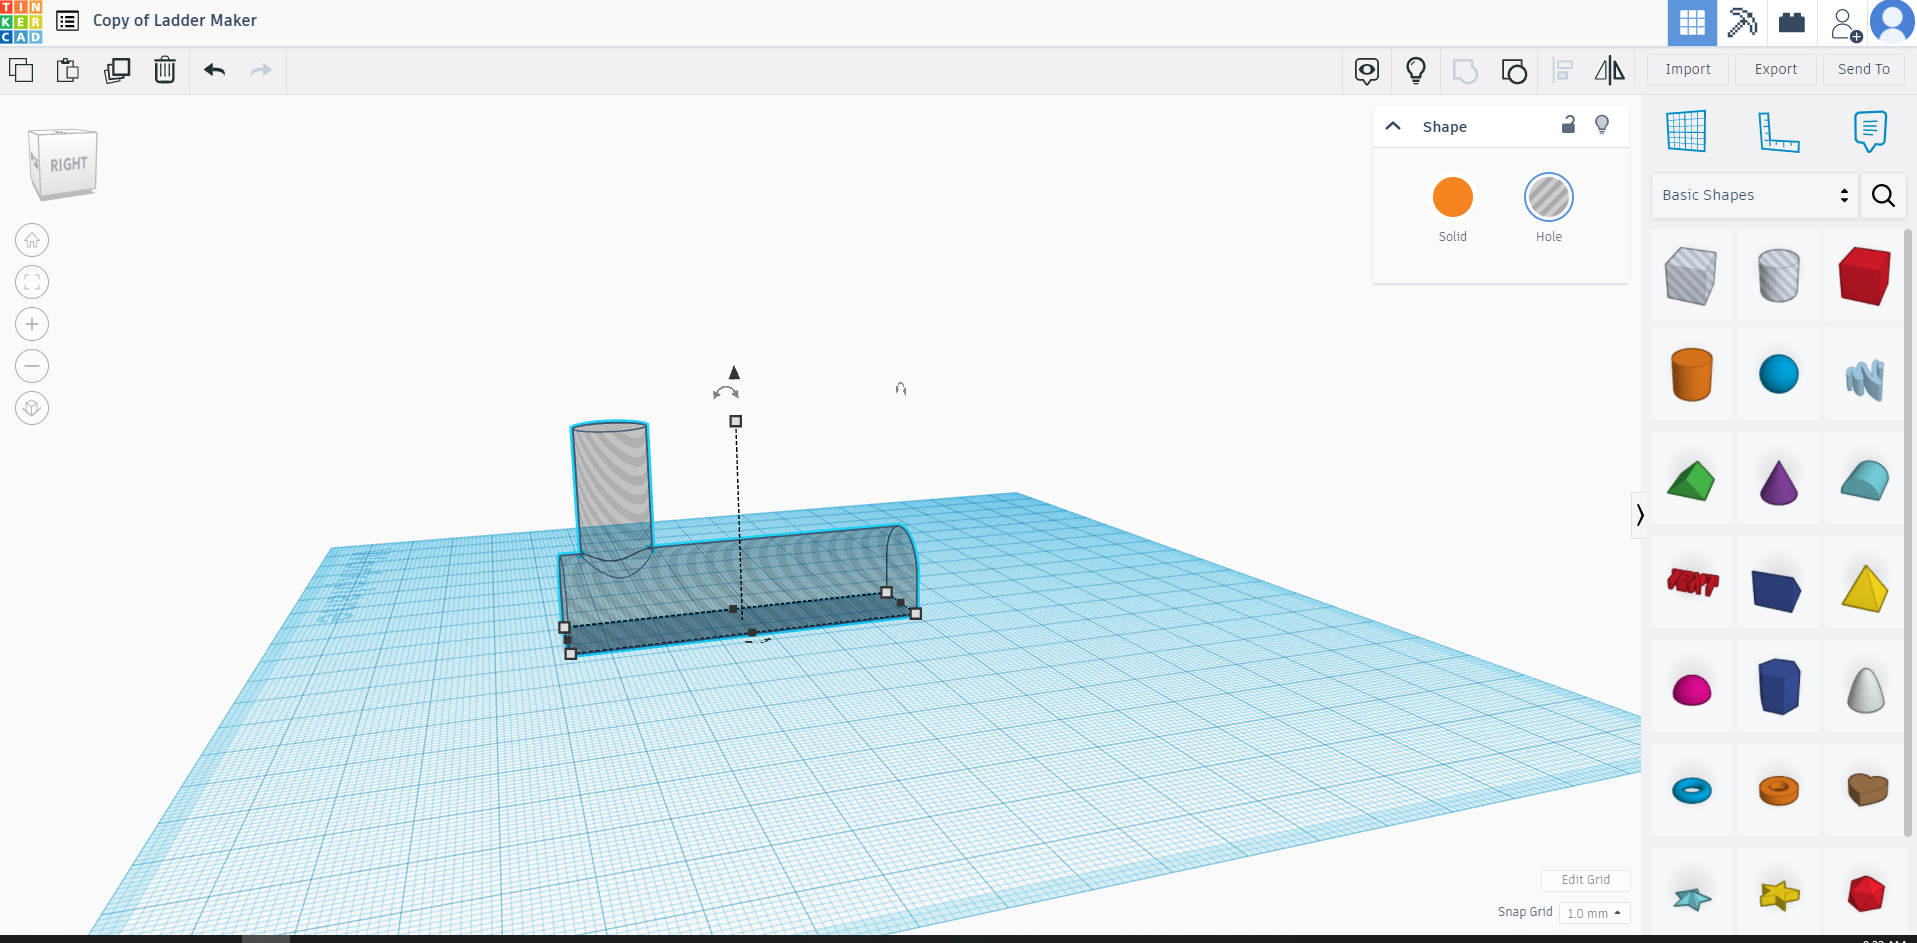
First create a hollow cylinder (from basic shapes). Change the sides from the default of 20, to the maximum of 64. (this will make the cylinder smoother than the default).
Rotate that cylinder so it is laying horizontally.
Now adjust the diameter to accommodate the 5/8" dowel. Quick internet search converts the 5/8" to 15.875 millimeters. Tip: double check with a digital caliper, and consider adding a little leeway.
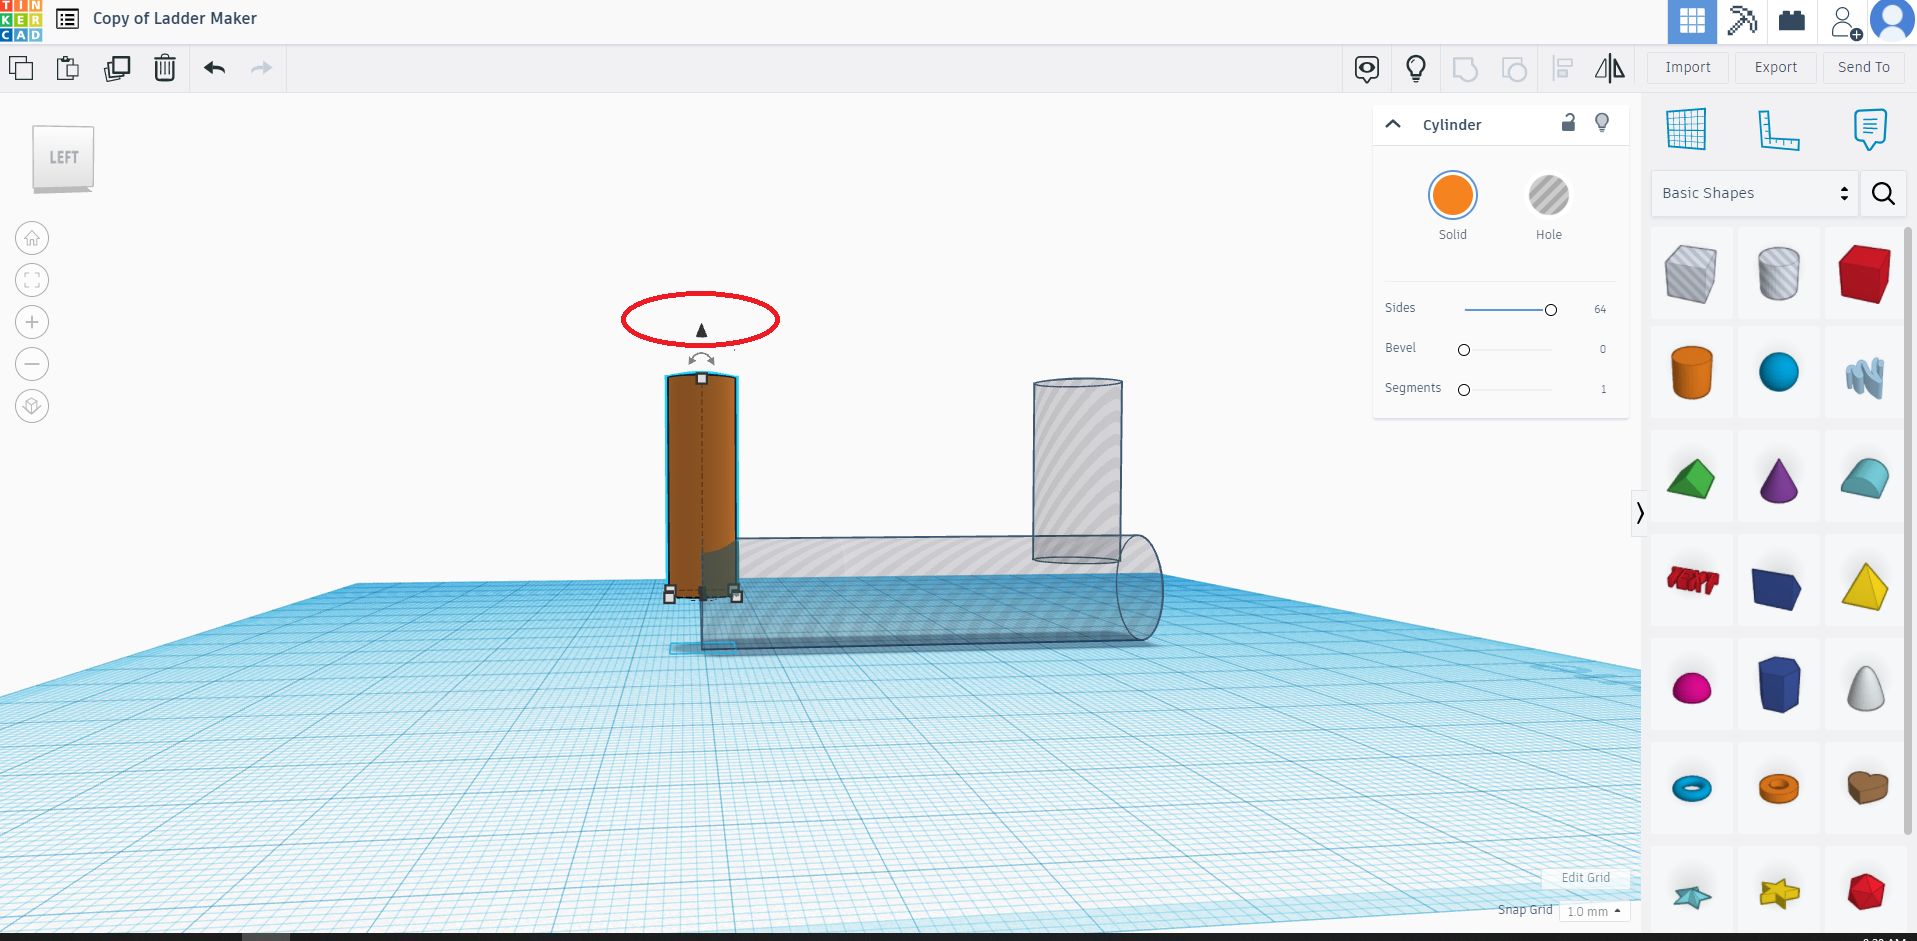
Create a second hollow cylinder. Change the sides to 64. Leaving this one upright. Adjust its diameter to accommodate the diameter of the flange bearing which is 5/8" or 15.875mm.
Create a solid cylinder which will act as the spacing peg. Again, change the sides to 64. Adjust the diameter to 3/8" or 9.525mm.
Select all three cylinders and use TinkerCADs alignment feature to center them all in a line.
Move the upright hollow cylinder to one end, and the solid cylinder to the alternate end; spacing them about 55mm apart (maybe less if you have a bird much smaller than a cockatiel).
Move the solid cylinder up (horizontally) about 5mm or so.
Why approximate? Well if you are designing this from scratch you may be doing some test prints to tweak some of the dimensions/results.
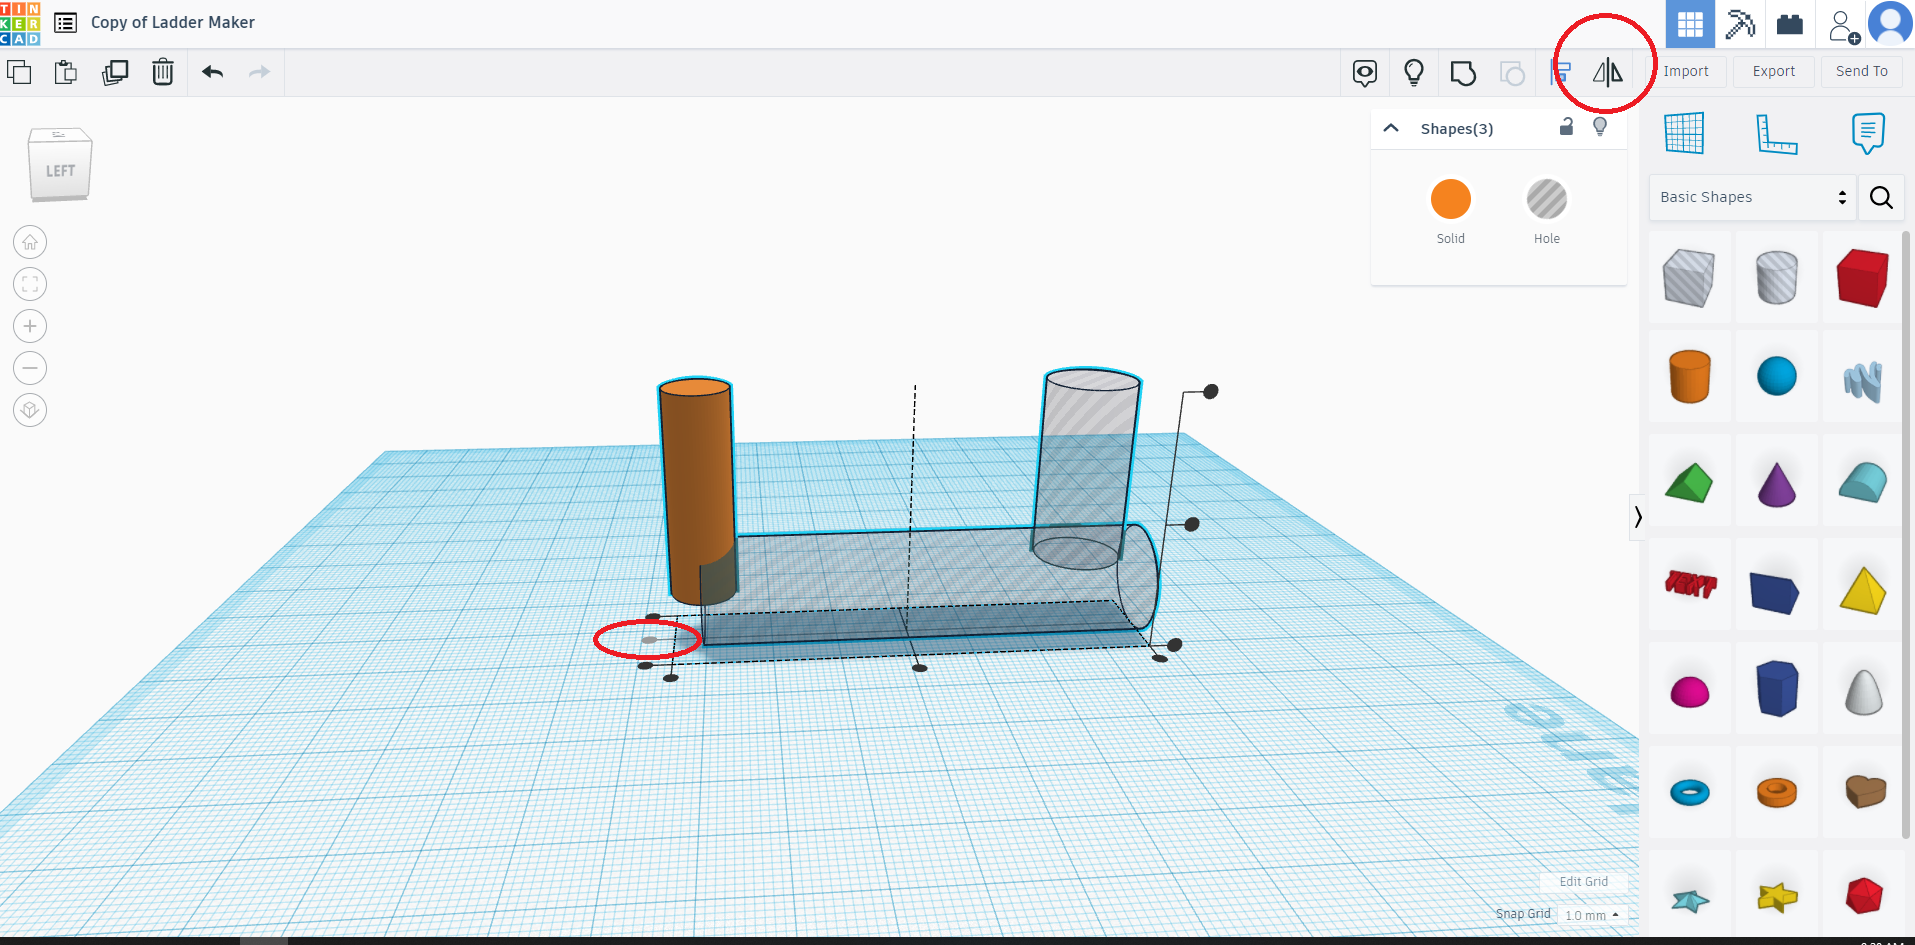
Make a hollow rectangle the same width and length as the hollow cylinder for the 5/8" dowel. This is so the jig will be able to snap over the dowel. If there was just the hollow cylinder it wouldn't fit over.
Now make a solid rectangle and place it around the rest of the objects. A little wider than the hollow horizontal cylinder.
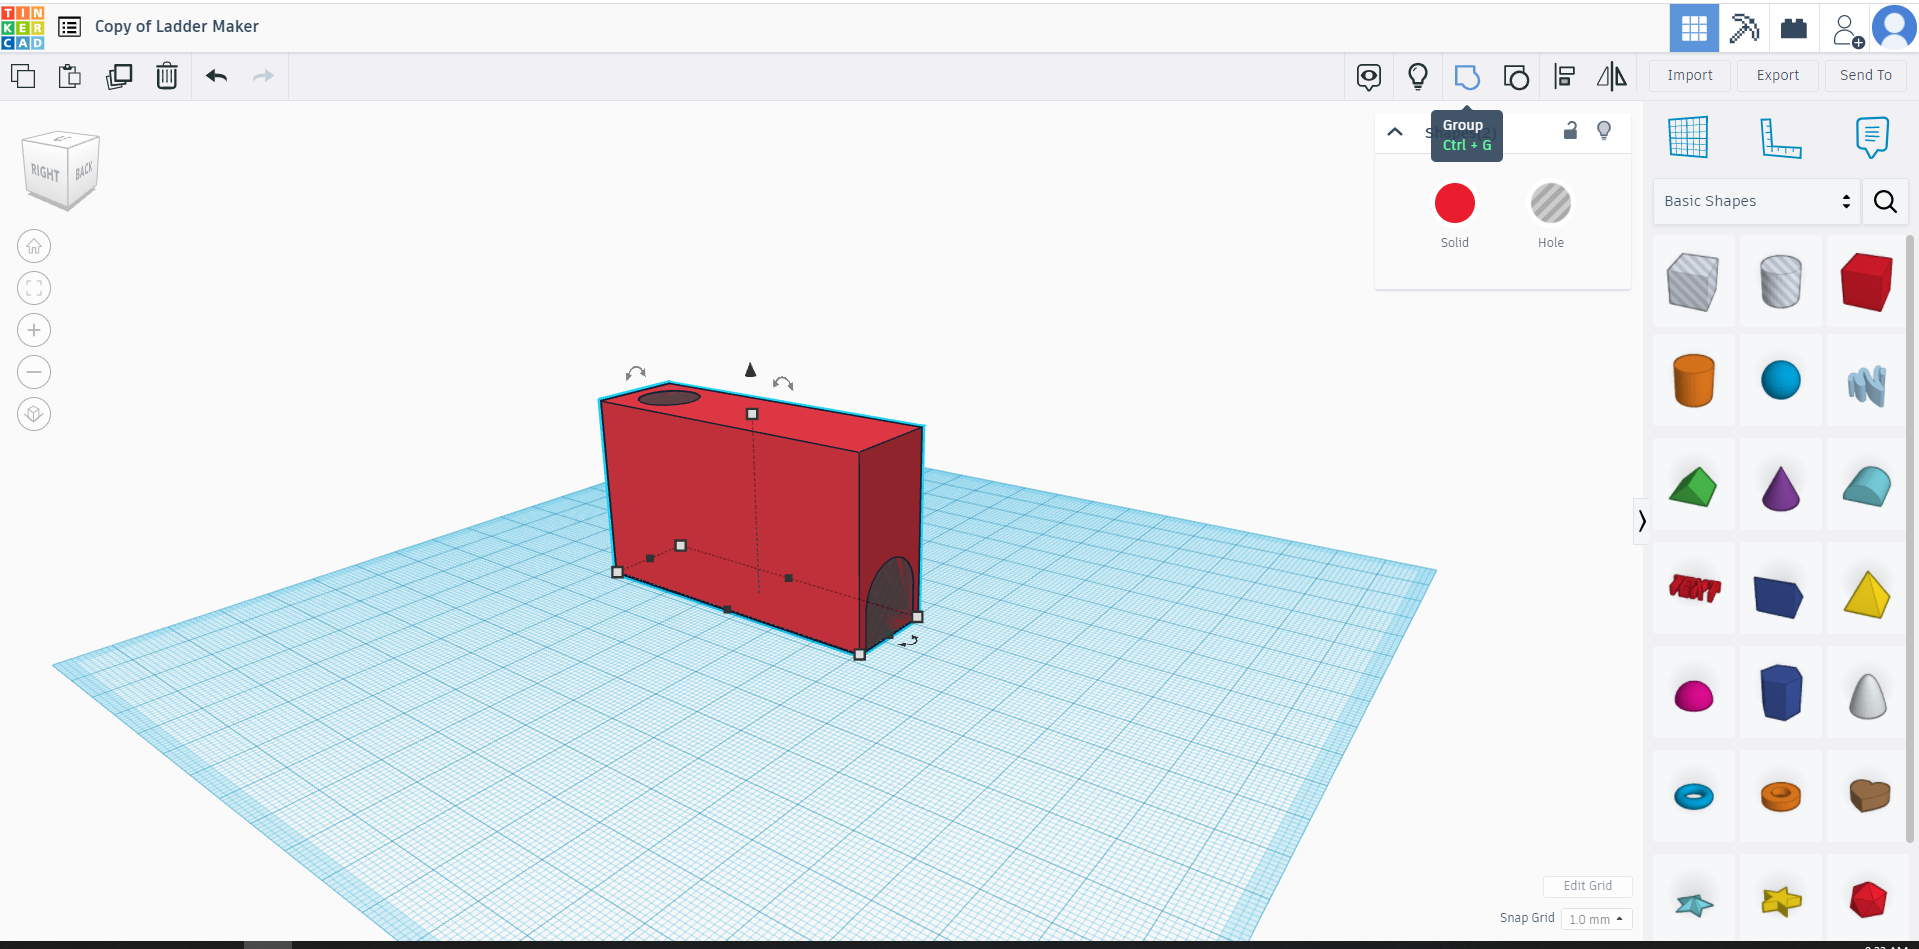
The upright cylinder should be tall enough to accommodate the height of the flange bearing (1") plus a little to ensure an unblocked passage for the drill bit into the hollow horizontal cylinder.
Group the hollow cylinders and cube together, you may want to hide the solid cylinder and solid cube to do so.
Next group the cube and the hollow sections (do not select the solid cylinder at this time, hiding it will help. Otherwise you'll end of deleting a section of the indexing peg).
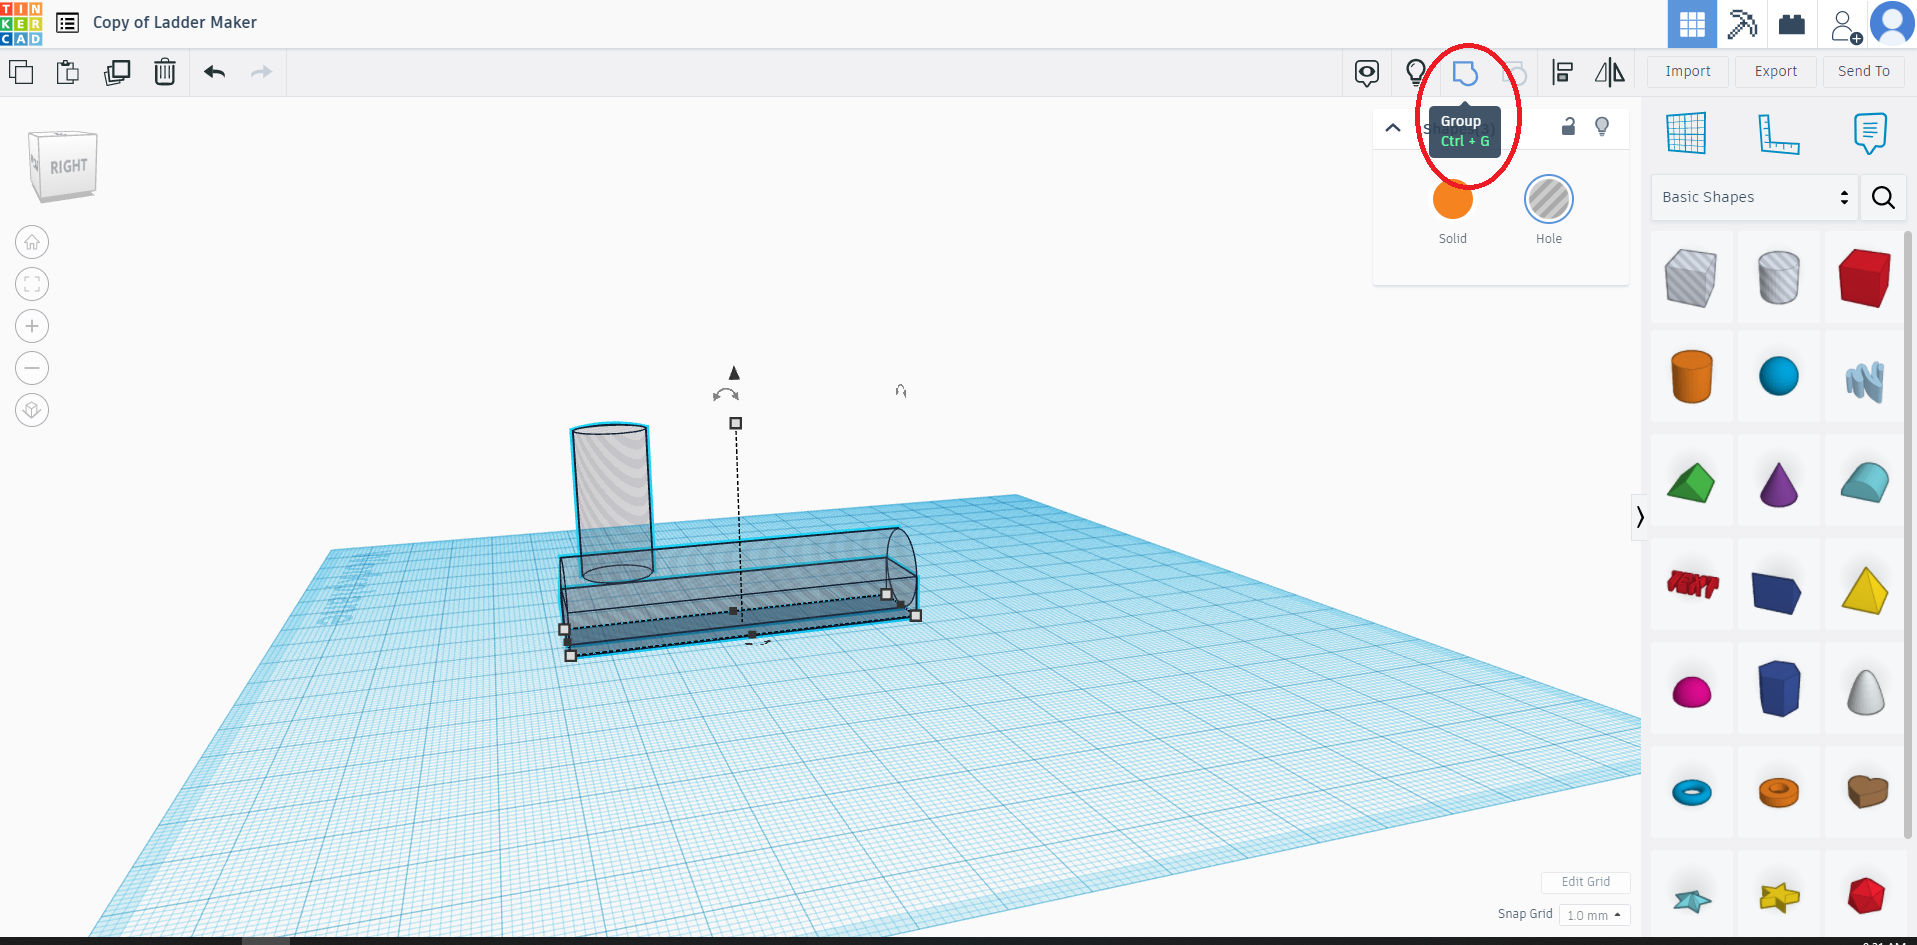
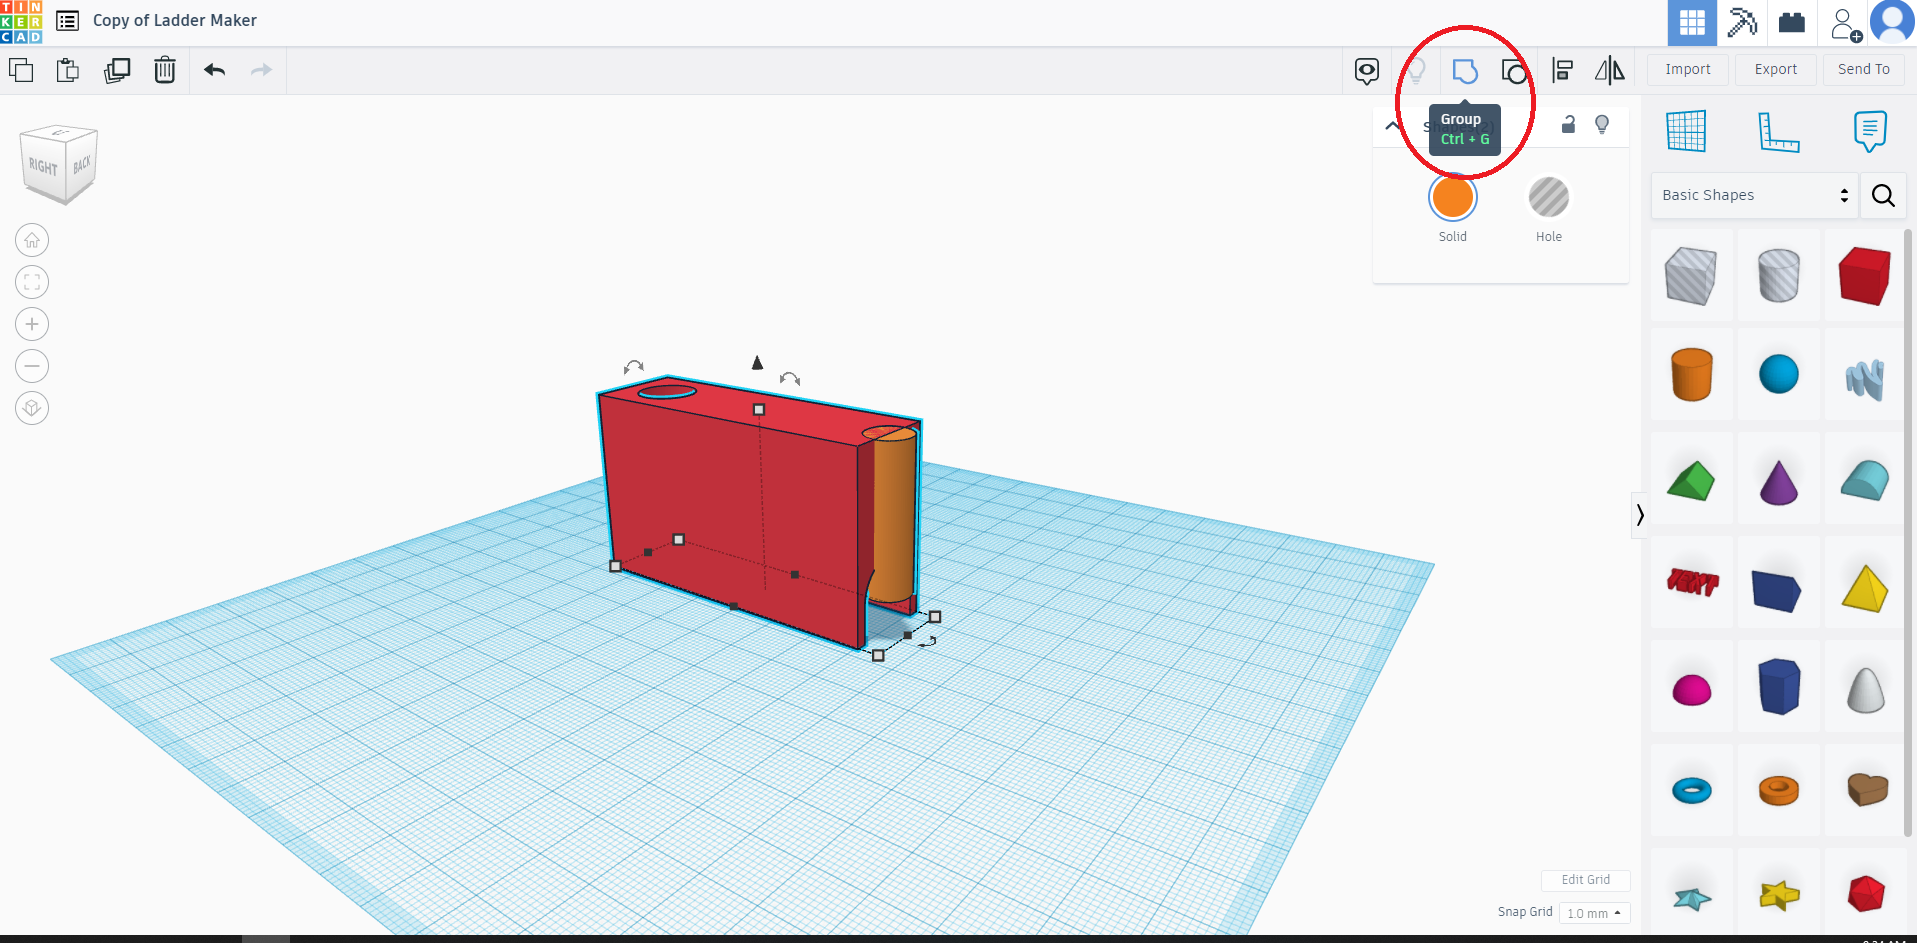
Now you can group all the objects together, including the solid cylinder (the indexing peg).
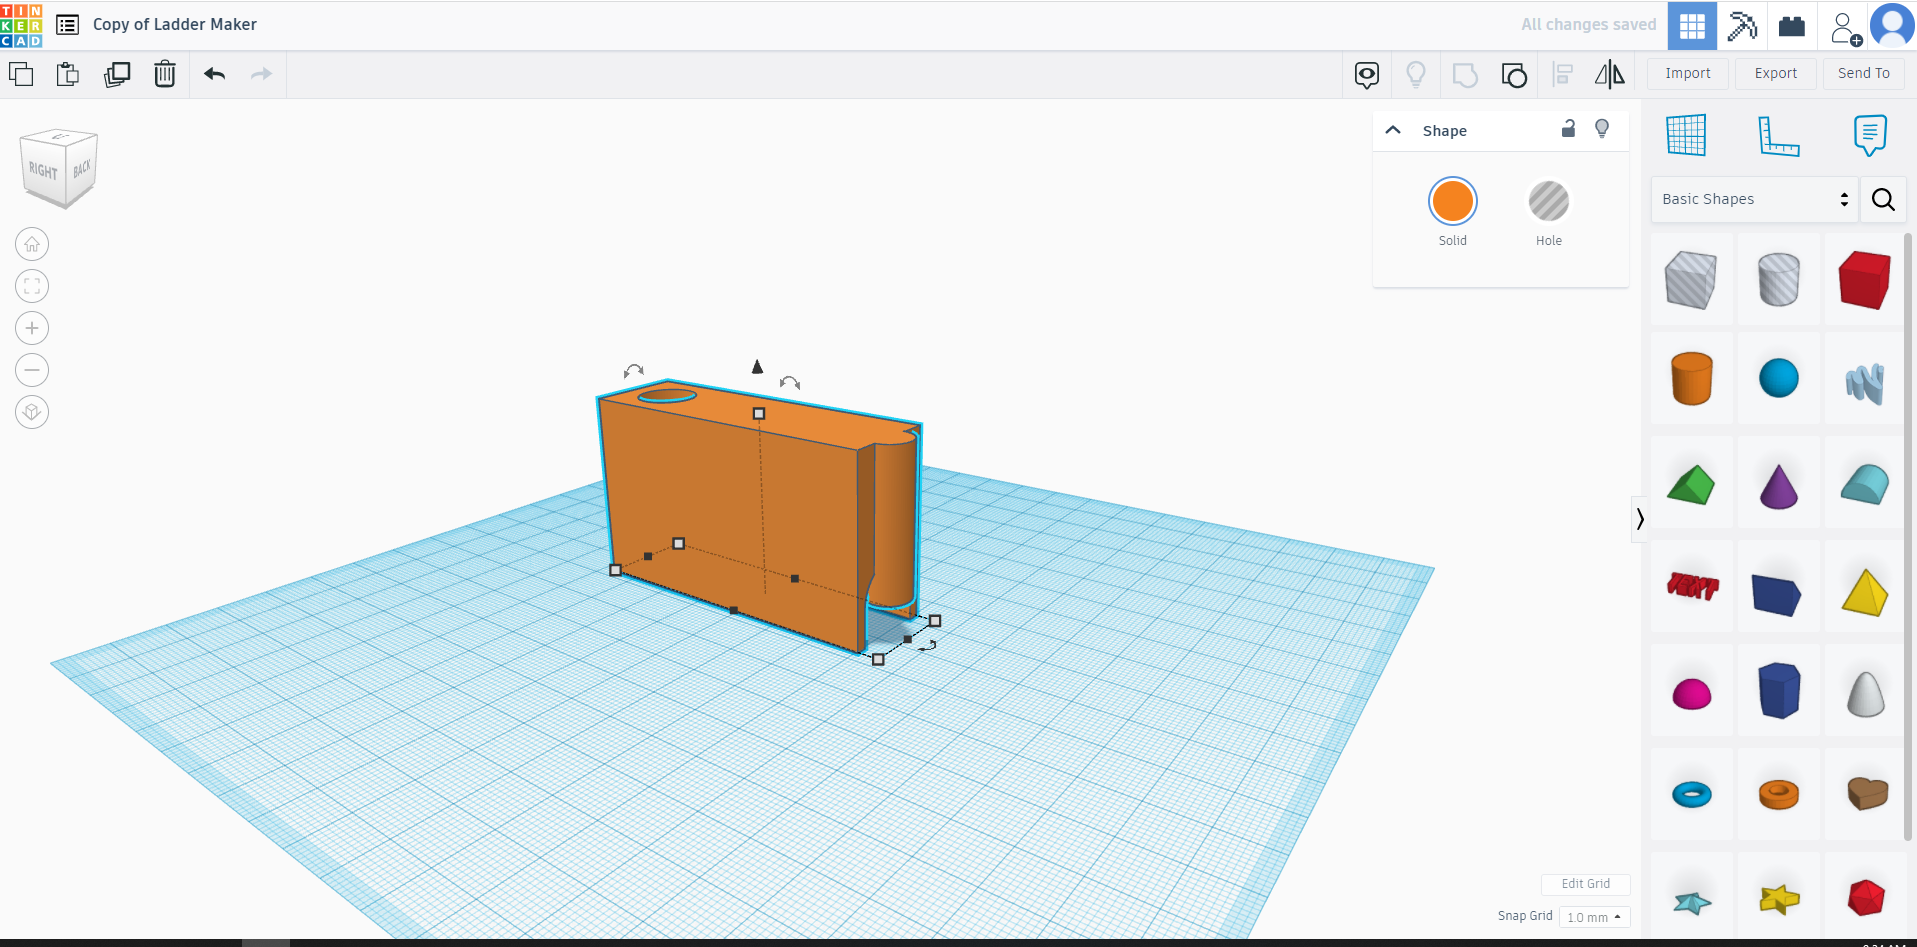
To avoid unnecessary support material when printing, I rotate the object 90 degrees so it will print flat and upside down, putting the hollow horizontal opening on the top.
When you're down, export grouped/merged objects to an STL.
Printing
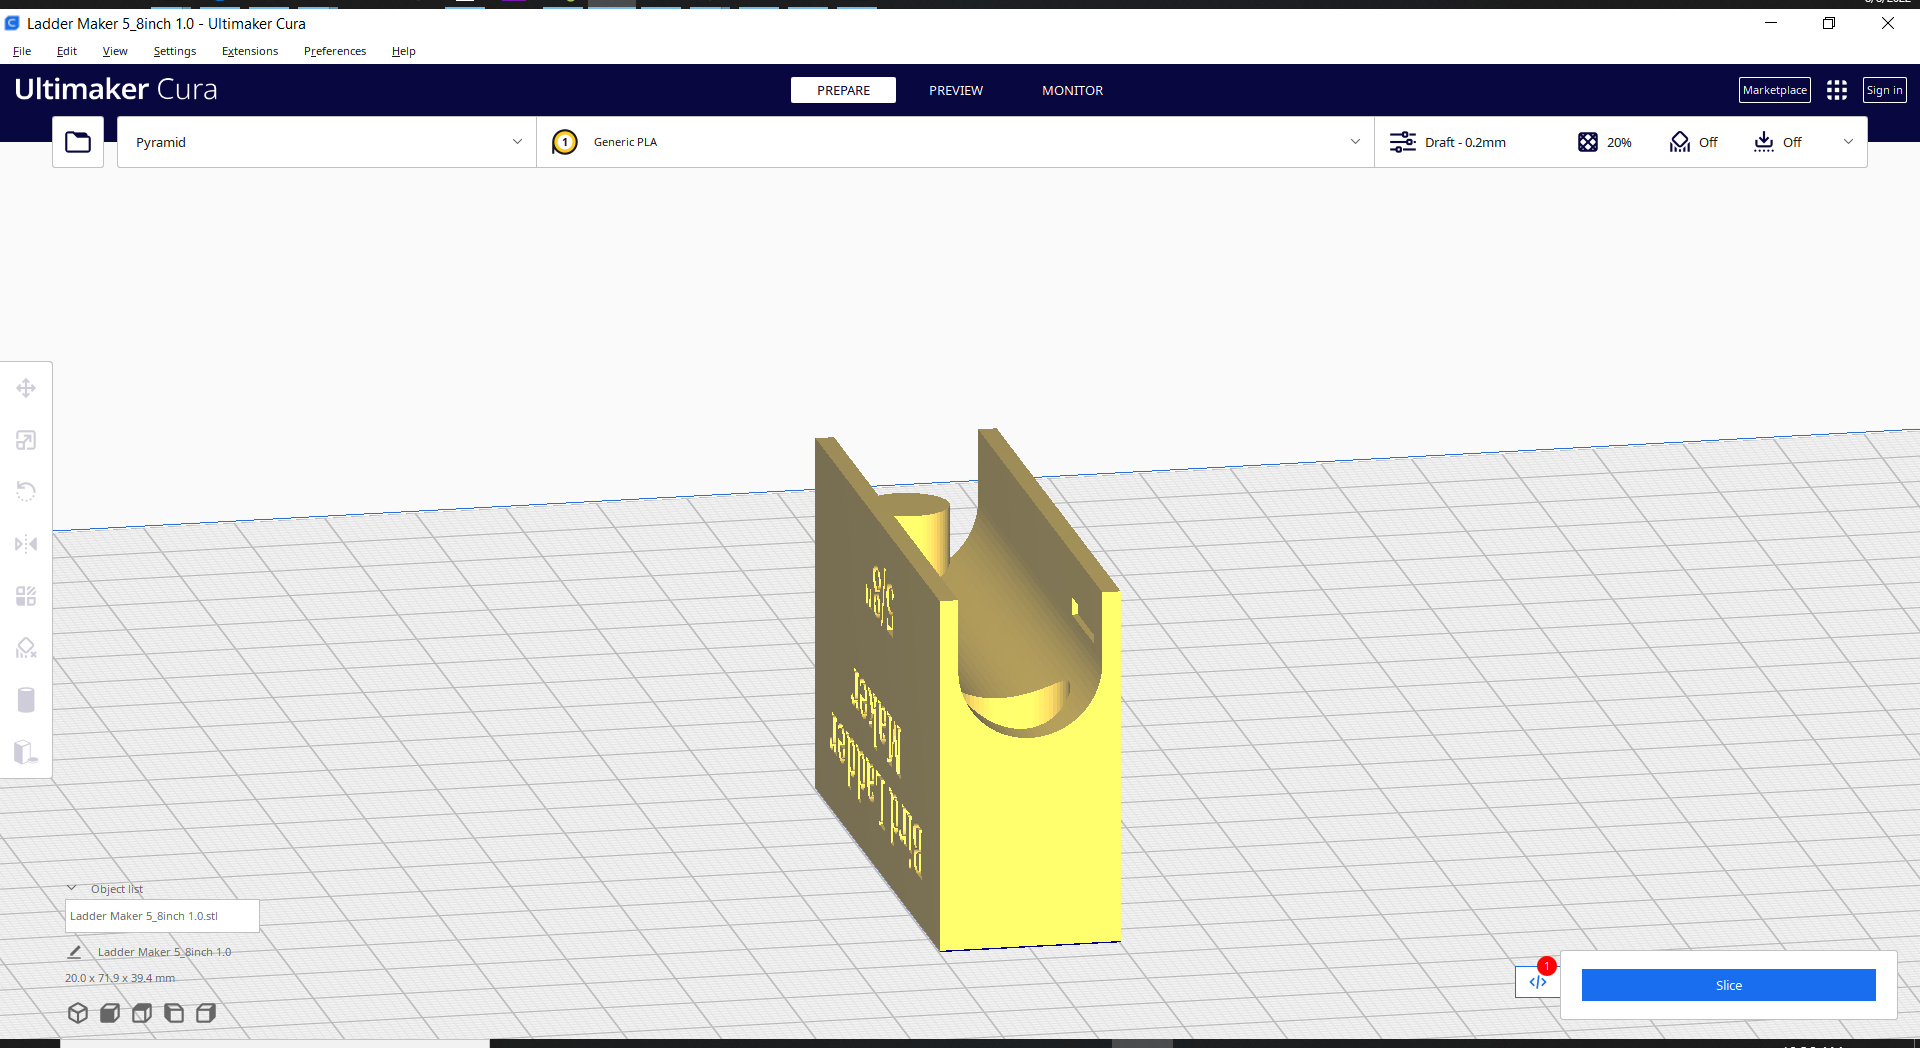
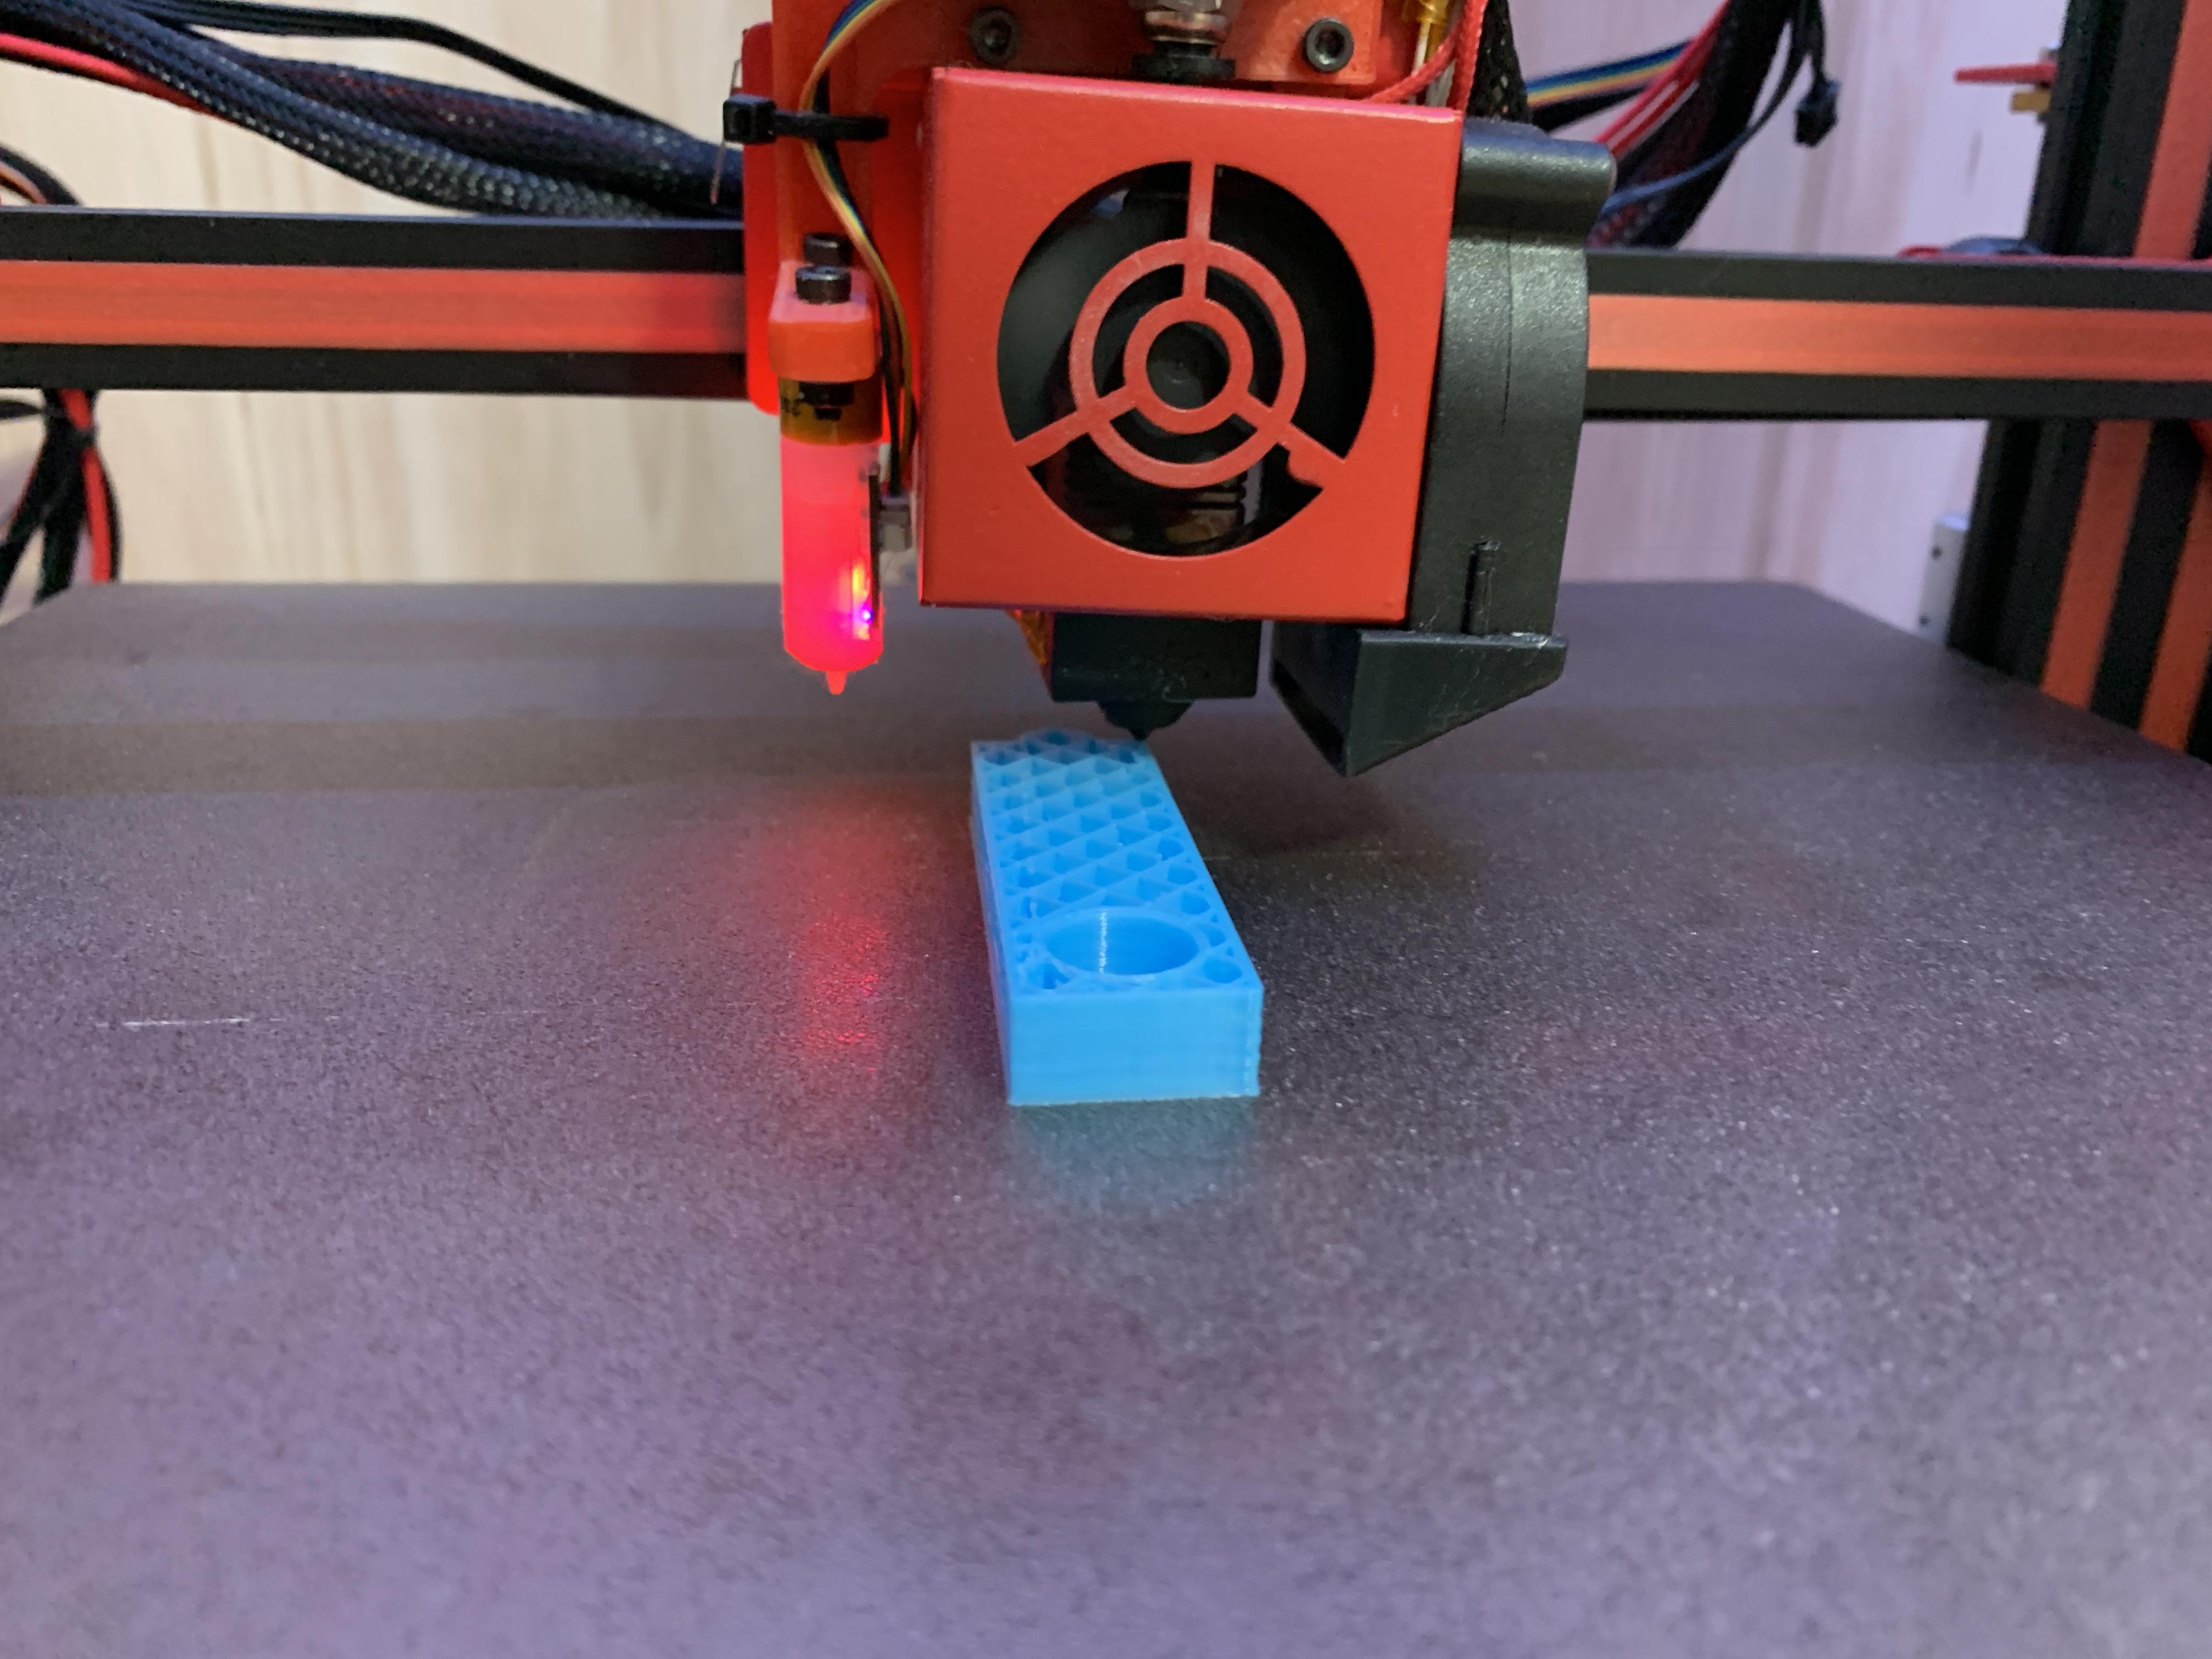
Open the STL in your 3D slicing software, and adjust the print settings as needed. I used 20% grid infill. I set the temperature I use for most PLAs. I think PLA is probably sufficient, but PETG would likely be more suitable. Supports disabled (unless you didn't rotate the object). I use a textured PEI plate, so I also disable Build Plate Adhesion (as it isn't necessary for my setup). Send the G-code to the 3D printer for printing... and now wait.
Alternatively, have a 3D printing service print it for you.
Post Printing, Installing the Flange
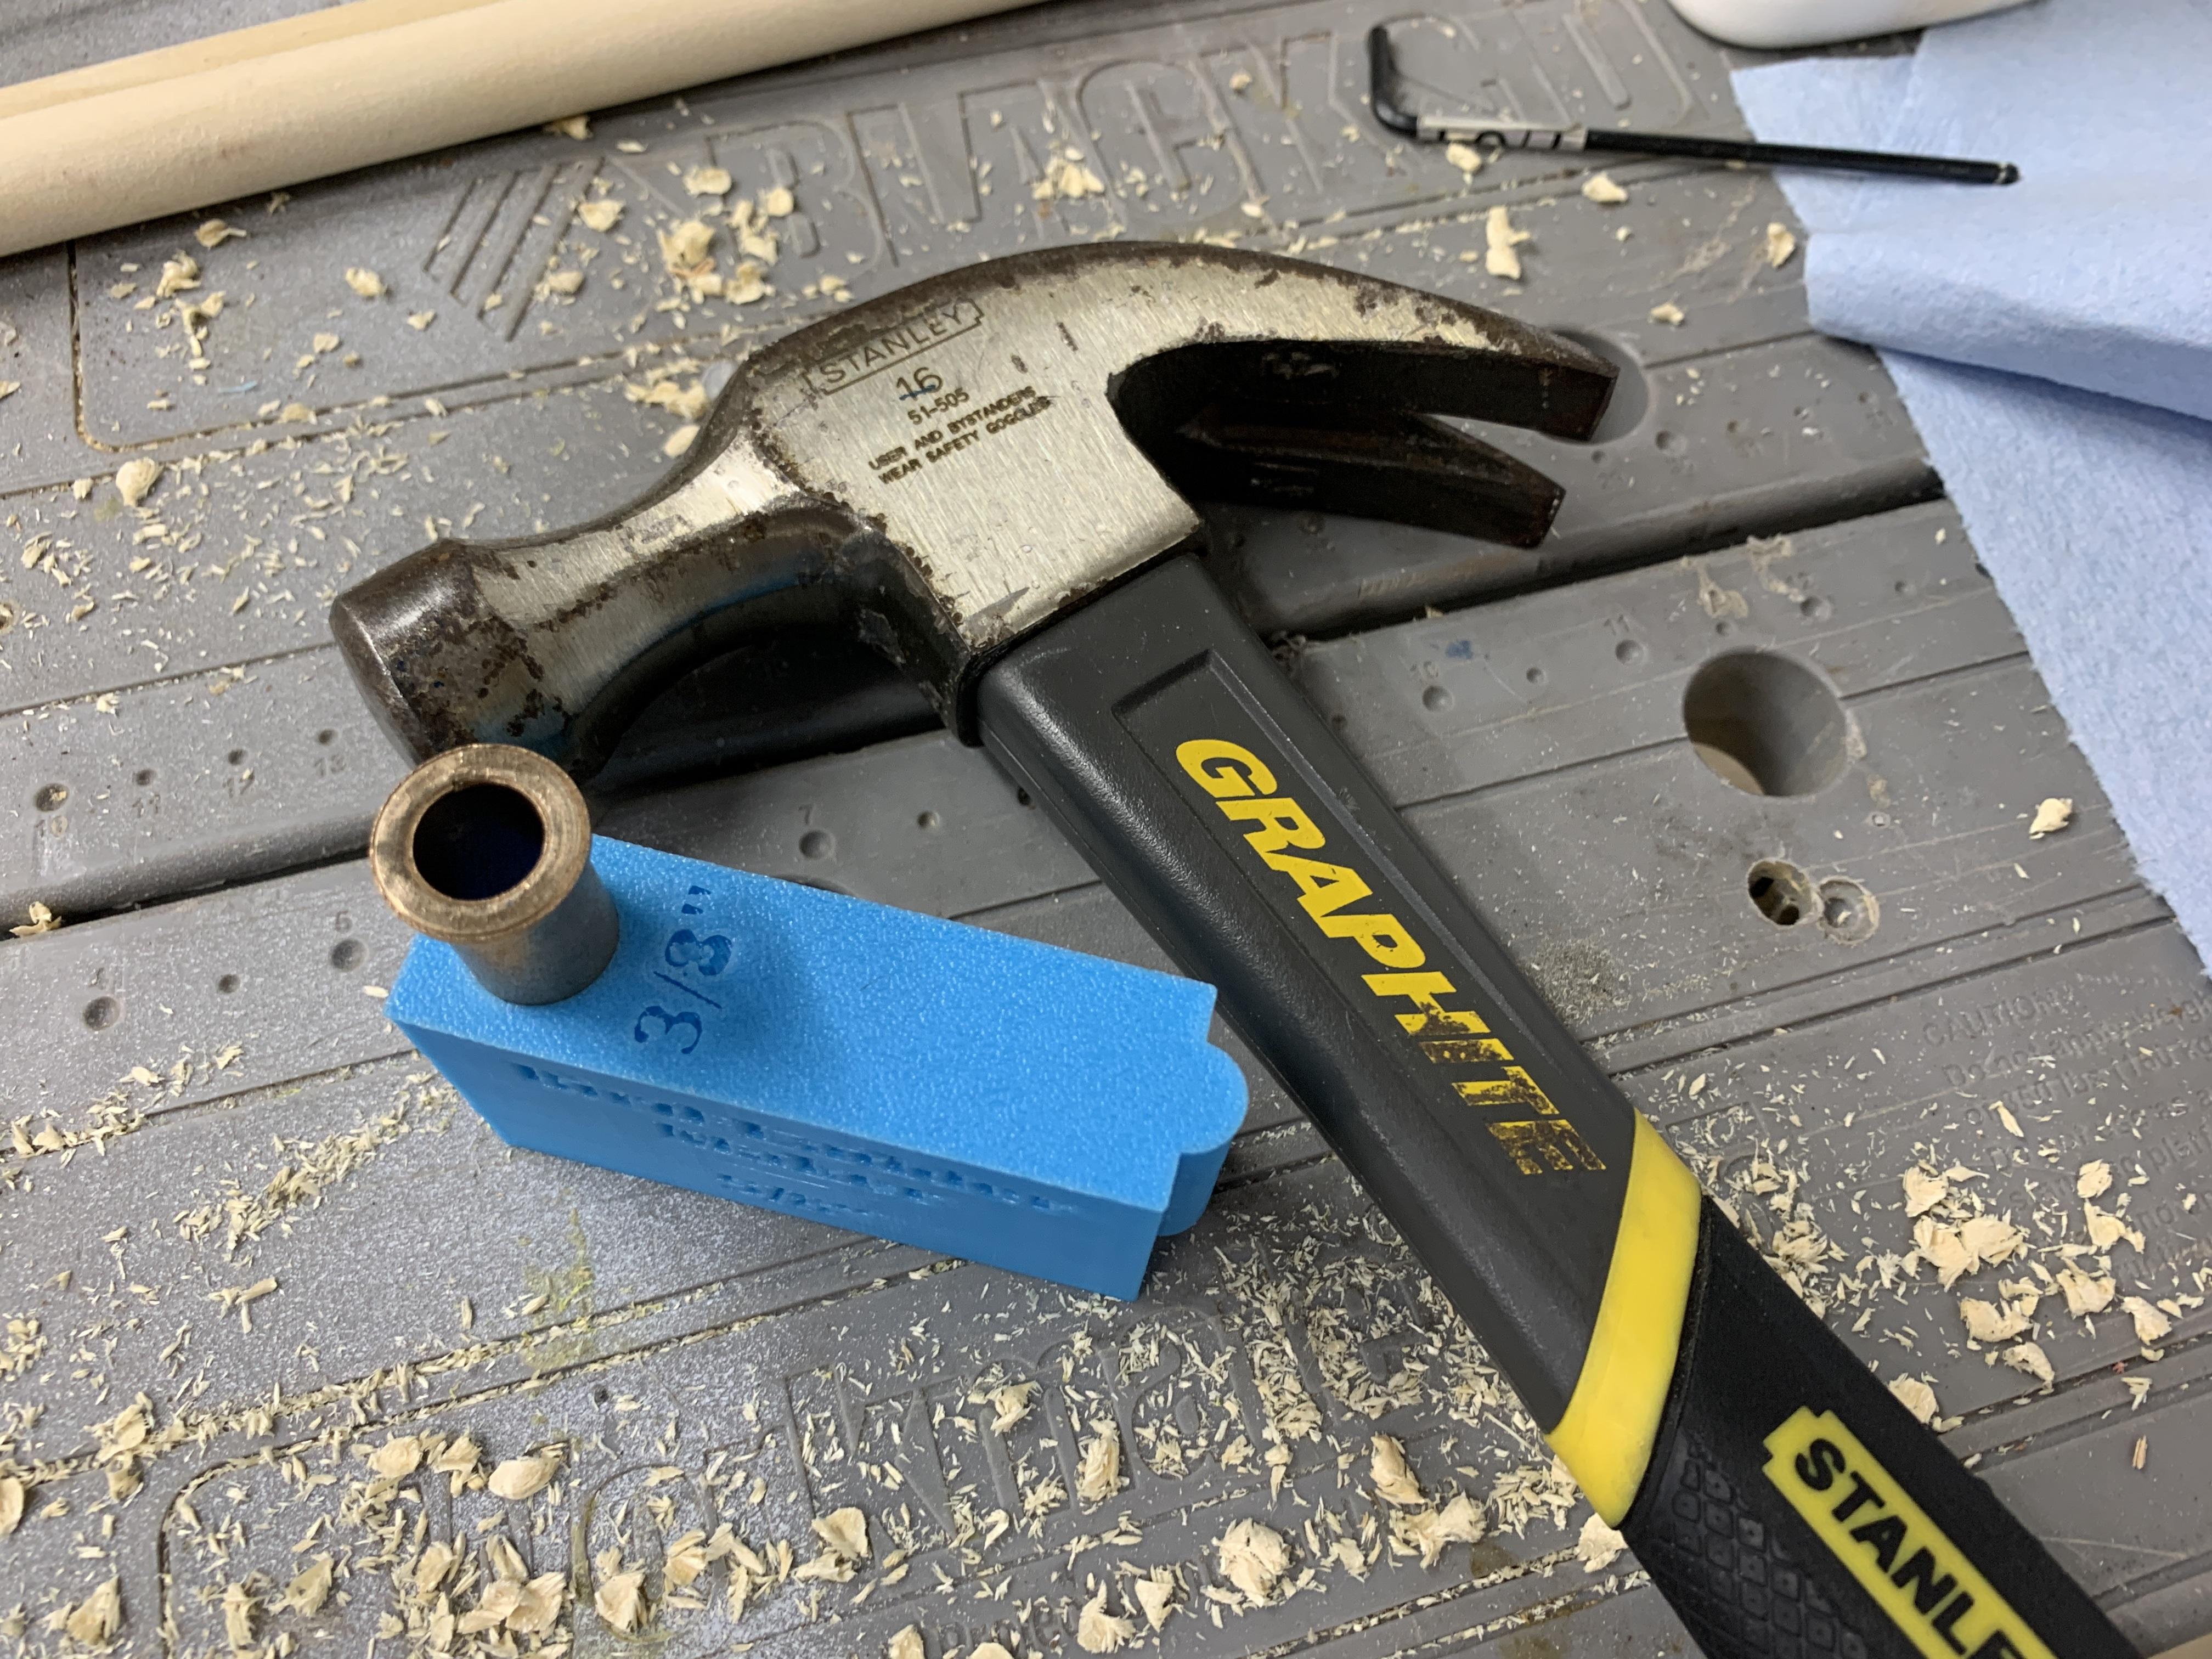
Check the fitment of the flange. Make adjustments to the design and reprint as needed.
When satisfied you can optionally apply some glue like E6000, to the outside of the flange before pushing it into place. You can gently hammer the flange into place if needed (you should probably cover it to protect from any glue shooting out).
Adjust the Stop Collar

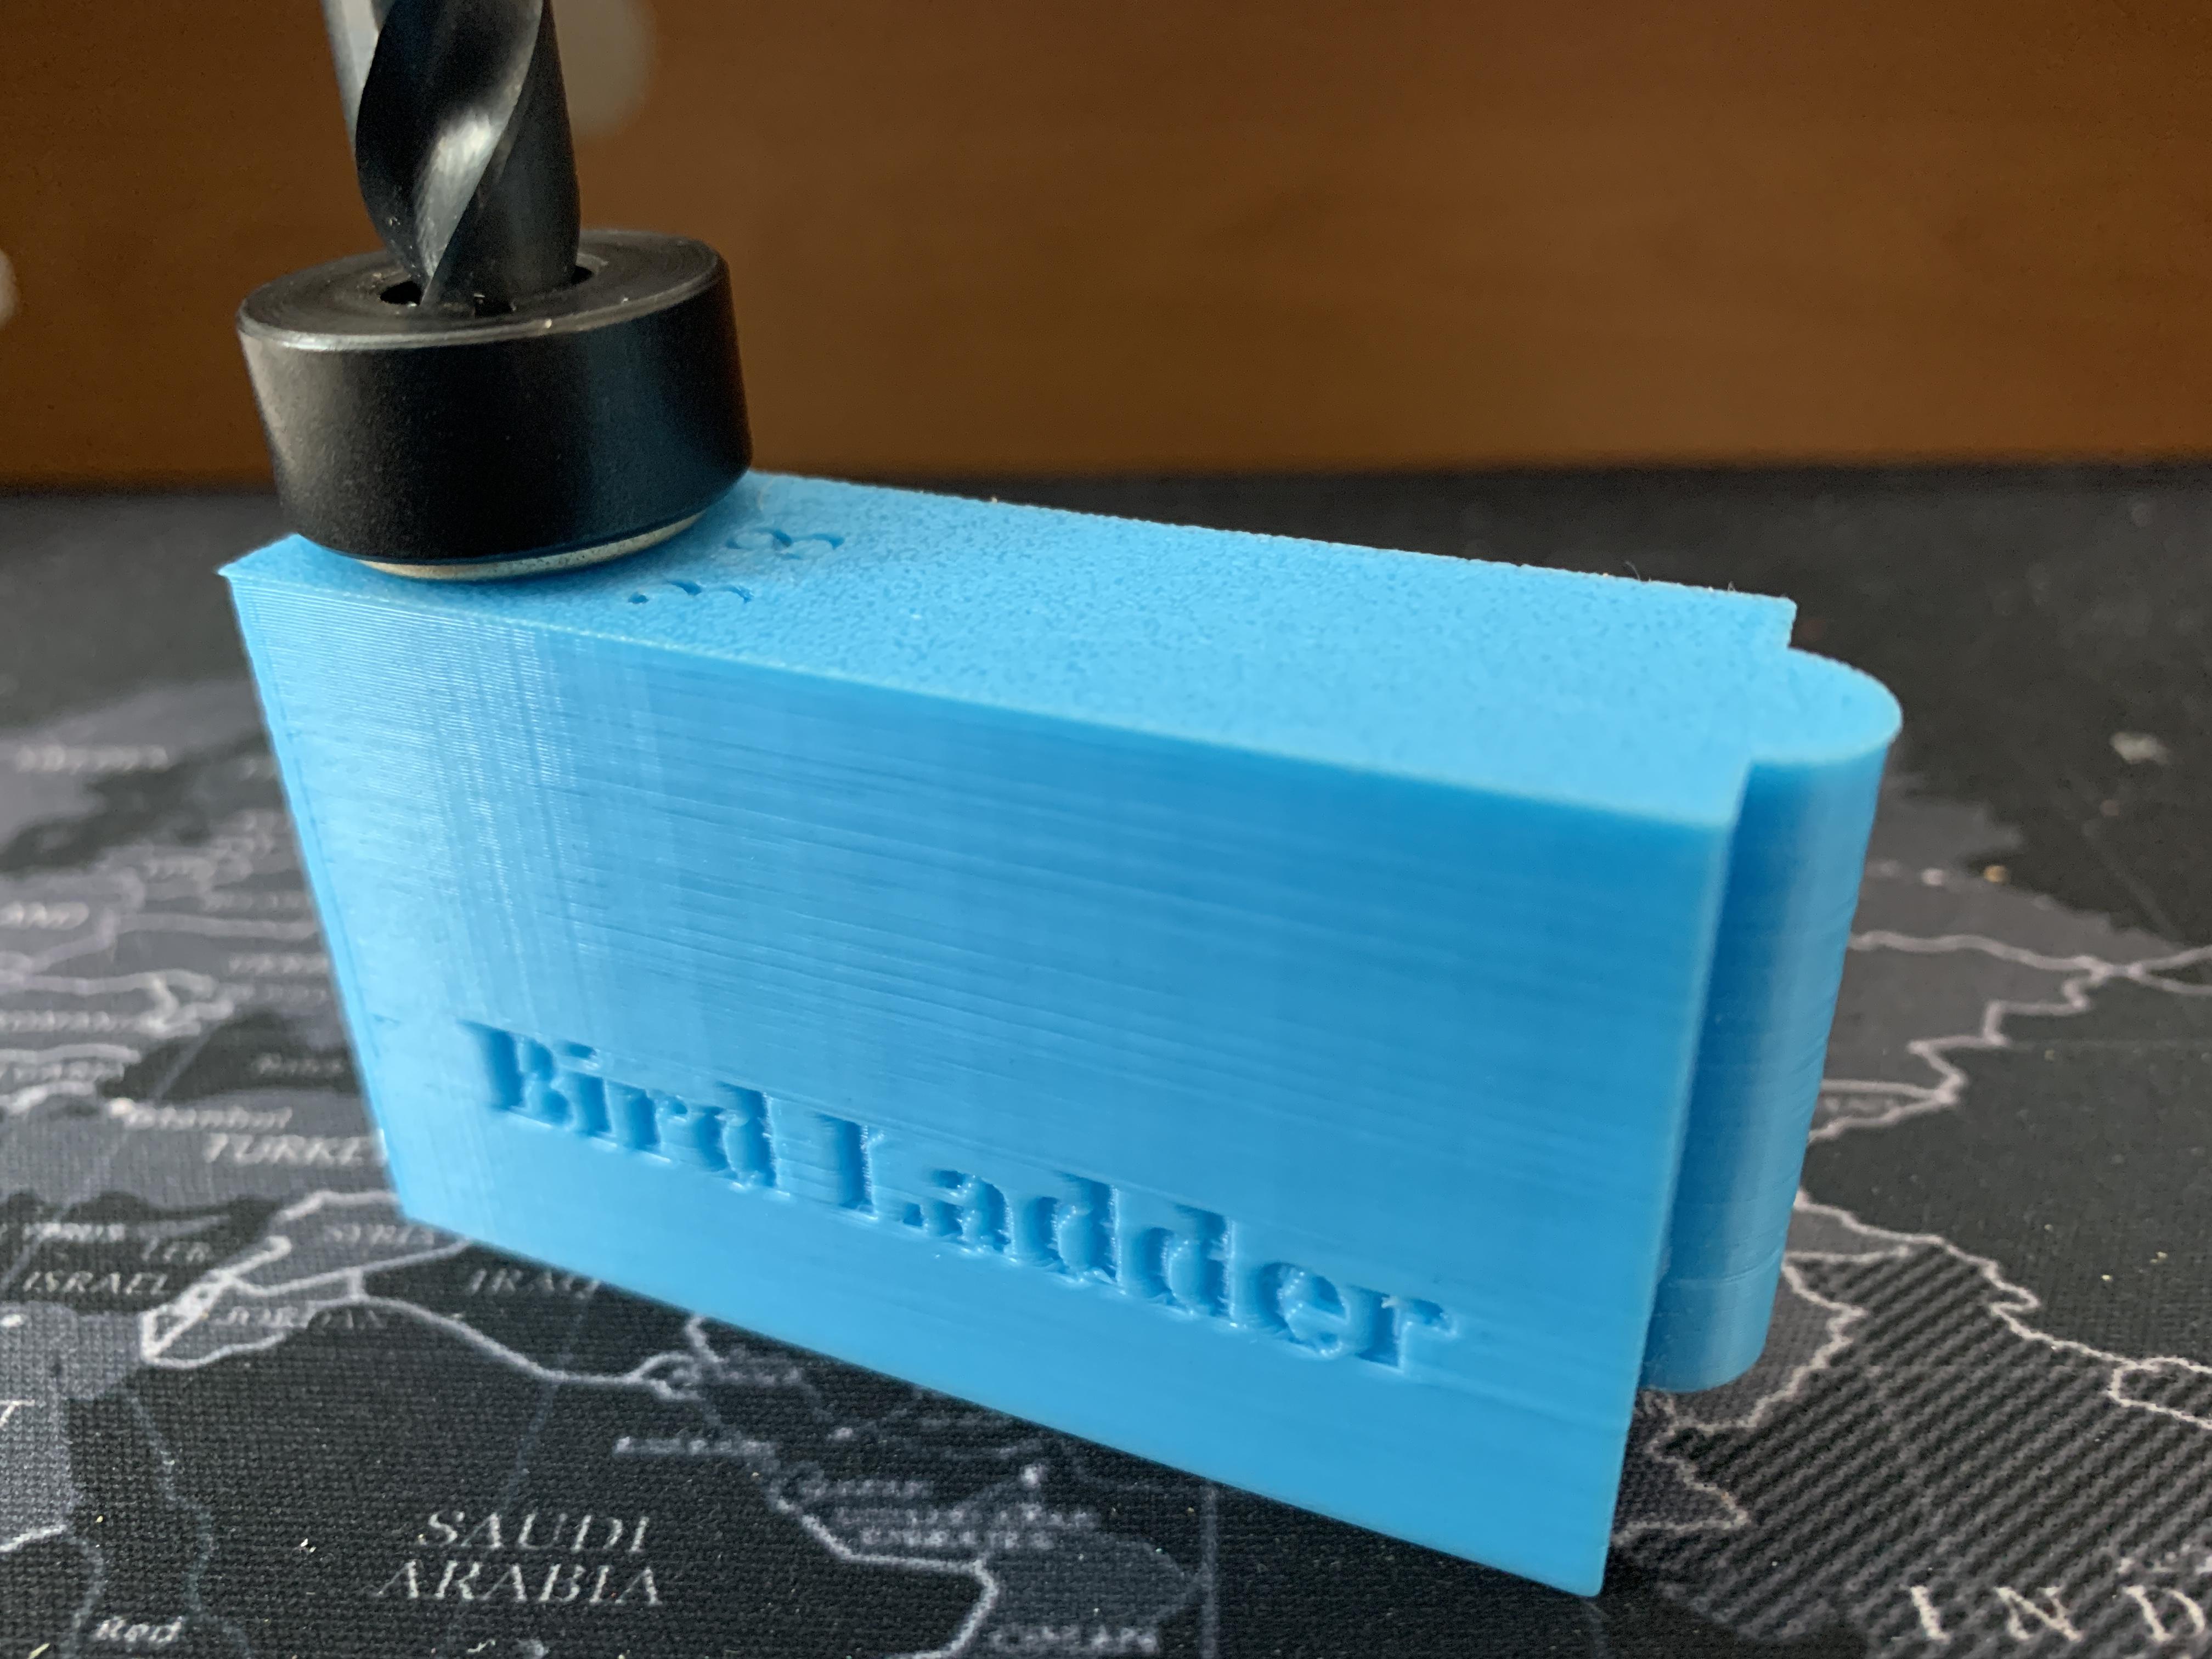
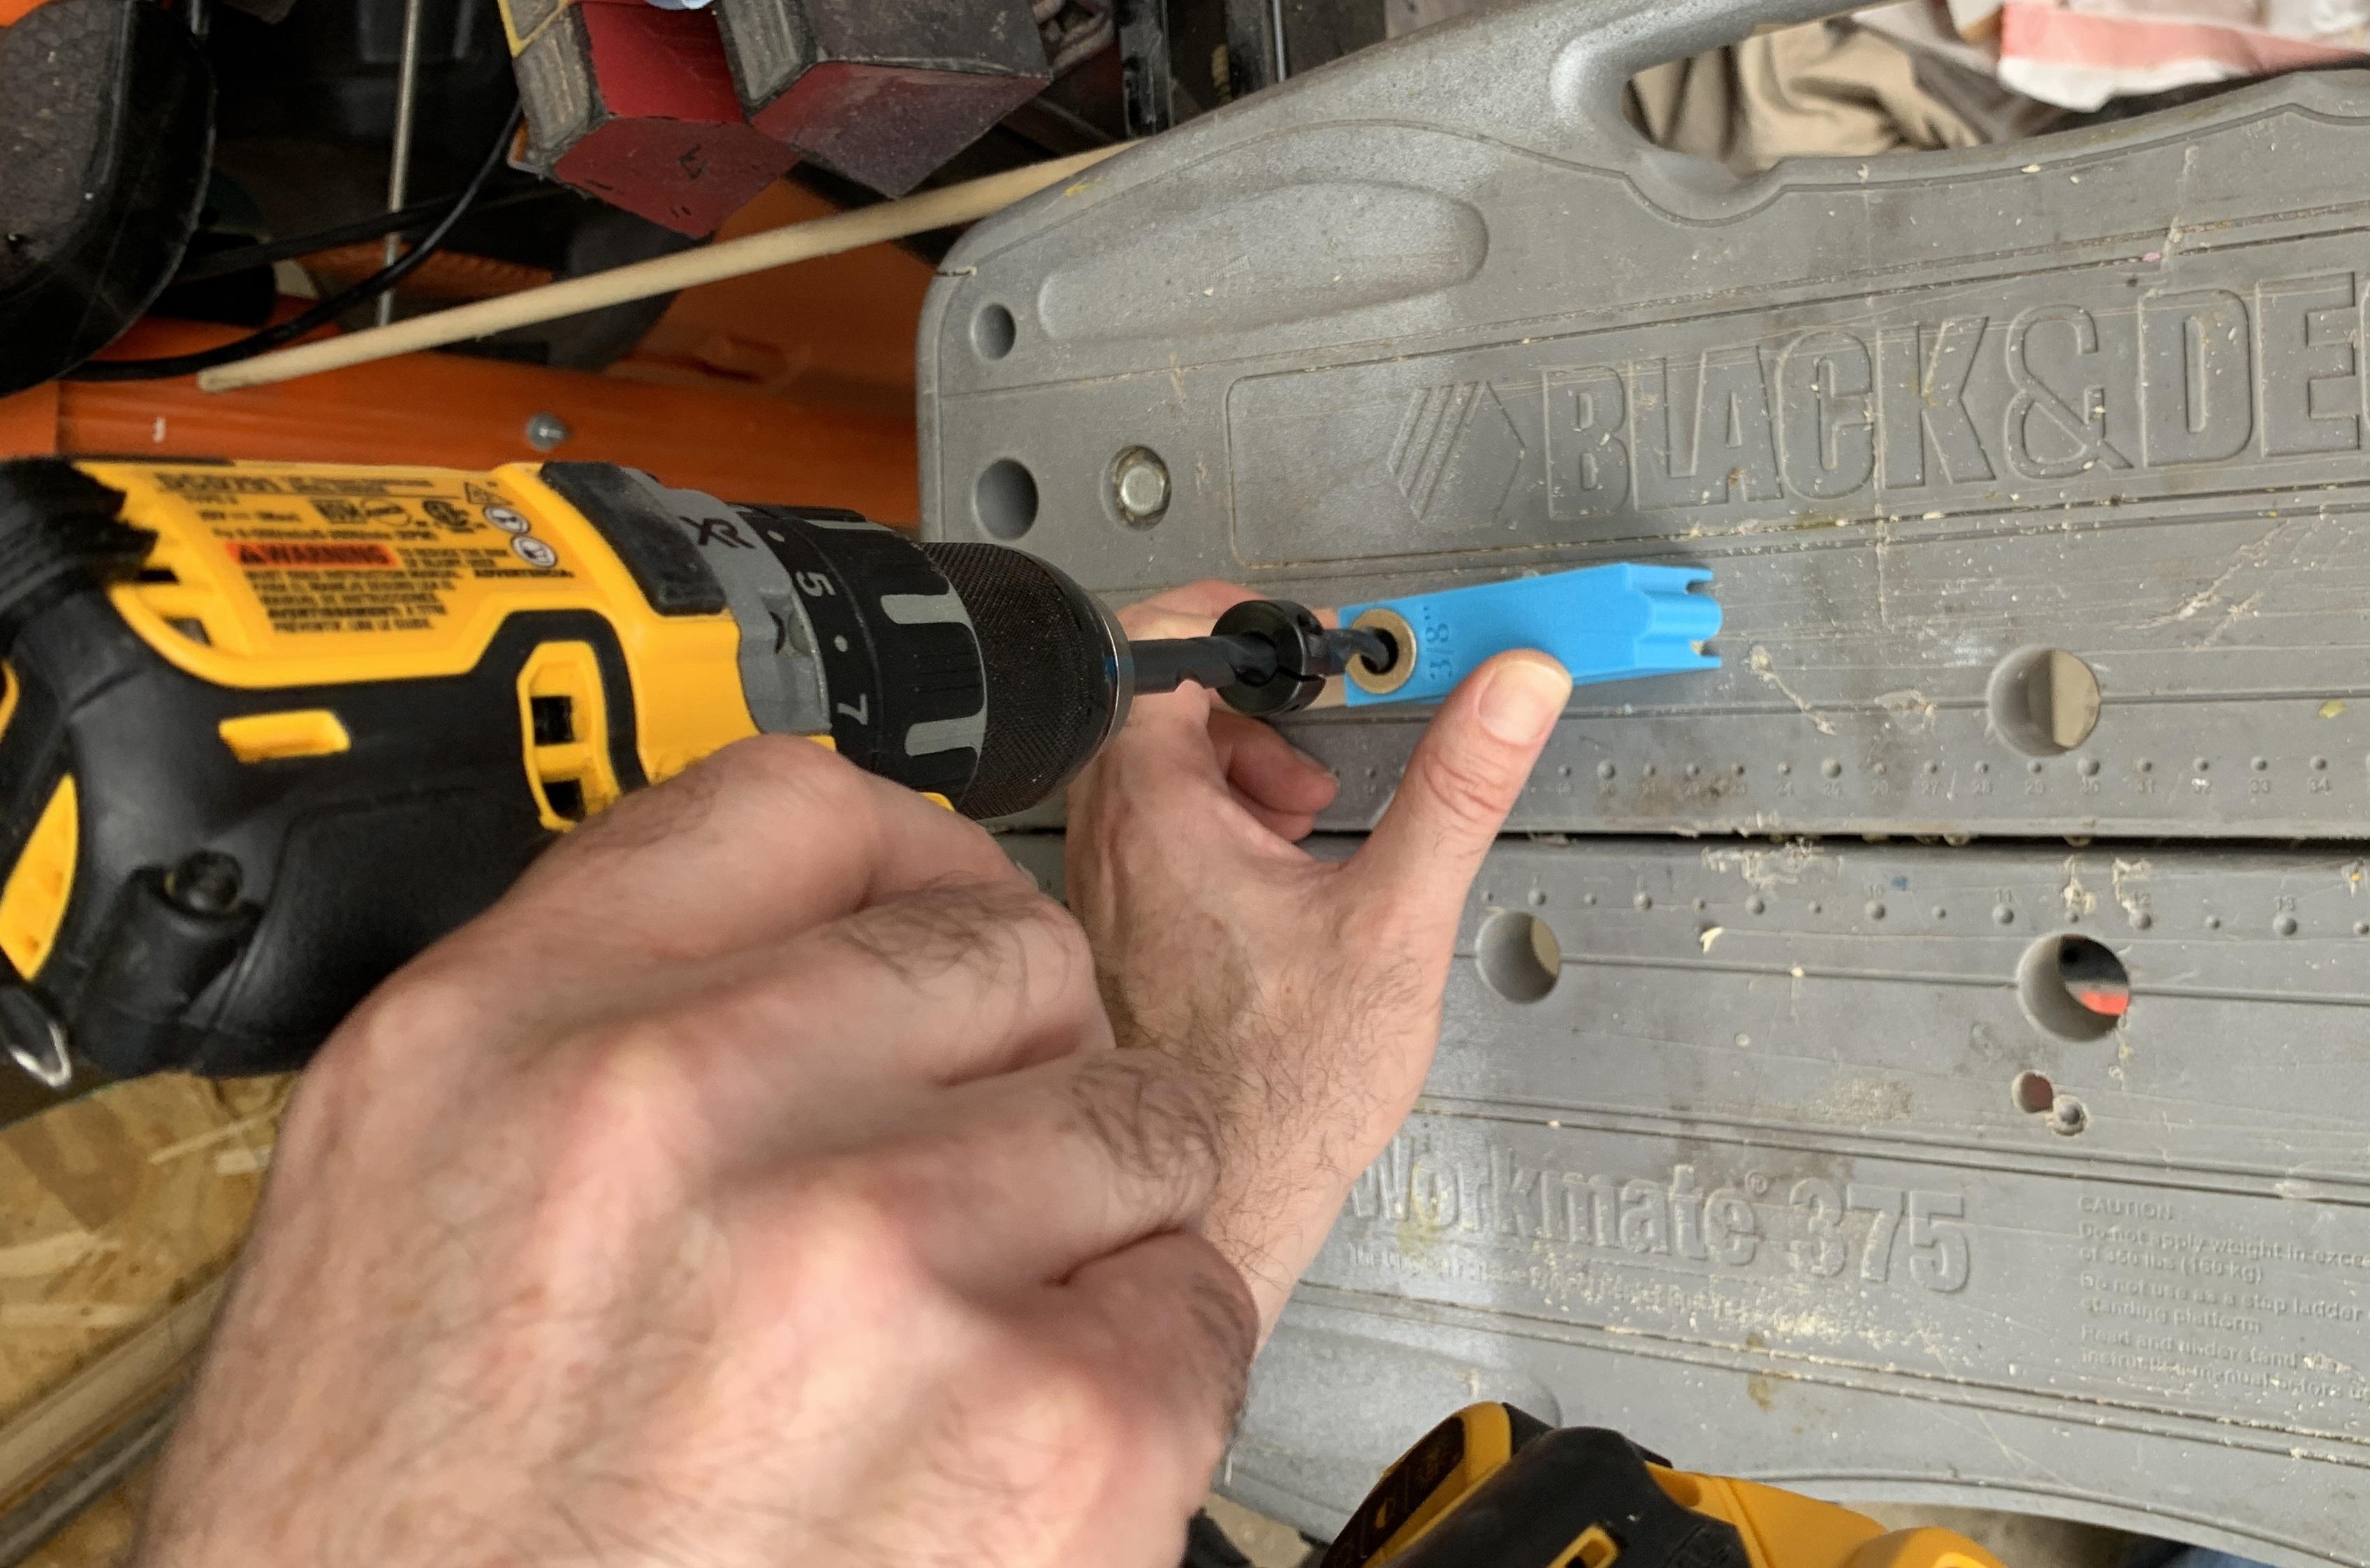
Place the 3/8" stop collar over the 3/8" drill bit. Slide the drill bit into the 3/8" flange bearing and adjust the stop collar so the drill bit is just a little past halfway into the hollow horizontal cylinder. It the completed version I shared, there is a slight indent visible from underneath the jig that can be used as an adjustment mark. Tighten the grub screw on the stop collar, with an appropriate Allen/hex wrench.
Build the Side Rails
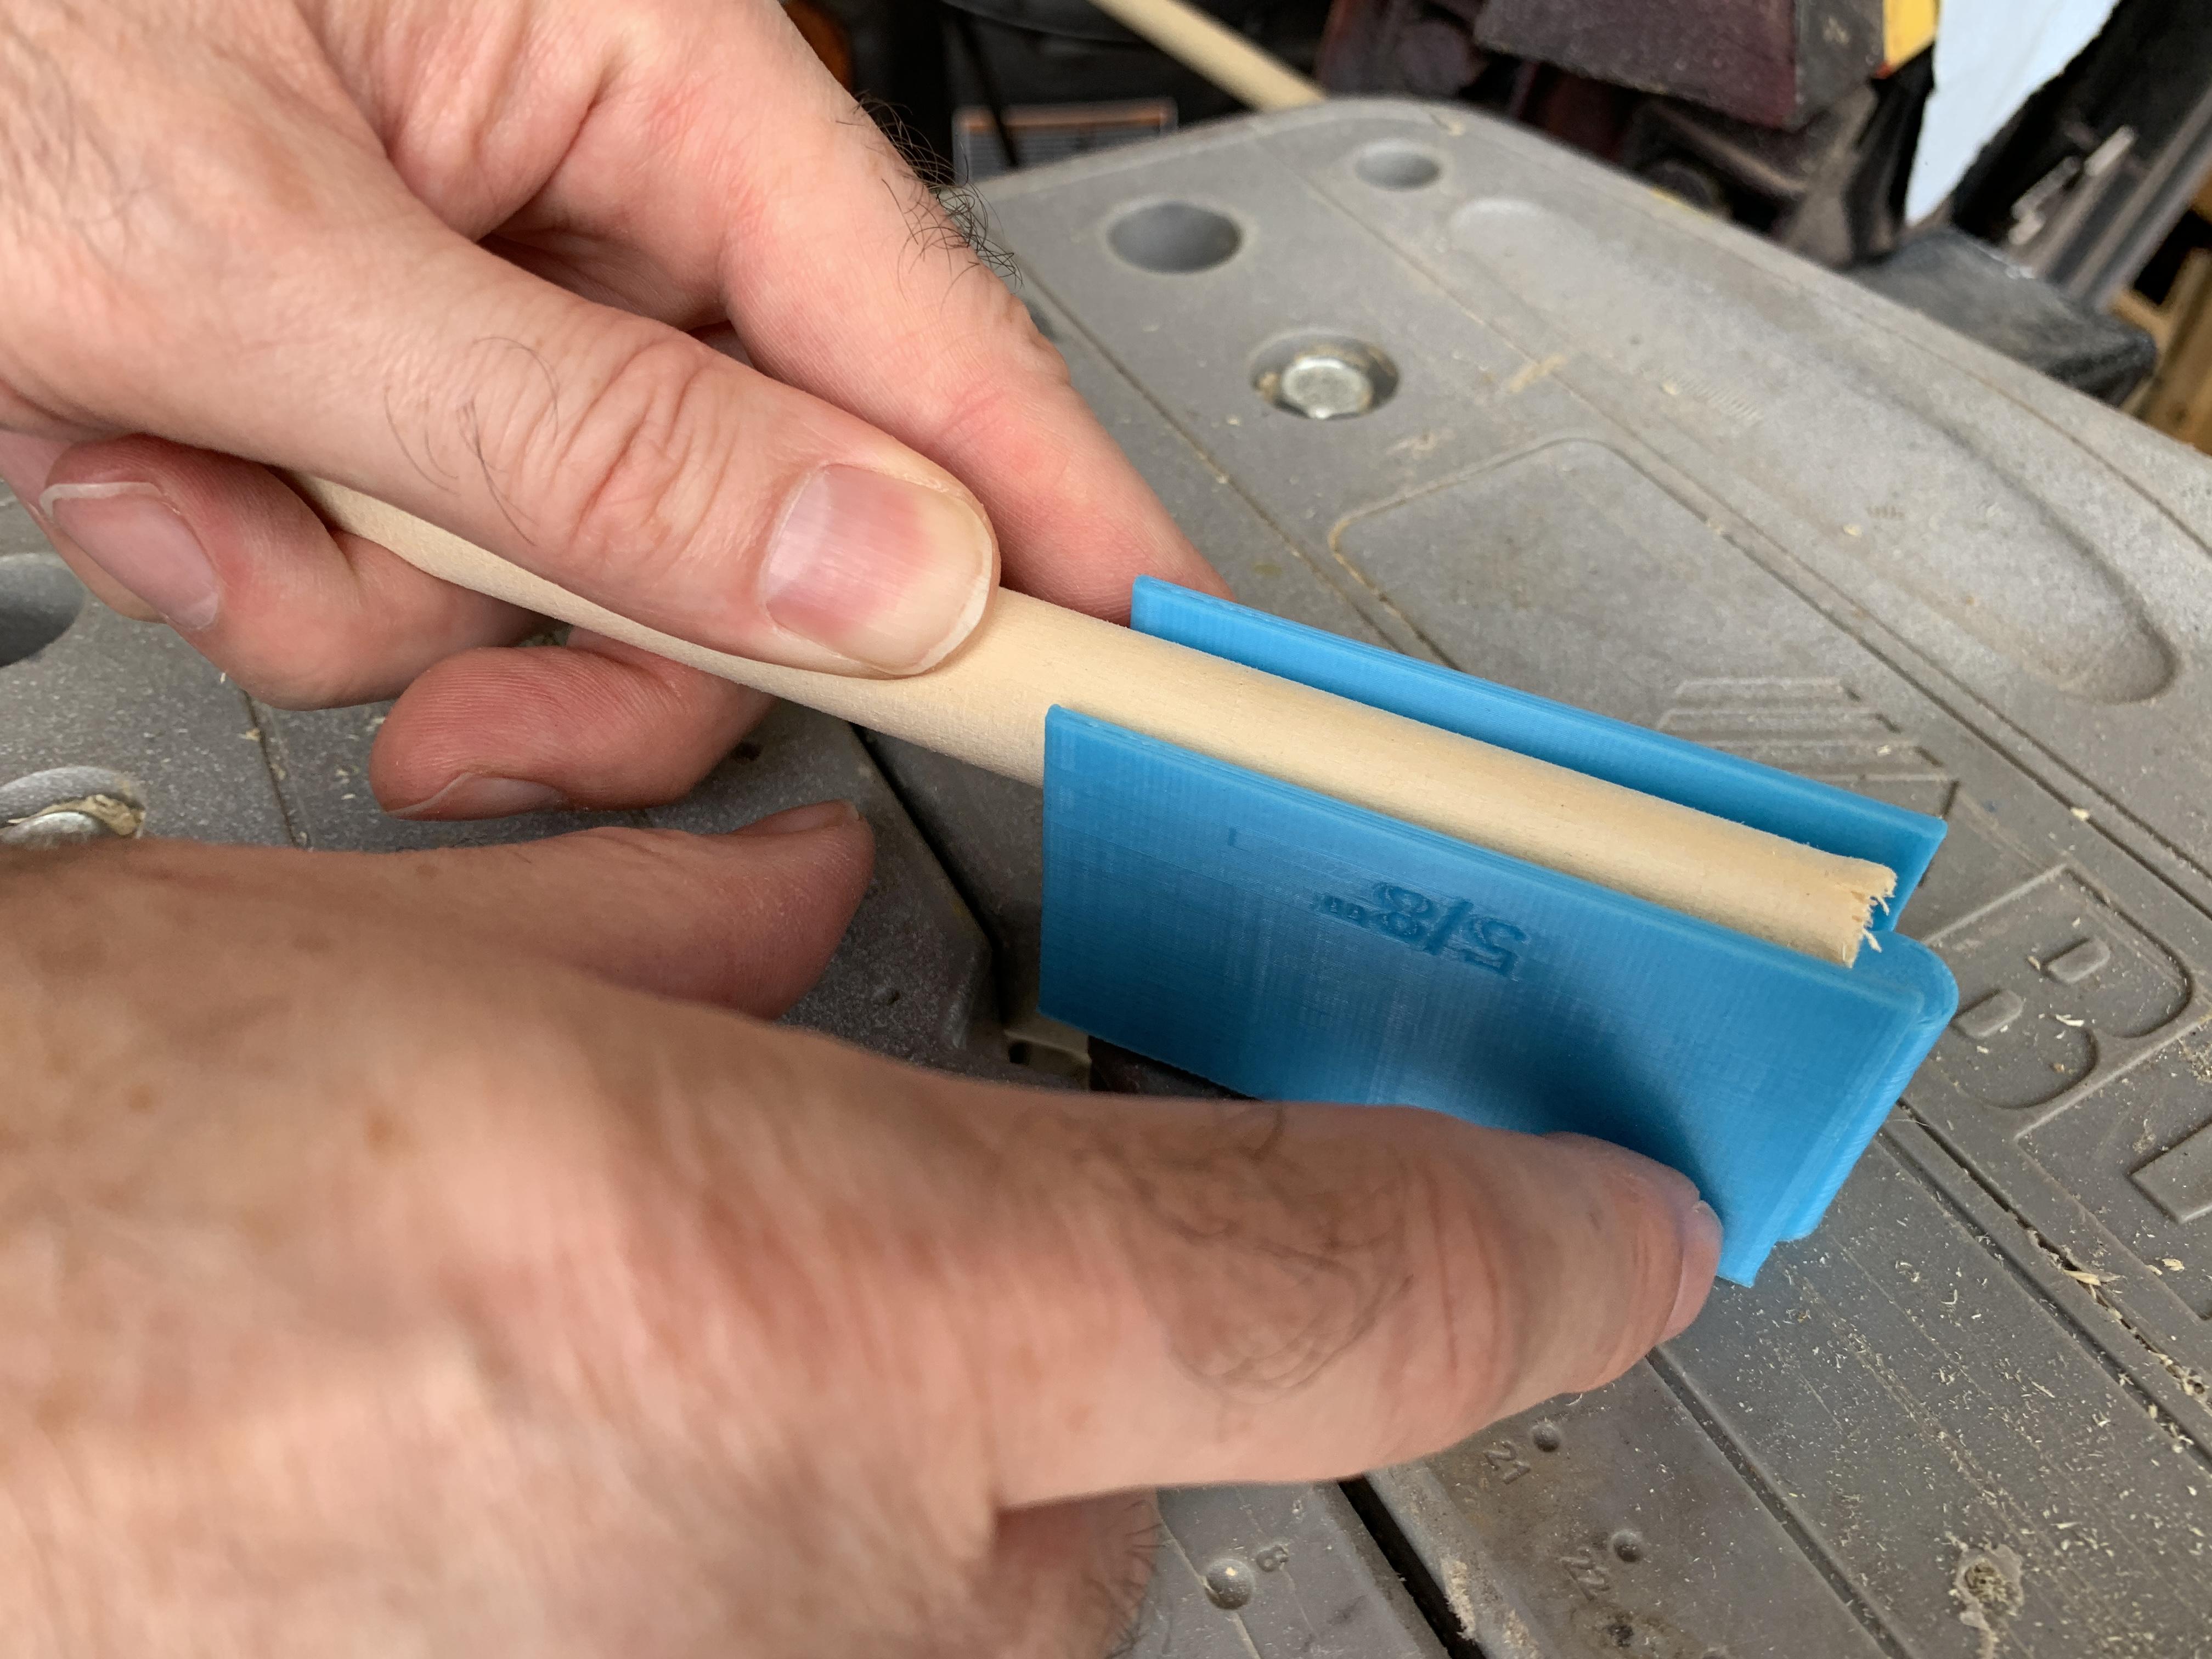
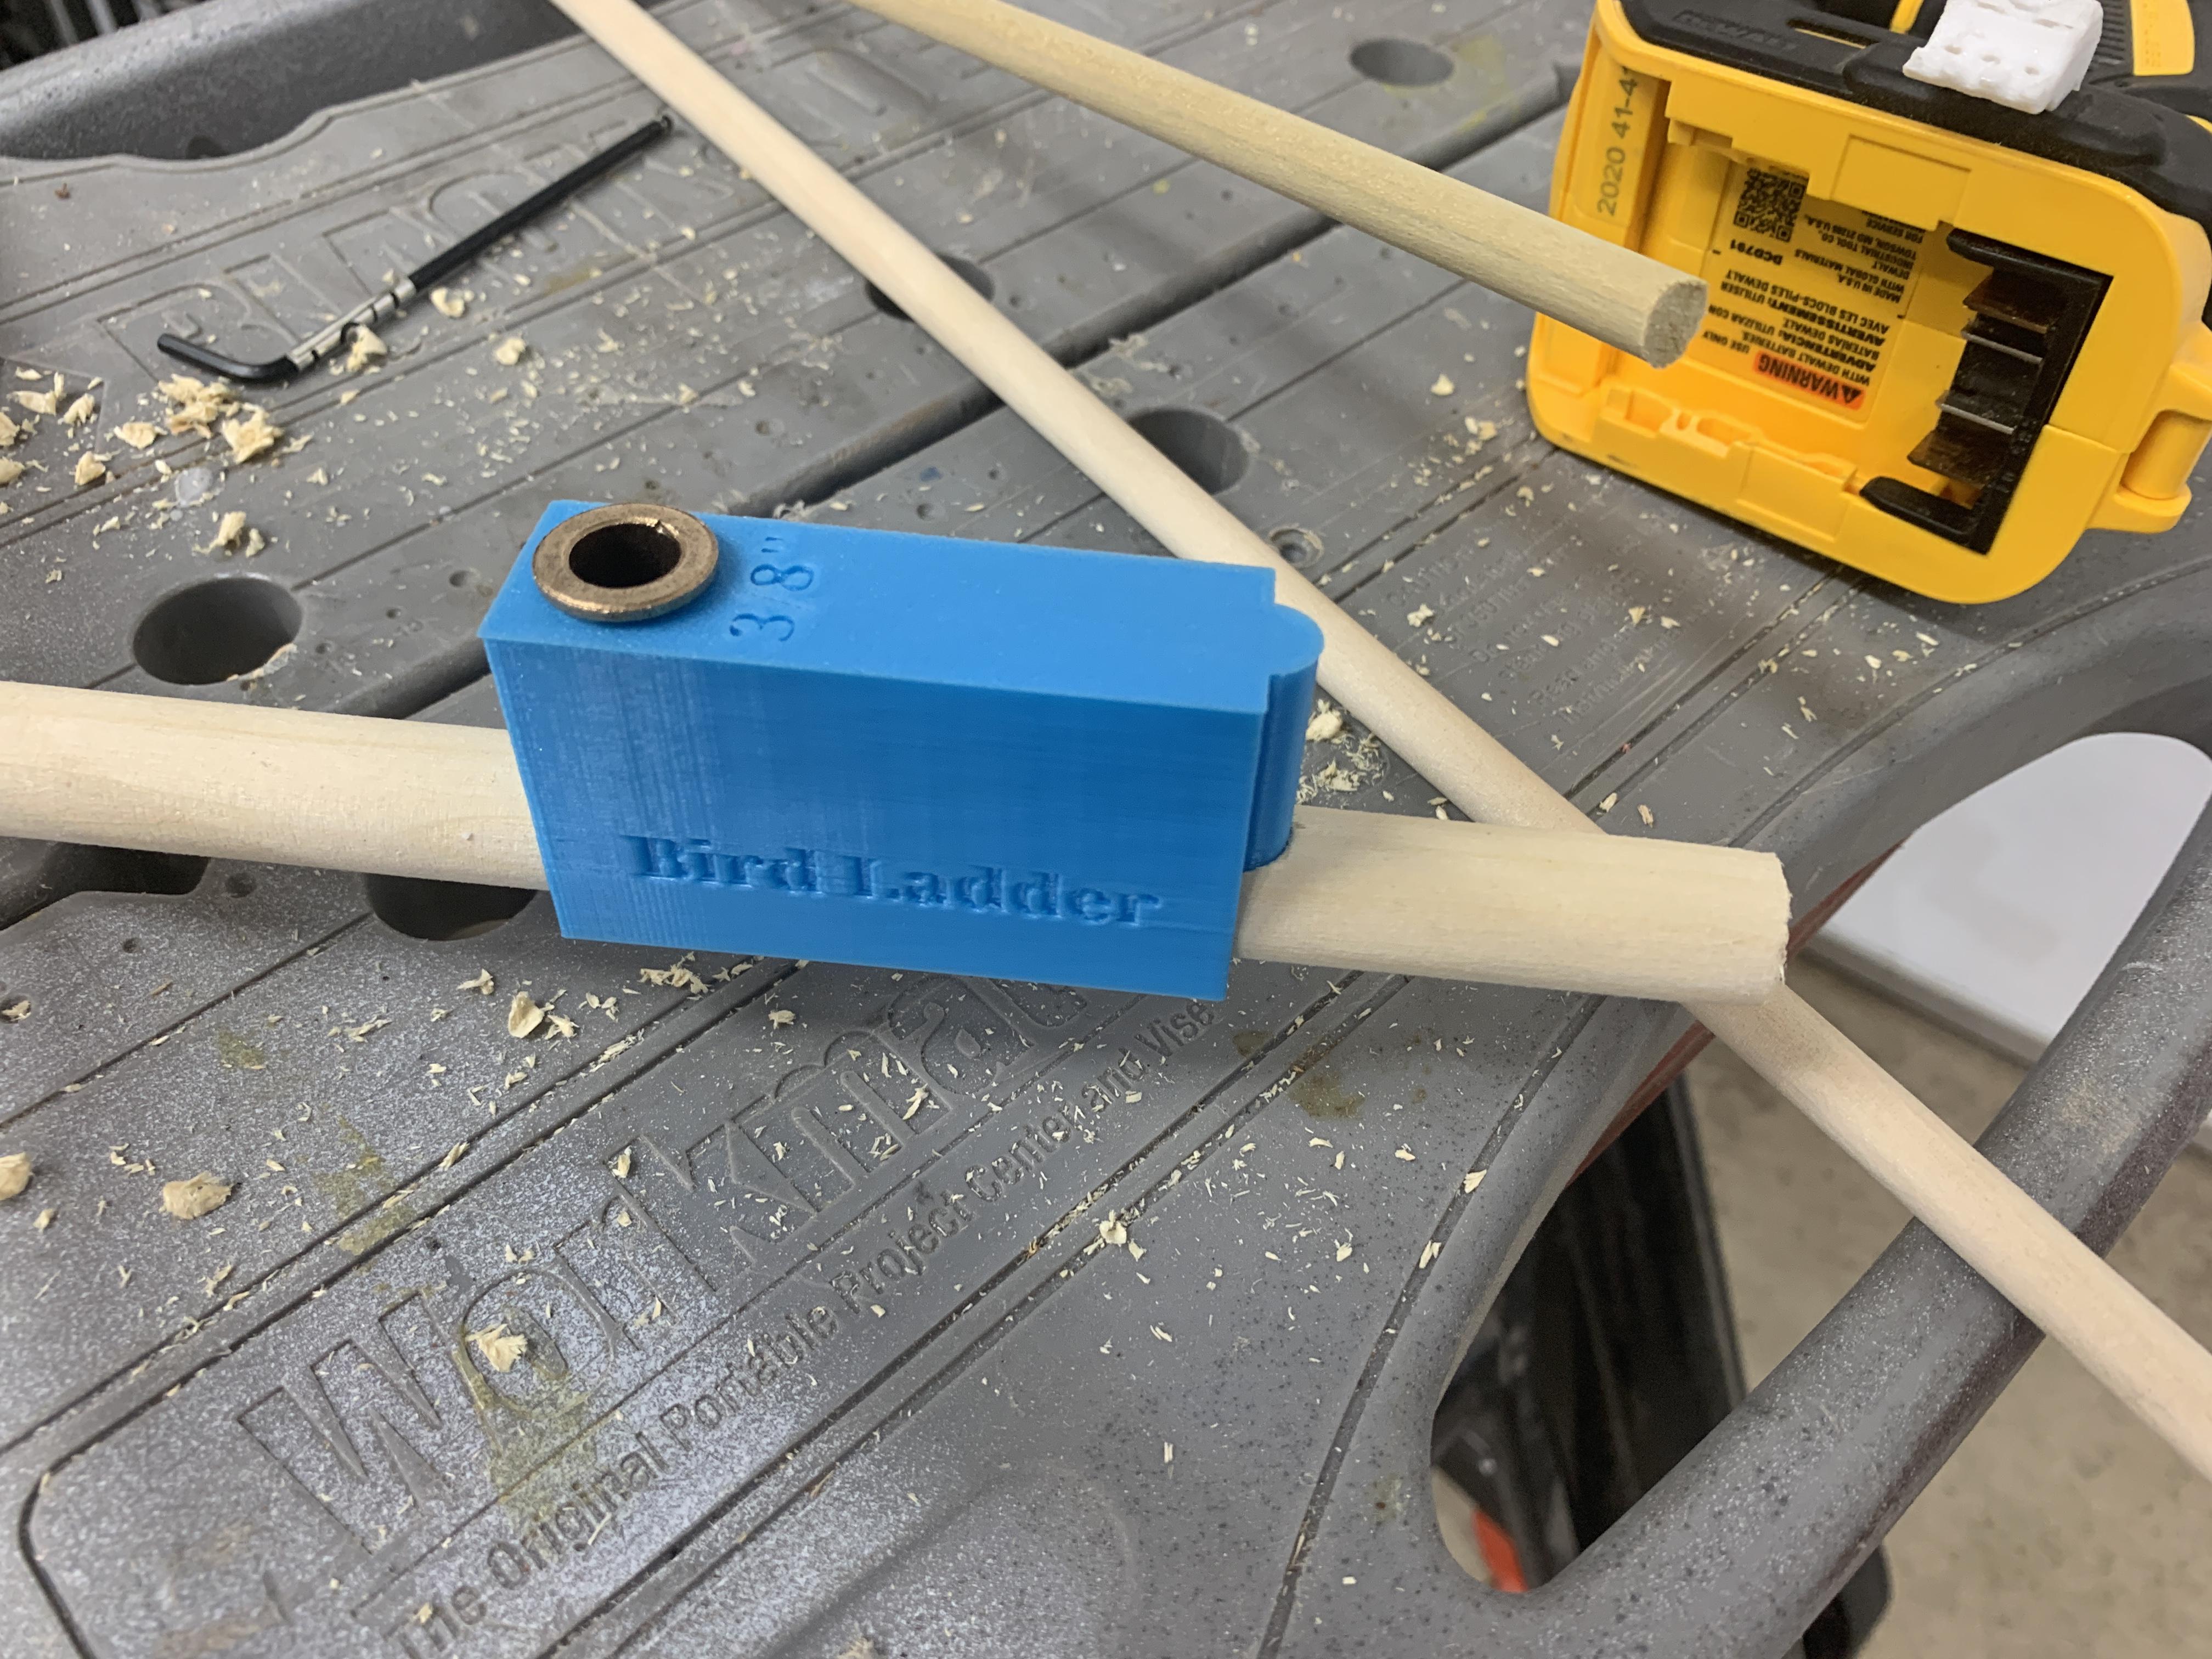

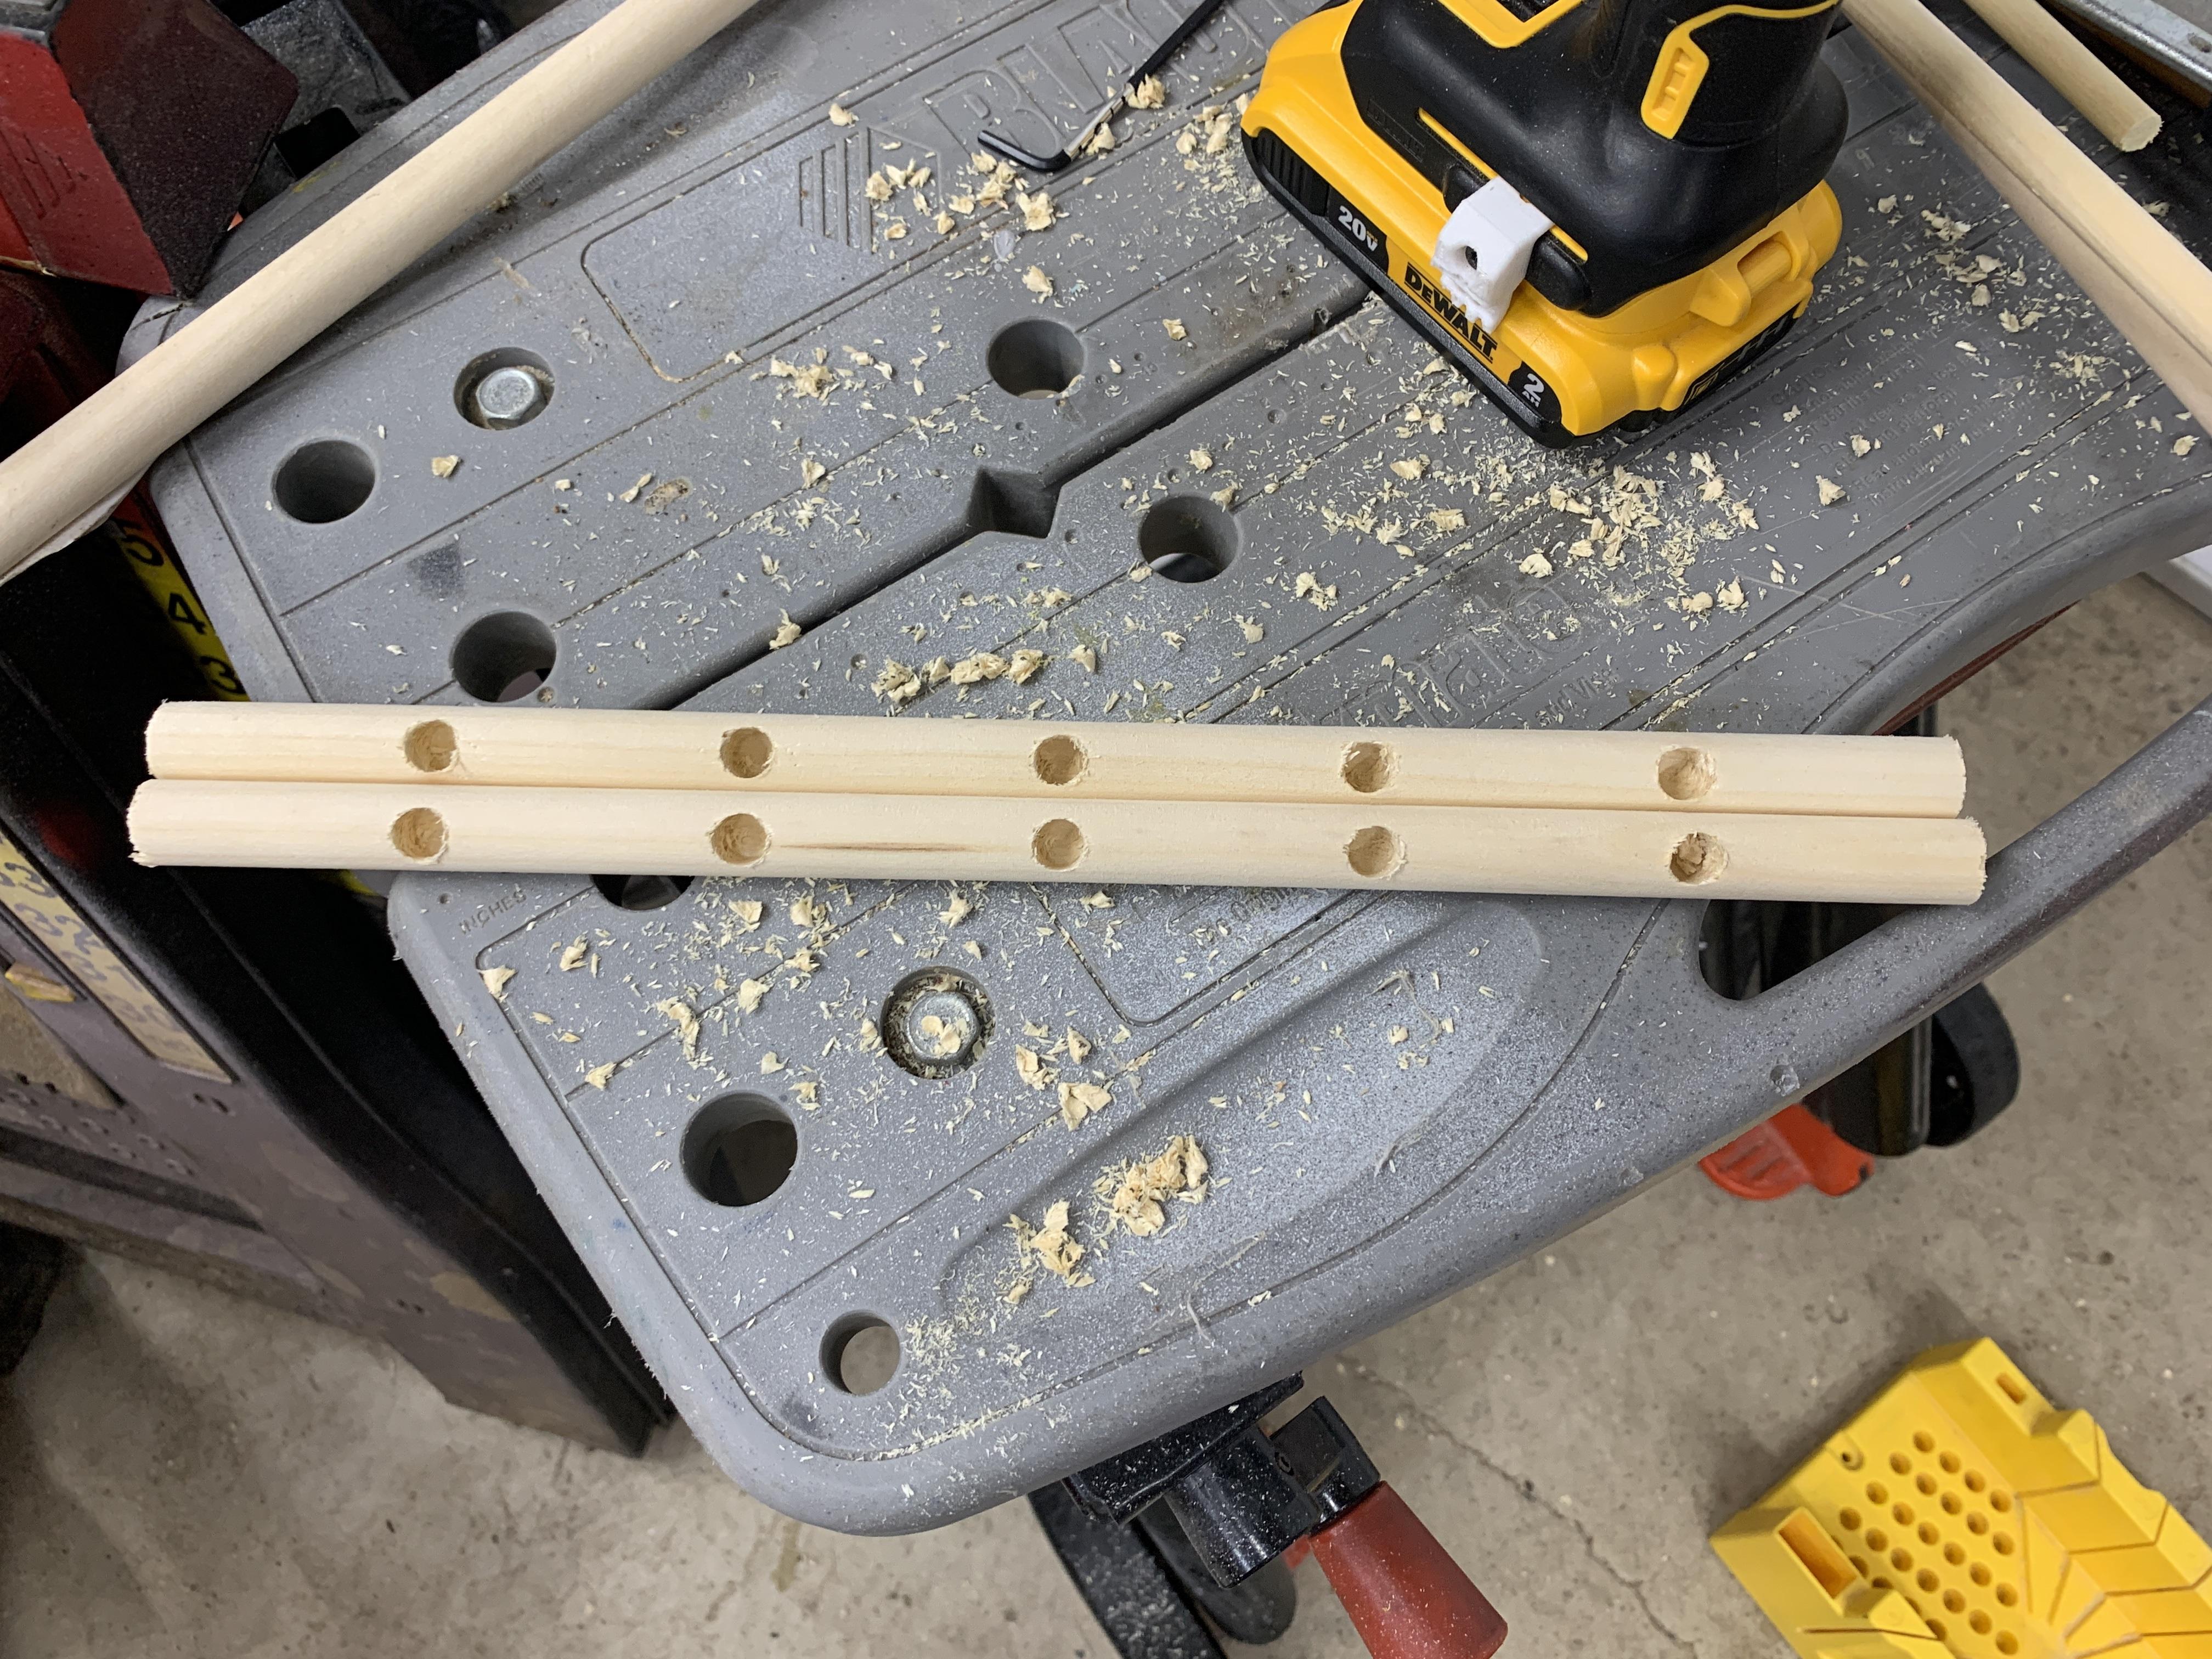
Place the 5/8" dowel onto a work bench.
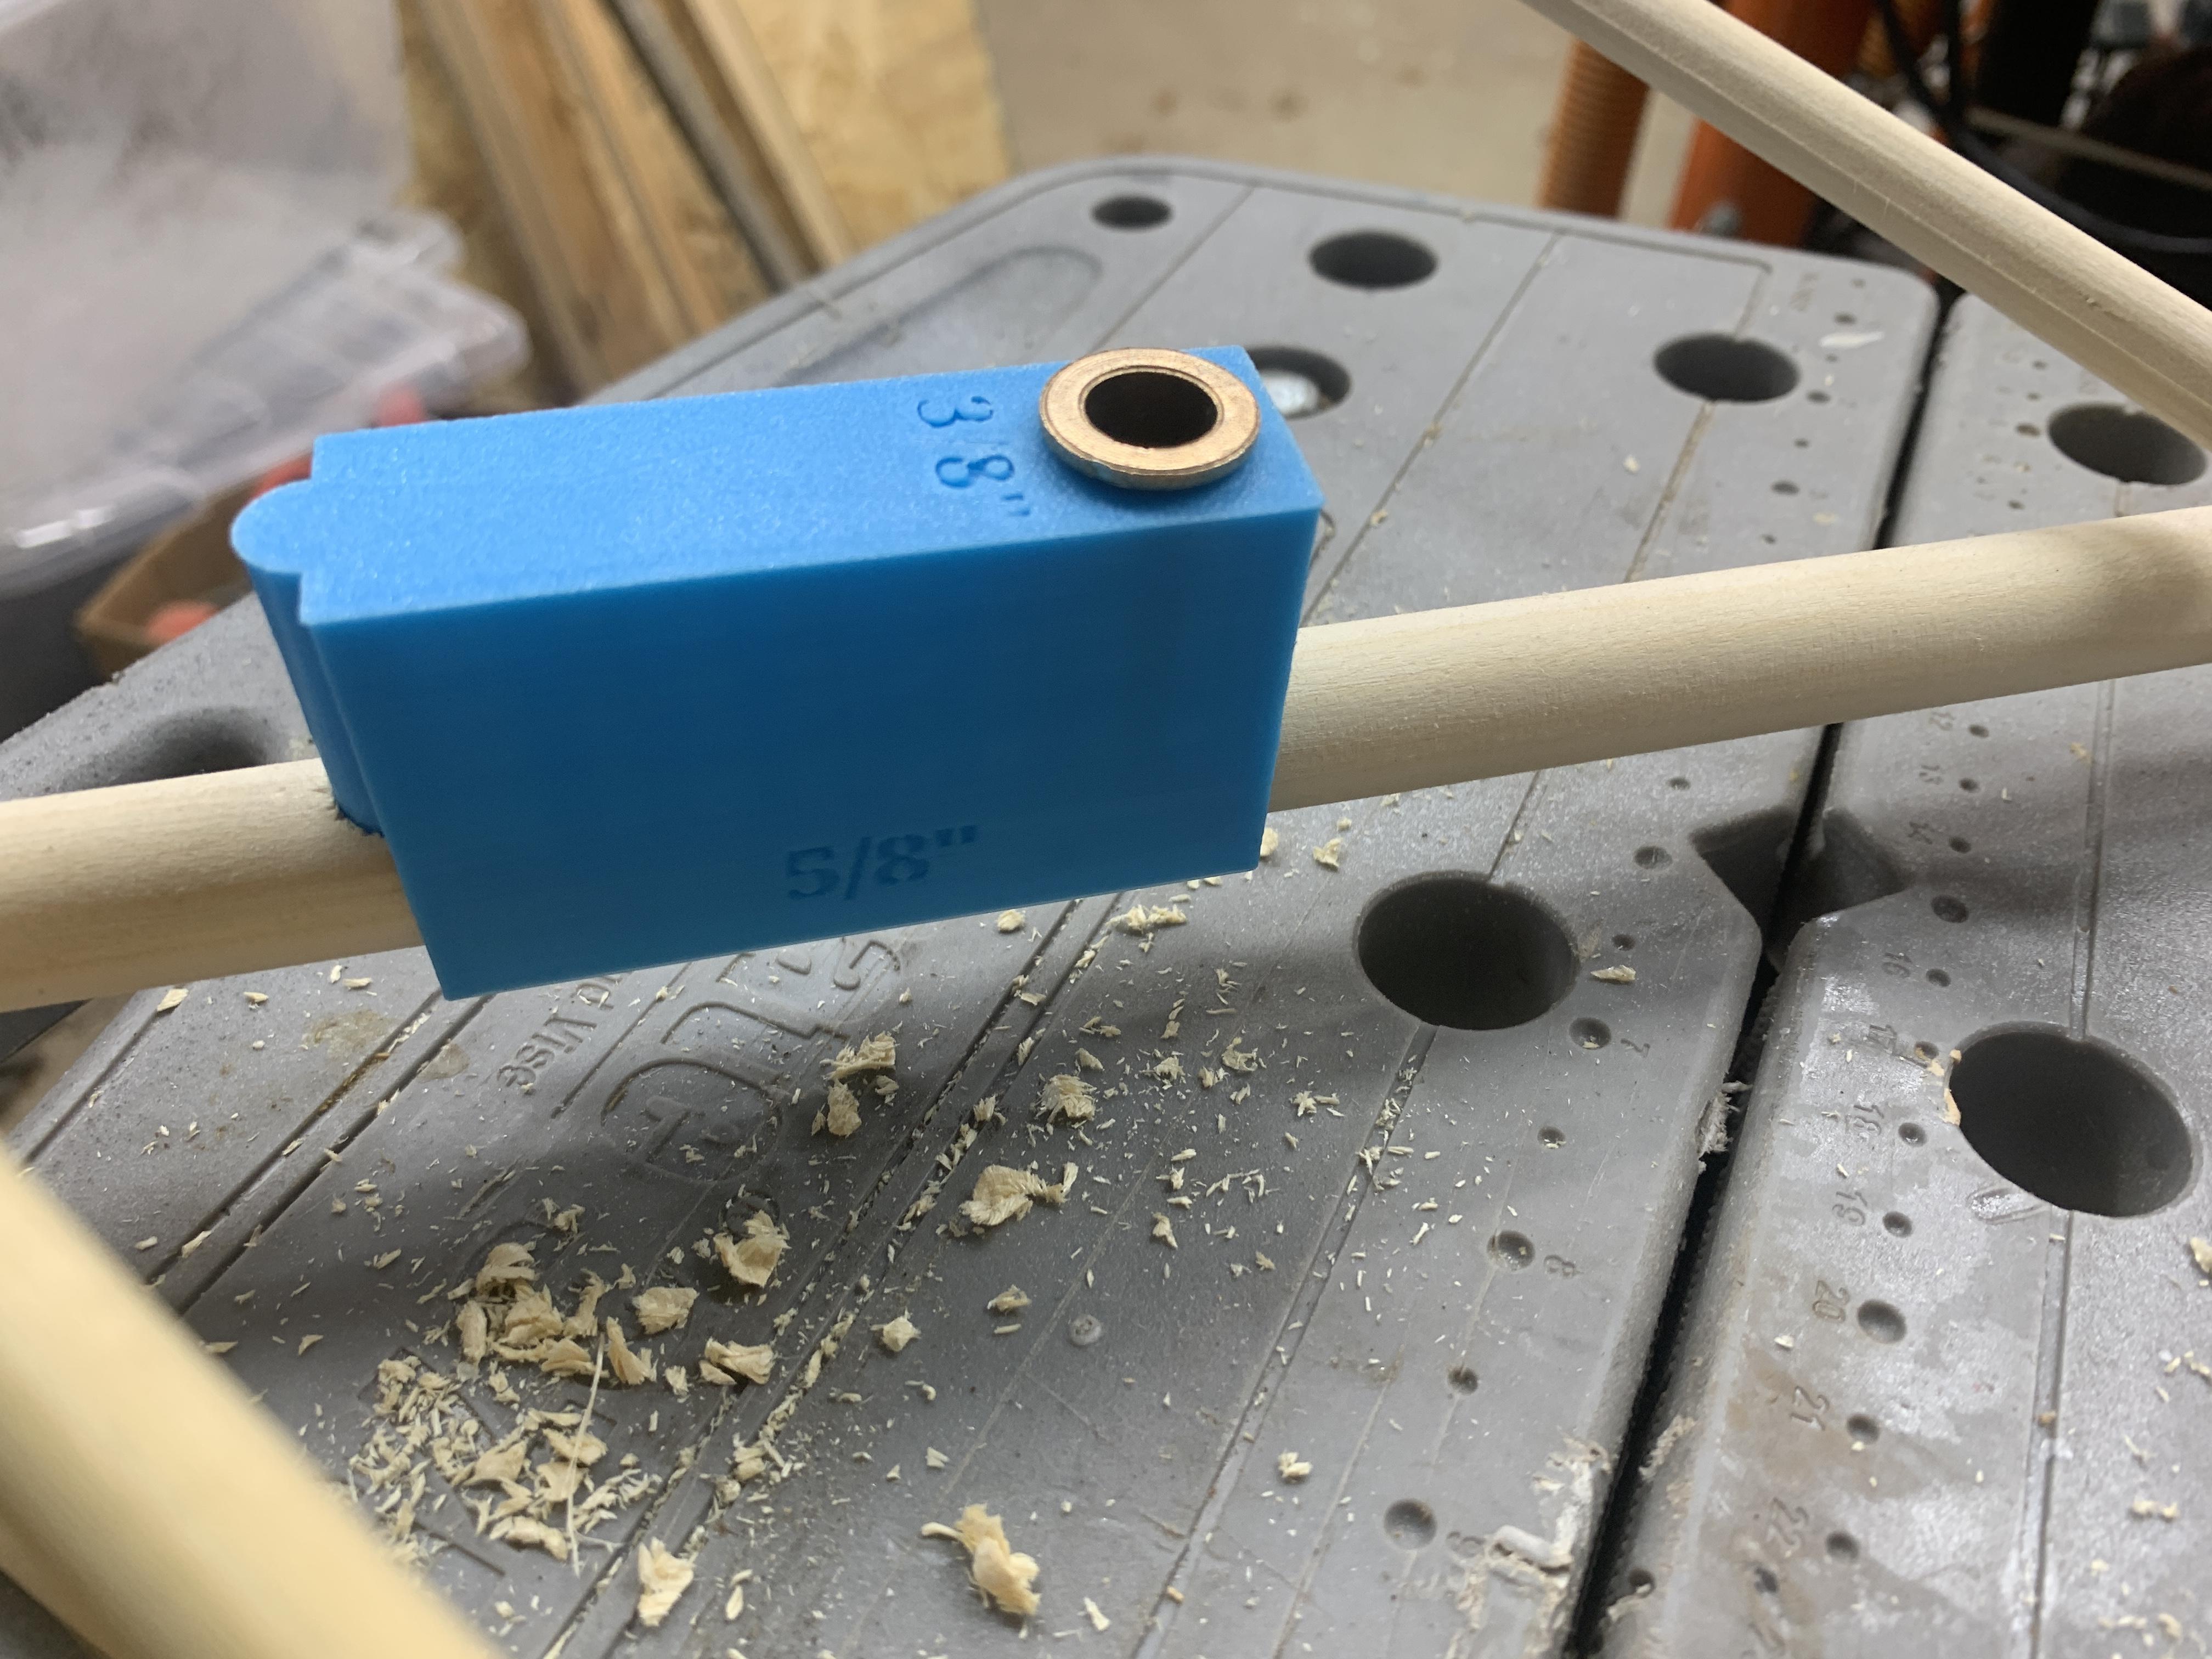
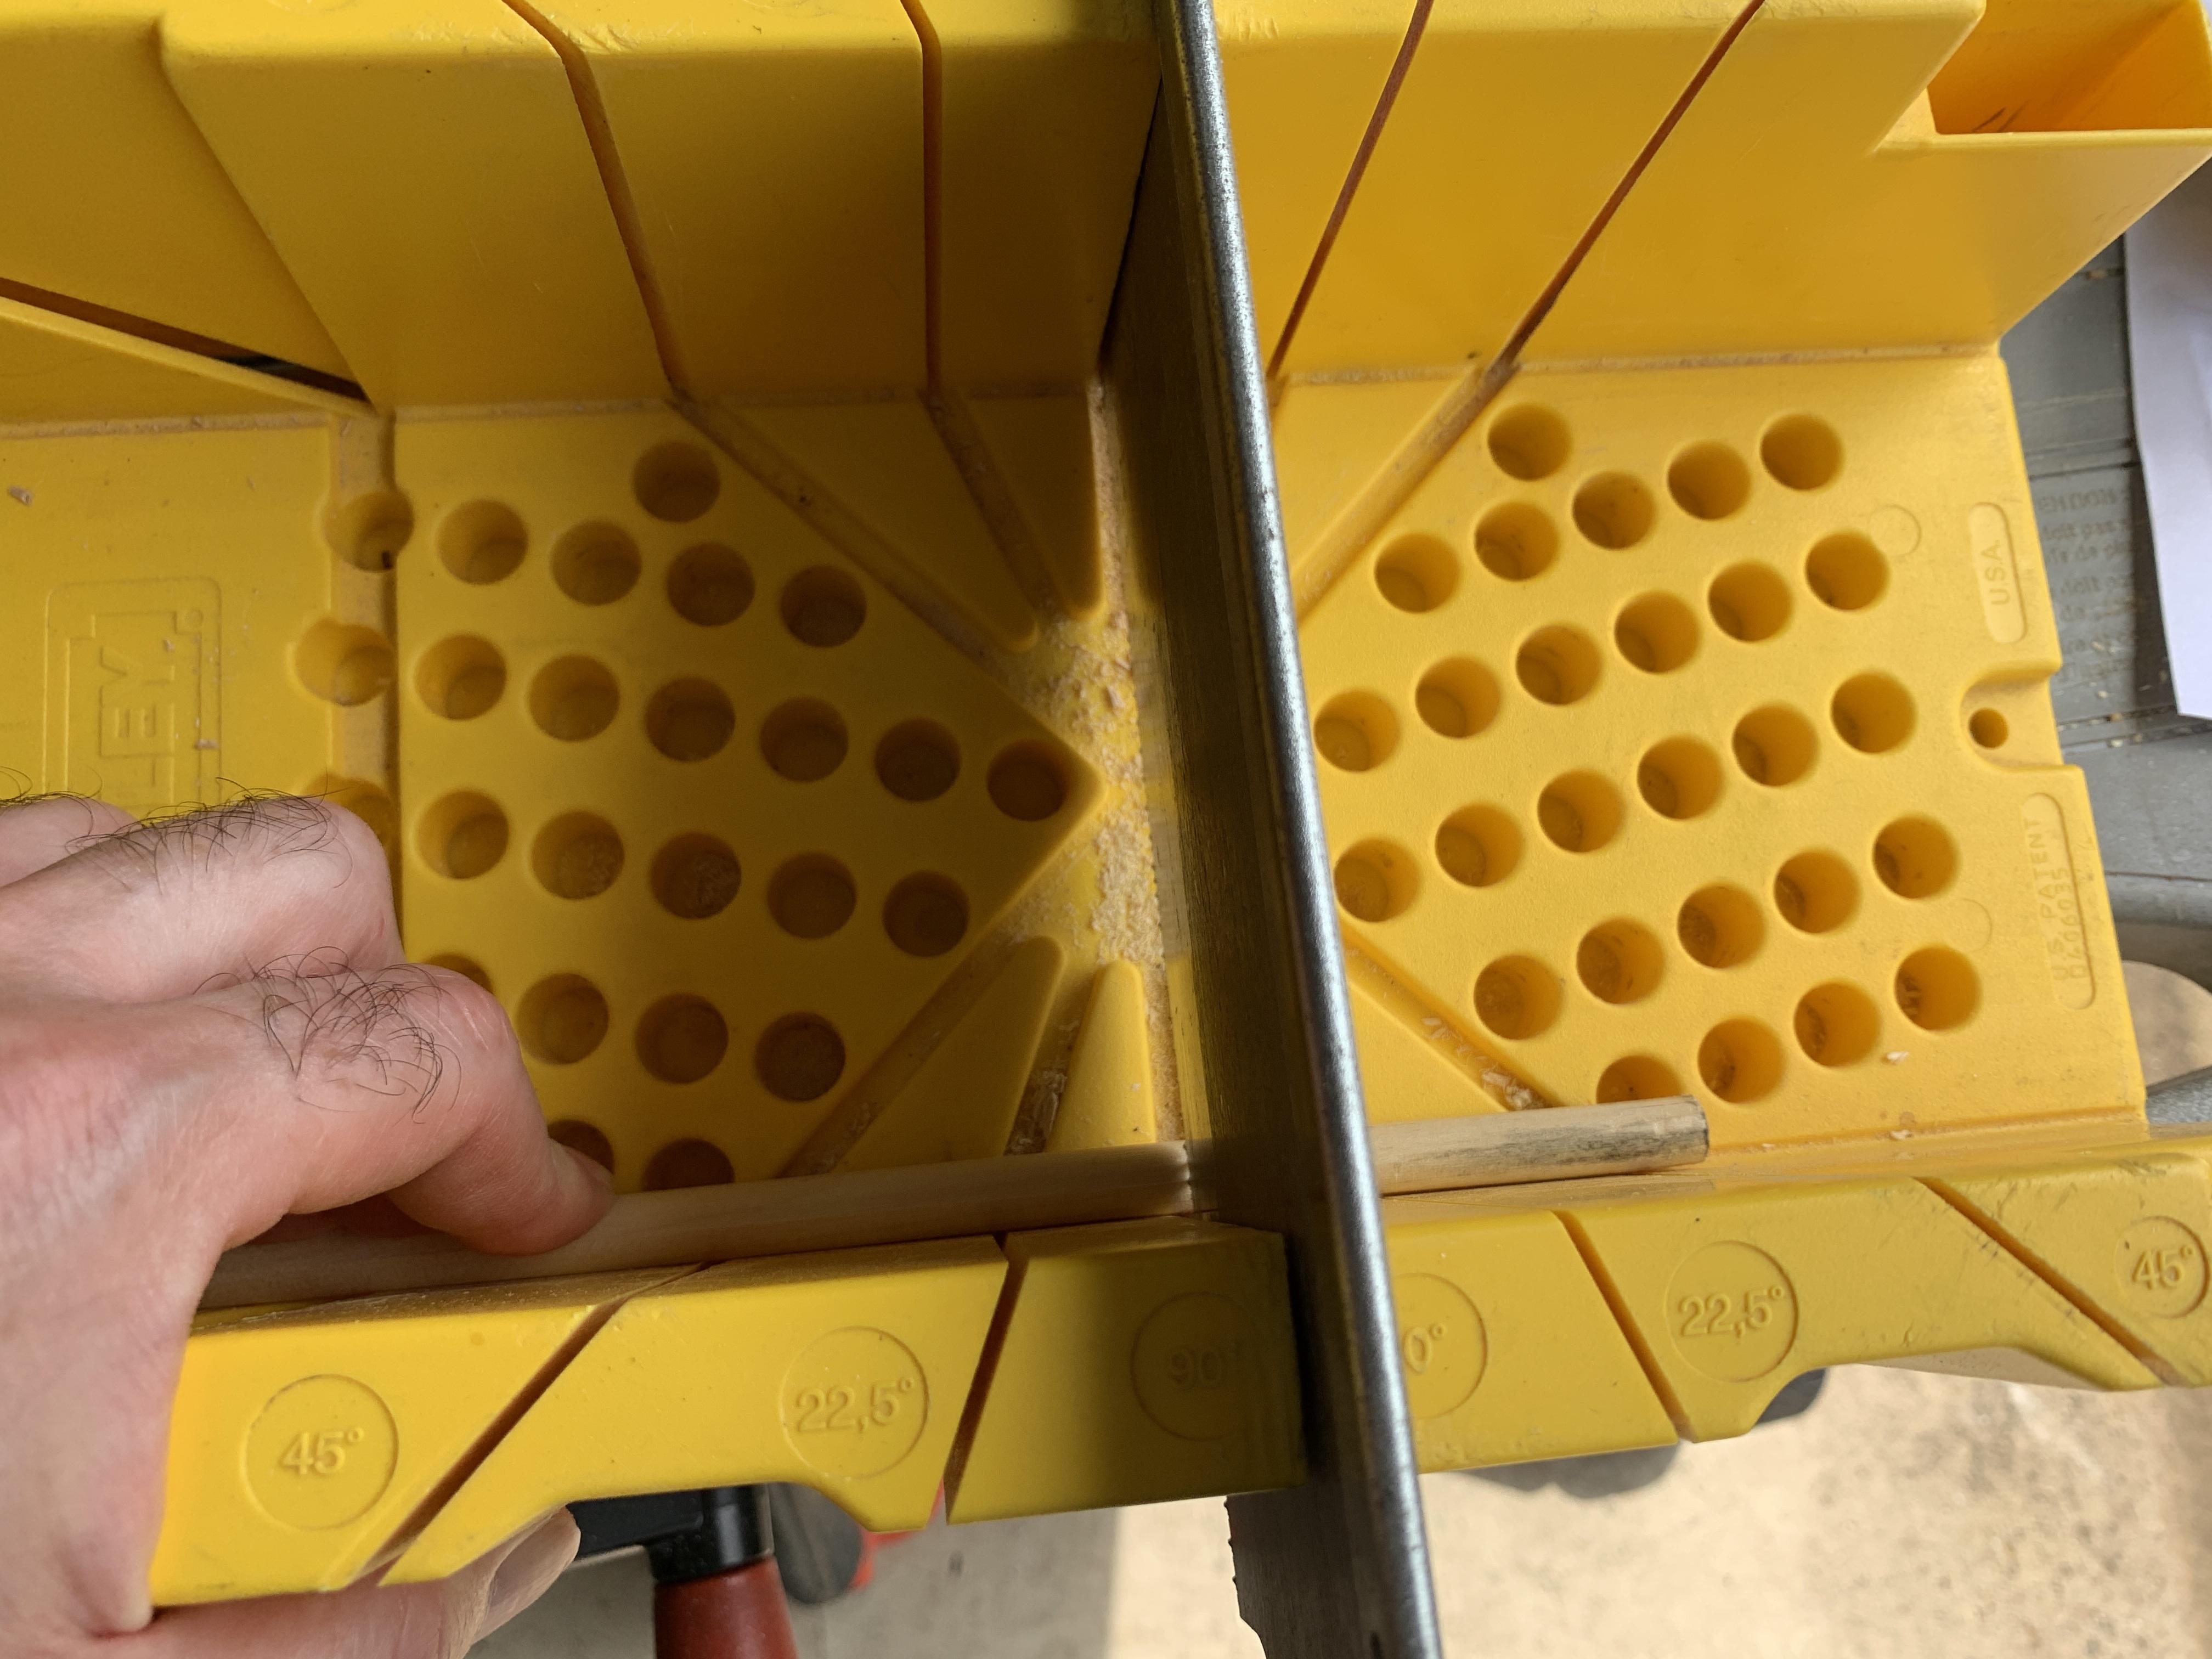
Place the jig over the dowel, using the 3/8" peg as a stop point for the end of the dowel.
Insert the 3/8" drill bit and stop collar into a drill.
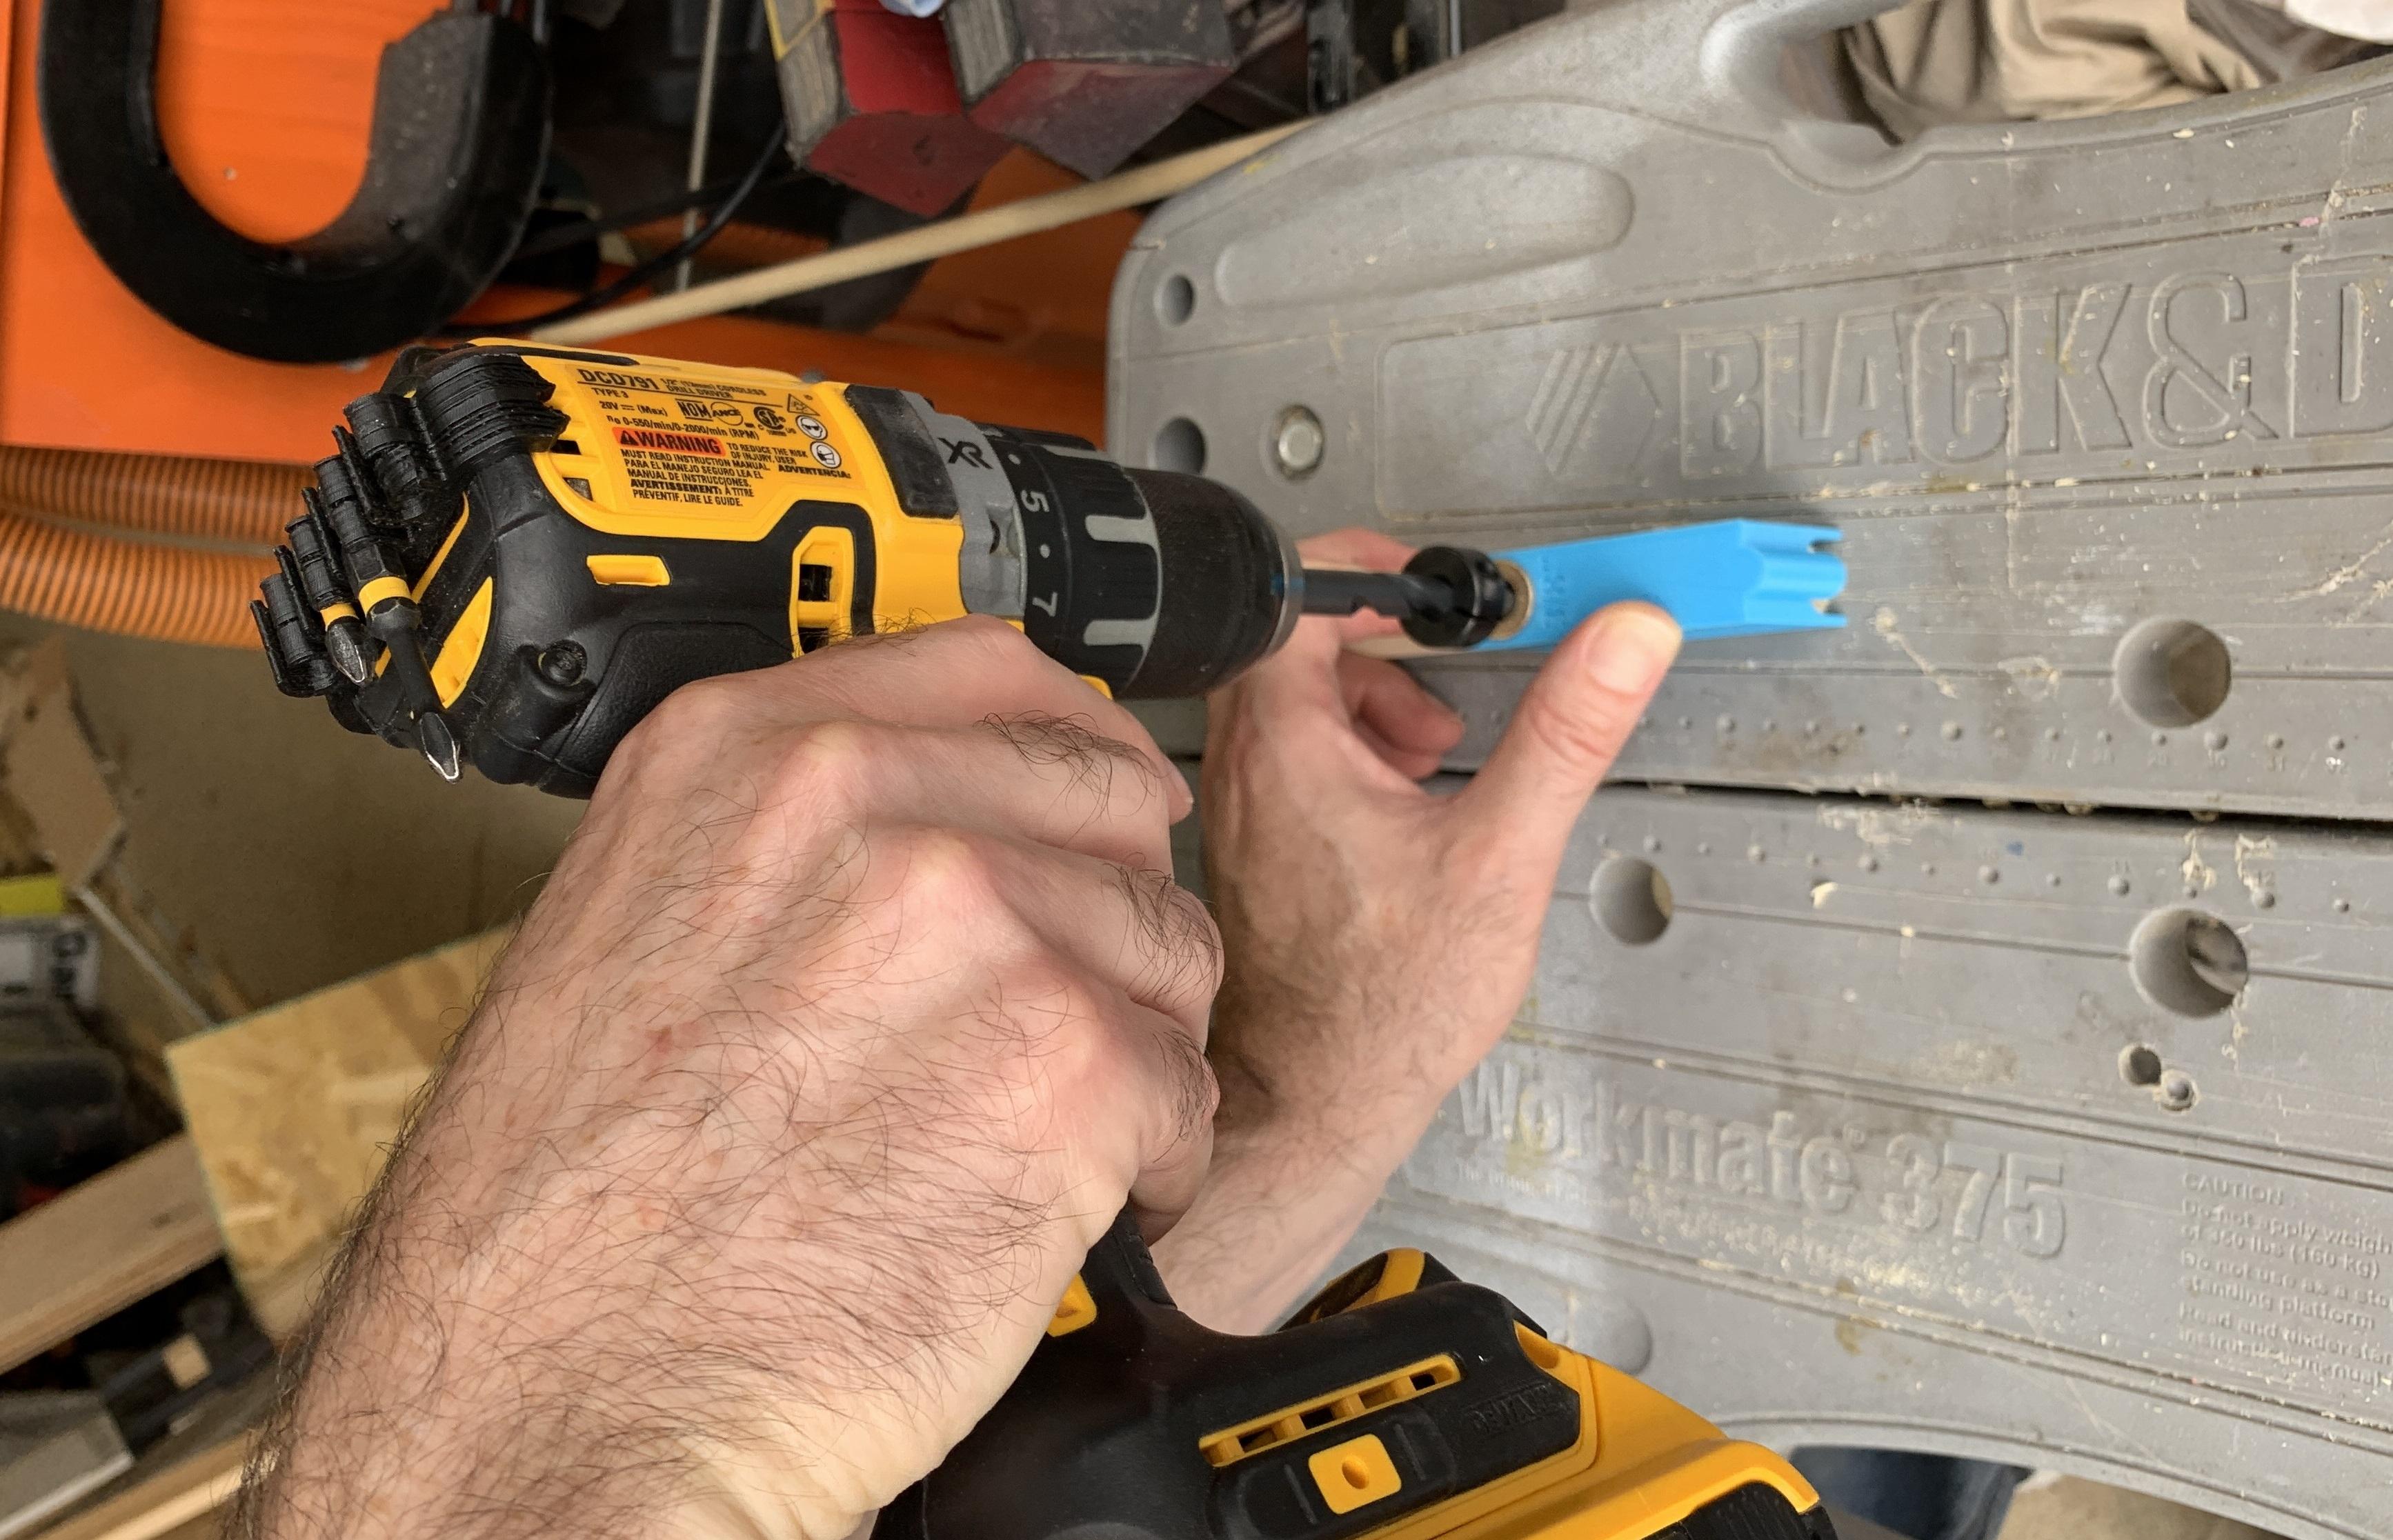
Holding the jig and dowel firmly in place, drill thru the flange bearing into the 3/8" dowel. The stop collar (if adjusted correctly) will prevent the drill bit from going all the way through the dowel.
Set the drill into reverse, and back the drill bit out of the hole (not doing so may eventually work the flange bearing out of the jig).
Lift the jig off the dowel. Move the jig further up (along) the dowel, pushing the 3/8" alignment/spacing peg into the last drilled hole.
Repeat the drilling step to make another hole.
Repeat the adjustment of the jig and drilling until you get the number of ladder rungs or desired ladder length.
I move the jig one last time and use a pencil to make a mark through the flange. I than use a miter box and saw to make a nice straight cut. This way the first and last ladder rung will be the same distance from the start and end of the upright.
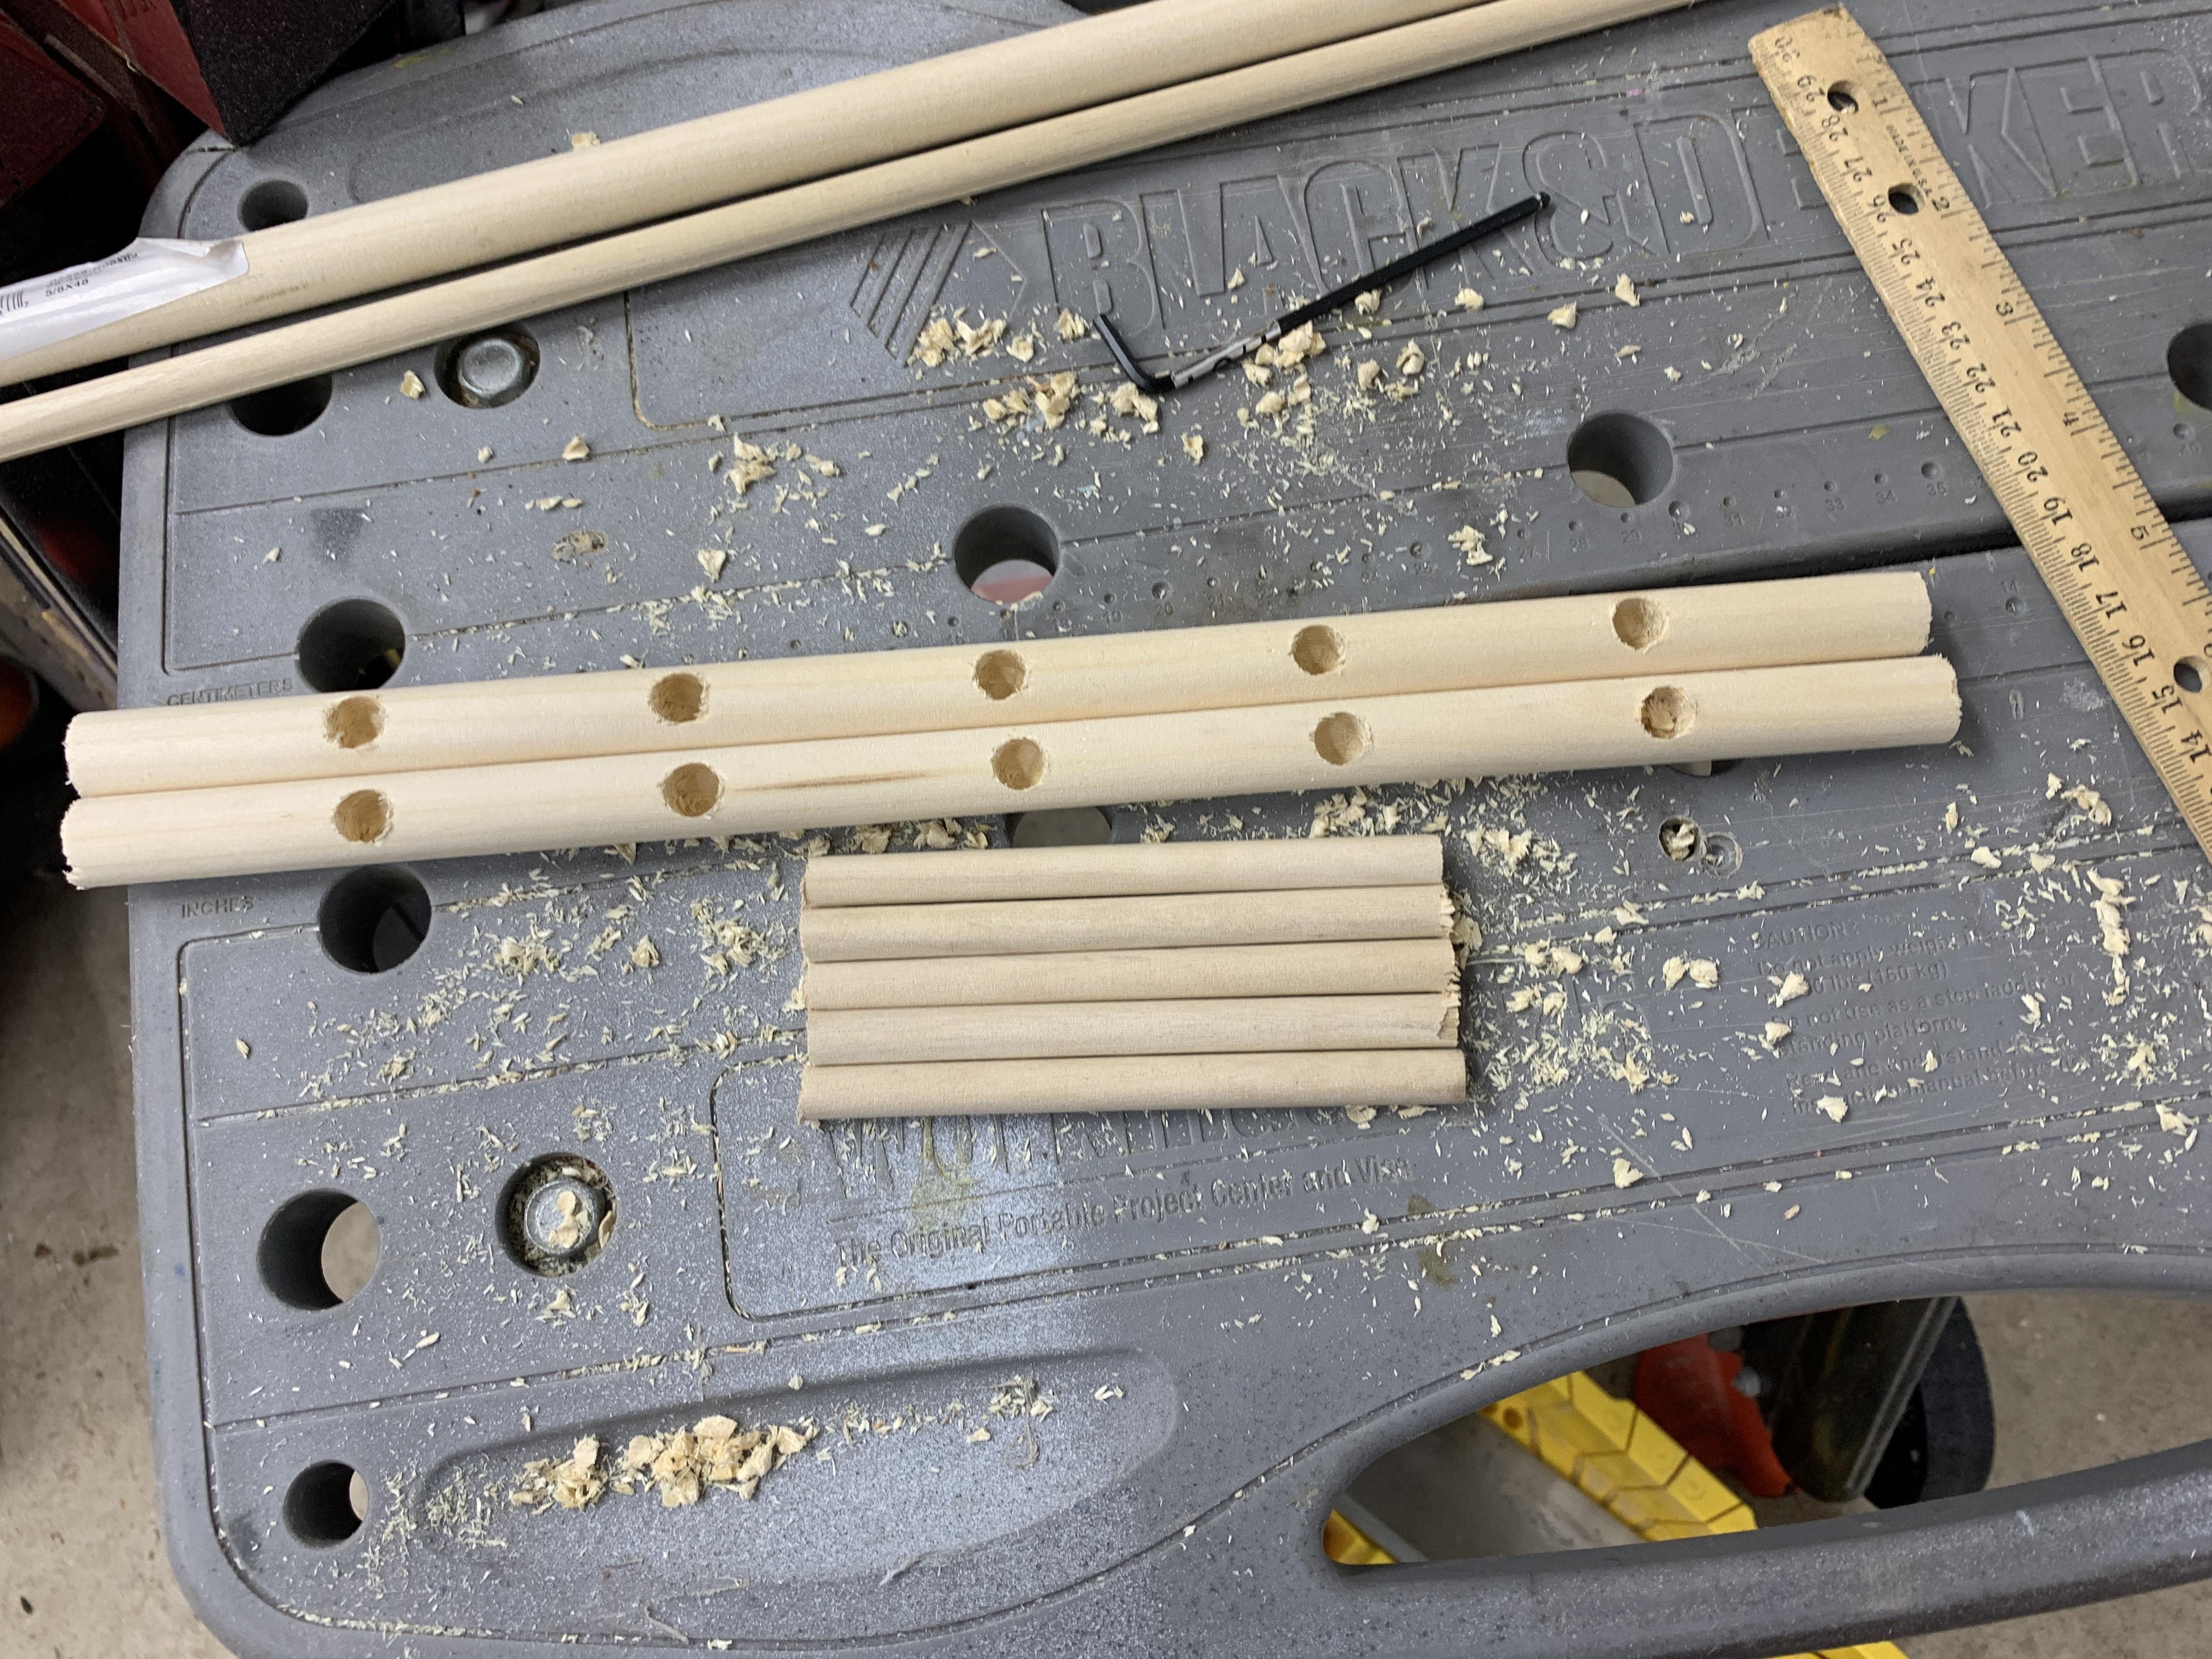
Now repeat on the remainder of the 5/8" dowel (or a new 5/8" dowel, depending on your desired ladder size).
Sand any rough ends.
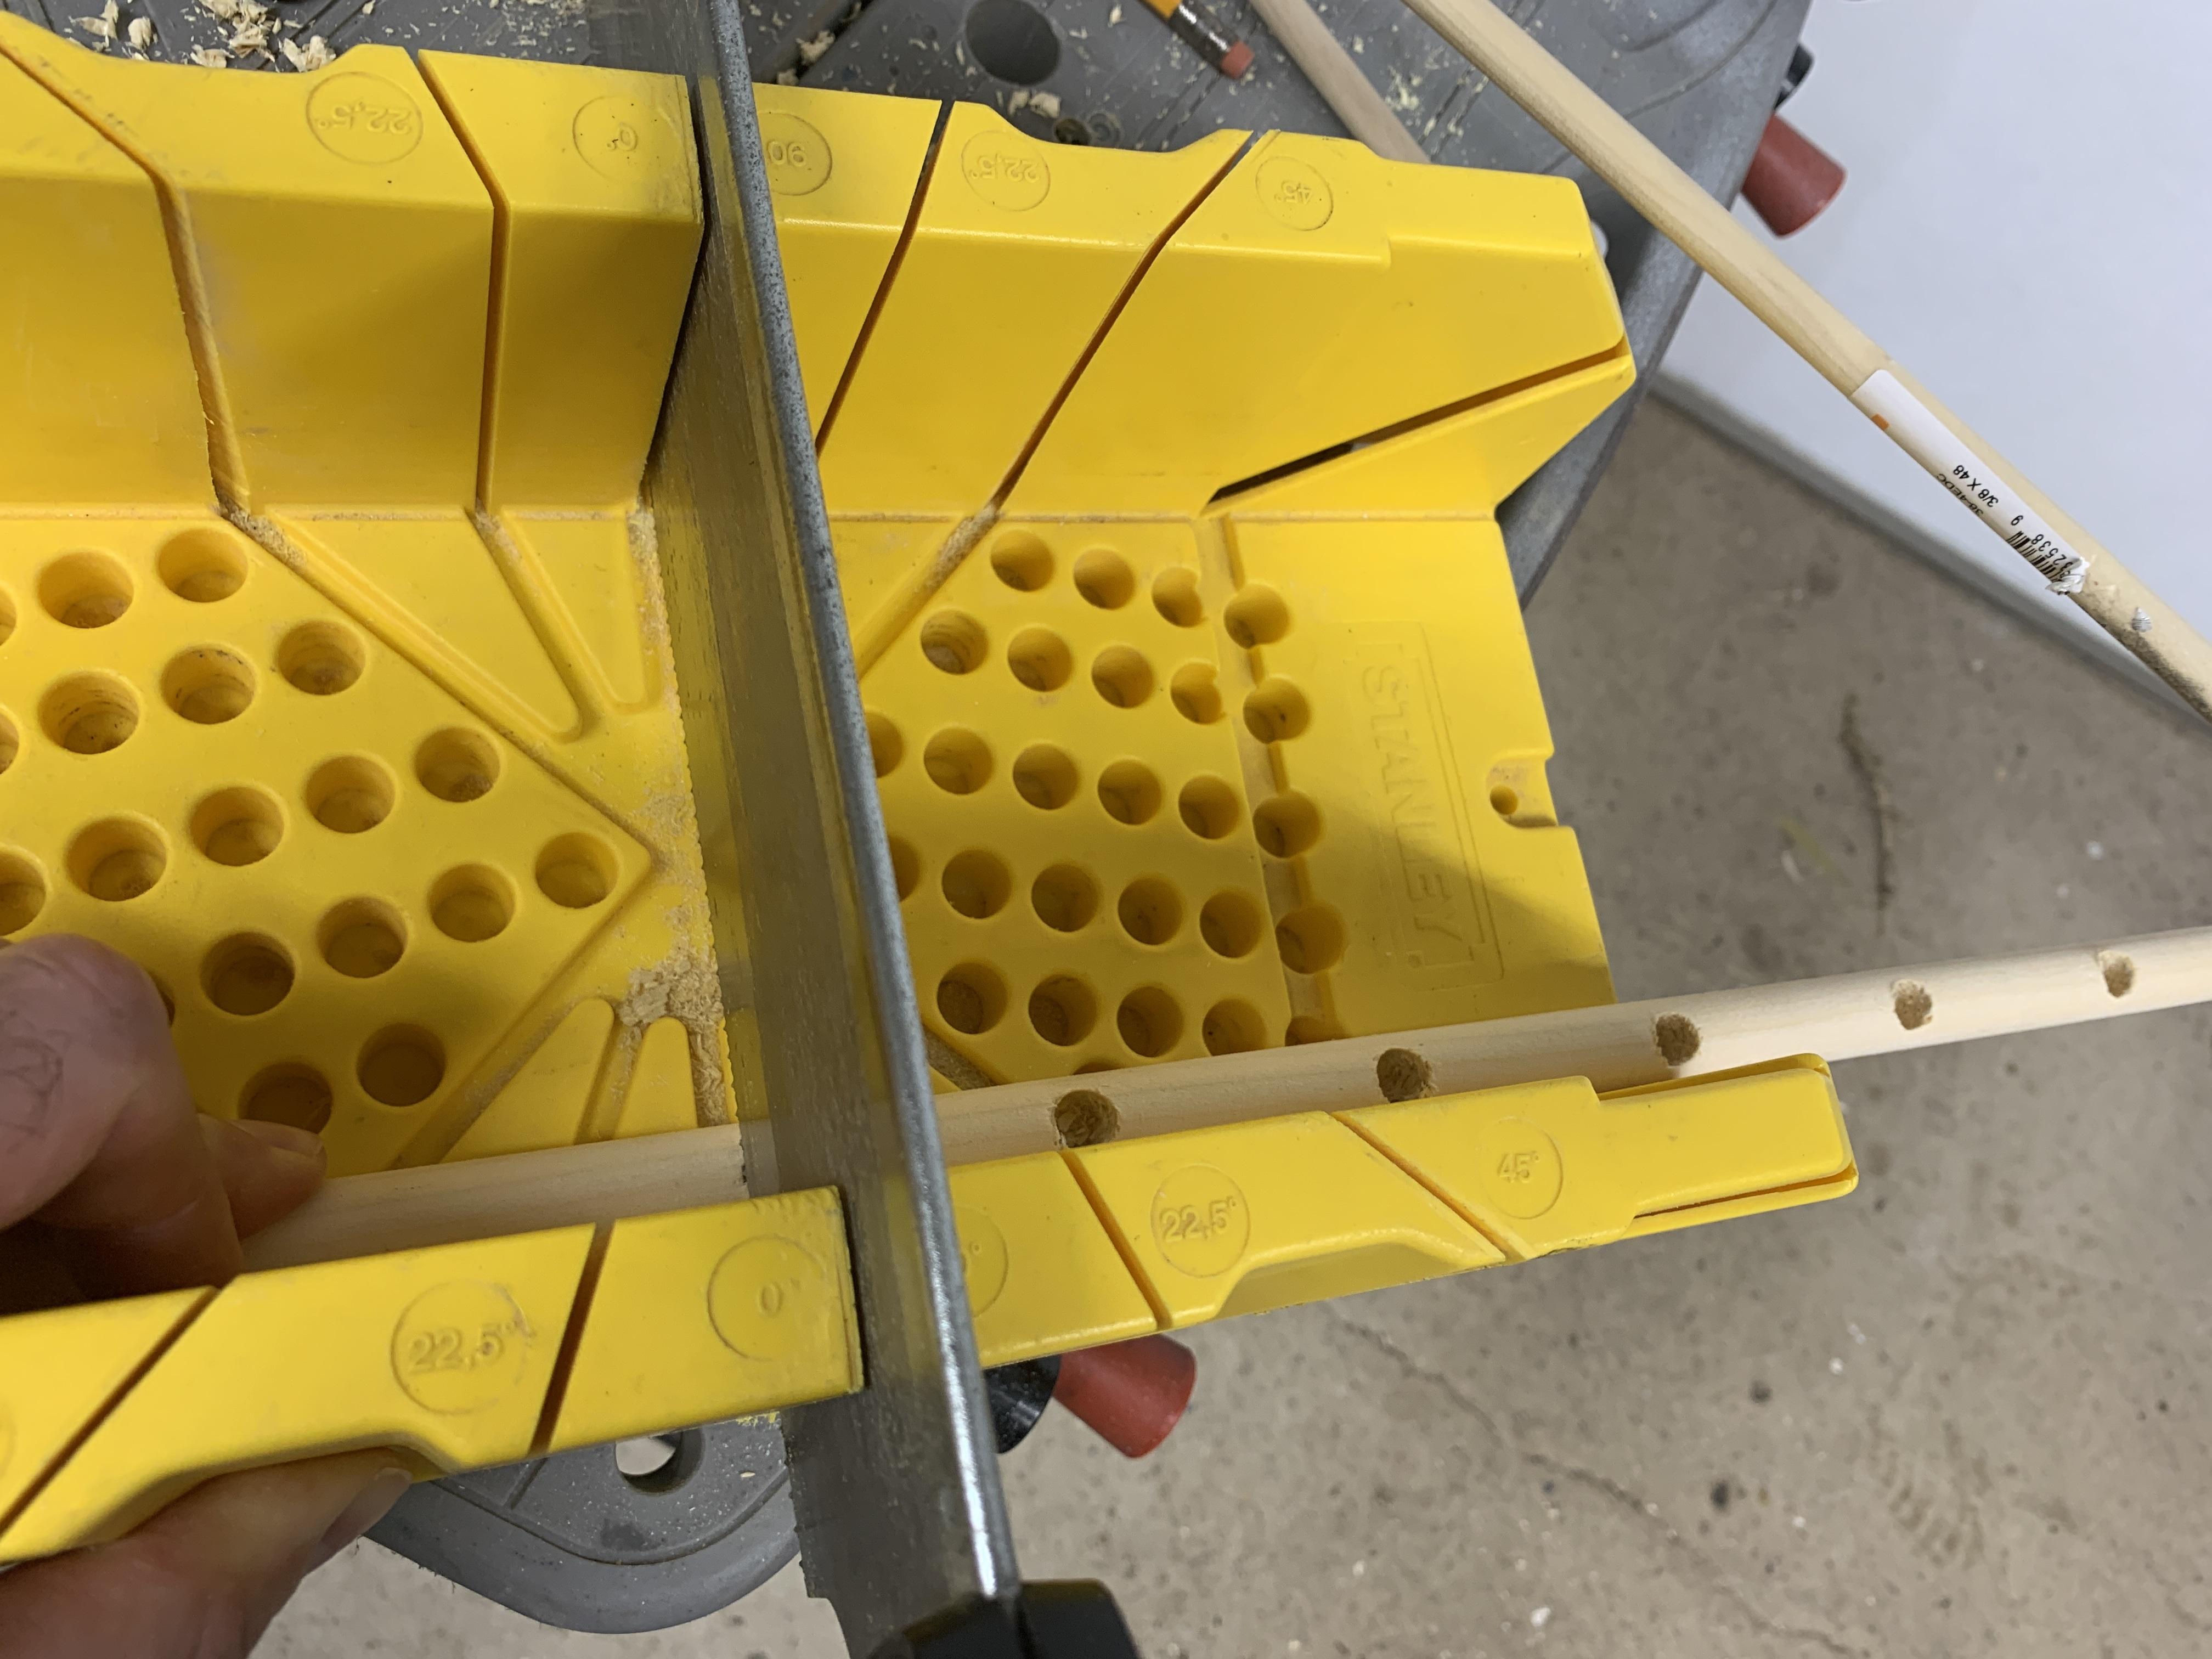
Cut the Ladder Rungs
Choose if you want the ladder uprights to be 2 3/4" (for smaller birds) or 3 3/4" (for medium sized birds). Assuming the depth of your drilled holes is 3/8", multiply by two (3/4") and add that to the chosen width. That is the length your ladder rungs should be cut to. I went with 3 3/4" wide ladder rungs, with a 3/8" drilled depth. So, I'm cutting my rungs to 4 1/2" each.
Measure and mark the 3/8" dowel, at 4 1/2" (or the length you determined above).
Use a miter box and saw to cut the dowel at the marks you made.
(Its likely more accurate to make each subsequent mark after the previous one has been cut. Otherwise you would need to account for the thickness of the blade/waste).
Repeat for the number of ladder rungs you require.
Sand any rough ends.
Install the Ladder Rungs
Lay one of the side rails down with the holes face up.
Place a drop of white Elmer’s glue in each hole, don't use too much or you'll be doing a bit of cleanup afterwards.
Push a ladder rung into each of the holes.
Clean up any glue that squeezes out.
Lay the other side rail down with the holes face up.
Place a drop of white Elmer’s glue in each hole.
One by one, carefully line up each ladder rung to the alternate side rail.
Push the two side rails closer together over the ladder rungs (more glue cleanup).
Put some rubber bands over the two side rails to act as a clamp as the glue dries.
Perform additional glue clean up as needed.
Should be dry after 20 minutes or so.
Install the Cup Hooks

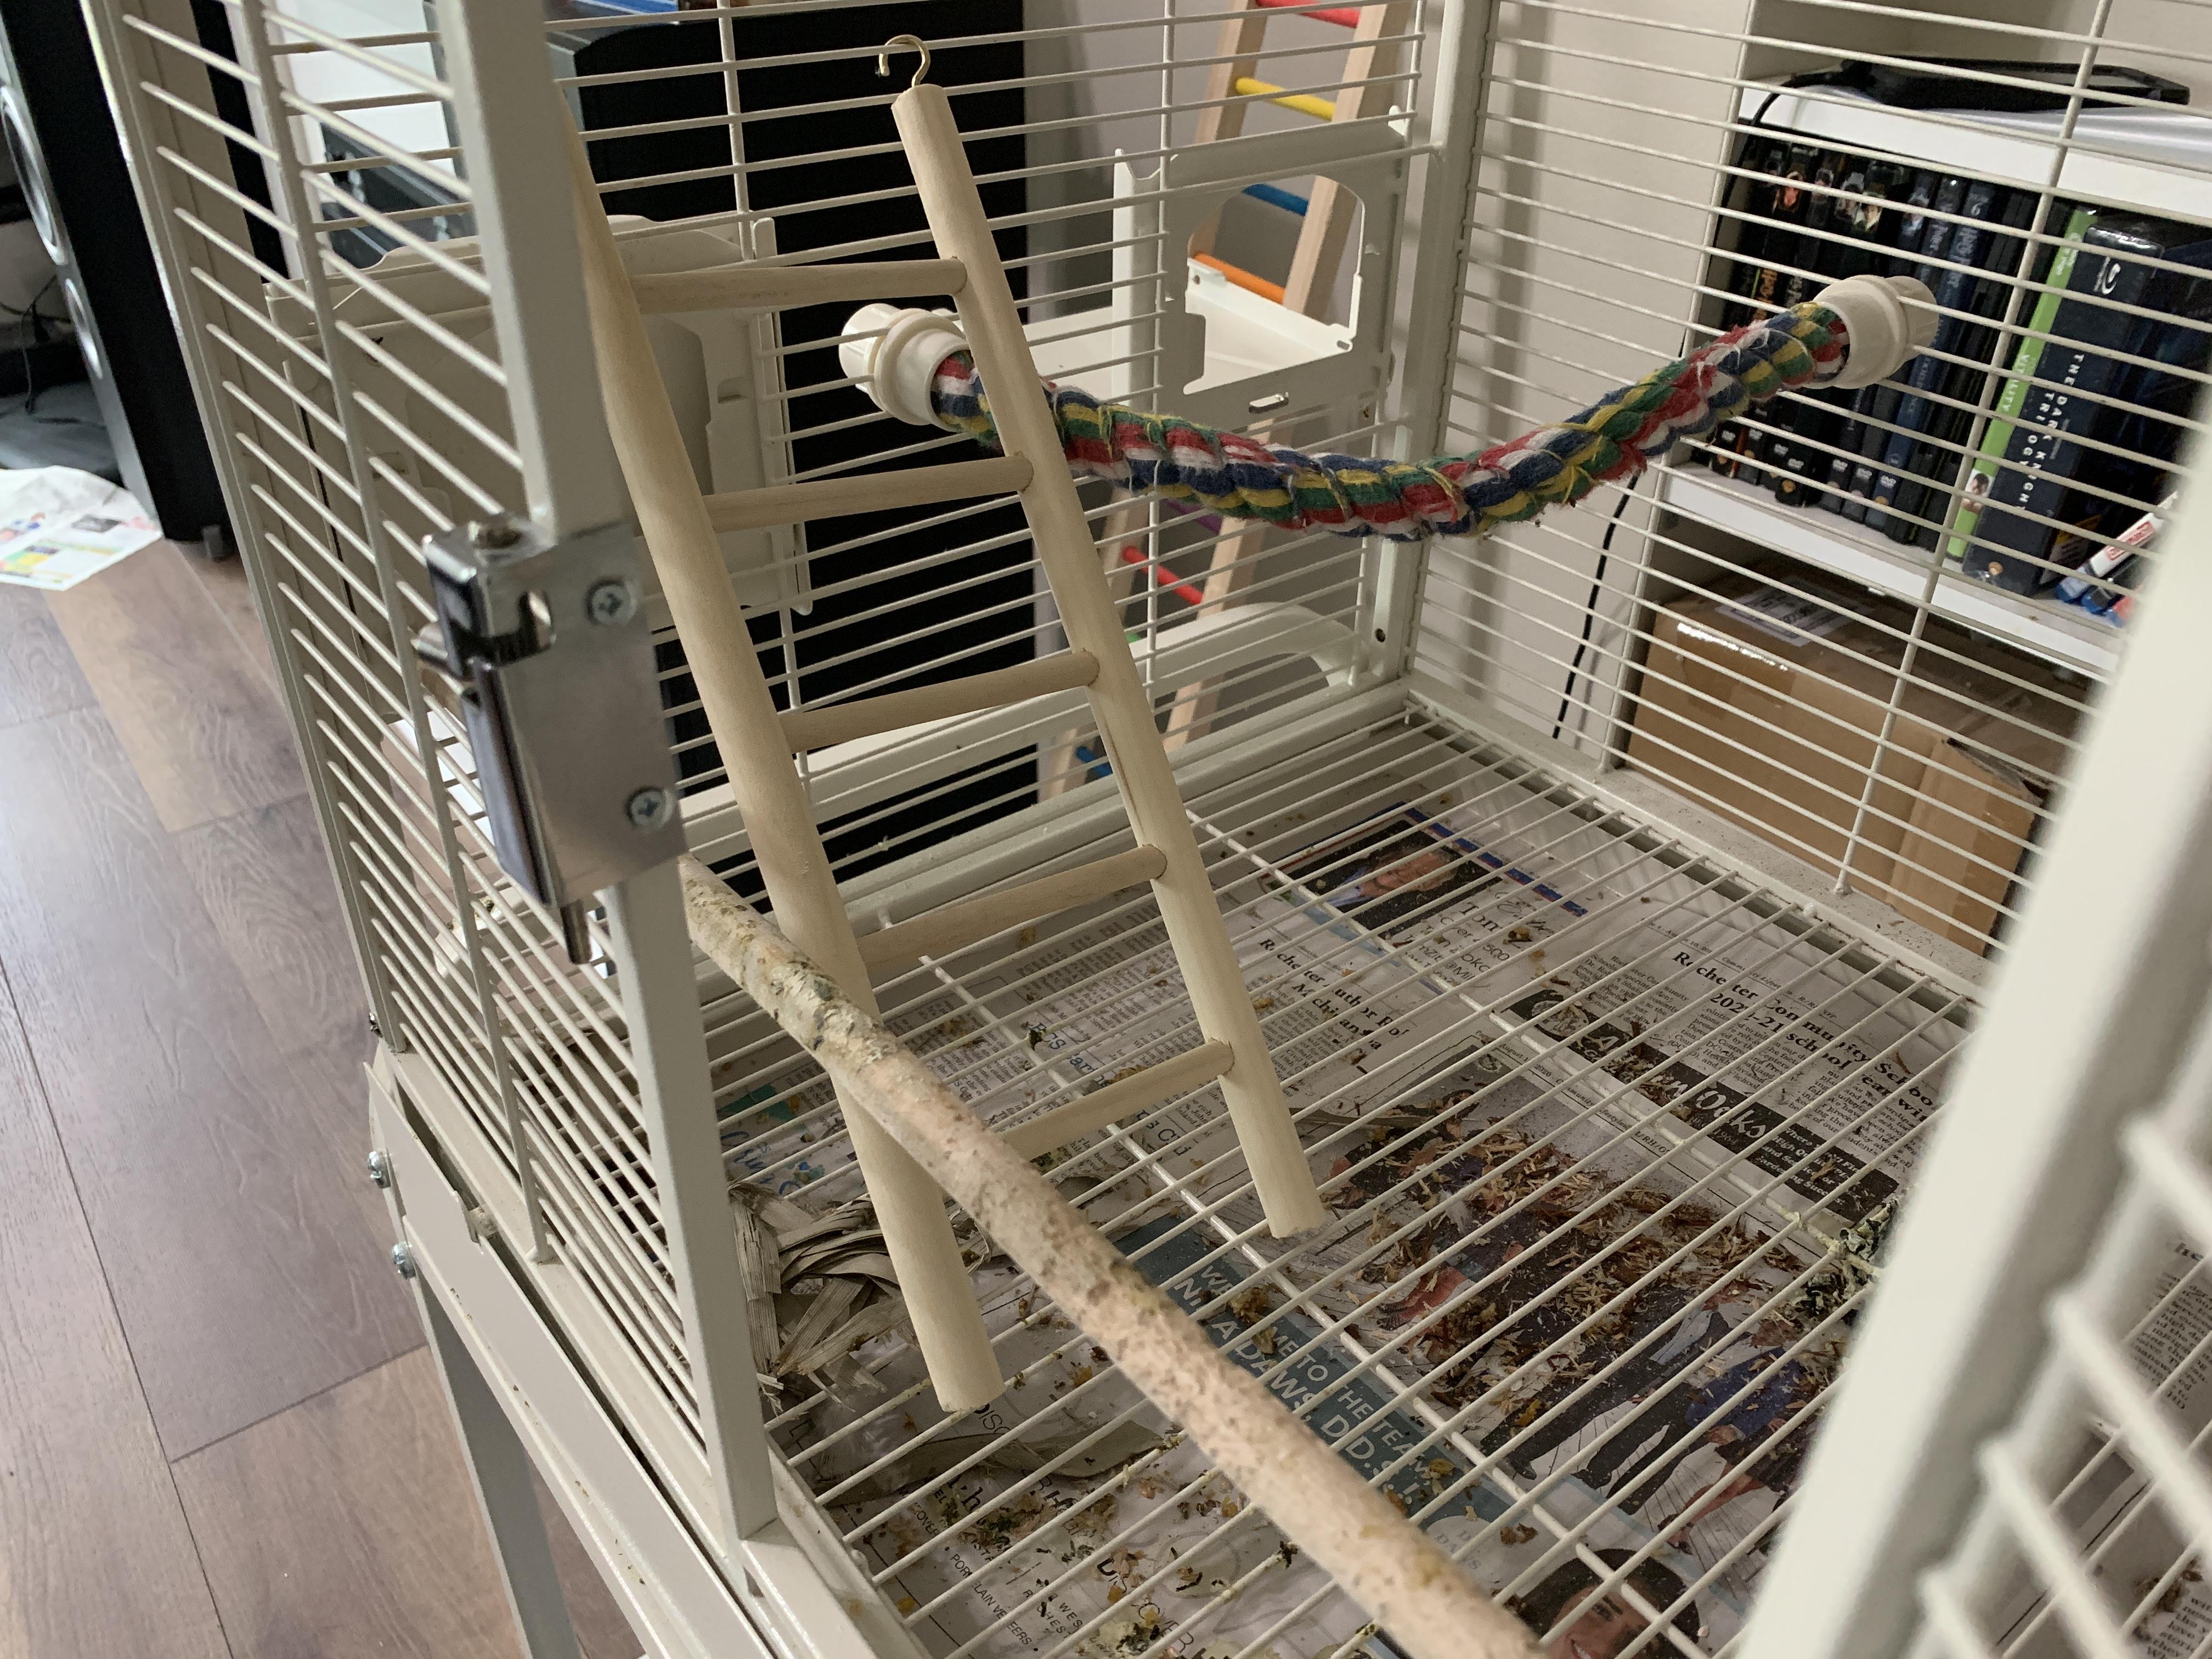
On one side of the ladder (which will be the top of the ladder), screw a cup hook into each of the ladder side rails.
Hook the ladder into place.
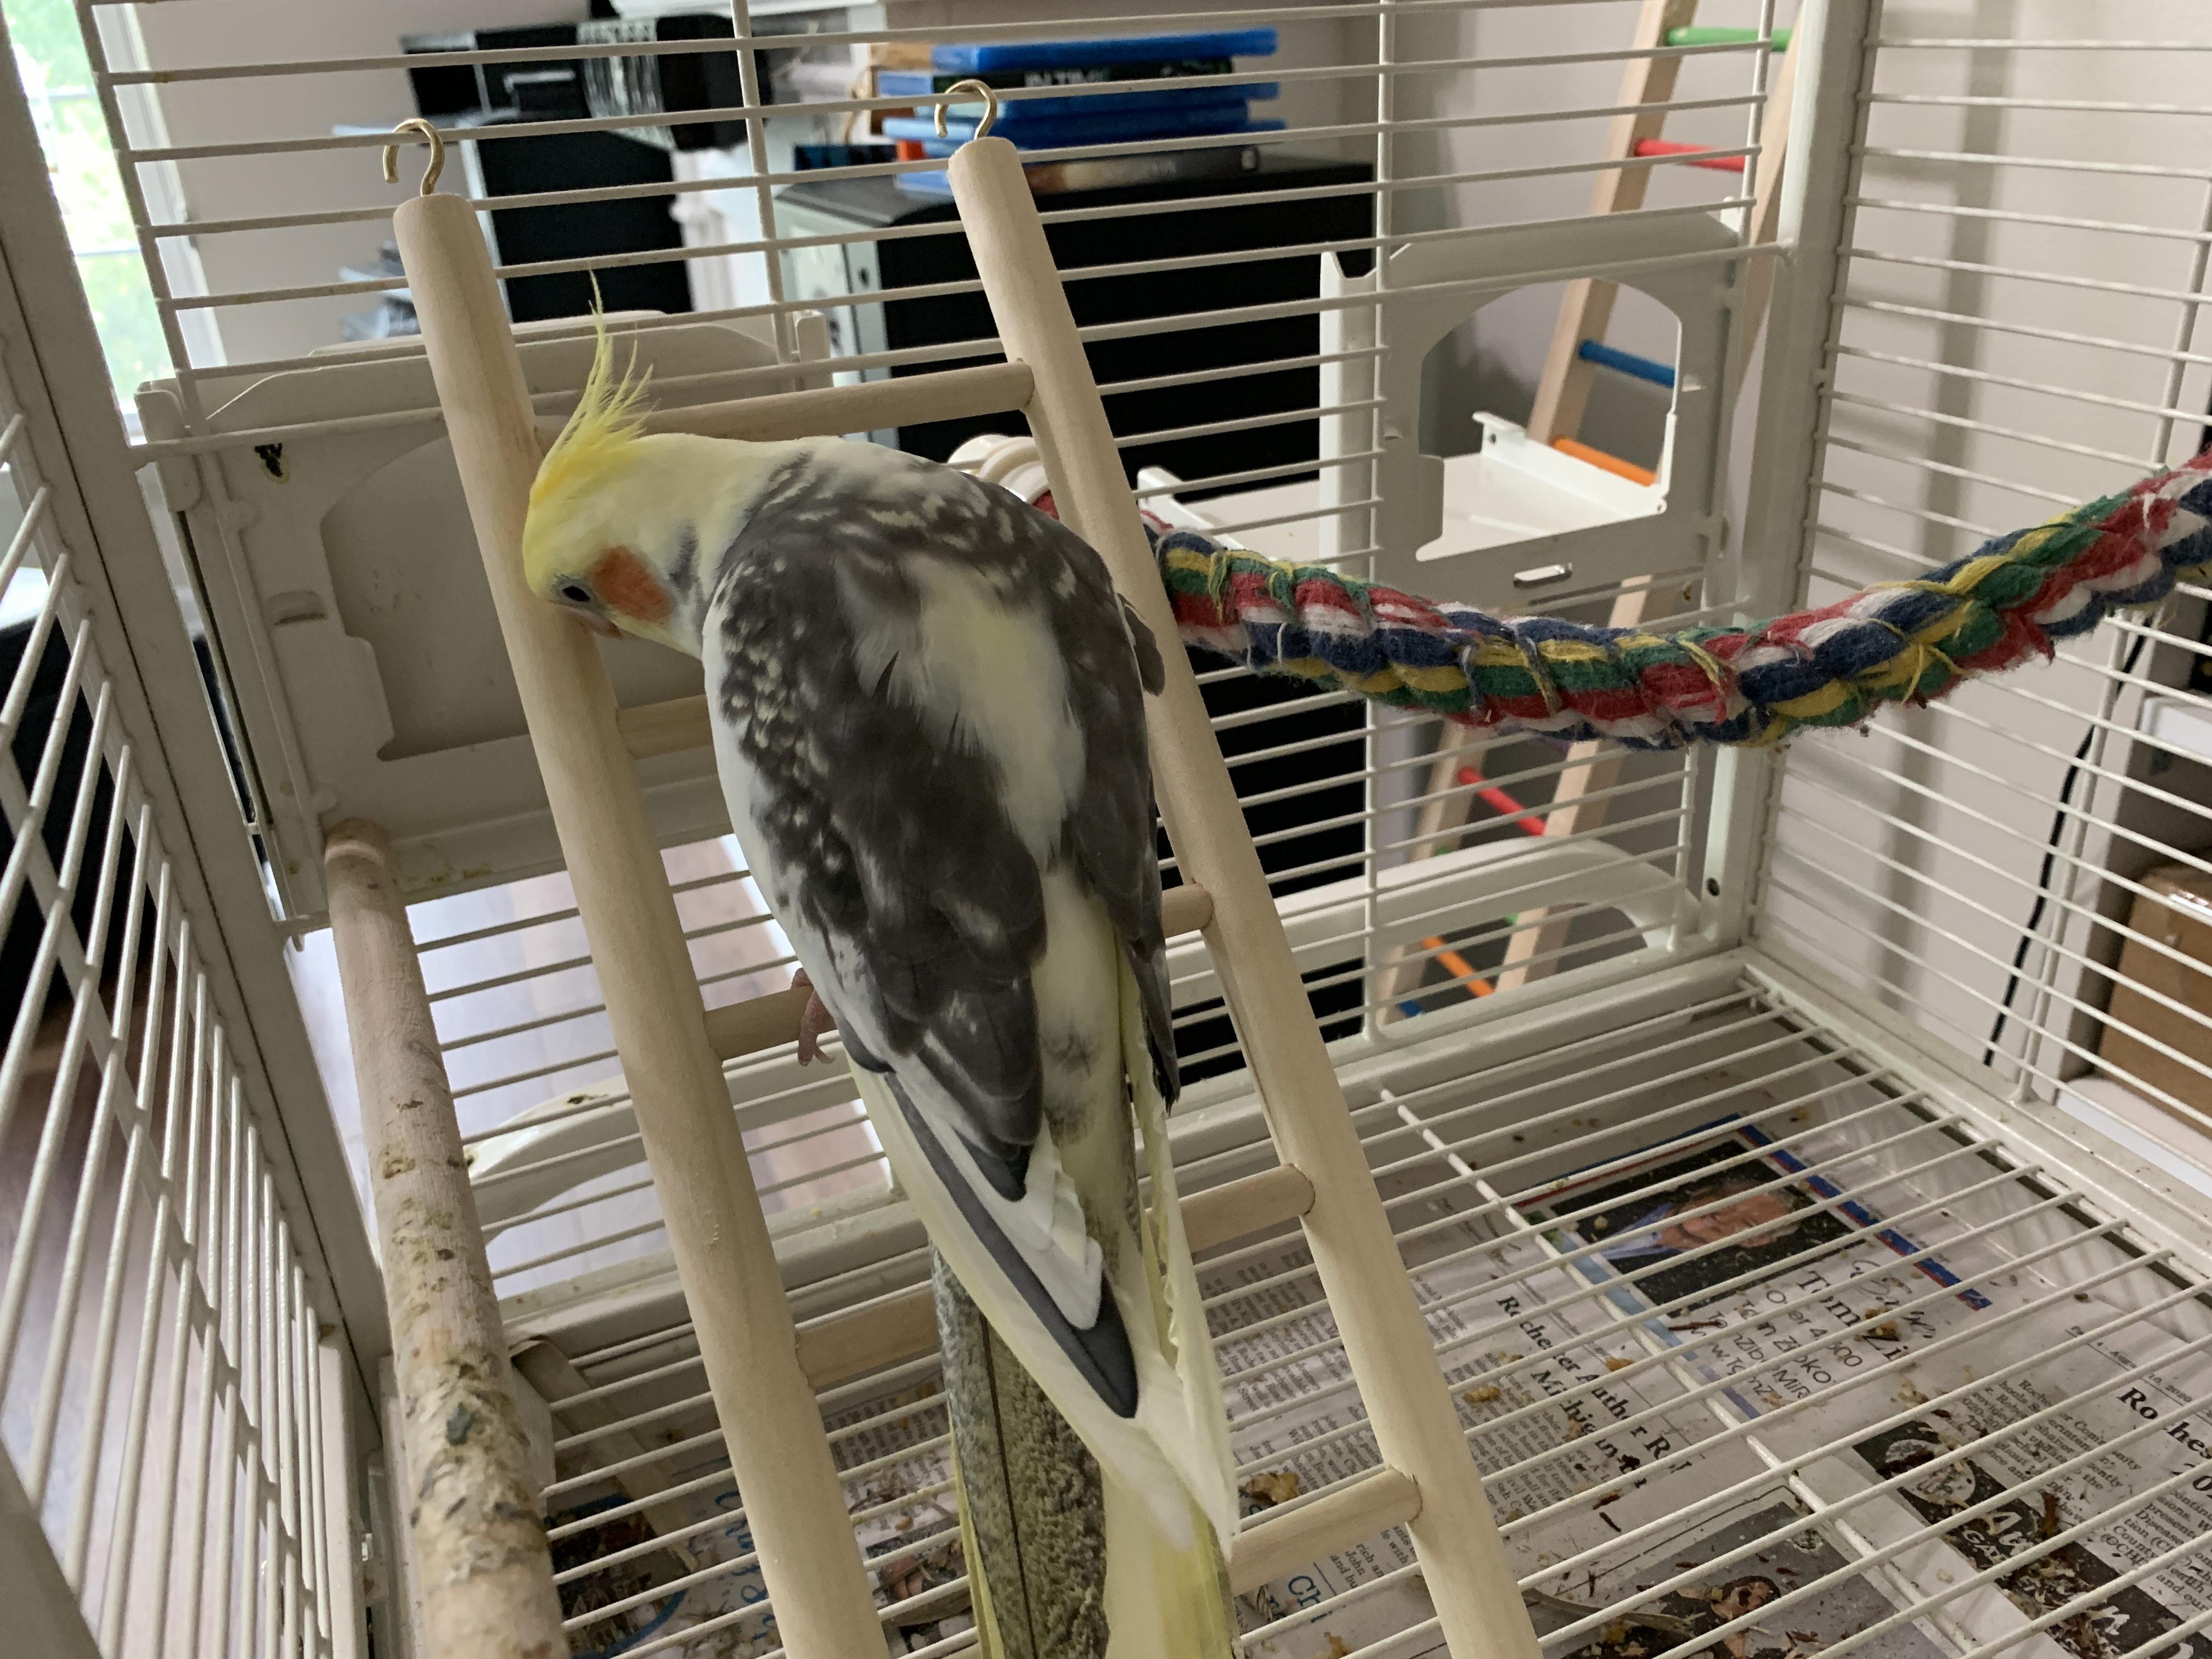
Use smaller ladders inside cages, and on play structures.
We have a three foot ladder from the ground to a window play center. And a four foot ladder from the ground to one of the cages (soon for the other birds cage as well, as she is older and starting to have trouble getting around).