Binary Code Microbit Translator
by bananarita333 in Circuits > Assistive Tech
2327 Views, 13 Favorites, 0 Comments
Binary Code Microbit Translator


Binary Code is the basic foundation of computer code, and can represent letters in 01 format. Each letter is translated into 4 digits and has a unique combination of 0's and 1's. For example, A = 01000001. This coding language fascinated me, and I thought it would be cool to create a translator that can translate letters to binary code format. This could be a fun project to teach kids about binary code. You can also change just a few things in the code and make this project applicable to something like a morse code translator or whatever you want it to be! P.S. I am definitely not the best coder and there is probably an easier way of making this device, so feel free to change it up in any way to make the coding process more efficient! You can also reach out to me at bananarita333@gmail.com if you have any suggestions on how to improve my code.
Downloads
Supplies


All you need for this project is a V2 Microbit with a Micro USB cable and a device where you can access the makecode.microbit.org website.
Open Project
First, go on the Makecode website. For this project I will be using block code, but feel free to use python if it's easier for you. Here is the link: makecode.microbit.org
If this is your first time using it, you might need to create an account (it’s free!)
You should see something like this:
Next, click on the New Project box.

It is going to ask you to give your project a name. You can name it whatever you want, but I named mine ‘Binary Code Translator’ so it would be easier for me to find it later.

Next click on create! You have now opened a project.
Making a Variable
After opening the project you should see something like this:
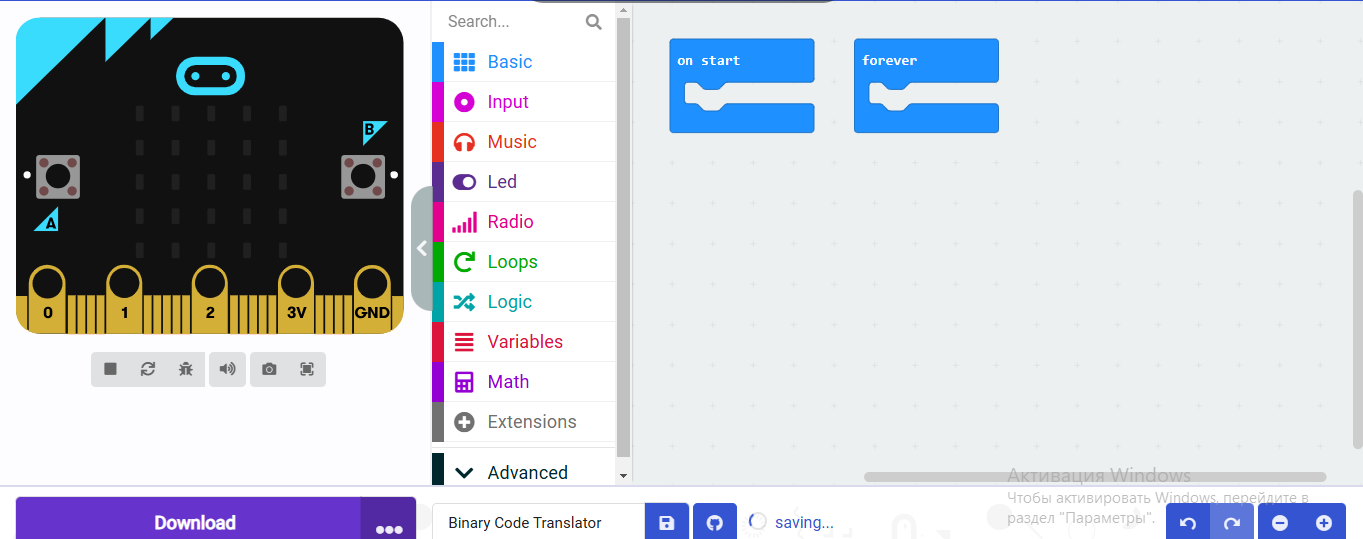
Now, first we need to make a code where you can scroll through all the letters of the alphabet and choose the one you want to translate to binary code. To do this, we are going to need to make a variable.
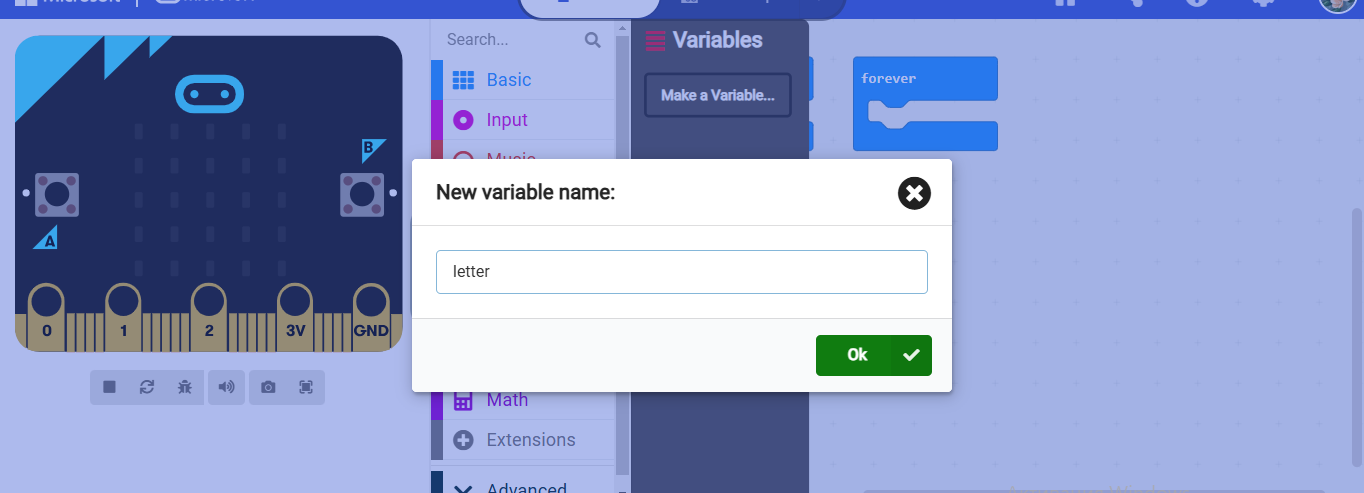
Go to the variables category and click on ‘Make a Variable’


Name your variable whatever you want, it doesn't matter. I named mine ‘letter’ for simplicity.
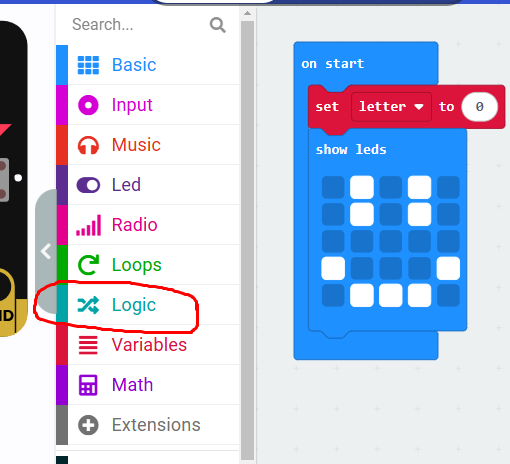
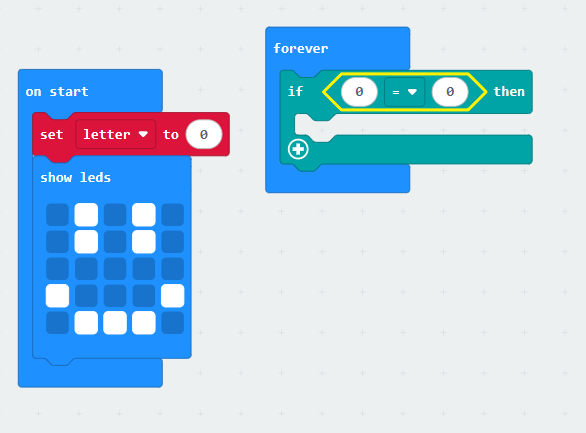
Once you have created a variable, a few new blocks are going to appear in the Variable category. Take the “Set ‘letter’ to 0” block and put it inside the ‘On Start” bracket.

This will ensure that the code knows what value the variable starts at and always reset to that same value. You can also put a fun LED that will display as soon as you power the micro:bit.

Letter Selection Code
To make the letter selection function, we are going to match each letter of the alphabet with a value of our variable ‘letter’, and every time button b is pressed, the value will increase by one. So, if our variable ‘letter’ is equal to 5 (because we pressed the button 5 times) then the microbit will display the letter E because we have a code that says: ‘if “letter” is equal to 5, show string E’.
Now to do this we are going to use a lot of the ‘if, then’ blocks.
First, go to the ‘Logic’ category of blocks.
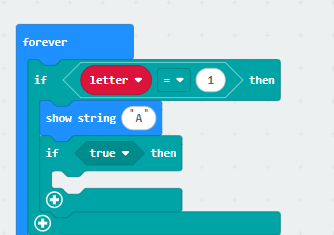
Choose the “If true then” bracket and put it inside the forever loop that we already had from the start.

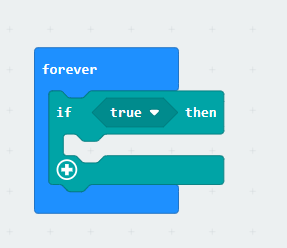
Next go to the “Comparison” section of the ‘Logic’ blocks and select the “0 = 0” boolean hexagonal block. Put it inside the ‘true’ space of the ‘if then’ block.

By now your code should look something like this:
Now we need our variable instead of the first 0 of the boolean block.
Go to the variables category, and select the round block with the variable you named earlier.

Put the round variable block inside of our boolean replacing the first 0.
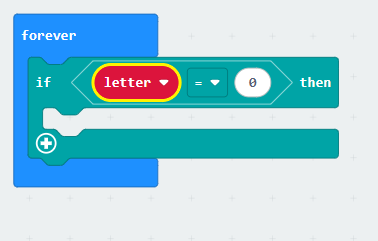
Next just change the second 0 to a 1. This will ensure that we can still see our smiley at the start, and the first letter will only show after you press a button.

Now to make the first letter display when our variable is = 1, we need to go to the ‘Basic’ category and select the “ Show string ‘hello’ ” block.
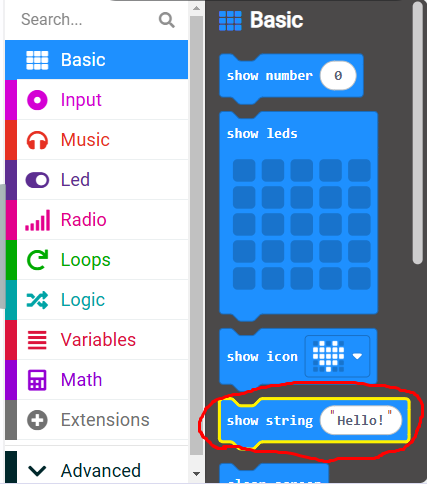
Put this block inside of our ‘if then’ bracket.

Now replace the “hello” with our first letter, “A”.
Your code should look something like this:

This is the basic code outline for the alphabet scrolling function. Now we will need to repeat this for all the other letters, adding one to the value each time. You can do this a lot faster by just duplicating our entire ‘ if letter = 1 show string A ’ function. To duplicate, right click and select the ‘duplicate’ option.
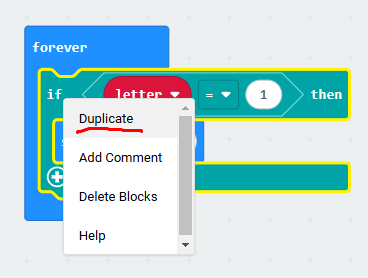
When you click it you should see a semi transparent version of our ‘if then’ function appear.
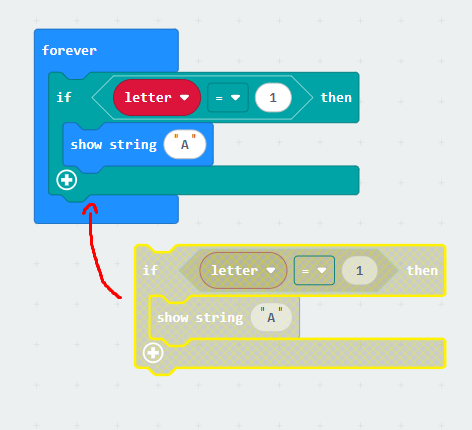
You want to drag it UNDER our first ‘if then’ bracket (still in the forever loop), and it should stop being transparent.
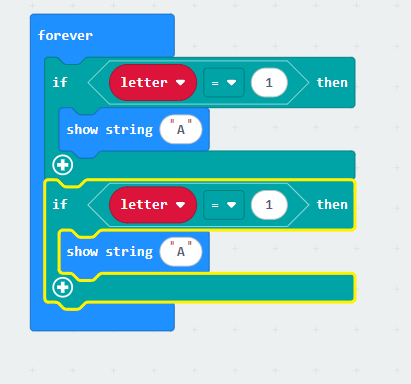
Now just change the value by 1 (so now ‘letter’ = 2) and change A to our second letter, B.

Now you need to repeat these steps for every letter of the alphabet. Remember to add one to the value so that each letter has its own corresponding number.
Downloads
Buttons Code
Now we are going to make a short code for the buttons. When button B is pressed 1 will be added to the value of our variable 'letter'. So, let's say we start the project and the value of ‘letter’ resets to 0 (because of the red block we have in the ‘On start’ loop) then when we press button B, the value of ‘letter' is changed by +1 so the letter A displays on the microbit (because “if ‘letter’ = 1, show string A”).
To code the buttons, first go to the ‘Input’ category of blocks.

Select the ‘on button “a” pressed’ bracket.
Now switch button “a” to button b on the push down menu of the bracket.

Next go to the “variables” category, and select the “change ‘letter’ by 1” block.
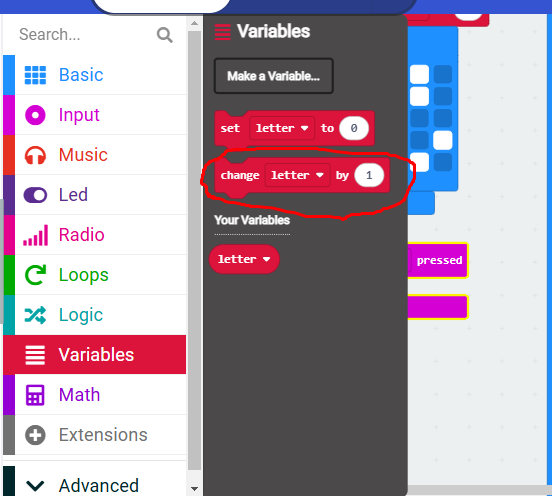
Put this block inside of our ‘on button b pressed' bracket

Great! Now you have coded the button scroll function. However, the letter selection scroll can only go one way. So, we need to code the second button so we can go backwards as well.
Just duplicate the blocks we made for button B.

Now change button B to button A on our second bracket.

And now just change the “1” on the second bracket to a “-1”

Perfect! Now we have coded the letter scroll function. You can now go on the simulator that is on the side of the screen to see if your code works. When you press button b for the first time, the letter “A” should display on your micro bit when you press it again, you should see the next letter, “B”, and so on. And when you press button a, it should go backwards, and you should see the previous letter. If your code doesn’t do that you should go back and revise to make sure you did everything correctly.
Downloads
Binary Code Translator Button
Now that we have completed the letter selection code, we need to actually make the binary code translator part of our project. This is probably the easiest but most time consuming part of the project. We are going to make a code that translates a letter to binary code if the logo touch sensor on the microbit is pressed. So, if we are on the letter H, for example, and the logo is pressed, the microbit will show: 01001000.
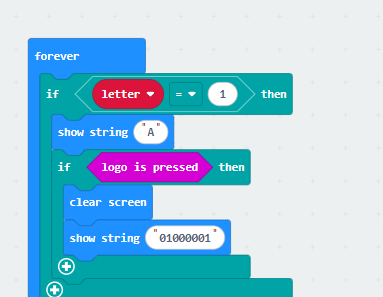
To do this, we first need to get another ‘if, then’ block and put it under our ‘show string “A” ’ bracket, but still inside the other ‘if then’ bracket.

Now, go to the ‘Input’ category and scroll all the way down. Choose the ‘logo is pressed’ boolean.

Put the ‘logo is pressed’ boolean inside the “true” space of the ‘if then’ block we just added.


Now, go to the ‘Basic’ category and pick up the ‘clear screen’ block and put it inside our new ‘if logo is pressed then’ bracket.

Then get the “show string ‘hello’ ” block and put it under the ‘clear screen’ block.
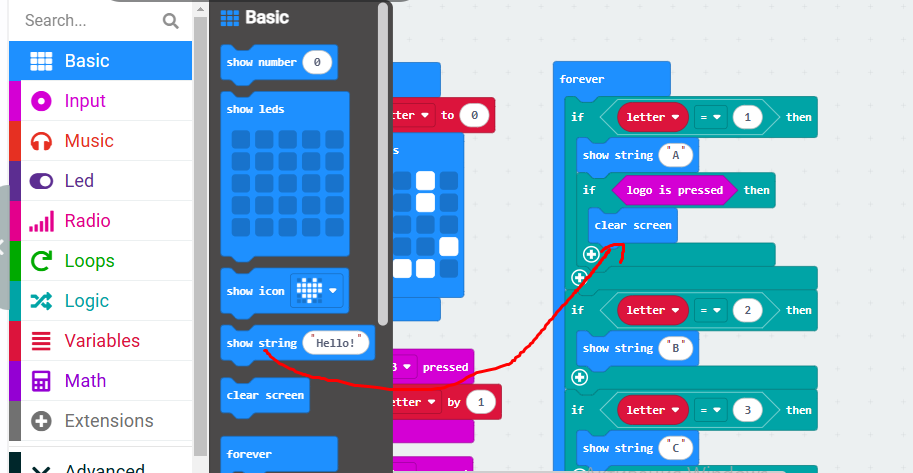

Now change “hello” to the binary code translation for A, which is 01000001.
What this code does is if we are scrolling through the letters and we are at the letter “A”, and we want to select that letter to translate, we press the logo touch sensor and it will give us the translation.
Next, repeat these steps to add a translation for every letter. You can use the duplicating function to make it faster and easier.
Here are all the translations:
A = 01000001
B = 01000010
C = 01000011
D = 01000100
E = 01000101
F = 01000110
G = 01000111
H = 01001000
I = 01001001
J = 01001010
K = 01001011
L = 01001100
M = 01001101
N = 01001110
O = 01001111
P = 01010000
Q = 01010001
R = 01010010
S = 01010011
T = 01010100
U = 01010101
V = 01010110
W = 01010111
X = 01011000
Y = 01011001
Z = 01011010
Test your code out on the simulator when you are done!
Download!

All that’s left to do is just to download our code to the microbit!!! Plug in the Micro USB cable into your micro bit and into the computer, then click on the 3 dots next to the download button.

Then click on ‘Connect Device’

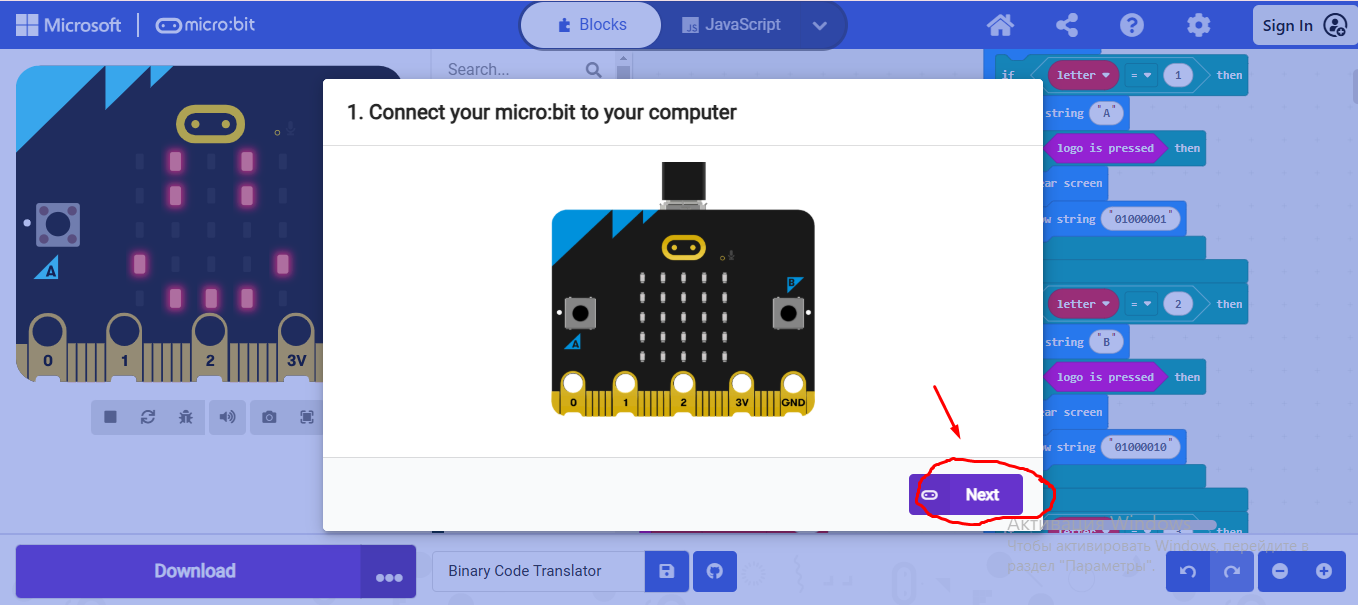
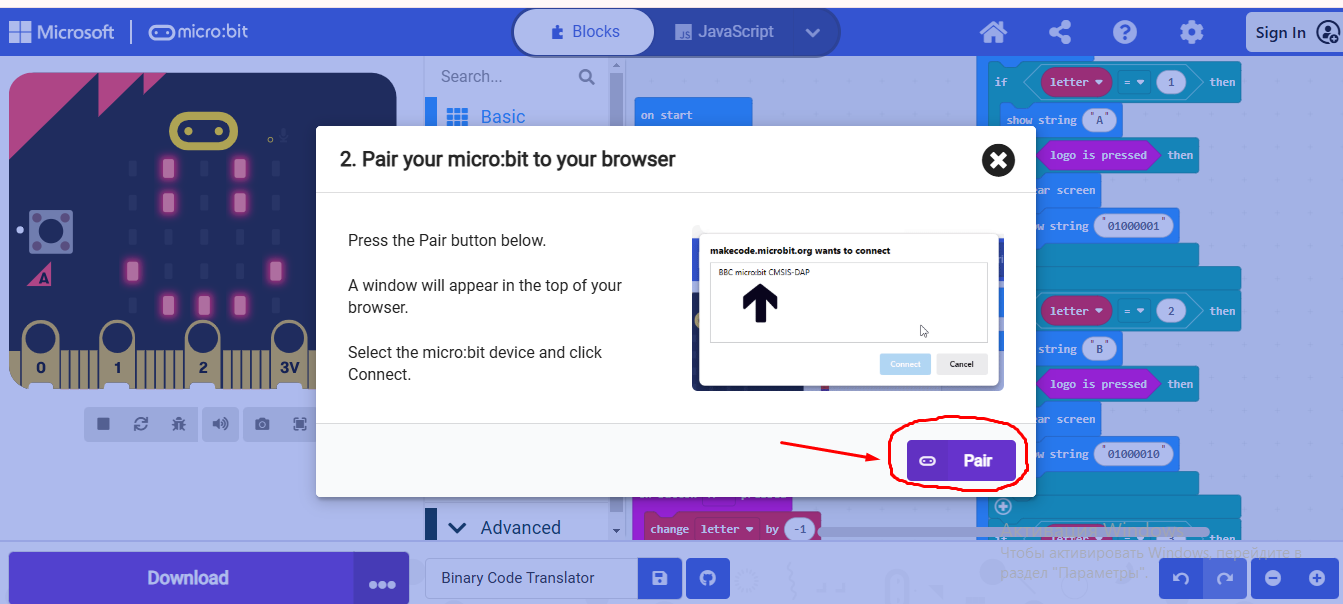
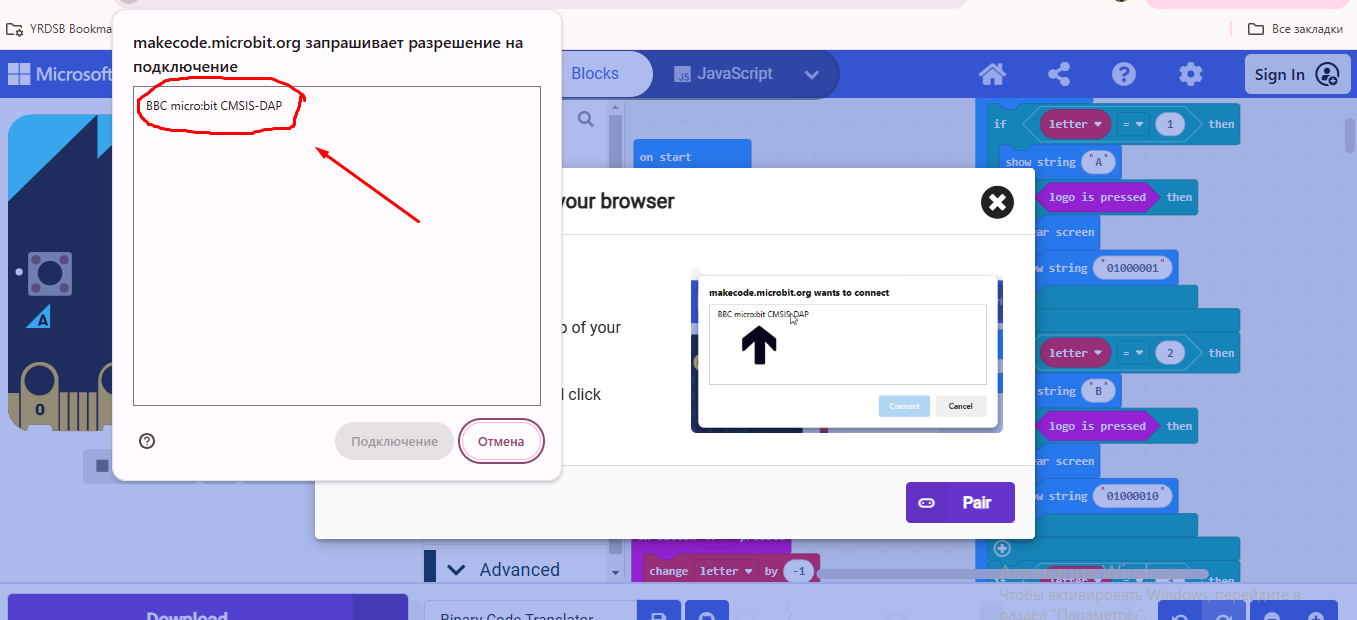
Now click the download button!


And you're done!!!!! I hope you enjoyed this instructable and had fun.
01000111 01101111 01101111 01100100 00100000 01001010 01101111 01100010 00100001 !